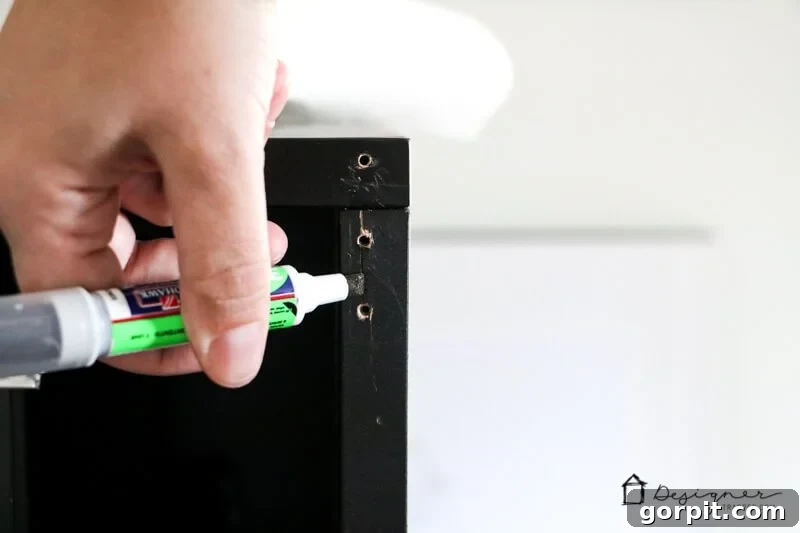
Transforming your beloved IKEA furniture and keeping it looking pristine has never been easier, thanks to an innovative furniture repair system designed specifically for IKEA pieces. Say goodbye to unsightly dings, dents, and scratches that accumulate over time. This ingenious product offers an effortless solution to restore your IKEA items, providing a seamless, factory-fresh finish that perfectly matches original IKEA colors. For any IKEA enthusiast, DIY decorator, or anyone looking to extend the life of their furniture, this repair solution is a dream come true. Whether you’re customizing new IKEA pieces, undertaking creative IKEA hacks, or simply refreshing existing furniture, achieving a perfect, undetectable repair is now firmly within your grasp.
As a devoted admirer of IKEA furniture, my passion for their practical, stylish, and affordable pieces runs deep. You might even call me a hard-core IKEA lover, always eager for a trip to explore the latest offerings and, more importantly, to discover new ways to transform plain furniture into unique, personalized statements. Over the years, I’ve embarked on countless IKEA hacks, turning everyday items into extraordinary home decor. Some of my most popular projects include the widely acclaimed IKEA Malm hack, which breathed new life into a basic dresser, and my IKEA desk hack, which cleverly mimics the appearance of a high-end, custom-built desk.
My enthusiasm for IKEA extends to every corner of my home, including imaginative creations for my children. Their IKEA kids’ table and chairs received a charming makeover, proving that even the simplest items can be infused with personality. One project that truly captured widespread attention was my IKEA Billy bookcase hack. This transformation allowed me to create the illusion of custom built-in shelving, providing ample storage and a sophisticated aesthetic that instantly elevated the room and subsequently went viral across the DIY community.
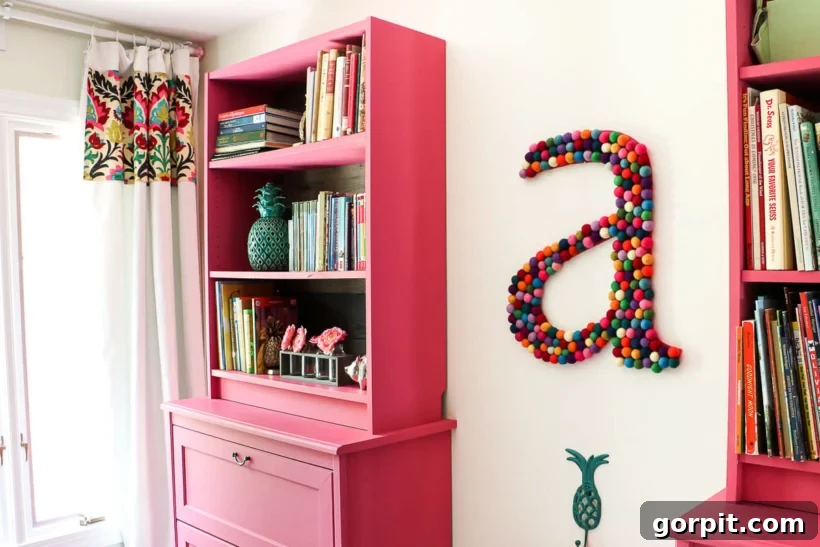
Indeed, my admiration for IKEA furniture knows no bounds. While I’ve always been thoroughly impressed by the quality and design of their pieces, the reality is that any furniture, regardless of its initial craftsmanship, will eventually show signs of wear and tear. Pieces that have been cherished and used for many years inevitably accumulate dings, dents, and scratches. It’s a natural part of life with furniture, and something I fully anticipate. For a long time, I celebrated the discovery of the secret to flawlessly painting IKEA laminate furniture, allowing for dramatic aesthetic changes. However, a significant challenge remained: finding an effective way to repair those unavoidable imperfections while achieving a perfect, undetectable color match with the original IKEA finish. That is, until now.
My search for the ultimate IKEA furniture repair solution finally ended when I discovered that Mohawk had developed a revolutionary 3-in-1 Repair Stick, specifically formulated with colors engineered to perfectly match the most common IKEA furniture finishes. This revelation was nothing short of a game-changer for anyone who loves and lives with IKEA furniture, and it felt like a collective sigh of relief for the entire DIY community.
This post contains affiliate links for your convenience. Click here for my full disclosure policy.
I wasted no time in acquiring the Mohawk 3-in-1 Repair Sticks, and since then, they have become an indispensable tool in my DIY arsenal. I’ve utilized them for numerous repairs, each time yielding impressive results. My most recent project involved repairing significant damage on our IKEA Galant bookshelves, which feature the popular IKEA “black-brown” faux wood grain finish. This particular color can be notoriously difficult to match, making it an ideal test for the Mohawk sticks.
The damage to these bookshelves was self-inflicted, born from a creative but ultimately unsuccessful attempt to hang a curtain rod. My initial idea was to install a curtain to hide the contents of the shelves, creating a pseudo-cabinet effect. While the concept seemed promising, the execution fell short of my expectations, leading me to remove the rod and hardware. This left behind prominent, unsightly holes where the screws had been driven into the top corners of the bookshelves. These were not mere minor nicks or superficial scratches; they were substantial holes demanding a robust repair.
Yet, armed with the incredible Mohawk 3-in-1 Repair Sticks, I was able to meticulously repair these holes in mere minutes. The beauty of this system is its ability to seamlessly integrate the repair, preserving the unique characteristics and texture of the piece while achieving an absolutely perfect color match and a smooth, professional application. Continue reading to discover my step-by-step process for this remarkably effective DIY furniture repair.
DIY IKEA Furniture Repair with Perfect Color Matching: A Step-by-Step Guide
Are you ready to restore your favorite IKEA pieces to their former glory? This guide will walk you through the simple process of repairing dings, dents, and holes in your IKEA furniture using the Mohawk 3-in-1 Repair Stick. Even if you’re a novice DIYer, you’ll be amazed at the professional-grade results you can achieve.
Materials Needed for Your IKEA Furniture Restoration
The beauty of this repair system lies in its simplicity. You won’t need a plethora of tools or complicated supplies. Here’s exactly what you’ll need to get started:
- Mohawk 3-in-1 Repair Stick: Select the specific color that best matches your furniture. While I’ve linked to the white option as it’s a popular IKEA shade, it’s crucial to choose the correct color for your project.
- Mohawk offers 4 distinct colors that are expertly matched to popular IKEA furniture finishes: classic black, versatile brown, crisp white, and subtle white stain.
- For common IKEA black-brown furniture (like my Galant bookshelves), a combination approach yields the best results. I highly recommend using the brown paint marker first, followed by the black fill stick to achieve that characteristic faux wood grain depth and a truly authentic match. This two-tone method ensures your repair blends flawlessly with the original finish.
- Clean Paper Towel or Soft Cloth: Essential for cleaning the marker tip, buffing away excess wax, and general clean-up.
Simple Steps to Flawless IKEA Furniture Repair
For those who prefer a visual demonstration, I’ve included an official video tutorial featuring me as I used the Mohawk 3-in-1 Repair Stick to fix a black IKEA office chair. This video provides an excellent overview of the technique. However, if you’re a fan of detailed written instructions with step-by-step photos, you’ll find everything you need below. Rest assured, even if you lack extensive painting experience or consider yourself new to IKEA hacking, this repair stick makes it incredibly easy to achieve outstanding, professional-looking results.
1) Prepare the Damaged Area: Level and Smooth. Your first step is to ensure the damaged area is as level as possible. Use the built-in leveler cap on the Mohawk stick to gently run across the imperfection. This action effectively removes any damaged pieces that might be protruding above the furniture surface, creating a smooth, even base for your repair. This initial preparation is crucial for a truly seamless finish.
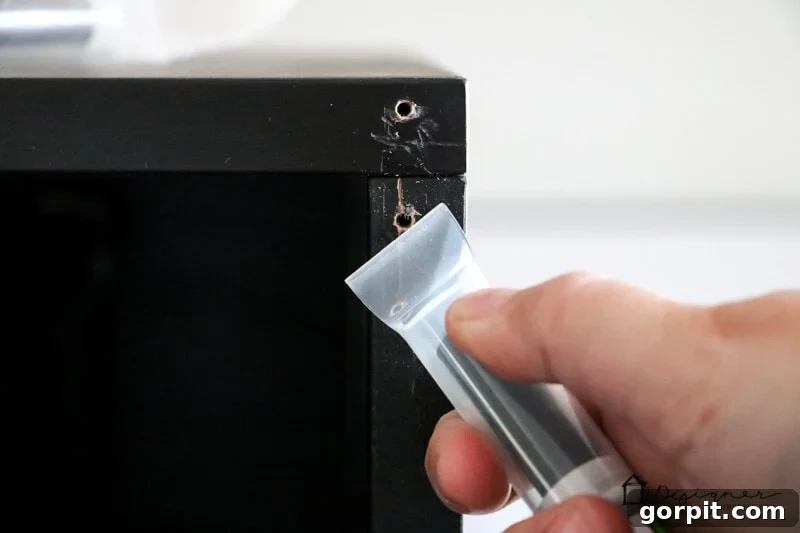
2) Activate the Paint Marker: Shake and Prime. Before applying the paint, thoroughly shake your 3-in-1 Repair Stick for approximately 60 seconds. This ensures the paint is perfectly mixed and ready for application. Next, press the marker tip down firmly onto a clean paper towel. Continue pressing and dabbing until the paint saturates the entire marker tip. This priming step guarantees a consistent and even flow of color for your repair.
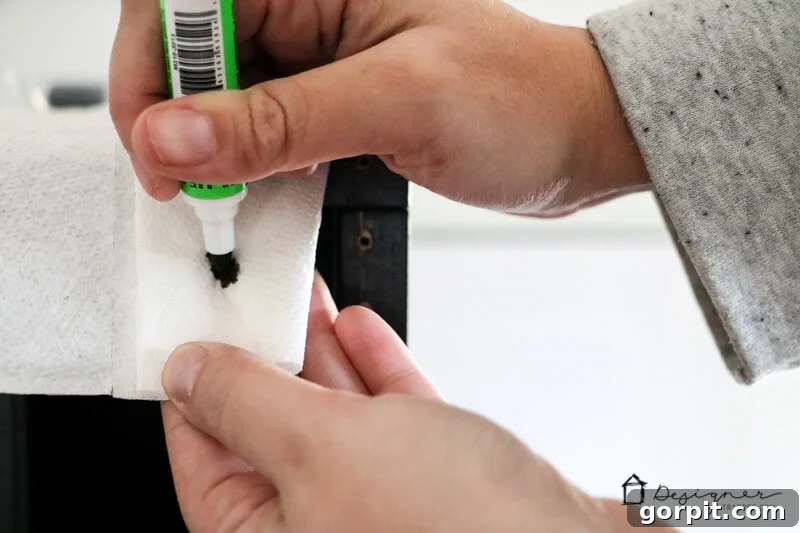
3) Restore Color: Apply the Paint Marker. With the paint marker primed, carefully apply it to the damaged area. The goal here is to replace any color that has been lost due to the ding, dent, or scratch. For deep gouges or areas where the base material is exposed, apply enough paint to cover the affected surface completely. This forms the foundational color layer for an invisible repair.
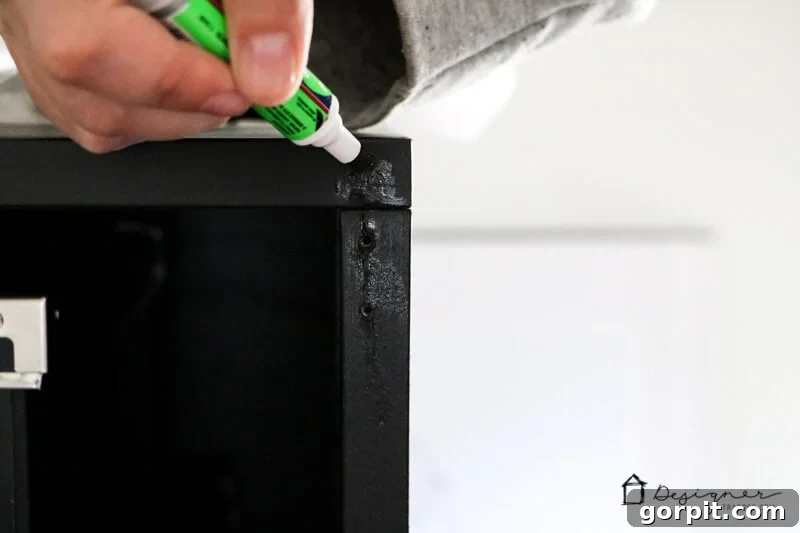
4) Fill Imperfections: Utilize the Fill Stick. Now, it’s time to address the physical indentations. Take the fill stick and hold it at a 45-degree angle. Apply firm pressure as you rub the stick back and forth directly over any dings, dents, or holes. Continue this motion until you achieve full coverage, ensuring all voids are completely filled. A key tip here: it’s better to slightly overfill the damaged areas rather than underfill them. Any excess material will be easily removed in the next step, ensuring a perfectly smooth surface.
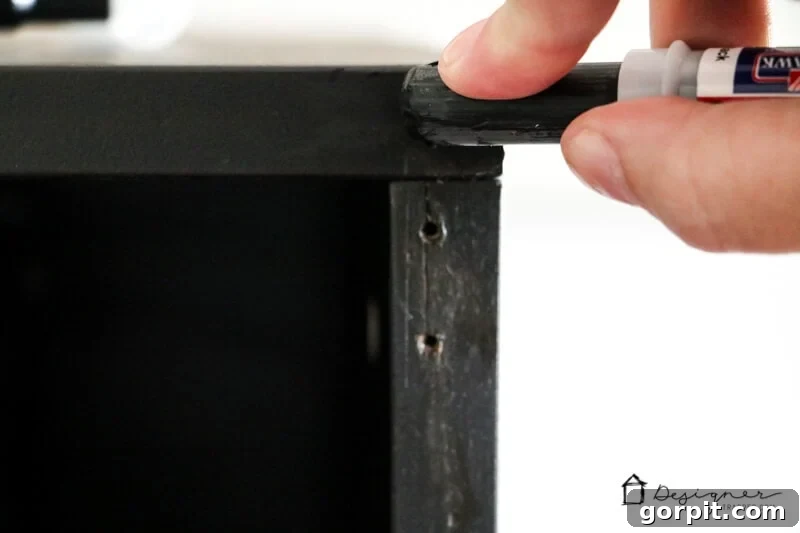
5) Remove Excess: Scrape for a Smooth Finish. After the fill stick has done its job, use the leveler cap once more. Gently scrape off any excess material that protrudes above the furniture’s surface. This process smooths the filled area, blending it seamlessly with the surrounding furniture. Work carefully to avoid removing too much of the filler from the repair itself.
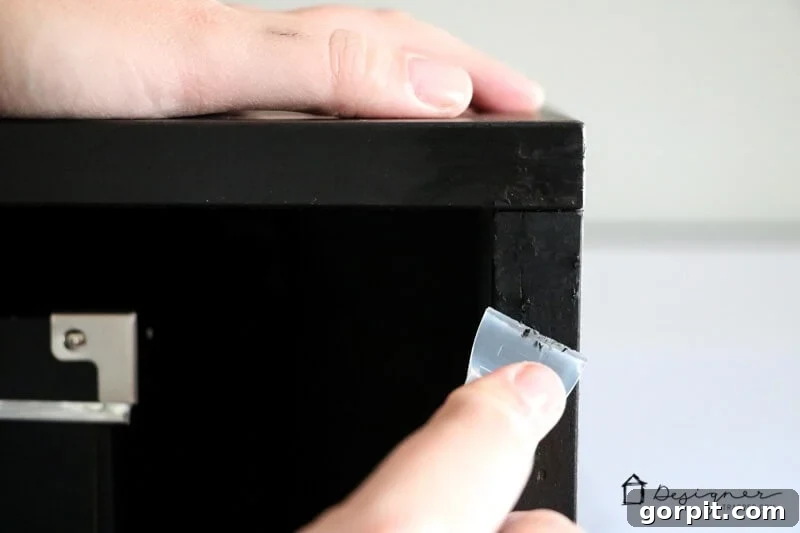
6) Final Polish: Buff for a Perfect Blend. As a final touch, take a soft cloth or a clean paper towel and gently buff the repaired area. This step helps to remove any wax residue from the fill stick and further polishes the surface, ensuring that the repair is not only perfectly colored but also perfectly smooth to the touch, making it virtually undetectable.
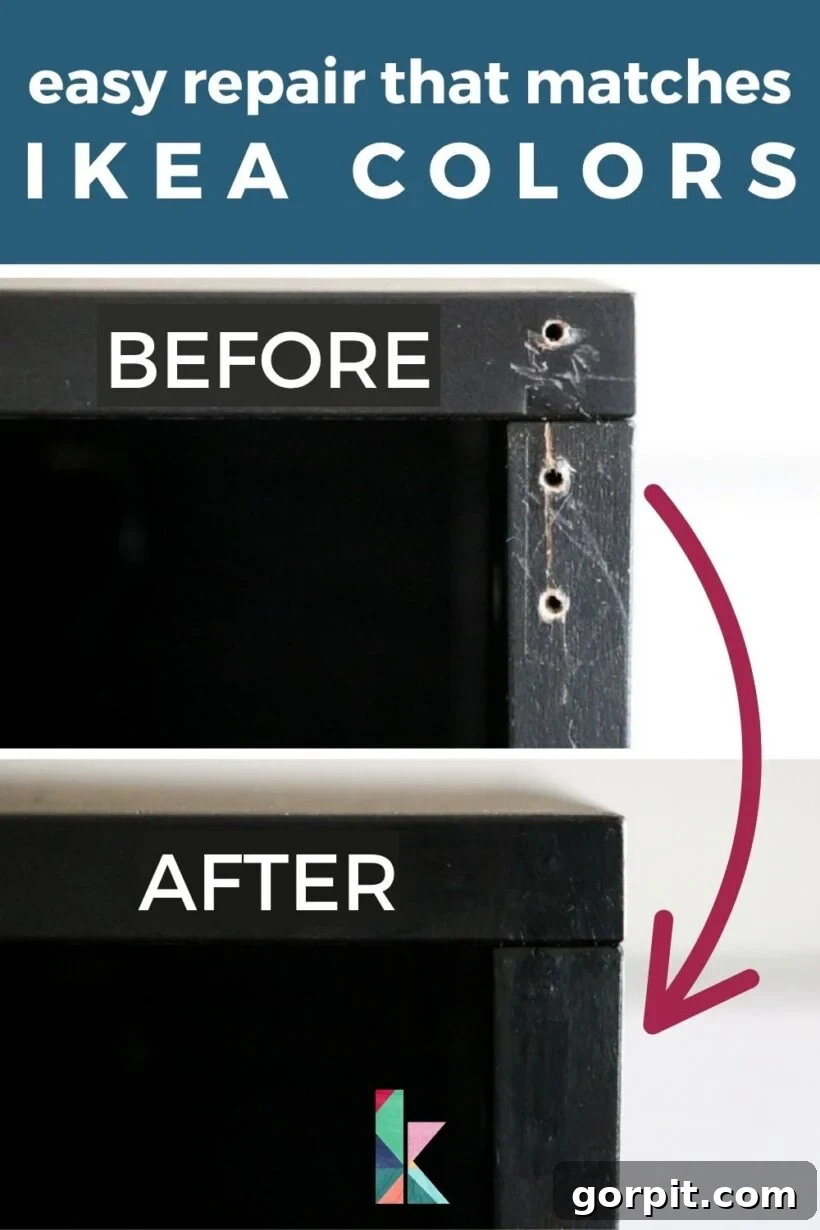
And there you have it! I wasn’t exaggerating when I said this furniture repair process is incredibly easy. But the ease of use is only one part of the story. The true marvel of Mohawk’s 3-in-1 Repair Sticks lies in their unparalleled ability to perfectly match the precise paint or stain of your IKEA pieces. This is a feat I had struggled to achieve with any other product before discovering Mohawk. We’re talking about a quick, five-minute repair that delivers a flawless color match – a true DIY victory in every sense! Don’t just take my word for it; observe the dramatic before and after transformation below.
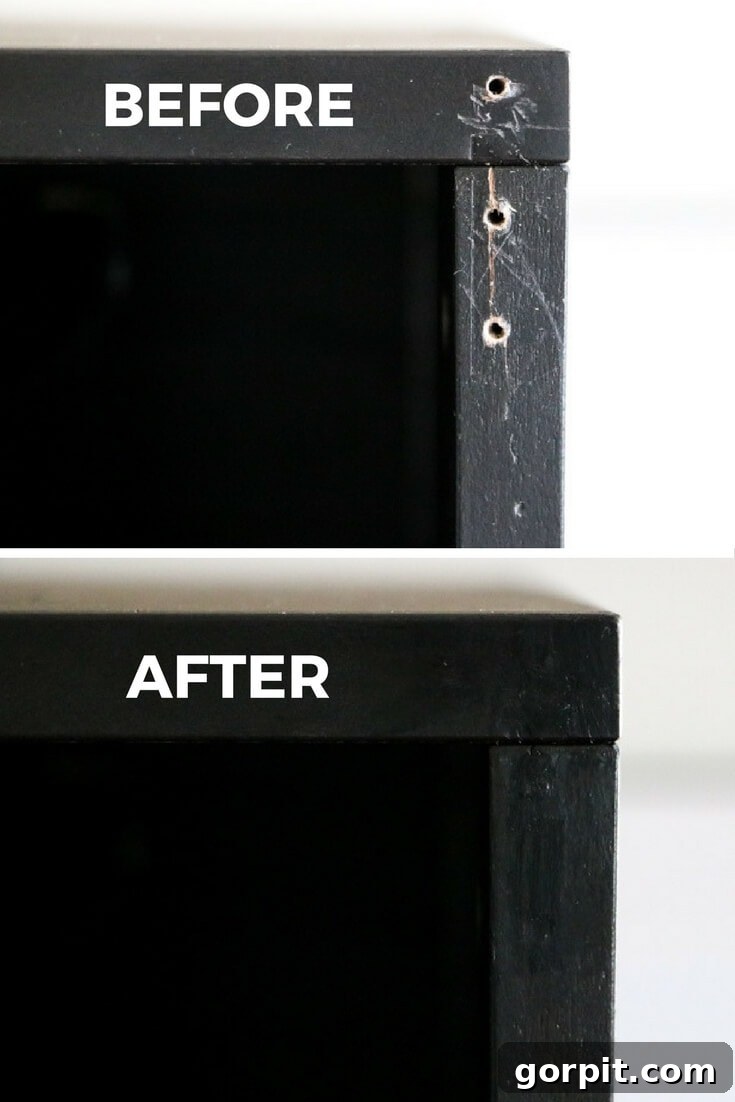
My IKEA Galant bookcases are now a joy to behold, completely free from the unsightly damage I had inflicted upon them. The beauty of this method is its simplicity and efficiency; there was no need to bring out a power sander, deal with messy paints, or worry about visible brush strokes. The entire restoration took mere minutes and required nothing more than the versatile 3-in-1 repair sticks. The result is a seamless finish with no tell-tale signs of a cover-up.
What are your thoughts on this effortless repair method? Do you have any IKEA furniture pieces in your home that could benefit from a quick and effective repair? Perhaps that light grey dresser with a chipped corner, a small bathroom cabinet with a scuff mark, a well-loved IKEA coffee table with surface scratches, or shelves with small dings? The high-quality pigment and filler in these sticks lay incredibly smooth, ensuring you achieve a perfect color match and an impeccable cover-up for virtually any size of imperfection on any IKEA piece. This system not only saves you money by preventing the need for costly replacements but also extends the life and aesthetic appeal of your cherished furniture, making it a sustainable and smart choice for any homeowner.
More IKEA HACK Posts
SEE ALL DIY POSTS
-
Creative Hacks for IKEA Bookshelves and Built-In Cabinets
-
Easy Furniture Repair to Match IKEA Paint Colors!
-
IKEA Billy Bookcase Hack for Loads of Storage
-
Affordable IKEA Desk Hacks You Will LOVE
-
How to Paint IKEA Furniture and Mistakes to Avoid
-
50 IKEA Hacks You Have to See to Believe
Curious about my unique approach to transforming rooms and spaces within our home? Dive into the details with Designer in a Binder®, my comprehensive guide to affordable and simple home decorating.
For exclusive content, behind-the-scenes glimpses, and early access to new projects and tips, don’t forget to subscribe before you leave! Join our community of DIY enthusiasts and get inspired.