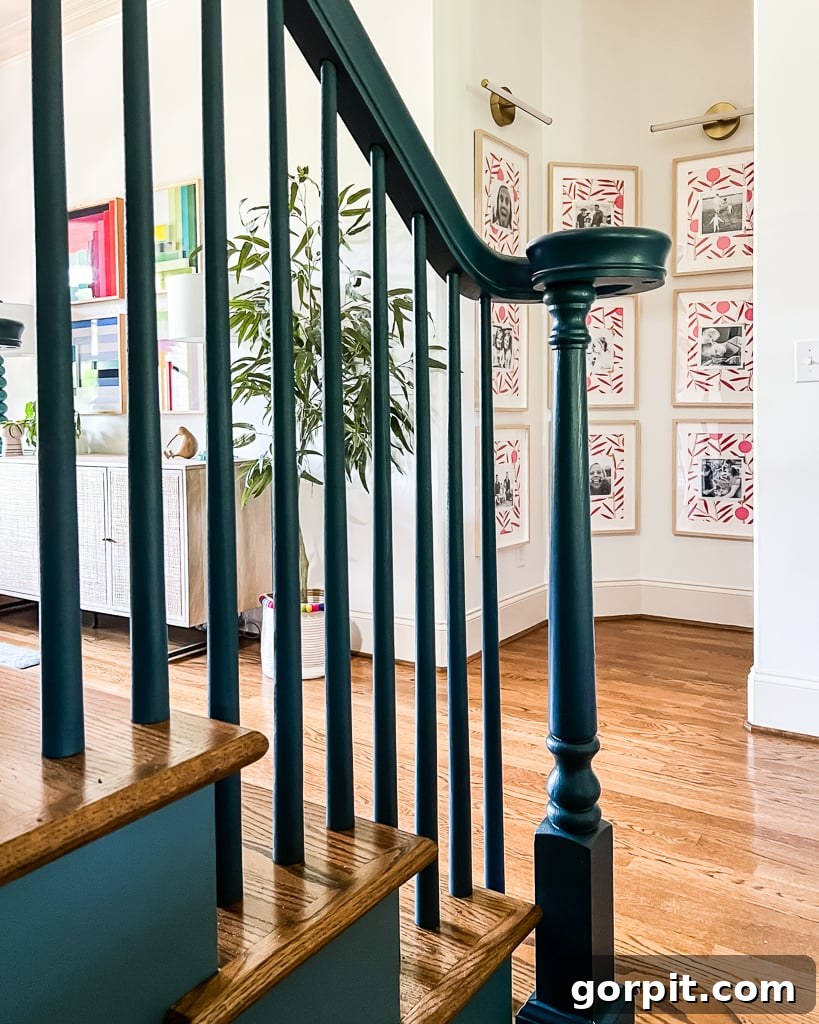
Transforming your home’s interior can often feel like a monumental task, especially when it involves key architectural features like your staircase. Yet, a simple update to your stair railing can dramatically refresh the entire ambiance of your living space. Replacing stair balusters, often referred to as spindles, is a highly effective and surprisingly straightforward DIY home improvement project that can yield stunning results without the need for a full-scale renovation. With the right tools, a clear plan, and a bit of dedication, you can achieve a modern, elegant, or custom look that perfectly complements your home’s style. This comprehensive guide will walk you through the entire process, sharing the exact steps we followed to revitalize our stair railing by replacing only the balusters.
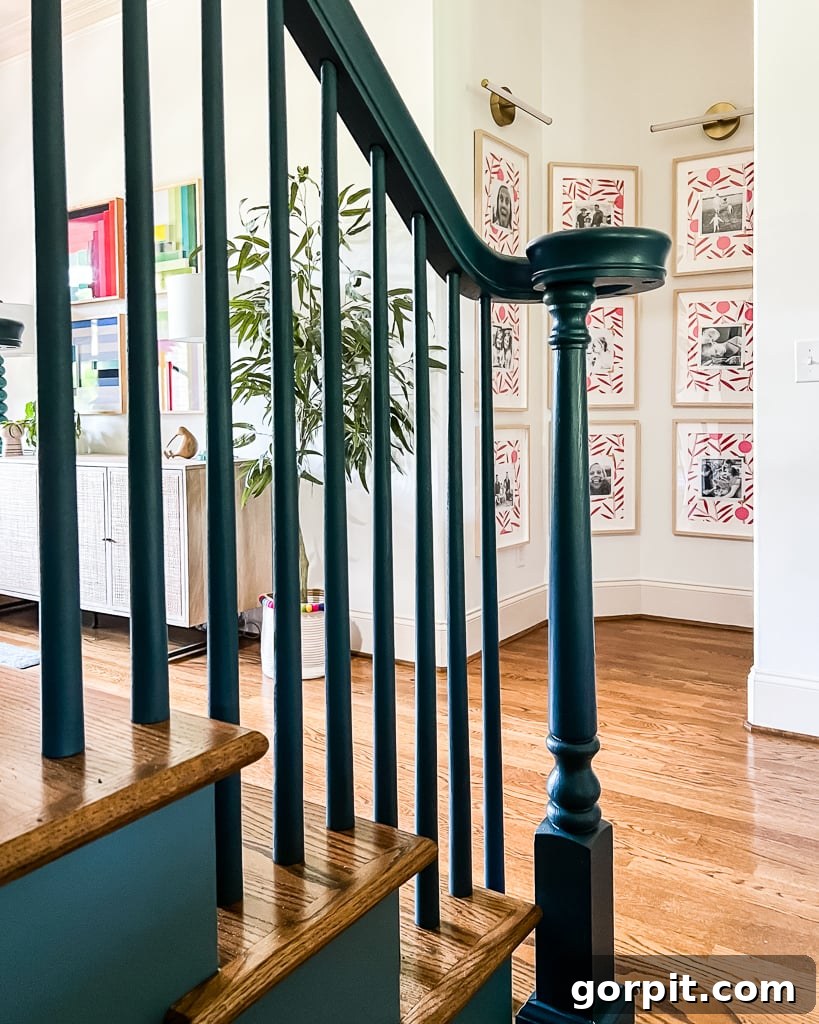
Table of Contents
Toggle
There’s an undeniable satisfaction that comes with transforming a previously overlooked or dated feature in your home. For us, the stair railing in our new home presented a unique challenge. When we first toured the house, the traditional elements, especially the elaborate coffered ceiling and the existing stair railing, felt a bit out of sync with our modern aesthetic. While we tackled the dining room ceiling with a creative wallpaper solution, updating the stair railing initially seemed far more daunting.
We extend our sincere gratitude to DAP Products for their partnership in making this renovation possible.
We’ve previously undertaken a DIY staircase makeover in our old home, which involved removing old carpet and installing beautiful hardwood stairs. That project, though seemingly complex, proved surprisingly manageable. However, the thought of removing iron balusters and replacing them felt like a completely different league of difficulty. The good news? Our recent experience proved that updating your stair railing by replacing balusters is absolutely achievable as a DIY project. It requires patience and time, but it’s far from impossible for even beginner DIY enthusiasts. This guide will share all the insights we gained.
Before diving into the “how-to,” let’s ensure we’re all familiar with the specific components that make up a stair railing and staircase, as understanding these terms is crucial for a successful project.
Understanding the Key Parts of a Stair Railing
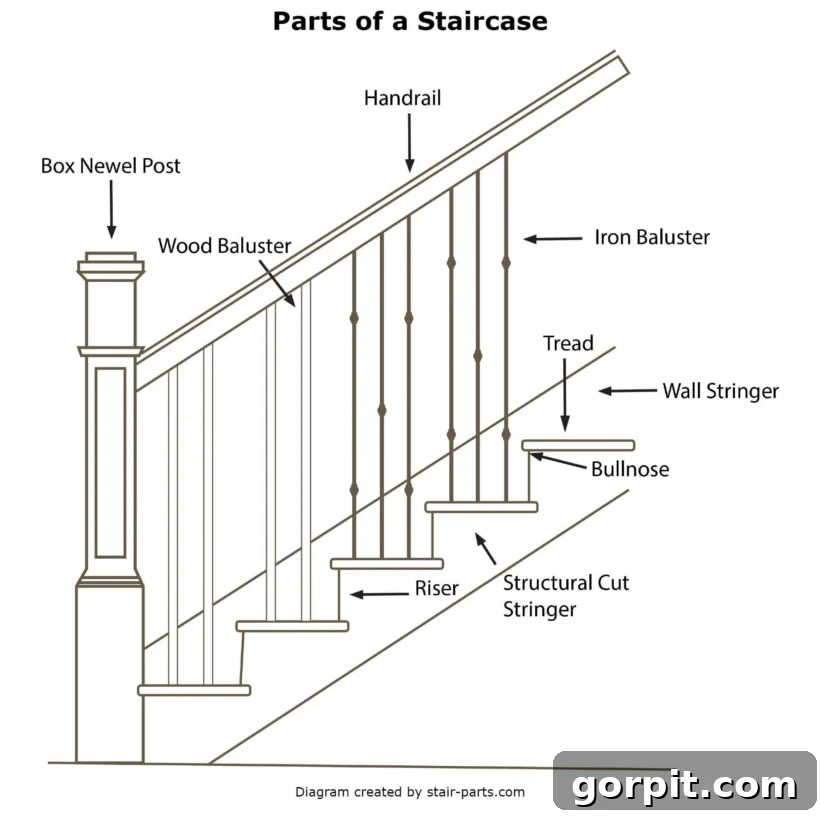
To embark on a stair railing update with confidence, it’s helpful to know the various components that form this essential architectural feature. While terms can sometimes be used interchangeably, understanding the specific names will aid in planning and purchasing materials. The diagram below provides a clear visual guide. Key components include:
- Balusters (or Spindles): These are the vertical or sometimes horizontal bars that fill the space between the handrail and the stair treads or floor. Their primary purpose is safety, preventing falls, but they also contribute significantly to the aesthetic of the staircase.
- Handrail (or Banister): This is the top rail that runs parallel to the stairs, providing support and a gripping surface.
- Newel Post: A larger, more substantial post that anchors the handrail at the top, bottom, and any turning points of the staircase. Newel posts are often decorative and serve as a focal point.
- Stair Treads: The horizontal surface of each step that you walk on.
- Stair Risers: The vertical face of each step, connecting one tread to the next.
This diagram from Stair-Parts is an excellent resource for a detailed understanding of stair parts.
What Parts of a Stair Railing Can You Replace?
The beauty of a DIY stair railing update is the flexibility it offers. You have the freedom to replace as much or as little of your existing railing as your budget and renovation goals allow. If you’re aiming for a complete overhaul, replacing the handrail, newel posts, and balusters simultaneously will give your staircase a brand-new look. This video provides a comprehensive guide on how to replace all these elements.
However, if your goal is to achieve a significant visual upgrade without the extensive time and expense of a full replacement, you’re in the right place. Our existing handrails and newel posts were structurally sound and had a classic shape that we knew could be revitalized with a fresh coat of paint. The main component that clashed with our desired aesthetic was the collection of old iron balusters. They simply didn’t align with our preferred style.
Many homeowners wonder, “Can you just replace the spindles or balusters?” The resounding answer is YES! This approach is incredibly effective for updating your staircase without dismantling the entire structure. By focusing solely on replacing the balusters, you can dramatically change the look and feel of your staircase while saving significant time, effort, and money. This method allowed us to achieve a modern, refreshed look without needing to disassemble our entire stair railing, proving that even a targeted update can make a huge impact.
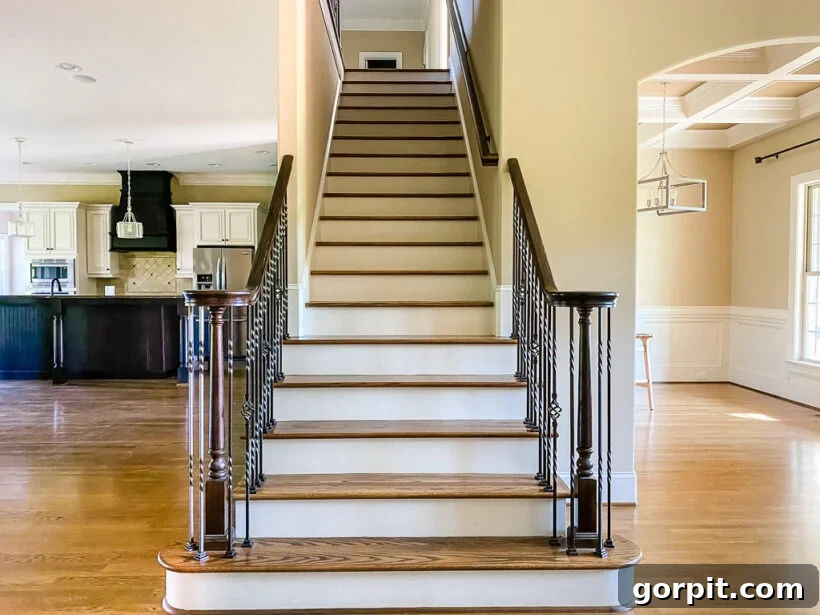
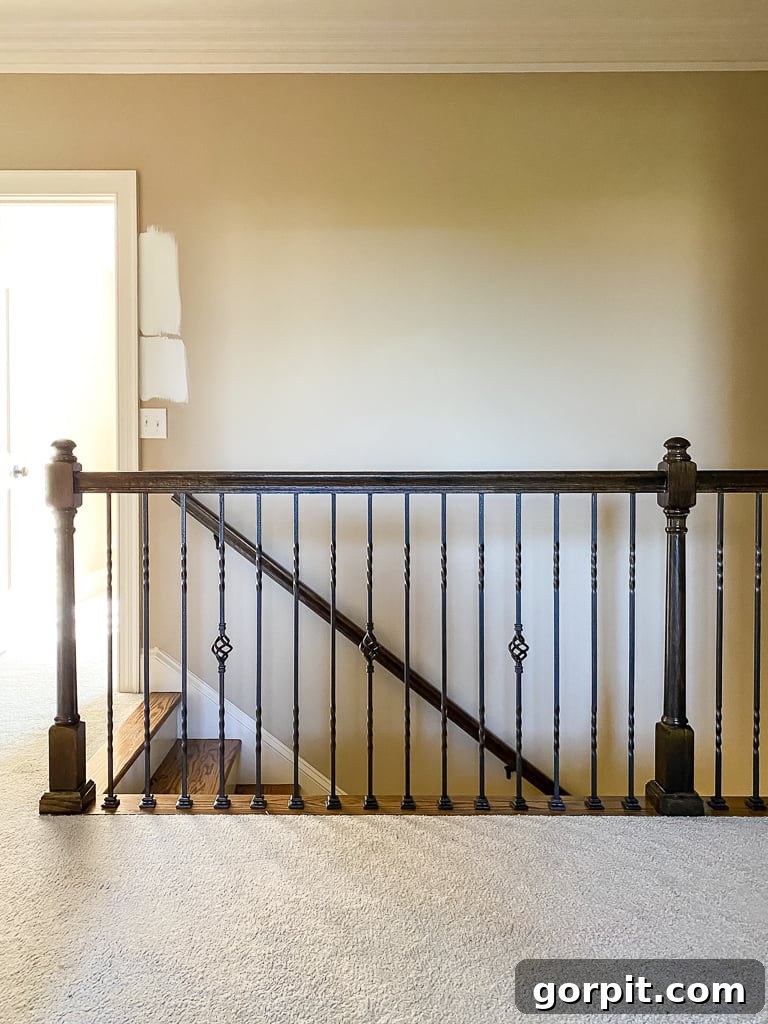
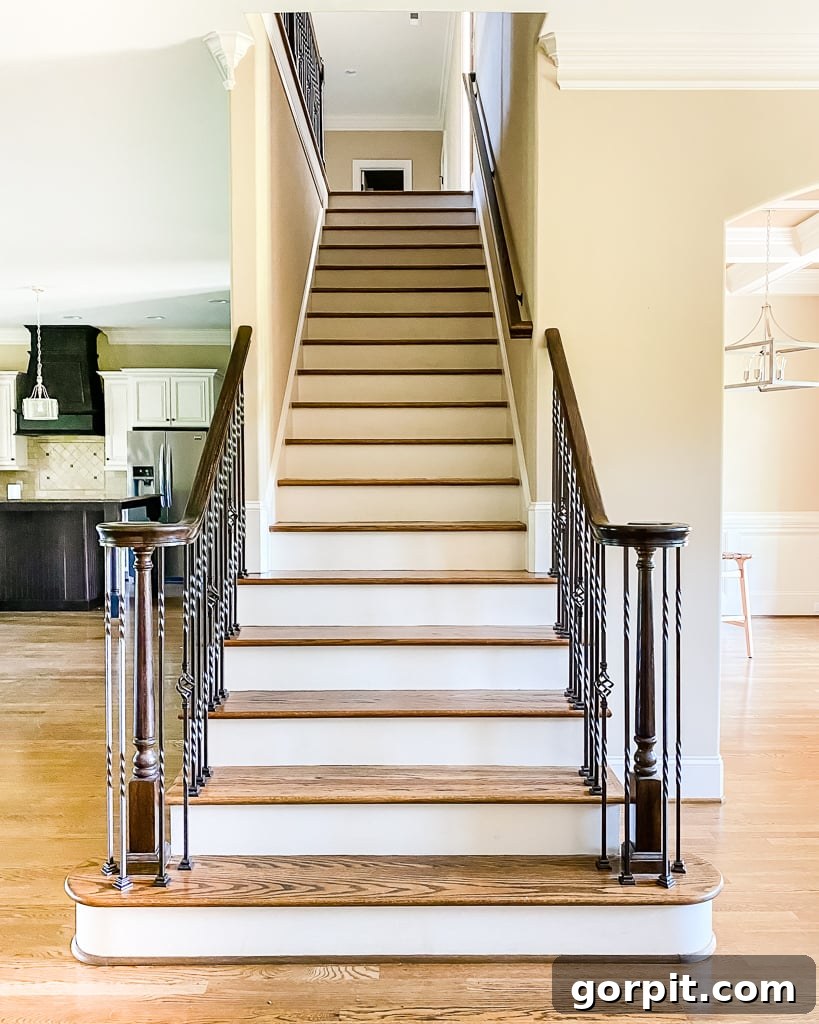
To illustrate the transformation, here’s a look at what our staircase, along with our dining room and kitchen, looked like before the baluster replacement:
And another angle showing the previous stair railing in the upstairs hallway:
This post contains affiliate links for your convenience. Click here for my full disclosure policy.
How to Replace Stair Balusters (Spindles): A Step-by-Step DIY Guide
Embarking on a stair baluster replacement project is an exciting way to modernize your home. This detailed guide breaks down each step, making the process clear and manageable for DIYers of all skill levels. Follow these instructions to transform your staircase.
Materials Needed for Baluster Replacement
Before you begin, gather all necessary tools and materials. Having everything on hand will ensure a smooth and efficient workflow:
- New Balusters: Choose a style that complements your desired aesthetic. We opted for simple pool cue balusters for a clean, modern look. Ensure they are the correct diameter for your existing holes, or be prepared to resize.
- Wood Glue: A high-quality wood adhesive like Dap Weldwood Original Wood Glue is essential for a strong, lasting bond between wooden balusters and the stair structure.
- Reciprocating Saw: This powerful tool is invaluable for quickly and cleanly cutting through old balusters.
- Metal Cutting Blades: If replacing iron balusters, these specific blades are crucial for efficient cuts.
- Wood Cutting Blades: For wooden balusters, ensure you have appropriate wood-cutting blades.
- Drill and Forstner Bits: Necessary for cleaning out old holes or enlarging them to fit your new balusters. Forstner bits create clean, flat-bottomed holes.
- Measuring Tape: For accurate measurements, especially when cutting new balusters to size.
- Channel Locks: These pliers provide excellent leverage for twisting and removing severed baluster pieces from their holes.
- Pin Nailer: Optional, but recommended for added security if there’s any slight looseness in the baluster’s top connection to the handrail.
- Compound Miter Saw or Hand Saw and Miter Box: For precise, angled cuts when trimming new balusters to the correct length. A compound miter saw offers speed and accuracy, while a hand saw with a miter box is a cost-effective alternative.
- Optional: Paint Sprayer and Spray Shelter: For achieving a smooth, professional finish on your balusters and handrail with minimal effort.
- This exact paint sprayer is highly recommended for its efficiency.
- While our specific spray shelter is no longer available, similar paint shelters can be found to contain overspray.
- Safety Gear: Always wear safety glasses, gloves, and hearing protection when operating power tools.
Video Overview
To gain a better understanding of the project’s flow and visual context, we highly recommend watching the concise video overview below before proceeding with the detailed written instructions. Seeing the steps in action will undoubtedly make the subsequent explanations more intuitive and easier to follow.
Step 1: Safely Remove Existing Balusters
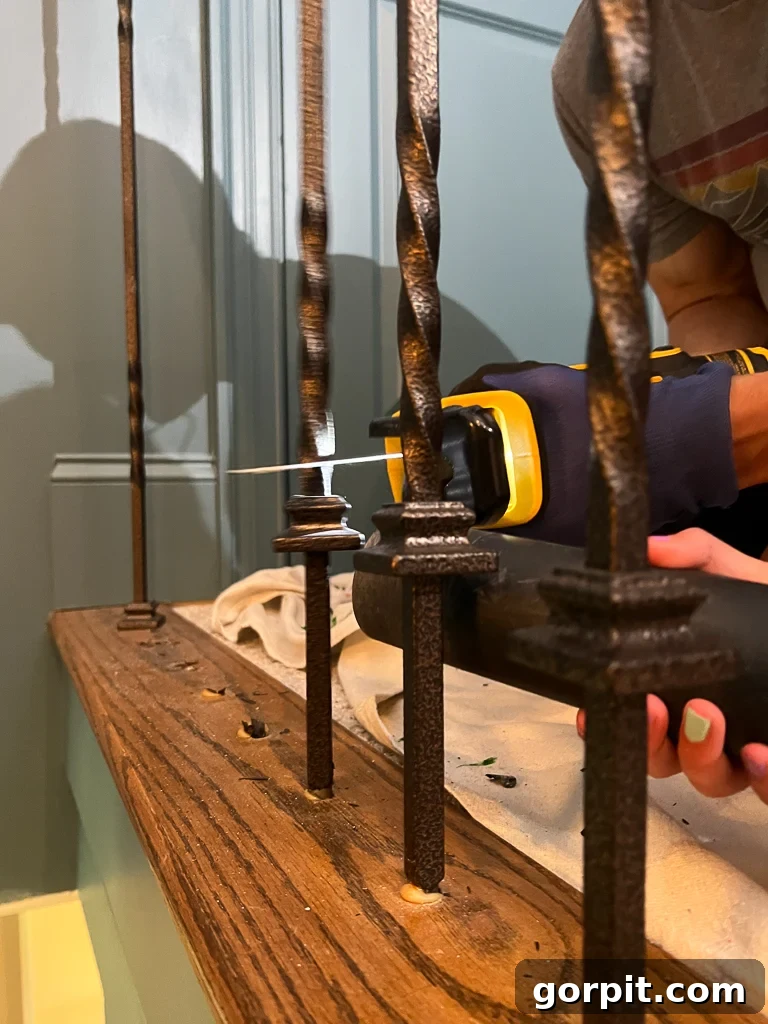
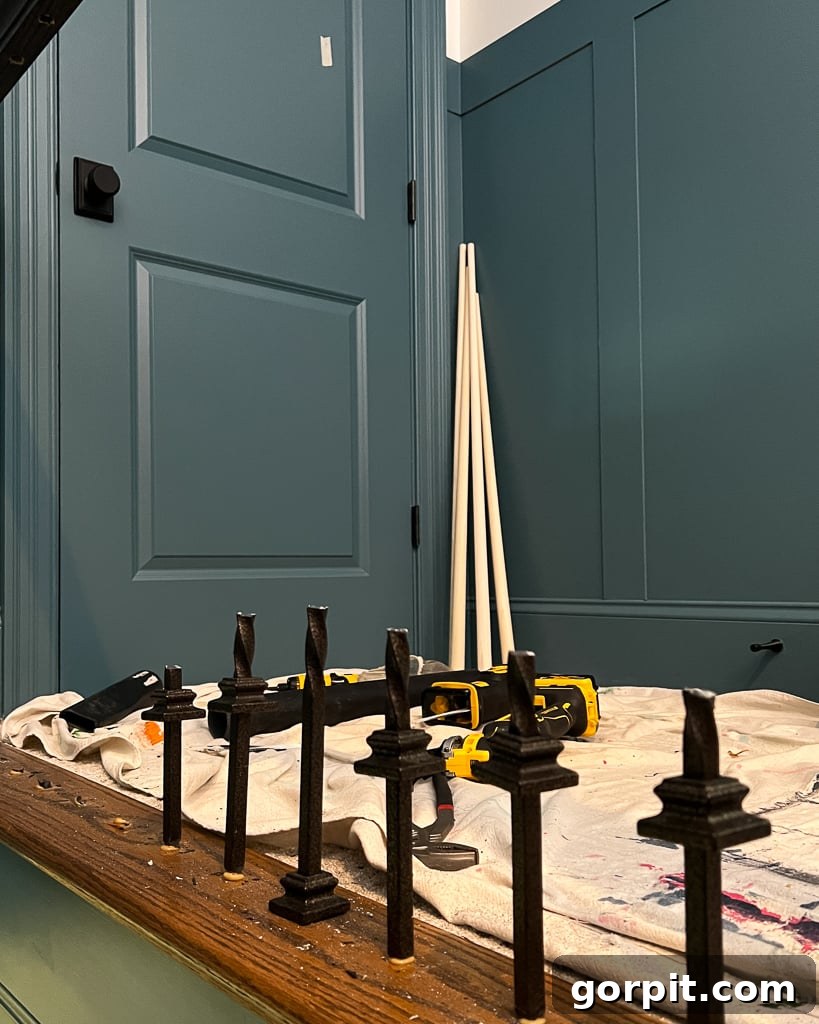
The first hurdle in updating your stair railing is the removal of the old balusters. For us, this involved iron balusters that were securely glued into both the stair treads at the bottom and the handrail at the top. While this initially seemed like a challenging task, we discovered a simple and effective method. Start by cutting through the middle of each baluster using a reciprocating saw. If you’re dealing with metal balusters, ensure you have high-quality metal cutting blades. For wooden balusters, a standard wood-cutting blade will suffice and often makes for an even quicker job.
Once the baluster is cut in half, you’ll have two shorter pieces. This significantly reduces tension and provides leverage. Use channel lock pliers to grasp the remaining top and bottom sections. With a firm grip and a twisting motion, you can usually break the glue seal, allowing you to pull out the remnants from their respective holes. This process can be tedious, especially with many balusters, but it’s not inherently difficult. Always prioritize safety by wearing appropriate eye and hand protection, and ensure your reciprocating saw blades are sharp to facilitate clean cuts and prevent unnecessary strain.
Step 2: Prepare the Existing Holes for New Spindles
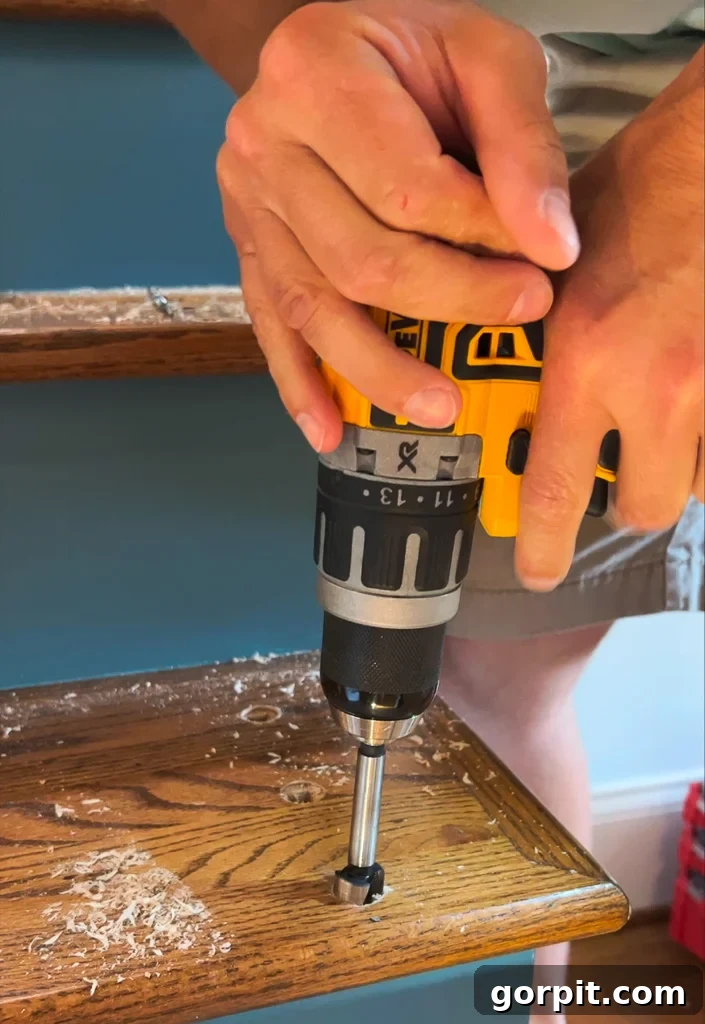
After removing all the old balusters, the next critical step is to prepare the existing holes in both your stair treads and handrail for the new spindles. Maintaining the original baluster spacing can save you a considerable amount of work, as it avoids the need to patch old holes and drill entirely new ones. If you plan to use the same spacing, carefully inspect each hole for any lingering glue residue, wood splinters, or debris.
You’ll need to ensure these holes are not only clean but also the correct size for the pins or ends of your new balusters. For our project, the holes in the handrail were adequately sized for the top of our new balusters, but the bottom holes in the stair treads required slight enlargement. This is where a drill and Forstner bits come in handy. Forstner bits are ideal for creating clean, precise, flat-bottomed holes without tearing the wood. Select a bit that matches the diameter needed for your new baluster pins. Even if the size is correct, a quick pass with a drill bit of the appropriate diameter can help clean out any hardened old glue or smooth out rough edges, ensuring a snug and secure fit for your new balusters. The specific diameter required will depend entirely on the type and style of balusters you’ve chosen.
Step 3: Pre-Paint Your New Balusters and Existing Handrail
This step is, without exaggeration, one of the most critical for achieving a professional finish with minimal effort. Do everything in your power to paint the stair handrail and newel posts *after* removing the old balusters and *before* installing the new ones. Painting around installed spindles is incredibly time-consuming, tedious, and often results in an uneven finish. The same logic applies to your new balusters: paint them *before* installation.
We leveraged our paint sprayer and a paint shelter for this task, which allowed us to apply smooth, even coats to all 65 balusters and the accessible sections of the handrail in less than 30 minutes of actual spraying time (excluding drying time between coats). This pre-painting strategy meant that after installation, we only needed to perform minor touch-ups, saving hours of detailed brushwork. We also took the opportunity to paint our stair risers during this phase, further streamlining the painting process. The bottom line: preparing and painting as much as possible before the new balusters go in will make your DIY staircase makeover significantly easier and more rewarding.
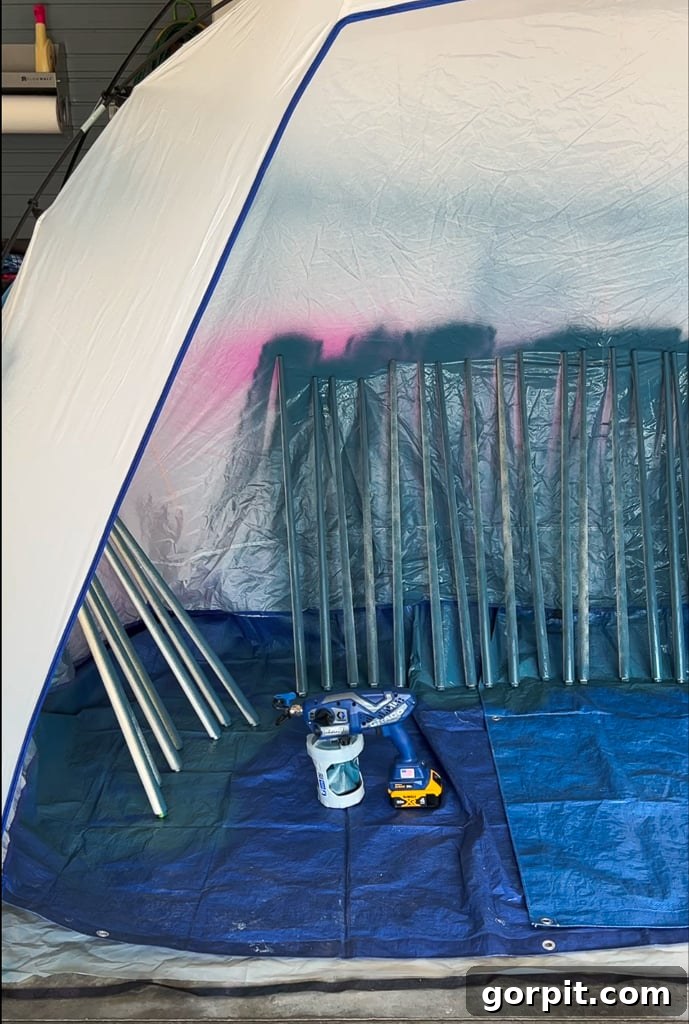
Step 4: Accurately Cut New Balusters to Length
Understanding the nuances of baluster lengths is crucial for a professional-looking staircase update. Most stair railings, particularly those with more than two balusters per tread, require balusters of varying lengths due to the rake (angle) of the stairs. In our case, with three balusters per stair, we needed three distinct lengths for the main stair railing, plus additional lengths for sections around the newel posts.
Balusters typically come in standard heights, so selecting lengths that are as close as possible to your required finished size is the most efficient approach. We ordered 34″, 36″, and 39″ lengths for the stair railing, and 41″ for the newel post sections. Even with careful selection, trimming will almost certainly be necessary to achieve a perfect fit. Measure each baluster individually, accounting for the depth of the holes in both the tread and the handrail, and consider any angled cuts required for a flush fit against the handrail. Our compound miter saw made these cuts quick and precise. If you don’t own one, a hand saw and miter box can achieve similar accuracy with a bit more manual effort. Cut carefully, measuring twice and cutting once, to ensure each baluster fits perfectly into its designated spot.
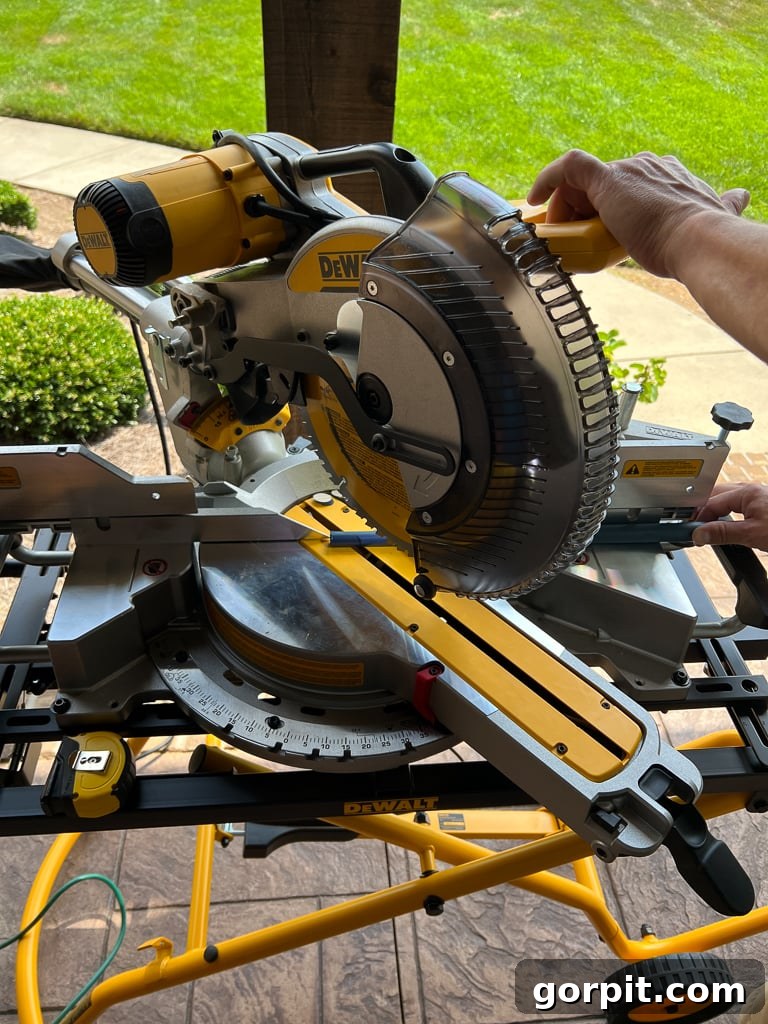
Step 5: Securely Position and Attach Your New Balusters
With the balusters prepped and painted, it’s time for installation. The pool cue balusters we selected feature a 3/4-inch “pin” at the bottom designed to sit securely in the stair tread holes, and a 5/8-inch top that fits into the handrail. Since we were attaching wood balusters to existing wooden treads and handrails, a robust wood glue was essential. We generously coated both the holes and the baluster pins with Dap Weldwood Original Wood Glue to ensure a strong, lasting bond.
Because we chose not to remove the entire handrail, a specific installation technique was required. We found it easiest to first angle the top of each baluster into the handrail hole, utilizing the slight extra depth of the handrail hole to allow for maneuverability. Once the top was partially in, we could then slide the bottom pin directly into its corresponding hole in the stair tread. This method requires a gentle touch and careful alignment to avoid damaging the fresh paint or the wood itself. To enhance stability, especially since the old handrail holes were slightly larger than our new balusters’ tops, we added a couple of pin nails at the top of each baluster. These small nails discreetly secure the balusters, preventing any potential wiggling or movement within the handrail, ensuring a solid and professional finish.
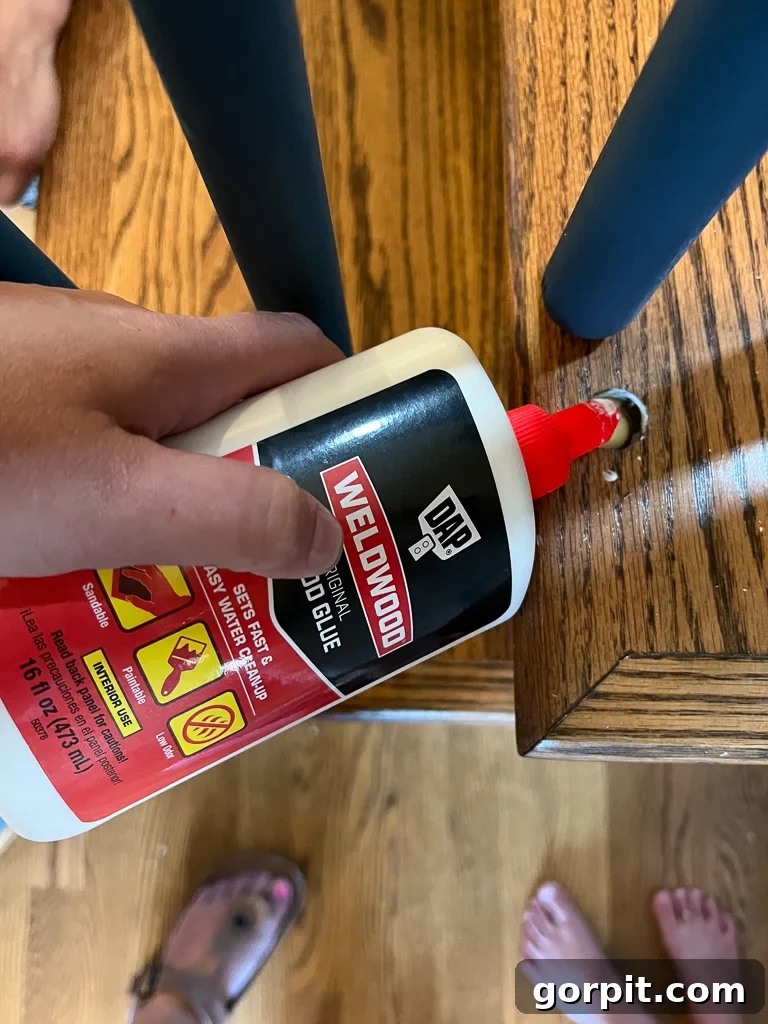
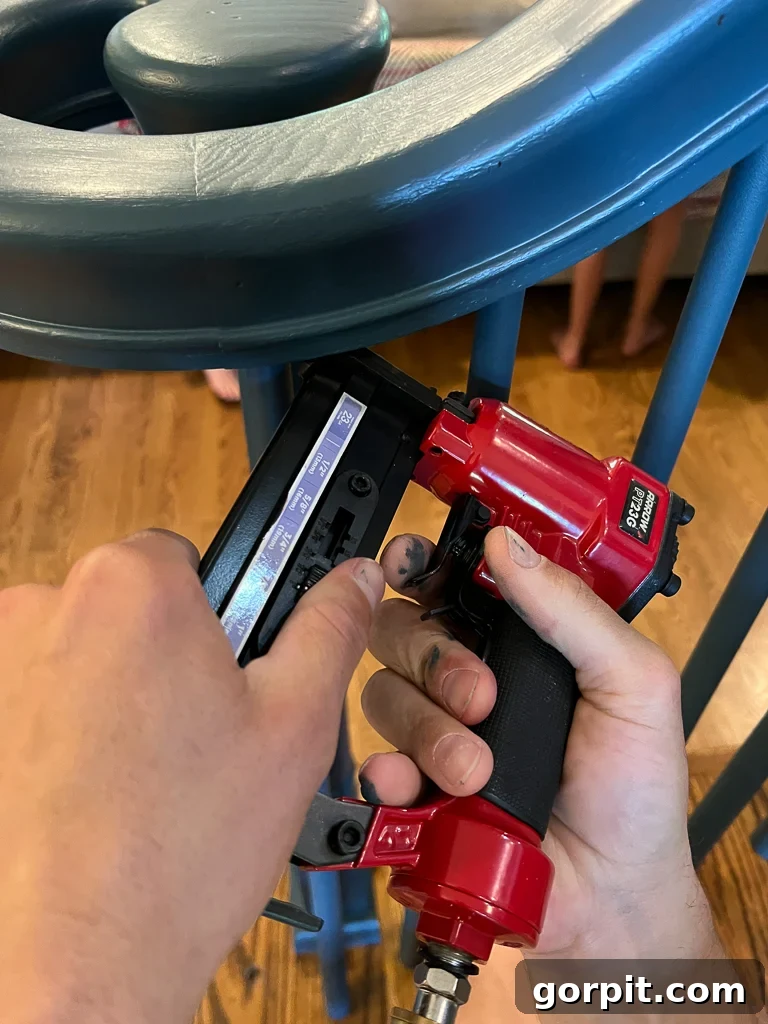
If you haven’t already viewed the video overview of this project, we strongly encourage you to scroll back up to the “Video Overview” section, located just under the list of materials needed. The visual demonstration will significantly clarify the installation technique described above, allowing you to see exactly how the balusters are angled and secured into place.
And that’s it! With these steps, our stair railing has been completely transformed, perfectly aligning with our home’s updated style. The dramatic change achieved through a relatively simple DIY project is truly remarkable!
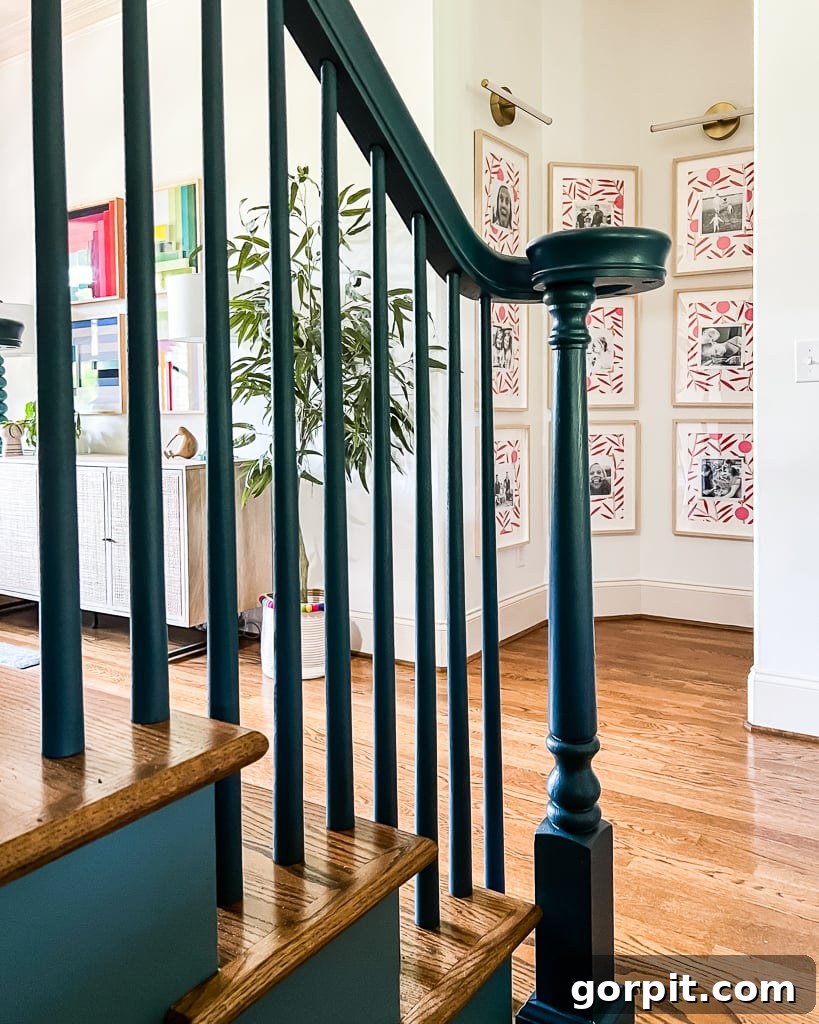
The new stair railing beautifully complements the entryway, creating a cohesive and inviting first impression. The view now perfectly frames our vibrant family photo gallery wall, enhancing the overall aesthetic of our home.
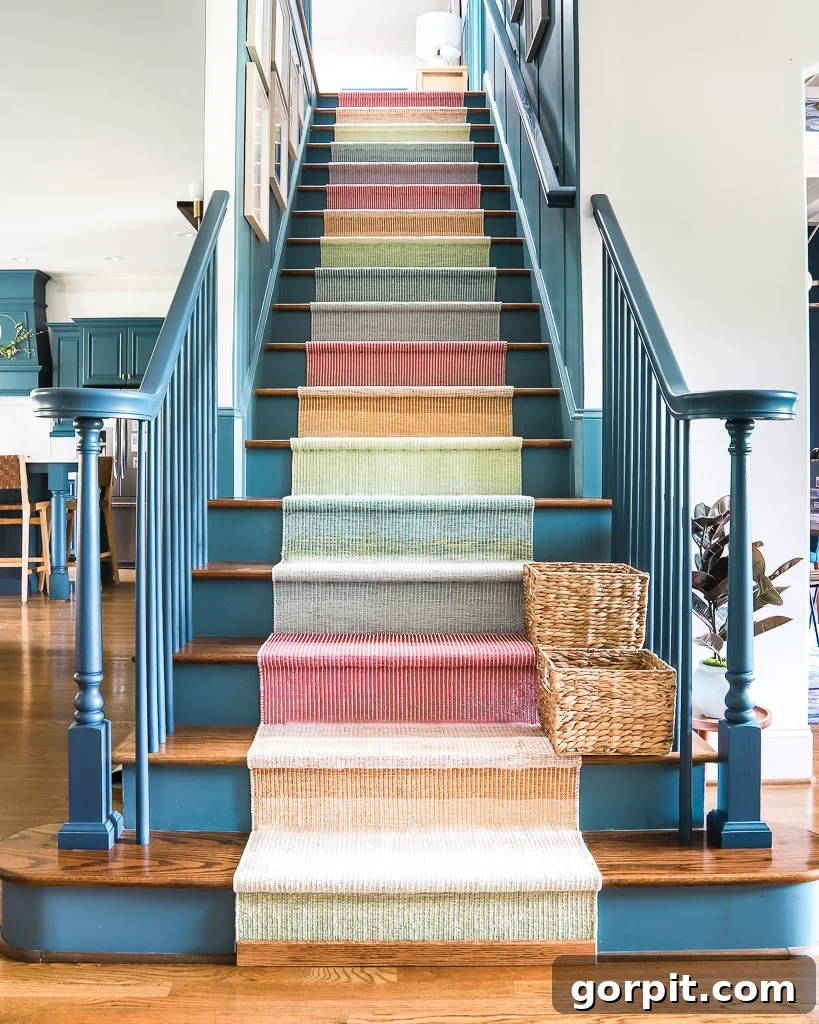
Just a few days after these photos were taken, we further enhanced our staircase with the installation of a stylish stair runner, which truly completed the look. You might also notice the DIY board and batten accent wall, a continuation of our upstairs hallway project. And observe the incredible increase in brightness upstairs! Those aren’t artificial lights; they are the result of the recently installed VELUX Sun Tunnels, which have flooded our formerly dark hallway with an abundance of natural light!
It’s quite a transformation from how it used to look, isn’t it?
Now, let’s address some of the most common questions that arise when considering a stair railing update.
Frequently Asked Questions About Stair Railing Updates
Updating your stair railing can be a significant decision for your home. Here are answers to some of the most frequently asked questions, providing clarity on cost, difficulty, and material choices.
Is Replacing a Stair Railing Expensive?
The cost of updating a stair railing can vary widely depending on the scope of the project, materials chosen, and whether you opt for professional installation or take on a DIY approach. For our project, focusing solely on replacing the balusters ourselves significantly reduced overall expenses by eliminating labor costs. Our new balusters, including shipping, totaled around $570. When factoring in additional materials like high-quality paint, new reciprocating saw blades, wood glue, and other miscellaneous supplies, the entire project came in at approximately $700. This is an incredibly reasonable investment for such a dramatic transformation, which now perfectly integrates with our home’s updated decor.
Replacing the entire handrail and newel posts would substantially increase costs due to the higher material prices and potentially more complex installation requirements. Our decision to retain these existing components, knowing they could be enhanced with paint, was a key factor in keeping the project budget-friendly and achievable for a DIY enthusiast.
Is It Difficult to Replace a Banister? Can I Do It Myself?
Based on our experience, replacing the balusters (often confused with the entire banister or handrail) is an easier project than many homeowners anticipate. While it is certainly time-consuming, requiring meticulous measuring, cutting, and installation for each individual baluster, the tasks themselves are not inherently difficult. Many steps involve basic carpentry skills that are accessible to beginner and intermediate DIYers.
Even if you were to undertake a more extensive renovation, like replacing the handrail and repositioning balusters as demonstrated in this video, the project remains highly achievable for a dedicated DIY enthusiast. The key is to approach it systematically, gather the right tools, and commit to the process. Patience and attention to detail will be your greatest allies in successfully transforming your staircase yourself.
What Type of Paint is Best for Stair Railings?
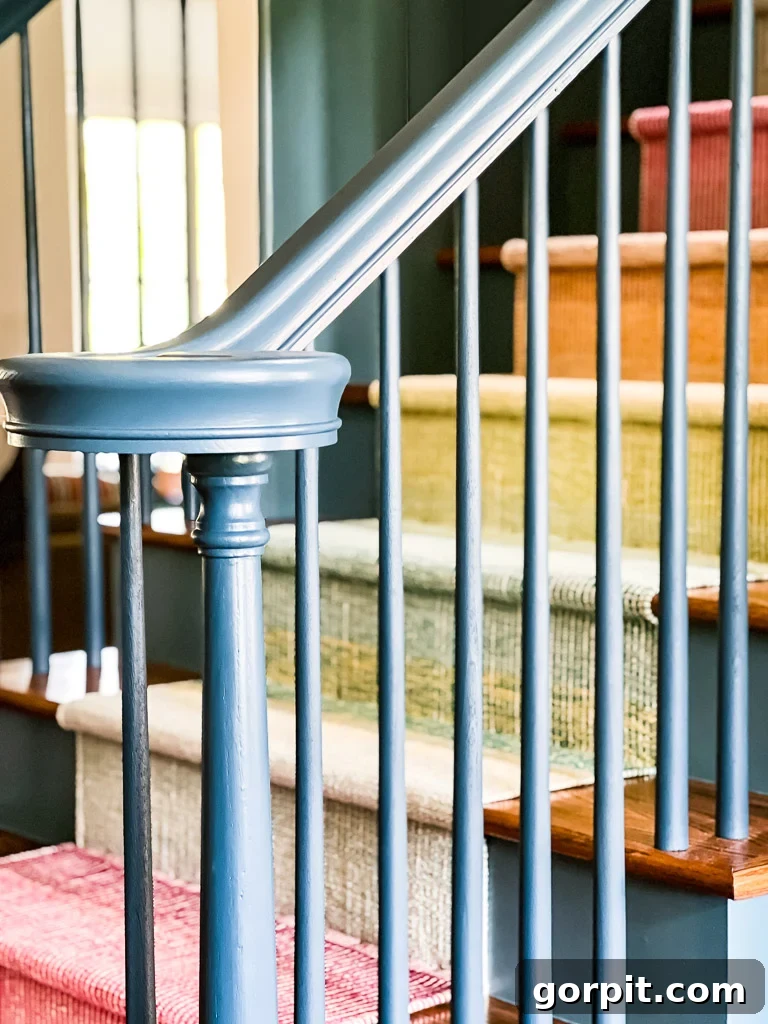
Choosing the right paint is crucial for a durable and long-lasting finish on high-traffic areas like stair railings. For our walls and stair risers, we selected Sherwin-Williams Emerald Designer Edition Interior Latex Paint in the serene color Refuge. However, for the balusters and handrails, which endure constant contact and wear, we opted for Sherwin-Williams Emerald Urethane Trim Enamel in the elegant shade of Seaworthy.
The choice of urethane paint for the railing components was deliberate. Urethane enamel is specifically formulated to create an exceptionally hard, durable, and chip-resistant finish, making it ideal for surfaces that experience significant wear and tear. A representative from Sherwin-Williams informed us that this type of paint dries up to seven times harder than standard latex paints, offering superior protection. We chose a satin sheen for a sophisticated look that is also easy to clean and maintains its luster over time. If you’re unsure about paint sheens, our comprehensive guide on choosing the right paint sheen for your project can provide further assistance.
What are the Most Important Tips for Replacing Stair Balusters?
After successfully completing this project, three key takeaways stand out as essential advice for anyone considering replacing stair balusters:
- Pre-Paint for Efficiency and Quality: This cannot be stressed enough. Dedicate the time to paint your existing stair handrail and newel posts *after* you’ve removed the old balusters and *before* you install the new ones. Simultaneously, paint your new balusters *before* they are installed. This approach eliminates the tedious and difficult task of painting around individual spindles, allowing for much faster application, better coverage, and a smoother, more professional-looking finish with minimal touch-ups required post-installation. It’s a game-changer for paint quality and overall project time.
- Utilize Existing Baluster Placement: Unless you have a strong desire to change the spacing or layout of your balusters, stick with the existing placement and holes. This strategy saves immense time and effort by avoiding the need to fill numerous old holes and precisely drill new ones. While it is possible to use wood plugs to fill old spindle holes, these patches can often be discernible, impacting the seamless look of your newly updated railing. Reusing existing holes ensures a cleaner, more integrated finish.
- Retain Your Existing Handrail (If Possible): If your current handrail is structurally sound and aesthetically acceptable, resist the urge to replace it entirely. Opting to keep and refresh your existing handrail, typically through sanding and painting, will save you a substantial amount of both money and time. Installing a new handrail often involves complex carpentry, precise measurements, and potential structural adjustments, which can significantly increase the project’s difficulty and cost. Updating your balusters and repainting the existing handrail provides a fresh look without the major undertaking of a full railing replacement.
More STAIR Posts
SEE ALL stair POSTS
-
15 Chic Stair Railing Ideas to Update Your Staircase
-
How to Install a Stair Runner: A Step-by-Step Tutorial
-
15+ Inspiring DIY Staircase Makeover Ideas
-
From Carpet to DIY Hardwood Stairs: Step-by-Step Tutorial
-
How to Replace Balusters to Update Your Stair Railing
-
Stair Riser Ideas to Make Your Stairs More Stylish
Explore more related posts to enhance your home:
- 15 Chic Stair Railing Ideas to Update Your Staircase
- Inspiring DIY Staircase Makeovers for a Fresh Look
- Creative Stair Runner Ideas to Elevate Your Stairs
- From Carpet to DIY Hardwood Stairs: A Step-by-Step Tutorial
- 8 Interior Design Mistakes You Don’t Even Know You are Making (and How to Fix Them)
- Gorgeous But Cheap Flooring Ideas to Transform Your Home
Curious about our systematic approach to transforming rooms and spaces throughout our home? Discover the strategies and insights within Designer in a Binder®.
For exclusive content, behind-the-scenes glimpses, and the latest updates on our projects, be sure to subscribe before you leave!