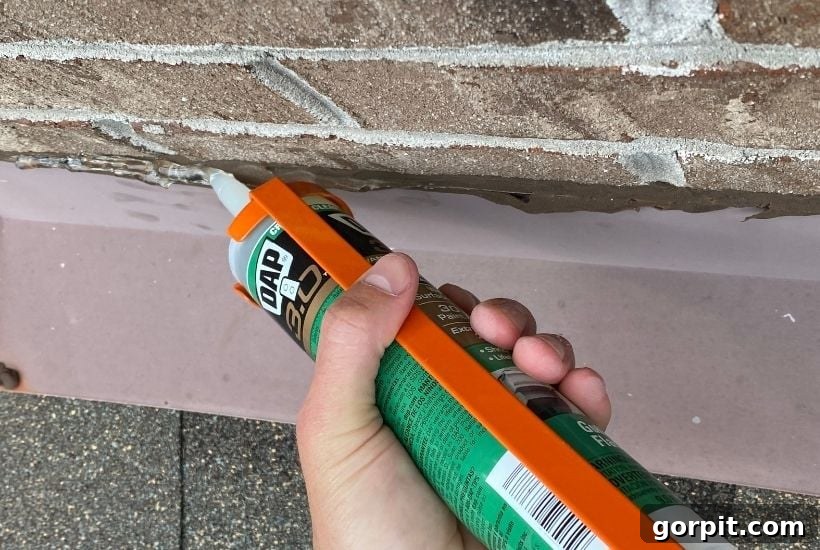
Mastering DIY Roof Flashing Repair: A Comprehensive Guide to Caulking and Preventing Leaks
Is your roof flashing no longer providing an impenetrable seal against the elements? Don’t fret! You don’t necessarily need to incur the cost of a professional roofer or a general handyman. Repairing compromised flashing is a manageable DIY project that can save you significant money and protect your home from costly water damage. This detailed guide will walk you through everything you need to know about inspecting, preparing, and expertly caulking your roof flashing.
This post is brought to you by DAP Products. All opinions expressed are 100% my own. This content may contain affiliate links, which means I may earn a small commission at no extra cost to you if you make a purchase. For more information, please refer to my full disclosure policy.
Understanding Roof Flashing: Your Home’s Unsung Protector
What Exactly is Roof Flashing?
Roof flashing is a critical component of your home’s exterior envelope, primarily designed to prevent water from penetrating your roof system where different surfaces meet. Typically crafted from durable materials like aluminum, steel, or copper, flashing acts as a waterproof barrier. It’s strategically installed in vulnerable areas where your roof intersects with other structural elements, such as the walls of your house, around dormers, chimneys, skylights, and vents. Its primary role is to divert water flow, ensuring it sheds off your roof and into your gutters, rather than seeping into your attic or interior walls. Despite its vital function in safeguarding your home from moisture, flashing often goes unnoticed until a problem arises.
The Critical Importance of Maintaining Your Roof Flashing
Neglecting your roof flashing can lead to severe and expensive consequences for your home. When flashing fails, even a small gap can allow water to infiltrate your house, leading to a cascade of problems:
- Water Damage: Leaks can cause stains on ceilings and walls, peel paint, and damage drywall.
- Structural Integrity Issues: Persistent moisture can rot wooden framing, compromising the structural stability of your roof and home.
- Mold and Mildew Growth: Damp environments are breeding grounds for mold and mildew, which can pose serious health risks to your family and degrade indoor air quality.
- Reduced Energy Efficiency: Water damage can compromise insulation, leading to higher heating and cooling costs.
- Pest Infestations: Damp, rotting wood can attract pests like termites and carpenter ants, adding another layer of damage.
Regular inspection and proactive maintenance, like proper caulking, are essential to extend the lifespan of your roof, preserve your home’s value, and prevent these detrimental issues. A small, inexpensive repair today can prevent a significantly larger, costlier repair tomorrow.
Inspecting Your Flashing: Identifying Potential Problems
When and How to Inspect Your Flashing
It’s advisable to inspect your roof flashing at least once a year, preferably in the spring or fall, and always after any severe weather events involving high winds, heavy rain, or hail. Early detection of compromised flashing can save you immense trouble. Here’s how to conduct a thorough inspection:
- Safety First: Prioritize safety above all else. If you are uncomfortable with heights, lack proper safety equipment, or your roof has a steep pitch, it’s always best to call a professional. If you choose to inspect yourself, use a sturdy ladder, wear non-slip shoes, and ideally have a spotter. Avoid inspecting on wet or icy roofs.
- From Ground Level: Use binoculars to get a preliminary view of hard-to-reach areas. Look for obvious signs of damage or deterioration from the ground.
- From Windows: If you have second-story windows or dormers, you might be able to get a closer look at certain areas of your roof without having to climb onto it directly. This offers a safer vantage point for initial assessment.
- On the Roof (If Safe): Carefully inspect all areas where flashing is present:
- Around the base of your chimney.
- Along all walls where the roof intersects.
- Around dormers and skylights.
- Around any roof vents or exhaust pipes.
- In valleys where two roof planes meet (though valley flashing is typically integrated under shingles, visible edges should be checked).
- What to Look For: Pay close attention to these warning signs:
- Visible Gaps or Cracks: The most common sign of flashing failure is a clear separation or gap between the flashing material and the adjacent surface (e.g., brick chimney, siding, roof shingles). Look for hairline cracks in existing caulk or sealant.
- Loose or Lifted Flashing: Flashing that appears to be pulling away from the surface, allowing water to get underneath.
- Rust or Corrosion: Especially on metal flashing, rust can indicate deterioration and potential holes.
- Missing or Compromised Caulk: Old, dried, or crumbling caulk around the edges of the flashing.
- Unsealed Nail Holes: Check for any roofing nails that are exposed or have lost their sealant.
- Water Stains: On the underside of the roof deck in your attic or on interior ceilings/walls directly below flashing points, water stains are definitive signs of a leak.
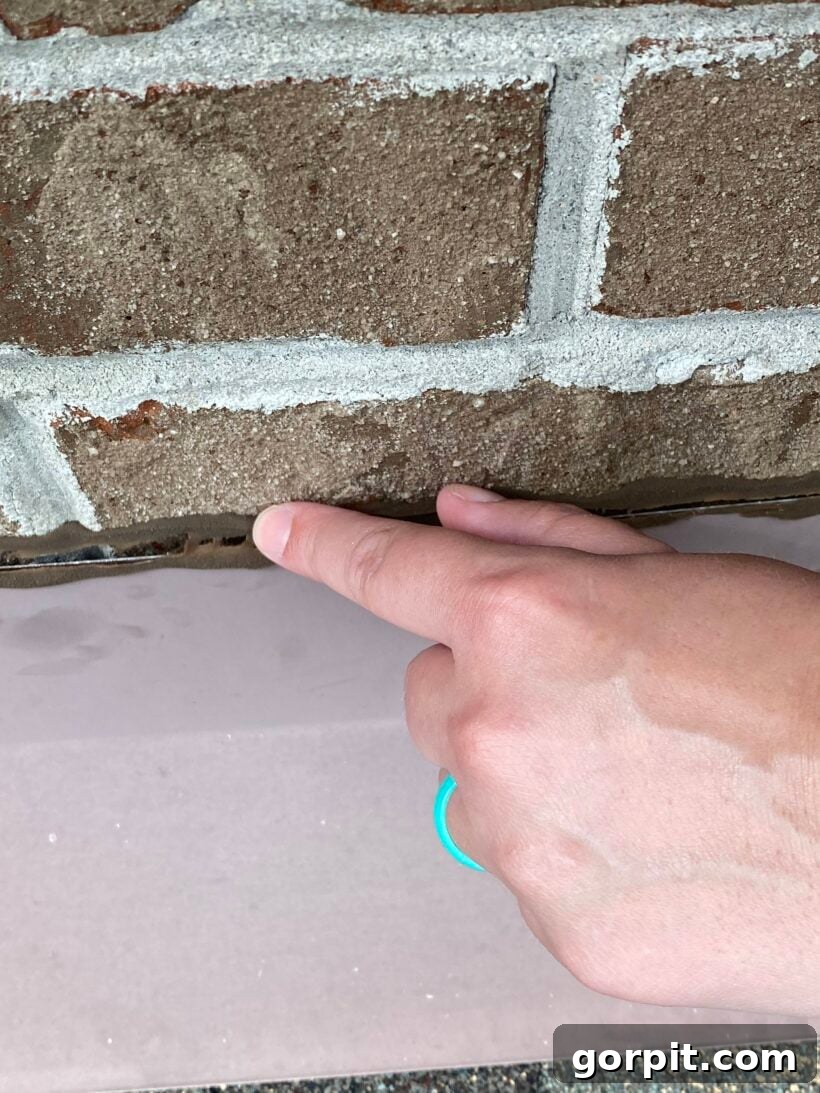
The image below illustrates what a compromised seal along the flashing might look like, showing a clear gap where water could easily penetrate.
Preparing for the Repair: Tools and Materials
Before you begin the caulking process, gather all necessary tools and materials to ensure a smooth and efficient repair. Having everything on hand will prevent unnecessary trips up and down the ladder.
Essential Tools and Materials You’ll Need:
- High-Quality Flashing Sealant: This is the most crucial item. We highly recommend products specifically designed for roofing and flashing.
- DAP Crystal Clear Premium Gutter and Flashing Sealant: This product is excellent for its durability and versatility. It offers superb adhesion, can be applied to wet or dry surfaces, and is water-ready in just 30 minutes. Its crystal clear finish ensures it blends seamlessly with any building material.
- DAP Ultra Clear Roof Waterproof Rubberized Sealant: Another top-tier option, known for its strong, rubberized seal that provides exceptional waterproofing.
- Caulk Gun: A standard caulk gun is required for applying the sealant evenly.
- Utility Knife or Caulk Tool: For cutting the tip of the caulk tube and for removing old caulk.
- Wire Brush and/or Scraper: To thoroughly clean the surface, removing old caulk, loose debris, dirt, and rust.
- Rags: For wiping surfaces and cleaning up excess sealant.
- Mineral Spirits or Denatured Alcohol: If using a solvent-based sealant (like DAP Crystal Clear), these are essential for cleaning tools and any accidental spills. Always check the sealant’s label for recommended cleanup.
- Safety Gloves: Especially important for solvent-based sealants to protect your skin.
- Safety Glasses: To protect your eyes from splashes or debris.
- Sturdy Ladder: Ensure it’s in good condition and properly secured.
- Bucket and Water: For rinsing brushes or rags if using water-based caulk, or just for general cleaning.
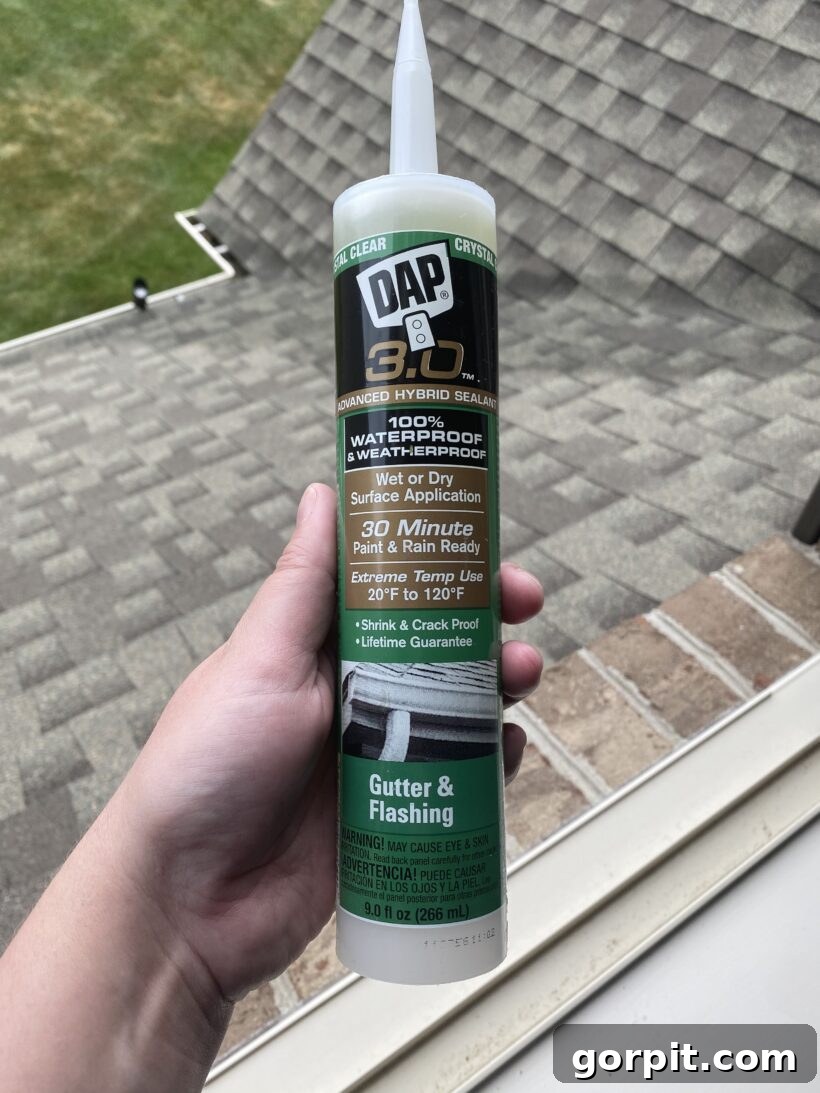
A note on the sealant: DAP Crystal Clear Premium Gutter and Flashing Sealant often requires solvent cleanup, so always wear gloves and eye protection when working with it. It’s better to be safe than sorry!
Step-by-Step Guide: How to Caulk Your Roof Flashing
Once you’ve safely ascended to your work area with all your tools, you’re ready to begin the repair process. Follow these steps for an effective and long-lasting seal.
1. Thorough Surface Preparation (The Most Crucial Step)
The longevity and effectiveness of your caulk job heavily depend on how well you prepare the surface. Do not skip or rush this step!
- Remove Old Caulk and Debris: Use your utility knife or a caulk removal tool to scrape away all old, cracked, or loose caulk. Ensure no crumbling pieces remain.
- Clean the Area: Use a wire brush or scraper to remove any dirt, moss, loose paint, rust, or other debris from both the flashing and the surface it abuts (e.g., chimney brick, siding, roof shingles). The goal is a clean, sound substrate for the new sealant to adhere to.
- Clean with Solvents (if necessary): For solvent-based sealants, if there’s any greasy residue or difficult-to-remove grime, wipe the area with a rag dampened with mineral spirits or denatured alcohol. Allow it to fully evaporate.
- Ensure Dryness: Even though products like DAP Crystal Clear can be applied to wet surfaces, for optimal adhesion and cure, a clean and dry surface is always preferred. If the surface is damp, wipe it down and allow it to air dry as much as possible, especially if working with a sealant that isn’t specifically rated for wet application.
2. Preparing Your Caulk Gun and Sealant Tube
- Cut the Nozzle: Using your utility knife, cut the tip of the sealant tube’s nozzle at a 45-degree angle. The size of the opening should match the size of the gap you intend to fill – a smaller opening for fine cracks, a larger one for wider gaps.
- Puncture the Inner Seal: Insert a long nail or the built-in puncture tool of your caulk gun into the nozzle to break the inner foil seal of the tube.
- Load the Caulk Gun: Place the sealant tube into the caulk gun and push the plunger rod firmly against the back of the tube.
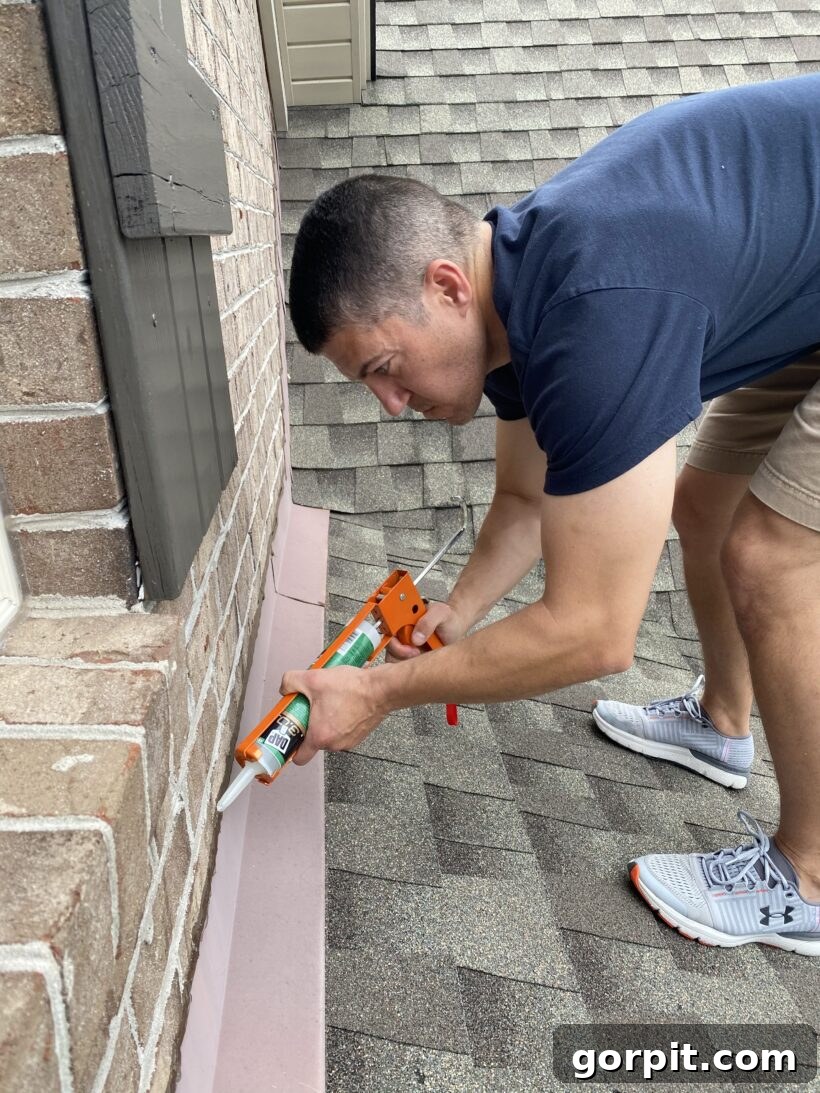
3. Applying the Sealant
Now it’s time to apply the fresh seal to your flashing. Remember, the goal is a complete, watertight seal, not necessarily a perfectly aesthetic bead.
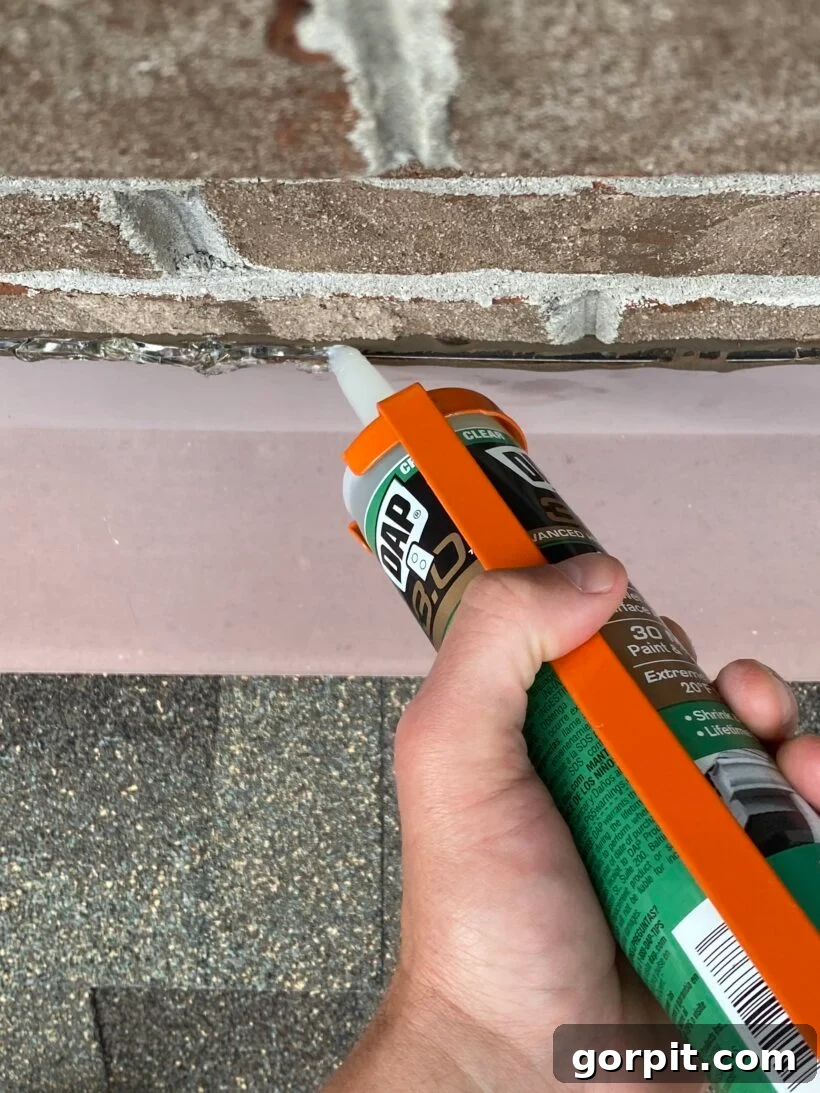
- Maintain a Steady Hand: Hold the caulk gun at a consistent 45-degree angle to the gap.
- Apply Continuous Pressure: Squeeze the trigger slowly and evenly, moving the gun along the seam in a smooth, continuous motion. This will create a consistent bead of sealant.
- Fill the Gap Completely: Ensure the sealant fully penetrates and fills the entire depth of the gap. Don’t just skim the surface. You may need to go over the same area twice if the gap is particularly deep or wide.
- Don’t Over-apply: While filling the gap is important, avoid excessive application, which can lead to messy cleanup and wasted product.
4. Tooling and Finishing (Optional but Recommended)
While the original content states it doesn’t have to look pretty, tooling the caulk bead can improve its adhesion and ensure a smoother, more effective seal against water.
- Smooth the Bead: Immediately after applying the caulk, use a caulk tooling tool, a gloved finger, or even a wet sponge to smooth out the bead. This pushes the sealant firmly into the joint and creates a clean, uniform finish.
- Wipe Away Excess: Use a clean rag dampened with the appropriate solvent (mineral spirits for solvent-based, water for water-based) to immediately wipe away any excess caulk that has spread beyond the joint.
5. Allow for Proper Curing
The final step is to let the sealant cure fully according to the manufacturer’s instructions.
- Water-Ready Time: As mentioned, DAP Crystal Clear Premium Gutter and Flashing Sealant is water-ready in just 30 minutes, which is a significant advantage for roofing repairs.
- Full Cure Time: However, note that “water-ready” is different from “fully cured.” Most sealants require 24-72 hours, or even longer in cold or humid conditions, for a complete cure. Avoid disturbing the area during this time.
- Protect from Elements: If rain is expected within the full cure time and your sealant isn’t fully cured, consider covering the area with a tarp to prevent washout.
Common Mistakes to Avoid When Caulking Flashing
To ensure a successful and lasting repair, steer clear of these common pitfalls:
- Inadequate Surface Preparation: Applying caulk over dirt, old caulk, or loose debris will prevent proper adhesion, leading to premature failure.
- Using the Wrong Type of Sealant: Not all caulks are created equal. Using an interior caulk or one not designed for exterior, roofing, or flashing applications will not provide the necessary weather resistance and flexibility.
- Applying to Excessively Wet Surfaces: While some advanced sealants like DAP Crystal Clear tolerate dampness, applying to a soaking wet or frozen surface generally reduces adhesion and cure quality for most products.
- Applying Too Thinly or Too Thickly: A bead that is too thin won’t provide an adequate seal, while one that is too thick can waste product, look messy, and take longer to cure properly.
- Ignoring Safety Precautions: Working on a roof without proper ladder safety, non-slip footwear, and eye/hand protection is extremely dangerous.
- Rushing the Cure Time: Disturbing the sealant before it’s fully cured can compromise its integrity.
When to Call a Professional Roofer
While caulking flashing is often a DIY-friendly task, there are situations where calling a professional is the wisest course of action:
- Extensive Flashing Damage: If the flashing itself is severely bent, rusted through, torn, or detached from the structure, a simple caulk repair won’t suffice. It likely needs to be replaced.
- Widespread Leaks: If you have multiple or significant leaks, or signs of water damage over a large area, the problem might be more extensive than just a failed caulk bead.
- Uncomfortable with Heights: If you’re not confident climbing on your roof or working at heights, it’s safer to hire a professional.
- Steep Roof Pitch: Steep roofs pose a higher risk and are best left to experienced roofers.
- Active Interior Leaks: If water is actively dripping into your home, especially after heavy rain, the repair is urgent and may require professional expertise to identify the exact source quickly.
Conclusion: Protect Your Home, One Caulk Bead at a Time
Inspecting and caulking your roof flashing is a vital, yet often overlooked, home maintenance task. It’s a quick, easy, and incredibly important DIY project that empowers you to protect your most valuable asset from the damaging effects of water. By following these steps, you can confidently tackle this repair, ensuring your home remains dry, safe, and secure for years to come. Don’t wait until you see water stains; make flashing inspection a regular part of your home maintenance routine!
For more home transformation insights and design strategies, explore Designer in a Binder®.
And for exclusive content, behind-the-scenes glimpses, and more valuable DIY tips, be sure to subscribe to our newsletter before you leave!