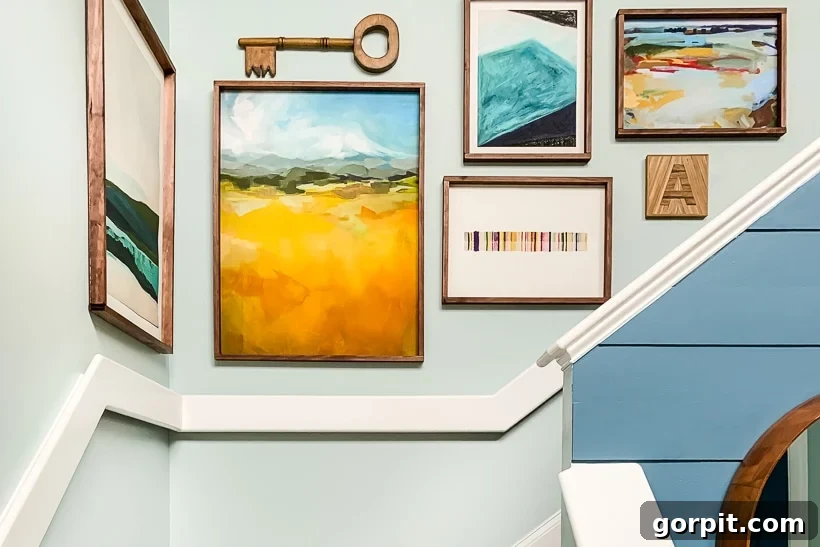
A stunning piece of art has the power to redefine any room, creating a focal point that captures attention and expresses your unique style. However, the dream of adorning your walls with magnificent art often collides with the reality of custom framing costs. That sticker shock can be a major deterrent, leaving beautiful prints tucked away in drawers instead of proudly displayed. What if you could achieve that sophisticated, finished look for your large prints without draining your wallet? This easy-to-follow tutorial reveals how to craft your own impressive DIY picture frames for less than $20 each, allowing you to transform your space with breathtaking art on a budget.
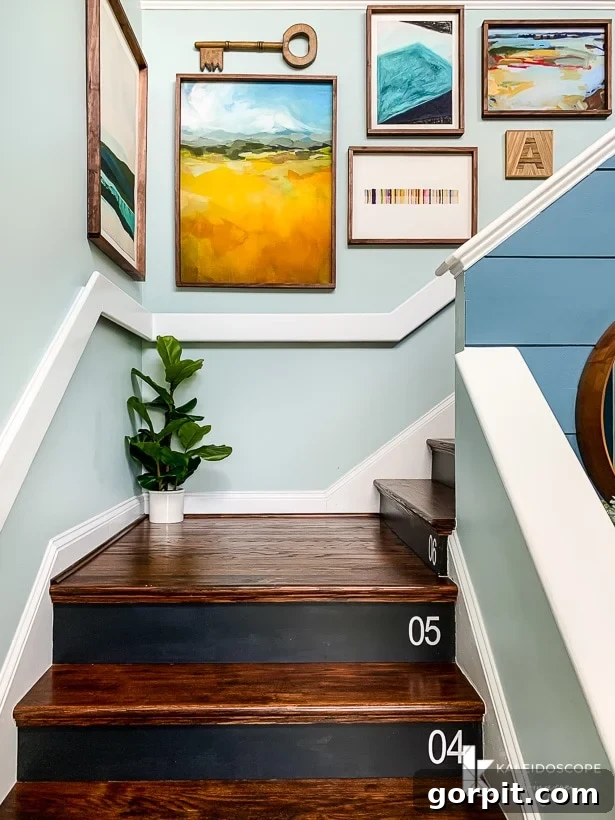
As a passionate home decorator, I’ve often found myself falling in love with a beautiful art print, only to be utterly dismayed by the exorbitant cost of framing it. Custom framing can be shockingly expensive, often costing more than the artwork itself! Even a simple frame with a basic mat can lead to significant sticker shock, pushing many cherished pieces out of reach for a finished display. This common dilemma shouldn’t prevent you from enjoying the art you adore.
A few years ago, when we began integrating large art prints into our home decor, we quickly realized that to stay within our budget for acquiring art, we had to become proficient in creating our own DIY picture frames. This journey led us to experiment with various methods, from crafting a robust DIY canvas frame for oversized canvas pieces to developing oversized DIY magnetic poster hangers – perfect for spaces where you want the flexibility to frequently change or rearrange your art. Through trial and error, we’ve refined our techniques, evolving from straightforward designs like our Large Wood Frame and our ingenious DIY Frame with No Power Tools (relying on wood glue for sturdy construction!). This particular tutorial, my friends, represents the culmination of our experience – it is, without a doubt, the most effective and budget-friendly method we’ve discovered to create a substantial DIY photo frame for under $20 each. Get ready to transform your walls with beautiful, custom-looking art!
This post contains some affiliate links for your convenience. Click here to read my full disclosure policy. We extend our gratitude to Mohawk Consumer Products for their sponsorship of this informative post.
For those curious about the stunning prints featured in this project, you’ll find all the sourcing details at the very end of this article. Happy framing!
How to Make DIY Art Frames for Large Prints
Creating your own large art frames is a rewarding project that allows for complete customization and significant cost savings. Follow these steps to build durable and stylish frames for your cherished prints.
Materials Needed
- 1 x 2 Pine Boards: These form the main structure of your frame. The quantity and length will depend on the specific dimensions of your art prints. Pine is an excellent choice for its affordability, lightweight nature, and ease of working.
- Screen Molding: This thin strip of wood will sandwich your print against the frame, providing a neat, finished edge and keeping the art taut. Like the pine boards, the amount needed is determined by your frame size.
- Behlen Solar Lux Dye Stain: (We used American Walnut). A high-quality dye stain penetrates wood deeply for rich, even color. Choose a shade that complements your artwork and existing decor.
- Patchal Putty and Putty Knife: Essential for seamlessly filling any nail or staple holes, creating a flawless finish. Patchal Putty is particularly easy to use due to its pre-colored nature and smooth texture.
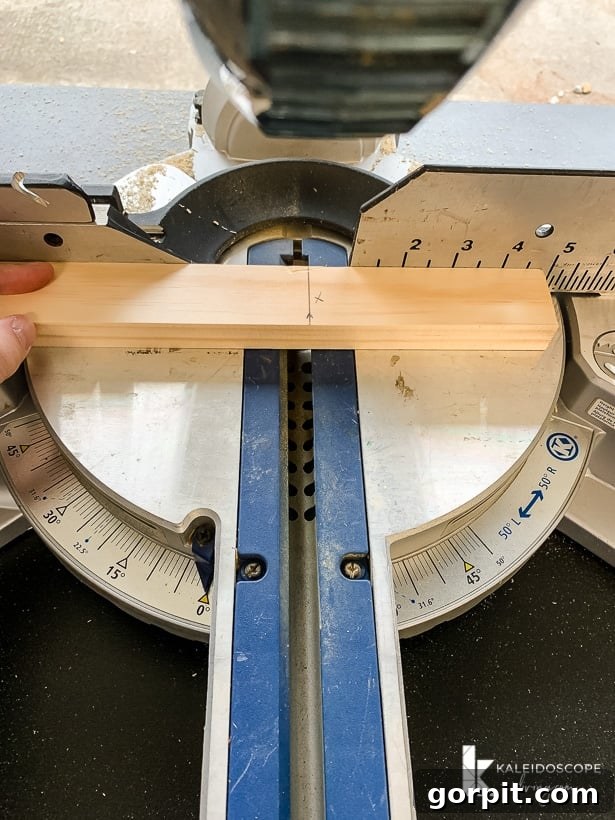
- Compound Miter Saw: Crucial for making precise, angled cuts for perfect frame joints. If you don’t own one, many hardware stores offer cutting services, or you can use a hand saw and miter box for smaller projects.
- Sawtooth Hangers: Simple and effective hardware for hanging your finished frames securely on the wall.
- Paper Towels: For wiping excess stain and general cleanup.
- Latex Gloves: Protect your hands from stains and other materials.
- Sandpaper: Fine-grit sandpaper (120-220 grit) for smoothing rough edges and preparing the wood for staining.
- Staple Gun or Brad Nailer: (We highly recommend this one for efficiency and ease of use). These tools secure the frame pieces together quickly and firmly.
- 90-Degree Angle Clamps: Indispensable for holding frame corners perfectly square while you fasten them, ensuring a professional-looking result.
- Tape Measure: Absolutely vital for accurate measurements, especially if you’re cutting your own wood.
Steps for DIY Picture Frame Tutorial
Time needed: 3 hours
Follow these detailed instructions for an easy and affordable DIY picture frame, perfect for large art prints.
- Cut Boards and Screen Molding Down to Size.
Precision in cutting is the foundation of a professional-looking frame. For each frame, you will need four pieces cut from your 1″ x 2″ pine boards: two horizontal pieces and two vertical pieces. It’s crucial to understand how these pieces interact: the horizontal pieces will intentionally overhang the vertical pieces to create a recessed area for your art. Similarly, you’ll need four pieces of screen molding, cut to the exact same lengths as your 1″ x 2″ pieces.
To ensure your frame perfectly accommodates your print while allowing enough surface area for attachment, adhere to this precise measurement formula:
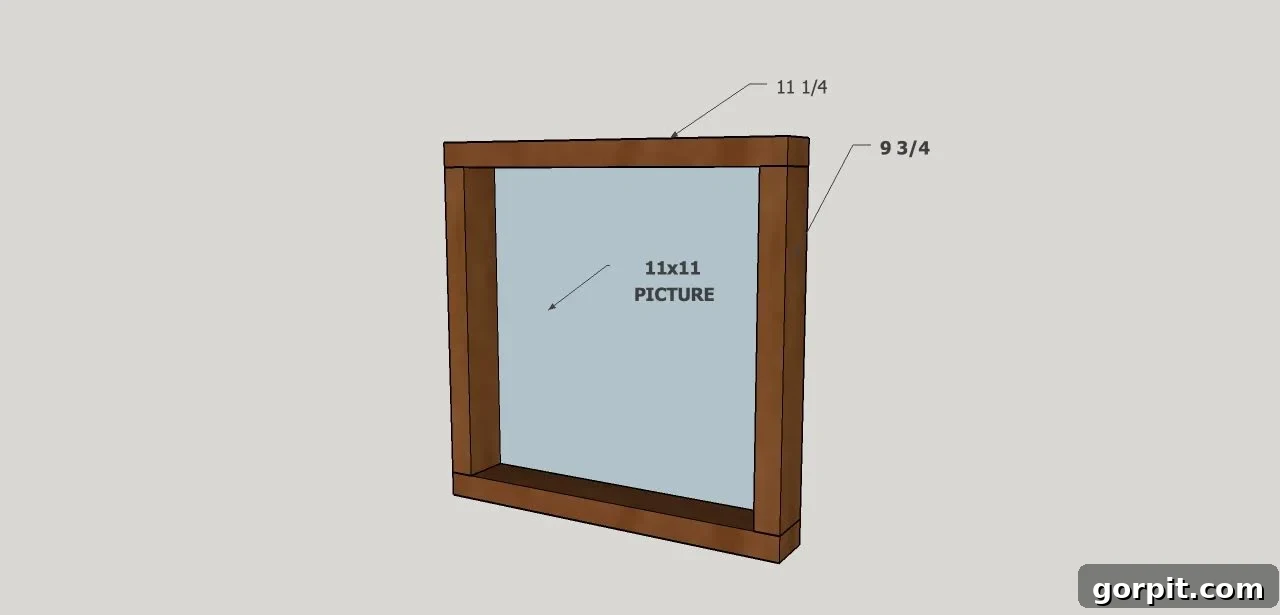
- Cut each horizontal pine piece to be 1/4 inch longer than the width of your print. This slight extra length creates the necessary overhang.
- Cut each vertical pine piece to be 1 1/4 inches shorter than the height of your print. This accounts for the total overlap created by the horizontal pieces at the top and bottom.
The diagrams below illustrate this critical sizing concept. While these diagrams were originally created for a different project, the underlying “formula” for calculating board lengths remains universally applicable for any size print you’re working with. Always double-check your measurements against your actual print before making cuts.

- Sand and Stain.
Once your cuts are made, take a moment to lightly sand any rough edges or splinters created by the saw. This step is crucial for a smooth, professional finish and helps the stain adhere evenly. Use a fine-grit sandpaper (around 120-220 grit) and work in the direction of the wood grain. After sanding, wipe away any sawdust with a clean cloth.
Next, grab your chosen wood stain (we used American Walnut for a classic look) and apply it generously to all cut pieces. You can use a sponge applicator, a brush, or a clean rag. For an even application, wipe the stain on, allowing it to penetrate for a few minutes, then wipe off any excess with a clean paper towel. This prevents a blotchy appearance and highlights the natural wood grain. For a deeper color, apply a second coat after the first has dried completely. Always wear latex gloves to protect your hands and work in a well-ventilated area.
- Create Wooden Frame.
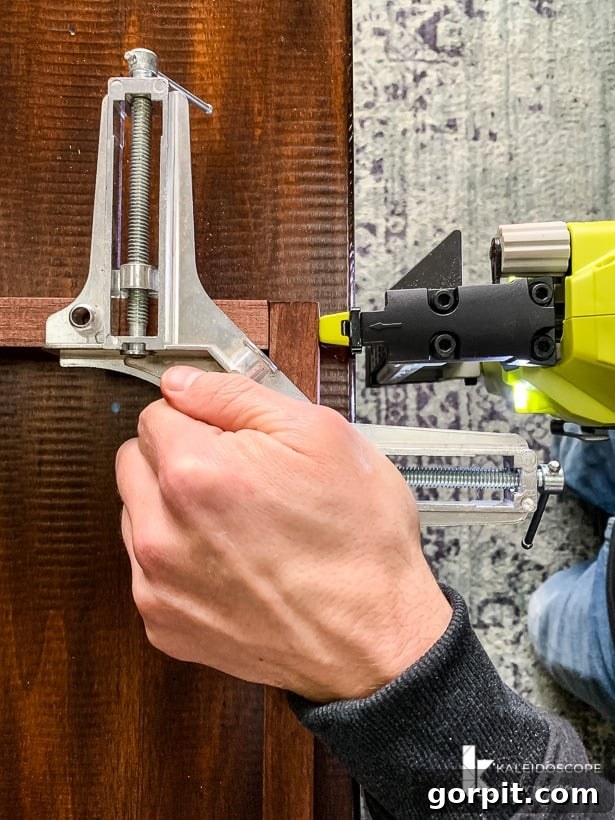
Allow the stain to dry completely according to the manufacturer’s instructions before proceeding. Once dry, it’s time to assemble your frame. The key to strong, square joints is using 90-degree clamps. Position two pieces of your frame (one horizontal, one vertical) together, ensuring they form a perfect right angle, and secure them tightly with the clamps. This will hold them firmly in place while you fasten them.
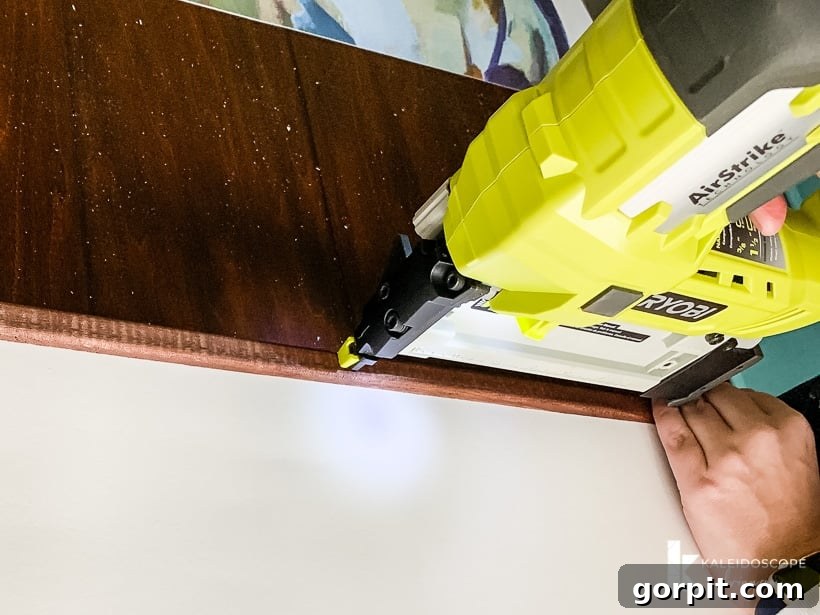
With the clamps holding the corner square, use your staple gun or brad nailer to attach the boards to each other. Drive staples or brad nails through the horizontal piece into the end grain of the vertical piece. For extra durability, you can also apply a bead of wood glue to the joint before clamping and nailing. Repeat this process for all four corners, carefully aligning each piece to form a perfectly square and sturdy frame. Ensure the frame is square before the glue fully sets (if used).
- Position Your Print, Art, or Photograph.
Once you are confident that your stain is thoroughly dry and your frame is securely assembled, you’re ready to integrate your artwork. While this method is incredibly effective and budget-friendly, I wouldn’t recommend it for irreplaceable, super-expensive original art pieces due to the permanent nature of some attachment steps. However, it’s absolutely perfect for displaying large posters, reproduction paper prints, or any non-valuable print like the ones we used in this project.
Carefully lay your print face down on a clean, flat surface. Then, center the back side of your newly constructed frame over the print. Ensure that the frame’s opening is perfectly aligned with your artwork, leaving an even border (or no border, depending on your preference) around the edges. It helps to flip the frame and print over to check the alignment from the front before proceeding to the next step. You can use a few pieces of painter’s tape on the back to temporarily hold the print in place.
- Add Screen Molding.
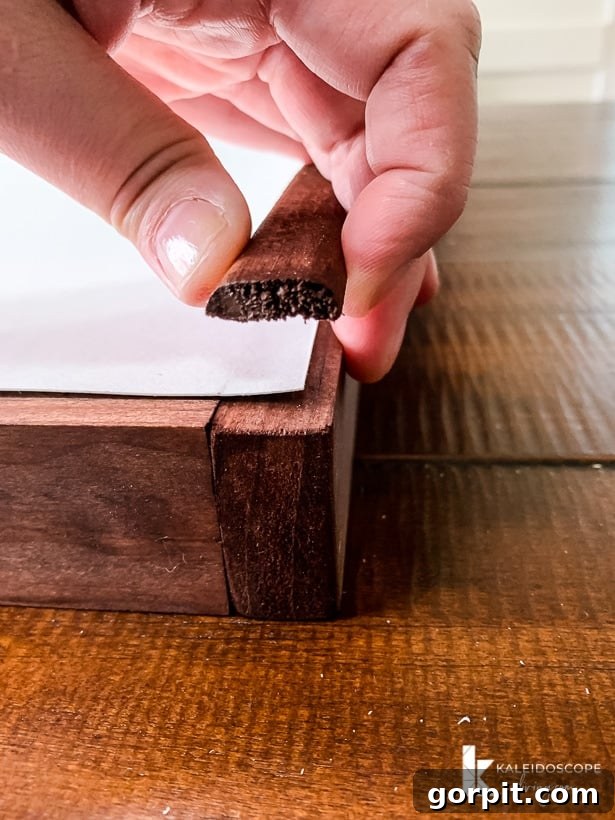
This step is what truly elevates the look and stability of your DIY frame. With your print carefully positioned on the back of the frame, you will now “sandwich” the print. Take your pre-cut pieces of screen molding and place them over the edges of your print, aligning them with the inner perimeter of the frame. The screen molding serves two vital functions: it securely holds your print in place and provides a clean, finished edge to the back of the frame, preventing the print from sagging or shifting.
Using your brad nailer (or staple gun), carefully attach the screen molding to the frame, ensuring it presses down firmly on the edges of your print. Drive nails every few inches along each strip of molding. This step makes SUCH a difference! It keeps your prints nice, taut, and smooth, eliminating any wrinkles or bumps that might detract from your beautiful artwork.
- Patch Holes.
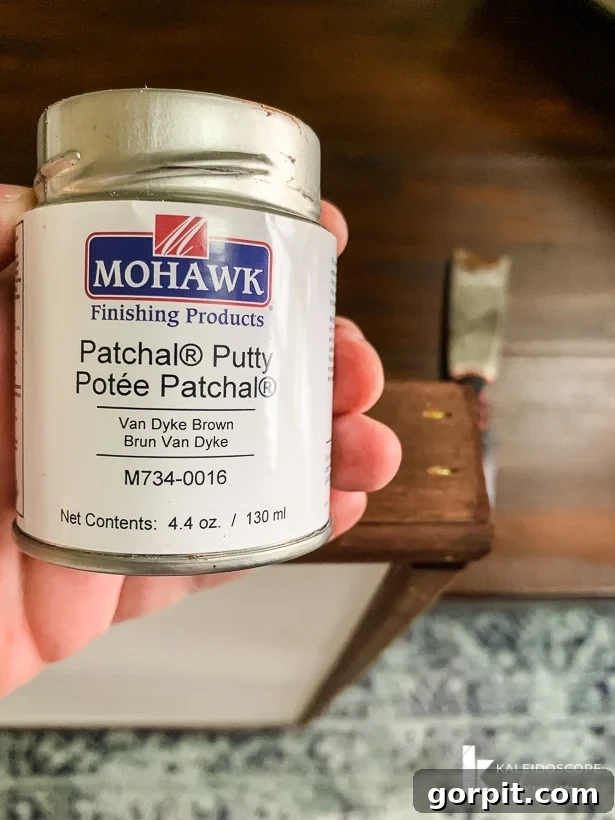
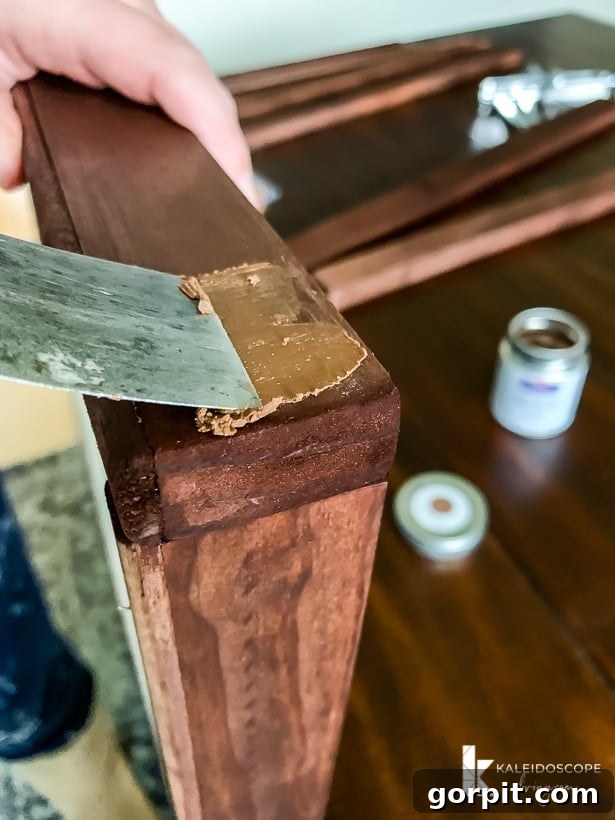
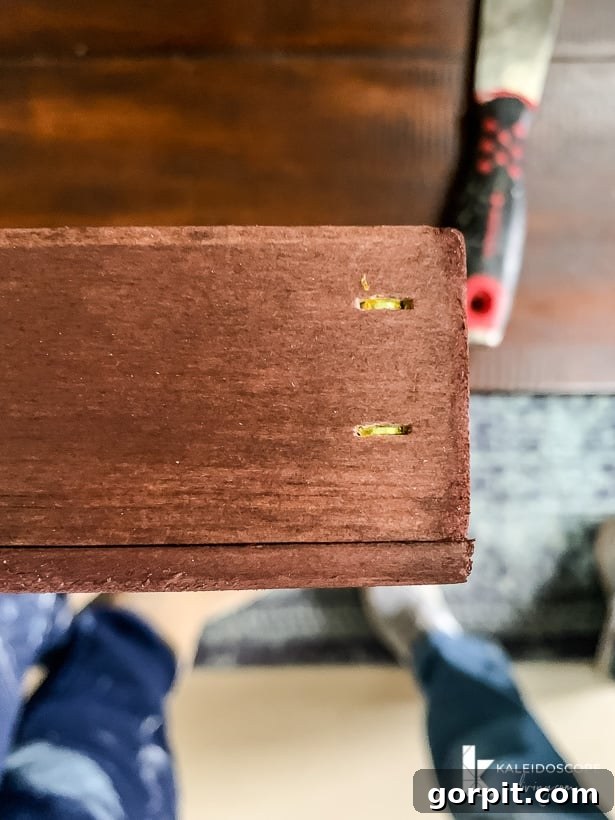
With your entire DIY picture frame now fully assembled, the final touch for a professional finish is patching any visible nail or staple holes. My absolute favorite product for this task is Mohawk’s Patchal Putty. It is remarkably easy to work with, far surpassing traditional wood filler or spackle in terms of user-friendliness. Its texture is incredibly smooth, almost like butter or Crisco, making application effortless.
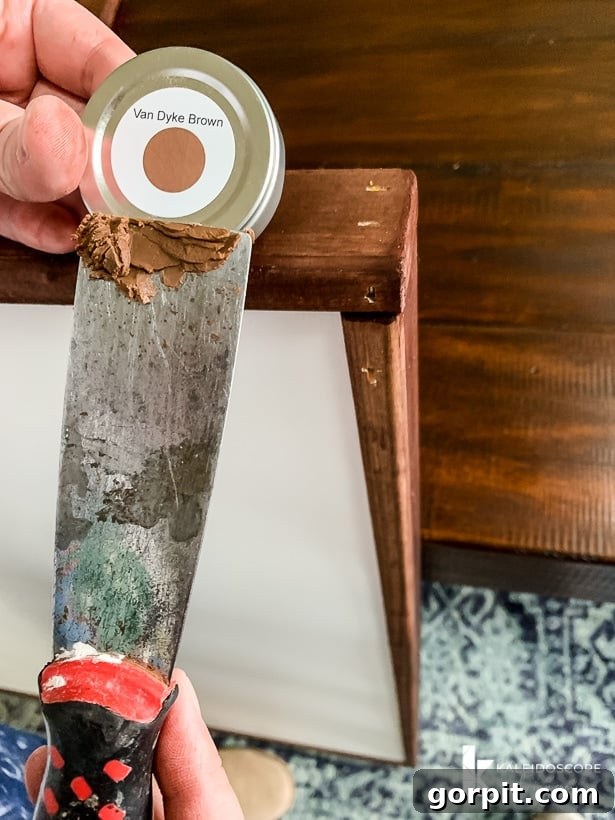
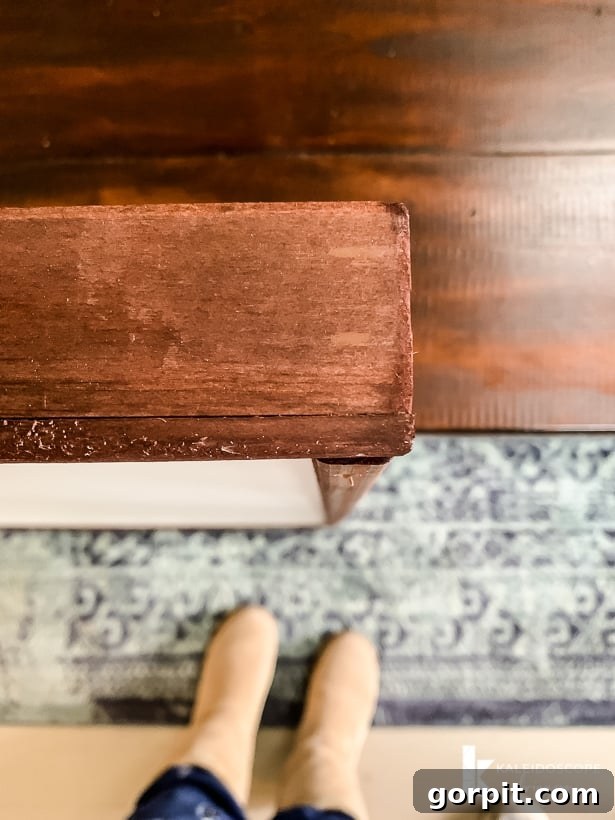
The best feature of Patchal Putty is that it comes pre-colored in various wood tones, eliminating the headache of trying to stain over patched areas afterward. (I don’t know about you, but we can never truly get wood filler to accept stain properly, leading to uneven finishes.) For this project, the Van Dyke Brown color blended seamlessly with our American Walnut stain. Simply apply a small amount of putty with a putty knife, pressing it firmly into each hole, and then wipe away any excess. The transformation is immediate and dramatic, making the frame look flawless. It literally takes about 4 seconds to achieve this perfect finish!
And here’s the before and after for you. It took about 4 seconds to accomplish this!
- Hardware.
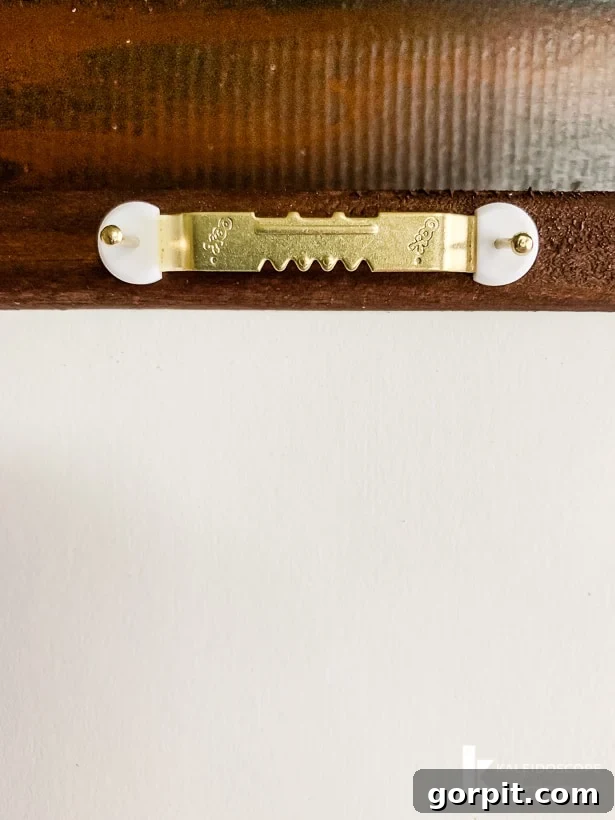
The final step is to attach the hanging hardware to your beautifully framed art. For most large frames like these, sawtooth hangers are an excellent choice due to their simplicity and ease of installation. Position one or two sawtooth hangers near the top center of the back of each frame. For wider frames, using two hangers spaced apart will help the frame hang more securely and stay level. Ensure they are aligned correctly so your art hangs straight.
Once the hardware is attached, you’re ready to hang your custom-made art frames! Take a step back and admire your handiwork. These DIY frames not only save you money but also give you the satisfaction of knowing you’ve created a beautiful piece of home decor with your own hands.
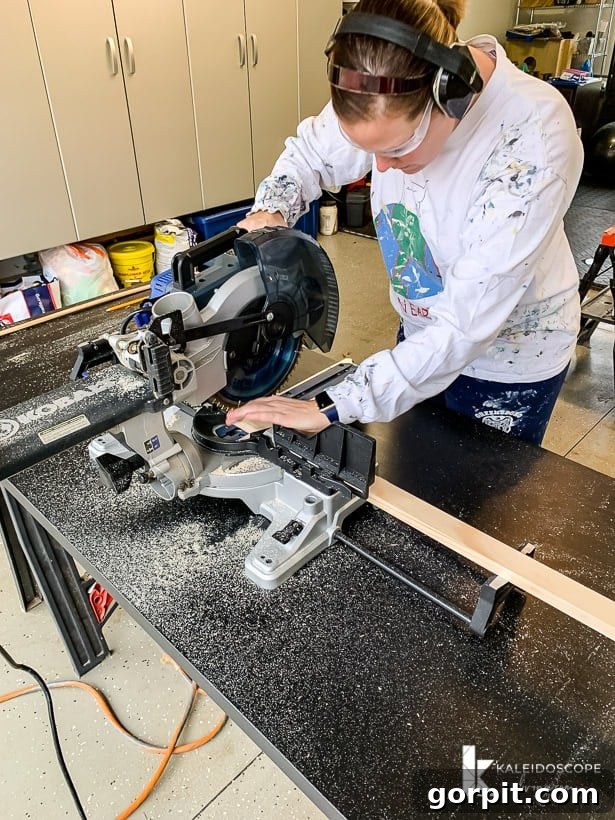
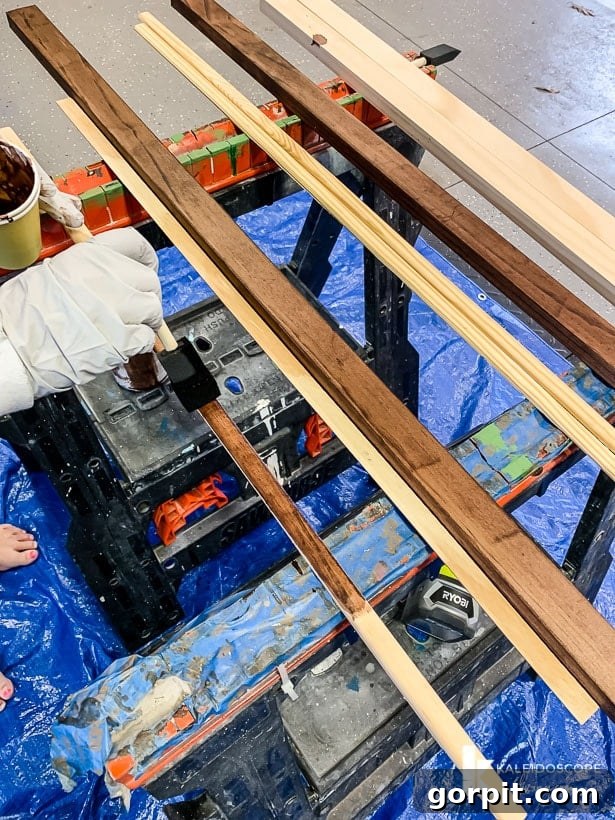
It’s truly that EASY! One of the greatest advantages of this DIY approach is the complete freedom to customize the height and width of your frames to perfectly match any piece of art. Our frames turned out absolutely beautifully, seamlessly integrating with our home’s aesthetic. We are particularly thrilled with how our stairwell gallery wall came to life, showcasing these stunning, budget-friendly art pieces.
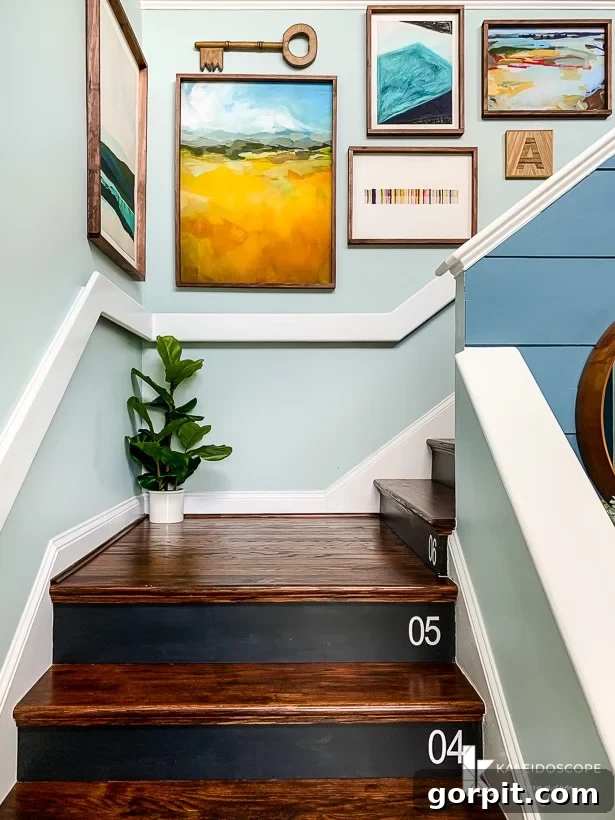
Shop Our Art
Curious about the specific art prints that grace our walls? Below, you’ll find all the details regarding the artwork we framed in this tutorial. Simply scroll through and click on any image to get full product information and discover where to purchase these beautiful pieces for your own home.
(Placeholder for dynamic “Shop Our Art” content)
We couldn’t be happier with the outcome of our DIY art frames. They are not only a testament to clever budgeting but also a reflection of personal style and craftsmanship. Take a look at a few more photos illustrating how seamlessly these large DIY frames integrate into our home decor, creating an inviting and art-filled atmosphere.
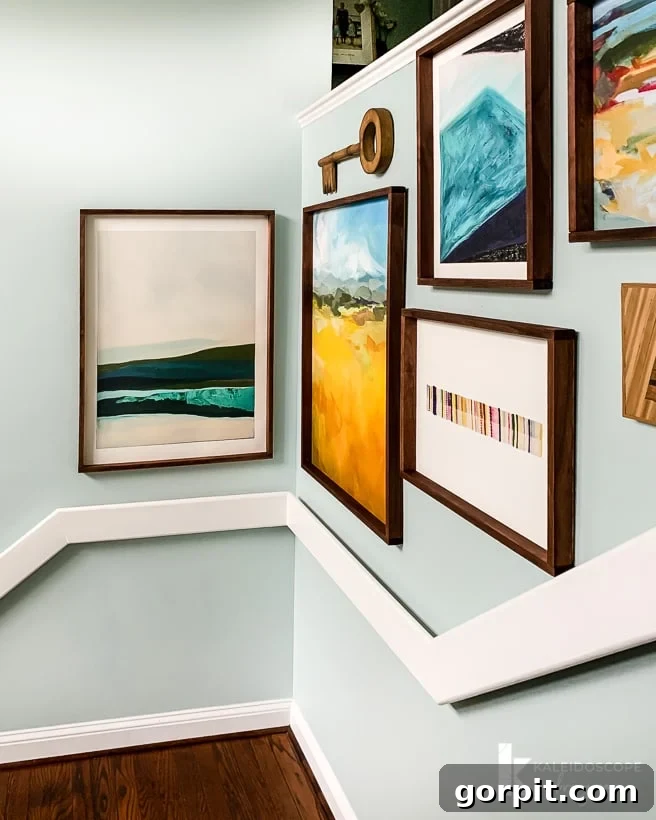
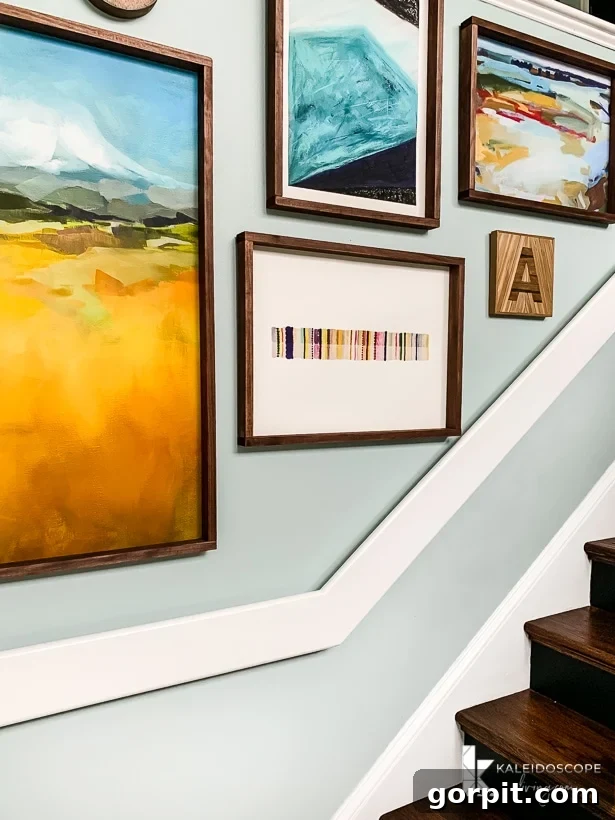
By investing a little time and effort into making these DIY picture frames, you empower yourself to stretch your decorating budget further than you thought possible. This means you can finally have those STUNNING, statement-making artworks proudly displayed on your walls without the financial strain. Don’t let a tight budget delay your dream of a beautifully curated home. With this easy tutorial, you can confidently fill your walls with gorgeous art, keeping both your aesthetic desires and your wallet happy.
Are you eager for more fantastic ideas to infuse your home with beautiful art? Understanding how to choose art that flows seamlessly through your home is a fundamental principle for elevating your interior design. Moreover, I strongly encourage you to overcome any apprehension about scale—remember, large-scale art makes a profound impact and undeniably enhances any space. Now armed with this straightforward tutorial, you have all the knowledge to create the perfect DIY picture frames, delivering that sought-after finished look to your cherished large prints.
More ART & Wall Decor IDEAS
SEE ALL ART POSTS
-
How to Display Art On Almost Any Smart TV
-
How to Make Faux Oversized Poster Hangers
-
DIY Light Up Wall Art
-
Make Large DIY Picture Frames For Less than $20 Each
-
DIY Magnetic Poster Hangers
-
27 Gallery Wall Ideas + Practical Tips to Inspire You
Wondering how I approach transforming rooms and spaces in our home, achieving a cohesive and stylish look? Be sure to check out Designer in a Binder® – it’s an invaluable resource for simplifying your decorating journey.
And if you’re looking for exclusive content, behind-the-scenes sneak peeks, and direct access to more home decor inspiration, make sure to subscribe before you head out! Don’t miss out on future DIY projects and design tips.
(Placeholder for subscription form content)