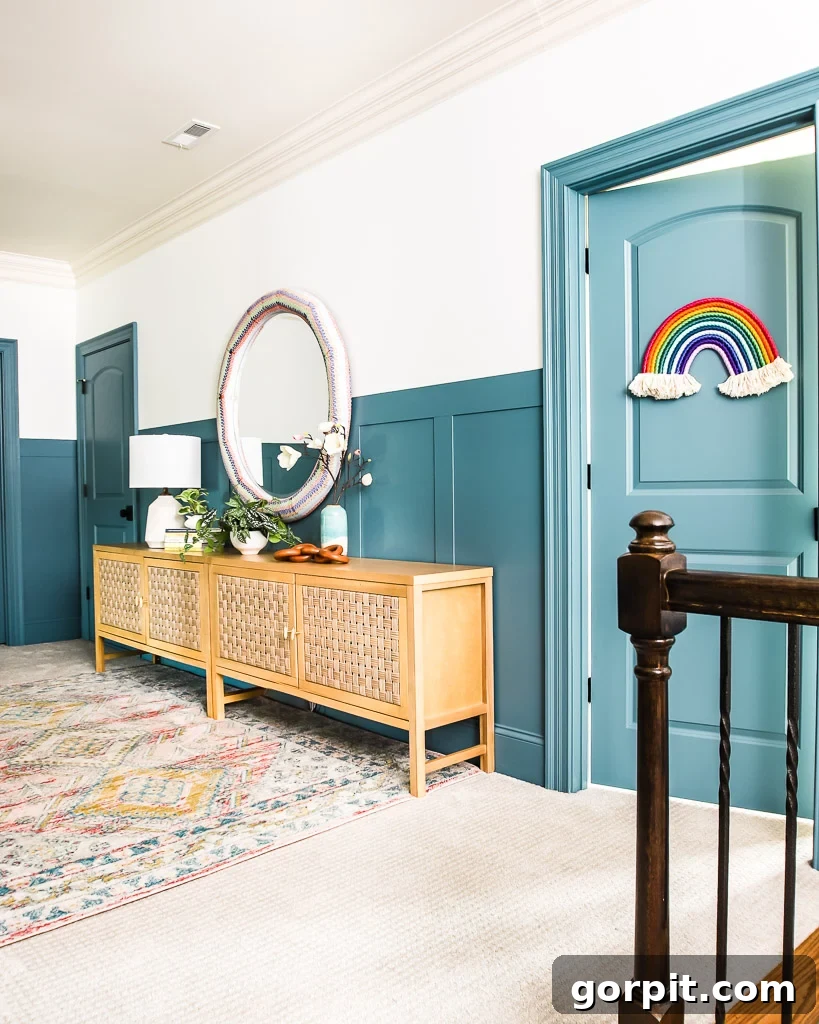
Transform any room in your home with the timeless elegance and captivating charm of a DIY board and batten accent wall! This comprehensive, step-by-step tutorial is designed for ease of installation, helping you achieve stunning, professional-grade results that will dramatically enhance your living space. Whether you’re looking to add architectural interest to a plain hallway, a cozy touch to a bedroom, or a sophisticated backdrop to a living room, a board and batten wall is a highly effective and surprisingly simple home improvement project.
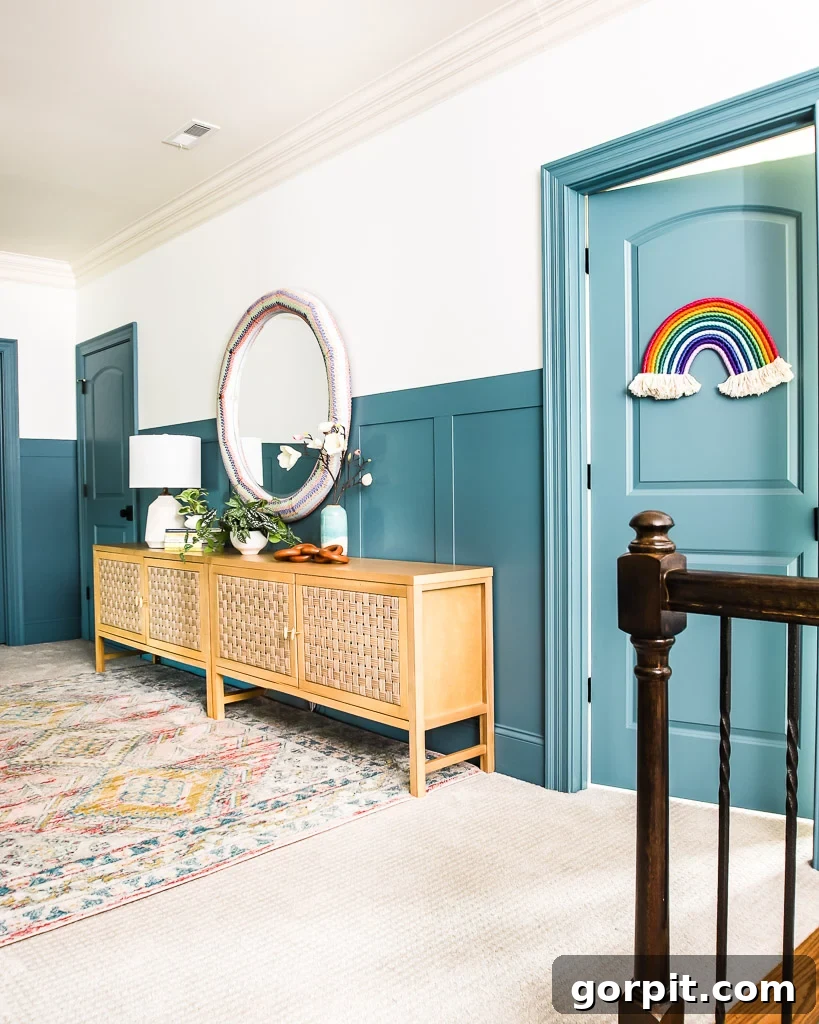
Table of Contents
If you’ve been following our home transformation journey, especially on Instagram, you’ve likely seen the dramatic impact of accent walls. We’ve explored various styles, from a sleek modern DIY plank wall that revitalized our old foyer, to a creative DIY herringbone accent wall crafted from upcycled fence wood in our former kitchen. These projects consistently prove how much character and depth a well-designed accent wall can bring to a space. After years of experimenting with different stunning accent wall ideas, we finally tackled our first board and batten wall, and the results are truly remarkable.
Our once-uninspiring upstairs hallway has been completely revitalized by this board and batten treatment. The transformation is profound, and what’s even better is how straightforward the installation process turned out to be. A key factor in simplifying this project was our decision to work with the existing baseboards, a method we highly recommend and will delve into further. Beyond its aesthetic appeal, this project was incredibly budget-friendly and cost-effective. We’re excited to share all the intricate details, tips, and tricks with you, ensuring your DIY journey is smooth and rewarding. You can find a complete source list for our current home’s hallway at the end of this post, to help you recreate the look.
Thank you to DAP Products for sponsoring this post and providing exceptional finishing materials.
What is Board and Batten? Defining This Classic Wall Treatment
Before diving into the installation process, let’s clarify what “board and batten” truly means. Traditionally, board and batten refers to a distinctive siding or paneling style where narrow strips of wood, known as “battens,” are placed over the joints of wider flat “boards.” This method creates a visually appealing, textured wall treatment with a classic, often rustic or farmhouse-style, charm. However, the modern interpretation of board and batten, and the method we employed, is a simplified approach. Instead of installing full boards, we utilize the existing wall surface as the “board” component and apply the vertical “batten” strips directly onto it. This technique significantly reduces both the labor and material costs while still delivering the iconic board and batten aesthetic.
This modern approach is particularly beneficial for DIYers seeking a high-impact transformation without extensive construction. It’s a fantastic way to add architectural detail and character to an otherwise bland wall. If your walls have a noticeable texture, you might consider installing thin plywood panels behind your battens to achieve the smoother, more traditional look of board and batten, as the original style is typically characterized by smooth surfaces. This will ensure your accent wall truly stands out with a refined finish.
The Right Wood Choice for Your Board and Batten Project: Why 1/4″ Plywood Shines
When embarking on a board and batten project, the variety of wood types and sizes can be overwhelming. Our experience led us to choose 1/4″ plywood, and we highly recommend it for several compelling reasons that greatly simplify the installation and enhance the final look and functionality of your accent wall.
Firstly, opting for 1/4″ plywood allowed us to seamlessly integrate the board and batten with our existing baseboards. The top edge of our baseboards measured precisely 1/4 inch thick. Using a thicker wood, such as 1 x 4s, for the battens would have resulted in an unsightly overhang, requiring angled cuts at the bottom of each batten to mitigate the protrusion. While this is a common workaround, it often compromises the clean, finished aesthetic. Our decision to retain the home’s high-quality, well-installed millwork meant avoiding any structural alterations, making the 1/4″ plywood the perfect thickness for a flush, professional transition.
Secondly, cost-effectiveness was a significant advantage. For our entire hallway, a considerably large space, we only needed two sheets of 1/4″ plywood. At approximately $43.98 per sheet, our total wood expenditure for this impactful project was a mere $88. This affordability makes board and batten an accessible and high-value home improvement, proving that a dramatic renovation doesn’t have to break the bank.
Finally, the slender profile of 1/4″ thick board and batten offers immense practical benefits. The minimal projection from the wall ensures that hanging artwork, mirrors, or other decorative items remains effortless. Thicker wood would cause these items to jut out significantly, creating an awkward and less aesthetically pleasing display. This thoughtful material choice preserves the functionality of your walls while adding immense visual appeal, ensuring your decor integrates harmoniously with your new accent wall.
This post contains affiliate links for your convenience. Click here for my full disclosure policy.
Essential Materials for a Stunning Board and Batten Accent Wall
Gathering the right tools and materials before you start is crucial for a smooth and efficient DIY board and batten installation. Here’s everything you’ll need to create a beautiful and lasting accent wall:
- 1/4 inch plywood (we recommend two 4′ x 8′ sheets for a typical hallway)
- Laser level (this is the exact laser level that we have and LOVE for its precision)
- Circular saw (essential for clean, straight cuts on your plywood sheets)
- Rip-cut Circular Saw Guide (a game-changer for consistently accurate rip cuts)
- Pin nailer or brad nail gun (ideal for securing thin plywood without large nail holes)
- 1-inch pin nails (perfect length for 1/4″ plywood and drywall)
- Standard Level (for double-checking vertical and horizontal lines)
- Compressor (a cordless air compressor offers incredible convenience and mobility)
- Miter saw (for precise cross-cuts and angled cuts if needed)
- DAP Alex Plus Caulk (our top choice for a paintable caulk that seals gaps beautifully)
- Caulk gun (for smooth, controlled application of caulk)
- DAP Plastic Wood-X (for filling nail holes, ensuring an invisible finish)
- Tape measure (for all your measuring needs)
- Painter’s tape (useful for holding pieces in place temporarily and marking lines)
DIY Board and Batten Installation: A Complete Tutorial
To give you a visual overview of the entire process, we highly recommend watching our short project video below before delving into the detailed written tutorial. It provides a concise demonstration of each step, helping you visualize the workflow and build confidence before you begin your own board and batten accent wall.
(Video Tutorial Placeholder: Insert your DIY Board and Batten Accent Wall video here for visual guidance.)
Time needed: 2 days
Follow these detailed steps to learn how to install a DIY board and batten accent wall efficiently and effectively, achieving a professional finish.
- Step 1: Determine the Height of Your Top Horizontal Board
The initial step involves deciding on the aesthetic height for the top edge of your board and batten accent wall. There’s no strict rule, as this is largely a matter of personal preference and the visual balance you want to achieve in your space. A common guideline is to aim for roughly two-thirds the height of your doors or windows for a classic look, which often provides a pleasing proportion. In our hallway, for instance, we found that 58 inches from the floor created the perfect visual impact. Begin by standing back and visually assessing your wall, then mark your desired height. Once you’ve chosen your height, use a reliable level to draw a faint, continuous line across the entire wall space at 57 inches (or 1 inch below your chosen top board height). This line will serve as a guide for your painting in the next step, indicating where your accent color should stop, knowing that the horizontal trim will conceal the upper edge.
- Step 2: Select the Dimensions for Your Horizontal and Vertical Pieces
Careful consideration of your wood dimensions is crucial for the overall aesthetic of your board and batten wall. While personal preference plays a significant role, a general design principle is to make your top horizontal trim pieces slightly narrower than your existing baseboards, but typically thicker than your vertical battens. This creates a subtle visual hierarchy and a finished look. For our project, we achieved a balanced appearance with specific measurements, which you can use as a reference point. The goal is to ensure a cohesive and intentional design. Think about the width of your room and the scale of the wall; wider battens might suit larger rooms, while narrower ones could be perfect for more intimate spaces or intricate patterns. Consistency in your chosen dimensions throughout the project is key to a polished outcome.
- Step 3: Pre-Paint for a Flawless Finish
This step is a secret weapon for achieving a truly professional and clean finish, and we cannot recommend it enough. While it might seem counterintuitive to paint before installation, pre-painting your walls and plywood components will save you significant time and effort in the long run, and yield far superior results compared to painting everything post-installation. Start by painting the lower section of your walls where the battens will be installed, extending up to the guide line you marked in Step 1. Don’t worry about creating a perfectly crisp paint line at the top, as this will be neatly covered by the horizontal trim. Next, paint both sides of your 1/4″ plywood sheets with a paint roller before cutting them to size. This ensures every edge and surface receives an even coat, eliminating missed spots or streaks that are difficult to correct once the wood is on the wall. This proactive approach prevents tedious touch-ups and ensures a seamless, factory-like finish.
- Step 4: Accurately Rip Your Plywood to Size
“Ripping” wood refers to cutting it lengthwise, parallel to the grain, to achieve narrower strips from a larger sheet. This step is essential for creating your horizontal and vertical trim pieces from the 1/4″ plywood. While it might sound intimidating to beginners, it’s quite manageable with the right tools. You’ll need a circular saw paired with a rip-cut Circular Saw Guide. This guide ensures straight, consistent cuts, making the process quick and accurate. For us, ripping all the necessary pieces took less than 10 minutes. After ripping your horizontal strips to their desired width, use your miter saw to cut them to the specific lengths required for each wall section.
IMPORTANT NOTE: To prevent “tear out” and splintering, especially with plywood, always rip your wood with the “good” (finished) side facing DOWN when using a circular saw. However, when trimming pieces to length with a miter saw, keep the “good” side facing UP. This simple trick will preserve the pristine surface of your accent wall components.
- Step 5: Install Your Horizontal Trim Pieces
With your wood pre-cut and pre-painted, it’s time to begin installation. Start by setting your laser level to project a precise line at the top edge where your horizontal pieces will be placed (the 58-inch mark from Step 1). This laser line is invaluable for ensuring your trim is perfectly level across the entire wall. Carefully align your first horizontal piece with this laser guide and secure it to the wall using your pin nailer or brad nailer. The narrow gauge of pin nails creates tiny holes that are easy to conceal later, contributing to a professional finish. This horizontal piece will effectively cover the upper edge of your pre-painted wall, creating a clean transition. We opted not to use Liquid Nails or any construction adhesive for our 1/4″ plywood. These individual pieces are lightweight enough that pin nails provide sufficient hold. Furthermore, avoiding adhesive minimizes potential damage to your drywall should you ever decide to remove the board and batten in the future. For added strength and stability without studs, use a criss-cross nailing pattern, driving nails at slight angles.
- Step 6: Strategize the Layout of Your Vertical Battens
This is often considered the most critical and challenging aspect of a board and batten project, especially in spaces with interruptions like hallways, multiple doors, or windows. Careful planning here ensures a visually balanced and appealing result. Standard spacing between vertical battens typically ranges from 12 to 20 inches. We aimed for approximately 18 inches between our battens, which strikes a good balance between density and openness. If you’re working on a long, uninterrupted wall in a large room, you might be able to apply a consistent spacing formula across the entire length. However, hallways present a unique challenge due to frequent doorways and wall breaks. Trying to maintain a single, rigid formula in such a space can lead to awkward batten placement, such as a batten landing right next to a door frame or too close to a wall corner.
Our solution, which we highly recommend for hallways, is to treat each section of the wall between doors, windows, or corners as an independent unit for spacing calculations. This allows you to achieve symmetrical and aesthetically pleasing batten arrangements within each distinct segment, even if the exact spacing varies slightly from one section to another. The subtle variations will be imperceptible to the naked eye but will result in a much more harmonious and intentional design throughout the entire space.
- Step 7: Mastering the Batten Spacing Formula
Don’t let the math intimidate you; this formula is straightforward once you understand the logic. For each independent wall section (as determined in Step 6), follow these calculations to find your optimal batten spacing:
- Measure the wall section: Begin by precisely measuring the total length (width) of your specific wall segment in inches. Let’s use our example: Wall = 77 inches wide.
- Determine desired number of spaces: Divide the wall length by your desired batten spacing (e.g., 18 inches). Round this result up or down to the nearest whole number. This gives you the number of “spaces” you’ll have on your wall.
- Example: 77 inches ÷ 18 inches (desired spacing) = 4.2. Round down to 4. So, we’ll have 4 spaces.
- Calculate number of battens: Subtract 1 from the number of spaces to find how many vertical battens you will need for that section.
- Example: 4 (number of spaces) – 1 = 3. So, we’ll have 3 battens.
- Calculate total batten width: Multiply the number of battens by the width of each batten (e.g., 4 inches for our plywood strips).
- Example: 3 battens x 4 inches (width of battens) = 12 inches of total batten width.
- Calculate remaining wall space: Subtract the total batten width from the total wall width. This is the amount of wall space that will remain visible between your battens.
- Example: 77 inches (wall width) – 12 inches (total batten width) = 65 inches of wall space not covered by battens.
- Determine actual batten spacing: Divide the remaining wall space by the number of “spaces” you determined earlier. This gives you the exact, equal spacing between each batten and from the wall edges.
- Example: 65 inches (remaining wall space) ÷ 4 (number of wall spaces) = 16.25 inches. This is your precise spacing from the edge of one batten to the edge of the next.
As you can see, our target of 18-inch spacing adjusted to 16.25 inches for this specific wall section. This is perfectly acceptable! The goal is uniform spacing within a section, not necessarily hitting an exact number across all sections, especially in a hallway. The naked eye won’t notice these subtle variations, but it will appreciate the balanced and symmetrical look within each independent segment. This method avoids awkwardly placed battens and ensures a harmonious design throughout your home.
- Step 8: Secure Your Vertical Battens
Once your spacing calculations are complete for each wall section, it’s time to install your vertical battens. Accuracy is paramount in this step. Measure the length for each individual vertical batten one at a time. This is critical because very few homes have perfectly level floors or baseboards. While your horizontal top board was installed to be perfectly level, the distance from that board to the top of your baseboard may vary slightly across the wall. Measuring each piece ensures a snug and precise fit, avoiding unsightly gaps.
Before nailing, we found it incredibly helpful to temporarily tape each batten into its calculated position. This allows you to dry-fit and double-check your measurements and spacing one last time. Once you’re confident in the placement, use your pin nailer to attach the vertical boards to the wall. As you nail, continuously check each batten with a level to ensure it is perfectly plumb (straight up and down). If you’re working alone, a useful trick is to place one nail in the middle of the batten first, adjust it to be level, and then secure the rest of the board by nailing up and down its length. This technique helps maintain accuracy throughout the installation of your DIY board and batten accent wall.
- Step 9: The Finishing Touches: Fill, Caulk, and Paint
Congratulations, the hardest part of the physical installation is behind you! Now comes the crucial stage of finishing that transforms your DIY project into a polished, professional-looking accent wall. Begin by filling all visible nail holes with DAP Plastic Wood-X. Apply a small amount, ensuring it’s flush with the wood surface. Allow it to dry completely according to product instructions, then lightly sand each filled spot until it’s perfectly smooth and undetectable to the touch. This step is vital for a flawless appearance.
Next, move on to caulking. This is where you truly seal the deal, eliminating any small gaps where the wood trim meets your wall or where wood pieces join. Use DAP Alex Plus Caulk, which is known for its paintability and smooth application. Apply a thin, consistent bead of caulk along all seams and edges. Immediately after applying a section, smooth the caulk with a wet finger or a damp sponge. Keep a very wet rag handy to wipe your finger clean between each swipe, ensuring a crisp, professional line. Caulking not only fills gaps but also makes the trim appear as if it’s seamlessly integrated into the wall, a mark of true craftsmanship.
Finally, once the wood filler and caulk are dry, it’s time for touch-up painting. Carefully paint over all the filled nail holes and caulked lines, blending them seamlessly with your pre-painted wood. This final coat will make all the difference, unifying the entire accent wall and giving it that high-end, custom look. Don’t skip this critical step! As seen in the before-and-after photos, these finishing details elevate the entire project from a DIY endeavor to a stunning architectural feature that enhances your home’s value and aesthetic appeal.
Showcasing the Finished Board and Batten Project
We are absolutely thrilled with how our board and batten accent wall turned out in the upstairs hallway! The transformation is truly remarkable, adding depth, character, and a touch of custom design that was previously missing. The once-plain walls now exude a refined elegance that instantly elevates the space. This project has not only enhanced the aesthetics of our hallway but has also complemented the recent installation of our Velux Sun Tunnels, which now flood the area with much-needed natural light, highlighting the intricate details of the board and batten. The interplay of light and shadow on the new wall treatment creates a dynamic and inviting atmosphere.
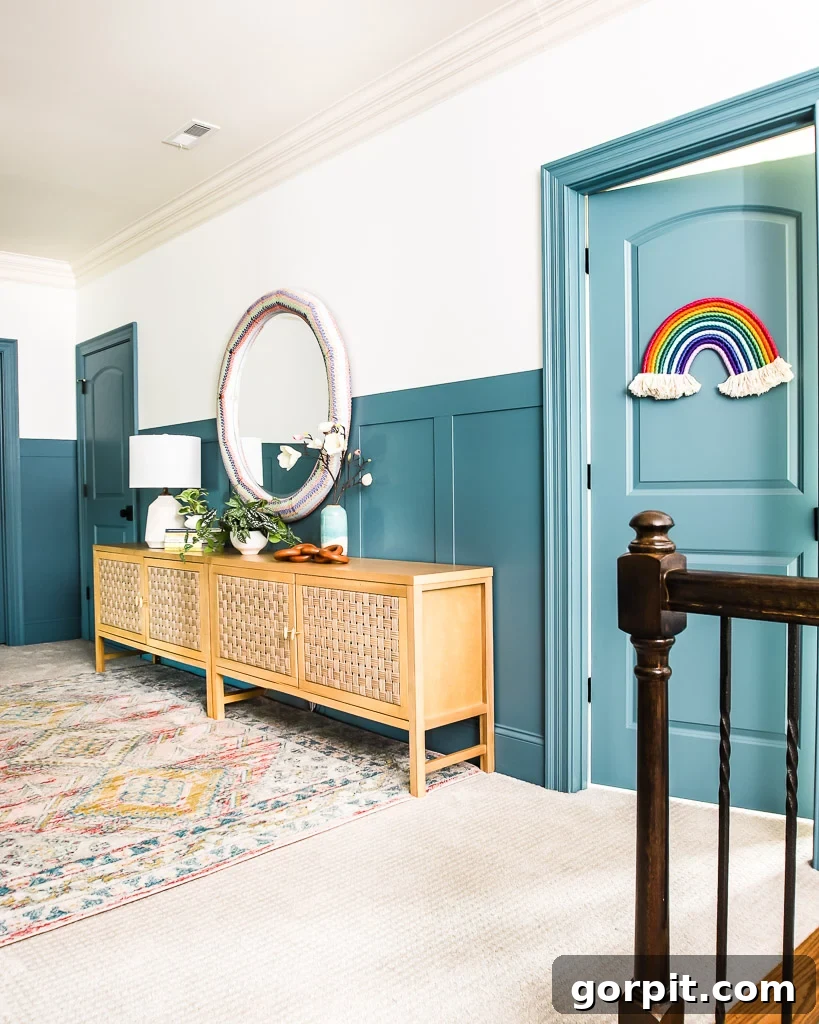
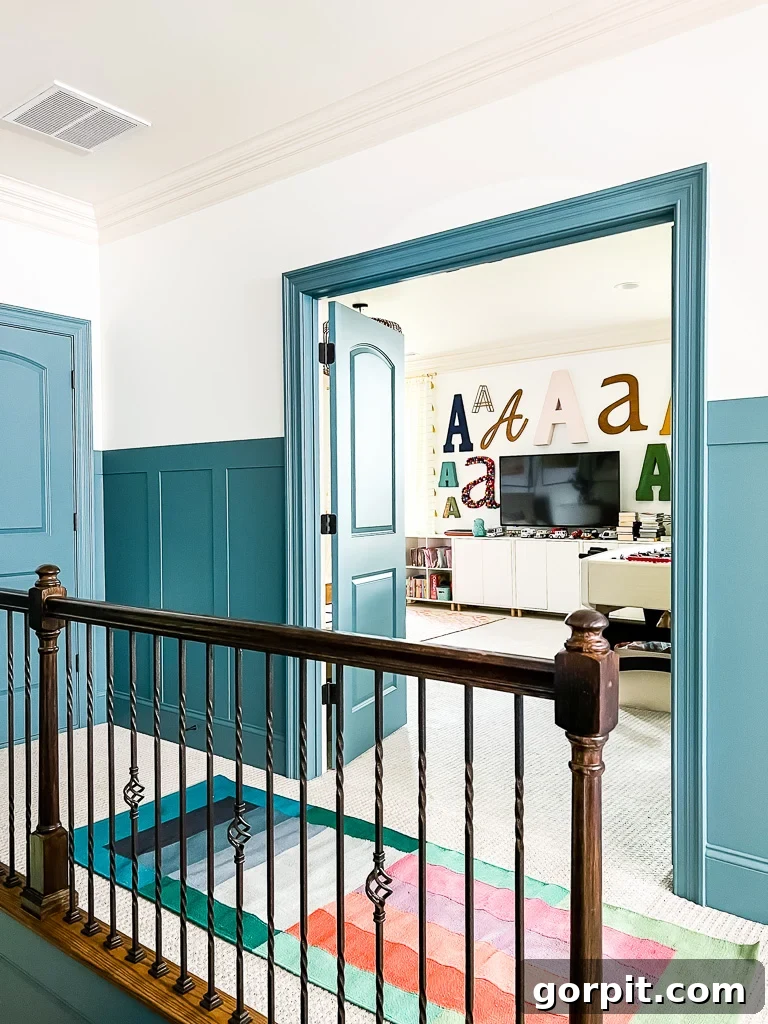
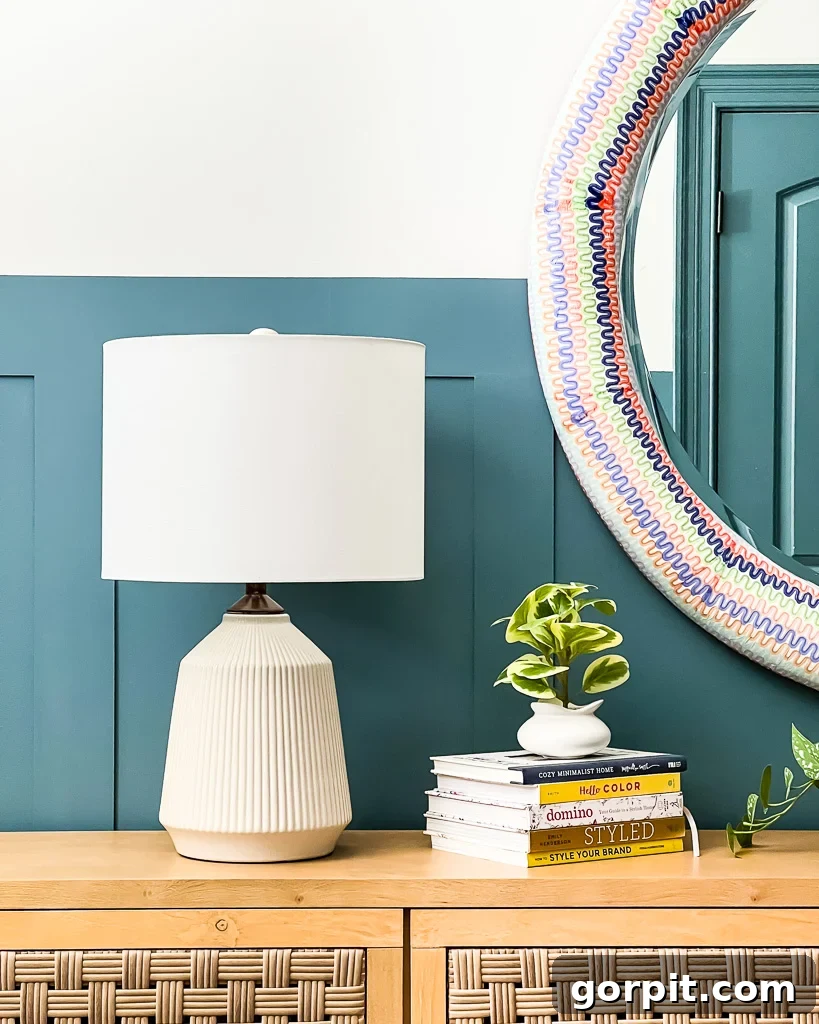
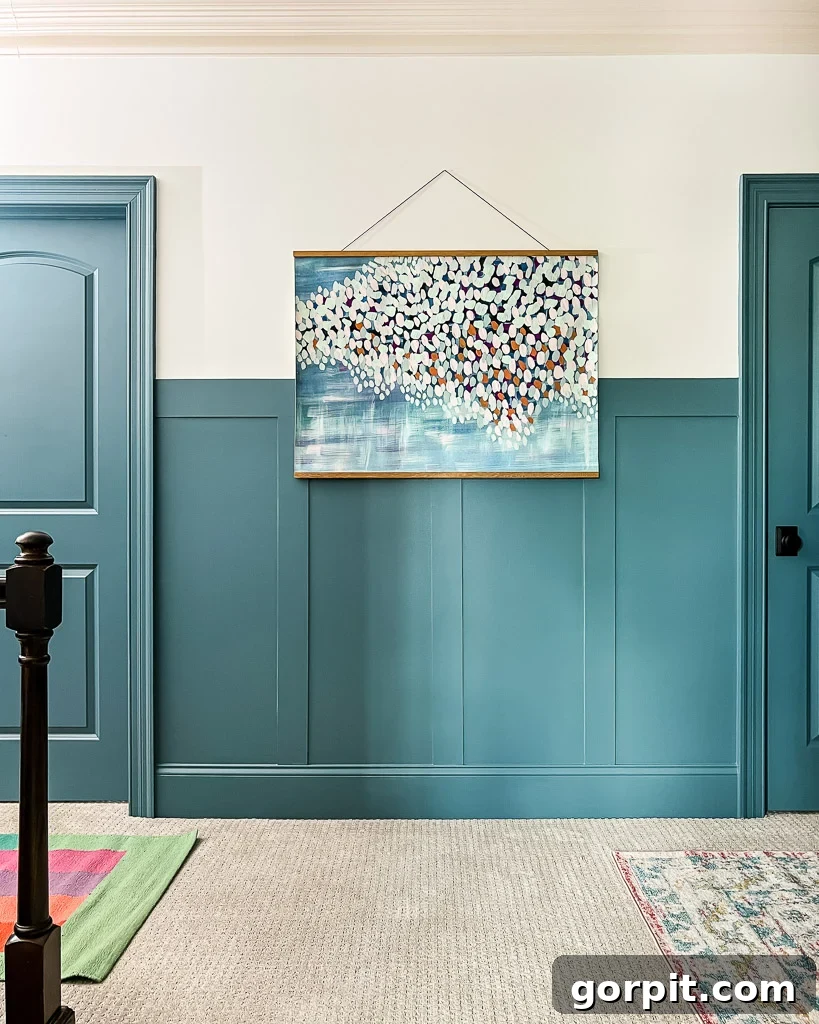
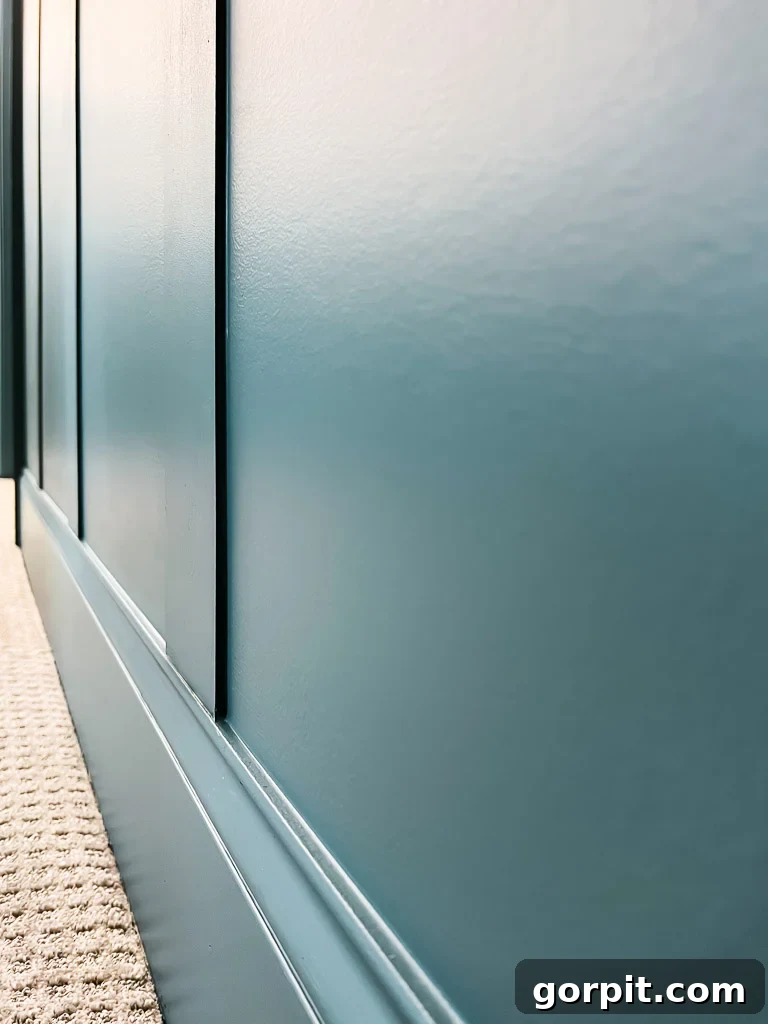
The decision to use 1/4″ plywood proved to be an excellent one, especially when viewed up close. The thin profile of the battens sits perfectly flush with our existing baseboards, creating a seamless and integrated look that truly gives the impression of custom millwork. This careful consideration of material thickness avoids any awkward transitions or visual bulk, contributing to the overall refined aesthetic.
Another significant advantage of the 1/4″ plywood is its practical benefit for decorating. With the battens barely protruding from the wall surface, we can easily hang artwork, mirrors, or other decorative elements without them sticking out awkwardly. This allows for effortless styling and ensures that our decor harmonizes beautifully with the new wall treatment, maintaining a cohesive and polished look throughout the hallway.
Frequently Asked Questions About Board and Batten Walls
The cost of a board and batten accent wall can vary significantly based on factors such as the size of your wall, the materials chosen, and your location. For our large hallway project, we were able to keep the wood cost incredibly low, spending only $88 on two sheets of 1/4″ plywood. Including the paint, caulk, and nail filler, the total project cost came to approximately $150. This demonstrates that board and batten can be a highly affordable and impactful DIY home improvement, offering significant aesthetic value without a hefty price tag.
For our board and batten accent wall, we selected “Refuge” by Sherwin-Williams, a beautiful hue that has truly transformed our hallway. When choosing paint colors for your own home, it’s crucial to remember that lighting conditions in a room can drastically alter how a color appears. We always recommend following our tips for selecting paint colors, which emphasize testing samples in your specific space. Samplize peel-and-stick paint samples are an excellent tool for testing colors without the mess of traditional paint pots, allowing you to confidently choose the perfect shade.
While I typically favor an eggshell finish for general wall surfaces due to its subtle sheen and durability, our board and batten project called for a slightly different approach. Since we painted not only the accent wall but also the existing baseboards, door trim, and doors the same cohesive color, we opted for a satin paint finish across all elements. Satin offers a slightly higher sheen than eggshell, making trim details pop while still being durable and easy to clean. If you’re unsure about the best paint sheen for your specific project, consult our comprehensive guide to choosing a paint sheen to make an informed decision that suits your aesthetic and functional needs.
Yes, board and batten can certainly be installed on textured walls, though there’s an important consideration for achieving the traditional smooth look. If your walls have a prominent texture (like orange peel or knockdown), applying battens directly might leave the texture visible in the “board” sections, which deviates from the classic smooth aesthetic. To achieve a truly traditional, smooth board and batten finish on textured walls, consider installing thin plywood or MDF panels in the “board” sections before attaching your battens. This creates a flat, smooth surface for painting and ensures the refined look that board and batten is known for. Alternatively, embracing the subtle texture within the board areas can create a unique, modern interpretation of the style.
Hallway Decor and Source List
Here’s a list of sources for the decor items featured in our transformed hallway. Please note that the beautiful mirror you see was a custom DIY project. You can find the full tutorial on how to create it here: DIY Mod Podge Mirror With Napkins.
(Product source list for hallway decor would typically go here.)
If you have any further questions or need personalized advice on your board and batten project, the quickest and most direct way to reach me is by sending a direct message via Instagram! I’d also absolutely love to see your finished projects if you use this tutorial. Please share your creations on Instagram and tag me @tasha.kaleidoscope so I can admire your work!
Other inspirational posts you may enjoy:
- Our UNIQUE Hallway Decor + Makeover Reveal
- Creative DIY Board and Batten Wall Ideas
- Stunning Accent Wall Ideas to Transform Any Room
- The Best Way to Test Paint Colors for Your Home
- DIY Staircase Makeover in 2 Days: Tutorial & Reveal
- How to Replace Balusters to Update Your Stair Railing
- Easy DIY Wood Slat Wall Treatment for Modern Homes
Curious about my unique approach to transforming rooms and spaces in our home, from concept to completion? Discover the simplified process with Designer in a Binder® – your ultimate guide to decorating with confidence and ease.
For exclusive content, behind-the-scenes sneak peeks, and fresh DIY inspiration delivered straight to your inbox, be sure to subscribe to our newsletter before you go!