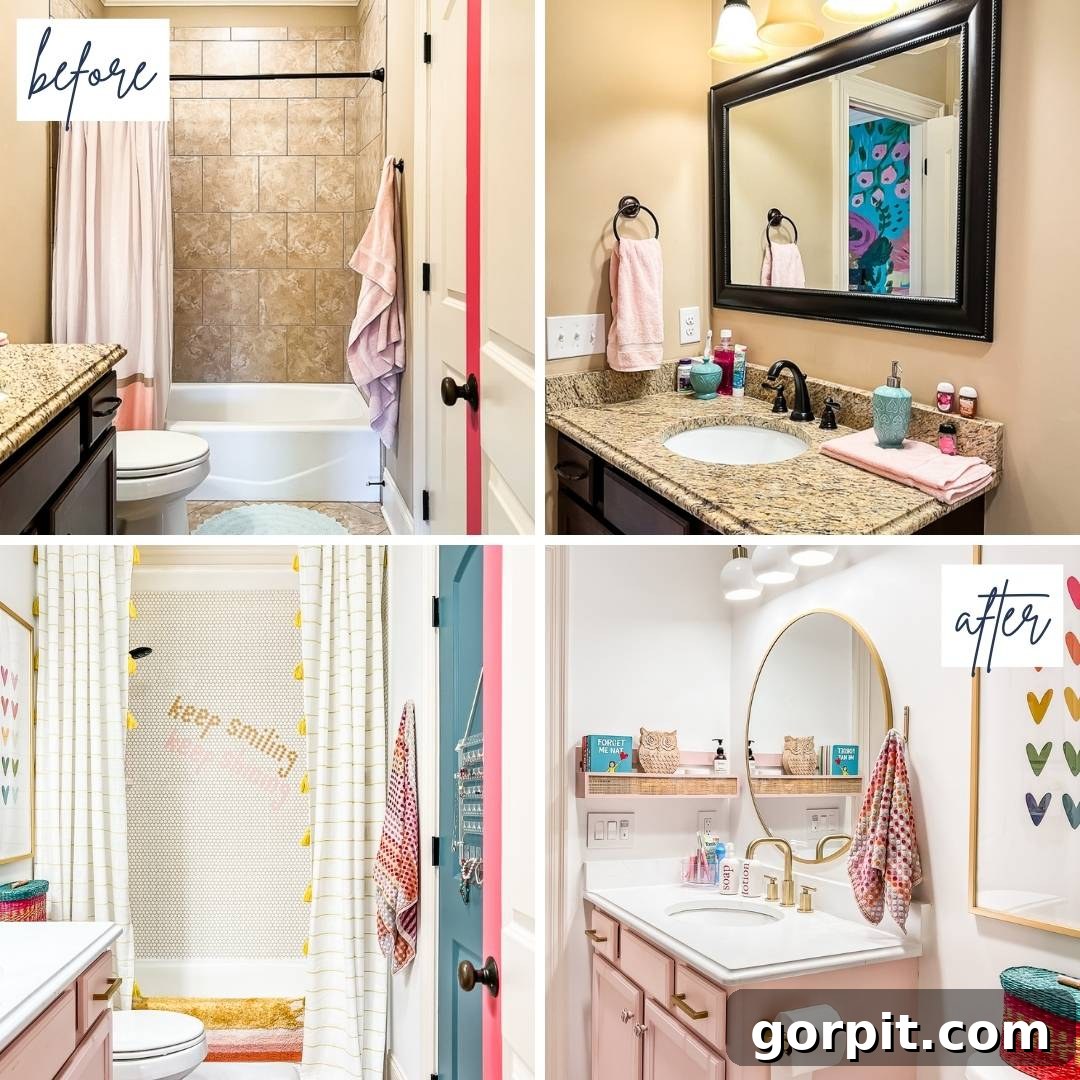
Embarking on a bathroom renovation often conjures images of significant expenses and prolonged disruption. Indeed, statistics from the National Kitchen and Bath Association suggest the average bathroom overhaul can set homeowners back approximately $8,100. However, defying these expectations, we successfully reimagined our daughter’s once dull and outdated bathroom into a remarkably vibrant and stylish sanctuary, all while keeping our expenditure well under $2,000! This achievement wasn’t magic; it was the result of strategic planning, smart material choices, and a willingness to embrace DIY. In this comprehensive guide, we’re thrilled to unveil the innovative strategies and practical tips that allowed us to execute a stunning bathroom makeover on a remarkably tight budget. Prepare to discover how, with a thoughtful approach and a bit of elbow grease, you too can breathe new life into an old bathroom without breaking the bank.
Having successfully navigated numerous bathroom transformations over the years, from complete gut renovations to remarkably cost-effective DIY projects, we’re seasoned veterans in this arena. This particular renovation, focusing on our daughter Attley’s bathroom, stands out as one of our most budget-conscious yet impactful endeavors. For those looking to maximize their bathroom renovation budget, we encourage you to explore our comprehensive resource on DIY bathroom remodel ideas designed to save money, linked within this post. Additionally, you’ll find details of four other significant bathroom renovations we’ve undertaken towards the end of this article.
The total expenditure for Attley’s bathroom overhaul, encompassing all materials and decorative elements, came in at an astonishingly low figure of under $1,700. This represents a staggering $6,400 reduction from the national average cost of $8,100, proving that a dramatic transformation is achievable without a hefty price tag. Continue reading to uncover the precise methods and smart choices that made this budget-friendly bathroom makeover a resounding success!
Please note: This post includes affiliate links for your convenience. For more information, please refer to our full disclosure policy here.
Expert Tips for a Stunning Bathroom Makeover on a Budget
Tip 1: The Power of a Precise Plan
Every successful renovation, regardless of its scale or budget, hinges on a meticulously crafted plan. This foundational step is not merely about listing tasks; it’s about envisioning the end result, defining your aesthetic, and laying out a clear roadmap to get there. For Attley’s bathroom, we leveraged a structured planning system to guide us from initial concept to final execution. A critical component of this process involved creating a digital mood board. This visual tool allowed us to virtually assemble all potential elements – from paint colors and fixture styles to decorative accents – ensuring they harmonized beautifully before any purchases were made. This eliminated costly mistakes and ensured a cohesive design.
Beyond aesthetics, a robust plan also encompasses practicalities. It involves a detailed budget allocation, a comprehensive list of all required purchases, and a realistic project timeline. By outlining these aspects from the outset, you gain invaluable control over your project. A well-defined plan acts as your compass, preventing impulsive purchases, unexpected expenses, and wasted time. We can attest that starting Attley’s bathroom remodel with such clarity empowered us to stay focused, adhere to our financial limits, and achieve our desired outcome efficiently.
Interestingly, the inspiration for Attley’s bathroom design sparked from a single “crucial element”—a vibrant bathmat (you can find a similar mat here). This initial piece helped dictate the color palette and overall playful aesthetic, simplifying subsequent design decisions immensely. It highlights how sometimes, one key item can anchor an entire room’s transformation.
For those utilizing structured planning resources, embracing a system that integrates design, budget, and timeline management is highly recommended for any home improvement project.
Tip 2: Maintain Your Bathroom’s Current Layout
One of the most significant cost-saving strategies for any bathroom renovation is to resist the urge to alter the existing layout. While the idea of a completely redesigned space might be tempting, moving essential elements like the toilet, shower, or sink can quickly escalate project costs. Why? Because shifting plumbing lines, relocating electrical outlets, or reconfiguring ventilation systems requires specialized labor, additional materials, and often permits, all of which add up exponentially.
Instead of incurring these substantial expenses, focus your energy and budget on superficial, yet highly impactful, aesthetic upgrades. By keeping the existing footprint, you free up funds to invest in elements that truly transform the look and feel of your bathroom: fresh paint, modern fixtures, stylish lighting, and thoughtful decor. This approach allows you to achieve a dramatic “new look” without delving into the complex and pricey realm of structural or utility modifications. For Attley’s bathroom, we were perfectly content with the functional layout. By choosing to retain it, we bypassed significant expenses, enabling us to allocate our budget to visible improvements that delivered maximum visual impact. This decision alone can shave thousands off your renovation costs, making a budget-friendly bathroom makeover entirely achievable.
Tip 3: Repurpose and Revitalize Existing Materials
Embracing a philosophy of “reduce, reuse, refresh” is paramount when undertaking a budget-friendly bathroom renovation. Rather than automatically budgeting for all-new components, critically assess the condition of your existing fixtures and fittings. Is your vanity structurally sound? Is the sink free from cracks and major damage? Is the bathtub functional and simply outdated in appearance? If these core elements are in good working order, considerable savings can be realized by opting to refresh them rather than replace them.
Simple yet effective transformations can be achieved through cosmetic updates. A fresh coat of specialized paint, new hardware (such as cabinet pulls or faucet handles), or even a professional resurfacing treatment can dramatically alter the look of an old vanity, sink, or bathtub. This approach not only saves you the direct cost of purchasing new, often expensive, bathroom cabinetry and plumbing fixtures but also reduces waste and the labor associated with removal and installation.
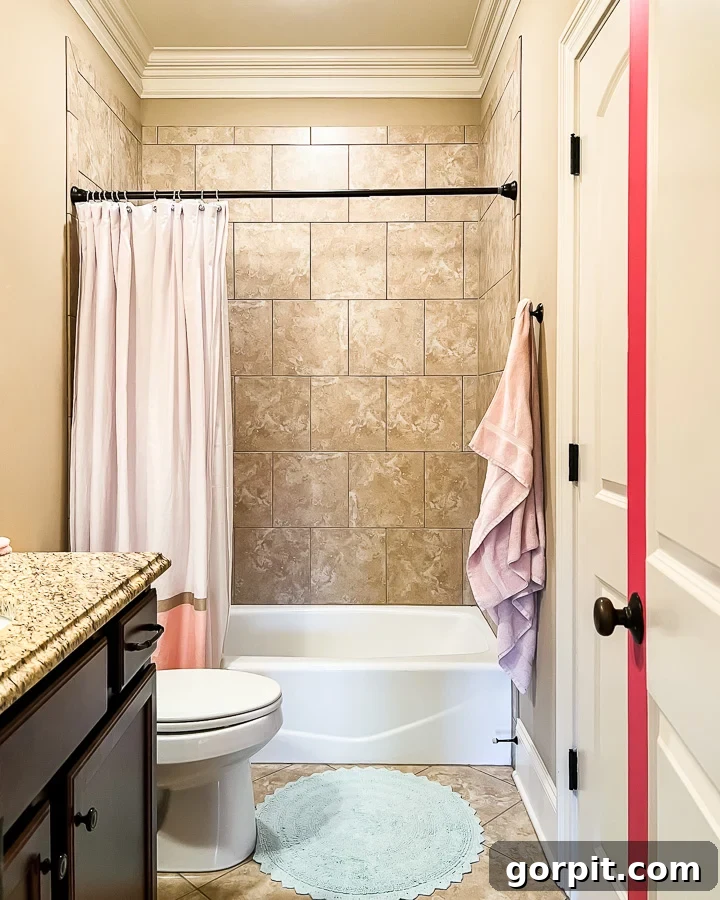
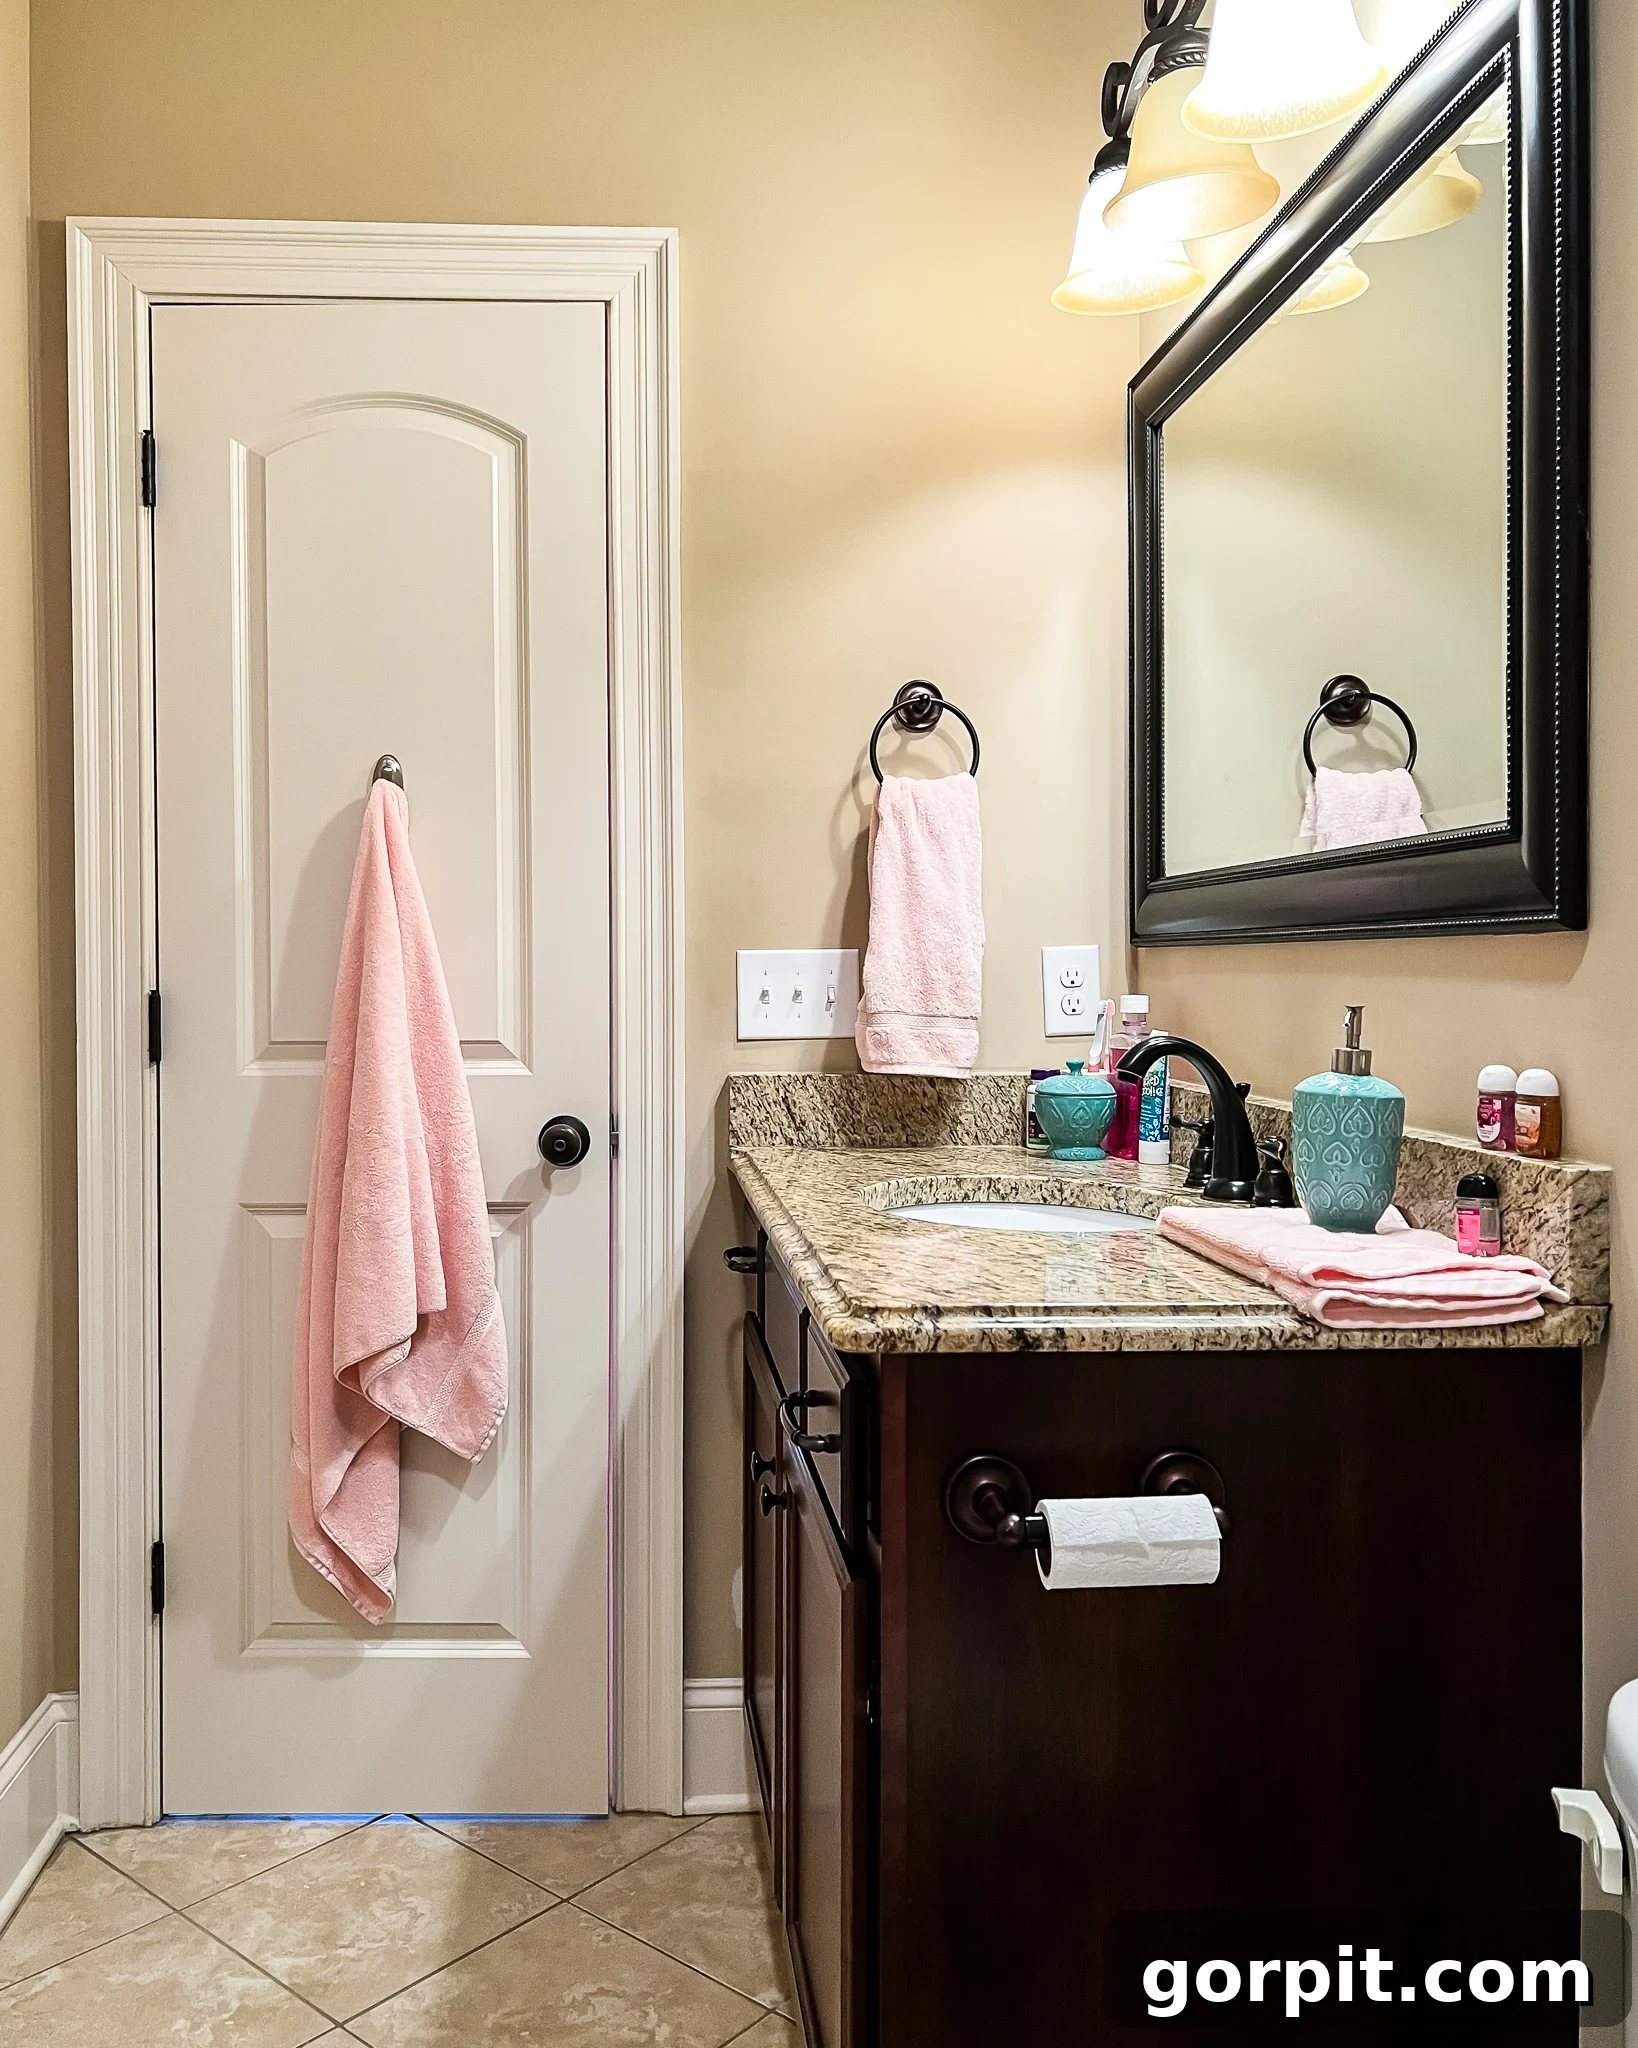
In Attley’s bathroom, we found ourselves in this exact scenario. Her bathtub, toilet, sink, and vanity were all perfectly functional and in excellent structural condition. However, their dated appearance clashed with the brighter, more modern aesthetic we envisioned for our home. The solution was clear: instead of costly replacements, we decided to give these existing elements a fresh lease on life through the strategic application of paint and other minor updates. This decision was a cornerstone of our budget strategy and seamlessly transitions us to our next crucial tip…
Tip 4: Unlock the Transformative Power of Paint
Few materials offer the dramatic impact and cost-effectiveness of paint. It is, without a doubt, the ultimate tool for a budget-friendly bathroom makeover. A fresh coat can instantly brighten, modernize, and completely redefine the ambiance of a space. For Attley’s bathroom, the existing dark brown walls made the room feel confined and dated. Our solution was simple yet profound: we painted them Pure White by Sherwin Williams. This single change injected immediate freshness and perceived spaciousness, setting a clean canvas for all subsequent updates.
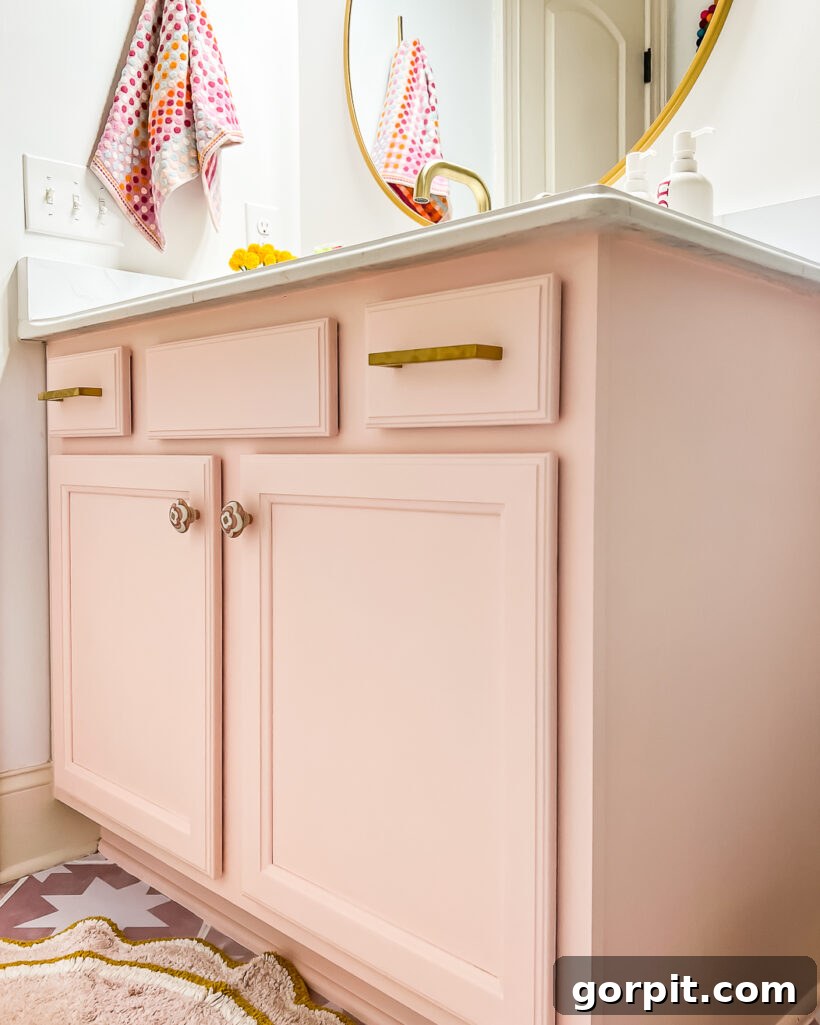
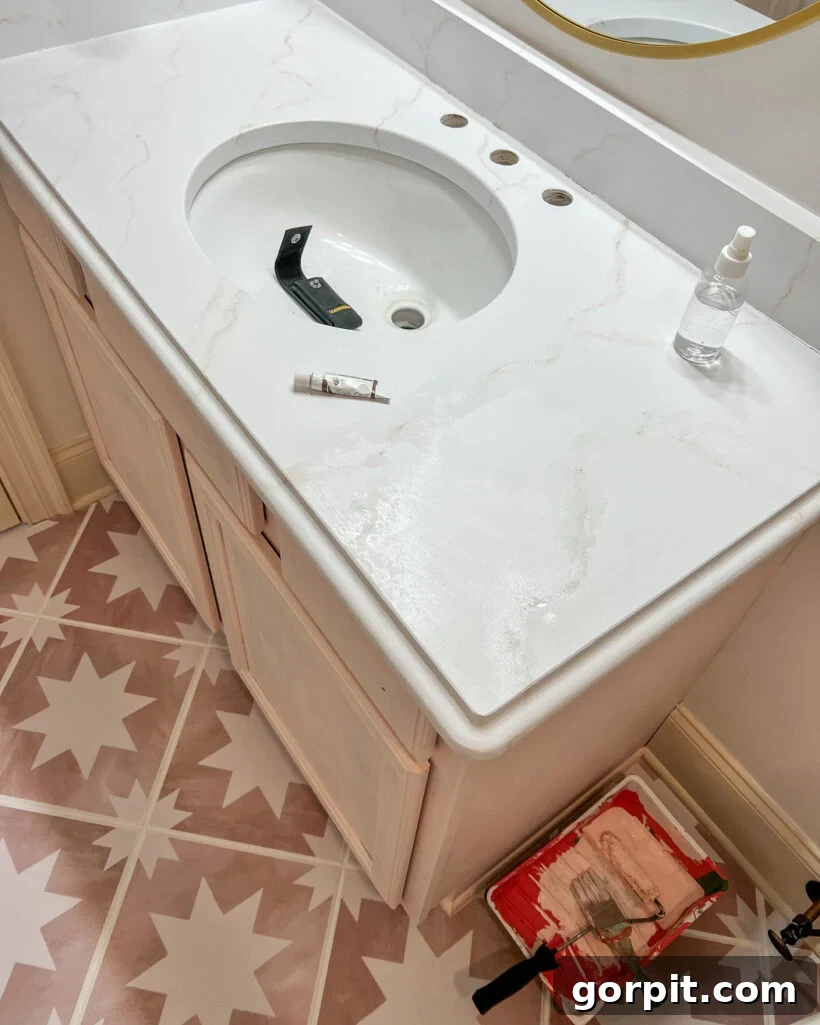
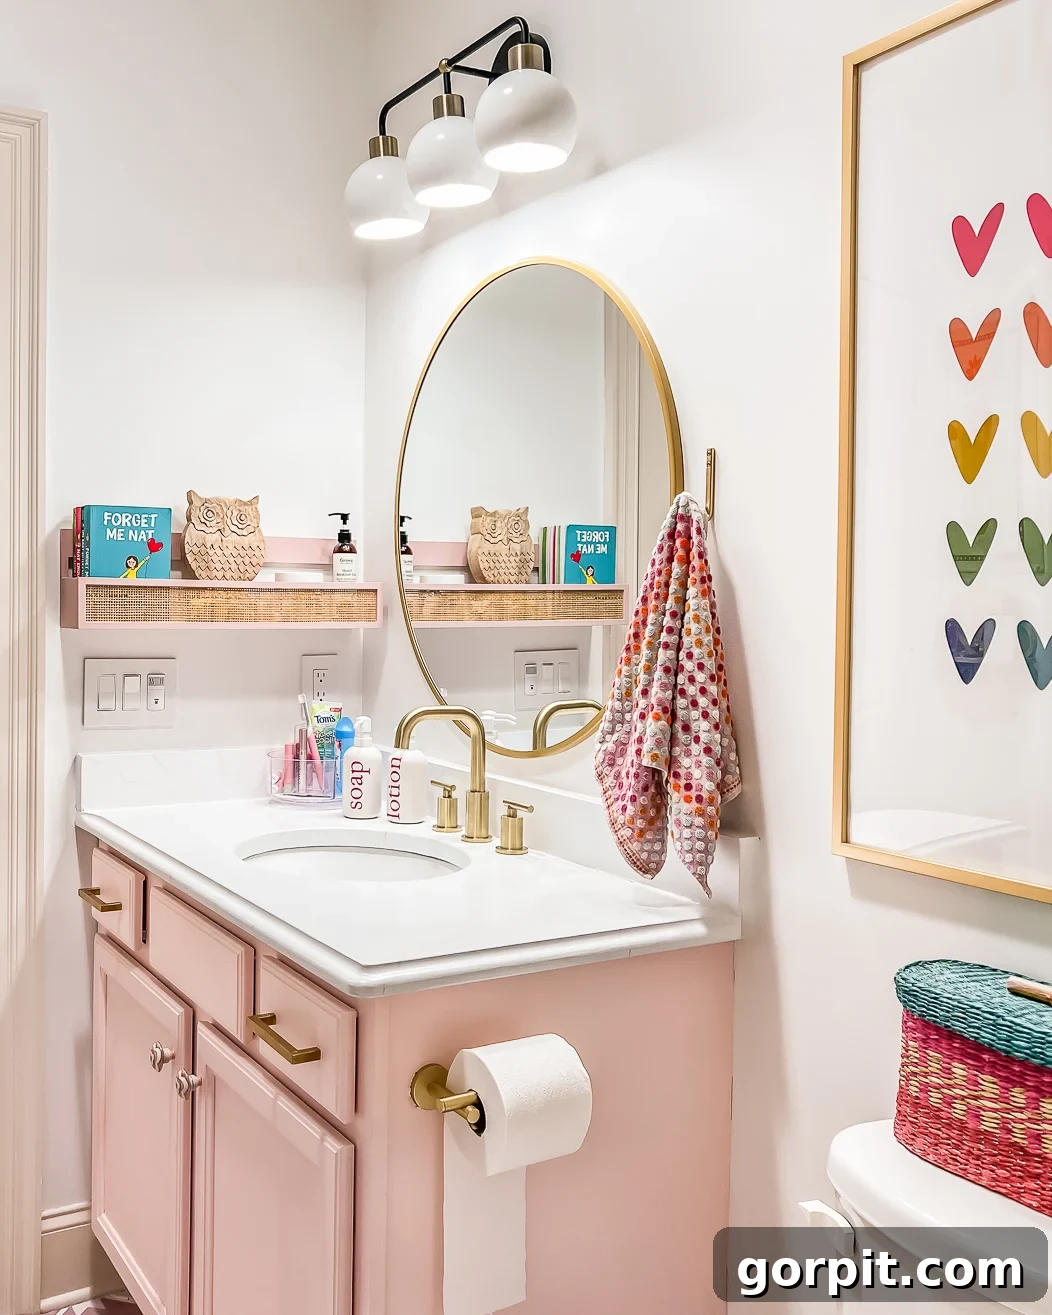
The magic of paint didn’t stop at the walls. We tackled several other key surfaces to maximize our budget. Her countertops, which were perfectly functional but lacked aesthetic appeal, received an incredible upgrade. I painted them to mimic the luxurious look of marble. This DIY project, surprisingly straightforward, has proven incredibly durable, holding up beautifully for nearly two years now. Additionally, the outdated vanity cabinet was revitalized using a quick and easy cabinet painting method, transforming its appearance without the expense of a new unit.
These three painting projects—walls, countertops, and vanity—collectively created an immense visual impact, making the bathroom feel entirely new. When considering small bathroom ideas, prioritizing paint is an intelligent choice, offering a high return on investment in terms of aesthetic appeal and budget savings.
Tip 5: Revamp Outdated Floor Tiles with Ease
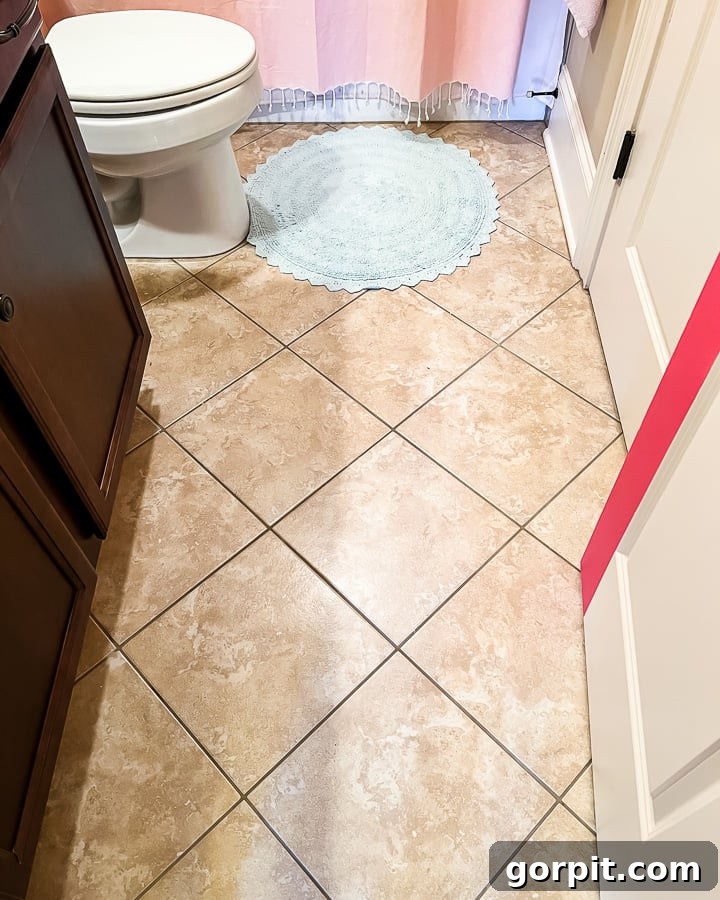
An outdated bathroom floor can instantly age an entire space, but a complete rip-out and replacement of tiles can be messy, time-consuming, and expensive. The good news for budget-conscious renovators is that there are fantastic alternatives to breathe new life into existing, structurally sound floor tiles. Exploring innovative cheap flooring ideas can lead to stunning transformations without the demolition.
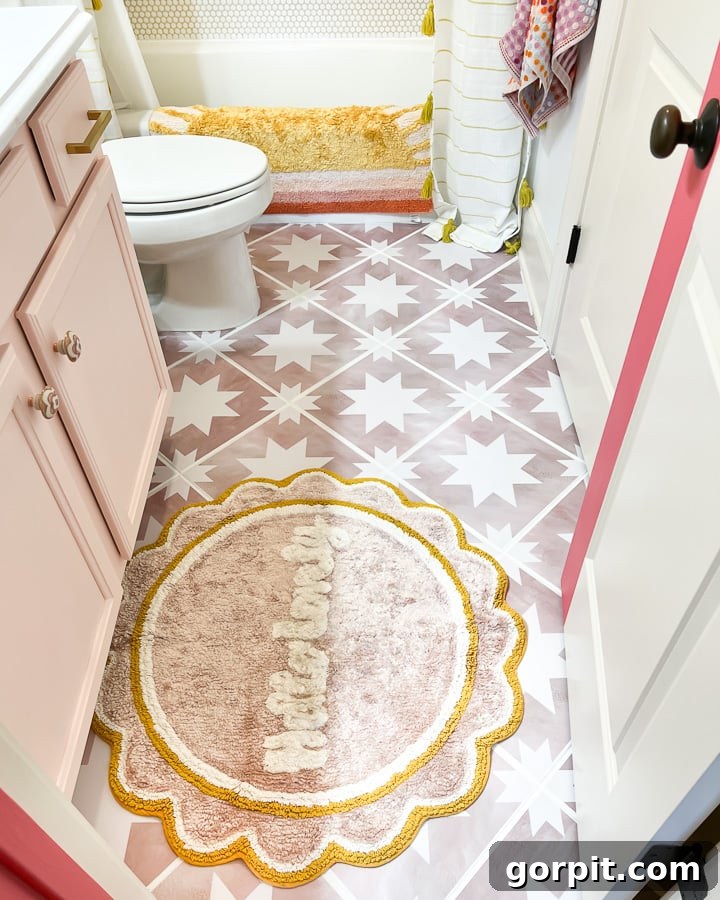
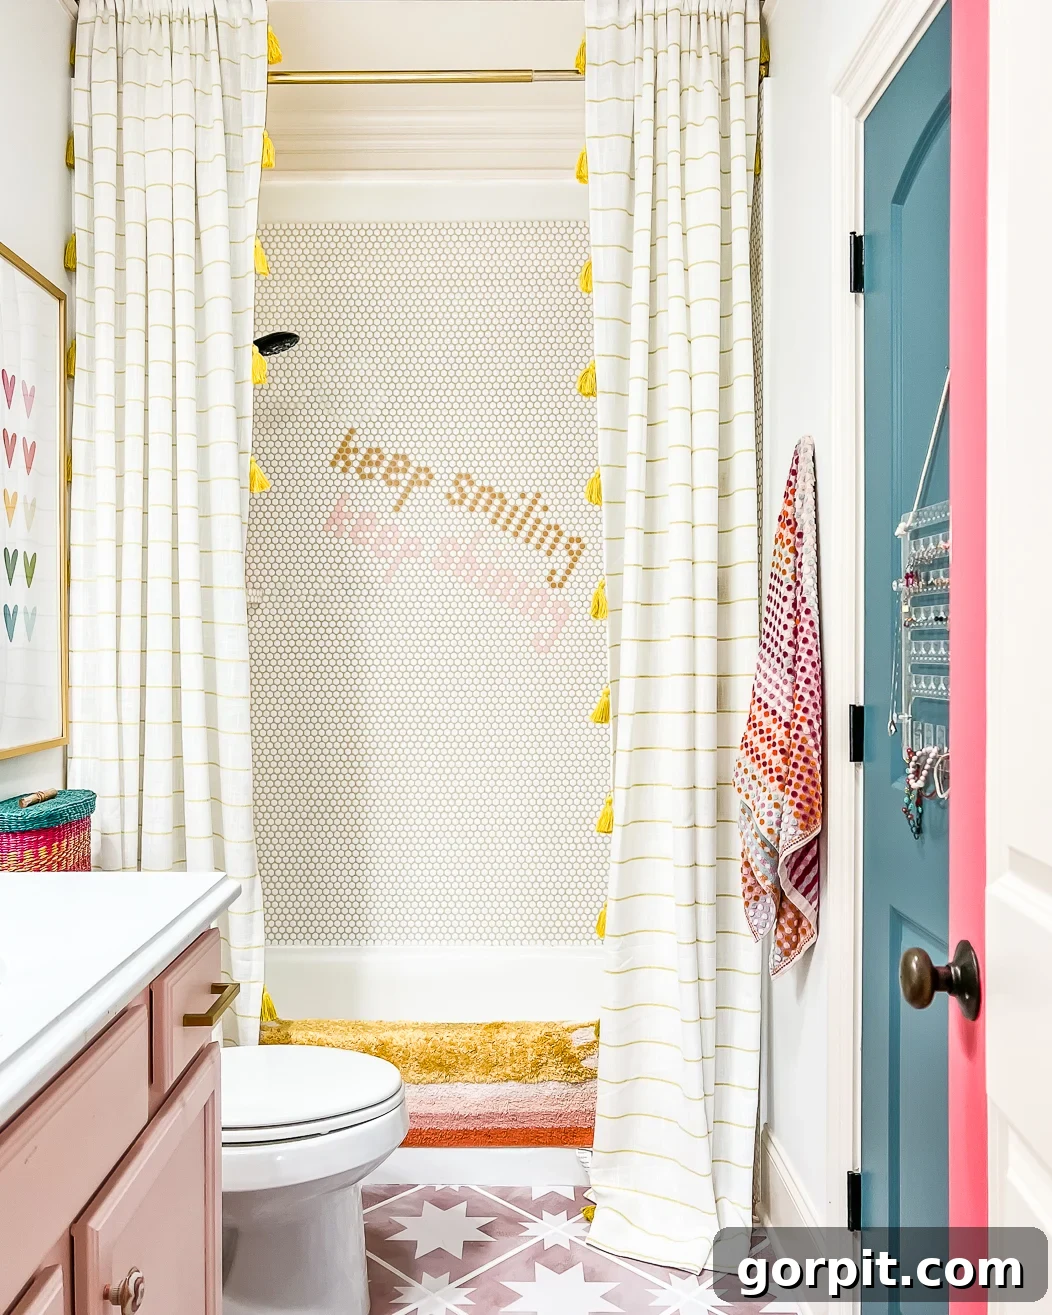
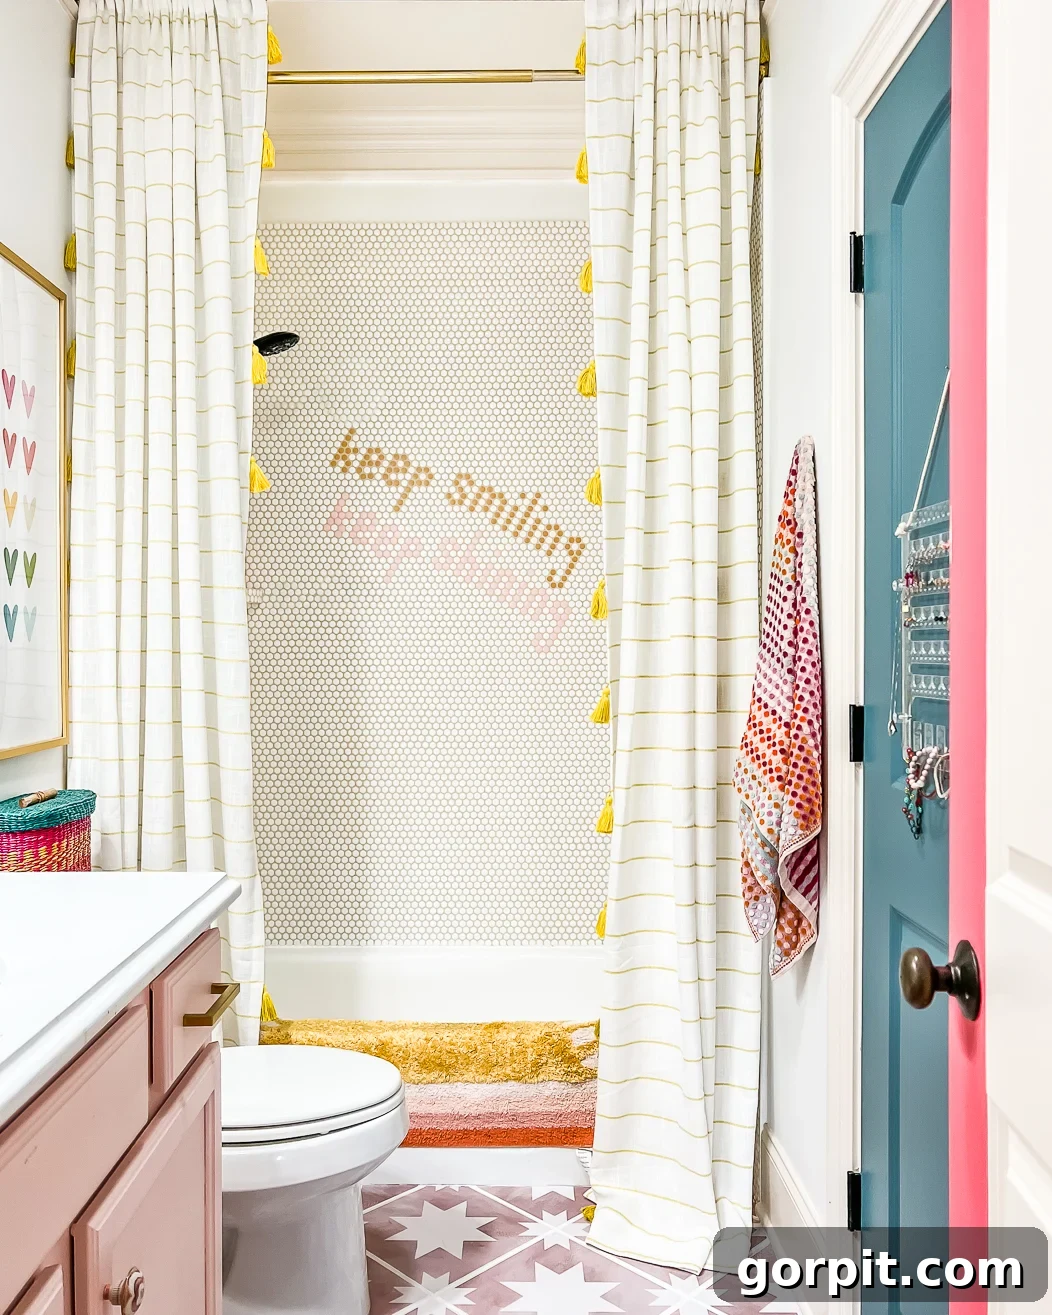
For Attley’s bathroom, we discovered the incredible potential of high-quality tile stickers. These “gorgeous” adhesive tiles provided a quick, clean, and remarkably effective solution to cover her drab, old brown floor tiles. The result was a fresh, modern pattern that completely revitalized the floor’s appearance and established a playful aesthetic for the room.
We understand that there’s often skepticism and misunderstanding surrounding tile stickers. Many wonder about their durability, waterproof qualities, and longevity. Based on our extensive experience, including their successful application in both of our daughters’ bathrooms, we can confidently affirm their resilience. They are indeed incredibly durable and waterproof, holding up perfectly against daily wear and tear. To address all your questions and see their performance firsthand, we highly recommend reading our detailed post: Everything You Need to Know About Tile Stickers. This resource provides a comprehensive look at what makes them a viable and attractive option for a budget-friendly bathroom floor update. The short video below also offers a visual testament to their enduring quality.
Tip 6: A Smart Alternative: Tiling Over Existing Tiles
When faced with outdated shower tiles, the conventional wisdom often points to two costly and labor-intensive options: painstakingly painting them with specialized kits or undertaking a complete demolition and reinstallation. However, for those committed to a budget-friendly and efficient bathroom makeover, there exists a less common but highly effective third path: tiling directly over existing tiles. While it might sound unconventional, this method can save substantial time and money, provided certain critical conditions are met.
The core principle is simple: **you can tile over existing tile if the underlying surface is in excellent, stable condition, devoid of any leaks, cracks, or signs of moisture damage.** It’s crucial that the existing tiles are firmly adhered and the substrate is robust. This technique bypasses the demolition phase, eliminating the mess, labor, and disposal costs associated with removing old tiles, as well as the need to replace costly cement board or other sub-materials.
Our journey to embracing this method began when we considered the brown tiles in Attley’s shower. Recalling a successful project by our friend, Bre from Brepurposed, who tiled over existing tile in her bathroom (guided by her tile-expert father-in-law), we were inspired to research its feasibility for a shower environment. Extensive investigation confirmed that, under the right circumstances, it was indeed a viable and durable option.
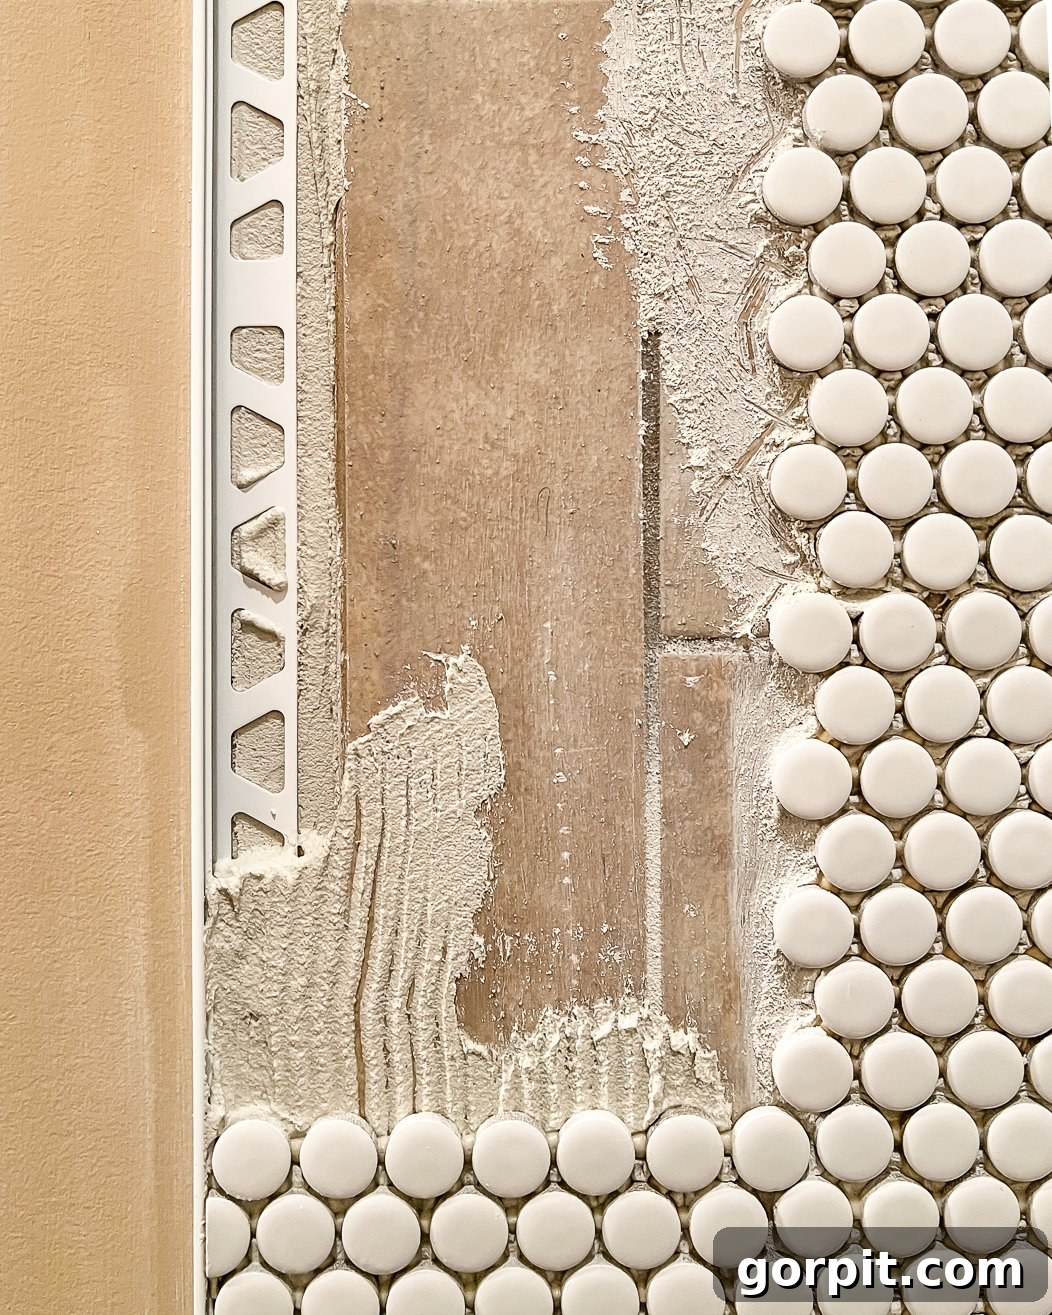
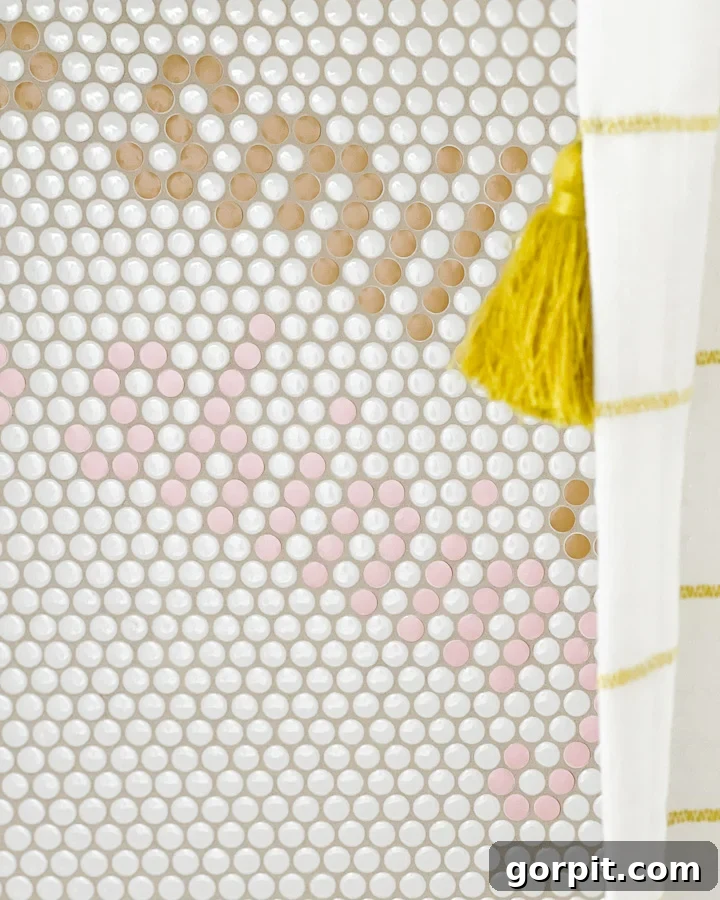
Confident that Attley’s shower tiles were in perfect condition, with no evidence of leaks, grout deterioration, or moisture issues, we decided to proceed. We quickly sourced the charming penny tile we envisioned and gathered all necessary supplies. The results, as the accompanying photos illustrate, were flawless. Nearly two years post-installation, the penny tiles layered over her old tiles continue to hold up beautifully, a testament to the success of this innovative approach. For a detailed guide on our process and to help you determine if this is the right option for your project, consult our dedicated post on how to tile over tile – it covers when this method is appropriate, and, critically, when it is best avoided.
While tiling and grouting Attley’s shower was still a significant DIY task, avoiding the demolition phase saved us an immense amount of time, effort, and material costs. Furthermore, we infused a unique, personalized element by adapting a technique from our DIY tile headboard project. We applied waterproof vinyl circle cutouts to the penny tiles, creating a custom message that added visual interest and a touch of whimsy to her shower space.
Tip 7: Elevate Your Space with Updated Lighting and Plumbing Fixtures
While grand structural changes might be off-limits for a budget bathroom makeover, strategically upgrading smaller, highly visible elements like lighting and plumbing fixtures offers immense transformative power. These details, though seemingly minor, contribute significantly to the overall perceived age and style of your bathroom. Fortunately, the market now abounds with stylish, high-quality options that deliver a modern aesthetic without an exorbitant price tag, easily found both online and at local home improvement centers.
Investing a modest portion of your budget here yields a substantial return in terms of updated appeal. For Attley’s bathroom, this meant bidding farewell to the old, builders-grade mirror and welcoming a sleek 32-inch round wall mirror. This simple swap instantly modernized the vanity area. We further enhanced the space by replacing the dated overhead light with a beautiful and contemporary light fixture, providing improved illumination and a significant style upgrade. The final touch was exchanging the old bathroom faucet for a more modern and streamlined option. Each of these changes, though individually affordable, collectively contributed to a fresh, cohesive, and significantly updated look for the entire bathroom, proving that small investments can lead to big impacts.
Tip 8: Create Visual Impact with Thoughtful Bathroom Decor
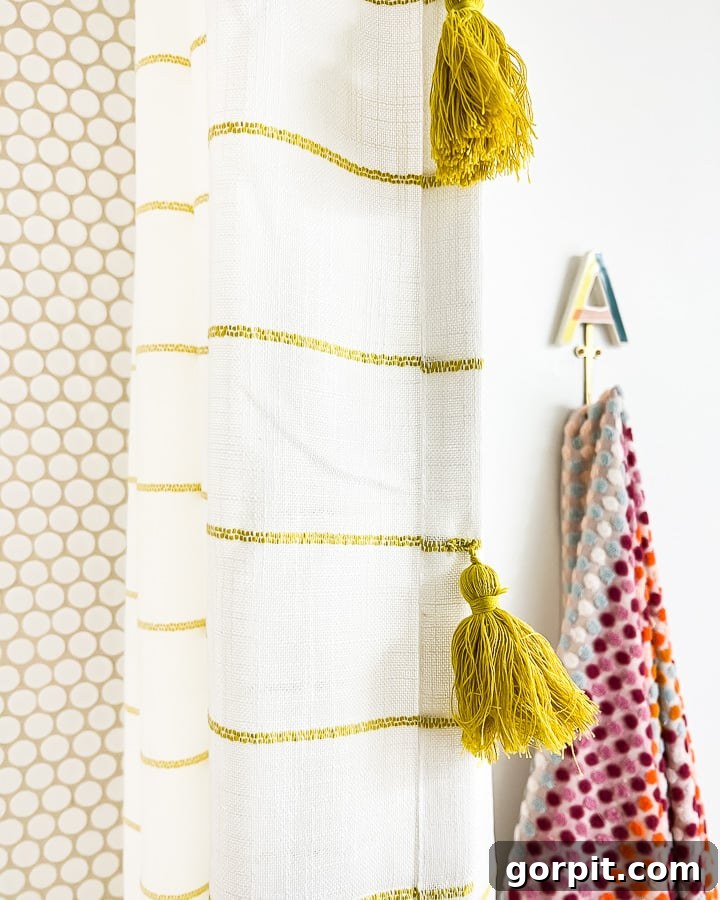
Never underestimate the transformative power of well-chosen bathroom decor, especially when working with a limited budget. Strategic decorative elements can significantly enhance the visual appeal and functionality of your space, often at a fraction of the cost of structural changes. One of our most impactful decor choices in Attley’s bathroom involved the clever use of curtains. We installed 9-foot window curtains on either side of the shower, paired with a complementary 9-foot shower curtain on a separate rod directly behind them. Hanging these curtains all the way to the ceiling not only beautifully frames the shower and tub area but also creates an illusion of much greater height and space, making the entire bathroom feel significantly larger.
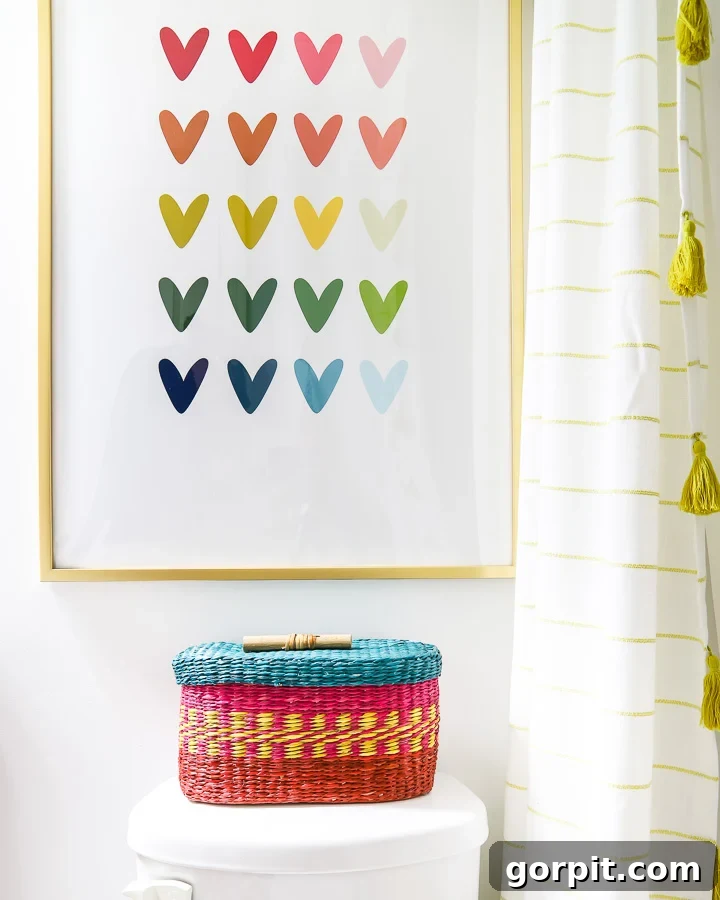
Beyond curtains, we infused the bathroom with vibrant, personality-rich artwork and accessories. Knowing Attley’s love for all things colorful, we incorporated a delightful rainbow heart art print (sized 24 x 36) framed in an inexpensive poster frame – a simple yet effective way to add a cheerful focal point. We also found a charming storage basket (similar options available) perfectly sized for toilet paper, combining practicality with playful aesthetics.
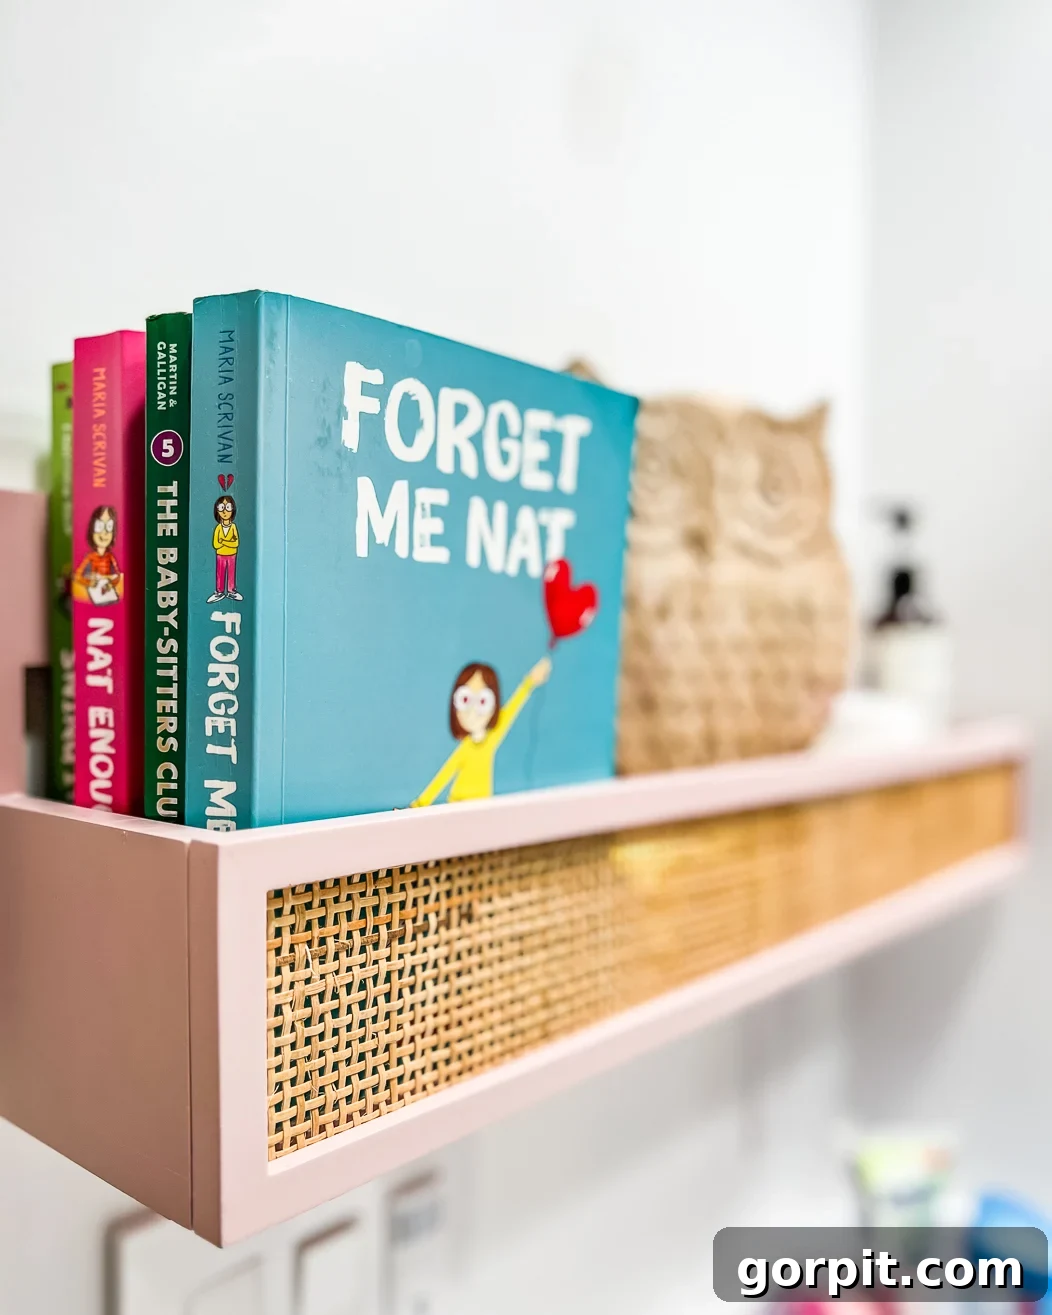
Functional touches were equally important. A cute monogrammed hook for her bath towel ensures practicality, reminding us that ample towel hooks and smart storage are essential in any bathroom design. As Attley transitioned into her tween years, her need for organized storage grew, prompting us to add ingenious solutions to keep her countertop clutter-free. We installed an adorable wall shelf near her sink, perfect for housing books, lotions, and hand sanitizer.
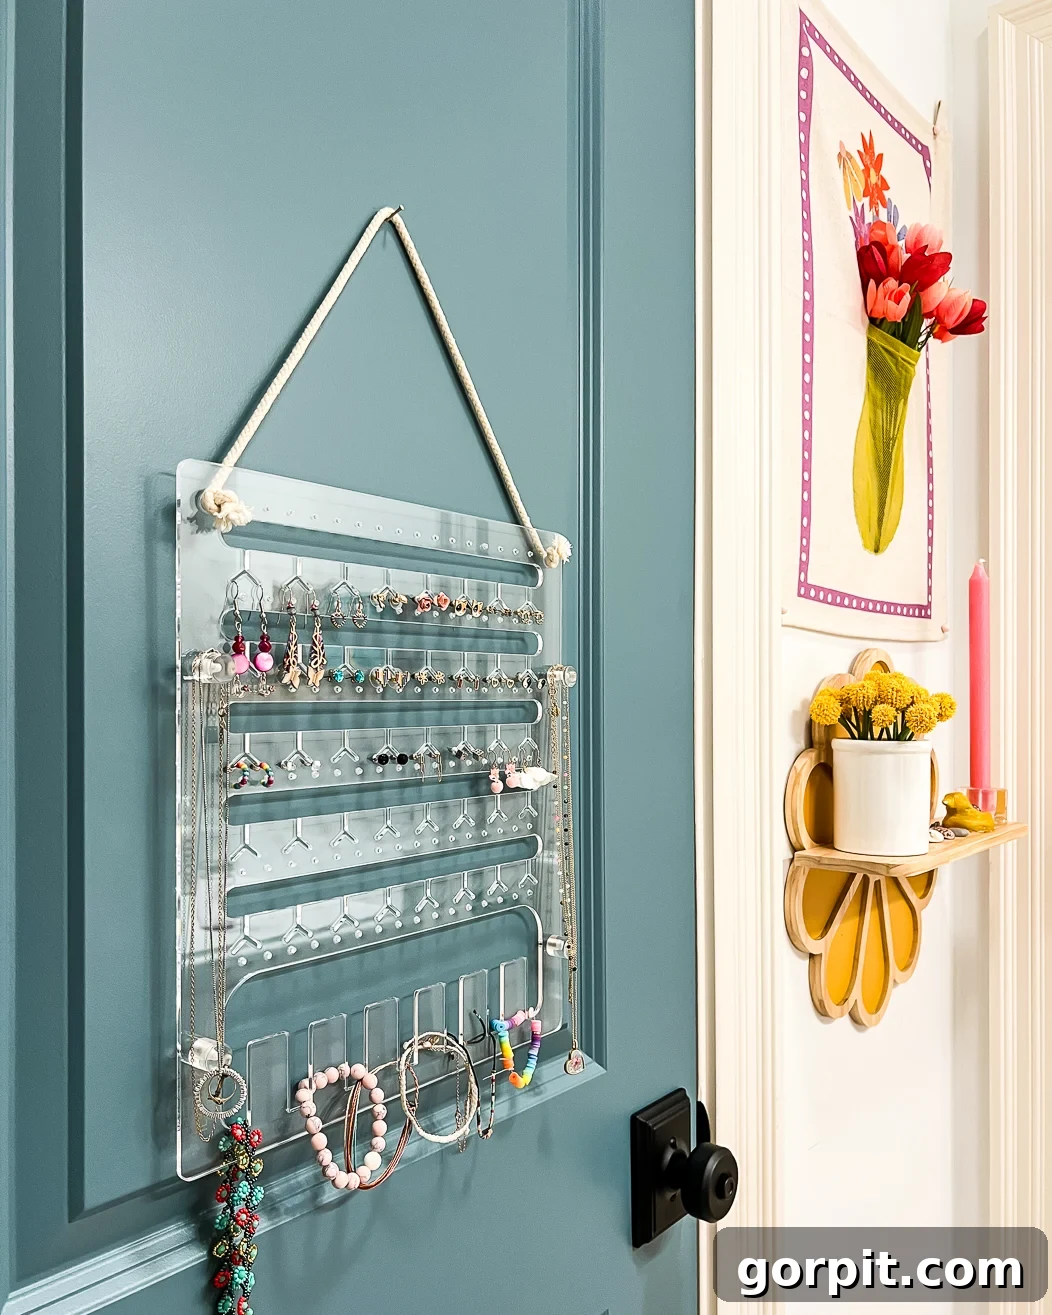
To further organize her jewelry and makeup, we utilized an inexpensive acrylic jewelry organizer discreetly hung on the back of her door, effectively freeing up valuable counter space. Completing the whimsical aesthetic, we incorporated a charming flower wall shelf and a wall tapestry, items we already owned, positioned strategically behind her vanity to add extra flair.
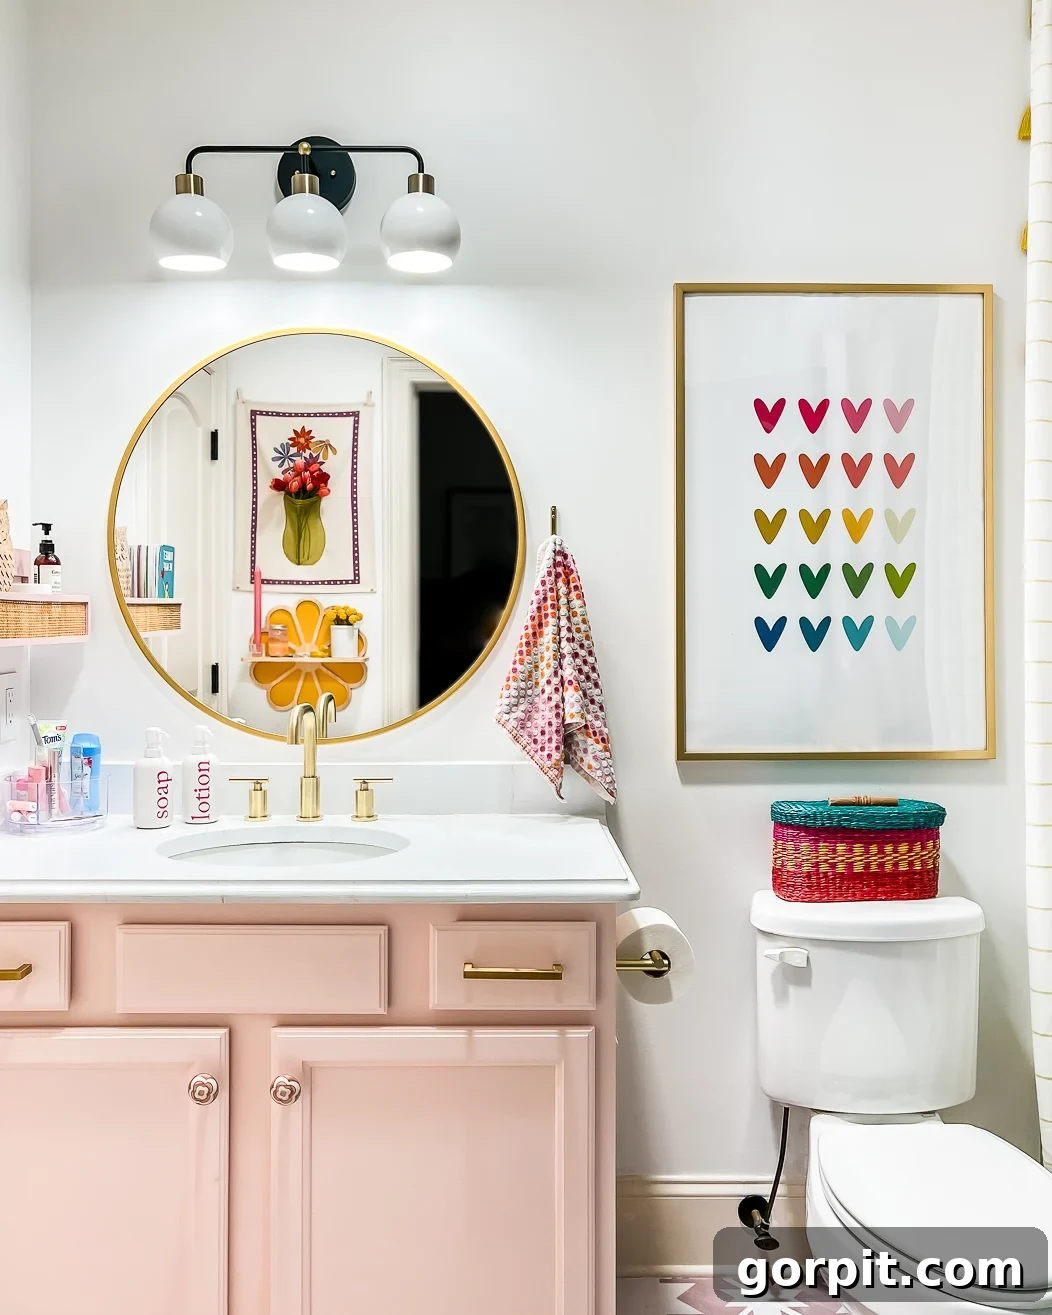
The pure joy and excitement on Attley’s face upon seeing her transformed bathroom made every effort worthwhile, underscoring the profound impact a personalized, budget-friendly makeover can have. As a final note, approximately a year after this initial renovation, we further enhanced the space with the installation of a VELUX Sun Tunnel, flooding the bathroom with abundant natural light and completing its bright, airy ambiance.
Detailed Budget Breakdown: Attley’s Bathroom Makeover
Curious about the exact financial details of this budget-friendly bathroom transformation? Below, we provide a transparent breakdown of every expense incurred, demonstrating how a significant impact can be achieved without a substantial outlay.
- Shower Tile: $213
- Grout, Primer, Thinset, and other supplies for tiling over tile: $286
- Tile Stickers (3 packs of 9): $153
- New Vanity Light Fixture: $259
- New Mirror: $90
- New Sink Faucet: $85
- Pair of 9-foot Curtains (similar option here): $50
- 9-foot Shower Curtain: $18
- Wall Paint: We utilized leftover paint, estimating a new gallon at approximately $40
- Cabinet Paint: $22
- Countertop Paint: Free (from leftovers); a new kit would cost around $44 (comprising white base coat and veining kit, topped with polyacrylic)
- Polyacrylic: Free (from leftovers); a new can would cost approximately $10
- New Cabinet Knobs: $30
- Inside Curtain Rod Mounting Brackets: $5
- Curtain Rod: $32
- Decor (including bath mats, artwork, frame, towels, shelves, hooks, etc.): $278
- Shower Head: $24
- GRAND TOTAL: $1,639
We sincerely hope this detailed breakdown, coupled with the practical tips shared throughout Attley’s budget-friendly bathroom makeover journey, empowers you to envision and execute your own dramatic space transformation. The fundamental principles remain consistent: strategically maintaining the existing layout, creatively updating current elements, and undertaking as much of the work yourselves as feasible are the keys to unlocking a stunning bathroom renovation on a budget.
Bathroom Source List
For your convenience, here are the key sources and product details for Attley’s budget-friendly bathroom makeover:
- Wall Color: Pure White by Sherwin-Williams
- Trim and Ceiling Color: Divine White by Sherwin-Williams
Links to all other products are provided throughout the post within their respective sections. Please refer to the detailed tips for direct links to specific items and decorative elements. Images often contain clickable links for product details as well.
Our Other Bathroom Renovations & Makeovers
If you’re inspired by Attley’s transformation and eager to see more, delve into the details of four other diverse bathroom projects we’ve completed over the years. Each project presented unique challenges and opportunities for innovative, budget-conscious design.
Avery’s Budget-Friendly Bathroom Makeover REVEAL
We transformed our daughter Avery’s beige and boring bathroom into a fun and beautiful space for only $900. And we did it all without doing any demo! You won’t believe what it used to look like.
Affordable Master Bathroom Remodel REVEAL
Think you can’t completely transform a master bathroom on a budget? Think again! This affordable master bathroom makeover completely transformed the space without changing any of the major elements in the space.
DIY Bathroom Remodel REVEAL
We completely gutted and renovated the bathroom our girls’ shared in our old home. We ripped out the old carpet and tile, removed a wall, added a window and replaced absolutely everything from the cabinetry to the tile. And we did 95% of the work ourselves. Check out how we did it!
The REVEAL of Our Colorful DIY Bathroom Remodel
See how we gutted and remodeled the half-bath of our old home in just seven days. We tiled the floor, painted a fun wall mural, replaced the toilet and vanity and more! Check out how this project unfolded.
Intrigued by our approach to transforming rooms and spaces throughout our home? Discover the strategies and insights within Designer in a Binder®, our comprehensive system designed to make decorating affordable and straightforward.
For exclusive content, behind-the-scenes glimpses, and early access to our latest projects and tips, be sure to subscribe to our newsletter before you leave!