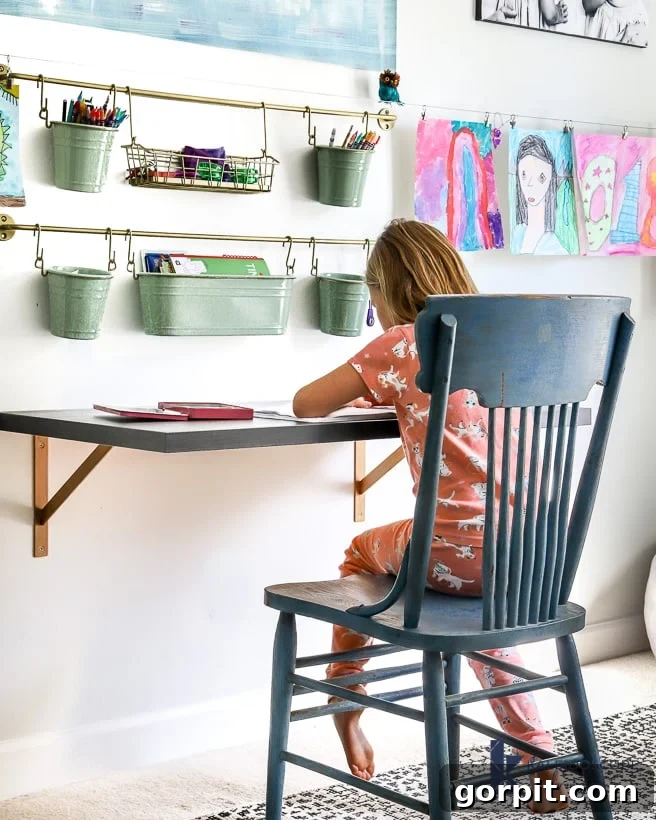
If you’re seeking an affordable, space-saving, and straightforward desk solution, look no further! This DIY floating desk tutorial is tailor-made for you. Its ingenious design frees up valuable floor space, making it perfect for smaller rooms or multi-functional areas. What’s more, the construction process is so simple that even those new to DIY projects can achieve professional-looking results with confidence.
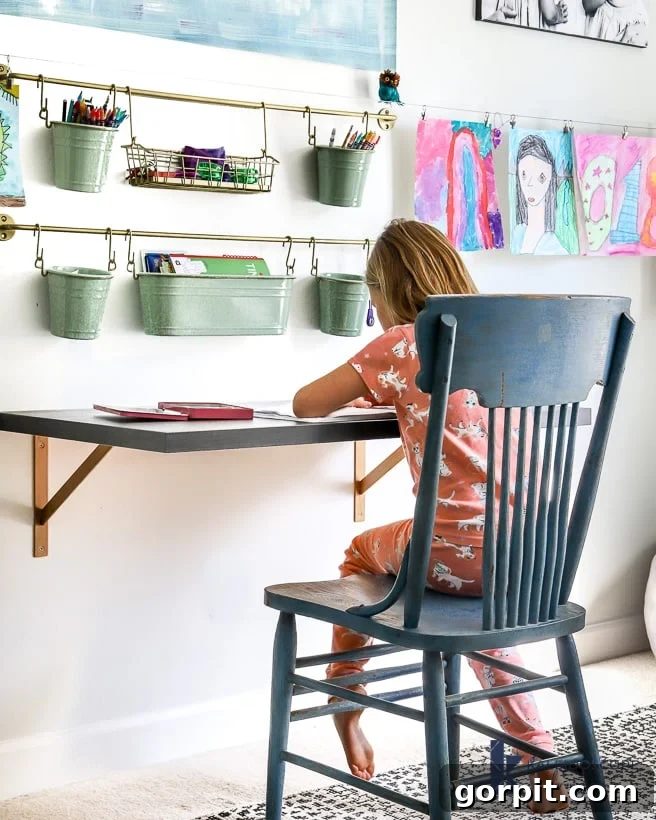
In our continuous effort to enhance organization and functionality within our home, we’ve recently focused on optimizing spaces, particularly our girls’ bedrooms. As children grow, their needs evolve, and what once served them perfectly may no longer be suitable. This was precisely the case with the custom-built IKEA kid’s table that formerly occupied Avery’s room.
While we cherished the memories created around that personalized table, our girls, now eight years old, found it increasingly uncomfortable due to their height. Recognizing the need for a more ergonomic and age-appropriate workspace, we decided it was time for an upgrade. We successfully sold the transformed table and chairs, paving the way for this fantastic DIY floating desk. This project has quickly become one of our favorite IKEA desk hacks, standing out as arguably the easiest and most impactful home improvement task we’ve undertaken this year. Beyond its simplicity, the affordability of this project makes it an incredibly appealing option for anyone looking to create a functional and stylish workspace without breaking the bank.
A floating desk offers numerous advantages, particularly for contemporary living. Its wall-mounted nature creates an illusion of greater space, making any room feel larger and less cluttered. This minimalist approach not only enhances the aesthetic appeal but also provides practical benefits, such as easier cleaning underneath and greater flexibility in furniture arrangement. Whether you’re setting up a dedicated home office, a compact study nook, a creative craft station, or even a chic vanity, a floating desk adapts seamlessly to various needs and design preferences.
Follow our comprehensive, step-by-step tutorial below to learn exactly how to construct your own custom DIY floating desk. With clear instructions and practical tips, you’ll be amazed at how quickly and easily you can transform your space with this elegant and highly functional addition.
This post contains some affiliate links for your convenience. Click here to read my full disclosure policy.
The Ultimate DIY Floating Desk Tutorial: Create Your Perfect Workspace
Embarking on a DIY project can be incredibly rewarding, and building a floating desk is an excellent entry point for beginners while still offering customization options for experienced crafters. This detailed tutorial will guide you through every stage, ensuring a smooth and successful build. From selecting the right materials to securely mounting your desk, we’ll cover all the essential steps to help you create a sturdy, stylish, and highly functional workspace.
Planning and Preparation: Laying the Foundation for Success
Before you even pick up a tool, thorough planning is paramount for any successful DIY project. A floating desk, in particular, requires careful consideration of its placement and intended use to maximize its benefits. Start by assessing your space: Where would a desk be most beneficial? Consider areas with ample natural light, proximity to electrical outlets, and minimal foot traffic. Measure the available wall space to determine the ideal dimensions for your tabletop, keeping in mind both aesthetics and functionality. Will this be a small writing nook or a more expansive workstation? Envision how the desk will integrate with your existing decor and how it will be used daily. Taking the time for this initial planning phase will save you time and effort later on and ensure your new floating desk perfectly meets your needs.
Materials Needed for Your Floating Desk Project
Gathering all your materials and tools before you begin is crucial for a smooth and efficient building process. Here’s a comprehensive list of what you’ll need, along with some important considerations for each item:
- Electric Driver: An absolute essential for quickly and securely driving screws. Ensure it’s fully charged or has access to power. A drill attachment for pilot holes will also be invaluable.
- Screws & Drywall Anchors (if needed): The type of screws and anchors you’ll need depends heavily on your wall type.
- For Wall Studs: If you can secure your brackets directly into wall studs, use sturdy wood screws long enough to penetrate the bracket and at least 1.5 inches into the stud.
- For Drywall (without studs): If studs aren’t available where you want to mount your desk, you MUST use heavy-duty drywall anchors. Toggle bolts or self-drilling metal anchors designed for substantial weight are recommended. Always check the weight rating of your chosen anchors to ensure they can support the weight of your tabletop plus anything you plan to place on the desk.
- Tabletop or Wood Piece to Form Desktop: This is the most visible component of your desk, so choose wisely.
- Our Choice: We opted for the LINNMON table top from IKEA, measuring 47 1/4″ x 23 5/8″ in the stylish black/brown color. This option is popular for its affordability and clean aesthetic.
- Alternatives: Other excellent choices include butcher block for a rustic, durable finish, high-quality plywood cut to size and finished, or even reclaimed wood for a unique, eco-friendly touch. Consider the thickness and material, as it affects both appearance and stability.
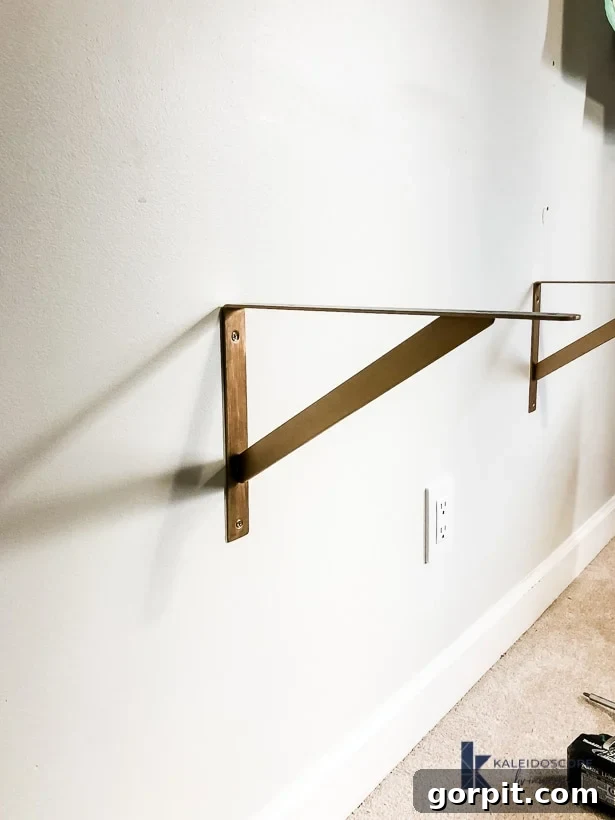
- Brackets: The structural backbone of your floating desk. Choose brackets that are strong enough to support your tabletop and its intended load. L-shaped brackets are common and effective. Consider their material (steel for strength) and design (decorative vs. minimalist). The number of brackets will depend on the length of your tabletop; generally, three brackets are recommended for tables over 3 feet long to prevent sagging.
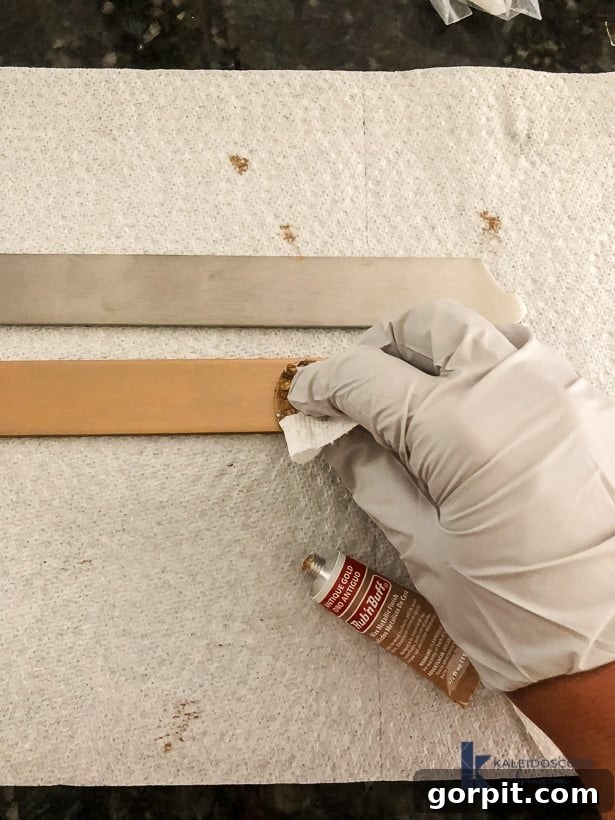
- Rub N’ Buff (if you want to change the color of your brackets like I did): This is a fantastic product for customizing the finish of metal items.
- I specifically used the Antique Gold color to give my brackets a sophisticated, aged look that perfectly complements the room’s decor. You can find Rub N’ Buff in various metallic shades to match your design vision.
- Level: An indispensable tool for ensuring your desk is perfectly horizontal. A spirit level or a digital level will work wonders in achieving a professional finish.
- Measuring Tape and Pencil: For accurate measurements and marking positions on the wall and tabletop.
- Stud Finder: Absolutely essential for locating wall studs, which provide the strongest and most secure mounting points for your brackets.
- Safety Glasses: Always protect your eyes when drilling or using power tools.
Step-by-Step Installation Guide
With your materials ready, let’s dive into the installation process. Taking your time with each step will ensure a stable and beautiful floating desk.
1) Customize Your Brackets (Optional but Recommended)
If you desire a different aesthetic for your brackets, now is the time to apply your Rub N’ Buff. This product is remarkably easy to use: apply a small amount to a cloth or gloved finger and rub it onto the metal surface in thin, even coats. Allow each coat to dry for a few minutes before applying another, building up the color and sheen to your desired intensity. This step ensures that your brackets are visually appealing and cohesive with your overall room design before they are permanently mounted.
2) Determine Bracket Placement and Secure to Wall
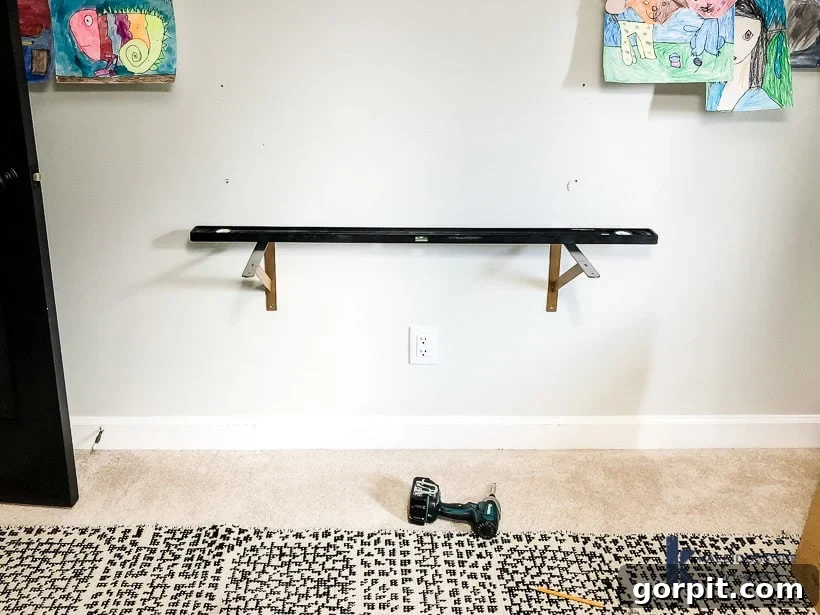
Carefully decide on the exact location for your brackets on the wall. For maximum stability and security, we strongly recommend positioning them so that you can screw them directly into wall studs. Use a stud finder to locate the studs and mark their centers with a pencil. The spacing of your brackets should be relatively even across the length of your tabletop. Once the stud locations are marked, hold each bracket against the wall, align it with the stud marks, and use your level to ensure it is perfectly horizontal. Mark the screw holes through the bracket. Drill pilot holes into the wall studs before driving your screws to prevent wood splitting and ensure a tighter fit. If studs are not available where you need them, use the appropriate heavy-duty drywall anchors discussed in the materials section. Double-check with your level as you secure each bracket to the wall to guarantee a perfectly flat surface for your desk.
3) Attach the Tabletop to Your Brackets
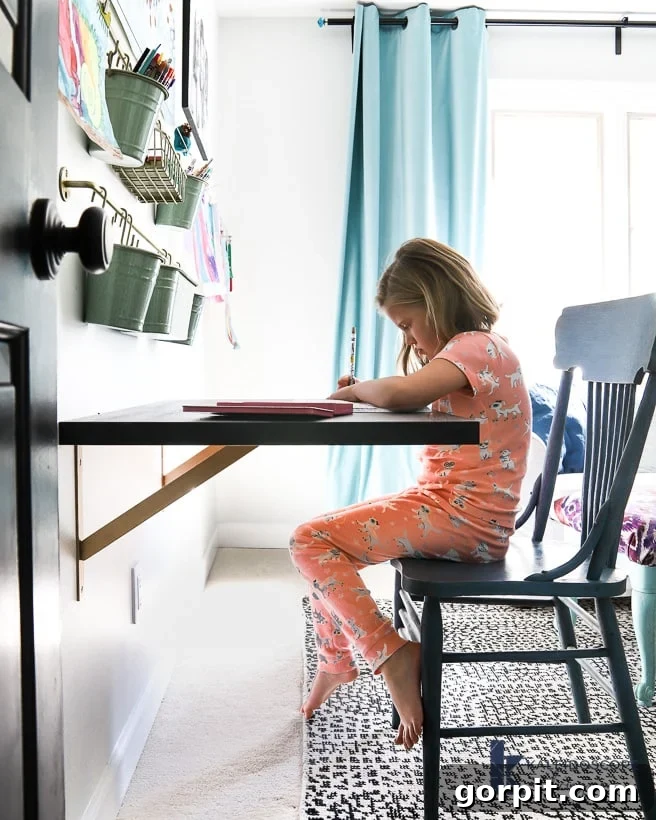
With your brackets firmly in place and perfectly level, it’s time to install your tabletop. Carefully place your chosen tabletop onto the installed brackets, ensuring it is centered and aligned as desired. Once positioned, use a pencil to mark the underside of the tabletop where the bracket screw holes align. For tabletops made of particle board (like many IKEA options), it’s highly recommended to pre-drill shallow pilot holes at these marks. This step is crucial for preventing the material from splitting when you drive the screws. Finally, secure the tabletop to each bracket using at least two screws per bracket. Ensure the screws are not too long, to avoid puncturing through the top surface of your desk. Drive them snugly until the tabletop is firmly attached and stable. Give the desk a gentle wobble test to confirm its sturdiness.
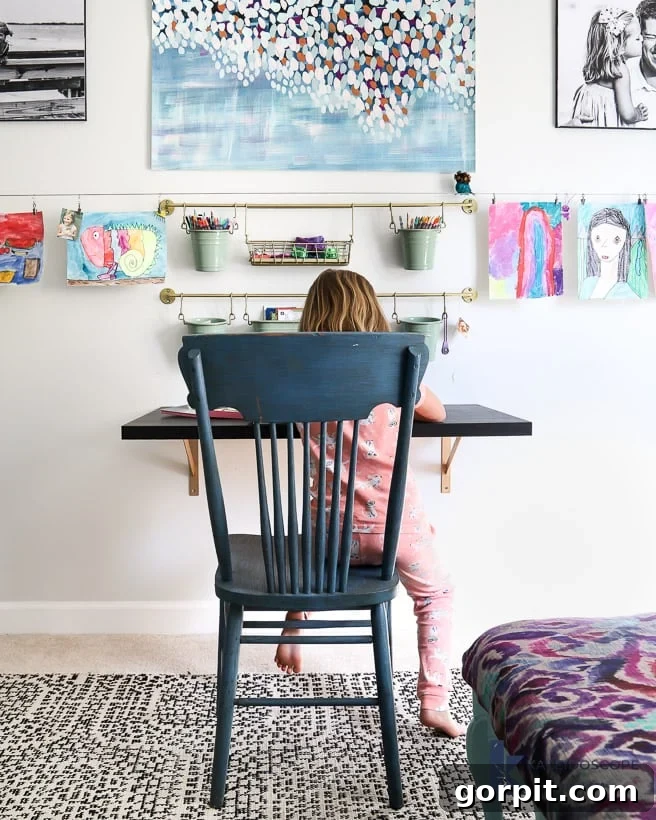
That’s it! I told you it was easy! The entire process is surprisingly straightforward, and the transformation it brings to a room is truly remarkable. We are absolutely thrilled with how our floating desk turned out – it’s functional, stylish, and exactly what we needed to optimize our space.
Customization and Personalization: Making Your Desk Uniquely Yours
One of the greatest joys of DIY is the ability to personalize your creations. Your new floating desk, while functional on its own, can be further enhanced to perfectly match your aesthetic and workflow. Consider painting or staining the tabletop to complement your room’s color scheme. Add smart storage solutions like shallow drawers mounted beneath, wall-mounted shelves above for books and decor, or stylish organizers on the surface to keep clutter at bay. Integrated LED strip lighting underneath or along the back edge can create a sophisticated ambiance and provide essential task lighting. For an ergonomic setup, think about attaching a monitor arm or a pull-out keyboard tray. The possibilities are endless, allowing you to create a workspace that is not just practical but also a true reflection of your personal style.
Maintenance and Care for Long-Lasting Enjoyment
To ensure your DIY floating desk remains a beautiful and functional part of your home for years to come, a little routine maintenance goes a long way. Regularly wipe down the tabletop with a damp cloth and mild cleaner, especially if it’s a high-traffic area or used for crafts. Avoid harsh chemicals that could damage the finish. Periodically, check the tightness of all screws, both where the brackets attach to the wall and where the tabletop attaches to the brackets. Over time, slight shifts or vibrations can loosen fasteners, so a quick check every few months will prevent any wobbling and maintain the desk’s structural integrity. By taking these simple steps, you can preserve the look and stability of your custom-built floating desk.
What do you think of this versatile and space-saving floating desk? Are you tempted to tackle this incredibly easy and rewarding project for yourself? We highly encourage you to give it a try and discover the satisfaction of creating a custom piece of furniture that perfectly fits your needs and style. Before you go, be sure to explore our other inspiring DIY furniture posts for more ideas and projects to elevate your home!
More DIY Furniture Posts to Inspire Your Next Project
SEE ALL DIY POSTS
If you’ve enjoyed crafting this floating desk, you’ll love exploring other creative furniture projects! Dive into our collection of DIY furniture posts for more innovative ideas, step-by-step guides, and inspiration to help you transform your home with custom pieces. From elegant shelving to clever storage solutions, there’s a project waiting for every skill level.
-
Easy DIY Floating Shelves & Desk for an Awkward Nook
-
How to Paint IKEA Furniture and Mistakes to Avoid
-
How to Make a DIY Dog Crate that Looks Like Furniture
-
How to Decoupage Furniture With Fabric
-
IKEA Lack Hack – A High-End Look on a Dime!
-
Easy and Gorgeous Ikea Desk Hack
Curious about how I approach transforming rooms and spaces in our home, achieving stunning results on a budget? Delve into my proven methodology with Designer in a Binder®. It’s a simple, affordable system designed to help you decorate your home like a pro.
And for exclusive content, insider tips, and behind-the-scenes sneak peeks into upcoming projects and design inspirations, make sure to subscribe to our newsletter before you navigate away! Join our community of DIY enthusiasts and home decor lovers to stay updated on all the latest trends and tutorials.