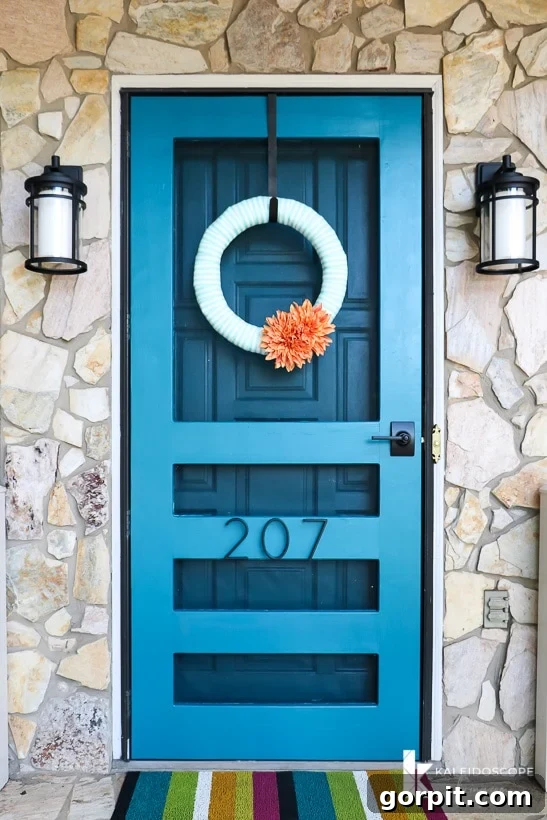
Transforming your home’s entrance with a custom-built screen door offers a blend of timeless charm, superior functionality, and unmatched durability. Forget the frustrations of flimsy, mass-produced options that rarely fit your aesthetic or last beyond a season. This comprehensive guide empowers you to design and construct a high-quality, stunning DIY screen door that perfectly complements your home, keeps pesky bugs at bay, and invites refreshing breezes indoors. It’s a project that delivers not just practical benefits but also a significant boost to your home’s curb appeal and your personal satisfaction.
Table of Contents
Why Build Your Own Custom Screen Door?
As spring awakens and summer rapidly approaches, the longing to open your doors and welcome in the fresh, clean air becomes undeniable. However, this desire often collides with the reality of buzzing insects and the limitations of standard screen doors. For many homeowners, the journey to find the perfect screen door is fraught with compromise.
My partner, Joe, and I faced this exact dilemma when upgrading our old home. Our existing storm door was not only outdated and dilapidated but completely failed to offer the high-quality, stylish functionality we envisioned. We scoured stores, only to find a frustrating dichotomy: doors that looked appealing were often flimsy and wouldn’t withstand daily use, while sturdy options were invariably unattractive, detracting from our home’s character.
This common challenge highlights the primary reasons why building a custom DIY screen door is often the superior choice:
- Unmatched Customization: You get to choose every detail, from the wood type and finish to the exact dimensions and decorative elements, ensuring a perfect match for your home’s architectural style.
- Superior Quality & Durability: Store-bought screen doors, especially at lower price points, are frequently constructed with lightweight materials and less robust joinery. A DIY approach allows you to select premium lumber and employ strong construction techniques like pocket hole joinery, resulting in a door that lasts for years.
- Cost-Effectiveness (with added value): While the initial material cost might be comparable to some off-the-shelf options, the value derived from a custom, high-quality, and aesthetically pleasing door far exceeds that of a generic purchase. You’re investing in longevity and tailored design.
- Enhanced Curb Appeal: A beautifully crafted screen door can significantly elevate your home’s exterior, adding charm and character that a standard door simply cannot.
Is This DIY Screen Door Project For You?
We absolutely adore the custom screen door we built, and we believe you will too! This project is designed for DIY enthusiasts with an intermediate skill level. It requires some fundamental understanding of woodworking terminology, safe tool operation, and accurate measurement and cutting techniques. If you’ve successfully completed a few basic DIY projects, such as building simple furniture or shelving, you likely possess the foundational skills needed to confidently tackle this screen door build. It’s a rewarding project that will undoubtedly expand your woodworking repertoire.
This post contains affiliate links for your convenience. Click here for my full disclosure policy.
Materials and Tools We Used
To embark on your custom screen door journey, gather the following essential materials and tools. Investing in quality tools will not only make the process smoother but also ensure a more professional and durable outcome:
- (3) 2x6x8 Lumber (three 2-inch by 6-inch boards, 8 feet long)
- (1) 2x8x8 Lumber (one 2-inch by 8-inch board, 8 feet long)
- Durable Screening Material (fiberglass is common and flexible, aluminum offers more rigidity)
- Pre-made Screen Molding (we highly recommend 1/4 x 3/4 inch to save time)
- Exterior-grade Wood Putty or Spackle
- Assorted Sandpaper (120-grit, 180-grit, 220-grit for smooth finish)
- Heavy-duty Staple Gun and Staples (3/8-inch or 1/2-inch leg length)
- Table Saw (for ripping boards accurately and consistently)
- Circular Saw or Miter Saw (for precise cross-cuts)
- Router with a Rabbeting Bit (essential for creating the screen groove; a 3/8-inch or 1/4-inch rabbeting bit is ideal)
- Chisel (for squaring up routered corners)
- Kreg Pocket Hole Jig and Kreg Pocket Hole Screws (for strong, concealed joinery)
- Kreg Wood Plugs (for cleanly concealing pocket holes)
- Utility Knife (for trimming excess screening)
- Tape Measure, Pencil, Speed Square
- Safety Glasses and Hearing Protection (always use when operating power tools)
Step-by-Step Tutorial: Build a DIY Screen Door
Time needed: 5 hours (excluding drying time)
Follow these detailed steps to craft a beautiful, sturdy, and affordable screen door for your home!
-
Determine Your Door Dimensions
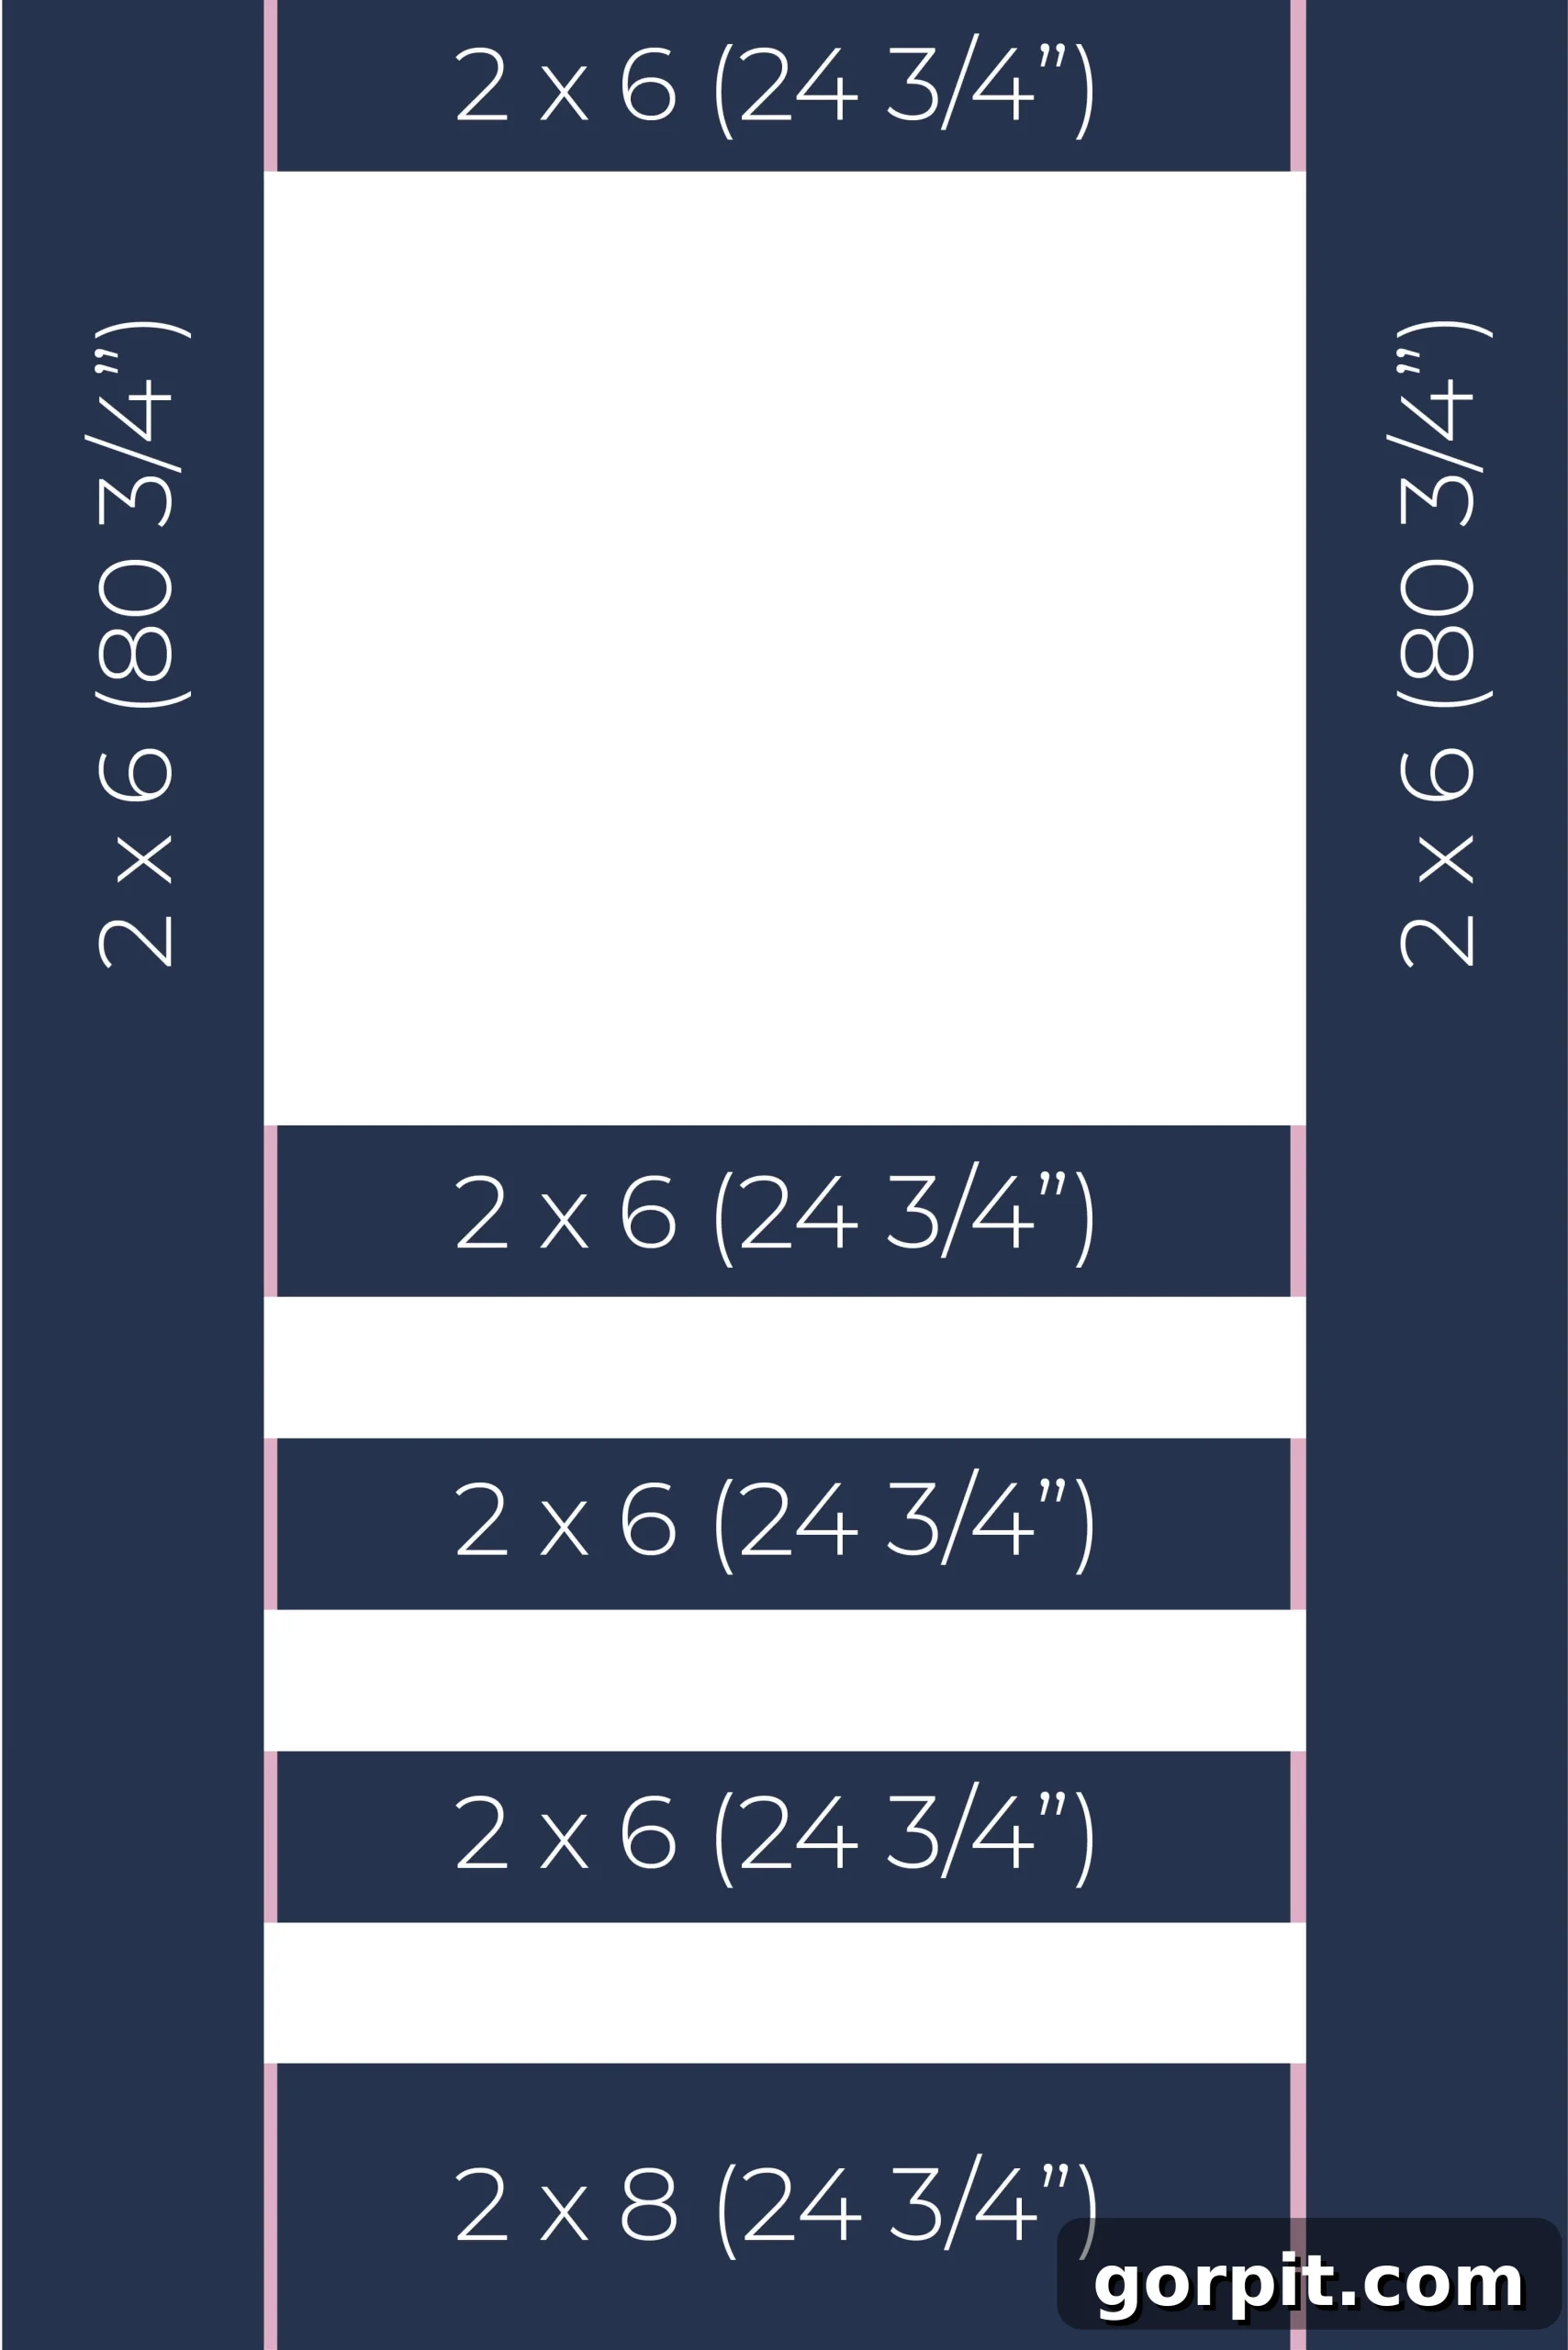
The success of your DIY screen door hinges on accurate measurements. Carefully measure the exact height and width of your existing door frame opening. Take measurements at multiple points (top, middle, bottom for width; left, middle, right for height) and use the smallest dimensions to ensure your new door will fit without binding. Most standard door openings are around 36 inches wide by 80 inches tall, but older homes often have unique sizes. For our project, the door measured 35 1/4 inches by 80 3/4 inches. When planning your cuts, consider a small clearance gap (e.g., 1/8 to 1/4 inch) around the perimeter to allow for easy opening and closing, especially with temperature and humidity changes. The diagram below illustrates our cut lengths and joint placements (not to scale for clarity). The pink lines indicate where the wood pieces join, simplifying the cutting process to straightforward straight cuts.

-
Precisely Cut Your Wood Pieces
Using either a circular saw or a miter saw, carefully cut all your lumber pieces to the precise lengths determined in the previous step. Precision here is paramount for a professional-looking and square door. Always double-check your measurements before making any cut. A table saw will be invaluable for ripping boards to specific widths, especially if you need to create custom dimensions for your door frame elements. For instance, after cutting our 24 3/4-inch length from the 2×8 for the bottom rail, we then ripped the remaining portion of that 2×8 down to the same width as the 2×6 pieces to ensure a uniform appearance throughout the frame. Remember to wear appropriate safety gear, including safety glasses and hearing protection, when operating power tools.
-
Assemble the Outer Frame
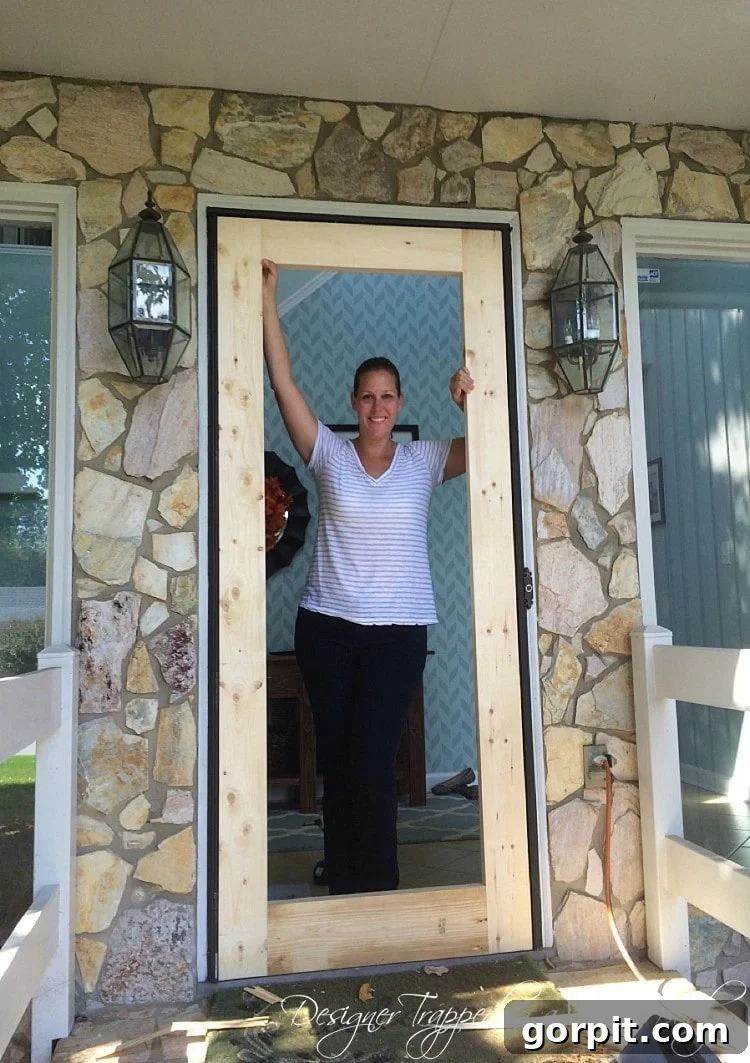
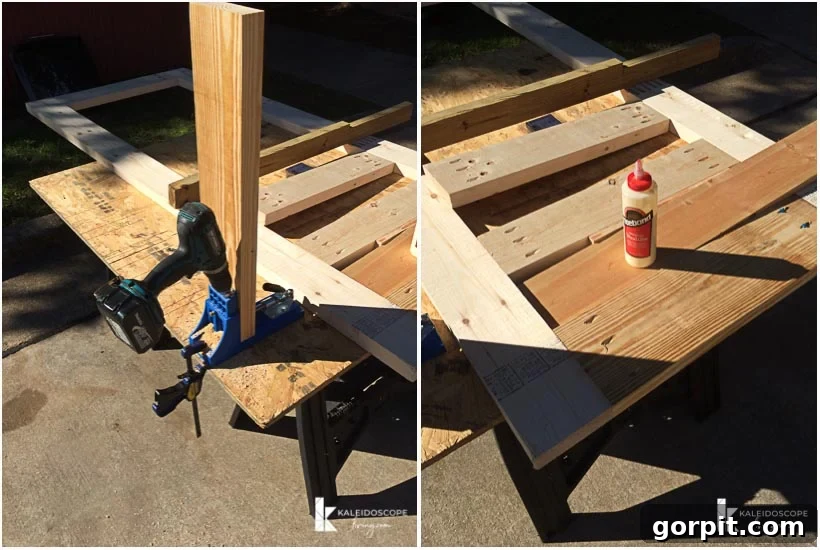
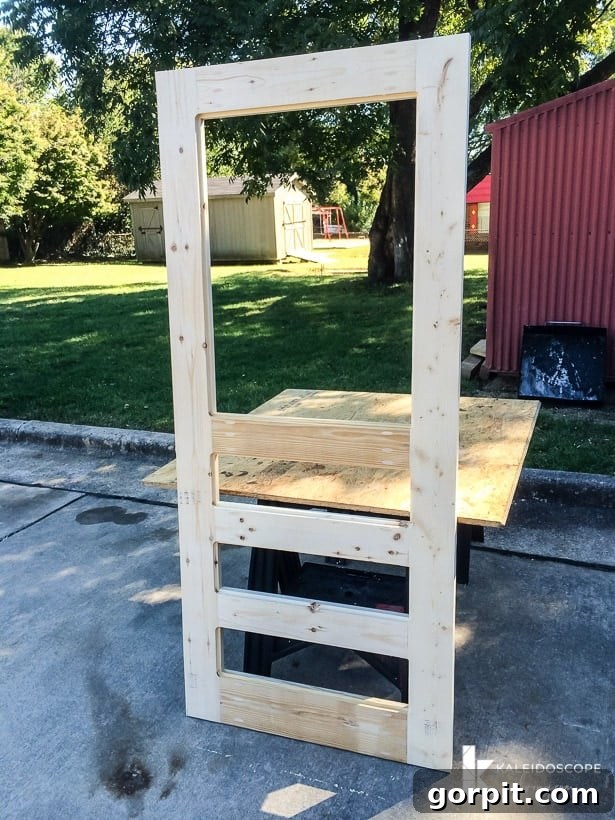
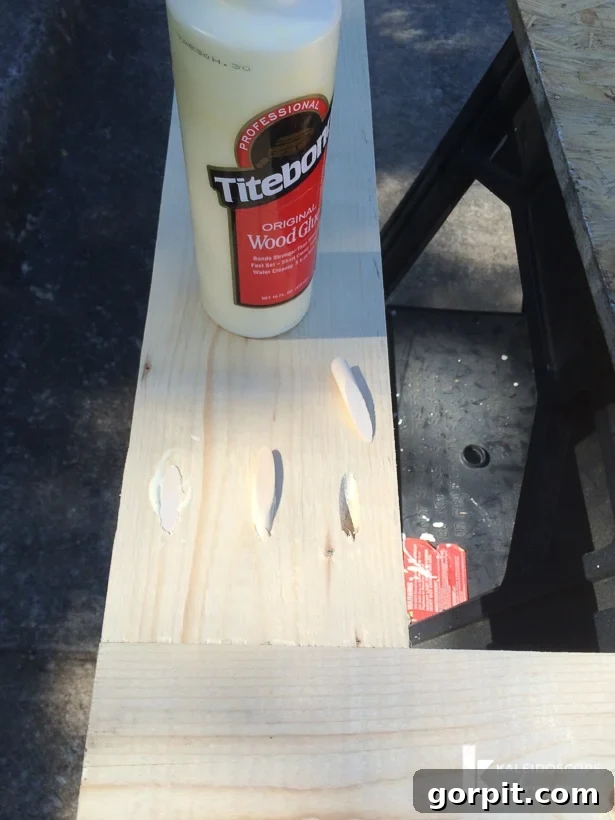
Once all your wood pieces are accurately cut, it’s time to begin assembly. Start with the outer perimeter of your screen door. Utilize a Kreg pocket hole jig to create strong, hidden joints. This system allows you to drill angled holes into one piece of wood, which then connects to another piece with specialized screws, creating a very robust and stable joint. Assemble the two vertical stiles and the top and bottom rails of your door’s outer frame first. After assembly, it’s critical to perform a “dry fit” – place the assembled outer frame into your existing door frame opening. This allows you to confirm that the dimensions are correct and that the frame fits snugly without being too tight or too loose. Make any minor adjustments now, before proceeding to the inner elements.
-
Mark Hinge Placement
If you are replacing an old storm door, you can often use the existing hinge locations on your door frame, which simplifies this step significantly. During your dry fit, carefully mark the precise positions where the hinges will attach to your new screen door. Use a pencil to transfer these markings onto the screen door frame. If you’re installing new hinges or don’t have existing placements, ensure hinges are spaced evenly for optimal support and smooth operation. Consider mortising (recessing) the hinges into the wood for a flush, professional finish, though this is optional for a screen door.
-
Complete the Screen Door Frame Assembly
Once you’re completely satisfied with the fit of the outer frame, proceed to attach the horizontal and any vertical intermediary pieces that form the design of your screen door. Again, use your Kreg pocket hole jig to create strong, secure connections between these inner frame elements and the outer frame. Ensure that all joints are tight and square, using clamps if necessary, to prevent any twisting or warping. A well-assembled frame is the backbone of a durable and functional screen door.
-
Fill and Smooth Imperfections
For a flawless, professional finish, address any visible gaps or imperfections. Apply exterior-grade wood putty or spackle to fill any small gaps between the joints of your assembled frame. This ensures a seamless appearance once painted. Next, insert your Kreg wood plugs into all the pocket holes created by your screws. Once the putty/spackle and wood plugs are completely dry (refer to product instructions for drying times), sand the entire screen door frame. Start with a coarser grit sandpaper (e.g., 120-grit) to smooth out any major discrepancies, then progressively move to finer grits (180-grit, then 220-grit) for an incredibly smooth, paint-ready surface. A smooth surface is crucial for an even paint application and a polished final look.
-
Create the Screening Groove (Rabbet Joint)
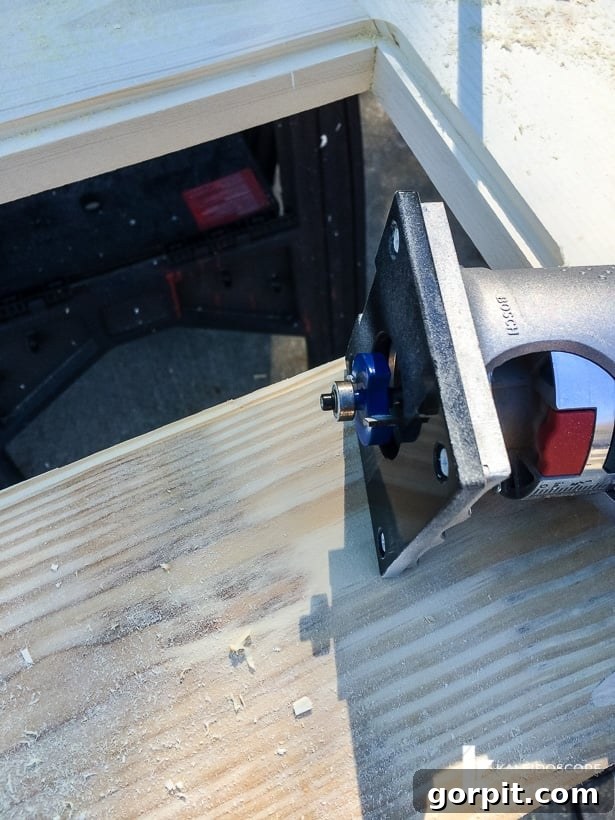
This step is critical for securely installing your screening material. On the back side of your screen door frame, you’ll need to use a router fitted with a rabbeting bit to create a groove (or rabbet) along the inner edges where the screen will sit. A rabbet joint is a recess cut along the edge or end of a board, creating a step. For this project, a 1/4-inch deep rabbet is highly recommended. While we initially used a 3/8-inch routing bit to make our rabbet 1/2 inch deep, we later realized that a 1/4-inch depth would have allowed us to use standard 1/4 x 3/4 inch screen molding commonly available at home improvement stores. This would have saved us significant time and effort in creating custom molding. Therefore, we strongly advise you to route out a 1/4-inch deep rabbet. After routing, you will need to use a sharp chisel to square up the rounded corners left by the router bit, ensuring neat, crisp corners for your screen and molding. Always prioritize safety when using a router: wear eye and ear protection, secure your workpiece, and keep hands clear of the bit.
-
Paint the Front Side of Your Screen Door
Now is the ideal time to paint the front side of your screen door. Painting before attaching the screen simplifies the process considerably, as you won’t have to worry about accidentally getting paint on the delicate screening material. Choose an exterior-grade paint that is durable and resistant to weather elements. Apply a high-quality primer first, especially if you’re making a significant color change or using a porous wood, to ensure excellent adhesion and a vibrant, long-lasting finish. Allow adequate drying time between coats and before proceeding to the next step.
-
Attach the Screening Material
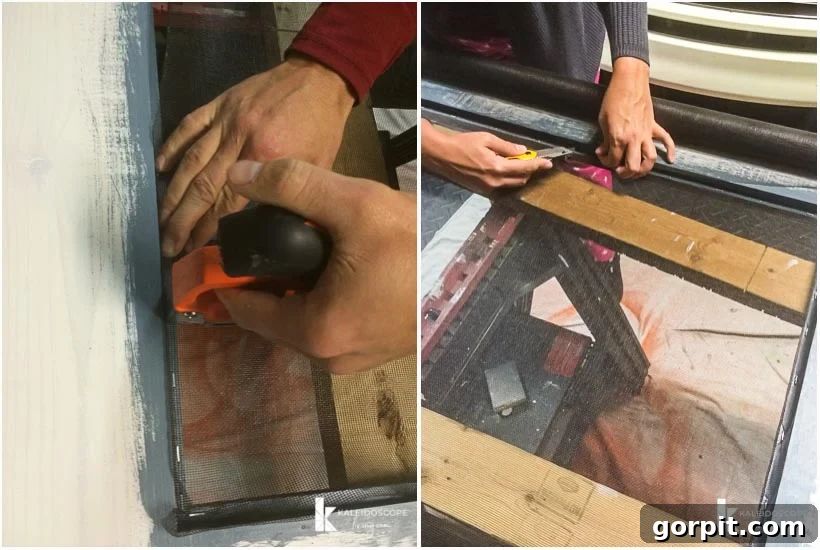
With the front painted, you’re ready to attach the screening. Lay your chosen screening material over the back side of the door, ensuring it covers all the rabbeted areas. Starting from one edge, use your staple gun to secure the screening within the rabbet groove. The key is to pull the screen taut, but not so tight that it stretches or tears. A good technique is to staple one side, then move to the opposite side, pulling gently to remove slack before stapling. Work your way around the perimeter, ensuring even tension. Having a second person to help hold the screen taut can make this step much easier. Once fully stapled, use a sharp utility knife to carefully trim away any excess screening material, leaving a clean edge within the rabbet.
-
Cut and Secure Screen Molding
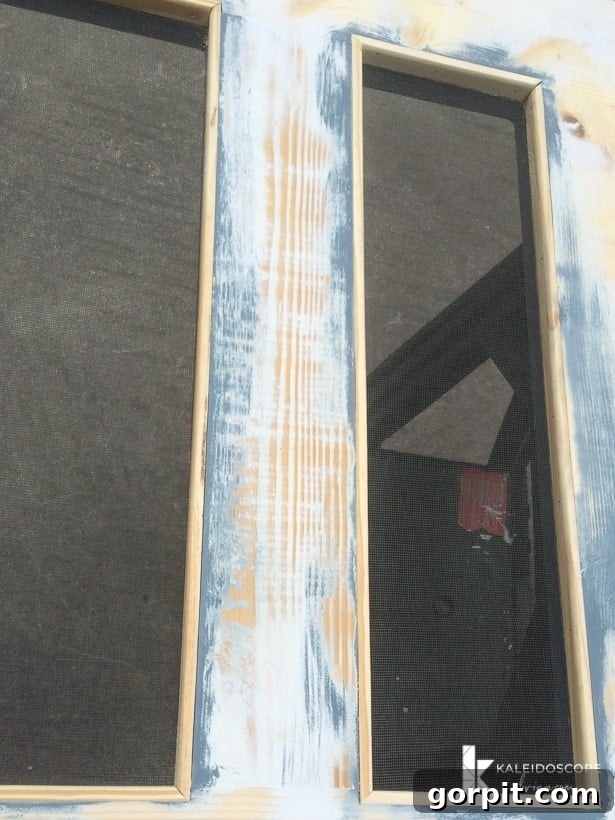
After the screening is securely in place, it’s time to cover those staples and create a finished look with screen molding. As mentioned in Step 7, we strongly recommend purchasing ready-made screen molding (typically 1/4 x 3/4 inch) from your local home improvement store. Trust us, attempting to create your own molding from scratch is an unnecessary amount of extra work. Measure and cut the molding pieces to fit precisely around the perimeter of your screened areas. Miter the corners at 45-degree angles for a seamless, professional joint. Attach the molding using small brad nails or staples, ensuring they are flush with the wood surface. This step not only conceals the staples but also adds a decorative frame around your screen, enhancing its visual appeal.
-
Paint the Back Side of Your Screen Door
With the screen and molding now attached, you can paint the back side of your screen door. Before painting, carefully tape off the screening material with painter’s tape to prevent any paint from getting onto it. This meticulous step ensures a clean and crisp finish. Apply your chosen exterior paint, ensuring even coverage and allowing for proper drying time between coats. The tape will protect your screen and ensure the overall aesthetics remain high.
-
Hang Your New Screen Door
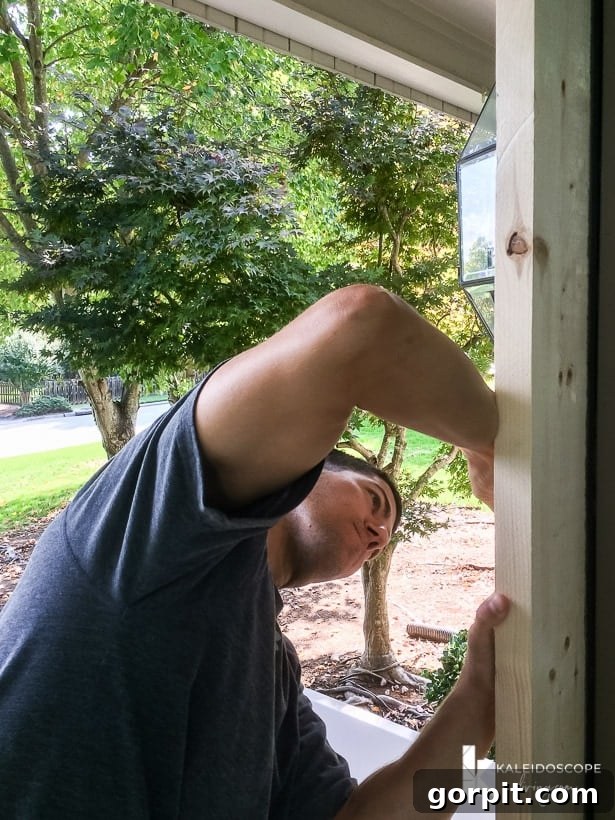
Once all paint is thoroughly dry, it’s time for the exciting moment: hanging your newly built screen door! Attach the hinges to the marked locations on your screen door, ensuring they are securely fastened with appropriate screws. Then, carefully align the door within its frame and attach the hinges to the door jamb. You may need an extra set of hands for this step to hold the door steady while you screw in the hinges. Check the door’s swing to ensure it opens and closes smoothly without rubbing against the frame. Adjust the hinges if necessary for optimal operation.
-
Attach Door Hardware
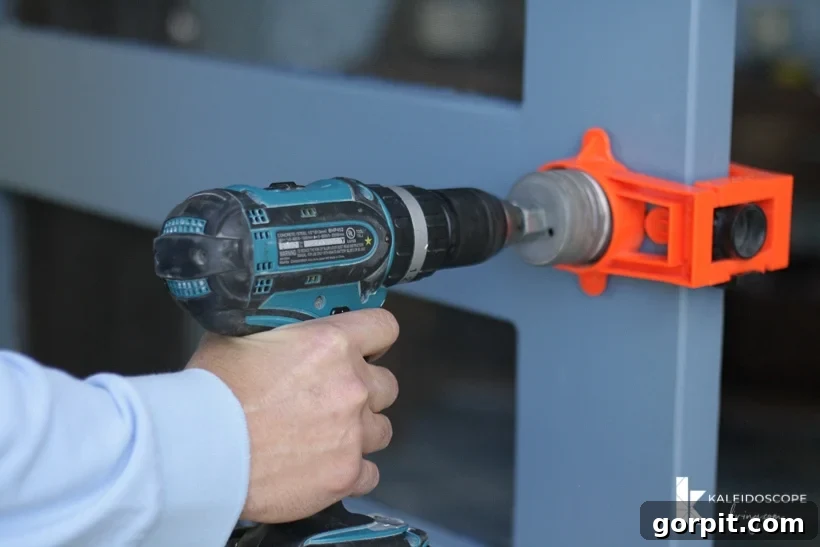
The final touch for your custom screen door is adding the hardware. Install your preferred door handle, latch, and any other desired accessories. We found that a doorknob installation kit we already owned made this process incredibly straightforward. If you desire, you can also add decorative elements like house numbers or a custom kickplate to personalize your door further. Stand back and admire your handiwork – you’ve just built a beautiful, custom screen door!
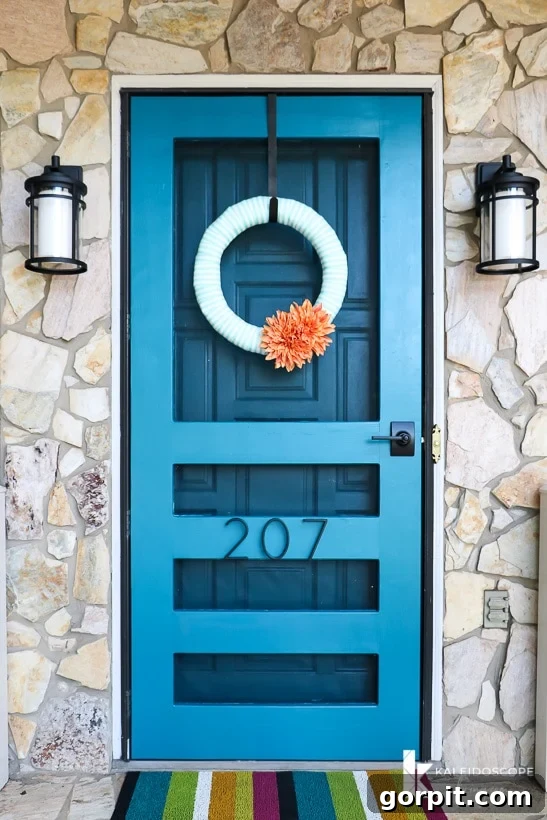
That’s it! We are absolutely thrilled with how our DIY screen door turned out. It perfectly embodies the style and quality we envisioned for our home. UPDATE: We recently repainted our screen door in a gorgeous shade called “Velvet Curtains” by Valspar to perfectly match our freshly painted front door, and we honestly love it even more now! This demonstrates the versatility and customizability of a DIY approach – you can always refresh its look to suit evolving tastes or exterior updates.
Time and Cost to Build Your DIY Screen Door
While some DIY projects offer dramatic savings in both time and money, building a custom screen door often falls into a different category. Our primary motivation for undertaking this project wasn’t solely cost reduction, but rather the inability to find an off-the-shelf option that met our specific needs for aesthetics, quality, and durability. However, we did achieve some savings.
The total lumber cost for our screen door was approximately $32.00, and the screening material added another $10.00. Compared to purchasing a pre-made screen door, which can range anywhere from $75 to $200 (and often for a lesser quality or less appealing design), we certainly saved some money, though not a colossal amount. The true value, however, lies in the superior quality and bespoke design we achieved.
In terms of time, the actual construction of our screen door took us around 5 hours. This estimate excludes the necessary drying times for wood putty, spackle, and paint. Considering the precision involved in measuring, cutting, assembling, and finishing, this timeframe is quite reasonable for a custom build. The effort was undeniably well worth it to achieve precisely the door we wanted – a high-quality, sturdy, and visually stunning addition to our home that will last for years to come.
By diligently following this step-by-step tutorial, you too can create a DIY screen door that not only boasts exceptional quality and durability but also perfectly matches your desired aesthetic. So, gather your tools, source your materials, and begin the rewarding journey of building your unique, custom DIY screen door today! The satisfaction of crafting something beautiful and functional with your own hands is truly unparalleled.
More OUTDOOR IDEAS
SEE ALL outdoor POSTS
-
Fire Pit Ideas for Every Outdoor Space
-
How to Make a DIY Outdoor Chandelier
-
Modern DIY Garden Trellis
-
DIY Outdoor Electrical Box Cover
-
DIY Diamond Wire Trellis for a Vine
-
A Complete Review of Vego Garden Beds: Pros, Cons, and Everything In-between
Other posts you may enjoy:
- 4 Steps to Restoring Teak Furniture
- 5 Steps to Prepare Your House for Exterior Paint
- Porch Decorating Ideas and Designer Tips
Curious about my unique approach to transforming rooms and spaces within our home? Discover the power of Designer in a Binder® – your affordable and straightforward guide to home decoration.
For exclusive content, behind-the-scenes sneak peeks, and fresh DIY inspiration delivered directly to your inbox, be sure to subscribe before you go!