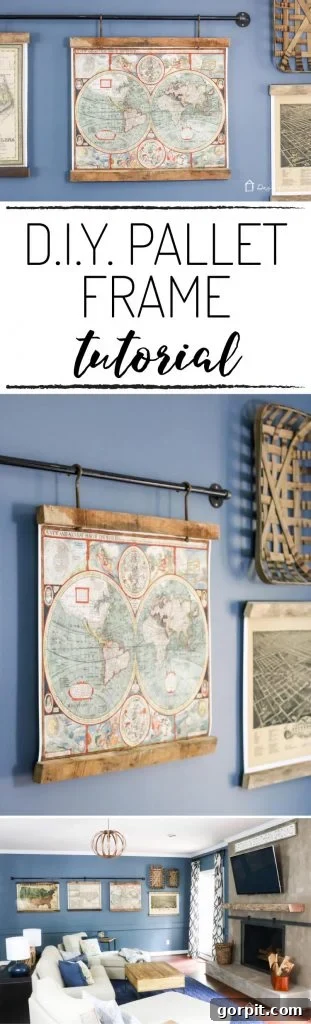
Learn How to Make Unique Picture Frames from Reclaimed Materials and Hang Them from a Pipe!
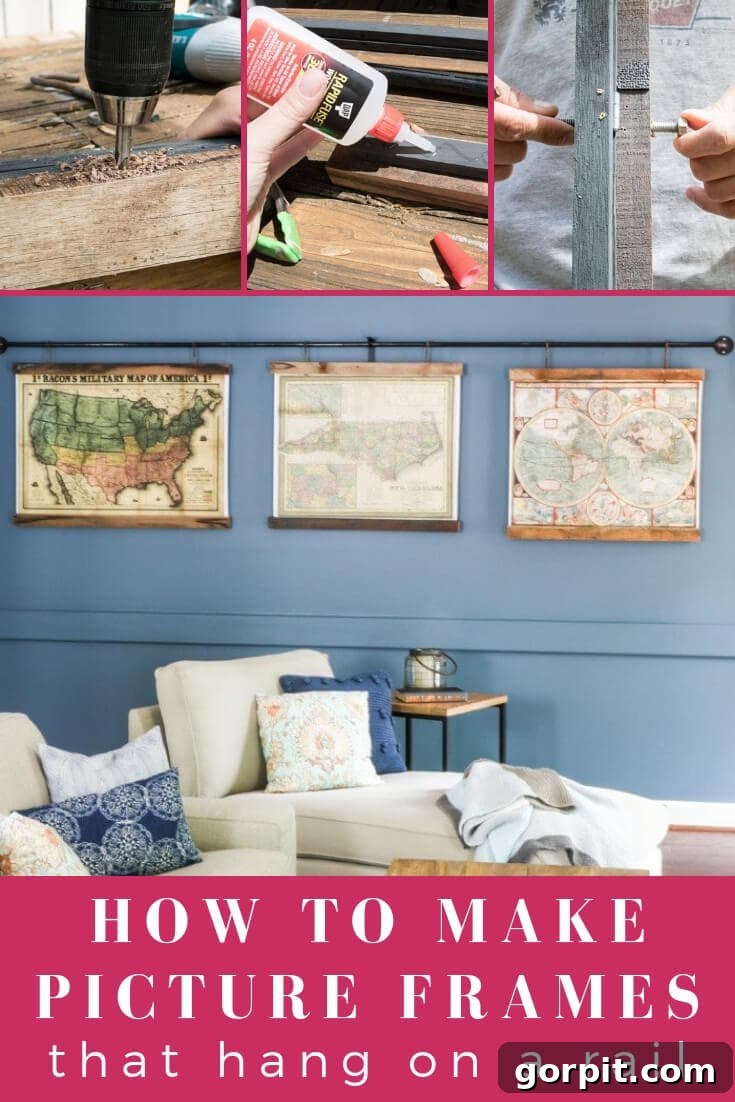
A big thank you to Dap for sponsoring this project. As always, all opinions are 100% my own based on my experience.
Are you searching for an affordable, impactful way to transform a large wall in your home? Look no further! Today, we’re diving into an exciting DIY project that will teach you exactly how to make picture frames from reclaimed materials – specifically, old pallets – and then elevate them further by hanging them from an industrial pipe. This unique approach creates stunning, customizable wall art that won’t break the bank and adds unparalleled character to any room.
My journey to this project began with a familiar challenge: a vast, empty wall in our family room that demanded attention. Traditional artwork for such a significant space can quickly become prohibitively expensive. I knew I needed a creative, budget-friendly solution that still delivered on style and personality. Serendipitously, my husband, Joe, brought home an old pallet, and my creative gears immediately started turning. We’ve always had a fondness for maps, and I realized I could source reproduction maps quite inexpensively, making them the perfect focal point. The idea was born: combine rustic reclaimed wood with vintage maps, all presented in an unexpectedly modern way. This comprehensive guide will walk you through two distinct methods for crafting these picture frames, including a clever design that allows you to swap out your prints with ease, and detailed instructions on how to create that distinctive pipe hanging system. Get ready to add character, charm, and a touch of industrial chic to your home!
Why Choose Reclaimed Wood for Your Picture Frames?
Using reclaimed materials for DIY projects offers a multitude of benefits, making it an increasingly popular and responsible choice for homeowners and crafters alike. When you decide to make picture frames from reclaimed wood, you’re not just crafting; you’re contributing to a sustainable lifestyle and creating pieces with genuine soul.
- Sustainability and Eco-Friendliness: By repurposing old pallets, barn wood, or other discarded timber, you’re actively diverting waste from landfills and significantly reducing the demand for newly harvested lumber. This environmentally conscious practice makes your project a small but impactful step towards a greener home.
- Unparalleled Character and History: Reclaimed wood comes with a unique story etched into its grain. The natural imperfections – knots, nail holes, saw marks, weathered textures, and varying color tones – give each piece a distinct personality that new, uniform wood simply cannot replicate. This inherent character adds warmth, depth, and a sense of history that elevates your decor beyond the ordinary.
- Cost-Effectiveness: One of the most significant and appealing advantages is the cost. Materials like pallets, old fence planks, or leftover construction wood can often be acquired for free or at a very minimal cost from local businesses, construction sites (with permission), or online marketplaces. This makes creating high-impact, custom art incredibly budget-friendly.
- Unique Aesthetic and Versatility: The raw, authentic beauty of reclaimed wood perfectly complements a wide variety of interior design styles. Whether your home is industrial, rustic farmhouse, bohemian, modern minimalist, or even eclectic, these frames will seamlessly integrate and enhance your existing decor, making your artwork truly one-of-a-kind.
- Durability and Strength: Often, reclaimed wood has already stood the test of time, proving its resilience against the elements. Once properly prepared, cleaned, and treated, it can be just as strong, if not stronger and more stable, than newly milled lumber.
For this specific project, we primarily opted for pallet wood. Pallets are incredibly accessible, often available for free, and offer a fantastic source of raw material once disassembled. While they require some effort for de-nailing, cleaning, and sanding, the satisfaction of transforming discarded wood into beautiful, functional picture frames is immense, yielding results that far surpass anything you could purchase off the shelf.
Gathering Your Materials: What You’ll Need to Make Picture Frames
Essential Frame Building Materials:
- Reclaimed Wood: An old pallet is ideal, but barn wood, fence planks, or other salvaged timber work beautifully. Ensure it’s free of major rot or pests.
- Maps or Large Prints: Choose artwork that inspires you! (I purchased all of my reproduction maps at this awesome Etsy store)
- DAP Rapid Fuse Wood Adhesive: A crucial component for strong, durable bonds on often irregular reclaimed wood, minimizing the need for nails or screws that can cause splitting.
- Wood Clamps: Essential for firmly holding wood pieces together while the adhesive cures.
- Table Saw: (Optional but recommended) For ripping wider reclaimed wood into uniform strips, especially if your source material is varied.
- Chop Saw or Miter Saw: (Alternatively, a good hand saw and miter box) For making precise, clean crosscuts to achieve desired frame lengths.
- Drill and Drill Driver: For pre-drilling holes and fastening screws.
- Sanding Supplies: Sandpaper (various grits) or an orbital sander to smooth rough edges and prepare the wood surface.
- Safety Gear: Always wear safety glasses, work gloves, and hearing protection when operating power tools.
Optional Materials for Changeable Prints & the Industrial Pipe Hanging System:
*NOTE: To ensure proper assembly, all your pipe fittings (elbows, nipples, flanges) must match the diameter of your chosen iron pipe. For a robust industrial look, we opted for 1-inch pipe.*
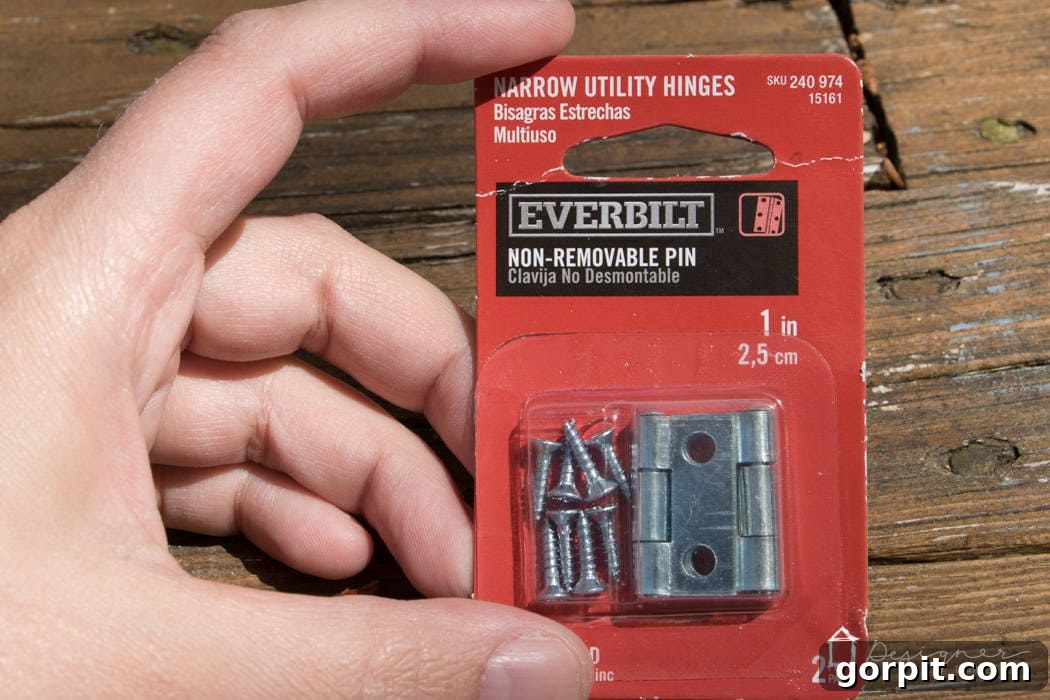
- Narrow Utility Hinges: These enable the backer strips to pivot, allowing for easy print swapping.
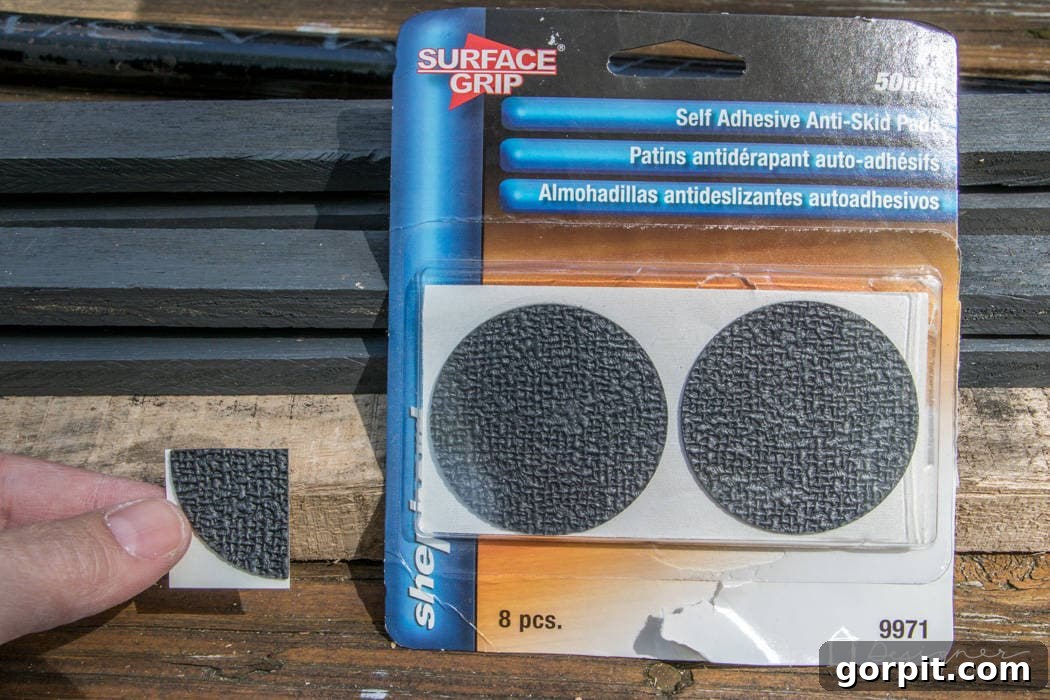
- Anti-Skid Pads: Small adhesive pads to secure prints within the frame and prevent slippage.
- Paint or Stain: (Optional) For finishing your reclaimed wood or for adding a protective or aesthetic coat to the pipe components.
- Screw Hooks and Nuts: These will serve as the attachment points for hanging the frames from the pipe rod. (We loved the look of old, rusted ones for added character!)
- Iron Pipe: A 10-foot length is a good starting point for multiple frames, but adjust based on your wall size and number of frames.
- 2 90-Degree Iron Elbows: To connect the main pipe to the vertical support pieces.
- 2 Iron Nipples: Short threaded pipe sections that extend from the flanges to the elbows.
- 2 Iron Floor Flanges: These are the circular bases used to securely mount the pipe system to the wall.
- Additional Wall Supports: A central curtain rod bracket is highly recommended for long pipes to prevent sagging from the weight of multiple frames.
Method 1: The Super Easy Way to Make Fixed Picture Frames
This method is ideal if you’re looking for a quick, straightforward approach to display your prints permanently. It’s incredibly fast, requires fewer steps, and still captures the fantastic aesthetic of reclaimed wood. Perfect for those who want a simple solution without the need to frequently change their artwork.
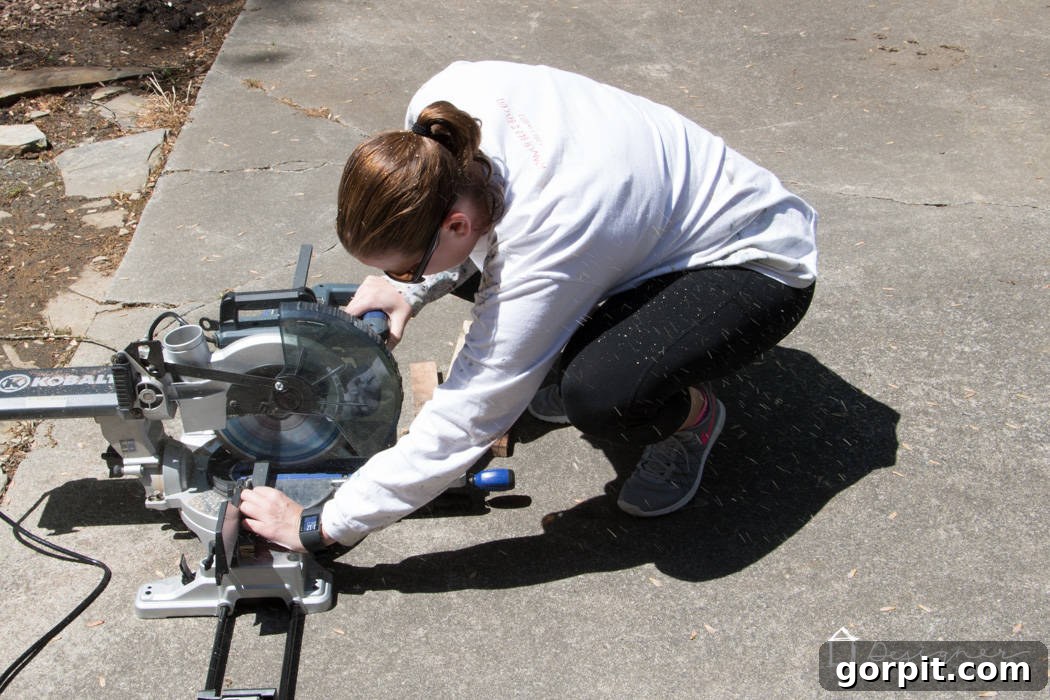
- Prepare and Cut Your Wood Pieces: For each print you intend to frame, you will need four uniform lengths of reclaimed wood. Use a compound miter saw or a reliable hand saw to cut these pieces to your desired length. For a visually appealing effect, we suggest cutting them so they overhang your map or print slightly on the top and bottom edges, creating a natural and robust border. Ensure all cuts are precise and straight for a clean, professional finish.
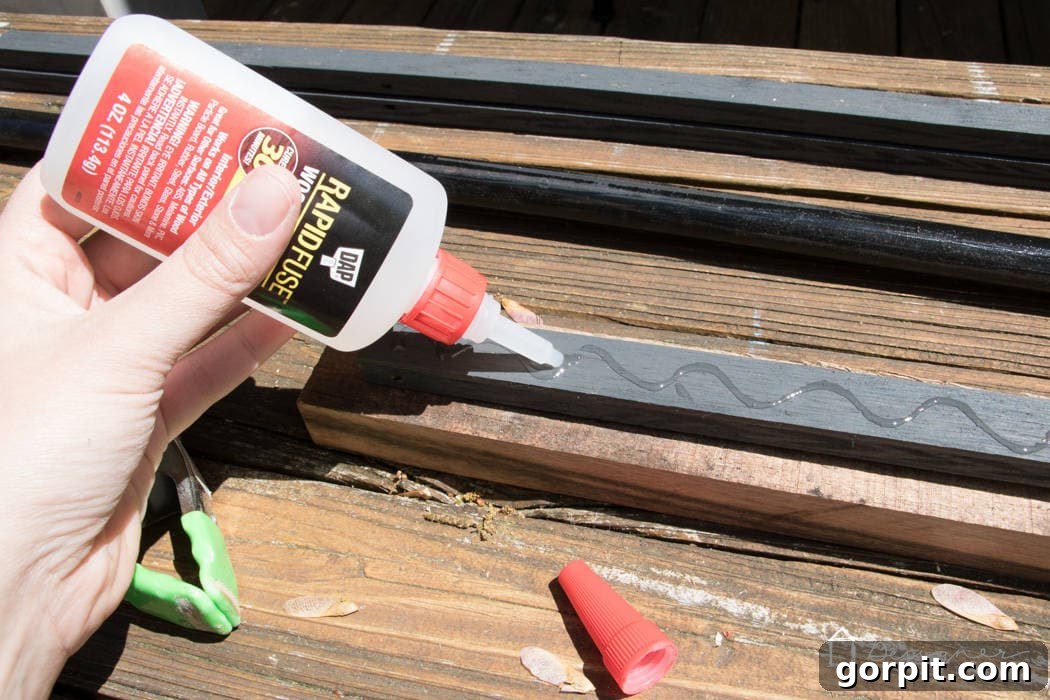
- Gather Your Adhesive and Clamps: Have your DAP Rapid Fuse Wood Adhesive and a set of sturdy clamps ready. Rapid Fuse is an excellent choice for this project, especially when working with reclaimed wood, as it forms a powerful and reliable bond quickly, often eliminating the need for nails or screws which can sometimes split older, more brittle timber.
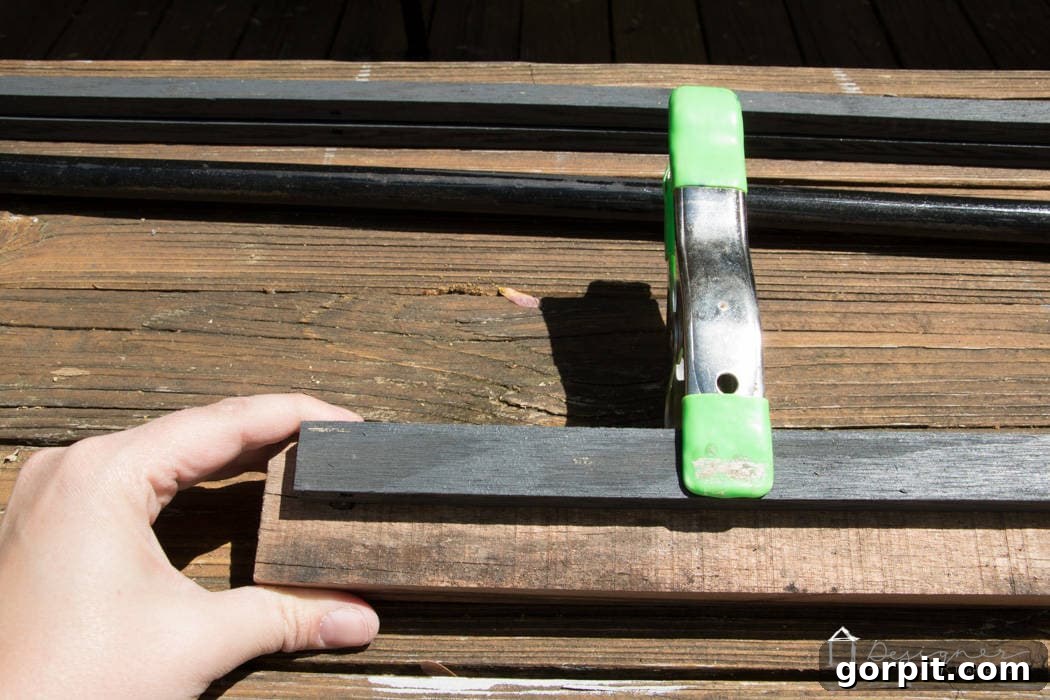
- Assemble and Clamp the Frame: Apply a small, even bead of Rapid Fuse along the edge of two of your prepared wood pieces. Carefully position your print or map between these two pieces, ensuring the edges are aligned precisely and the print is centered. Once positioned, use your clamps to firmly hold the pieces together, creating the top or bottom section of your frame. Repeat this exact process for the other two wood pieces at the opposite end of your print. Allow the adhesive to cure completely for at least 30 minutes, or according to the specific product instructions. The strong bond will securely hold your artwork in place.
- Hang Your Finished Artwork: Once the adhesive has fully cured and the frame is rigid, your beautifully framed print is ready for display! Attach your preferred picture hanging hardware to the back of the frame. For a no-fuss, damage-free hanging solution that’s perfect for many wall types, I’m personally a huge fan of Command Picture Hanging Strips, especially for lighter prints or temporary displays.
It truly is that straightforward! This method allows you to quickly transform your favorite prints into stylish, eye-catching wall art, leveraging the rustic charm and affordability of reclaimed wood. It’s an instant and satisfying upgrade for any space!
Method 2: How to Make Picture Frames for Easily Swappable Prints (and the Industrial Pipe Hanging System)
If you desire more flexibility, the ability to effortlessly change your displayed prints, or are set on incorporating the unique industrial pipe hanging system, this method is tailored for you. While it involves a few more steps, it remains entirely manageable for any enthusiastic DIYer. Don’t be deterred by the detailed instructions; the resulting functionality and aesthetic are well worth the effort!
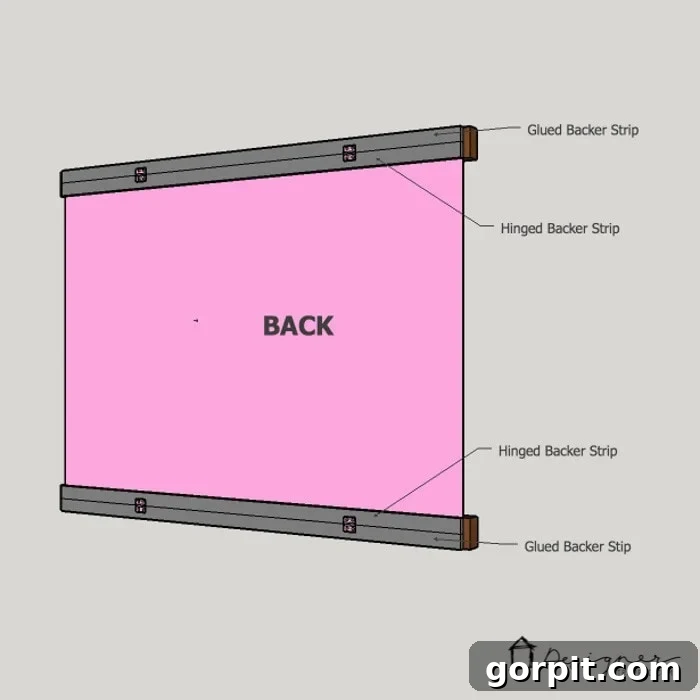
To help you visualize the construction, here are diagrams identifying the different pieces we’ll be referring to throughout this tutorial. Understanding these components will make the assembly process much clearer and simpler to follow:
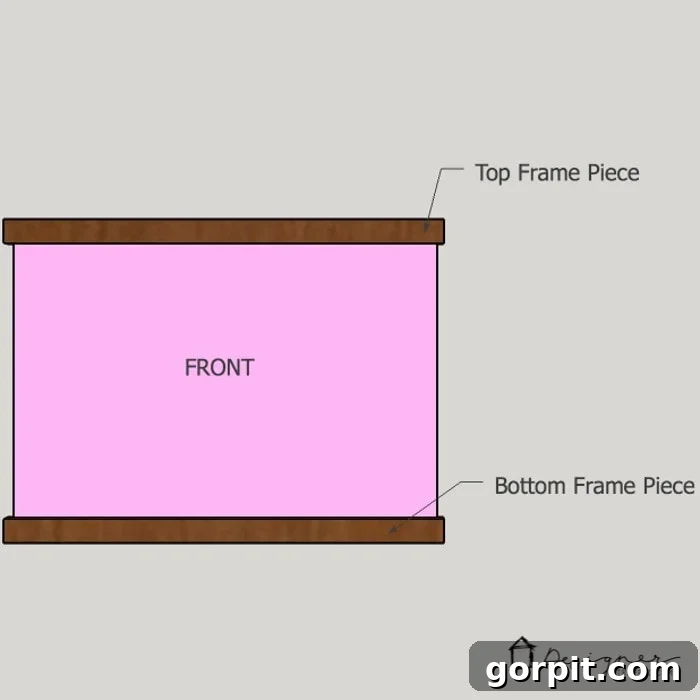
- Prepare Your Front Frame Pieces: Begin by preparing the primary wood pieces that will form the visible front of your frames. If your reclaimed wood (such as pallet planks) is inconsistent in width or wider than desired, use a table saw to “rip” it down to a uniform, appealing width. This step is optional but allows for greater consistency and customization. However, broader wood pieces also create a striking visual impact, so adjust according to your aesthetic preference and the amount of material you have available.
- Create Backer Strips (Glued & Hinged): For the crucial back support of your frames, we will create two types of backer strips per frame. To conserve our limited pallet wood, we opted to use plywood for these, but any suitable wood will work. Start with wood pieces that match the width of your front frame pieces (from Step 1). Using your table saw, carefully rip each of these backer pieces precisely in half lengthwise. One half of each will become the “glued backer strip,” permanently attached to the frame, while the other half will become the “hinged backer strip,” designed to pivot open and closed. This innovative design is central to the frames’ print-swapping functionality.
- Cut All Wood Pieces to Length: With your front frame pieces and backer strips prepared to their correct widths, it’s time for final length cuts. Utilize a compound miter saw or a precise hand saw to cut all these pieces to the exact desired length. It’s important that all corresponding pieces are uniform. As with Method 1, we recommend cutting them to slightly overhang the width of your maps or prints, creating an attractive and deliberate border around your artwork.
- Attach the Glued Backer Strips: Now, permanently attach the first set of backer strips. Apply a generous but even amount of DAP Rapid Fuse Wood Adhesive to one side of each “glued backer strip.” Carefully align and press one glued backer strip onto the back of each top and bottom front frame piece. When working with delicate, reclaimed wood, high-quality adhesives like Rapid Fuse are invaluable. They form extremely strong bonds and minimize the risk of splitting or damage that can occur when using nails or screws on older timber.
- Clamp and Cure: Securely clamp the newly glued pieces together, ensuring they are stable and flat during the curing process. Allow the Rapid Fuse to cure for the recommended 30 minutes. If you are constructing multiple frames, you can efficiently prepare the next set of pieces while the first set cures, optimizing your workflow.
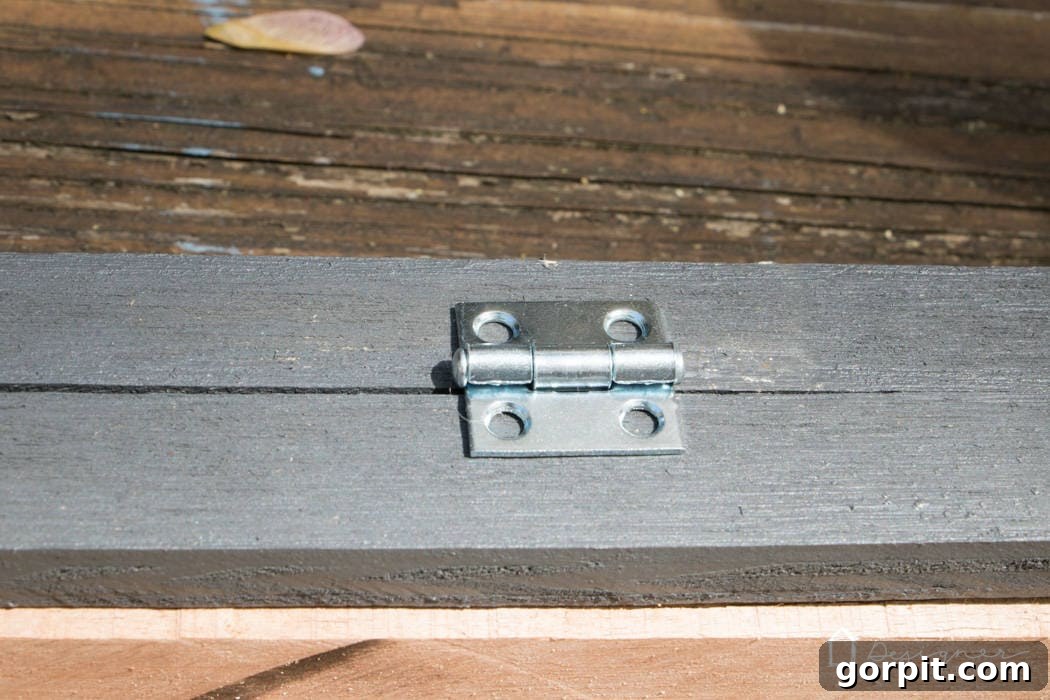
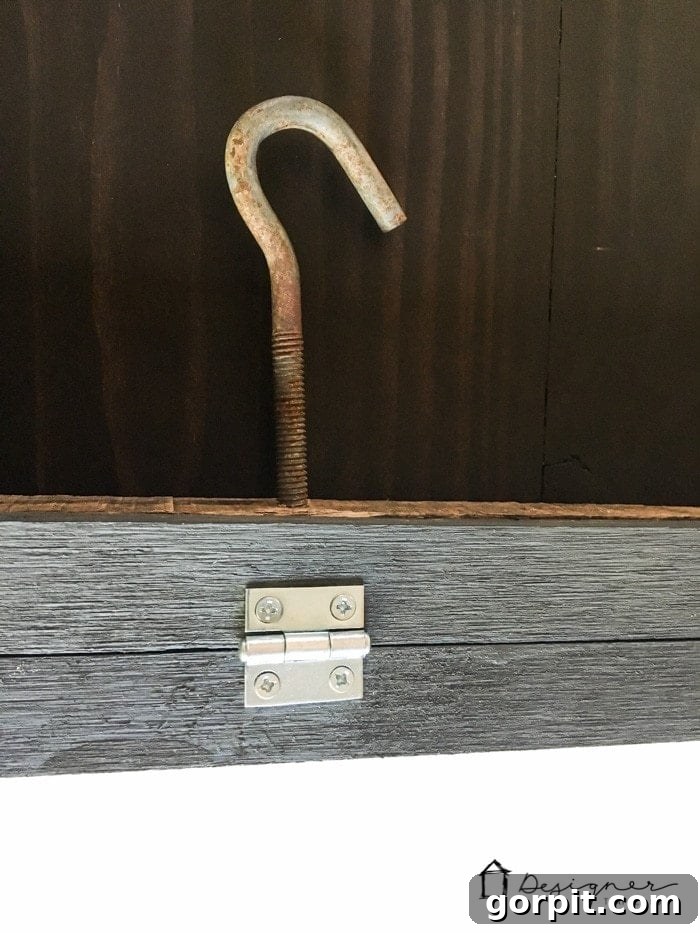
- Attach Hinges and Hinged Backer Strips: Once the glued backer strips are firmly attached and the adhesive has completely cured, it’s time to add the hinges. Position your narrow utility hinges evenly along the edge of the *glued* backer strip. Attach one side of each hinge to the glued backer strip using small screws. Then, align and attach the corresponding “hinged backer strip” to the other side of the hinge, ensuring it can pivot smoothly open and closed. This creates the essential “door” mechanism for inserting and removing your prints.
- Add Anti-Skid Pads: To ensure your valuable maps or prints remain perfectly positioned and prevent any unsightly slipping within the frames, apply anti-skid adhesive pads to the inside surface of the backer strips. These small but highly effective additions provide crucial friction, keeping your artwork securely in place for long-term display.
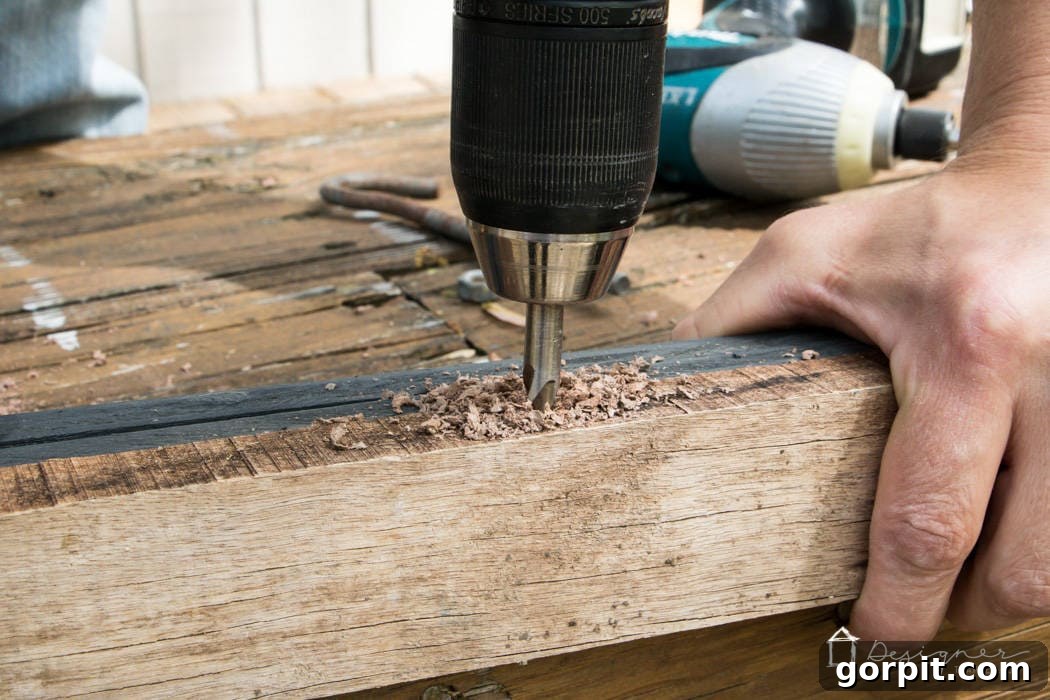
- Drill for Screw Hooks: Select your top frame pieces. Using a drill bit that is slightly larger than the diameter of your screw hooks, carefully drill two holes through the top edge of each frame. These hooks will serve as the attachment points for suspending your frames from the industrial pipe rod. Ensure the holes are evenly spaced for balanced and aesthetically pleasing hanging.
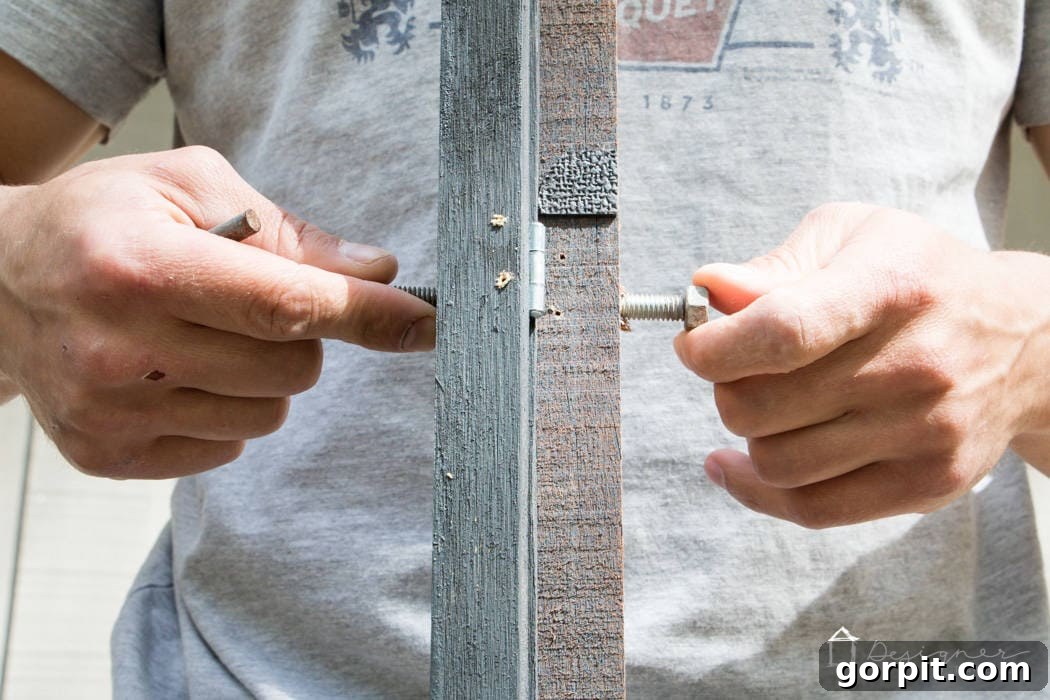
- Fasten Screw Hooks with Nuts: Insert your screw hooks into the pre-drilled holes from the top. On the backside of the frame, securely fasten a nut onto the threaded end of each screw hook. This simple but critical step provides extra security and significantly reinforces the hooks, preventing them from pulling out, especially given the potential weight of the frames and prints. We found that using old, rusted nuts added an authentic, charming industrial touch.
- Insert Your Print and Secure: Now for the exciting part! Gently slide your chosen map or large print between the front frame pieces and the hinged backer strips. Take your time to ensure the print is perfectly positioned and aligned. Once satisfied, carefully close the hinged backer strips and secure them with two small screws on each end. This ingenious, accessible design allows you to easily open the back, remove or insert a new print, and then securely close it again whenever you wish to refresh or update your display.
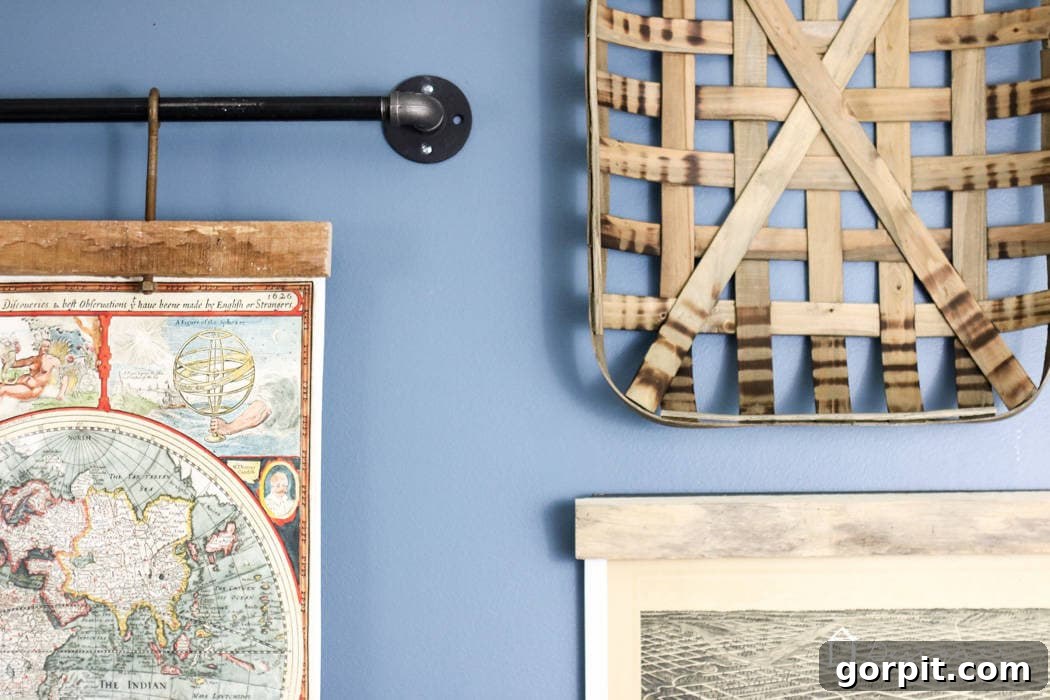
- Assemble and Hang Your Industrial Pipe Rod: The final step is to install your striking industrial pipe hanging system. This rod will serve as the anchor for your framed artworks and is a key element of the overall aesthetic. Assemble your 10-foot iron pipe (or custom length) by attaching the 90-degree elbows, iron nipples, and iron floor flanges to create a secure wall-mounted rod. Due to the substantial weight of multiple reclaimed wood frames, especially if they are large, we highly recommend adding a central curtain rod bracket. This provides crucial additional support, preventing any undesirable sagging of the pipe over time and ensuring your beautiful art remains perfectly displayed and stable.
Congratulations! You’ve successfully mastered two distinct methods for how to make picture frames from reclaimed materials, including a versatile system for changing prints and a unique industrial pipe hanging solution. This project is not only incredibly affordable and environmentally friendly, but it also results in genuinely unique, visually stunning, and highly functional wall art. We are absolutely thrilled with the outcome and the character it adds to our home!
Styling Your Reclaimed Wood Frames: A Gallery of Inspiration
The inherent beauty of these DIY frames lies in their incredible versatility. The rustic charm of reclaimed wood, combined with the raw, industrial edge of the pipe hanging system, makes them suitable for a wide array of interior design styles. From modern farmhouse to urban loft, these frames will find their place. Here’s a glimpse into how we styled ours and some inspiring ideas for integrating them into your own living space:
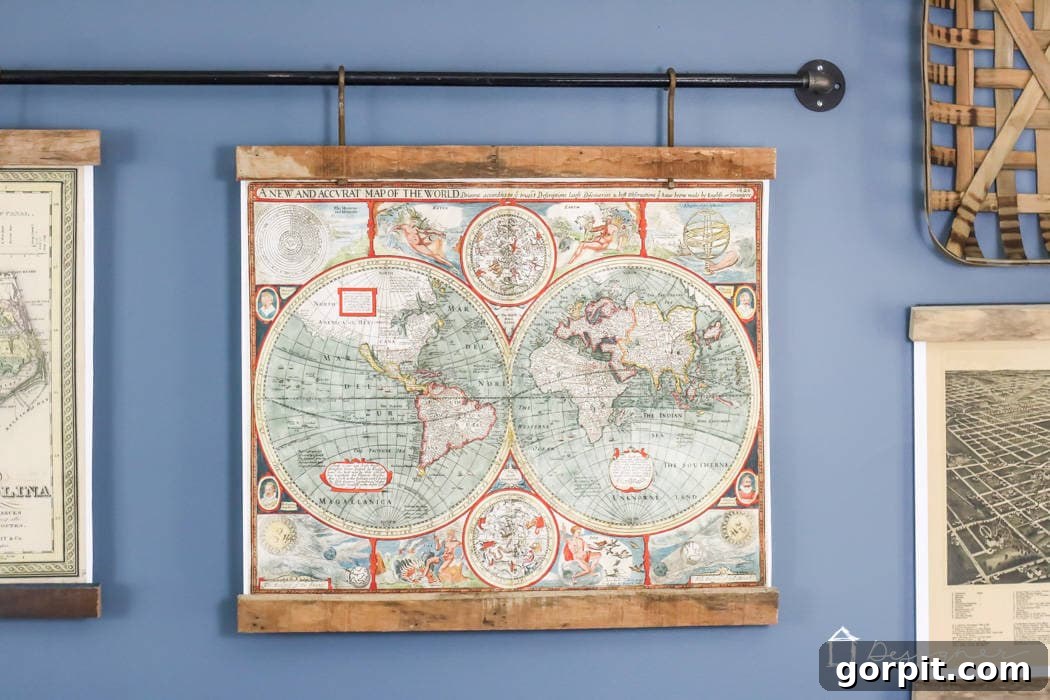
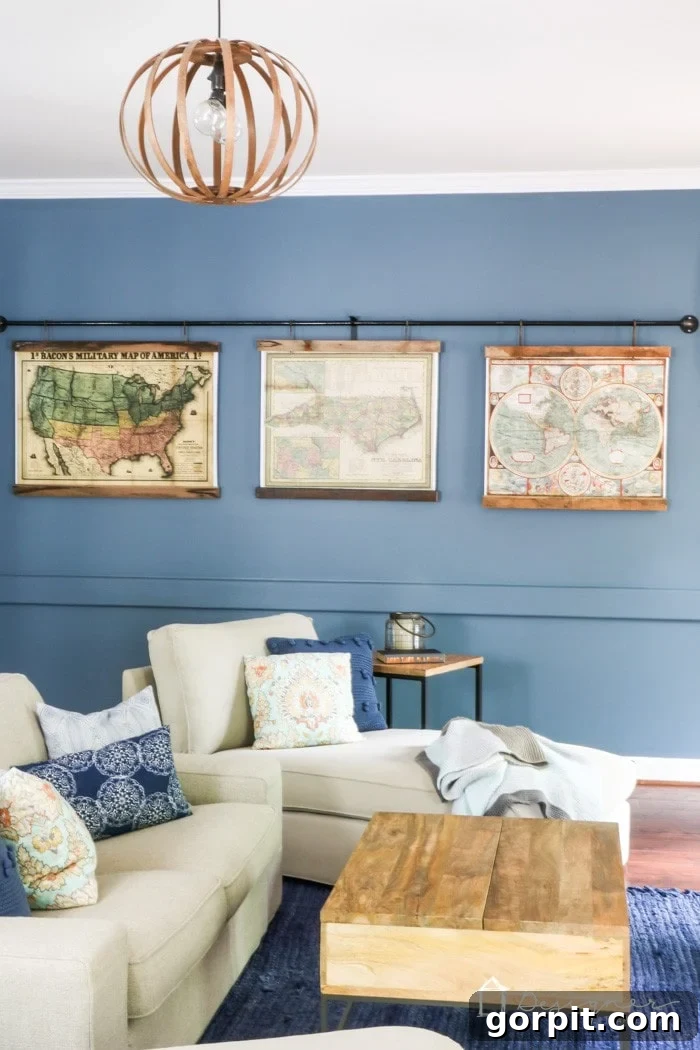
Our framed maps look particularly striking alongside our recently updated fireplace, which we deliberately gave an industrial feel. We even crafted that DIY barn door style fireplace screen ourselves, further enhancing the cohesive rustic-industrial aesthetic throughout the room. The blend of textures and materials creates a warm yet sophisticated ambiance. You can read more about our fireplace makeover in this post to see how we achieved this look.
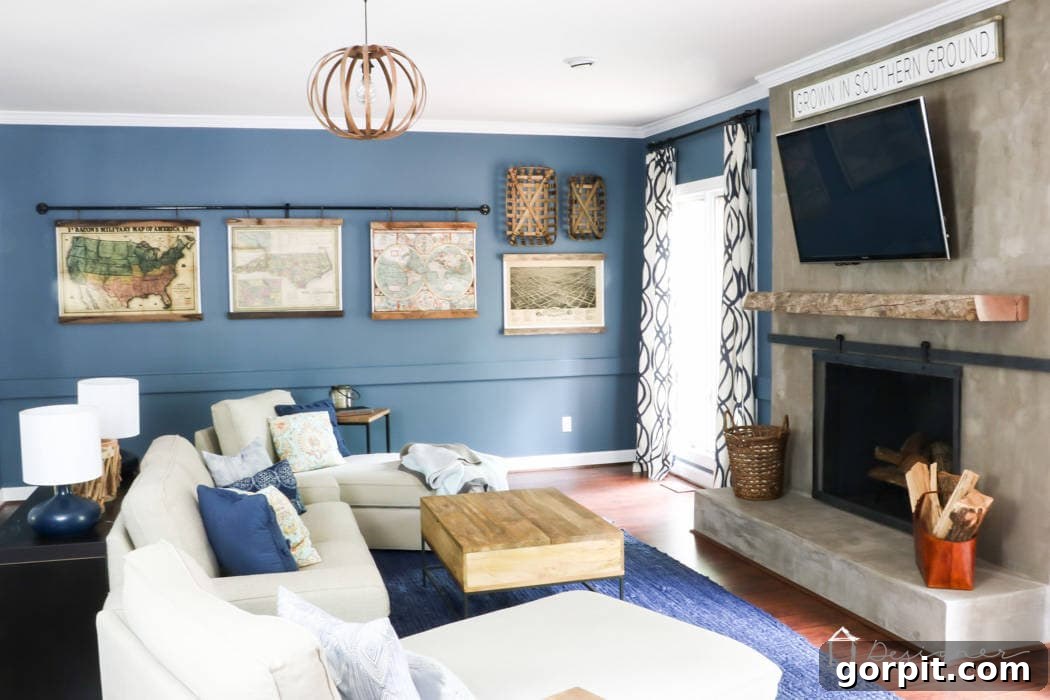
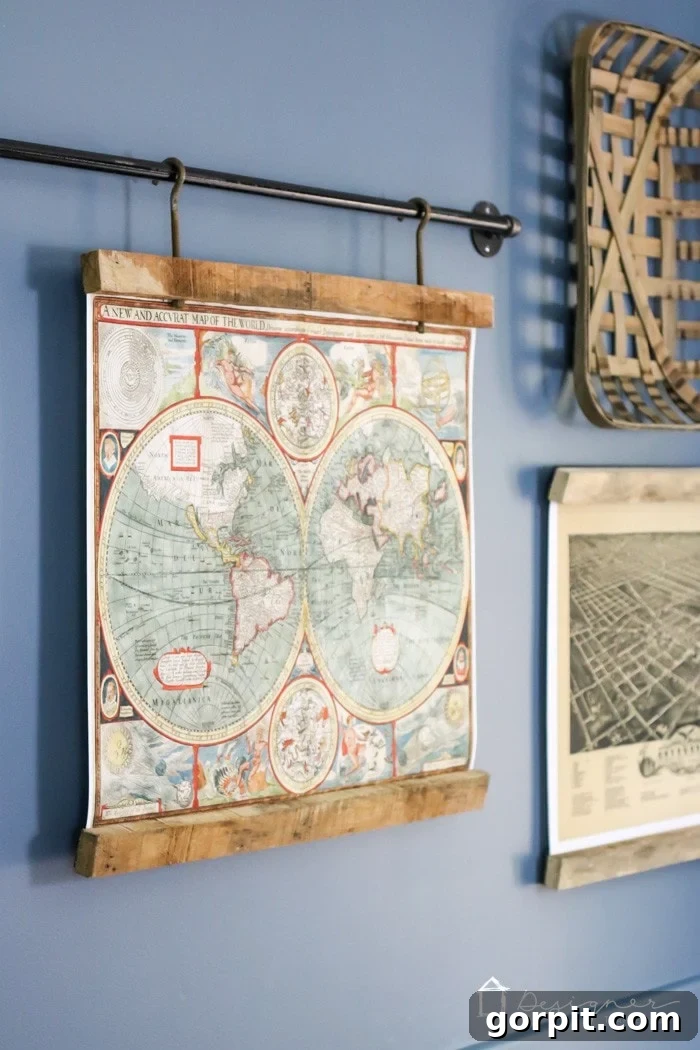
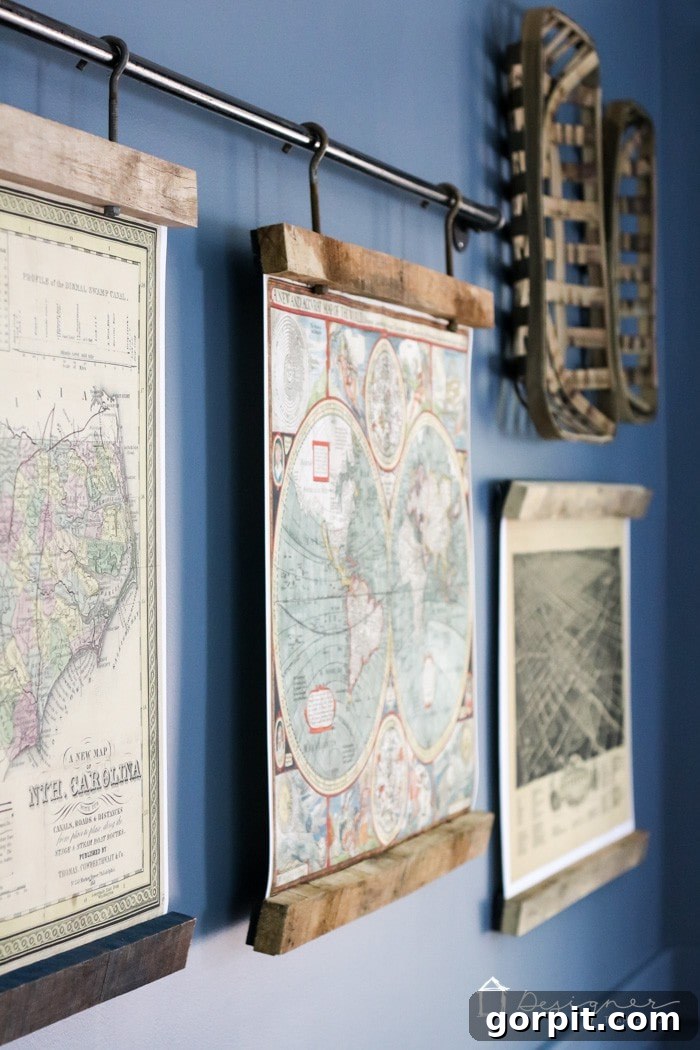
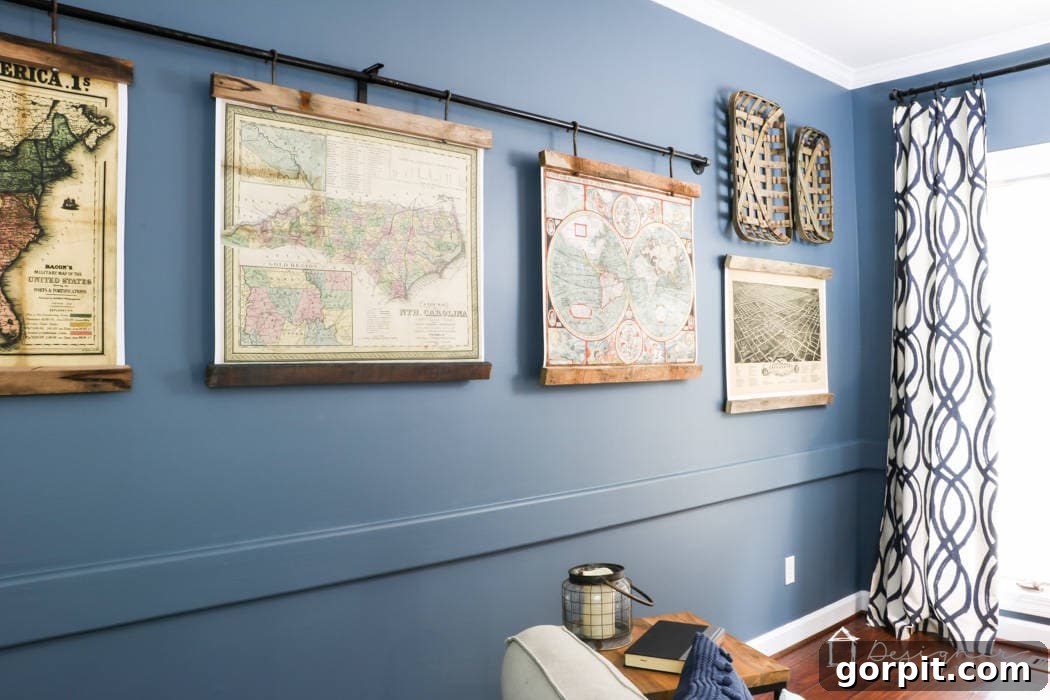
With a 10-foot pipe, we comfortably fit three of our large maps, creating a grand horizontal display. For the fourth map, we chose a different approach, hanging it directly on the adjacent wall. To complement its rustic charm, we surrounded it with these gorgeous North Carolina tobacco baskets. The baskets introduce wonderful added texture, dimension, and a touch of regional history, perfectly tying into the raw appeal of the reclaimed wood frames. This showcases how versatile these frames can be and how beautifully they integrate with other decor elements, allowing for diverse arrangements and creative displays.
Beyond Maps: Other Creative Ideas for Your Reclaimed Wood Frames
While vintage maps create an undeniably stunning and sophisticated display, the versatility of these reclaimed wood frames extends far beyond cartography. Don’t limit your imagination! These adaptable frames are perfect for showcasing a wide variety of large-scale prints, photographs, and artworks, allowing you to continually refresh your decor with new inspirations and interests:
- Botanical Prints: Bring the serene beauty of the outdoors inside with elegant illustrations of plants, flowers, or herbs. These can add a calming, natural touch.
- Architectural Drawings: For a sophisticated and intellectual touch, consider framing blueprints, sketches, or renderings of famous buildings or local landmarks.
- Vintage Travel Posters: Continue the wanderlust theme with vibrant, nostalgic travel advertisements from bygone eras, evoking a sense of adventure.
- Black and White Photography: Large-scale monochromatic photographs can achieve a powerful, artistic, and timeless statement, adding drama and depth to any wall.
- Abstract Art: Showcase bold colors, dynamic shapes, or intricate patterns to create a modern focal point that sparks conversation.
- Children’s Art: Elevate cherished drawings and paintings from your little ones by framing them beautifully. This adds a personal, sentimental touch to any room and celebrates their creativity.
- Inspirational Quotes: Large typographic prints with meaningful quotes can serve as daily motivation or add a personal mantra to your living space.
The possibilities are truly endless, making these DIY frames a timeless and adaptable addition to your home decor strategy.
Final Thoughts & Source List
We are absolutely delighted with how this project turned out! Creating these reclaimed wood picture frames and implementing the unique industrial pipe hanging system has completely transformed our family room wall into an eye-catching focal point. It serves as a testament that with a little creativity, some effort, and the willingness to repurpose materials, you can achieve high-end, custom looks on a budget, all while being environmentally conscious.
We hope this detailed tutorial has inspired you to embark on your own reclaimed wood framing adventure! What do you think of our DIY reclaimed wood frames? Are you ready to tackle this project and add some industrial-rustic charm to your own home? Share your thoughts, questions, or your own project ideas in the comments below! We love hearing from fellow DIY enthusiasts.
Source List for Room Elements:
- Wall color: Phillipsburg Blue by Benjamin Moore
- DIY bentwood pendant light: tutorial can be found here
- Tobacco baskets