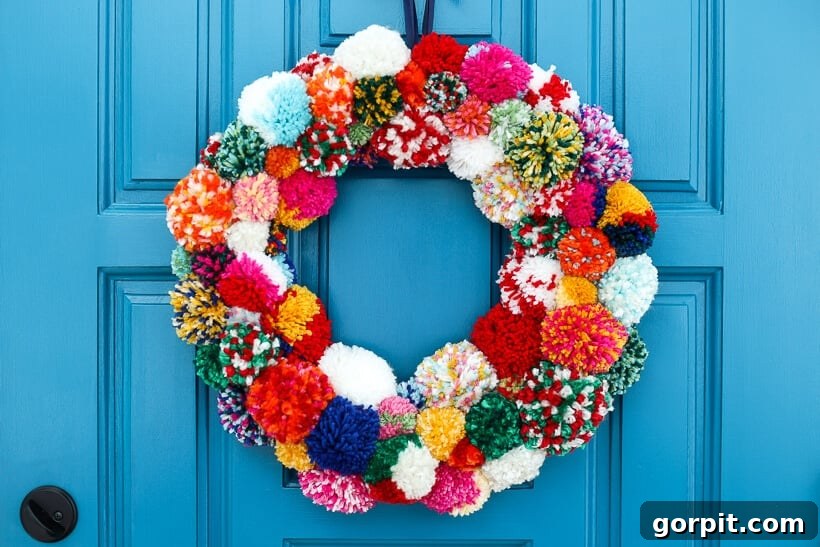
Welcome, fellow craft enthusiasts and color lovers! If you’re anything like me, you find immense joy in vibrant hues and unique home decor that transcends the ordinary. Every year, as the crisp air ushers in the Fall and Winter seasons, I often feel a pang of disappointment with the ubiquitous, often muted, traditional wreaths. While charming in their own right, they seldom offer the burst of color or contemporary flair that truly reflects my style. This feeling of creative yearning is what sparked the inspiration for my very own, brilliantly colored DIY pom pom wreath – a project I’m thrilled to share with you today.
This isn’t just any wreath; it’s a celebration of color and texture, designed to bring cheer to your home for more than just a single season. Imagine a handmade piece that defies conventional seasonal boundaries, offering a joyful accent from autumn through winter and beyond. If you’re ready to infuse your living space with personality and craft something truly special, this DIY pom pom wreath tutorial is your perfect guide. Let’s dive into creating a decorative piece that’s as fun to make as it is to display.
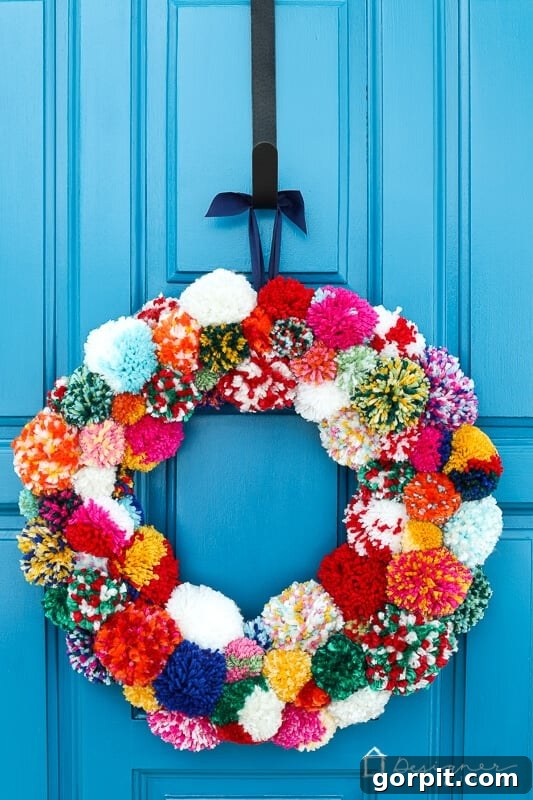
Table of Contents
Toggle
My journey to creating this delightful pom pom wreath began a few years ago when I stumbled upon a beautiful, albeit pricey, pom pom wreath from Anthropologie. While its aesthetic captivated me, two significant drawbacks prevented me from making it my own: a hefty price tag of $118 and its rather modest 14-inch diameter. Knowing I could achieve a similar, if not superior, result with a personal touch and at a fraction of the cost, I embarked on this DIY adventure. I gathered a sturdy wreath form, high-quality pom pom makers, and an abundance of colorful yarn, eager to bring my vision to life.
Let me be upfront: crafting this DIY pom pom wreath is a labor of love that requires a considerable investment of time. It’s not a quick weekend project, but rather one to savor over several sessions. However, what it lacks in speed, it more than makes up for in simplicity and enjoyment. This was a project that truly became a family affair, with all four of us chipping in to make pom poms whenever we had a spare moment. The collective effort made the process even more rewarding as we gradually filled our 16-inch wreath form with a joyful array of fluffy creations.
In terms of cost, I spent approximately $45 on yarn, with plenty left over for future projects, and an additional $25 on other essential supplies. This brought the total investment to around $70. While not the cheapest craft project, it’s undeniably a far more appealing price point than $118 for a smaller, mass-produced wreath. The satisfaction of a personalized, handmade piece that perfectly matches my aesthetic and budget truly made every minute worthwhile. Read on to discover how you can create your own vibrant pom pom wreath and add a splash of custom color to your home decor.
This post contains some affiliate links for your convenience. Click here to read my full disclosure policy.
DIY Pom Pom Wreath Tutorial: Craft Your Own Colorful Decor
Embarking on a DIY project can be incredibly rewarding, especially when the result is a stunning and personalized piece of home decor. This pom pom wreath is not only visually striking but also surprisingly simple to construct, making it an ideal project for crafters of all skill levels. Follow these detailed steps to create a magnificent, colorful wreath that will brighten any space.
Supplies Needed for Your Pom Pom Wreath Project
Gathering all your materials before you begin ensures a smooth and enjoyable crafting process. Here’s a comprehensive list of what you’ll need to create your vibrant pom pom wreath:
- 16-inch foam wreath form: This provides a sturdy base for your pom poms. The foam material is easy to pin into and holds its shape well.
- Yarn in colors of your choosing: This is where your creativity truly shines! I sourced my yarn during a fantastic half-off sale at Joann Fabrics, proving that beautiful materials don’t have to break the bank. Consider a variety of textures and fiber contents for added visual interest.
- Pom pom makers: These ingenious tools make crafting perfectly round, fluffy pom poms a breeze.
- Initially, we experimented with these more budget-friendly pom pom makers. While functional, they didn’t quite meet our expectations for efficiency and ease of use.
- After a short trial, we quickly upgraded to these superior pom pom makers. Trust me, the slightly higher investment is absolutely worth it for the improved functionality and professional-looking results. We purchased both the medium and large sets, utilizing all four sizes to create a diverse collection of pom poms for our wreath.
- Scissors: A sharp pair of craft scissors is essential for cutting yarn and trimming your pom poms to perfection.
- Straight pins or T-pins: You will need pins that are at least 2 inches long, or ideally longer. Shorter pins may not adequately secure larger pom poms to the foam wreath form, especially as the wreath becomes fuller.
- 2-inch ribbon: Select a ribbon that complements your chosen yarn colors, as this will be used for hanging your finished wreath. A sturdy, wider ribbon will provide a secure and elegant display.
Video Overview: Crafting Your DIY Pom Pom Wreath
To give you an even clearer understanding of the process, I highly recommend watching the short video below. It provides an excellent visual overview of each step, making the detailed instructions even easier to follow. Watching it before you begin will help you visualize the flow of the project and build your confidence. The video will begin after a brief advertisement.
(Video content will play here after a short ad)
Step 1: Mastering the Art of Pom Pom Making
Your crafting journey begins with the joyous, albeit extensive, task of making pom poms! While I confess I didn’t keep an exact count, prepare to make a substantial number – it takes a lot to achieve a lush, full wreath. We used a vibrant selection of 15 different yarns, each contributing its unique color and texture to the final design. Don’t be afraid to experiment with your palette; the more variety, the more dynamic your wreath will be!
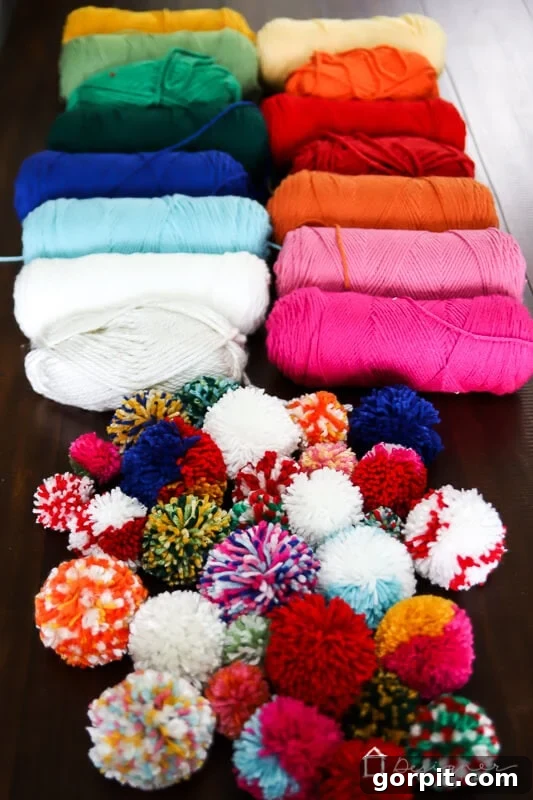
Making pom poms with the recommended pom pom makers is wonderfully straightforward. Simply follow the directions provided with your pom pom makers, which typically involve wrapping yarn around two arch-shaped pieces, closing them, cutting along the groove, and tying a knot before opening the maker. For a visual guide, refer to the photos below that illustrate the process.
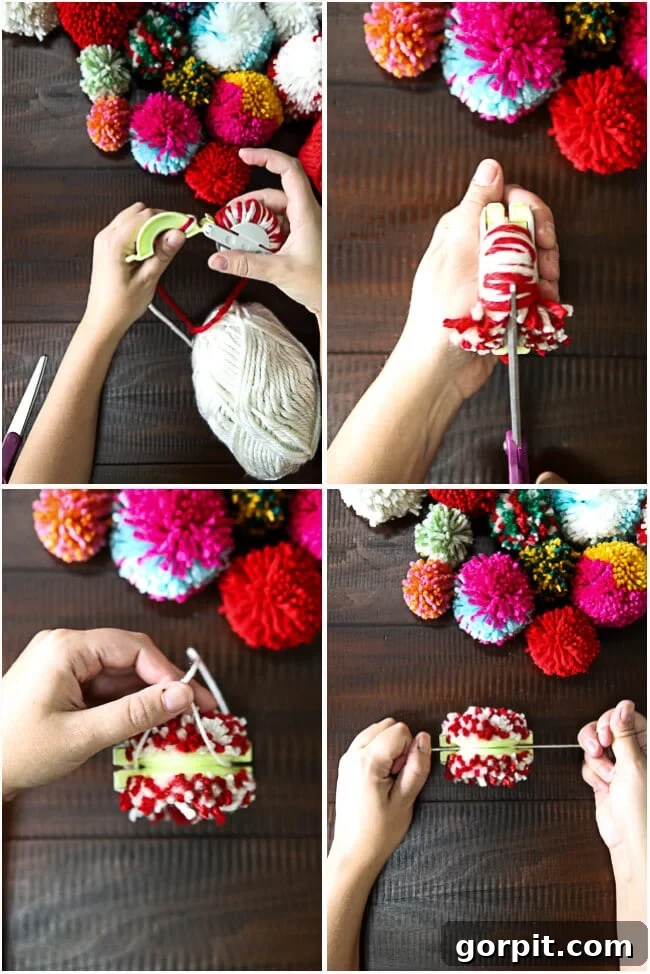
As you delve into pom pom creation, here are a few expert tips to achieve different styles and textures:
- Confetti-Style Multi-Colored Pom Poms: For a dazzling, confetti-like effect, wrap several different strands of yarn around your pom pom maker simultaneously. This technique blends the colors organically, creating a truly unique and festive look.
- Color-Block Style Pom Poms: If you prefer more distinct color segments, wrap one color of yarn at a time. Once you’ve achieved the desired density for that section, switch to a new color. Repeat this process with several different colors within a single pom pom to create a beautiful color-block design.
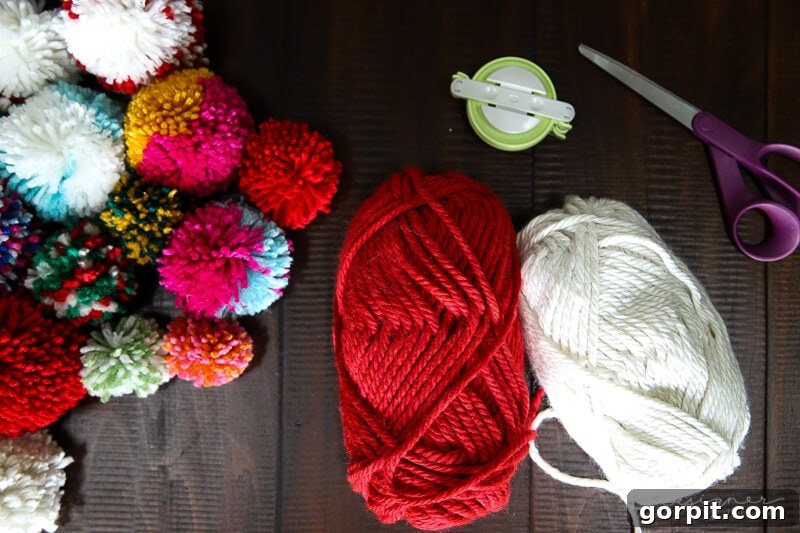
- Achieving Extra Fluffy Pom Poms: The fluffiness of your pom poms is largely determined by the type of yarn you choose. For super soft and voluminous pom poms, opt for a thicker, looser yarn. Acrylic yarns with a plush feel or certain wool blends work wonderfully for this. You’ll notice some of our pom poms are exceptionally fluffy due to this yarn choice (refer to the yarn in the photo below for an example).
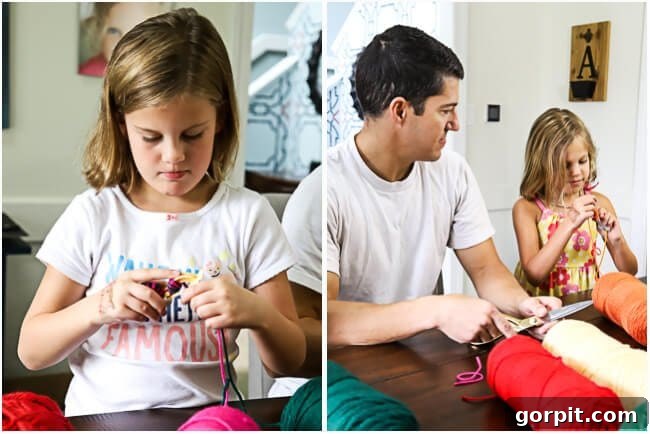
One of the best parts of this project was how engaging it was for everyone. My daughters, Attley and Avery, were absolutely captivated by the process of making pom poms, showing boundless enthusiasm. Even Joe, though perhaps a tad less excited than the girls, joined in the fun. Crafting together turned the time-consuming aspect into a cherished family memory, making the finished wreath even more special.
Step 2: Thoughtful Placement: Pinning Pom Poms to Your Wreath Form
Once you’ve amassed a respectable pile of pom poms, it’s time to start bringing your wreath to life! This step involves carefully pinning each pom pom onto your wreath form. Beginning the pinning process before all pom poms are made allows you to gauge how many more you’ll need and, crucially, helps you balance the colors and sizes across the wreath. Don’t underestimate the importance of strategic placement; distributing colors evenly and mixing up the pom pom sizes creates a more harmonious and visually appealing final product.
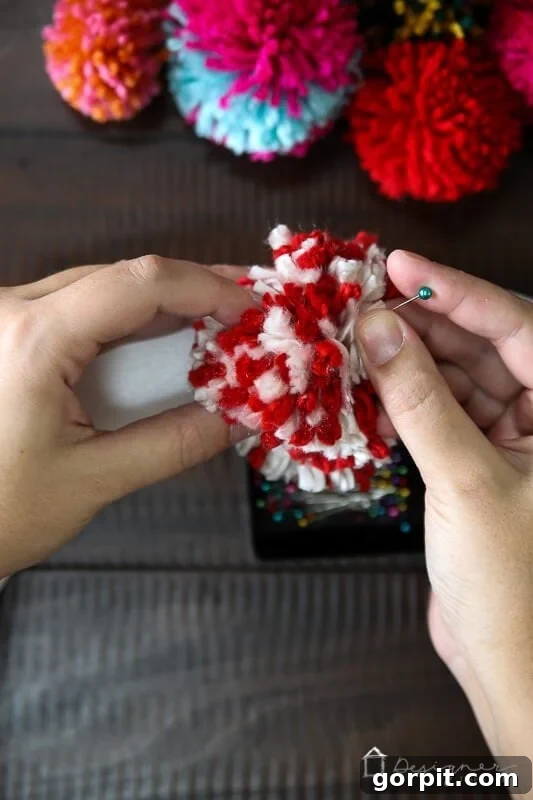
When pinning, ensure your pins go deep enough into the foam to securely hold each pom pom in place. For larger or denser pom poms, longer T-pins are particularly effective. Take a step back frequently to observe your progress, checking for any gaps or areas that might be oversaturated with a particular color. This iterative process of making, pinning, and evaluating ensures a beautifully balanced and full wreath.
Step 3: Filling Your Wreath Form: Repeat and Refine
The core of this project is a continuous cycle of making and pinning pom poms. Keep creating new pom poms and securing them to your wreath form using your trusty straight pins or T-pins. The goal is to achieve a dense, plush covering that completely transforms the wreath form into a cloud of colorful yarn. To ensure an ideal display when hung, I highly recommend working with your wreath form laid flat on a table.
This method is crucial because you will not attach pom poms to the very back of the wreath. By keeping the back flat and uncovered, your finished wreath will sit flush against a wall or door, avoiding any awkward gaps or tilting. Focus on filling all the visible surface area of the wreath form as it lies flat on your workspace. Don’t worry about the underside; it will remain the plain wreath form, serving its functional purpose without needing decoration. Continue this process of making, placing, and adjusting until you are delighted with the fullness and aesthetic balance of your vibrant, handmade creation.
Step 4: The Finishing Touch: Adding a Ribbon for Hanging
With your wreath nearly complete, the final step is to add a hanger that is both functional and aesthetically pleasing. We opted for a sophisticated 2-inch navy blue ribbon, which provided a lovely contrast and anchor to our array of colorful pom poms. Before filling in the very last section of your wreath form—typically about 2 inches of bare space—take a moment to secure your hanging ribbon.
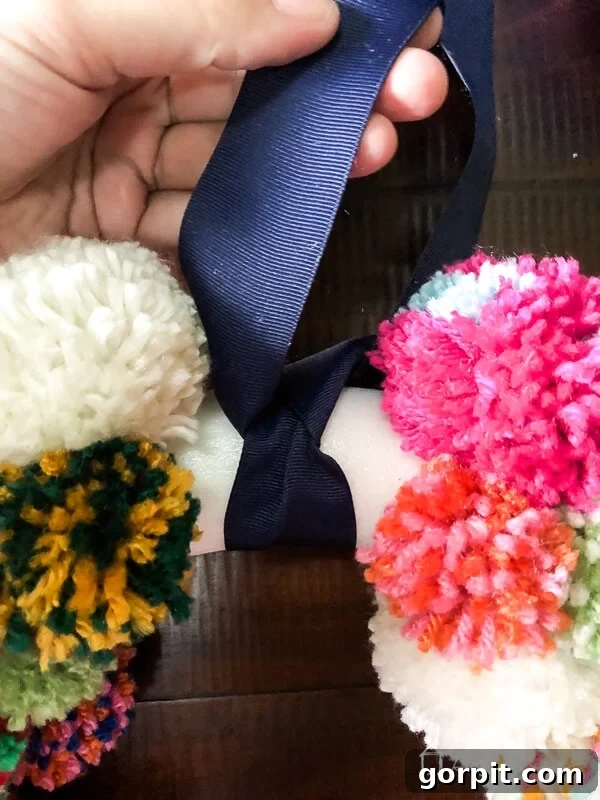
Tie the ribbon securely around the wreath form, creating a loop for hanging. Once the ribbon is in place, you can then strategically pin the final pom poms over the top of the ribbon’s knotted section. This technique cleverly conceals the tie, creating a seamless and professional finish. Your colorful DIY pom pom wreath is now ready to be displayed!
And there you have it! A project that is super easy in its individual steps, yet culminates in an absolutely gorgeous, personalized piece of decor. While I won’t sugarcoat the time commitment, the stunning result is undeniably worth every minute. I particularly adore that this wreath is perfect for both Fall and Winter, allowing us to enjoy its cheerful presence for two seasons each year. This versatility makes the effort invested feel even more rewarding and practical.
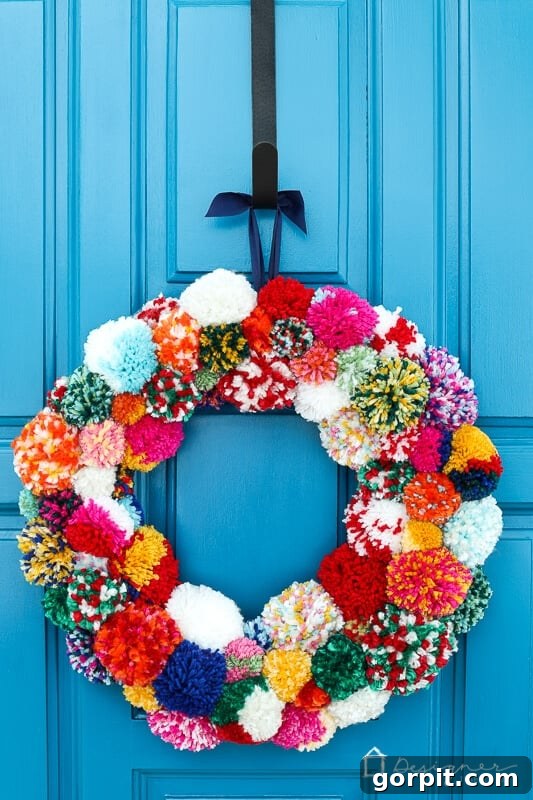
This pom pom wreath isn’t just a decoration; it’s a testament to the joy of handmade crafts and the beauty of infusing your home with personal style. It stands out from conventional seasonal decor, offering a fresh, vibrant, and utterly unique accent that is sure to draw compliments. Whether hanging on your front door to welcome guests or adorning an interior wall, this colorful creation brings warmth and cheer wherever it goes.
Other posts you may enjoy for more DIY inspiration and home decor ideas:
- DIY Magical Christmas Lanterns
- How to Make a Christmas Reindeer from Logs!
- How to Make a Gift Bag Out of Wrapping Paper
- 6 Secrets to Elevate Your Christmas Aesthetic
- DIY Advent Calendars
- DIY Santa Sacks
Wondering how I approach transforming rooms and spaces in our home, creating cohesive and beautiful designs? Check out Designer in a Binder®. It’s my proven system for decorating your home with confidence and ease, guiding you through every step of the design process.
And if you’re eager for exclusive content, behind-the-scenes sneak peeks, and direct access to more creative home decor ideas, be sure to subscribe to my newsletter before you go! Join our community of fellow DIY enthusiasts and never miss out on the latest inspiration.
Thank you for joining me on this colorful crafting adventure. Happy decorating!