Unlock Organization: Master Custom Labels with Your Cricut Machine
Thank you to Cricut for sponsoring this post. This post contains affiliate links for your convenience. Click HERE to read my full disclosure policy.
Table of Contents
The Power of Cricut for Home Organization
As a passionate advocate for home organization, I’ve discovered a secret weapon that consistently keeps spaces tidy and functional: clear, custom labels. While traditional label makers offer convenience for small tasks, they often fall short when it comes to creating the impactful, easy-to-read labels necessary for truly effective organization. This is where the magic of a Cricut cutting machine comes into play. If you’ve ever pondered, “Can a Cricut serve as a sophisticated label maker?” the resounding answer is an emphatic YES!
Cricut machines revolutionize the way we approach labeling. They transform a mundane chore into an exciting creative project, allowing you to design labels of any size, shape, font, and material imaginable. Whether you’re decluttering a pantry, organizing a craft room, or personalizing containers for your kids, a Cricut empowers you to create custom labels that not only serve a purpose but also add a touch of style to your home. In this comprehensive guide, I’ll share my two absolute favorite methods for crafting stunning, professional-looking labels with your Cricut cutting machine.
Choosing the Right Cricut Machine for Your Labeling Needs
Before diving into the label-making process, it’s helpful to consider which Cricut machine might be best for your projects. If you’re new to the world of cutting machines and don’t yet own one, I highly recommend exploring my unbiased review of Silhouette vs. Cricut to help you make an informed decision. Personally, I own and frequently use a range of Cricut machines:
- The Cricut Explore Air 2: A versatile workhorse, perfect for a wide variety of materials and projects.
- The Cricut Maker: The ultimate crafting machine, offering unparalleled power and precision for cutting hundreds of materials, from delicate fabric to thick balsa wood.
- The Cricut Joy: A compact and incredibly user-friendly machine, ideal for quick, everyday projects and smart materials that don’t require a mat.
Each machine has its strengths, but all are capable of creating fantastic labels. For a more detailed comparison, check out my post on how to choose the best Cricut machine for you. Now, let’s explore the exciting possibilities of making custom labels!
Method 1: Crafting Durable Vinyl Labels with Your Cricut
Vinyl labels are a fantastic choice for items that need to withstand daily use, moisture, or frequent handling. They adhere beautifully to smooth surfaces like plastic bins, glass jars, and metal containers, making them perfect for pantry organization, bathroom storage, or even outdoor items. This method leverages your Cricut’s cutting precision to create crisp, long-lasting labels.
Supplies for Vinyl Labels
- Cricut Cutting Machine: (I used my Cricut Explore Air 2 for this pantry label project, but a Cricut Joy or Cricut Maker would also work perfectly.)
- StandardGrip or LightGrip Cutting Mat: Essential for holding your vinyl securely during cutting.
- Cricut Premium Vinyl: Available in a vast array of colors and finishes. Permanent vinyl is great for long-lasting labels, while removable vinyl is ideal for temporary applications.
- Weeding Scraper Tools: Crucial for removing excess vinyl and revealing your intricate design.
- Cricut Transfer Tape: Used to lift your cut vinyl design off its backing and transfer it cleanly onto your desired surface.
Step 1: Design Your Vinyl Labels in Cricut Design Space.
The first step is to bring your label ideas to life in Cricut Design Space. I find that sans-serif fonts are generally the easiest to weed, especially for smaller text or when making many labels, as they have fewer intricate curves and serifs. For my pantry project, I aimed for simplicity and legibility. Here’s my proven process:
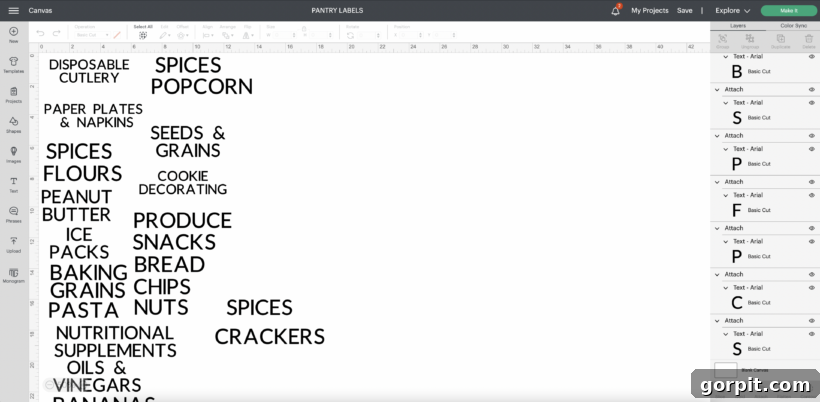
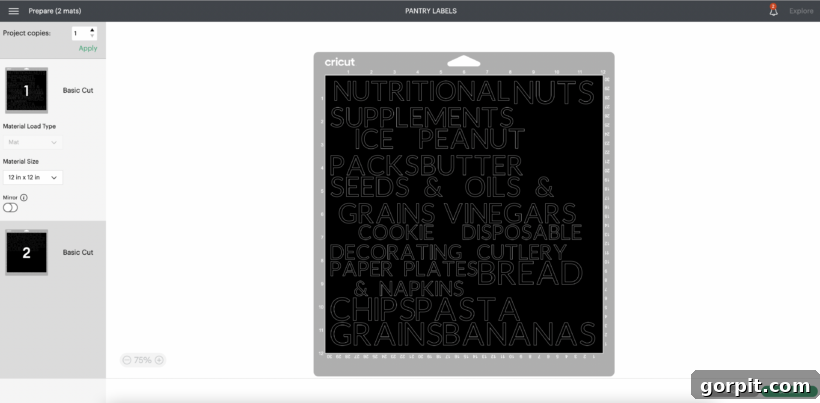
Start by identifying all the items you wish to label. I often use sticky notes, placing one on each bin or container and writing down its intended label. Once I have my comprehensive list, I head to Design Space. Measure your bins or surfaces accurately to ensure each label fits perfectly. You’ll likely find that labels with varying numbers of characters will require slightly different dimensions, so customize each one accordingly. Input each label into Design Space, choosing your preferred font and adjusting the size. If you have multiple lines of text for a single label, remember to use the “Attach” feature in Design Space to ensure they cut together as one design rather than scattering across your mat. This precise planning in Design Space is what makes the end result look so professional. Below, you can see how my pantry label project was laid out in Design Space.
Step 2: Precisely Cut Your Vinyl Labels.
Once your design is finalized in Design Space, click the “Make It” button. You’ll notice that Cricut’s intelligent software automatically arranges all of your text elements on the digital mat preview. This clever optimization minimizes material waste by positioning everything in the most space-efficient way possible. Follow the on-screen prompts to select your material settings (e.g., Premium Vinyl), load your cutting mat with the vinyl securely adhered, and press the flashing “Go” button on your Cricut machine. The machine will then meticulously cut out your labels with incredible accuracy, ready for the next step in the process.
Step 3: Weed Your Vinyl Design for Perfection.
After your Cricut has finished cutting, it’s time for the weeding process. This involves carefully removing all the excess vinyl that isn’t part of your design, leaving only your desired letters or shapes on the vinyl backing. I always reach for my Cricut weeder tool, which resembles a small dental pick – its fine point is perfect for intricate details. Start by peeling away the large sections of vinyl around your text. Then, meticulously use the weeder tool to remove the small inner pieces of letters, like the centers of “O”s, “A”s, and “P”s. Take your time during this step; proper weeding ensures a clean, professional-looking label.
Step 4: Expertly Transfer Your Vinyl Labels Using the Hinge Method.
Once your design is perfectly weeded, the next crucial step is transferring it smoothly onto your chosen surface. Begin by applying a piece of Cricut transfer tape over the entire surface of your weeded vinyl design, pressing it down firmly. Use a scraper tool to burnish (rub) over the transfer tape repeatedly, ensuring the vinyl letters adhere well to the tape. Then, carefully cut each individual label into its own rectangle shape, making it easier to handle.
For flawless application, I highly recommend using the “hinge method.” This technique prevents bubbles and crooked placement. Here’s how:
- Position: Choose one label and place it precisely where you want it on your surface.
- Hinge: Apply a strip of painter’s tape or Scotch tape horizontally across the top of your vinyl label, creating a “hinge.” This holds the label firmly in place.
- Peel: Flip the label upwards, using the hinge as an anchor. Carefully peel off the vinyl’s backing paper, exposing the adhesive side of your design which is now stuck to the transfer tape.
- Apply: Gently lower the label back down onto your surface. Starting from the hinge and working your way down, use your scraper tool to burnish the vinyl onto the surface. Apply firm, even pressure to ensure proper adhesion and eliminate any air bubbles.
- Reveal: Finally, slowly and carefully peel off the transfer tape at a 45-degree angle. Your custom vinyl label will now be perfectly adhered to your surface!
You can see a visual demonstration of the hinge method in the video below, which quickly illustrates these steps for seamless application.
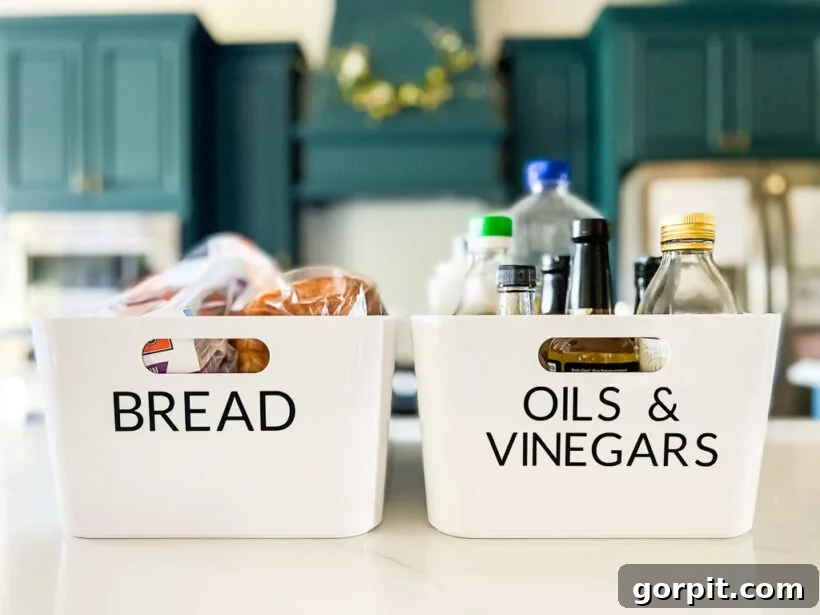
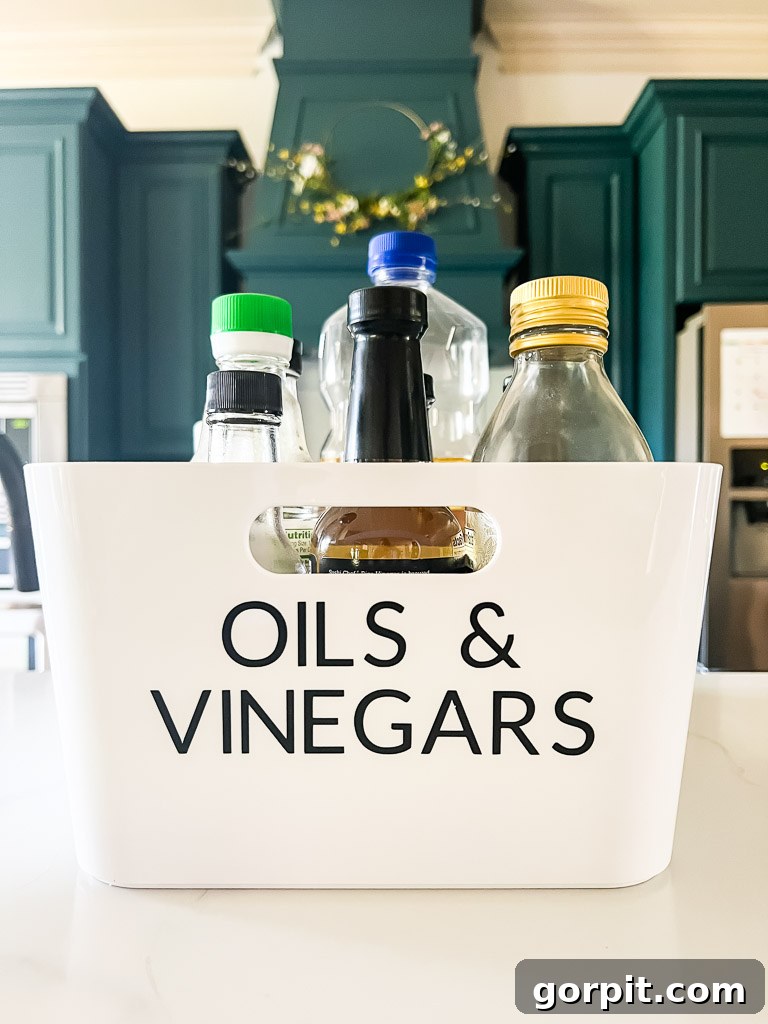
That’s it! The results are truly transformative. Below, you can see how some of the bins in our pantry turned out with these custom vinyl labels. I absolutely adore how large, clear, and easy these labels are for both me and my children to read. This level of customization and readability is simply unattainable with a standard label maker, making the Cricut an invaluable tool for home organization.
Method 2: Elegant Pen and Paper Labels with Your Cricut
While vinyl labels are fantastic for durability, there’s a unique charm and versatility to paper labels. This method, often underutilized, allows your Cricut to write text with its pens or markers and then precisely cut out the paper into any shape you desire. It’s an ingenious way to achieve the aesthetic of beautiful handwriting without actually having to write it yourself – a perfect solution for those, like me, who aren’t always thrilled with their own penmanship! These labels are perfect for gifts, planners, folders, or decorative bins where a softer, more crafted look is desired.
Supplies for Pen and Paper Labels
- Cricut Cutting Machine: (I used my Cricut Joy for this particular project, showcasing its agility for smaller tasks. However, any Cricut Explore or Cricut Maker machine can also perform this function beautifully.)
- Cricut Smart Paper Sticker Cardstock: This innovative material has a sticky backing, making application incredibly simple. I opted for black cardstock for a dramatic contrast.
- Cricut Marker or Pen: Cricut offers a vast range of pens in various colors, thicknesses, and effects (e.g., metallic, glitter, gel). For my project, the metallic silver marker provided a stunning look against the black cardstock.
Step 1: Create Your Design for Pen Labels in Cricut Design Space.
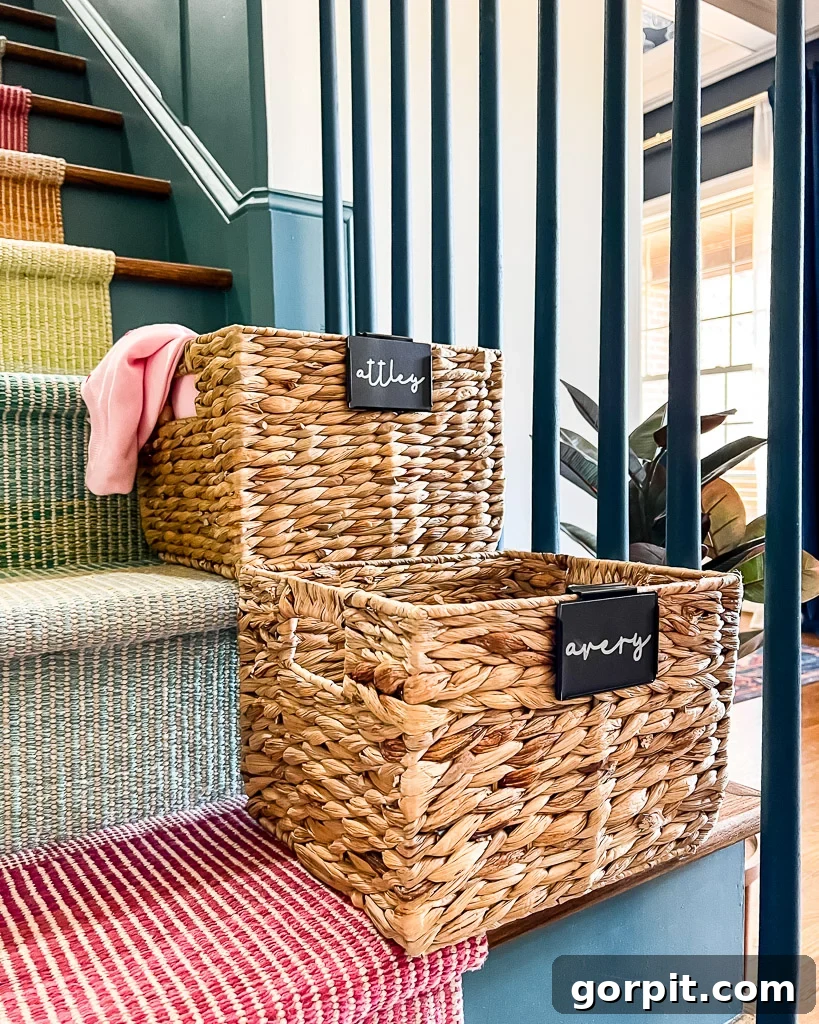
When designing pen-and-paper labels, you’ll focus on two key elements: the label’s shape and size, and the text you want your Cricut to write. Consider the item you’re labeling and how the label will be attached. For this project, I needed labels for my daughters’ “take upstairs with you” water hyacinth baskets, which we keep on our stairs. I chose a simple rectangular shape, custom-sizing it to fit perfectly within the basket bin labels I was using.
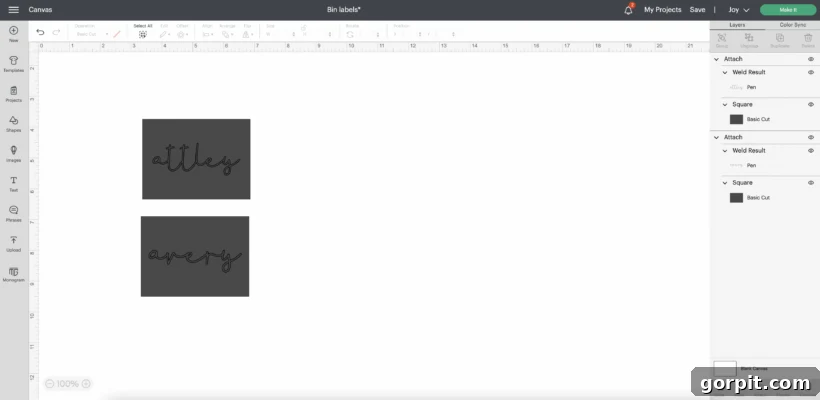
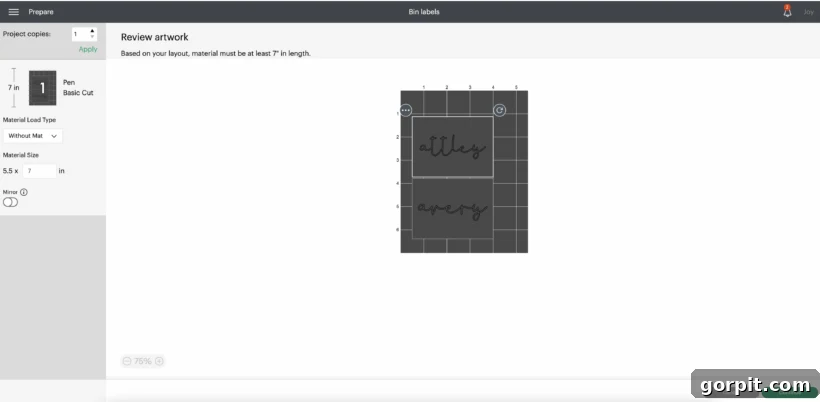
Within Design Space, select a shape (e.g., a rectangle, circle, or custom silhouette) for your label. Ensure its “Operation” is set to “Basic Cut” so your machine knows to cut the outline. Next, add your text. Choose a Cricut writing font; I selected “BFC Flannel Shirt” for a charming, handwritten feel. Crucially, set the “Operation” for your text to “Pen” and select the color of the pen you’ll be using. This tells your Cricut to write the text rather than cut it out. Finally, select both the shape and the text, and use the “Attach” feature. This locks the writing and cutting actions together, ensuring your text is written *on* your label shape before it’s cut out.
Step 2: Send Your Design to Your Cricut Machine for Writing and Cutting.
With your design prepared, click “Make It” in the top right corner of Design Space. The software will guide you through the process. A fantastic advantage of using Smart Materials, like the Cricut Smart Paper Sticker Cardstock, is that they can often be used without a cutting mat, especially with the Cricut Joy. Simply load your Smart Material directly into your machine.
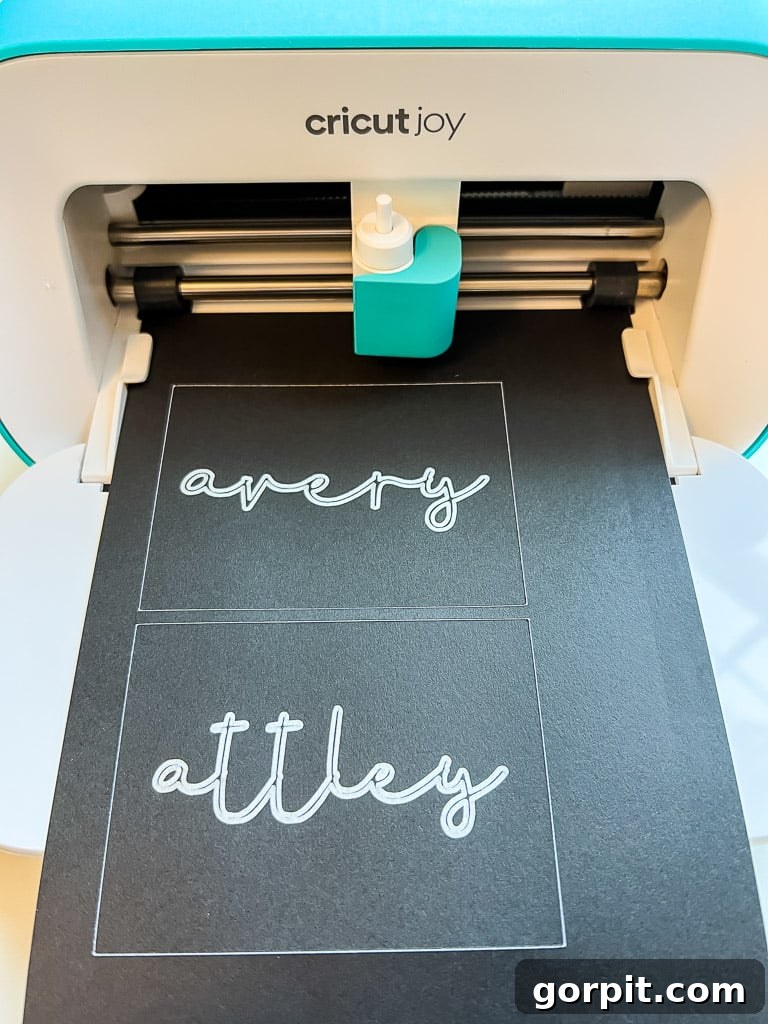
Design Space will prompt you at the appropriate times to load your chosen pen or marker into the designated clamp (usually Clamp A for pens) and then to load your fine-point blade (usually Clamp B for cutting). In my experience, the Cricut always performs the writing action first, meticulously drawing your text onto the cardstock. Once the writing is complete, it will prompt you to remove the pen and insert the cutting blade, then proceed to cut out the precise shape of your label. This sequential process ensures both the text and the label shape are perfectly executed.
Here’s how my two labels looked immediately after my Cricut Joy wrote and cut them out. I personally chose to go back with the silver marker and fill in the spaces between the double-lined text to give them a bolder, more pronounced appearance, but this is entirely optional and depends on the specific look you’re aiming for.
Step 3: Apply Your Beautiful Pen Labels.
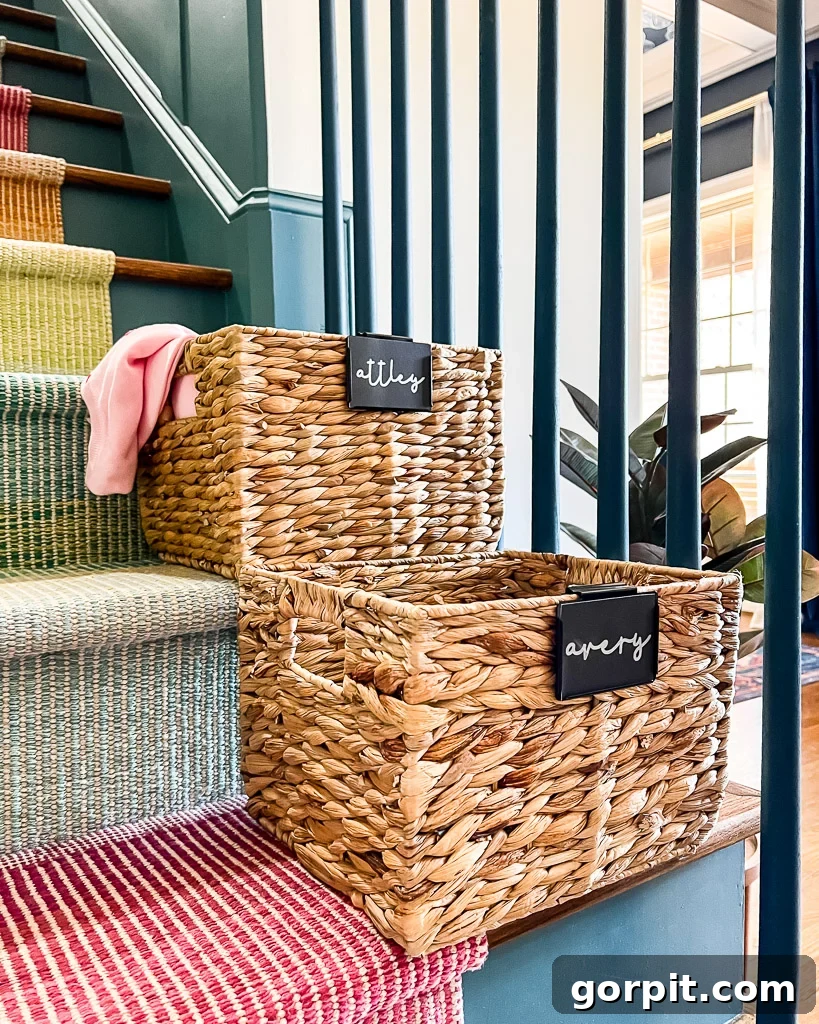
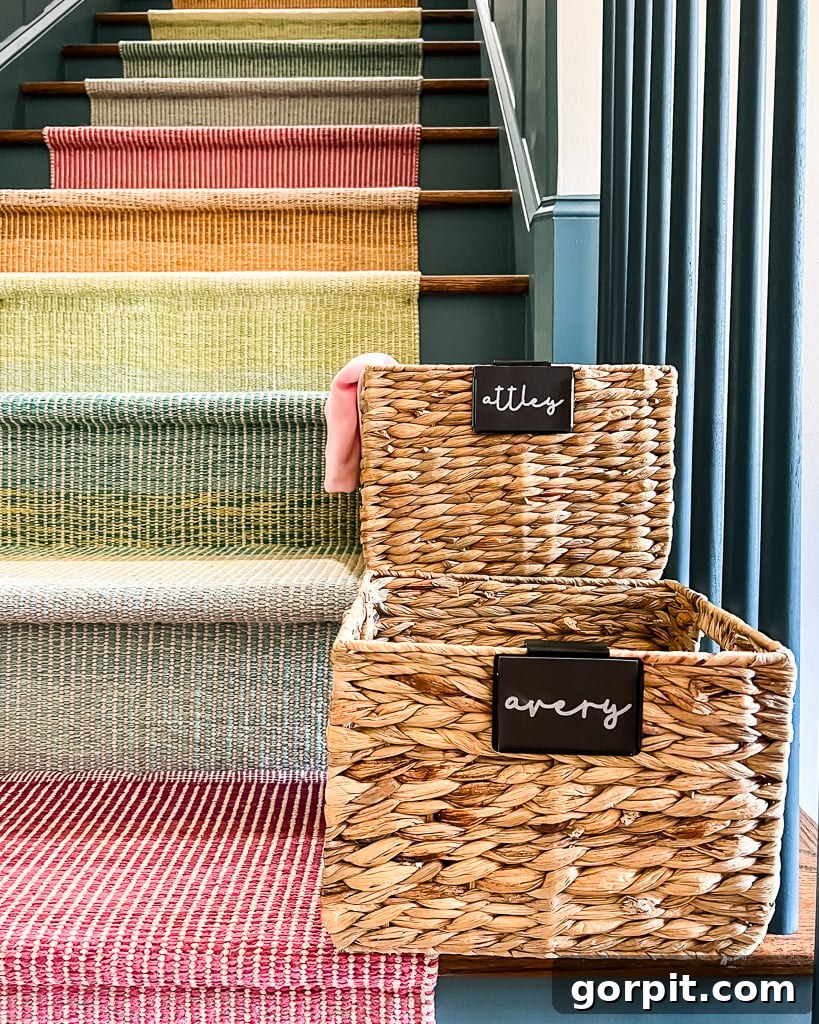
One of the greatest benefits of using Cricut Smart Paper Sticker Cardstock is its peel-and-stick convenience. For many projects, you can simply peel off the backing paper and adhere your custom label directly to a smooth surface. However, the water hyacinth baskets I intended to label have a rough, textured natural material, which isn’t ideal for direct sticker application. In this case, I simply placed my new labels onto these clever basket bin labels and then clipped them onto the baskets. The result was incredibly charming and functional!
Conclusion: Custom Labels Made Easy
There you have it – my two favorite, tried-and-true methods for creating custom labels with your Cricut cutting machine. Whether you need the durability and sleek finish of vinyl labels for a bustling pantry or the elegant, personalized touch of pen-and-paper labels for decorative baskets, your Cricut machine offers endless possibilities. These techniques not only elevate your home organization but also infuse your spaces with a unique, handcrafted appeal. I encourage you to experiment with different fonts, colors, and materials to discover what works best for your specific needs and aesthetic. Which method will you try first?
More Cricut Inspiration and Organization Tips
Ready to dive deeper into the world of Cricut crafting and home organization? Explore these additional resources for more inspiration and practical advice:
- 26 Clever and Creative Gifts for Makers & Crafters
- Which Cricut Machine is Right for You? How to Choose
- Silhouette vs. Cricut – My Unbiased Review
- 10+ Best Gifts for Crafters: What Every Crafty Person Needs/Wants!
- Cricut Projects for Your Home
- Personalized Cricut Ideas for Christmas
Curious about my unique approach to transforming rooms and spaces within our home? Discover the secrets within Designer in a Binder® – your affordable and simple guide to decorating your home with confidence.
And for exclusive content, behind-the-scenes sneak peeks, and fresh ideas delivered right to your inbox, be sure to subscribe to our newsletter before you leave!