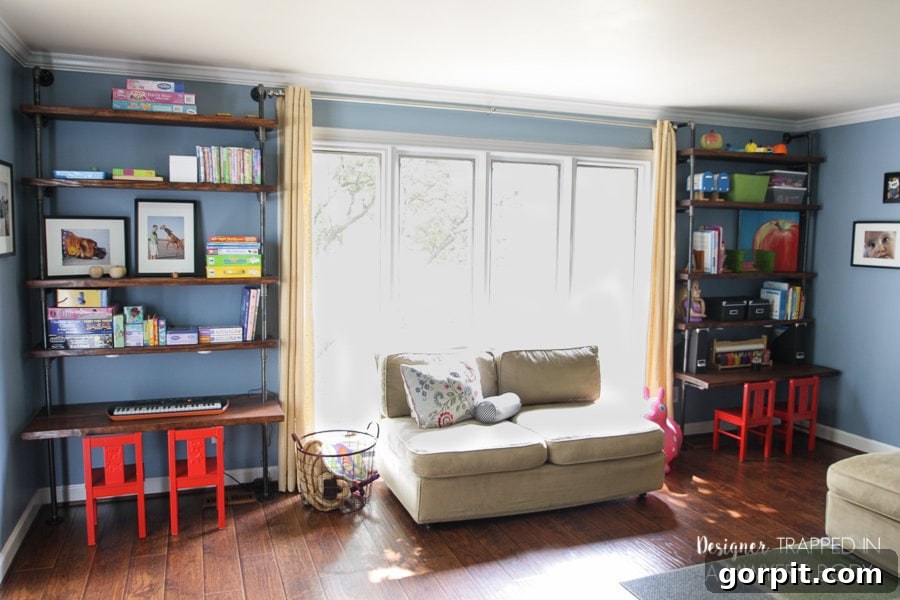
Transform Your Space: Build Stunning DIY Industrial Pipe Shelves and Built-In Desks
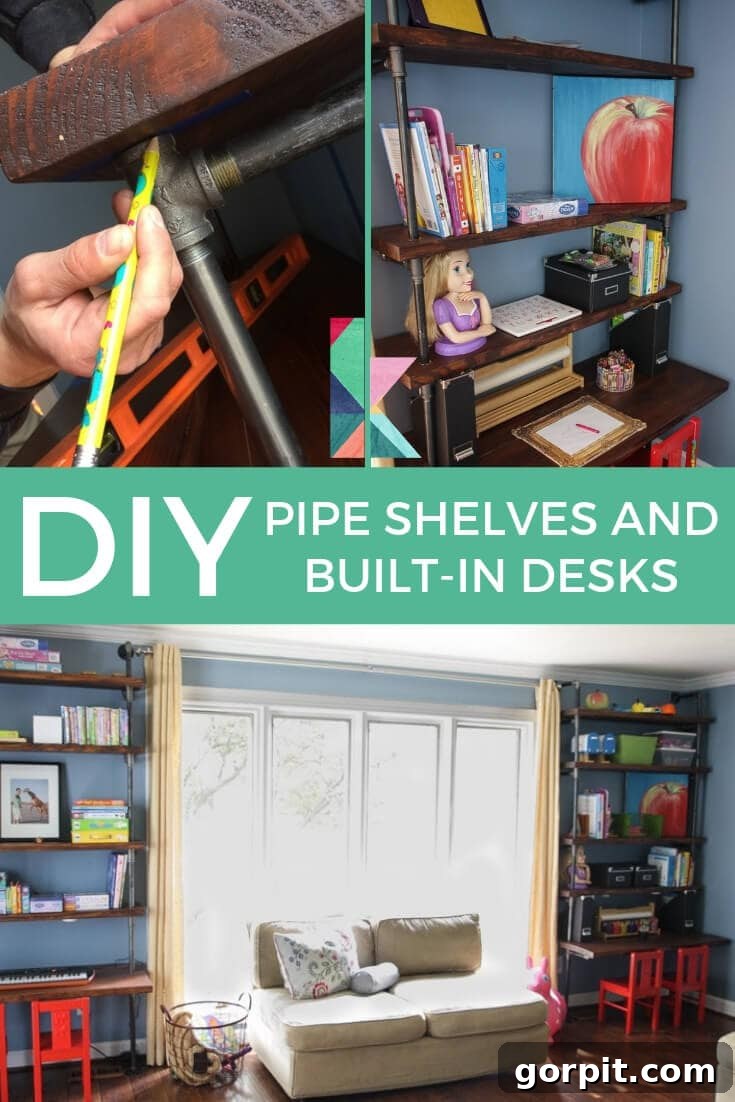
Are you constantly searching for more storage solutions in your home? Does your current storage fall short on both functionality and style? Many homeowners face the challenge of cluttered spaces, especially in areas like playrooms, home offices, or living areas, where a constant influx of items can quickly overwhelm existing organizational systems. We certainly did, and it led us to discover an incredibly versatile and stylish solution: DIY industrial pipe shelves with integrated built-in desks.
Our twin girls’ playroom was a testament to this struggle. Despite being fortunate enough to have a dedicated playroom, the arrival of their second birthday, close to Christmas, meant an explosion of new toys, books, and dress-up clothes from our generous friends and family. Suddenly, our existing storage was completely inadequate. Puzzles, which our girls absolutely adore and are incredibly good at, lay in haphazard piles on the floor. Lego sets were precariously crammed onto any available shelf, barely fitting.
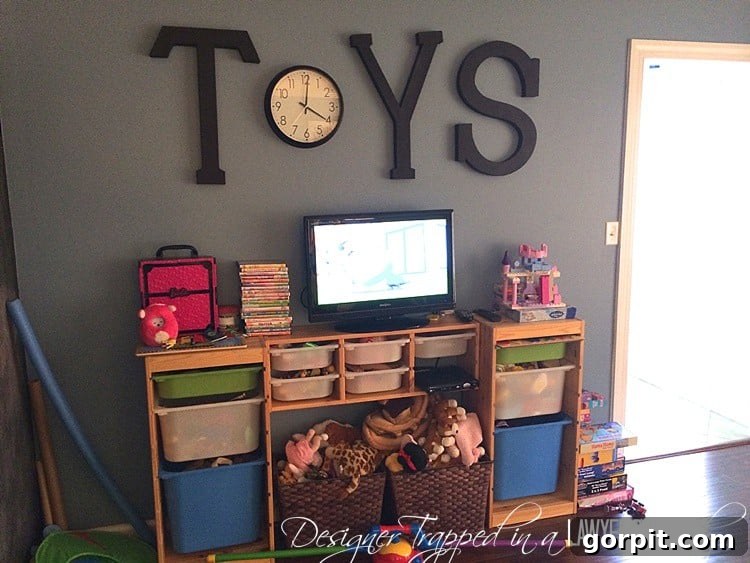
Toy bins were overflowing, and DVDs were stacked precariously on top of our limited shelving. While some might not consider it excessively messy, for us, it was enough to cause daily frustration. More importantly, it hindered our girls’ ability to find their beloved toys, leading them to forget about items they genuinely enjoyed simply because they weren’t easily accessible. Their dress-up clothes, once neatly hung on temporary Command hooks, had outgrown their makeshift solution. Even the rain gutter bookshelves, perfect for small board books, were no longer suitable for the larger, more advanced books they now enjoyed.
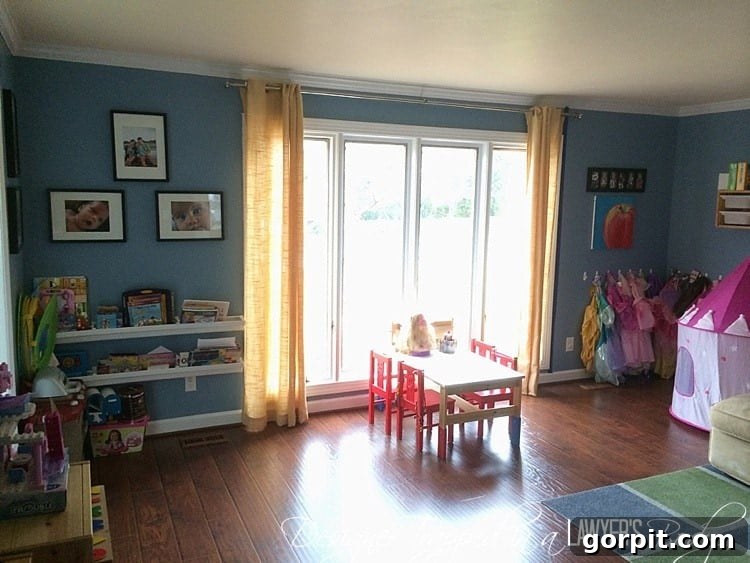
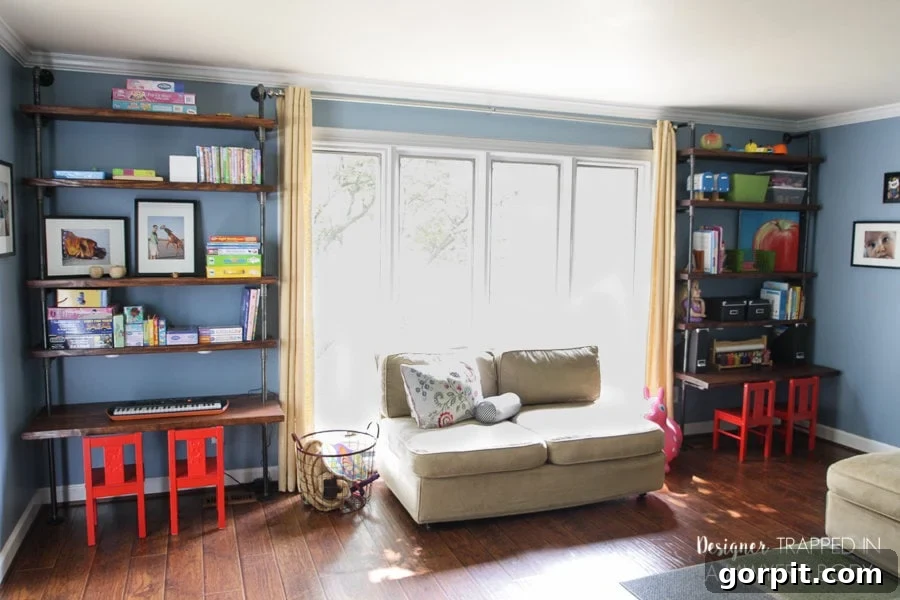
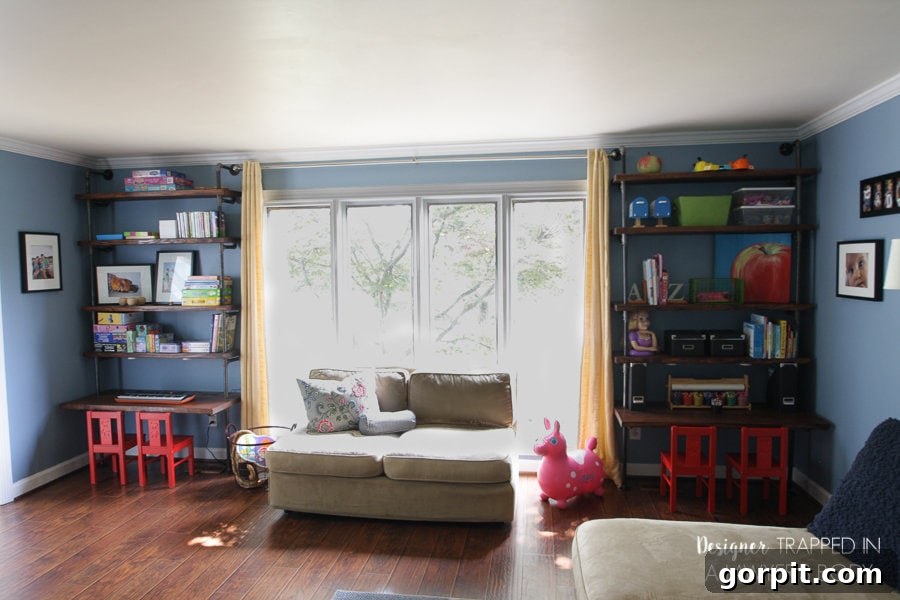
It became clear we needed a robust, long-term solution that was both highly functional and aesthetically pleasing. That’s when we decided to embark on a DIY project to build super stylish, industrial-inspired pipe shelves with seamlessly integrated built-in desks. The transformation has been incredible, providing an abundance of much-needed storage and elevating the entire look of the room. We are absolutely thrilled with the outcome, and now, we’re excited to guide you through the process so you can create your own custom industrial pipe shelving and desk units. This post contains some affiliate links. Click here to read my full disclosure policy.
How to Build Your Own DIY Industrial Pipe Shelves and Built-In Desks
Building your own industrial pipe shelves and desks is a rewarding project that offers immense customization potential. The rugged charm of gas pipe combined with warm wooden shelves creates a distinctive look that can enhance any space, from a vibrant playroom to a sophisticated home office. Follow this comprehensive guide to achieve a professional finish and maximize your storage.
Materials Needed:
- 2 x 12 Pine Boards: The amount needed will depend entirely on the dimensions and number of shelves/desks you plan to build. Pine is a great choice for its affordability and workability, but other wood species like oak or maple could also be used for a different aesthetic.
- 3/4 inch Gas Pipe: The quantity required is project-specific. We opted for gas pipe because it typically comes pre-finished in black, saving time on painting. Purchasing pre-cut and pre-threaded lengths is highly recommended to avoid specialized tools and extra work. Remember, if you choose a different pipe diameter (e.g., 1/2 inch or 1 inch), all your fittings must match that exact diameter for compatibility and safety.
- “T” Joints: These are essential for creating horizontal connections and supporting your shelves at various heights.
- Elbow Joints: Used primarily at the top of your vertical pipe runs and for creating corners or turns in your design.
- Floor Flanges: These crucial fittings provide a stable base for your pipe structure on the floor and allow for secure attachment to the wall at the top of your units.
- Wall Anchors: Necessary for securely attaching floor flanges to drywall or plaster walls when a stud isn’t available, ensuring stability and safety.
- Wood Screws: Various lengths will be needed for attaching flanges to floors/walls and potentially for securing shelves or desk components.
- Wood Stain: Choose a color that complements your existing decor. We highly recommend our favorite stain for its rich finish and ease of application.
- Protective Top Coat: Essential for protecting your stained wood from wear, moisture, and scratches. We used this durable top coat for long-lasting results.
Tools Needed:
- Drill and/or Drill Driver: For drilling pilot holes, driving screws, and using the Forstner bit.
- Kreg Jig Pocket Hole System: Invaluable for creating strong, concealed joints when attaching multiple boards, especially for the desk surface.
- Miter Saw: For precisely cutting your pine boards to the correct lengths for shelves and desks.
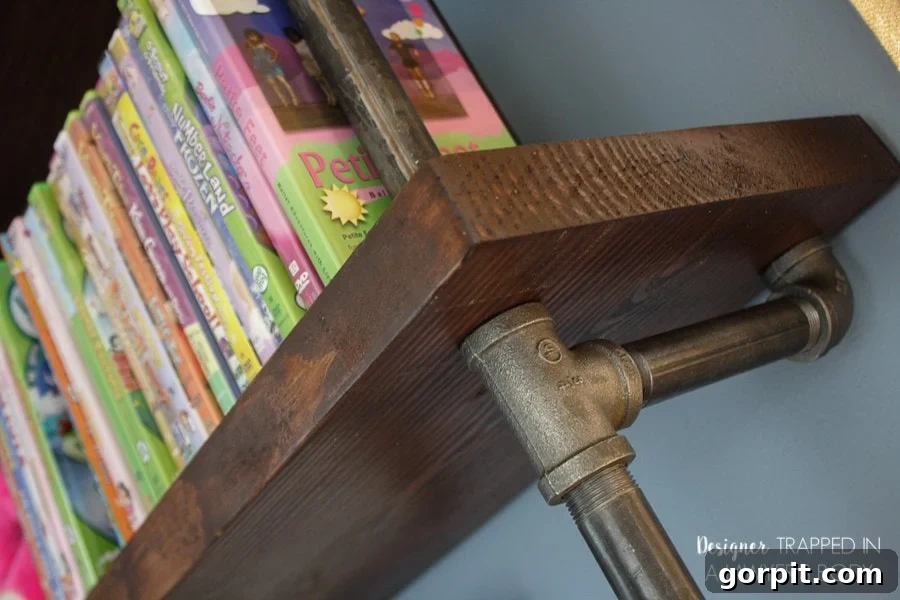
- 1 1/8″ Forstner Bit: This specialized drill bit creates clean, flat-bottomed holes, perfect for allowing the pipe to pass through your shelves smoothly.
- Tape Measure & Pencil: For accurate measuring and marking.
- Level: Crucial for ensuring all shelves and pipes are perfectly horizontal and vertical.
- Stud Finder: To locate wall studs for secure attachment points.
Detailed Steps to Build Your Custom Pipe Shelves and Desks:
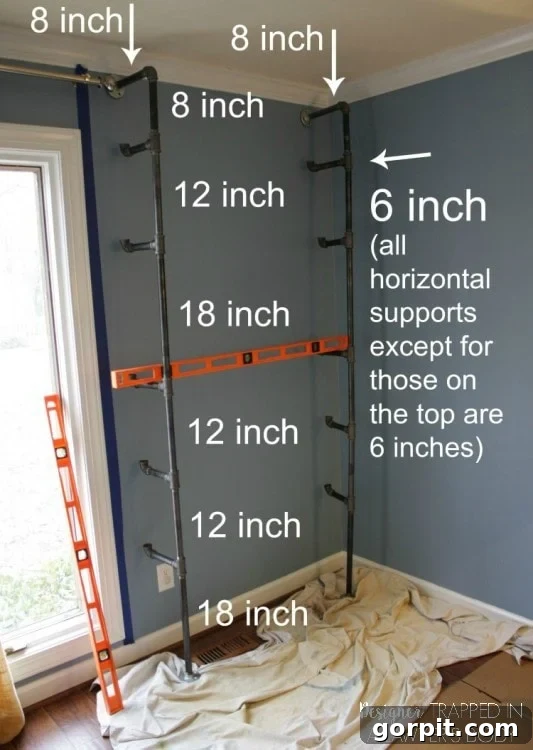
1) Meticulous Planning and Measurement: This is arguably the most critical phase of your project. Take your time to precisely measure your available space. Consider the total height, width, and depth you desire for your units. Sketch out your design, marking the exact placement of each shelf and desk. Remember to account for the additional length that each “T” joint and elbow joint will add to your overall height and width – these fittings are not negligible. Carefully calculate the lengths of pipe you’ll need for each vertical and horizontal segment. Think about what you’ll store on each shelf; for example, our diagram below shows the specific pipe lengths we used to create units with integrated desks on each side of a large window in our playroom. Precise planning now will save significant headaches later.
2) Assemble the Pipe “Skeleton” for a Dry Fit: Before cutting any wood, purchase all your pipe components and assemble the entire pipe structure (without the wood shelves). This “dry fit” allows you to verify that all your pieces fit together as planned and, more importantly, helps you determine the *exact* finished dimensions. Due to the threading and tightening of pipes and fittings, the precise height and width can vary slightly from theoretical calculations. Once assembled, measure the exact distance between your vertical pipe runs. This measurement will be the critical guide for cutting your shelf and desk lengths. Disassemble the pipe structure carefully, keeping components organized.
3) Prepare Your Wood Shelves and Desk Surfaces: Using your miter saw, carefully cut all your 2 x 12 pine boards to the precise lengths determined in step 2. Once cut, thoroughly sand all surfaces and edges to ensure they are smooth and free of splinters. After sanding, apply your chosen wood stain according to the manufacturer’s instructions. Allow the stain to dry completely, then apply several coats of a protective top coat. This step is crucial for durability, protecting the wood from moisture, scratches, and everyday wear, especially in a high-traffic area like a playroom.
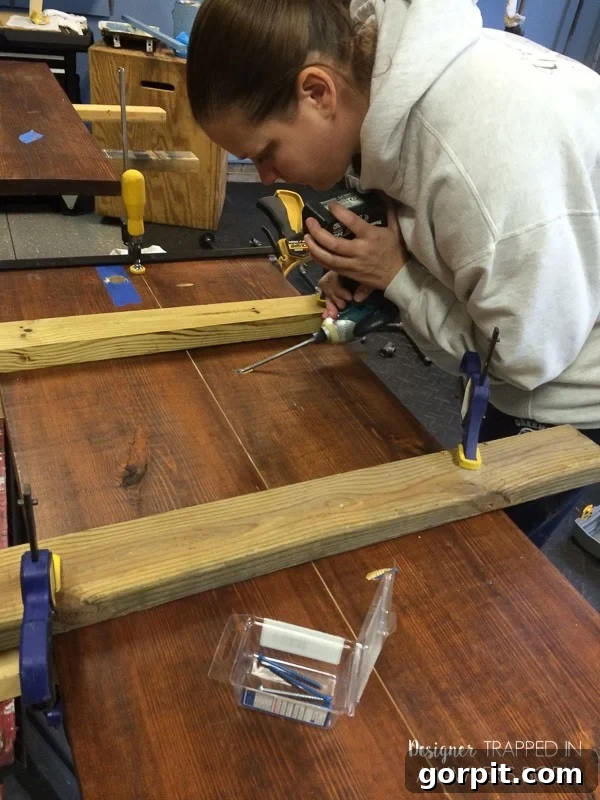
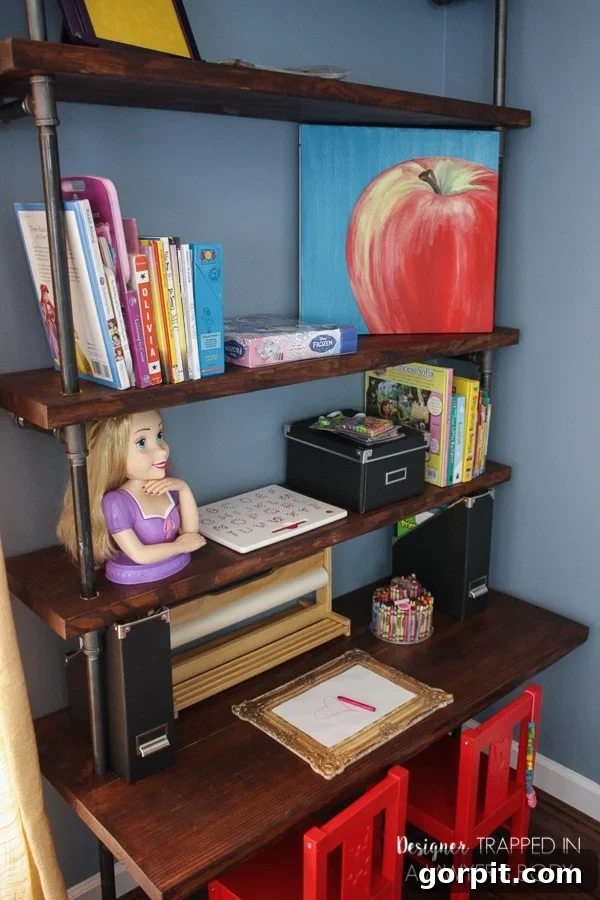
4) Construct the Built-In Desk: For the desk surface, you’ll need two of your stained pine boards to create a wider, more substantial surface. Use your Kreg jig pocket hole system to securely attach these two boards together along their long edges. This creates a strong, seamless desk top. Before assembly, remember to also drill the holes for your vertical pipes to pass through the desk, as described in more detail in step 6.
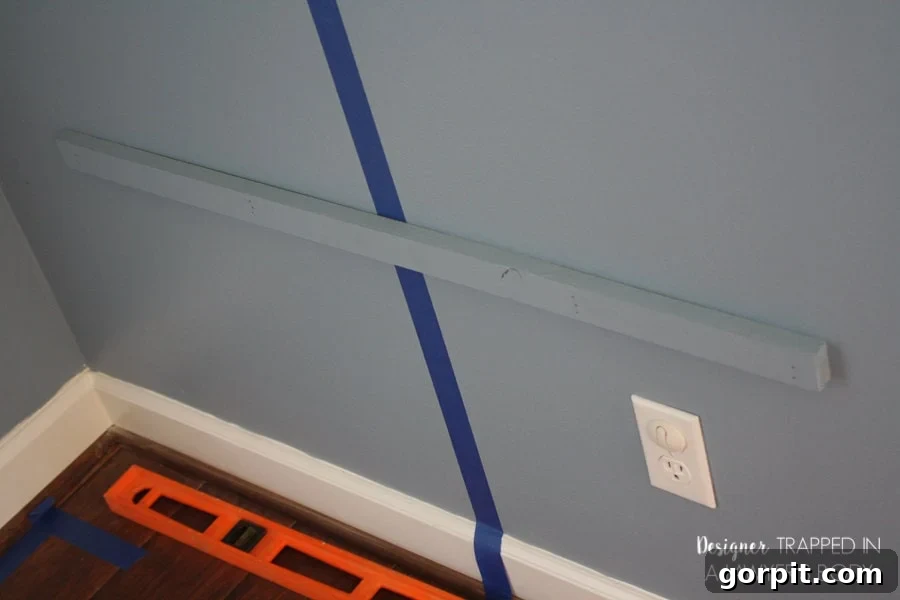
5) Install the Desk Support Bracket: To provide robust support for the back edge of your built-in desk, attach a sturdy bracket to the wall. This bracket will bear the weight of the desk’s rear, while the horizontal pipe pieces will support the front. It’s important to note a key distinction here: for all upper shelves, the horizontal pipe pieces typically face towards the wall to create a minimalist look. However, for the desk, these horizontal pipes must face *away* from the wall to properly support the deeper desk surface. Ensure the bracket is level and securely fastened to wall studs or with appropriate heavy-duty wall anchors.
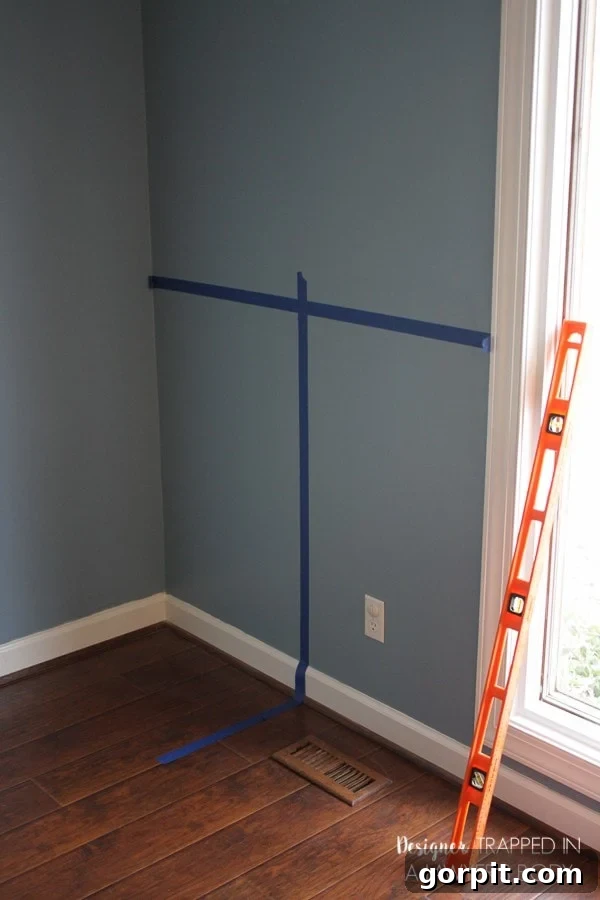
6) Bottom-Up Assembly and Precision Drilling: Now, you’re ready for the main assembly, working your way up from the bottom. Begin by attaching the floor flanges for the lowest vertical pipes directly to your floor. We used one wood screw per floor flange to allow for minor adjustments during assembly, but you can add more for extra stability once satisfied with the placement. However, do check for level at every single step. To ensure perfect symmetry and alignment, mark the centerline of your wall and the center of each shelf. Before drilling, position each shelf and desk, then wrap the ends where the pipes will pass through with painter’s tape. This allows you to trace the exact circumference of the pipe holes without marking directly onto your stained wood. Use your 1 1/8 inch Forstner bit to drill clean, precise holes through the marked points on each shelf and desk. The Forstner bit is ideal for this as it creates flat-bottomed holes, giving a neat, professional appearance.
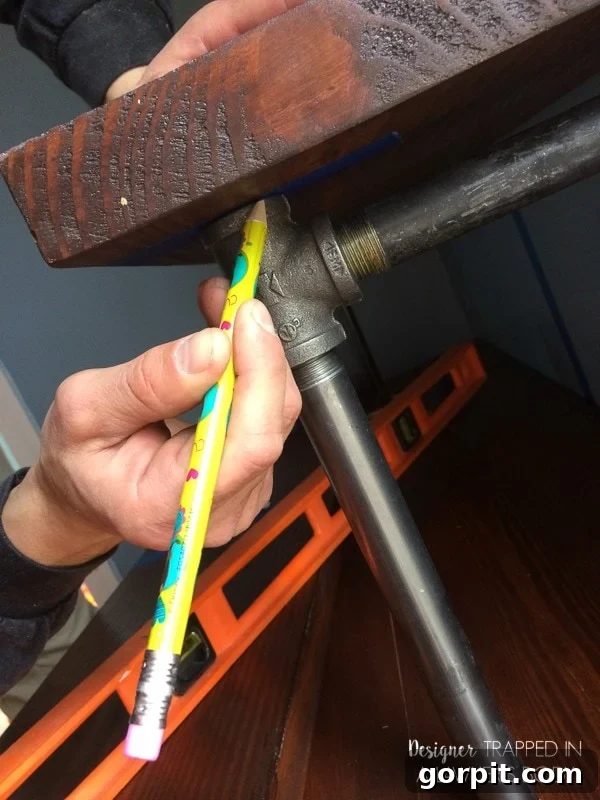
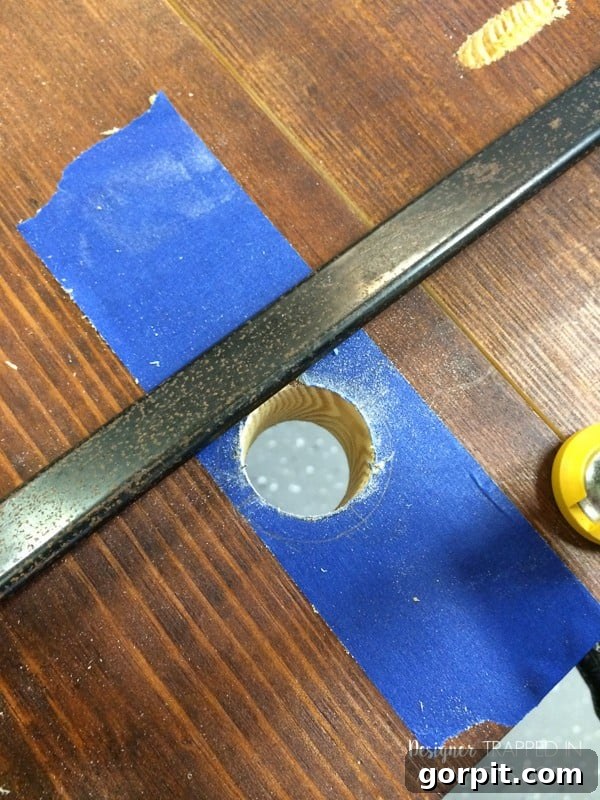
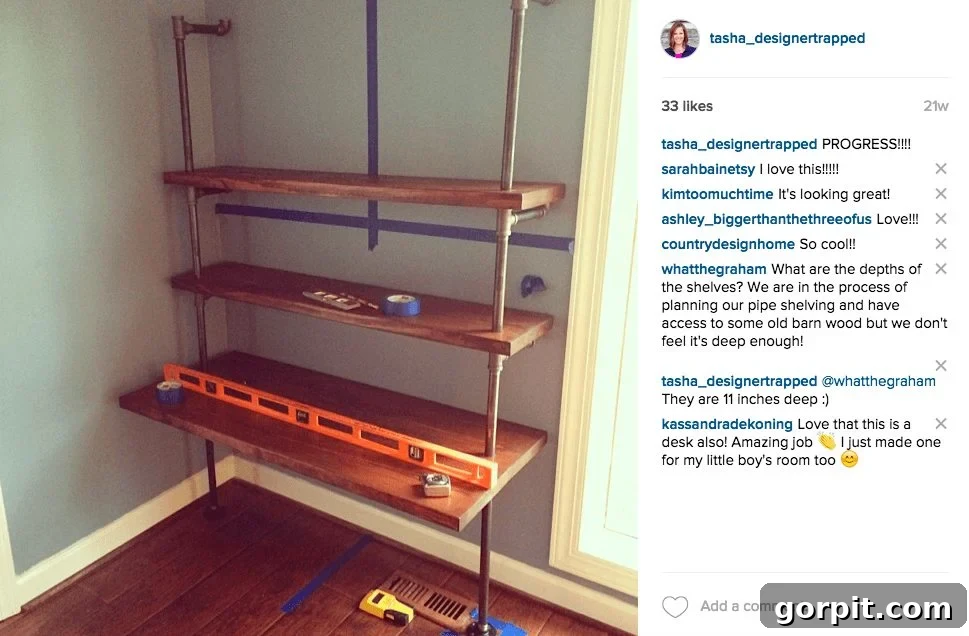
7) Progressive Assembly of Shelves: With your first set of holes drilled, position the shelf or desk in place. Then, screw the next length of vertical pipe into the fitting below it. This process is repeated for each subsequent shelf: drill the holes, slide the shelf into position over the pipes, then connect the next length of pipe. Continuously check for level and tighten all connections as you go. Working methodically from the bottom up ensures the entire structure remains plumb and stable. We shared our progress on Instagram as we built these units, showcasing the step-by-step transformation.
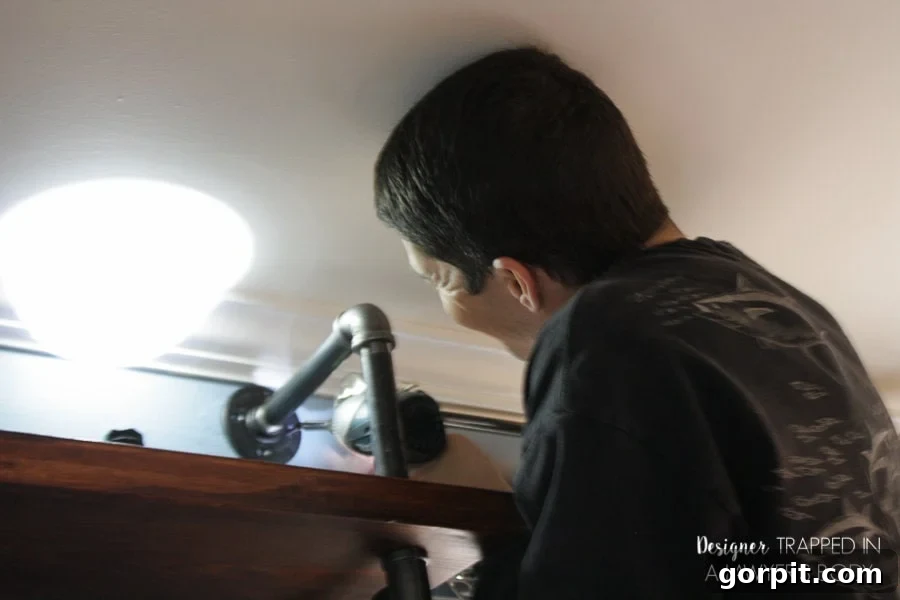
8) Secure the Top Section to the Wall: For the very top of each unit, instead of a “T” joint, you will use an elbow joint. Screw a short, typically 8-inch, length of pipe into this elbow joint. On the end of this short pipe, attach a floor flange. This flange will then be securely fastened to your wall. Use wood screws if you’re lucky enough to hit a wall stud, or employ appropriate heavy-duty wall anchors to ensure the entire structure is firmly anchored and cannot tip over. This final attachment point is crucial for the overall stability and safety of your industrial pipe shelving unit.
Time and Cost Investment for Your Custom Pipe Shelving:
While the assembly process itself can move quite quickly once you get into a rhythm, this isn’t a project to rush. The most time-consuming aspects are the initial planning and measuring phase, which demands meticulous attention to detail, and the shopping for materials. A common frustration many DIYers face with industrial pipe is the removal of stubborn price stickers and labels, which can take a surprising amount of time and effort. In total, we estimated approximately 30 hours for this entire project, encompassing all phases from design to the final wipe-down.
Regarding cost, industrial gas pipe isn’t the cheapest material. Our project, which included two full shelving units and two integrated desks, came to around $500 for materials. This cost could certainly be reduced by using a thinner diameter pipe or exploring alternative pipe materials if you’re on a tighter budget. However, we specifically wanted a substantial, robust, and authentic industrial look, so we opted for the heavier gauge pipe, considering it a worthwhile splurge. For two custom-designed desks and two extensive sets of bookshelves tailored precisely to our needs, this price tag represents excellent value compared to purchasing pre-made units of comparable quality and size. The investment in time and money yields highly personalized and durable furniture pieces that will last for years.
Versatility and Impact of Industrial Pipe Shelves:
Though these particular units were custom-built for our twin girls’ playroom, their industrial aesthetic and functional design make them incredibly versatile for almost any room in your home. Imagine these robust shelves and desks in a home office, providing ample space for books, files, and equipment, while offering a comfortable workspace. They would also be fabulous in a family room, serving as stylish display shelves for decor, media, or extra storage. Even in a bedroom, they could create a modern study nook or an impressive display for personal collections. The possibilities are truly endless, limited only by your imagination and space.
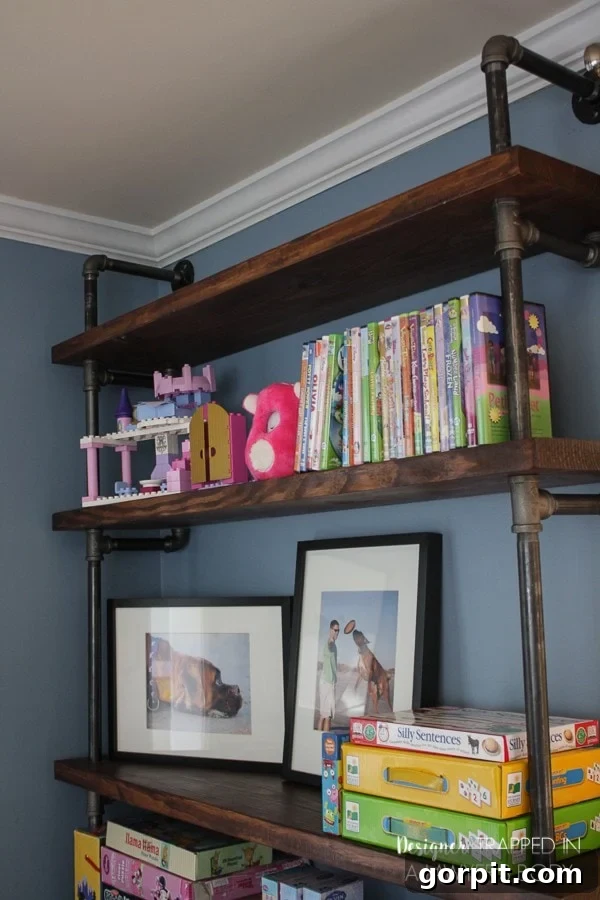
The end result is truly stunning! Beyond the obvious visual appeal, we are consistently impressed by how functional these desks and shelves are. They have transformed a cluttered, disorganized space into an efficient, beautiful, and inspiring environment for our girls to play, learn, and grow. The combination of the dark, rugged pipe and the warm, stained wood creates a unique industrial-chic look that is both modern and timeless.
What do you think of this transformation? If you’re inspired to tackle your own custom storage project and want to save this detailed tutorial for later, be sure to pin it! Happy building!