Crafting Personalized Mason Jars: The Ultimate DIY Guide for Every Occasion
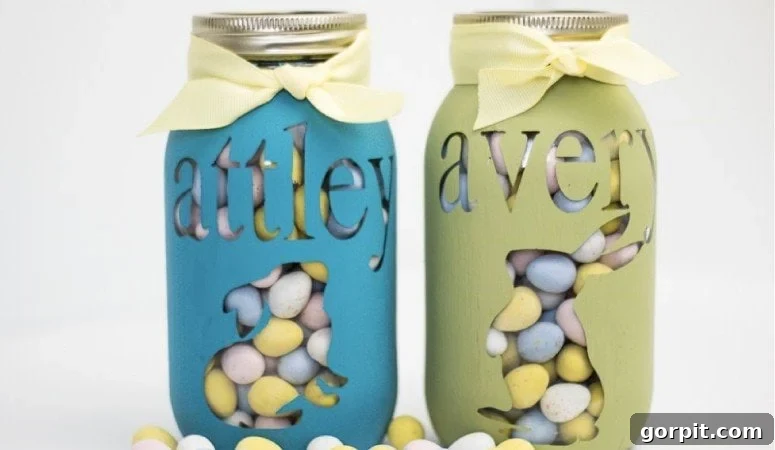
There’s a unique charm in giving a gift that reflects effort, thought, and a personal touch. While store-bought presents have their place, nothing quite compares to the warmth conveyed by a handmade item. As someone who cherishes the art of thoughtful gifting, especially for my loved ones, I’ve always sought creative avenues to make presents truly special. My twin girls, with their appreciation for all things beautiful and ornate, have further fueled my passion for elegant gift presentation. This quest for uniqueness often leads me down delightful DIY paths, resulting in creations that are not only aesthetically pleasing but also carry a piece of my heart. This year, I embarked on a mission to transform simple Easter candy into a memorable experience, and the result was an enchanting personalized mason jar that I’m thrilled to share with you.
This project is surprisingly simple, requiring minimal time and effort, yet it yields a stunning, high-impact result. Whether you’re preparing for Easter, a birthday, a wedding, or simply want to create a charming piece of home decor, these customizable mason jars are perfect. Dive into this comprehensive guide to learn how you can craft your very own DIY personalized mason jars with ease. Please note: This post includes affiliate links for your convenience. For more details, please review my full disclosure policy.
Why Choose Personalized Mason Jars for Your Gifts?
Mason jars are incredibly versatile, serving as much more than just storage containers. They are blank canvases waiting to be transformed into something extraordinary. Personalizing them elevates their status, turning them into cherished keepsakes or delightful gift vessels. Here’s why they are an ideal choice for any occasion:
- Thoughtful & Unique: A personalized jar demonstrates genuine care and consideration, making the recipient feel truly special.
- Versatile & Adaptable: Perfect for any holiday (Easter, Christmas, Valentine’s Day), birthdays, graduations, teacher appreciation, baby showers, or even as wedding favors.
- Budget-Friendly: Crafting these jars is an economical way to create high-value gifts without breaking the bank.
- Reusable & Eco-Friendly: Beyond the initial gift, the jar can be repurposed for storage, decor, or future gifting.
- Creative Outlet: It’s a fun and engaging craft project that allows for endless creativity in design and color choices.
- Memorable Presentation: Imagine the delight on someone’s face as they receive a beautifully decorated jar filled with their favorite treats or a small, meaningful gift. It’s an experience, not just a present.
The Ultimate DIY Personalized Mason Jar Tutorial
Gathering Your Essential Materials
Before we begin, ensure you have all the necessary supplies. Choosing the right materials is key to achieving a professional and durable finish. Don’t worry, most items are readily available at craft stores or online.
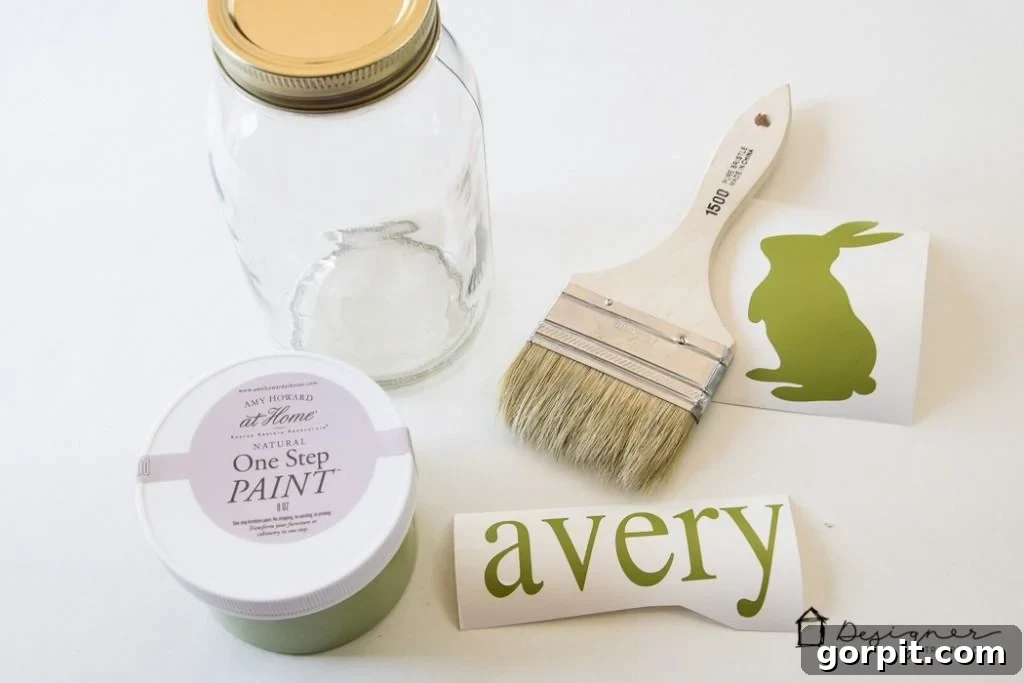
- Smooth Glass Mason Jar: The foundation of our project. Opt for mason jars with smooth sides, as this provides an ideal surface for applying vinyl and paint without interference from embossed patterns. Jars like this type are perfect, ensuring your design adheres flawlessly and the paint coats evenly. Make sure they are clean and dry before you begin.
- Chalk Paint: This is our paint of choice due to its excellent adhesion properties on glass, minimal need for priming, and lovely matte finish. It dries quickly and offers a beautiful, slightly distressed look if desired.
- For a vibrant green, I personally recommend Amy Howard At Home One Step Paint in Dunavant Green.
- For a serene blue, Americana Decor Chalky Finish Paint in Treasure delivers a stunning result.
- Feel free to experiment with any chalk paint brand and color that suits your aesthetic or the occasion.
- High-Quality Paint Brush: A good quality synthetic brush will provide smooth, even coverage and minimize brush strokes. A 1-inch or 1.5-inch flat brush is usually ideal for jar surfaces.
- Vinyl and Cutting Machine OR Vinyl Craft Stickers: This is where the personalization comes to life!
- Option 1 (Cutting Machine): If you own a cutting machine like my beloved Silhouette CAMEO, you have limitless design possibilities. You’ll also need adhesive vinyl (removable or permanent, depending on how long you want the design to last as a stencil).
- Option 2 (Vinyl Craft Stickers): No cutting machine? No problem! Vinyl craft stickers are an excellent alternative. Look for vinyl decals or stencils that are specifically designed for crafting and can be easily removed without leaving residue.
- Important Note: Do NOT use traditional paper stickers with adhesive backing. These are not designed to be peeled off cleanly after painting and will likely tear or leave sticky residue, ruining your hard work. Always choose vinyl.
Step-by-Step Guide to Crafting Your Mason Jars
Now that you have all your supplies, let’s get crafting! Follow these simple steps for a flawless finish.
Step 1: Design and Prepare Your Vinyl Stencil
This is where your creativity shines!
Using a Cutting Machine:
Open your cutting machine’s software (e.g., Silhouette Studio, Cricut Design Space). Brainstorm your design. For Easter, a bunny silhouette and the recipient’s name work wonderfully. For other occasions, consider initials, a special date, a simple heart, or a festive motif. Choose a font that is easy to cut and read. Larger, bolder fonts tend to work best. Arrange your chosen text and shapes on your digital canvas, ensuring they fit well on the mason jar’s smooth surface. Once your design is perfected, load your adhesive vinyl into the machine and cut it according to your software’s instructions. After cutting, carefully “weed” your design – this means removing the excess vinyl around and inside your letters/shapes, leaving only the stencil you wish to apply to the jar. For this project, we are creating a negative stencil, so you will peel away the letters/shapes themselves, leaving the surrounding vinyl that will act as a barrier for the paint.
Using Vinyl Craft Stickers:
If you’re using pre-made vinyl craft stickers, simply select the letters and shapes you want to use. Ensure they are made from vinyl and have a clean, removable adhesive. These are often found in the scrapbooking or craft sticker aisles of your local craft store.
Step 2: Apply the Vinyl to Your Mason Jar
Before applying, ensure your mason jar is completely clean and dry. Wipe it down with rubbing alcohol if necessary to remove any oils or residues that could affect adhesion.
For Cut Vinyl Stencils:
Carefully transfer your weeded vinyl stencil onto the clean, smooth surface of the mason jar. Use transfer tape if your design has multiple loose elements (like separate letters). Once positioned, press down firmly on the vinyl, paying extra attention to the edges of your letters and shapes. Use a credit card or a craft squeegee to smooth out any air bubbles and ensure the vinyl is fully adhered to the glass. This crucial step prevents paint from bleeding underneath, ensuring crisp lines.
For Vinyl Craft Stickers:
Peel your chosen vinyl stickers from their backing and carefully apply them to the jar. Press down firmly to remove any air bubbles and ensure strong adhesion, especially around the edges. Take your time to align them perfectly.
Step 3: Paint Your Mason Jar with Chalk Paint
With your vinyl securely in place, it’s time to paint!
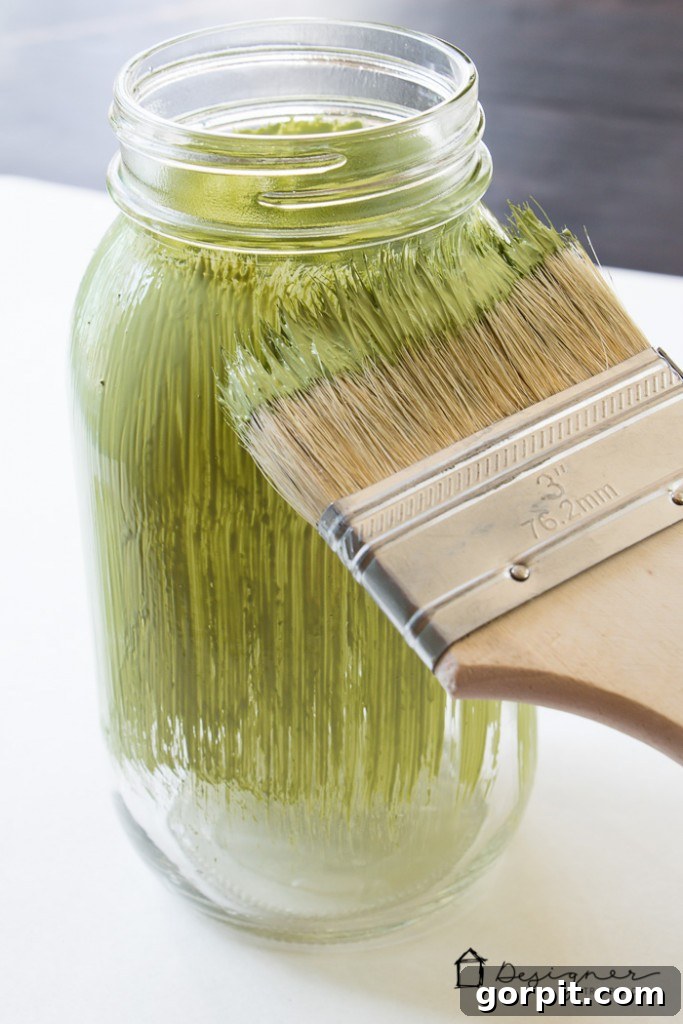
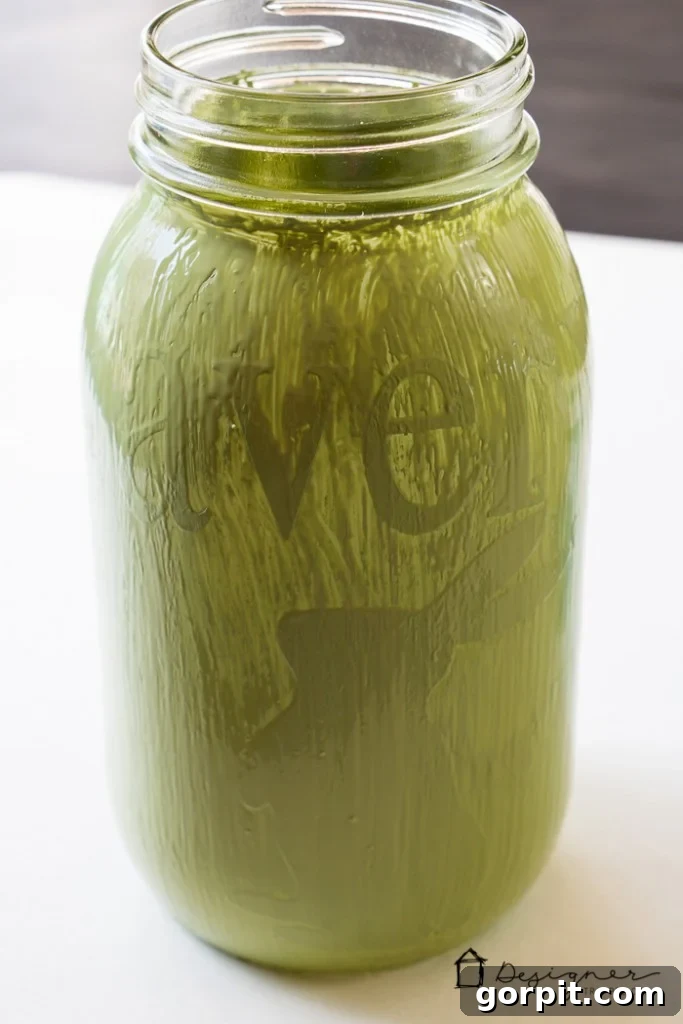
Dip your paintbrush into the chalk paint, making sure not to overload it. Apply your first coat of chalk paint evenly over the entire jar, completely covering the vinyl stickers. Use long, smooth strokes. Don’t worry if the first coat looks a bit translucent; chalk paint builds opacity beautifully with multiple thin layers. Allow the first coat to dry completely. This usually takes about 15-30 minutes, depending on humidity and paint thickness. Once dry, apply a second coat of chalk paint. This second layer will provide full coverage and a rich, opaque finish. For a more distressed look, you can sometimes get away with just one thicker coat, but two thin coats generally yield a smoother, more even result. Ensure this second coat is also fully dry before proceeding to the next step. Resist the urge to peel the vinyl while the paint is wet, as this can cause smudging and jagged edges.
Step 4: Carefully Peel the Vinyl and Add Finishing Touches
This is the most satisfying part, revealing your personalized design!
Once the paint has dried to the touch (typically within an hour or two), but before it has fully cured (which can take 24-48 hours), carefully begin to peel the vinyl off the jars. If the paint is too wet, it might smudge. If it’s too dry, it might chip along with the vinyl. A good tip is to use a crafting weeder tool or tweezers to gently lift the edge of the vinyl and slowly pull it away. Pull the vinyl at a sharp angle against itself (almost flat against the jar) to get the cleanest lines. If you notice any small paint bleeds, you can gently scrape them away with a craft knife or a toothpick once the paint is fully dry.
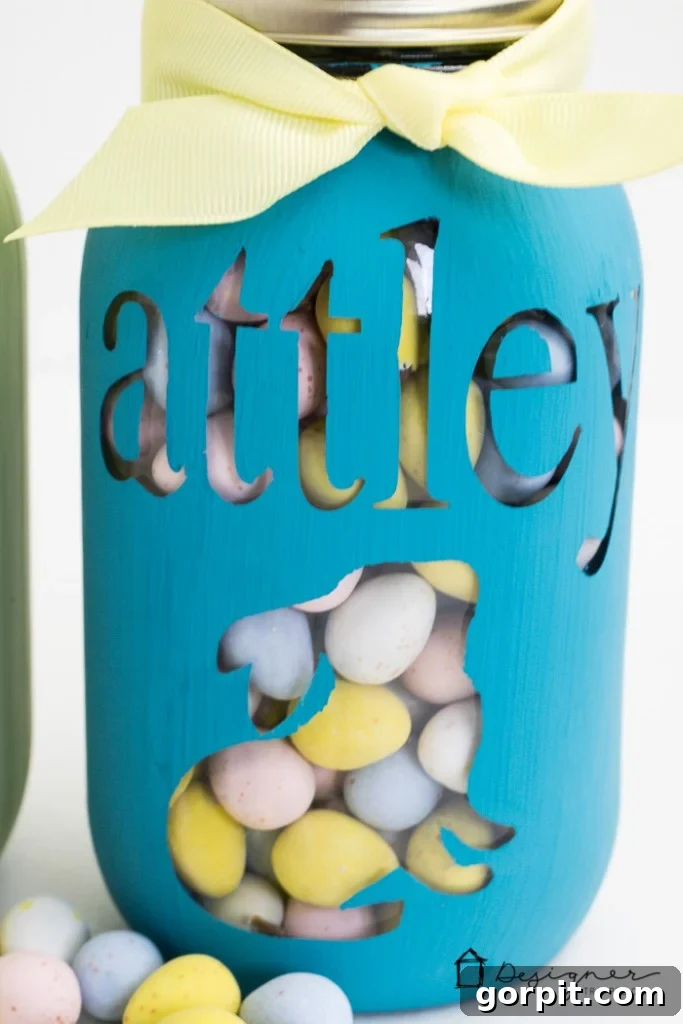
Once the vinyl is removed and your design is revealed, let the jar sit for at least 24 hours to allow the paint to fully cure and harden. This will ensure durability. To finish, fill your adorable personalized mason jar with candy, small toys, notes, or any other thoughtful gift. For an extra touch of charm, tie a small bow around the neck of the jar using ribbon, twine, or raffia that complements your chosen colors.
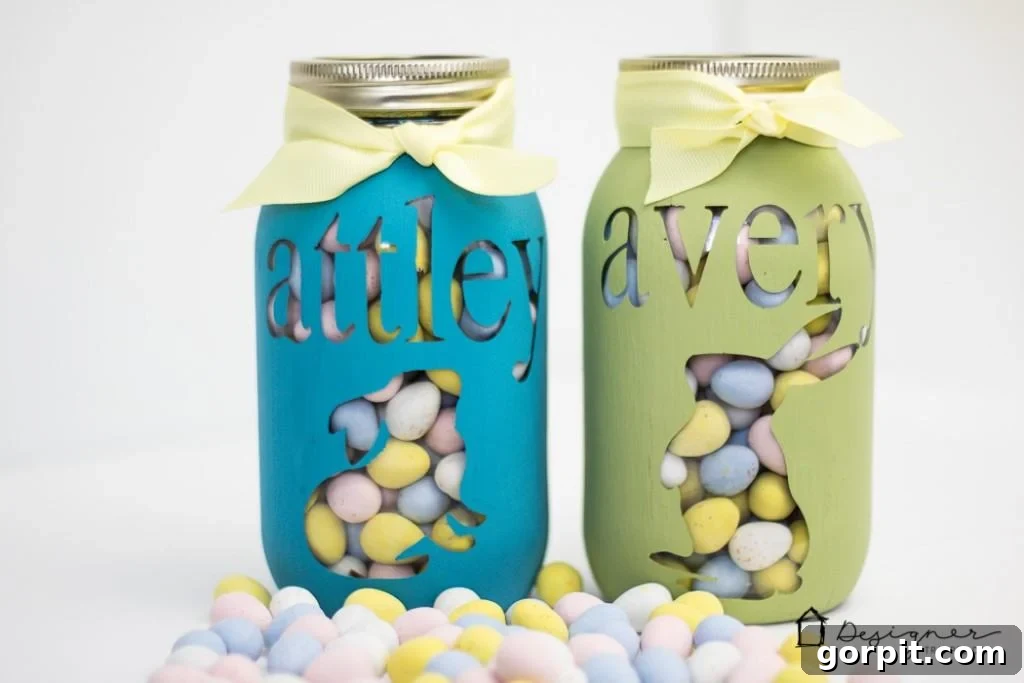
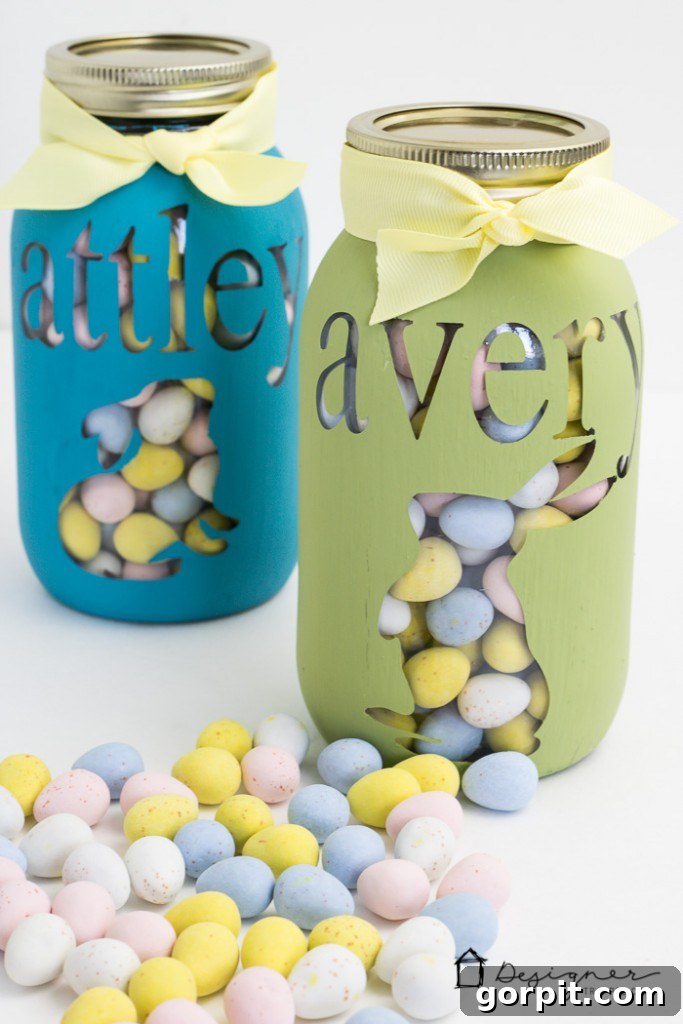
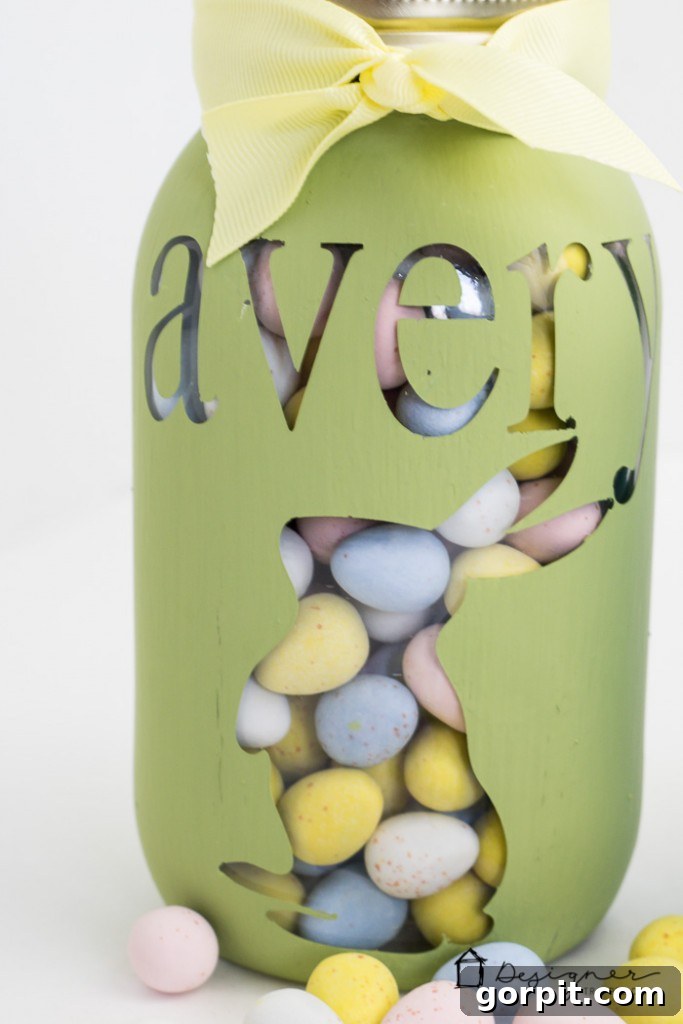
Can you believe how incredibly easy that process is? And just look at the adorable finished product! These personalized mason jars aren’t just gifts; they’re expressions of love and creativity. They are a fabulous way to present a gift to someone special, making any occasion feel more celebrated and memorable.
Customization Ideas & Expanding Your Creativity
The beauty of this project lies in its endless customization possibilities. Here are a few ideas to spark your imagination:
- Themed Jars: Adapt the designs for Christmas (snowflakes, trees, “Merry & Bright”), Valentine’s Day (hearts, “Be Mine”), birthdays (age, initial, confetti), or even wedding favors (“Mr. & Mrs. [Name]”, wedding date).
- Different Fillings: Beyond candy, consider filling jars with homemade bath salts, cookie mix ingredients, sewing kits, small craft supplies, tea bags, or even a potted succulent.
- Distressed Look: For a rustic farmhouse feel, once the paint is fully cured, lightly sand certain areas with fine-grit sandpaper to reveal glimpses of the glass underneath.
- Sealant: For added durability, especially if the jar will be frequently handled or lightly cleaned, consider applying a clear sealant (like a clear matte spray sealer) over the chalk paint. Ensure the sealant is non-toxic if food will be placed directly inside.
- Lid Decor: Don’t forget the lid! You can paint the lid to match, cover it with fabric, or tie a decorative tag to it.
Care and Maintenance for Your DIY Mason Jar
To ensure your personalized mason jar stays beautiful for years to come, gentle care is recommended. Since chalk paint is not typically waterproof or dishwasher-safe without specific sealants, it’s best to hand wash the exterior gently. Avoid harsh scrubbing or abrasive cleaners on the painted surface. The inside of the jar can be washed as usual.
If you’re inspired by this project and are eager to try it yourself, make sure to pin this tutorial to your favorite craft or DIY board so you can easily refer back to it whenever you need!
More Inspiration for Your Home and Holidays
If you enjoyed this craft, you might love exploring other DIY projects and decorating ideas. Here are some related posts to fuel your creativity:
- Easter Basket Gift Ideas: Discover creative and fun ideas to fill those Easter baskets beyond just candy.
- Easter Egg Carrot Cupcakes: A delightful recipe to bake and decorate for your Easter celebrations.
- My Favorite DIY Easter Decorations + More: A collection of charming crafts to spruce up your home for spring.
- Easy Dotted Sharpie Easter Eggs: A simple yet artistic way to decorate Easter eggs without complex dyes.
- Decorating Easter Eggs With Dots and Glitter: Add sparkle and unique patterns to your traditional Easter egg hunt.
Curious about how I approach transforming rooms and spaces within our home, turning design dreams into reality? Dive into Designer in a Binder®, my comprehensive guide to help you decorate your home with confidence and ease.
For exclusive content, behind-the-scenes sneak peeks, and a deeper dive into my design world, be sure to subscribe to my newsletter before you leave! Join our community of DIY and design enthusiasts.