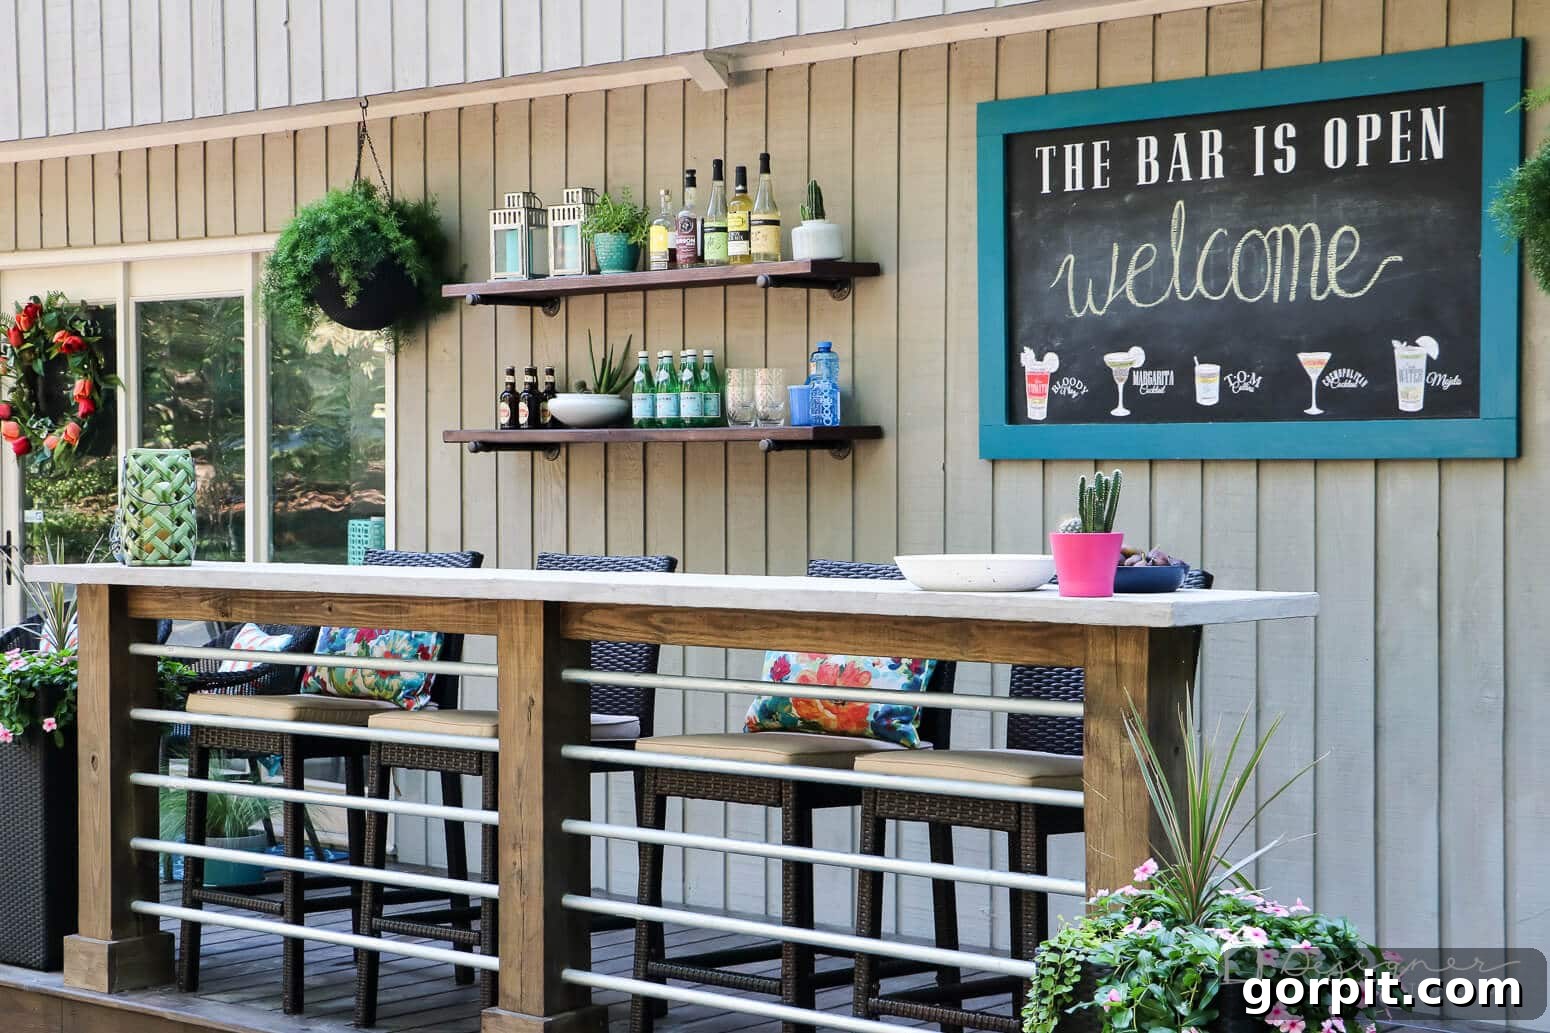
Build Your Dream Outdoor Oasis: The Ultimate DIY Deck Bar Tutorial
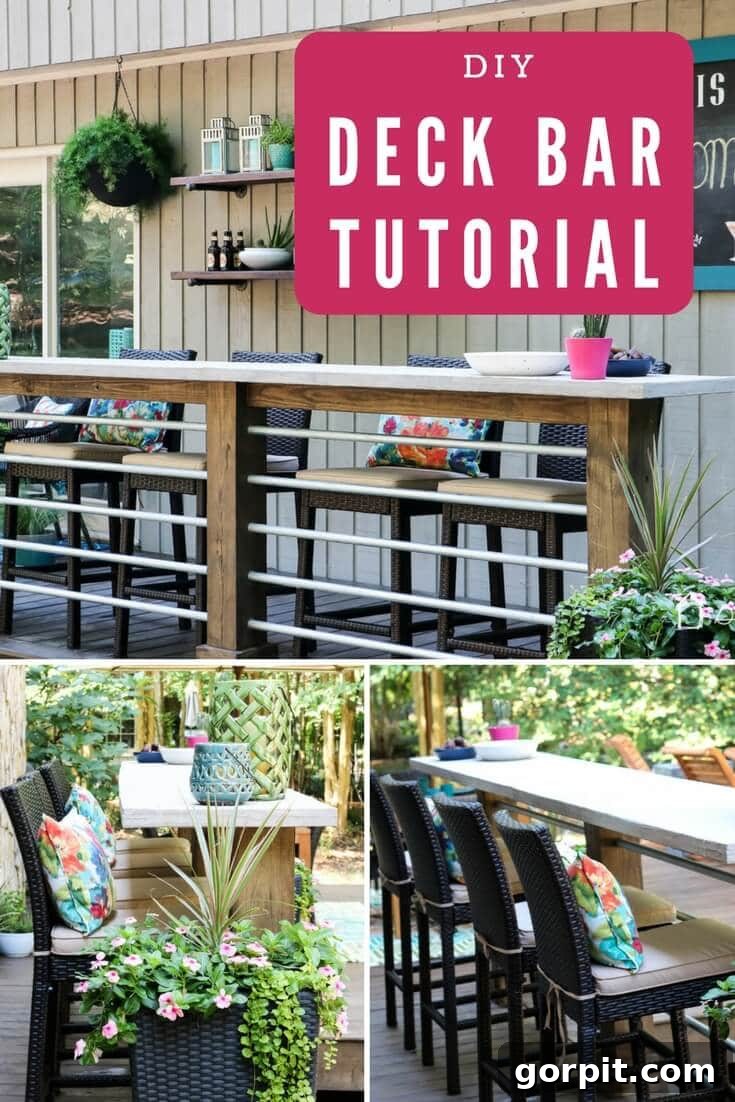
Transforming your backyard into an inviting outdoor living space is easier than you think. One feature that truly elevates any deck or patio is a custom-built outdoor bar. If you’ve been dreaming of having a dedicated spot for entertaining, serving drinks, and enjoying the fresh air, you’re in the right place! This comprehensive guide will walk you through building your very own DIY deck bar, a project that is both rewarding and surprisingly affordable. We recently completed our deck makeover, and adding this outdoor bar was one of the best decisions we made. It requires just a few basic materials available at any local home improvement store, making it a perfect weekend project for DIY enthusiasts of all skill levels.
Thank you to DAP Products for sponsoring this post. As always, the opinions and text are all mine. This post also contains some affiliate links for your convenience (which means if you make a purchase after clicking a link I will earn a small commission which helps keep my blog up and running but it won’t cost you a penny more)! Click here to read my full disclosure policy.
Why a DIY Deck Bar is a Game-Changer for Your Backyard
Imagine effortlessly hosting gatherings, mixing cocktails for friends, or simply enjoying your morning coffee in a stylish outdoor setting. A DIY deck bar offers numerous benefits:
- Enhanced Entertainment: It creates a focal point for socializing, providing a convenient surface for drinks, snacks, and conversations. No more running inside for every refill!
- Increased Functionality: Beyond entertaining, it can serve as an extra prep area for outdoor cooking or a display space for plants and decor.
- Personalized Style: Building it yourself allows you to customize the design, size, and finishes to perfectly match your aesthetic and existing outdoor decor.
- Cost-Effective: DIY projects often save significant money compared to purchasing pre-made outdoor bars, allowing you to invest in higher-quality materials or other backyard upgrades.
- Boosts Home Value: A well-designed outdoor living space, including a functional bar, can enhance your home’s appeal and market value.
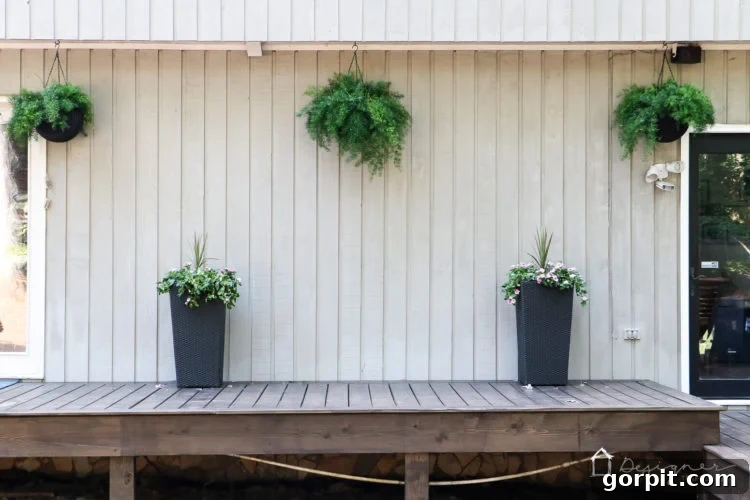
Before we dive into the building process, let’s take a quick look at the transformation. This was the exact spot where our DIY outdoor bar now sits – just a vast, empty space:
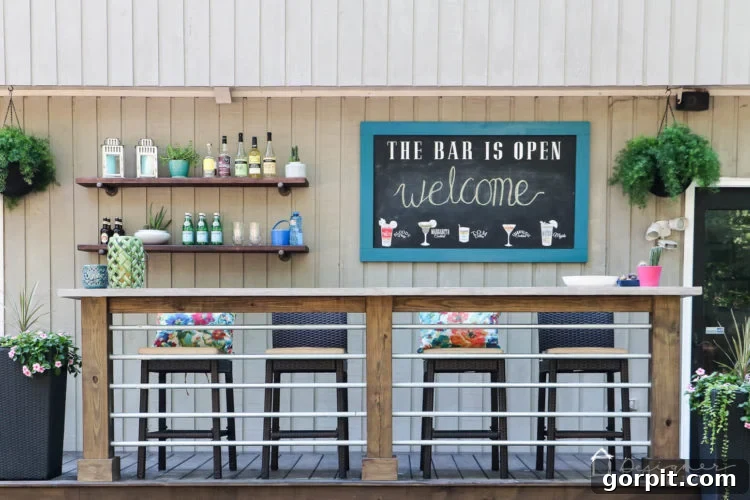
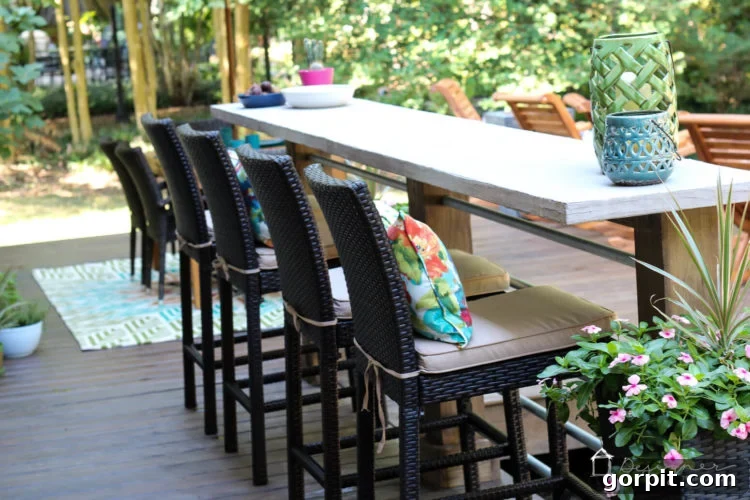
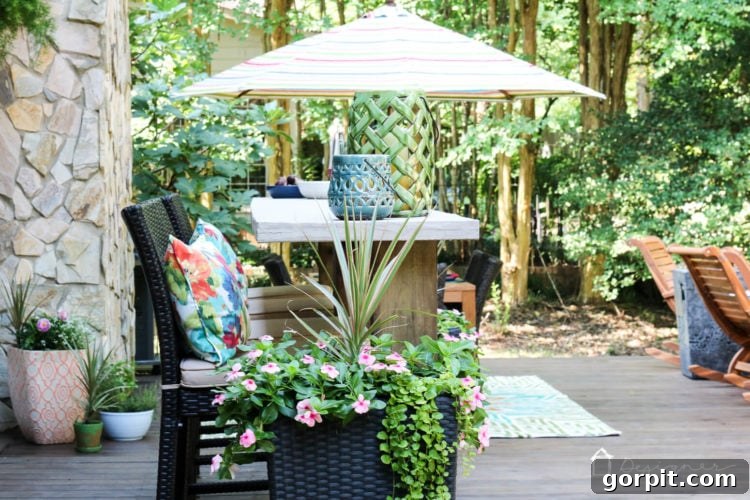
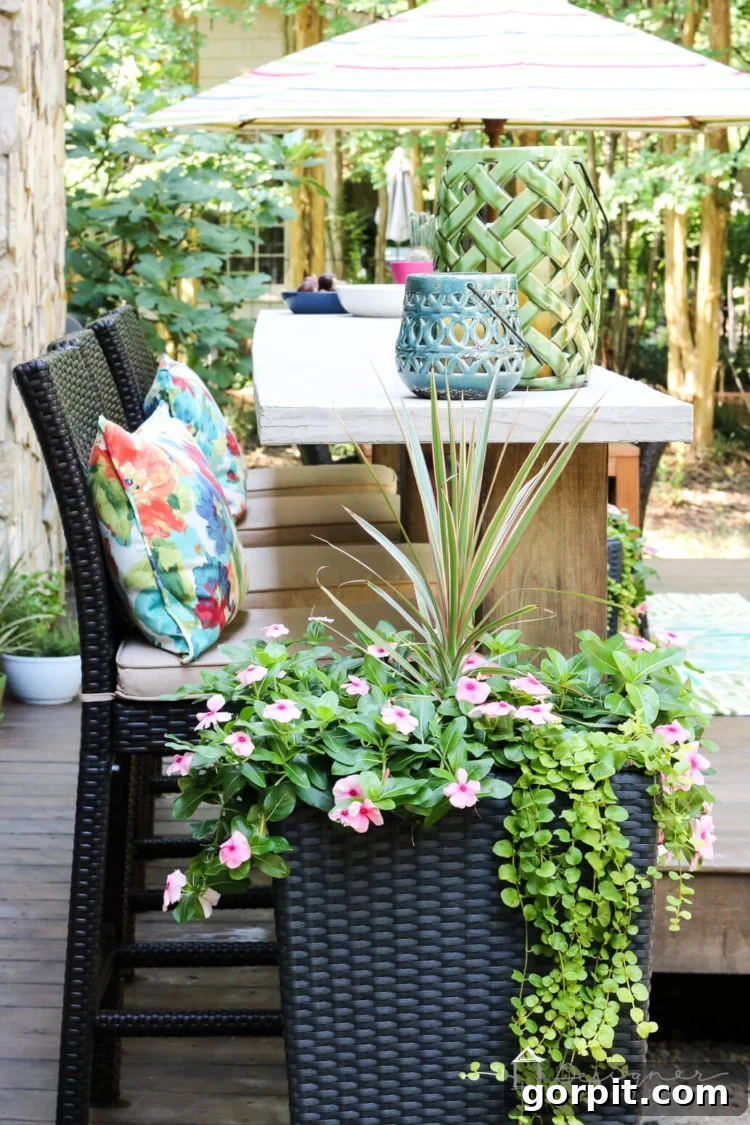
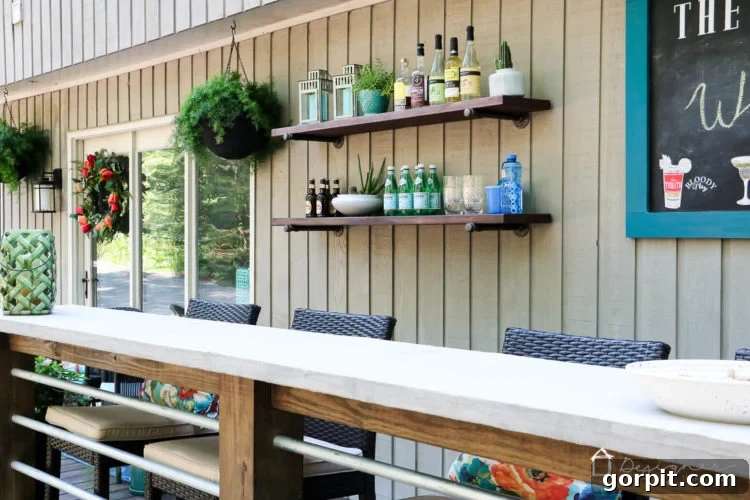
And here’s what it looks like now – a welcoming and stylish outdoor bar ready for countless memories!
Planning Your DIY Deck Bar: Essential Considerations
A successful DIY project starts with careful planning. Before you even touch a tool, consider these aspects to ensure your deck bar perfectly fits your needs and space:
1. Location and Orientation
Think about sun exposure, proximity to your main entertaining areas, and ease of access from your kitchen. Do you want it in full sun, partial shade, or under a pergola? Our bar is situated on our main deck, easily accessible from our outdoor dining area.
2. Size and Dimensions
The length and height of your bar will depend on your available space and how many people you envision accommodating. Standard bar height is typically around 40-42 inches, allowing for comfortable standing or use with bar stools. Measure your chosen spot carefully to determine the optimal length for your bar. For our project, we chose a generous length to maximize serving space and opted for three support posts for stability.
3. Design and Aesthetics
Consider the overall style of your deck and home. Will your bar complement it with a modern, rustic, or traditional look? Our design incorporates metal conduit railings and a concrete-overlay top for a contemporary industrial feel. Don’t forget about incorporating features like footrests or integrated lighting if desired.
Materials and Tools You’ll Need for Your DIY Outdoor Bar
Gathering all your materials and tools beforehand will ensure a smooth and efficient building process. Here’s a detailed list of what you’ll need:
Lumber & Structural Components
- 6 x 6 inch posts (The number and length depend on your bar’s size and desired height. We used three for our long bar.)
- 2 x 4s (Quantity varies with bar length; these will support the bar top.)
- OSB or plywood for the bar top substrate (Note: In retrospect, plywood is highly recommended for a smoother base and easier concrete overlay application.)
- 1 inch metal conduit (The length depends on your bar’s railing design.)
- Deck screws (For attaching 2x4s and other wood components.)
- Lag bolts (For securing post brackets to the deck.)
- Leftover decking or similar wood for trimming out the post bases (Optional, for aesthetics.)
Bar Top Finishing Materials
- Ardex Feather Finish (Or similar concrete overlay product for the bar top.)
- Quikrete Concrete Cure And Seal (Or a similar water-based acrylic concrete sealer for durability and finish.)
- DAP Plastic Wood (For filling gaps in wood trim.)
- Deck stain (To match your existing deck, if applicable, for all wood components.)
Adhesives and Sealants
- DAP Dynagrip Heavy Duty Construction Adhesive (Crucial for securing the bar top and conduit railings.)
Essential Tools
- 1 1/4″ Forstner bit (For drilling precise holes for conduit.)
- Post brackets (these are the kind we used)
- Post level (Essential for ensuring plumb and level posts.)
- Circular saw (For cutting large lumber like 6×6 posts and OSB/plywood.)
- Drill driver (For drilling holes and driving screws/lag bolts.)
- Hand saw or metal grinder (For cutting metal conduit.)
- Speed square (For marking accurate cuts.)
- Drywall mud pan (For mixing concrete overlay.)
- 8 to 10 inch drywall taping knife (For applying concrete overlay.)
Step-by-Step Guide: Building the Base of Your DIY Deck Bar
The base is the foundation of your outdoor bar, providing stability and structure. Follow these steps carefully to ensure a sturdy build.
Step 1: Determine Length, Height, and Post Layout
First, finalize the desired length of your DIY deck bar, as this dictates the number of support posts required. For a longer bar like ours, three posts provide excellent stability. Next, decide on the finished height of your bar from the ground; this will be the cutting length for your 6×6 posts. Mark these measurements precisely on your lumber.
Step 2: Cut and Install the Support Posts
Using a circular saw, carefully cut your 6×6 posts to the predetermined length. For thick lumber, it’s often easiest to cut through one side, then flip the post and cut through the other to achieve a clean, straight cut.
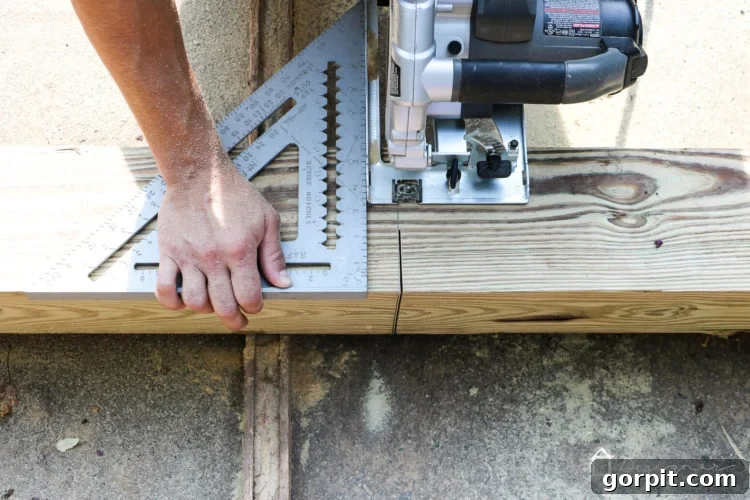
Once cut, determine the ideal spacing for your posts along the deck. Mark these spots and attach your chosen post brackets to the deck surface using lag bolts and a drill driver. After securing the brackets, place your 6×6 posts into them. Use a post level to ensure each post is perfectly plumb (vertically straight) and level before tightening the bracket fasteners. This critical step guarantees a stable and professional-looking bar.
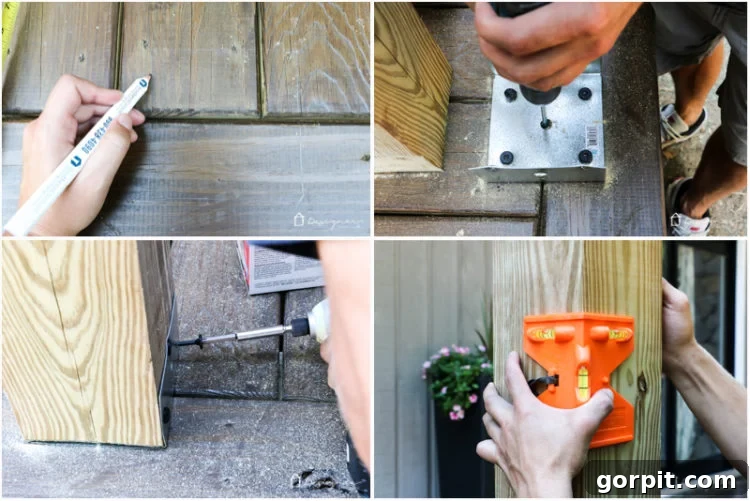
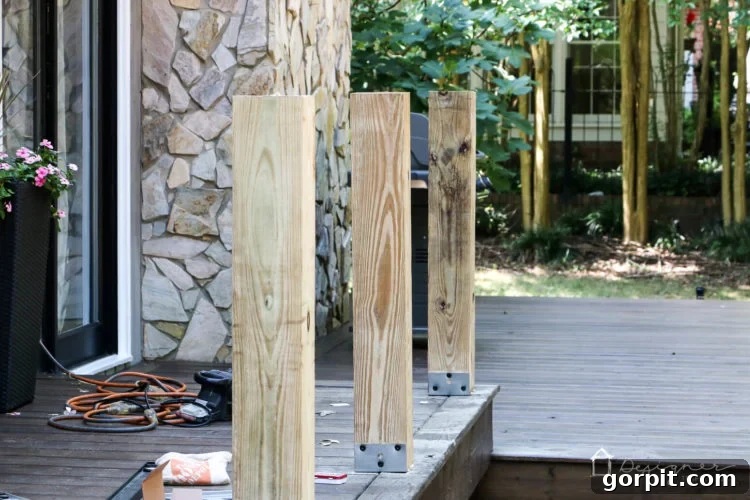
Step 3: Add Stylish Metal Conduit Railings (Optional)
To add a modern touch and functional footrests, we incorporated metal conduit railings. First, decide on the desired spacing for these railings on your posts. To ensure consistency, we created a simple wood jig with our hole placements. This jig allowed us to quickly hold it against each post and drill perfectly aligned holes using a 1 1/4 inch Forstner bit. This method guarantees that all railings will be perfectly level and spaced.
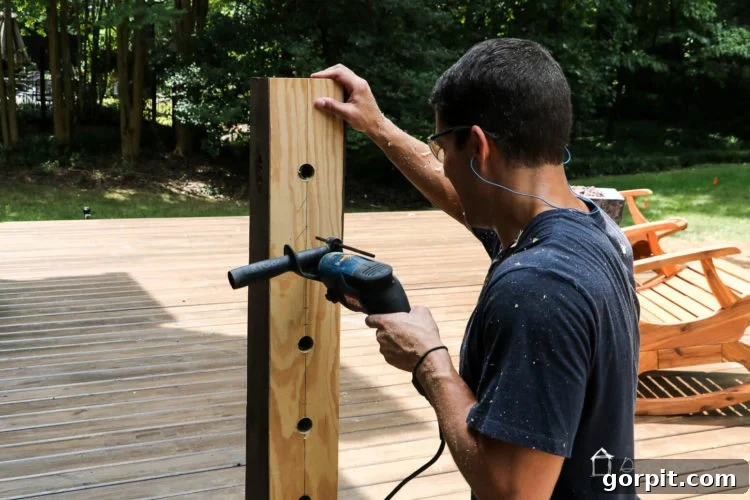
Measure the distance between your posts and add approximately 1 1/2 inches to this measurement. This extra length allows the conduit to securely fit into the drilled holes. Cut your metal conduit to these lengths using a hand saw or a metal grinder.
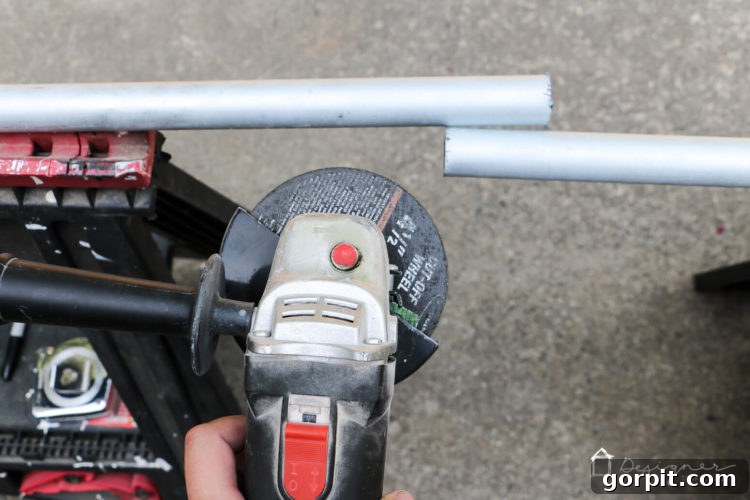
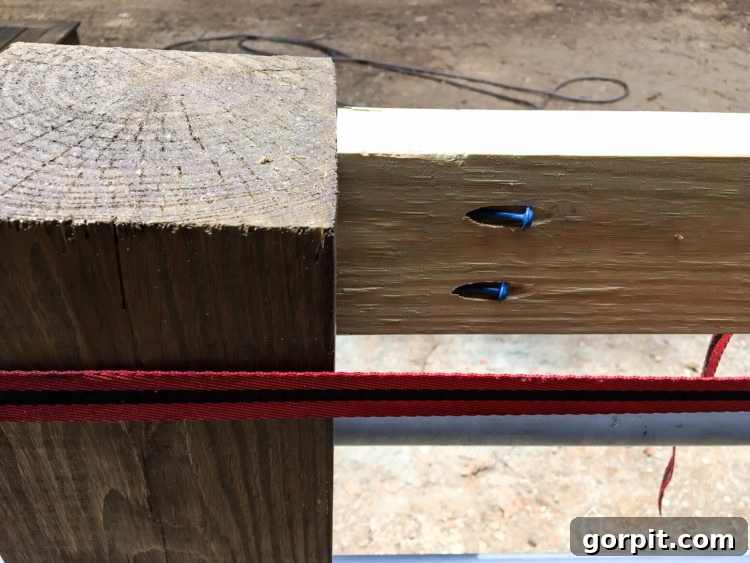
To insert the railings, you’ll need to temporarily remove the outer support posts. Insert one end of a conduit into the center post (which remains attached to the deck). Then, carefully reposition the corresponding end post, threading the other end of the conduit into its hole as you secure the post back into its bracket. Repeat this process for all railings. For a completely stationary railing that won’t spin, apply a dab of DAP Dynagrip Heavy Duty Construction Adhesive inside each hole before inserting the conduit.
Step 4: Secure the Bar Top Support Frame
Cut your 2x4s to fit snugly between each post. Attach these 2x4s horizontally, ensuring their top edge is flush with the top of your 6×6 posts. These pieces are crucial as they will provide essential support for the weight of your bar top, preventing any sagging over time.
Step 5: Finish the Base (Trimming and Staining)
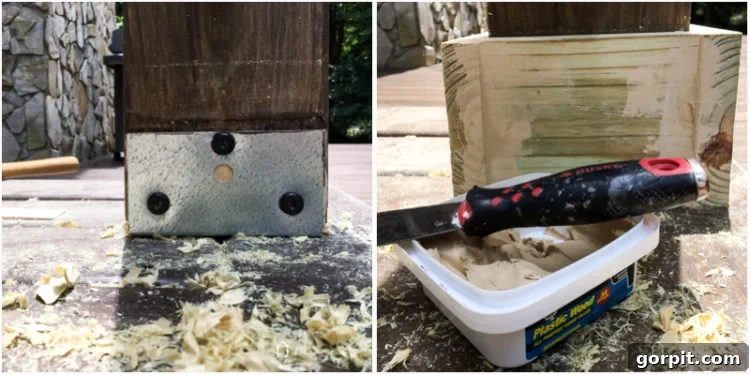
This step is optional but highly recommended for a polished look. We used leftover decking, with rounded edges ripped off by a table saw, to trim out the base of each post. This effectively hides the post brackets and gives a cleaner appearance. We used simple butt joints for the corners and filled any gaps with DAP Plastic Wood. Once the filler dried, it was easy to sand smooth and accept our deck stain, perfectly matching the rest of our deck.
Crafting the Perfect Bar Top: A Concrete Overlay Approach
The bar top is where your DIY deck bar truly shines. We chose a concrete overlay for its modern aesthetic and manageable weight.
Step 1: Preparing Your Bar Top Substrate (OSB vs. Plywood)
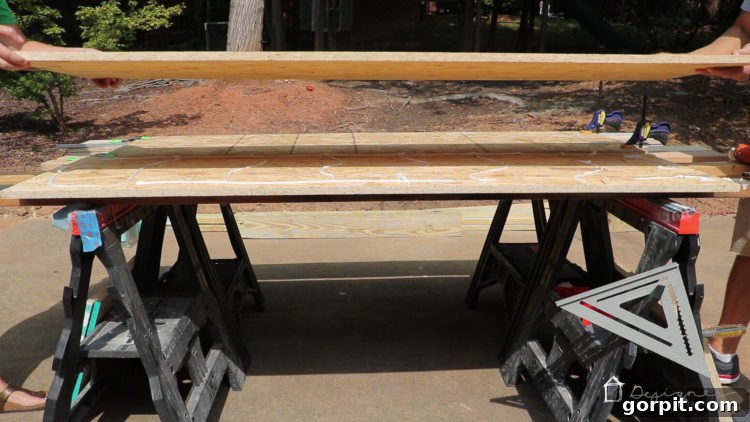
Our bar top was too long for a single sheet, so we cut four sheets of OSB (oriented strand board) to size, creating two pieces that would join over the middle post. To achieve a desired thickness, we sandwiched two pieces of OSB together for each section. If we were to do this project again, we would wholeheartedly recommend using a thick plywood instead of OSB. While OSB is more economical, plywood offers a much smoother, more stable base, which significantly simplifies the application of the concrete overlay and results in a crisper edge. The layered OSB, while functional, proved a bit tricky to get a perfectly smooth finish with the concrete.
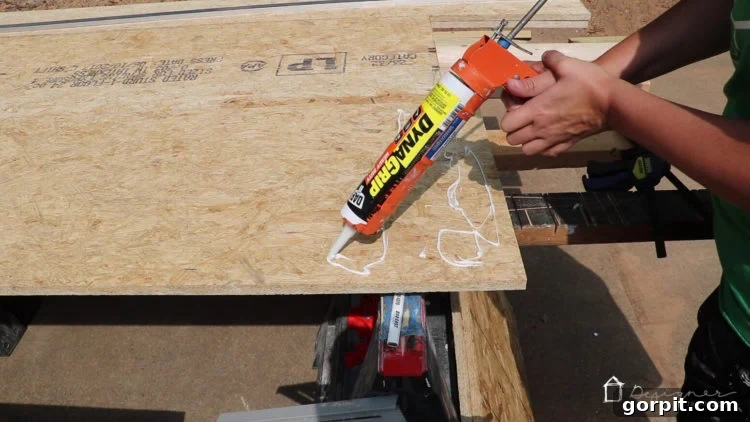
After cutting your chosen substrate to size, apply DAP Dynagrip Heavy Duty Construction Adhesive to the bottom piece of each section, then carefully place the top piece over it. Allow the adhesive to cure according to the manufacturer’s directions for a strong bond.
Step 2: Applying the Concrete Overlay
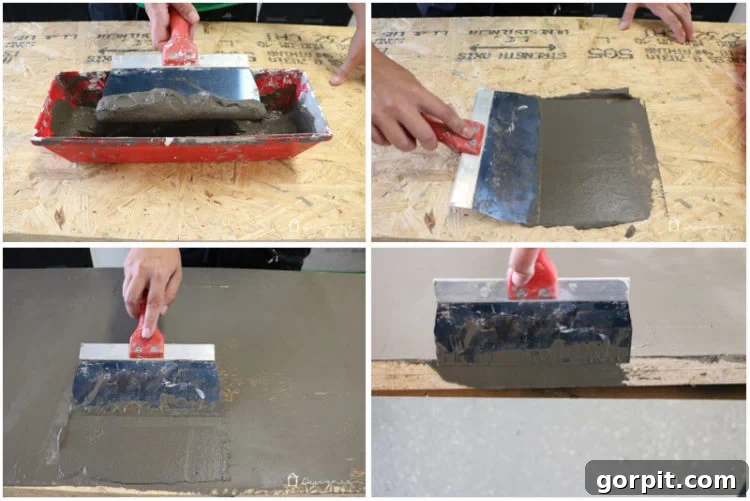
Regardless of whether you use OSB or plywood, the next crucial step is applying the concrete overlay. This process is similar to applying drywall mud, requiring patience and a light touch. You can refer to our detailed guide on how to apply concrete overlay in this post for a full walkthrough (you can skip any sanding steps mentioned if your substrate is new). Using a drywall mud pan to mix the Ardex Feather Finish and an 8 to 10-inch drywall taping knife, apply thin, even coats.
We applied a total of four coats to our deck bar top. The first coat is often the slowest to dry, as it adheres to the raw substrate. Subsequent coats, however, dry much more quickly, allowing you to build up the desired thickness and smooth finish efficiently. Work in manageable sections, ensuring each layer is smooth before applying the next. The goal is a uniform surface that mimics solid concrete without the immense weight.
Step 3: Sealing for Durability and Aesthetics
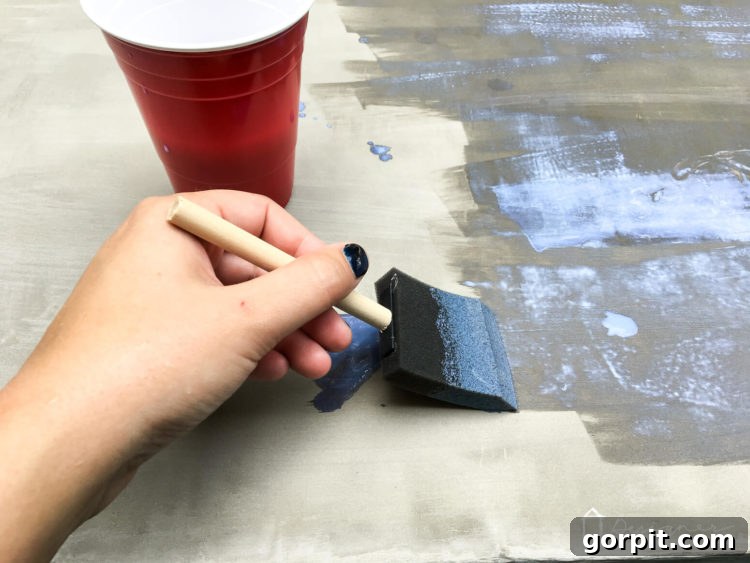
Once your concrete overlay is completely dry, it’s time to seal it. This is a vital step for outdoor use, protecting the surface from moisture, stains, and general wear. Apply a water-based acrylic concrete sealer in a satin finish to the bottom of the bar top pieces before attaching them to the posts. We used this exact sealer, which provides a lovely smooth finish with a subtle sheen.
The sealer will appear milky when wet but dries clear. Follow the product directions carefully: avoid applying it too thick or leaving puddles, and be sure to smooth out any air bubbles for an even finish. We applied two coats to the bottom surface.
Step 4: Attaching the Bar Top to the Base
Once the sealer on the bottom of your bar top is dry, apply a generous amount of DAP Dynagrip Heavy Duty Construction Adhesive to the top of each support post. Carefully position your bar top piece(s) onto the posts, ensuring proper alignment. This heavy-duty adhesive is perfect for this task due to its exceptional instant grab strength, which eliminates the need for clamps, as the weight of the bar top itself helps create a secure bond. Do NOT use screws to attach the bar top from above, as this will almost certainly cause the concrete overlay to crack.
If your bar top consists of multiple pieces (like ours), and you want to completely hide the center seam, you can apply a final, thin coat of concrete overlay to the entire top surface once both pieces are securely in place. While not strictly necessary, this extra step can create a truly monolithic appearance.
Step 5: Final Sealing and Considerations
After the bar top is fully attached and any additional overlay has dried, apply three coats of your chosen concrete sealer to the top and exposed edges of the bar. This final sealing step provides maximum protection against the elements.
We absolutely love the concrete overlay for our bar top! It delivers the industrial, modern look we desired without the impractical weight of a solid concrete slab. We considered pouring a full slab, but we’re glad we opted for the overlay, as a slab would have required significantly more robust support posts.
Important Consideration: Weathering and Longevity
Please note that your concrete overlay bar top may exhibit some darkening or wet spots when exposed to rain, especially along joints and seams. Achieving a perfectly impermeable seal on an overlay with multiple pieces can be challenging. However, these spots typically dry out completely once a sunny day returns, so it hasn’t bothered us. If you are an absolute perfectionist who desires a flawless, unchanging surface, a solid concrete slab might be a better option for you. Also, while durable, we anticipate this specific bar top will likely not last 20 years. However, given its inexpensive nature and the ease of the DIY process, replacing it down the line wouldn’t be a major undertaking for us. It’s a fantastic, budget-friendly solution for a stylish outdoor bar.
Enjoy Your New Outdoor Entertaining Hub!
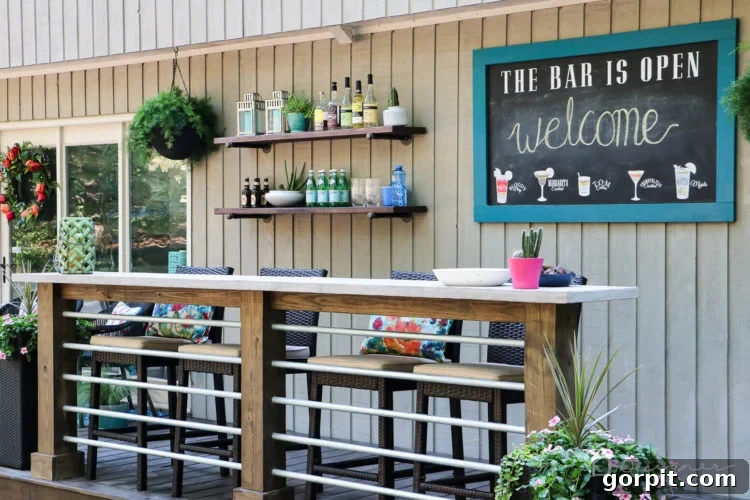
That’s it! Your stunning DIY deck bar is complete and ready for action. We are incredibly happy with how it turned out, creating a functional and beautiful focal point for our deck. Take a moment to admire your hard work:
If you loved this DIY outdoor bar project, be sure to save it to Pinterest or share it on Facebook so you can find it again later! And don’t forget to check out the rest of our exciting deck makeover reveal here for more inspiration.
Explore More Outdoor DIY Ideas!
Ready to tackle your next outdoor project? Here are some other creative DIY ideas to further enhance your outdoor living spaces:
-
Fire Pit Ideas for Every Outdoor Space
-
How to Make a DIY Outdoor Chandelier
-
Modern DIY Garden Trellis
-
DIY Outdoor Electrical Box Cover
-
DIY Diamond Wire Trellis for a Vine
-
A Complete Review of Vego Garden Beds: Pros, Cons, and Everything In-between
Curious about how I approach transforming rooms and spaces in our home? Check out Designer in a Binder®.
For exclusive content and behind-the-scenes sneak peeks, be sure to subscribe before you head out!