
Transform Your Space: A Modern DIY Plank Wall Tutorial for Contemporary Homes
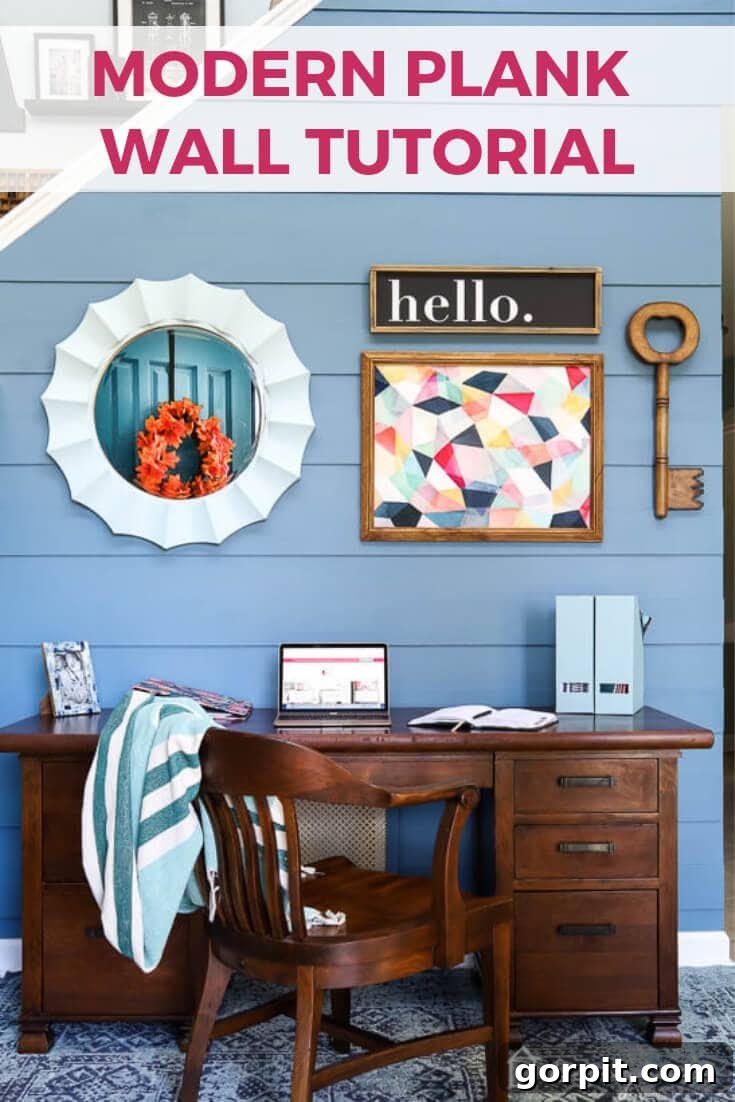
Plank walls have long been admired for their ability to add texture, character, and depth to any room. While traditional shiplap has dominated farmhouse-style decor, what about those of us who prefer a more modern, contemporary aesthetic? We believe everyone should be able to enjoy the charm of a plank wall, which is precisely why we’ve developed a streamlined, modern take on this classic wall treatment. In this comprehensive guide, you’ll discover how to create your own striking modern DIY plank wall with an easy, step-by-step tutorial that will transform your living space over a single weekend.
From Stencil to Stunning: Our Foyer’s Journey to Modern Elegance
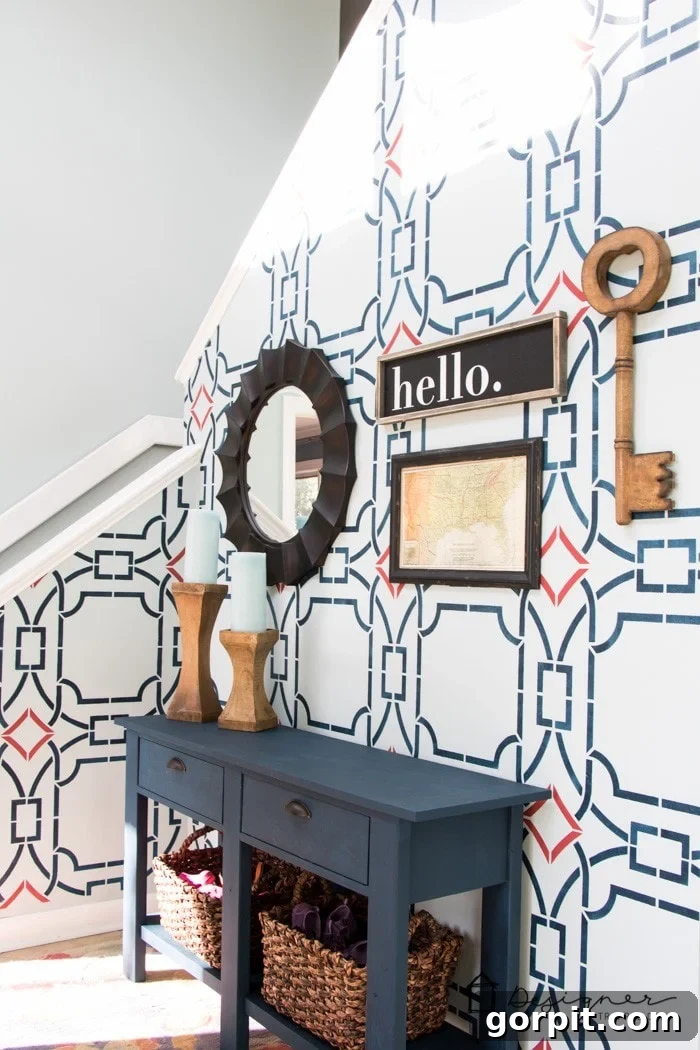
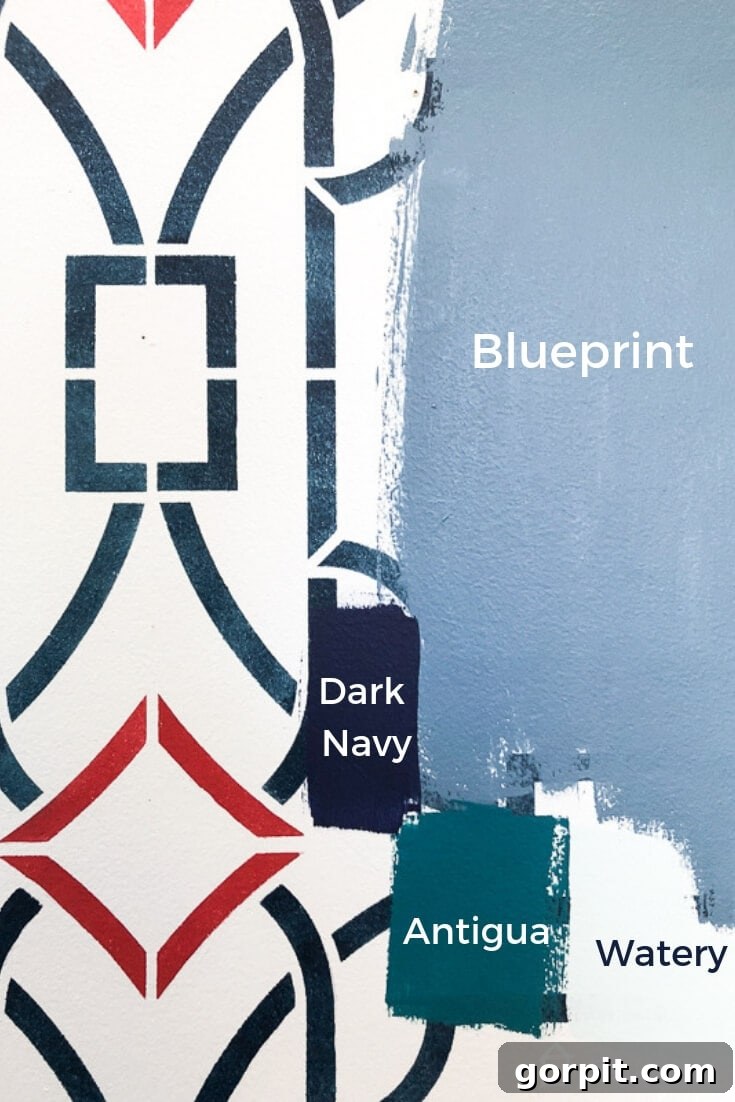
Our home’s foyer has undergone a truly exciting transformation, and we’re thrilled to share every detail. For several years, our foyer featured a bold stenciled wall, a project we once loved and thought was perfect for the space. You can see how it looked previously in the images below:
 |
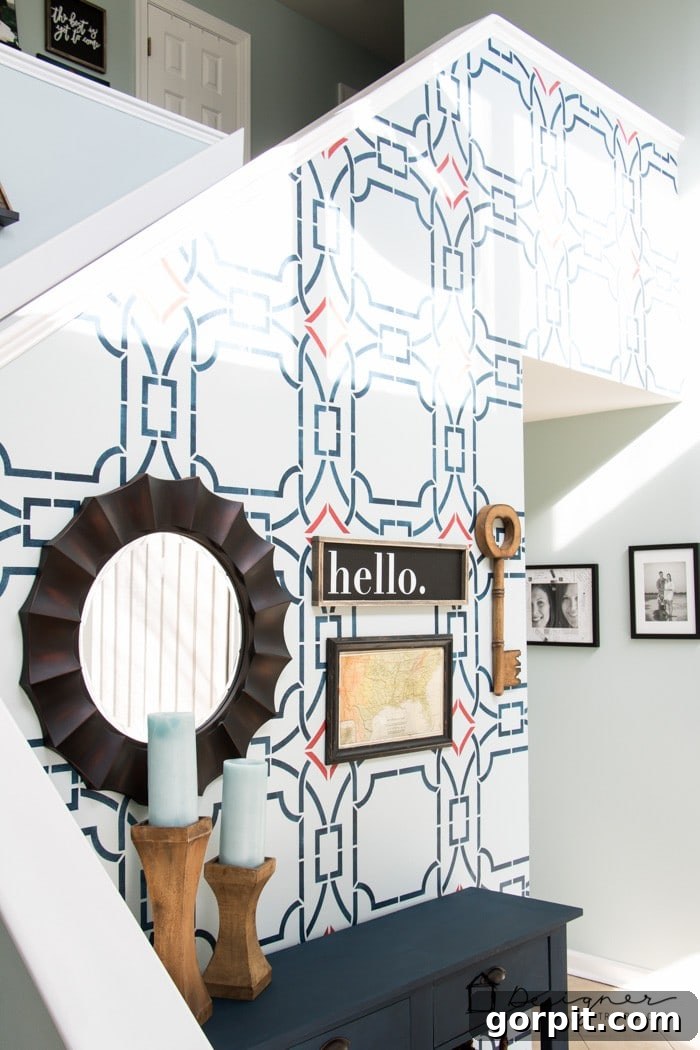 |
While I initially adored the stencil, my husband, Joe, never quite warmed up to it. My own feelings started to shift around last Christmas. I found it surprisingly challenging to decorate the wall festively, and over time, I simply grew bored with the pattern. The combination of Joe’s persistent dislike and my waning enthusiasm made it clear: it was time for a significant change. The question then became, what would replace it?
Inspired by Color: The BEHRBox Challenge and Blueprint S470-5
The perfect opportunity for this renovation arrived when BEHR Paint Company invited us to participate in their exciting BEHRBox challenge. This initiative showcased BEHR’s 2019 Color Trends, all conveniently available at The Home Depot®. Each color trend palette featured BEHR’s 2019 Color of the Year, Blueprint S470-5, a shade I instantly fell in love with upon its announcement. As one of four bloggers in the challenge, I was assigned the captivating Monochromatic color palette. This palette was not only gorgeous but perfectly aligned with my personal design preferences.
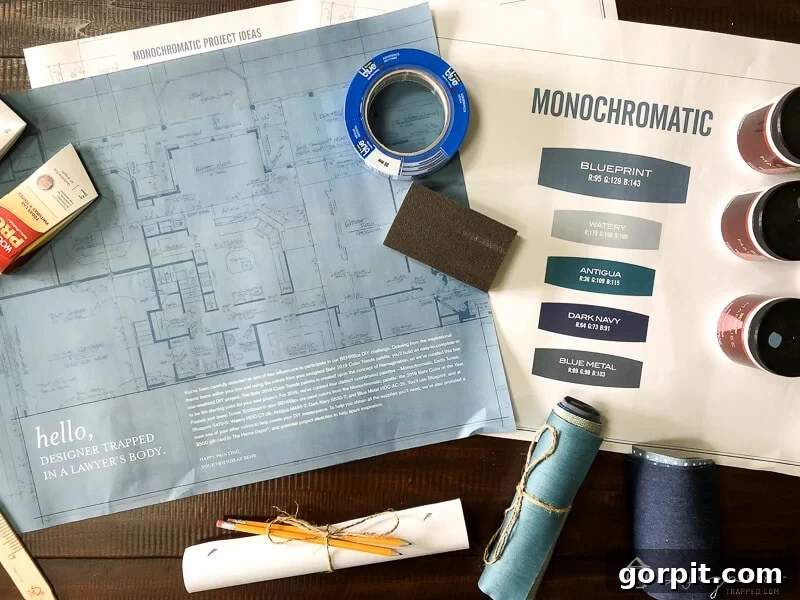
The BEHRBox challenge required us to complete a DIY project that could be finished in a single weekend, utilizing our assigned color palette. For me, it was a match made in heaven. The color Watery HDC-CT-26, included in the Monochromatic palette, was nearly identical to the existing base color in our foyer. Furthermore, our front door was already a shade very close to Antigua M460-7. After applying some paint samples to our foyer wall, my vision for the space became crystal clear.
Reimagining the Plank Wall: A Modern Alternative to Shiplap
While traditional plank walls and shiplap have soared in popularity within farmhouse decor, our home’s style leans towards an eclectic and contemporary aesthetic—far from farmhouse. However, I’ve always been drawn to the incredible dimension and texture that plank walls can add to a space. We even created a really cool herringbone plank wall from an old fence in our kitchen, and we absolutely adore it. For the foyer, however, we sought something a bit more subtle and refined, a design that would integrate seamlessly with our modern sensibilities.
This led us to the decision to develop a modernized version of the traditional plank wall specifically for our foyer. The goal was to create a clean, contemporary look that still offered visual interest and architectural detail, but without the rustic feel of classic shiplap. We envisioned wider planks, a minimalist finish, and a uniform paint color to achieve a sophisticated, sleek appearance. We are beyond thrilled with the outcome and can’t wait to show you how you can achieve the same stunning effect in your own home. So, let’s dive into this DIY modern plank wall tutorial and then celebrate with the grand reveal!
This post contains some affiliate links for your convenience. Click here to read my full disclosure policy.
Modern DIY Plank Wall Tutorial: Step-by-Step Guide
For your convenience, printable instructions for this project are often available from the original creator. For a visual guide, consider searching for “Modern DIY Plank Wall Tutorial” on video platforms.
Materials Needed for Your Modern Plank Wall:
- 1/4” Plywood Subfloor: You’ll need enough sheets to cover your desired wall area. This thin plywood is ideal for achieving a smooth, modern look and is easier to work with than thicker lumber.
- Plywood Strips (5” wide): These will be ripped down from your larger plywood sheets. The 5-inch width provides a contemporary feel, different from the narrower strips often seen in traditional shiplap.
- Circular Saw and Guide: Essential for straight, precise cuts when ripping down your plywood. A circular saw guide is a game-changer for accuracy, especially with thin, flexible plywood.
- Scrap Pieces of 5” Plywood: At least two pieces will serve as consistent spacers during installation, ensuring even gaps between your planks.
- Long Level: Crucial for ensuring your first plank, and subsequent ones, are perfectly straight and level.
- Finish Nail Gun: An absolute must-have for quick, secure installation. This is the model we own and highly recommend for its reliability.
- Caulk: For sealing seams where planks meet the existing wall or trim, creating a flawless finish.
- Spackle and Putty Knife: To fill nail holes smoothly before painting.
- Sandpaper: Fine-grit sandpaper for smoothing patched areas and any rough edges on the planks.
- Paint and Painting Supplies:
- BEHR MARQUEE® Interior Paint: Known for its exceptional coverage and durability. We used Blueprint S470-5 for the entire plank wall, applied in a flat finish for a sophisticated, modern aesthetic.
- Paint brushes, rollers, paint tray, painter’s tape: Standard painting tools.
- Optional for accents: We repainted an old mirror using BEHR Watery paint and added a touch of Rub N’ Buff in Antique Gold for a personalized touch.
Easy Steps to Your Stunning Modern Plank Wall:
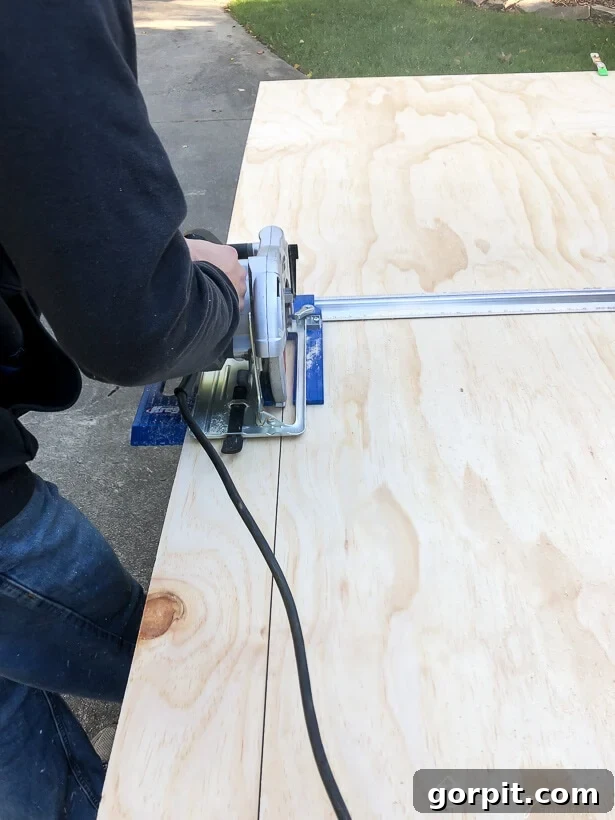
1) Prepare Your Plywood Planks: Begin by ripping your 1/4” plywood subfloor sheets into uniform 5-inch wide planks. While a table saw is an option for some, we found that using our circular saw with our circular saw guide was much quicker and more manageable, especially given the thin and somewhat flexible nature of the plywood. The guide ensures perfectly straight cuts, which is vital for a professional-looking finish.
2) Strategize Plank Placement: Before making any cuts for installation, carefully plan where your first plank will go. This involves a bit of simple math to ensure you don’t end up with awkward, tiny partial pieces at the end of your wall or in highly visible areas. For our foyer, we strategically decided to start with the plank positioned directly above the hallway entrance, ensuring a full, aesthetically pleasing piece would reside there. Measure your wall dimensions and dry-fit some planks to visualize the best layout.
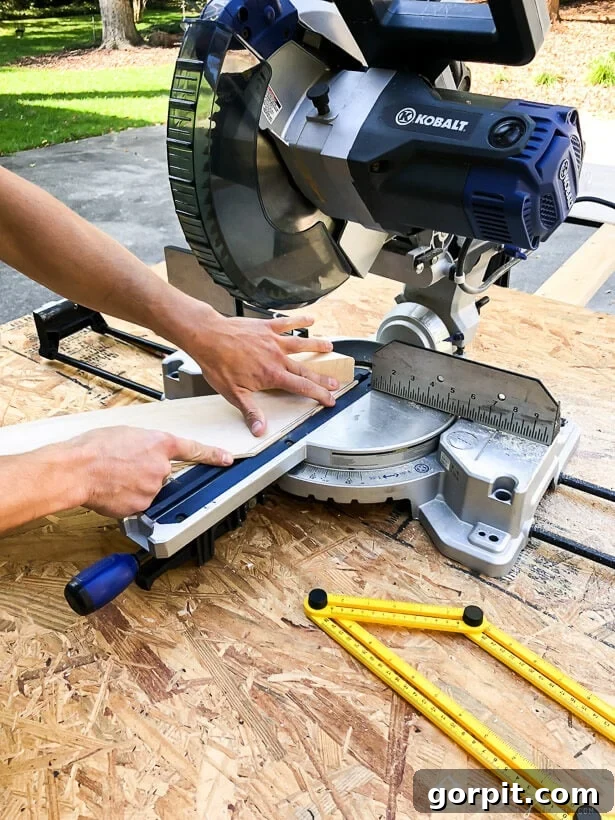
3) Cut Planks to Length: You will need to measure and cut each plank to its precise length as you work your way across and up the wall. We utilized our compound miter saw for these cuts. For certain areas, like around our banister, we had to carefully calculate and cut specific angles. While figuring out angles isn’t our strongest suit, we persevered, and if we can do it, so can you! Don’t overcomplicate it; take your time and double-check your measurements.
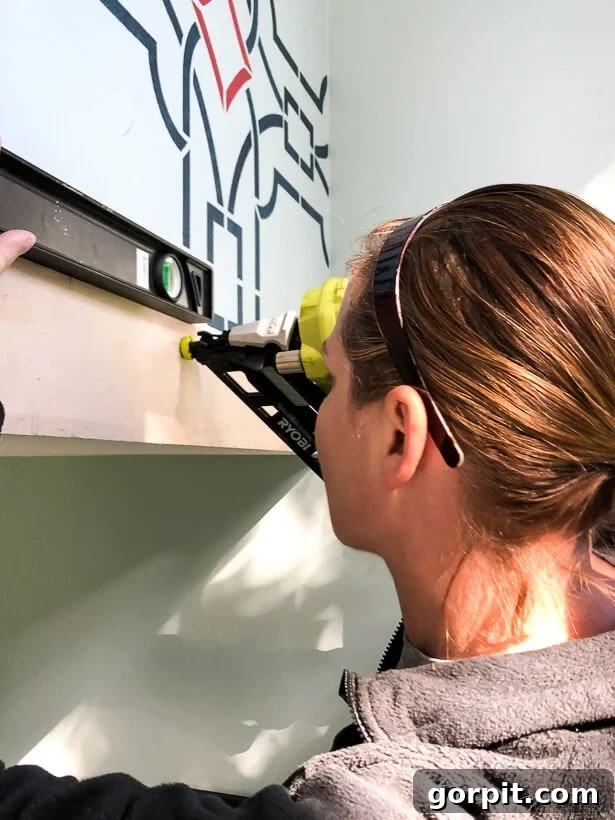
4) Install Your Planks with Precision: The key to a professional-looking plank wall is ensuring everything is level and evenly spaced. Use a long level to verify that your very first plank is perfectly horizontal before securing it. Then, use your finish nailer to attach it securely to the wall. For consistent spacing, we used two scrap pieces of our 5-inch planks as spacers. This clever trick eliminates the need to constantly check for level on every subsequent plank, as long as your first one is spot on. Simply place the spacers between the installed plank and the next one you’re about to attach. If you choose not to use spacers, remember to meticulously check each plank for level before nailing.
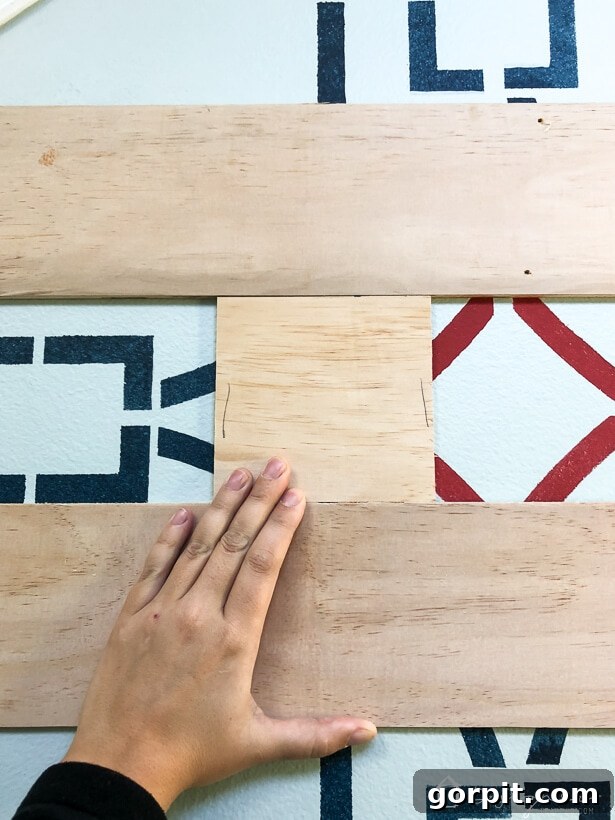
5) Continue Installation: Systematically work your way across and up the wall, cutting each plank to length, setting it with your spacers, and then nailing it into place. This repetitive process becomes quite efficient once you get into a rhythm.
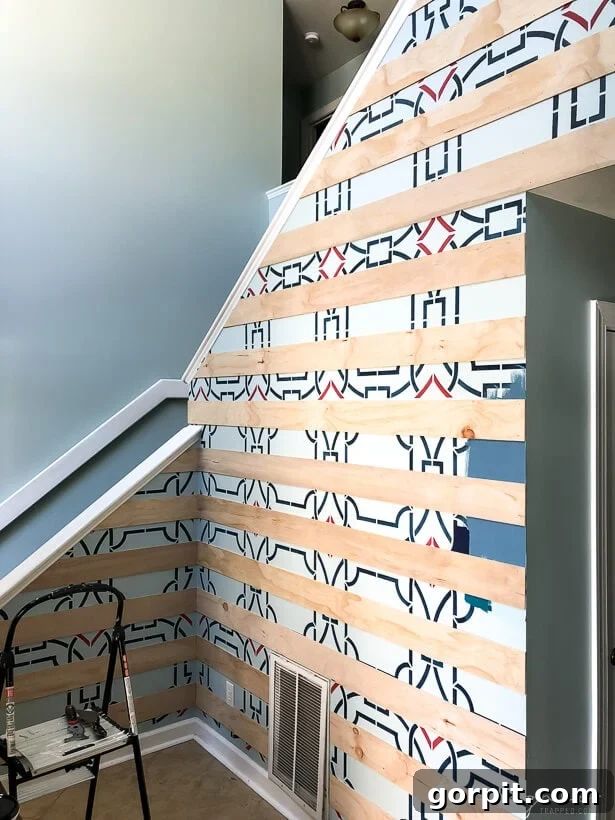
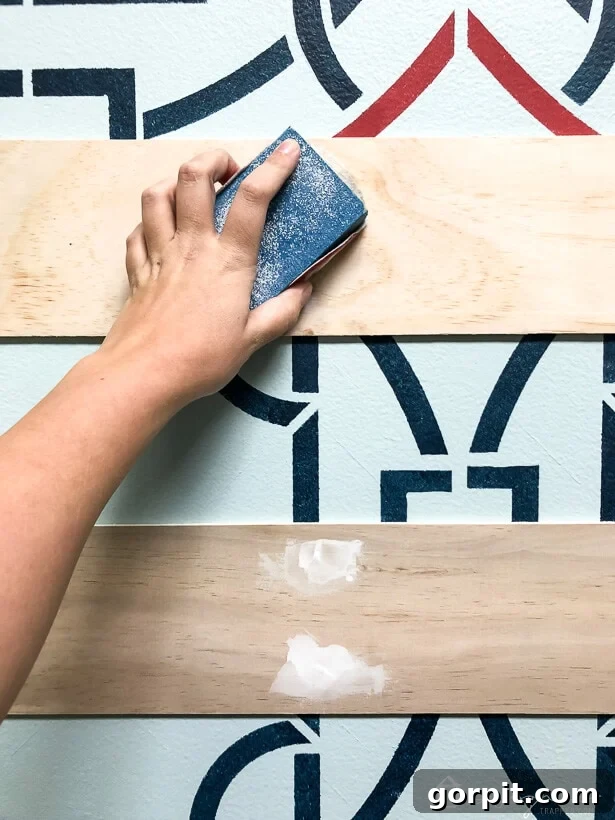
6) Patch and Sand: Once all your planks are securely installed, the next crucial step is to achieve a seamless finish. Carefully fill all visible nail holes with spackle using a putty knife. Allow the spackle to dry completely, then lightly sand these areas until they are perfectly smooth and flush with the plank surface. This step is essential for a truly polished, modern appearance.
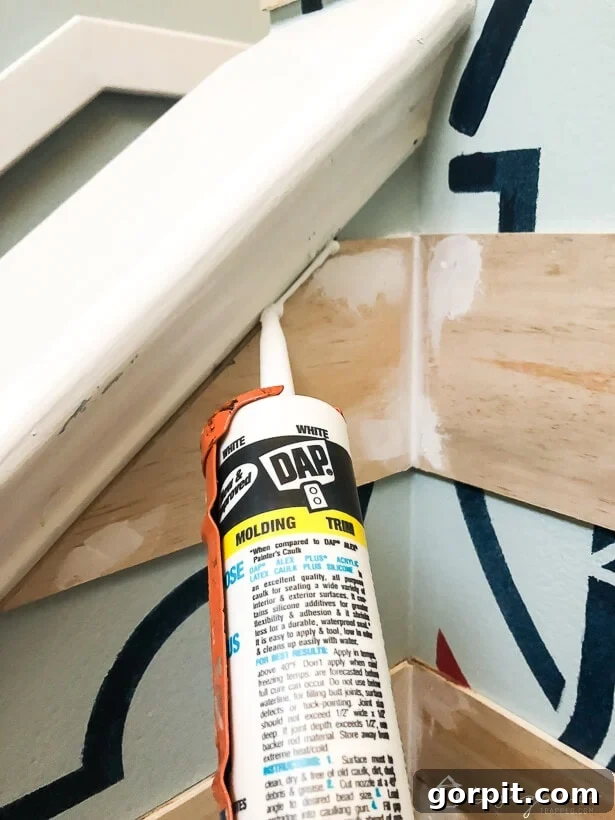
7) Caulk Critical Seams: Apply caulk along any seams where the plank wall meets existing walls, trim, or the ceiling and floor. This creates a clean, professional line and helps to minimize any visible gaps. A critical note for our modern design: we specifically chose NOT to caulk along the top and bottom edges of each individual plank. This decision was twofold: firstly, our planks fit snugly to the wall, making it unnecessary; and secondly, if we ever decide to remove these planks in the future, avoiding excessive caulk will make the process significantly less of a nightmare.
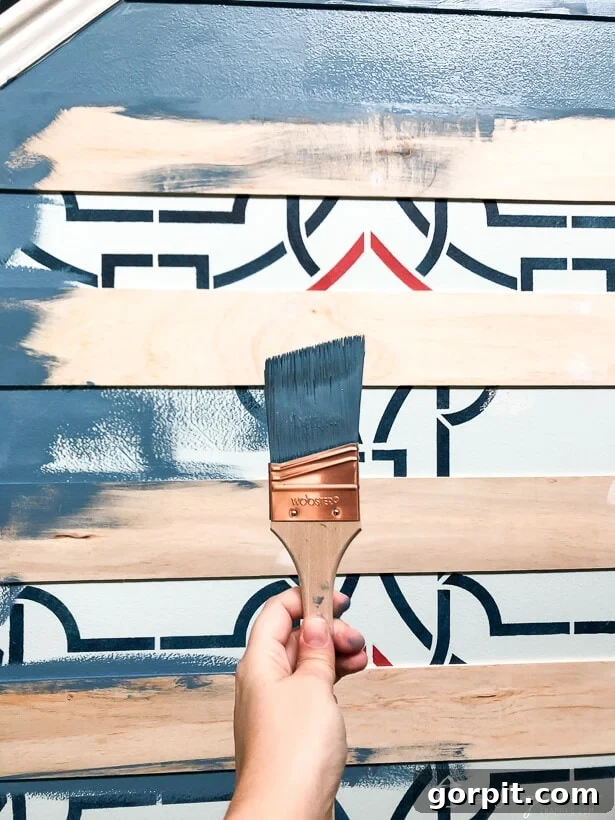
8) Paint Your Masterpiece: Now for the exciting part – painting! We applied BEHR MARQUEE®Interior Paint in Blueprint S470-5 with a flat finish to the entire plank wall. The BEHR MARQUEE® paint is renowned for its exceptional one-coat coverage, which made this step incredibly efficient and satisfying. The flat finish enhances the modern aesthetic, providing a subtle, sophisticated look that allows the texture of the planks to truly shine without distracting glare. Ensure proper ventilation and apply even coats for a flawless result.
The Grand Reveal: Our Transformed Modern Foyer
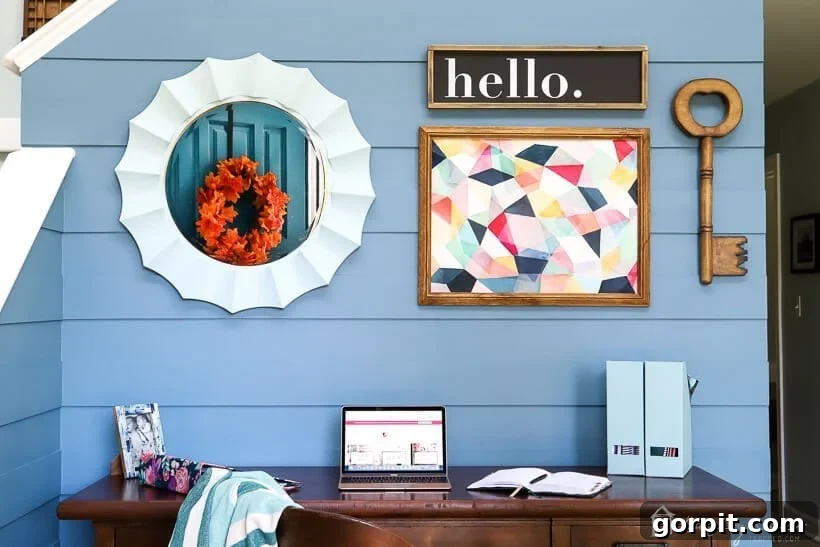
That’s it! This truly is an accessible DIY project that most can easily complete within a single weekend, resulting in a dramatic and stylish update. Now, feast your eyes on the incredible transformation. You’ll notice that we’ve also reimagined the functionality of this area. What was once just a space for a console table, now comfortably accommodates a desk where we handle bills and other tasks. This might be a non-traditional use of a foyer, but it works perfectly for our lifestyle, making the space significantly more functional and personalized than ever before.
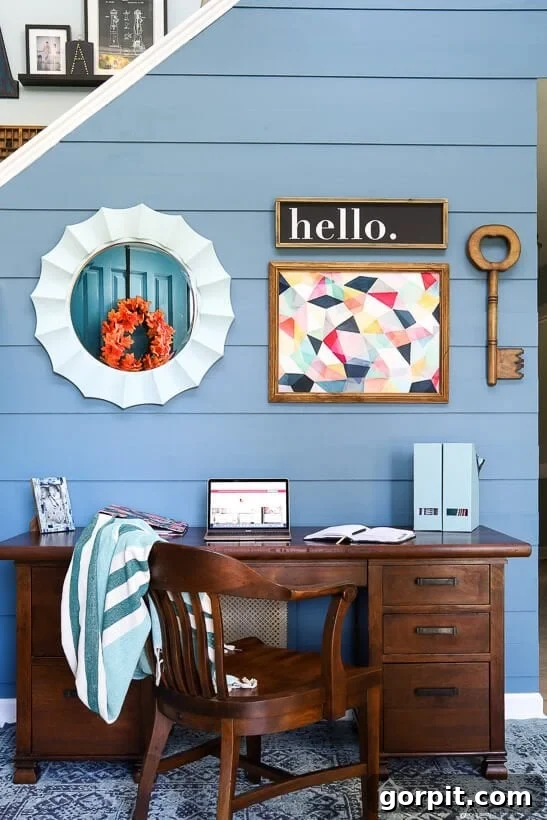
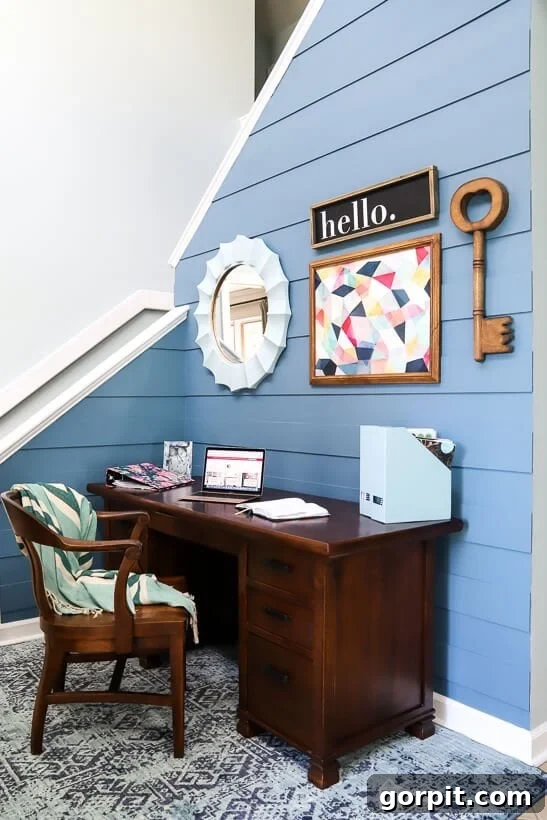
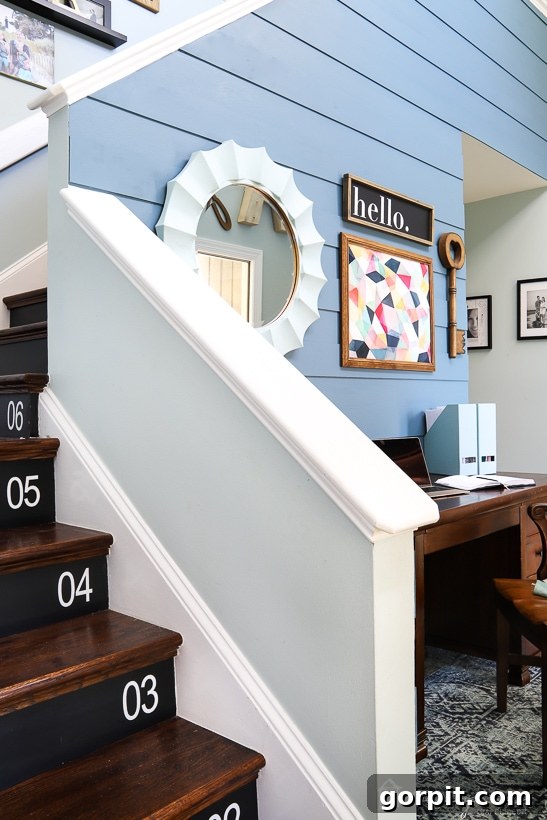
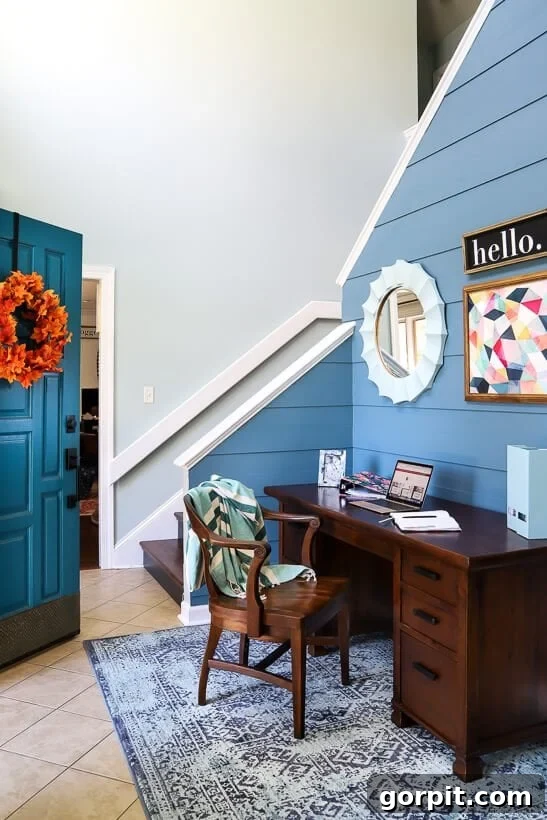
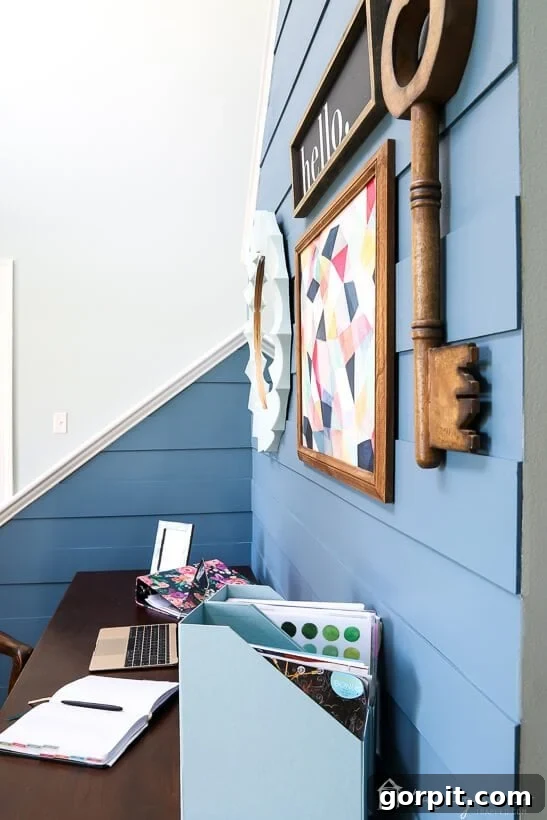
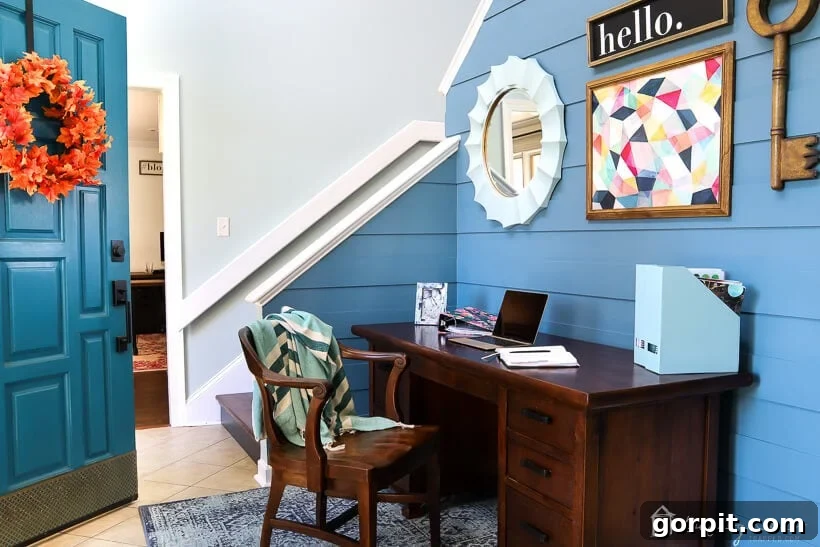
Joe and I are both absolutely thrilled with how this project turned out. The modern plank wall, painted in the beautiful BEHR Blueprint S470-5, creates a dramatic focal point. It delivers just the right amount of texture and visual interest, perfectly aligning with our home’s contemporary and eclectic style. It’s a testament that a classic wall treatment can indeed be reinvented to suit any design preference. What are your thoughts on this modern twist?
