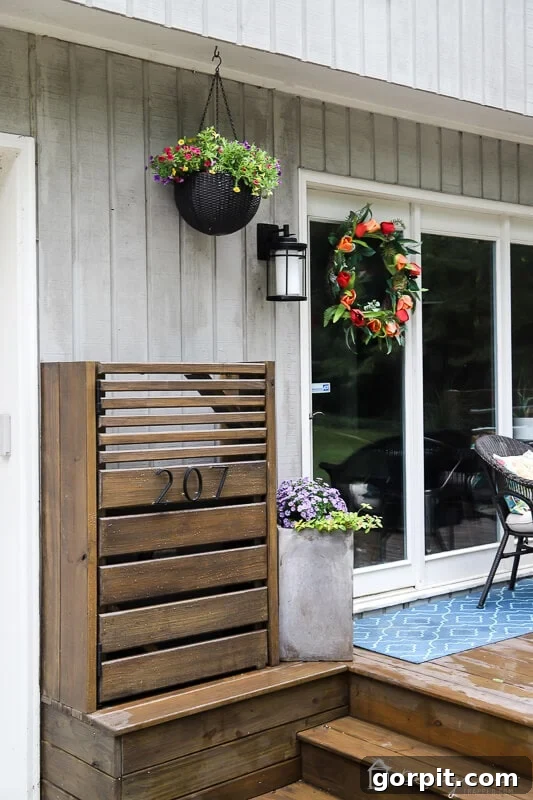
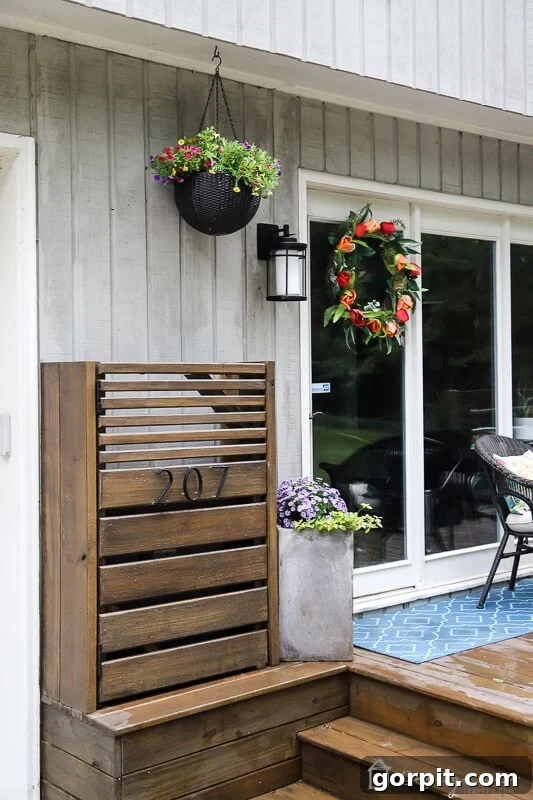
If you’ve ever found yourself wishing you could magically make those unsightly electrical meters, cable boxes, or other utility equipment vanish from the exterior of your home, you’re not alone. These necessary but often unattractive installations can significantly detract from your home’s curb appeal. But what if we told you there’s a stylish, functional, and DIY-friendly solution that allows you to transform these eyesores into an integrated feature of your home’s design? You are in the right place! We’re here to guide you through creating a beautiful and practical DIY outdoor electrical box cover, designed not just to conceal, but to enhance your home’s exterior.
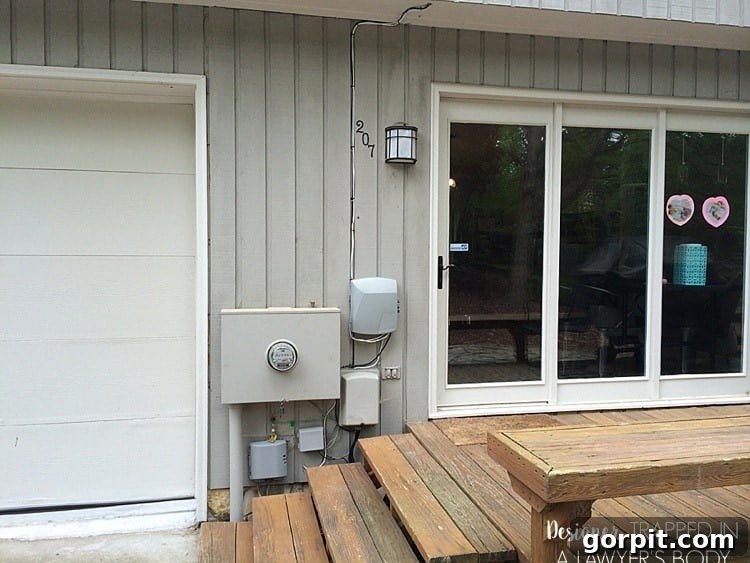
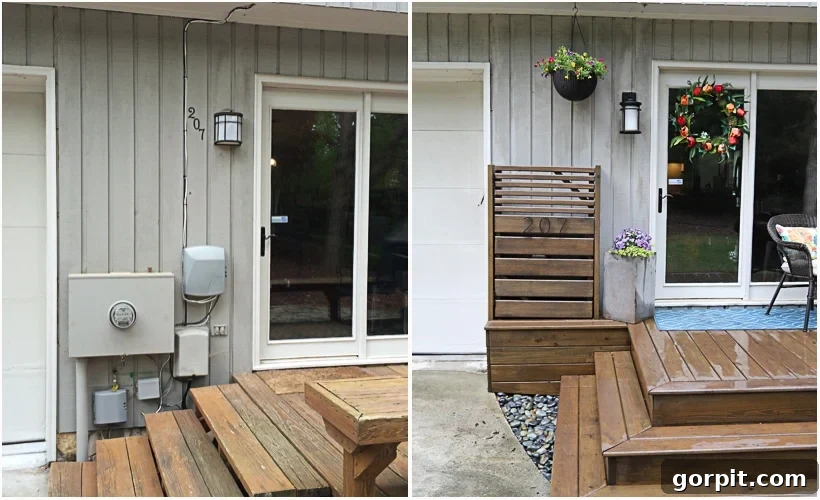
Many homeowners face the same dilemma: essential utility boxes are placed prominently on the side or back of their houses, often in high-traffic areas. In our case, a cluster of boxes was a constant distraction right by our back door—the entrance we use almost daily. While we understand their necessity, their presence significantly diminished the aesthetic appeal of our outdoor living space. Before embarking on this project, our view was dominated by this:
After successfully removing obsolete phone and cable boxes, we were still left with a large, unavoidable electrical box. That’s when we decided to integrate a clever solution into our deck rebuild project: a stylish outdoor electrical box cover. This isn’t just a static screen; it’s a fully accessible, hinged door that swings open effortlessly, ensuring utility companies can access the box whenever maintenance or readings are required. This dual approach of concealing and providing easy access makes our DIY outdoor electrical box cover an ideal solution for any homeowner looking to improve their home’s exterior.
A special thank you to DAP Products for their sponsorship of this informative post. Please note that this post includes affiliate links for your convenience. Your support through these links helps us continue providing valuable DIY content. Click here to read our full disclosure policy.
DIY Outdoor Electrical Box Cover: A Step-by-Step Tutorial for Concealing Exterior Utility Boxes
For your convenience, free printable instructions for this project are available. Simply fill out the form below to receive them.
Materials Needed to Build Your Outdoor Utility Box Screen
The exact dimensions and quantities of materials for your utility box cover will depend on the size of the area you need to conceal. However, here’s a comprehensive list of what we used for our project, providing a great starting point for your own DIY endeavor:
- Pine Deck Boards: We utilized 5/4″ pressure-treated pine, repurposing leftovers from our deck construction. Pressure-treated wood is crucial for outdoor projects as it resists rot, decay, and insect infestation, ensuring your cover lasts for years.
- 2″ x 8″ x 8 feet Pressure-Treated Pine Boards: These robust boards will form the main structural components, providing the necessary depth to clear your utility box comfortably.
- 2″ x 6″ x 8 feet Pressure-Treated Pine Boards: Used in conjunction with the 2x8s to achieve the required depth and structural integrity for the frame.
- (2) 2″ x 4″ x 8 feet Pressure-Treated Pine Boards: These are ideal for constructing the frame of your hinged gate door, offering a balance of strength and manageability.
- (2) Heavy-Duty Hinges: Essential for a sturdy and easily operable gate door. Choose exterior-grade, rust-resistant hinges to withstand outdoor elements.
- (1) Hook and Eye Latch: Provides a simple yet effective way to keep your cover securely closed, preventing it from swinging open unintentionally due to wind or other factors.
- Nail Gun: A pneumatic nail gun significantly speeds up assembly, ensuring strong and consistent fastening of your wooden components.
- Kreg Jig: This innovative tool is invaluable for creating strong, concealed pocket-hole joints, resulting in a cleaner, professional-looking finish without visible screw heads.
- 3-inch Exterior Screws: For robust connections, especially when attaching the main frame to your house and securing critical structural elements. Ensure they are suitable for outdoor use to prevent corrosion.
- DAP Platinum Patch Advanced Exterior Filler: An excellent choice for filling screw holes, gaps, and imperfections, creating a smooth surface ready for staining or painting. Its advanced formula ensures durability in outdoor conditions.
- Putty Knife: For smooth and precise application of the exterior filler.
- Stain of Your Choice: To protect the wood from weathering and to match your home’s exterior aesthetic. Consider a stain that offers UV protection.
- Level: Crucial for ensuring all elements of your cover are plumb and level, guaranteeing proper function and a professional appearance.
- Speed Square: An indispensable tool for making accurate cuts and ensuring all angles are square.
Step-by-Step Construction Guide
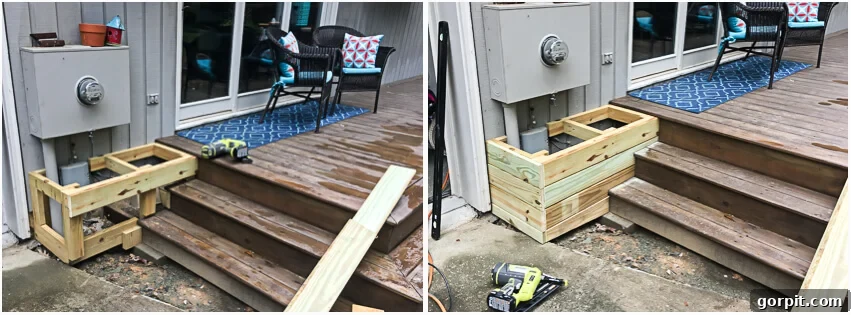
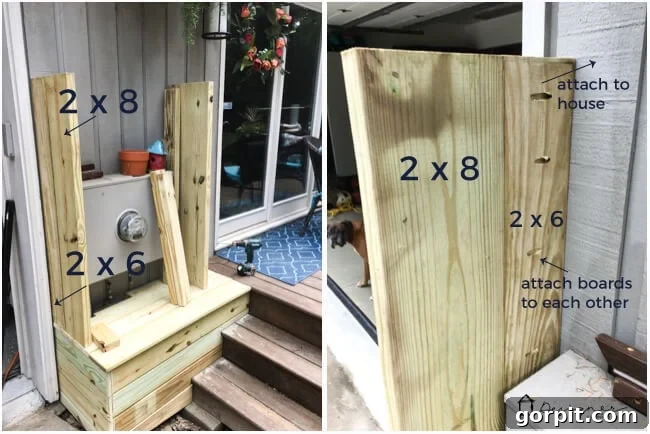
Our specific utility box location, adjacent to our deck stairs, required an initial base construction to bring the cover to deck level. This might not be necessary for everyone, but we’ve included a couple of photos for those who might encounter similar circumstances. This preparatory step ensures the hinged door operates smoothly without obstruction.
1) Accurate Measurement is Key: Begin by carefully measuring the height and width of the entire area you intend to enclose. This includes not just the utility box itself, but also any surrounding space you wish to cover for a seamless look. Double-check your measurements to ensure a perfect fit for your custom screen. Always measure twice, cut once!
2) Constructing the Main Frame: Now, it’s time to build the stationary frame that will attach to your house. We utilized a combination of 2″ x 8″ and 2″ x 6″ pressure-treated boards. This combination provided the necessary depth to ensure the frame cleared our utility box completely, allowing the door to swing open freely. We assembled these boards using our trusted Kreg Jig to create strong, hidden pocket-hole joints. This method is excellent for a clean finish as it hides the fasteners. Before permanently attaching the frame to your house, use a level to ensure it is perfectly plumb and level. An unlevel frame will lead to a misaligned door, impacting both aesthetics and functionality. Secure the frame to your house using exterior-grade screws, ensuring a solid, long-lasting attachment.
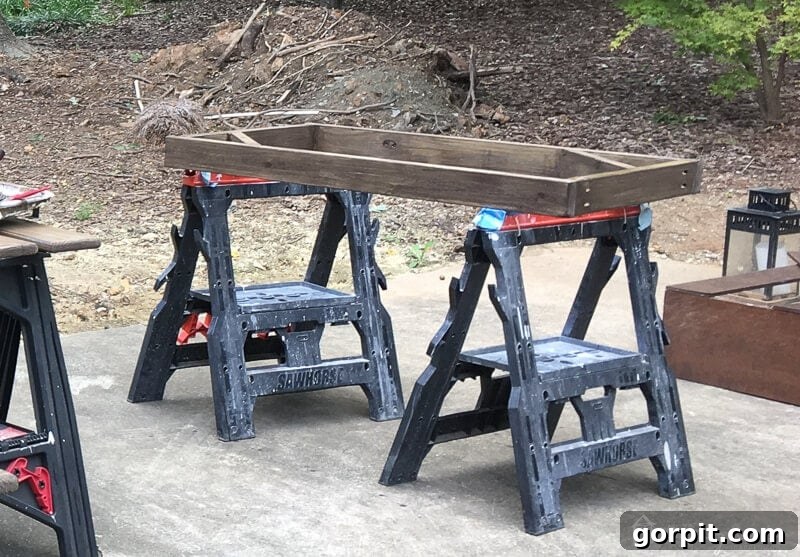
3) Building the Gate Door: Next, construct the frame for your gate door using 2″ x 4″ pressure-treated lumber, based on the height and width measurements you took in step 1. This gate will be the movable part of your cover. Use your Kreg Jig again to join the pieces of this simple outer frame. For added stability and to prevent the door from racking over time, incorporate corner braces in opposite corners. These diagonal supports will significantly strengthen the structure of your door.
4) Adding Decorative Slats: With the gate door frame complete, it’s time to add the decorative slats that will provide the concealment. This is where you can truly personalize your design. We chose a two-part design: the bottom half features wider 5/4″ deck boards, while the top half incorporates thinner slats (1 3/4″ wide), which we ripped from the same deck boards. A key detail was replicating the rounded edges of the original deck boards on our ripped pieces using a router. If you don’t have a router, a sander can achieve a similar softened edge, or you can opt for square edges for a different aesthetic. Experiment with different slat widths, spacing, or even diagonal patterns to match your home’s style.
5) Pre-Staining for Longevity and Appearance: Before final assembly of the slats to the door, it’s highly recommended to stain all your wood components. This includes the main frame already installed on your house and all the lumber designated for your gate door. Pre-staining ensures even coverage in hard-to-reach areas and provides a crucial protective barrier against moisture, UV rays, and general weathering. Choose a high-quality exterior stain that complements your home’s existing color palette. Allow ample drying time according to the product instructions.
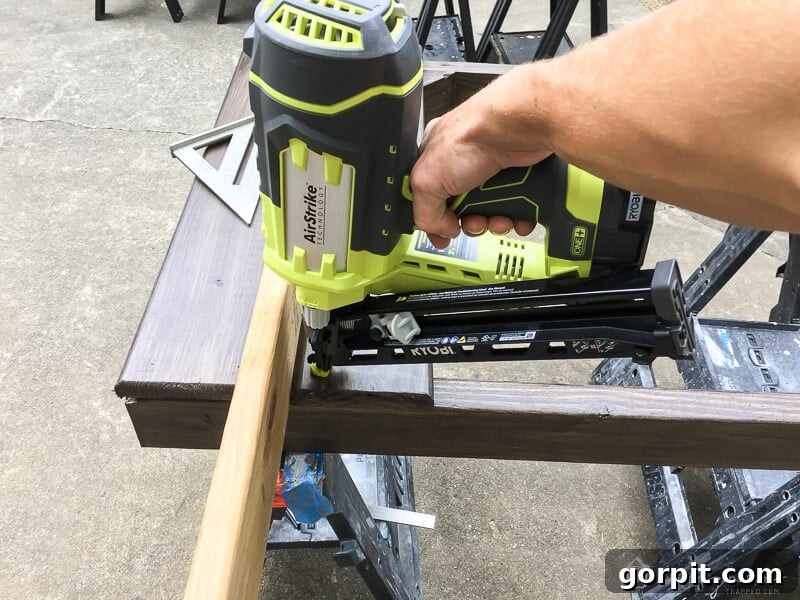
6) Attaching the Slats: Once the stain has dried, attach the decorative slats to the gate door frame. A nail gun makes this step quick and efficient, ensuring consistent fastening. To maintain uniform spacing between your slats, use a spare piece of deck board as a spacer. This small detail makes a big difference in the final look, creating a professional and aesthetically pleasing finish.
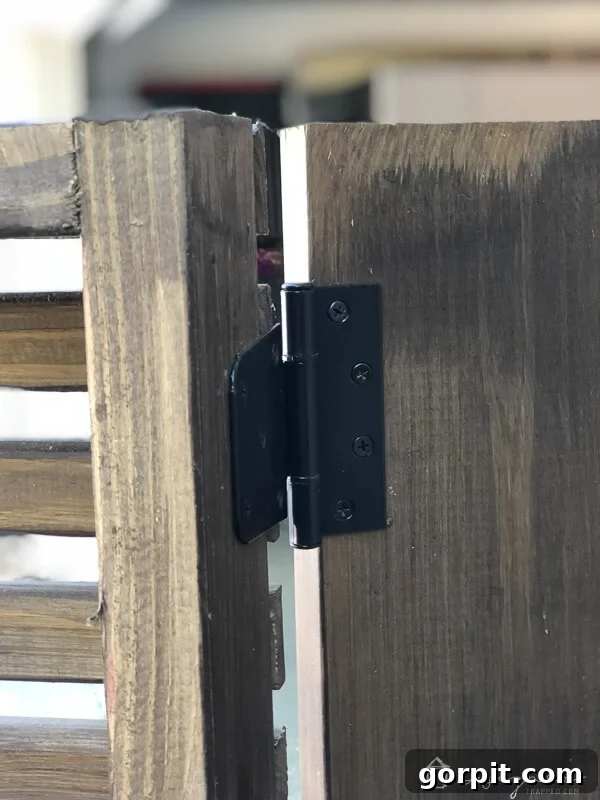
7) Hanging the Gate Door: Install your heavy-duty hinges onto the gate door and then carefully hang the door from the main frame attached to your house. This step requires precision to ensure the door opens and closes smoothly without binding. Adjust as needed until you are completely satisfied with the alignment and operation. Proper hinge placement is critical for the cover’s long-term functionality.
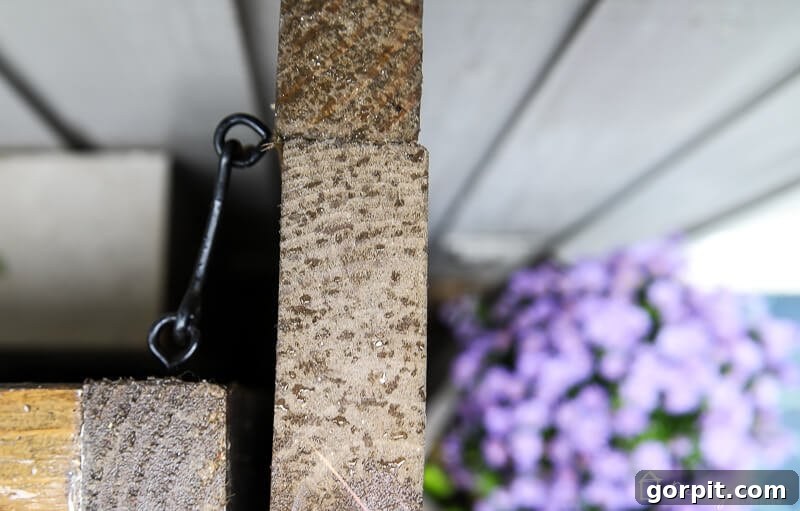
8) Installing the Latch Mechanism: With the gate door securely hung and aligned, install your hook and eye latch. This simple mechanism will keep the door securely closed when not in use, yet allows for quick and easy access to the utility box whenever necessary. Position the latch thoughtfully to ensure it engages firmly and holds the door flush with the frame. An overhead view demonstrates how this closure effectively keeps the cover neatly closed:
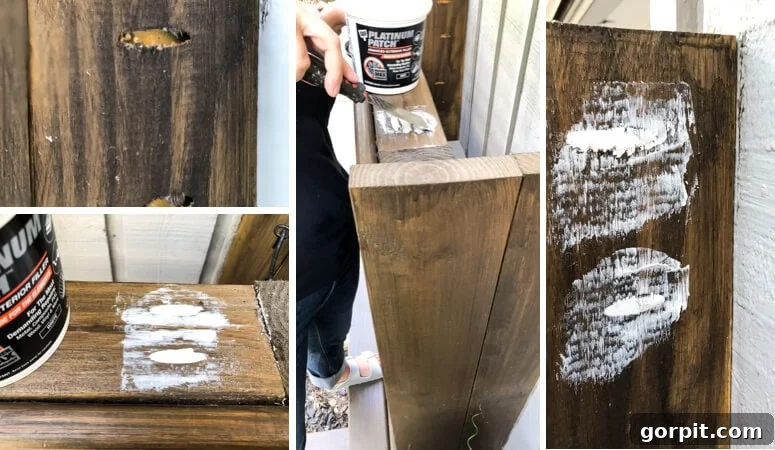
9) The Finishing Touch: Filling and Staining Pocket Holes: The final step in achieving a polished, professional look is to fill all visible pocket holes created by your Kreg Jig. Our preferred outdoor patching material is DAP Platinum Patch Advanced Exterior Filler. Apply the filler smoothly with a putty knife, ensuring it’s flush with the wood surface. Once the filler has thoroughly dried and cured according to manufacturer instructions, lightly sand the patched areas until smooth. Finally, apply a matching stain to these filled areas to seamlessly blend them with the rest of your cover. This step not only improves aesthetics but also adds an extra layer of protection against the elements.
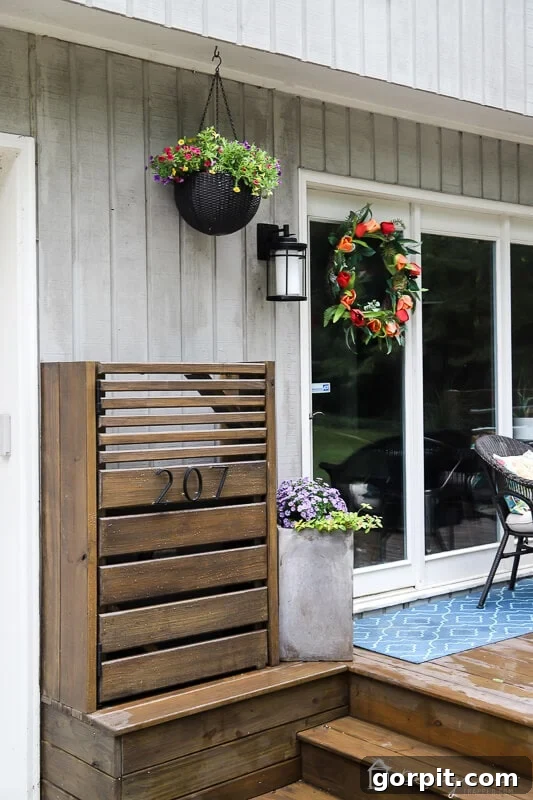
That’s it! Step back and admire your handiwork. This DIY outdoor electrical box cover is more than just a functional solution; it’s a significant aesthetic upgrade to your home’s exterior. It not only beautifully conceals those unavoidable utility boxes but also maintains easy access for maintenance, addressing any concerns about utility company requirements. Here’s a look at our completed project, demonstrating the remarkable transformation:
Witness the dramatic before and after transformation!
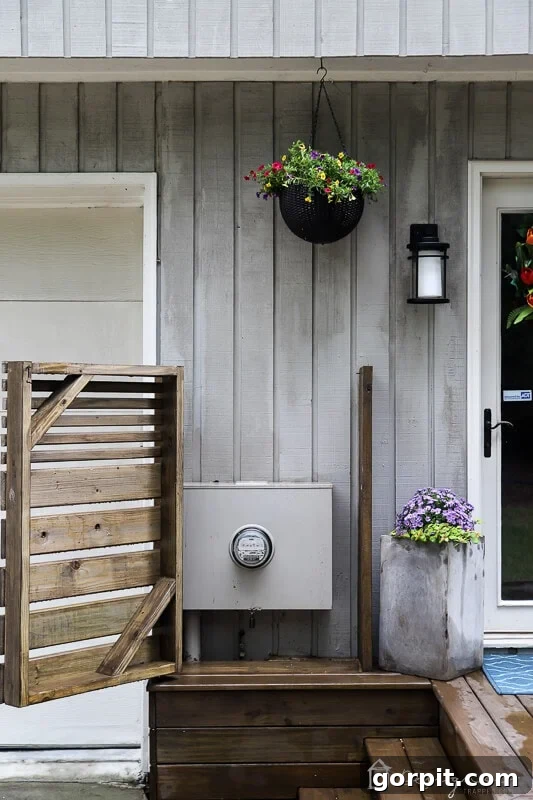
And for total transparency, here’s how elegantly it looks when open, revealing the previously exposed utility boxes:
What are your thoughts? The improvement is undeniable, isn’t it? If you’re living with an unsightly utility box, we wholeheartedly recommend tackling this rewarding DIY project. With a few essential tools, some readily available lumber, and a bit of dedicated time, you can construct this custom outdoor electrical box cover. It’s a highly achievable weekend project that offers a significant return on your investment in terms of enhanced curb appeal and personal satisfaction. The process is straightforward, the materials are common, and the impact on your home’s aesthetic is profound. Say goodbye to outdoor eyesores and hello to a beautifully integrated exterior!
Before you depart, be sure to explore the following posts for more inspiring DIY outdoor project ideas to further enhance your living spaces!
More OUTDOOR IDEAS
SEE ALL outdoor POSTS
-
Fire Pit Ideas for Every Outdoor Space
-
How to Make a DIY Outdoor Chandelier
-
Modern DIY Garden Trellis
-
DIY Outdoor Electrical Box Cover
-
DIY Diamond Wire Trellis for a Vine
-
A Complete Review of Vego Garden Beds: Pros, Cons, and Everything In-between
Curious about our systematic approach to transforming rooms and spaces within our home? Discover the secrets in Designer in a Binder®, our comprehensive guide to effortless home decorating.
For exclusive content, behind-the-scenes glimpses, and the latest updates on our projects, don’t forget to subscribe before you go! Join our community for fresh inspiration delivered directly to your inbox.