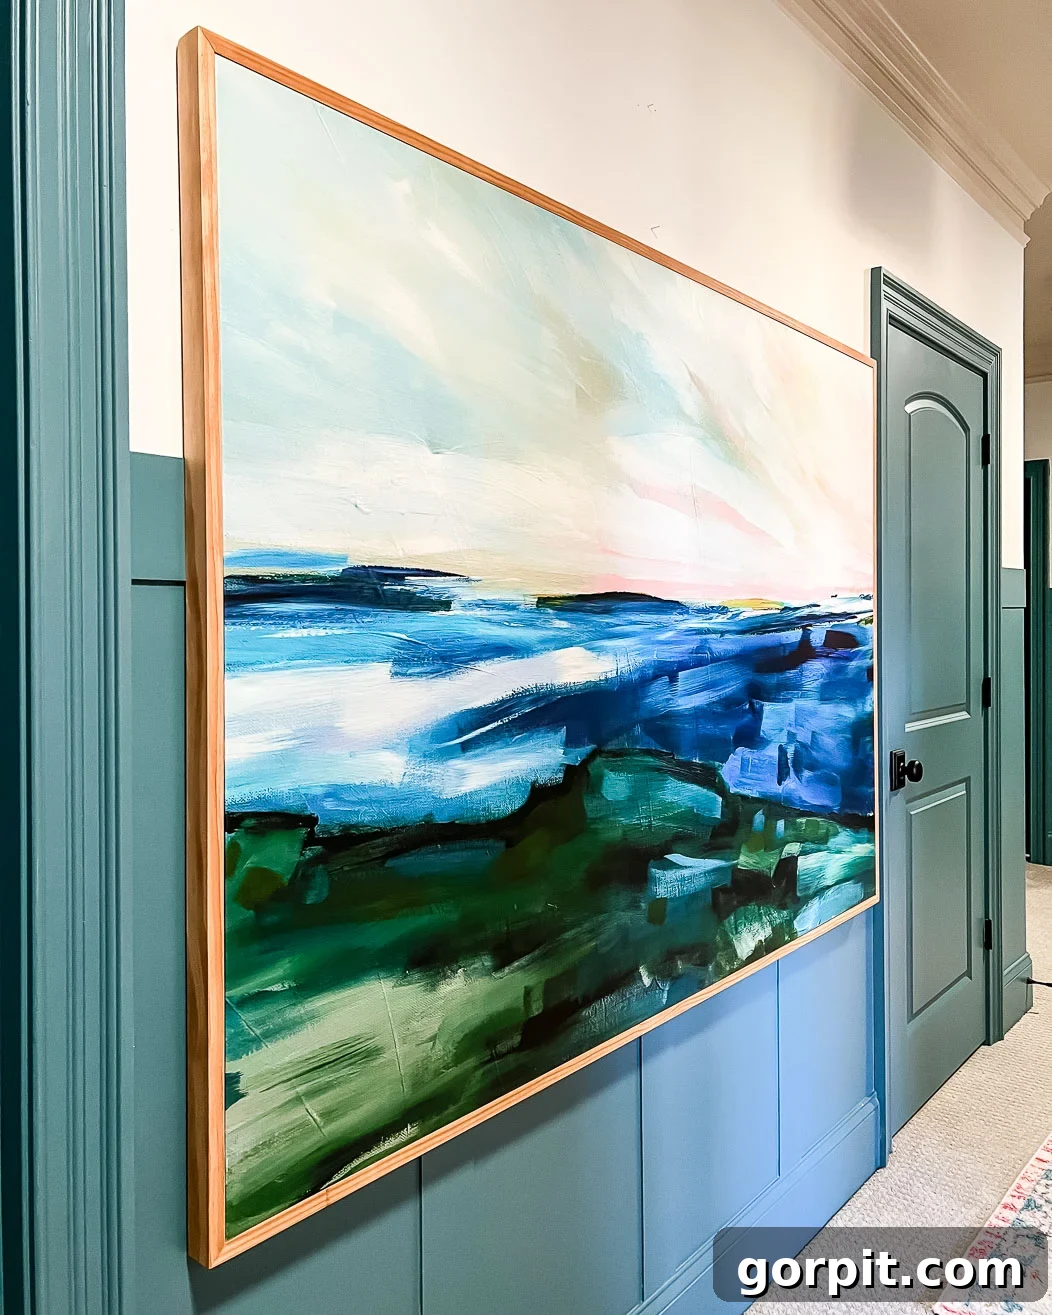
Transforming your home with captivating art doesn’t have to break the bank. While custom framing canvases can be astonishingly expensive, often surpassing the cost of the artwork itself, there’s a brilliant, budget-friendly solution within reach: building your own DIY canvas frame. This project is surprisingly simple, requiring minimal DIY expertise, and delivers a high-end, polished look that beautifully elevates any canvas art. In this comprehensive guide, we’ll walk you through every step of creating a stunning, custom frame for your artwork, saving you hundreds of dollars and adding a personal touch to your home decor.
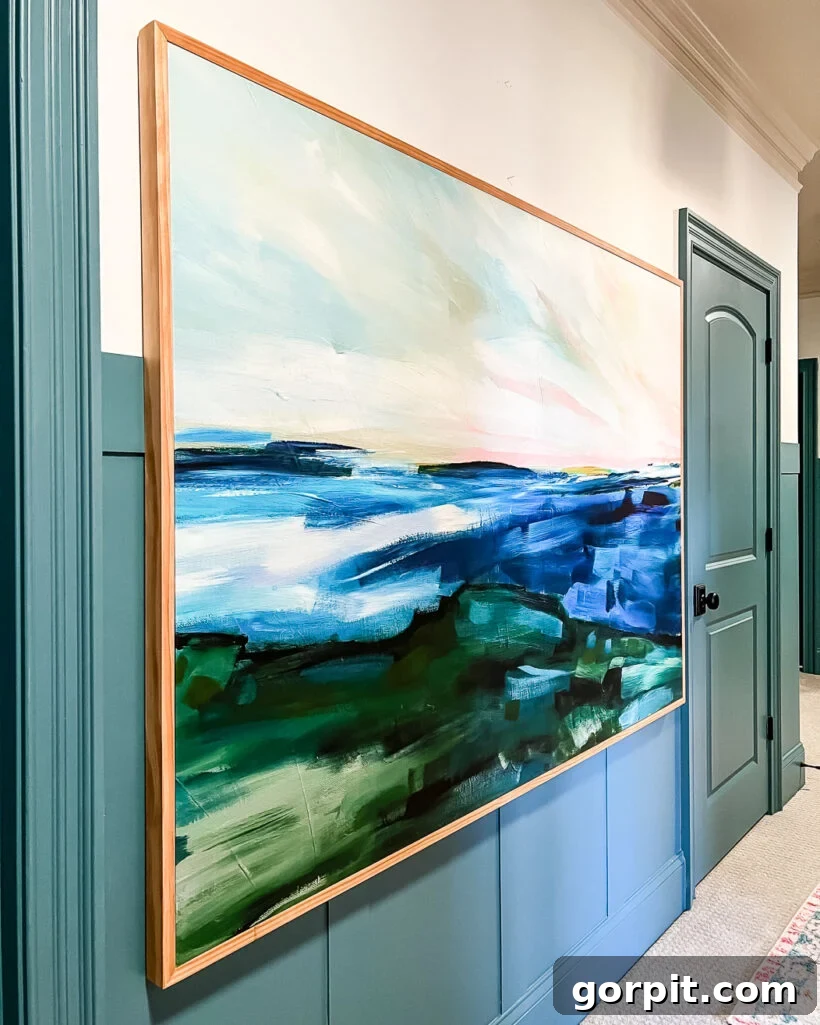
Table of Contents
Toggle
Thank you to DAP Products for sponsoring this post. This post contains affiliate links for your convenience. Click here for my full disclosure policy.
The Transformative Power of DIY Canvas Framing
Art plays a crucial role in creating a curated and inviting atmosphere within your home. It’s the soul of a room, adding character, depth, and a focal point that reflects your personal style. Through years of decorating and designing, I’ve discovered that investing in larger, impactful art pieces is often the best approach to truly make a statement. However, the beauty of substantial artwork often comes with a significant price tag, which is then compounded by the exorbitant costs of custom framing. This financial hurdle can make acquiring and showcasing grand art feel prohibitive for many homeowners.
This challenge is precisely why we’ve become advocates for building our own DIY art frames. It offers an unparalleled opportunity to achieve that high-end, custom look without the premium expense. Imagine falling in love with a breathtaking canvas, only to find that the framing alone costs nearly a thousand dollars. That was our reality with this gorgeous art canvas by Jen Florentine, a magnificent 70″ x 48″ piece destined for our living room art collection. While the canvas itself was an investment, the prospect of spending an additional $902 on a frame was simply out of budget. This experience solidified our commitment to the DIY path.
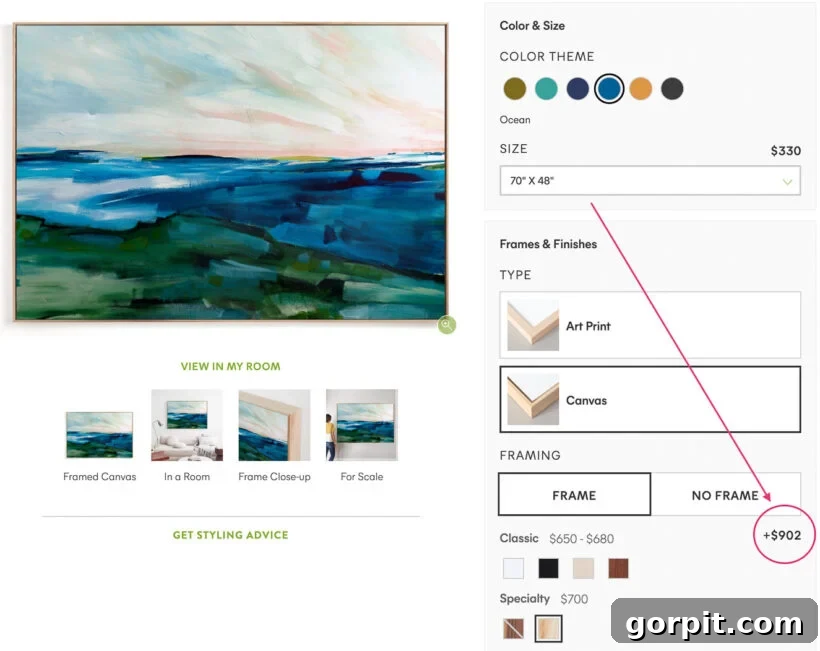
The solution? We built our own frame for less than $40, achieving a look identical to the $902 option we would have chosen. That’s an astonishing saving of over $850! This project isn’t just about saving money; it’s about empowering you to take control of your home decor, customize your art presentation, and experience the immense satisfaction of creating something beautiful with your own hands. Continue reading for the detailed tutorial and unlock the secret to affordable, elevated art display.
Why Frame Your Canvas? Elevating Your Art from Unfinished to Focal Point
You might be wondering if a frame is truly necessary for a canvas. After all, isn’t a canvas designed to be displayed as is? While technically true, an unframed canvas, especially a large one, often appears unfinished, lacking the visual gravitas it deserves. It can feel like a raw edge in a polished space, detracting from the overall aesthetic rather than enhancing it.
One of the primary reasons to frame your canvas is to create a distinct boundary for the artwork. Without a frame, the edges of the canvas can seem to blend into the surrounding wall, particularly if the canvas colors are similar to your wall paint. This diminishes the art’s impact, causing it to recede rather than command attention. A frame acts as a visual anchor, providing a clear separation between the artwork and its environment, allowing it to “pop” and truly stand out.
Consider our experience: our large canvas featured colors that, without a frame, tended to merge with our walls painted in Sherwin-Williams’ Pure White. The upper portion of the unframed canvas art visually dissolved into the background, as you can see in the “BEFORE” image below. The art, despite its size, failed to make the bold statement we envisioned.
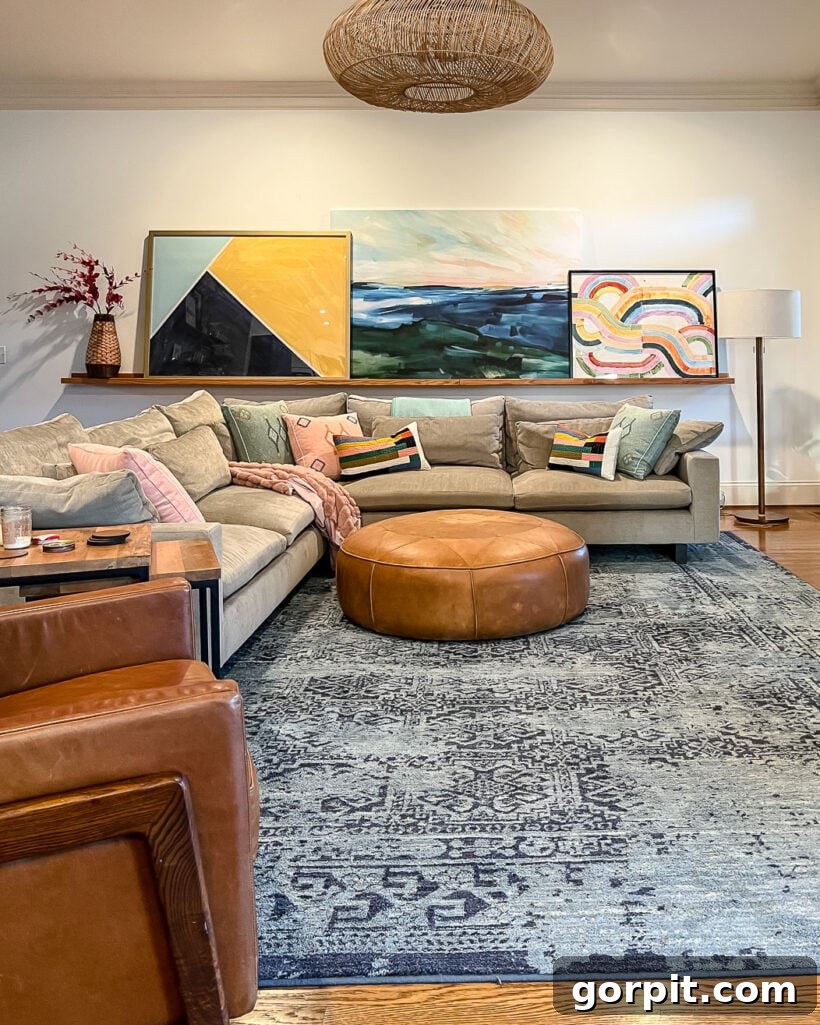
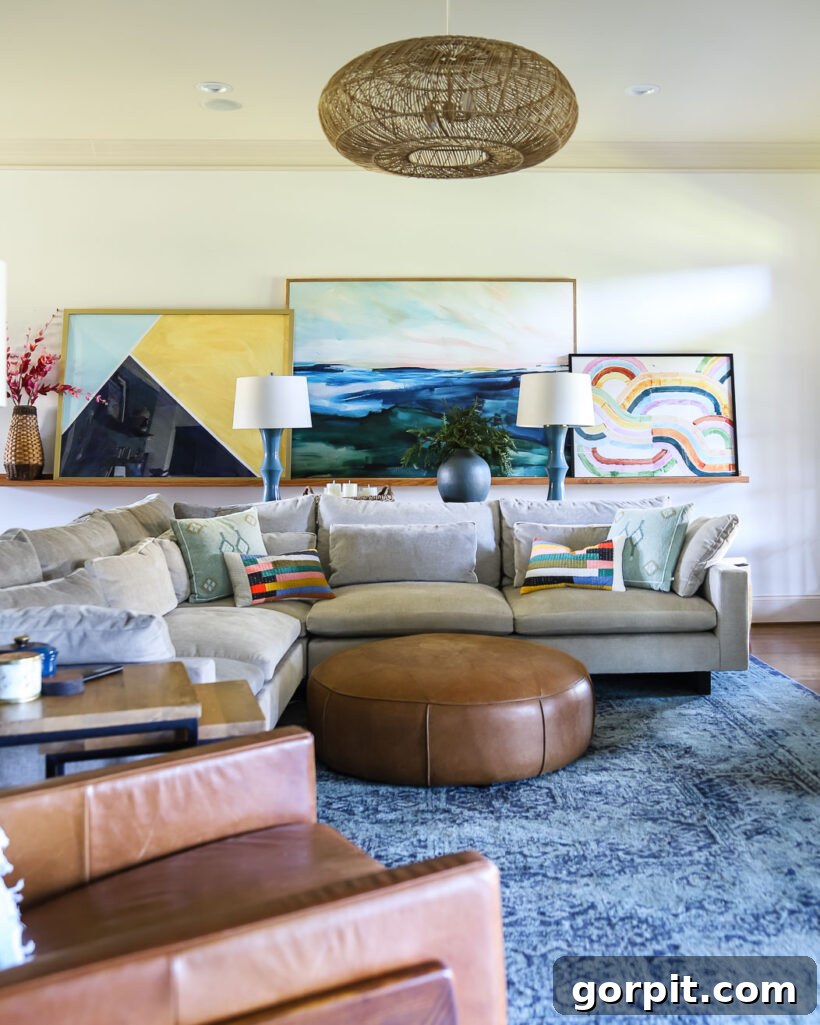
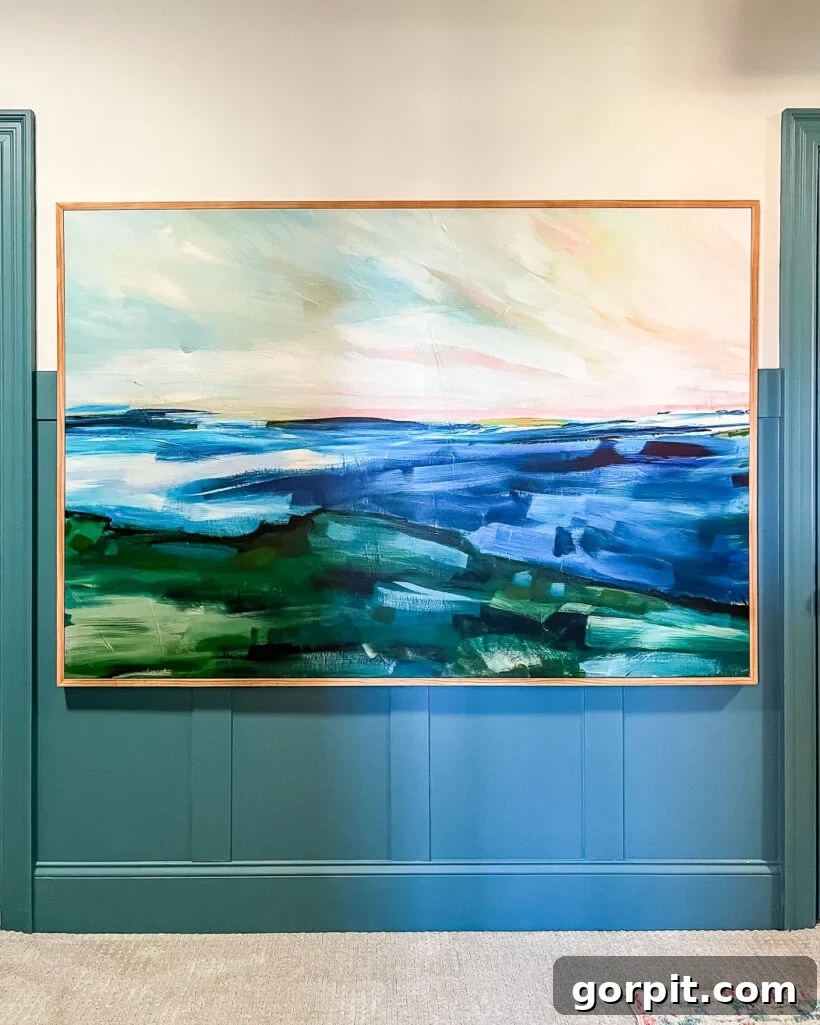
The difference is remarkable, isn’t it? The frame instantly transforms the canvas into a complete, professional-looking piece, giving it the presence it deserves. It defines the artwork, allowing its colors and composition to truly shine, making it an undeniable focal point in the room. This elevated presentation is precisely the goal of investing in large-scale art, and a DIY frame is the most economical and satisfying way to achieve it.
Gathering Your Essentials: Materials and Tools Needed
Before diving into the construction of your DIY canvas frame, it’s essential to gather all the necessary materials and tools. Preparation is key to a smooth and enjoyable building process. Most of these items are readily available at your local hardware store or can be ordered online. The best part? The total cost for the materials is incredibly low, especially when compared to custom framing.
- Tape Measure: For accurate measurements of your canvas and wood cuts. Precision here is paramount for a tight, professional-looking frame.
- 1 x 2 inch Pine Boards: These common lumber pieces are perfect for creating a slim, elegant frame. For our large 70″ x 48″ canvas, we used (2) 8-foot boards and (2) 6-foot boards. The total cost for the wood was approximately $26.56, an incredible value for the impact it creates.
- Wood Stain: (This is the stain we used, left over from another project). Choose a stain that complements your artwork and existing decor. You can opt for a light, natural wood look or a darker, richer tone. Alternatively, you could choose to paint your frame.
- DAP Weldwood Instant Adhesive: This fast-acting adhesive is a game-changer for woodworking projects, significantly speeding up the curing time compared to traditional wood glue.
- DAP Plastic Wood-X: An excellent wood filler for seamlessly concealing nail holes and small gaps, ensuring a smooth, professional finish that accepts stain beautifully.
- Sandpaper: Essential for smoothing out cuts, edges, and filled areas. Have a range of grits (e.g., 120-grit for initial smoothing, 220-grit for fine finishing).
- Miter Saw: This tool allows for precise angled cuts, crucial for creating perfect mitered corners. If you don’t have a miter saw, a hand saw and miter box can achieve similar results with a bit more manual effort.
- Nail Gun: A pneumatic or electric nail gun makes fastening quick and easy, ensuring strong joints. For this project, a pin nailer or a brad nailer is ideal. If a nail gun isn’t available, small finishing nails and a hammer will work perfectly well.
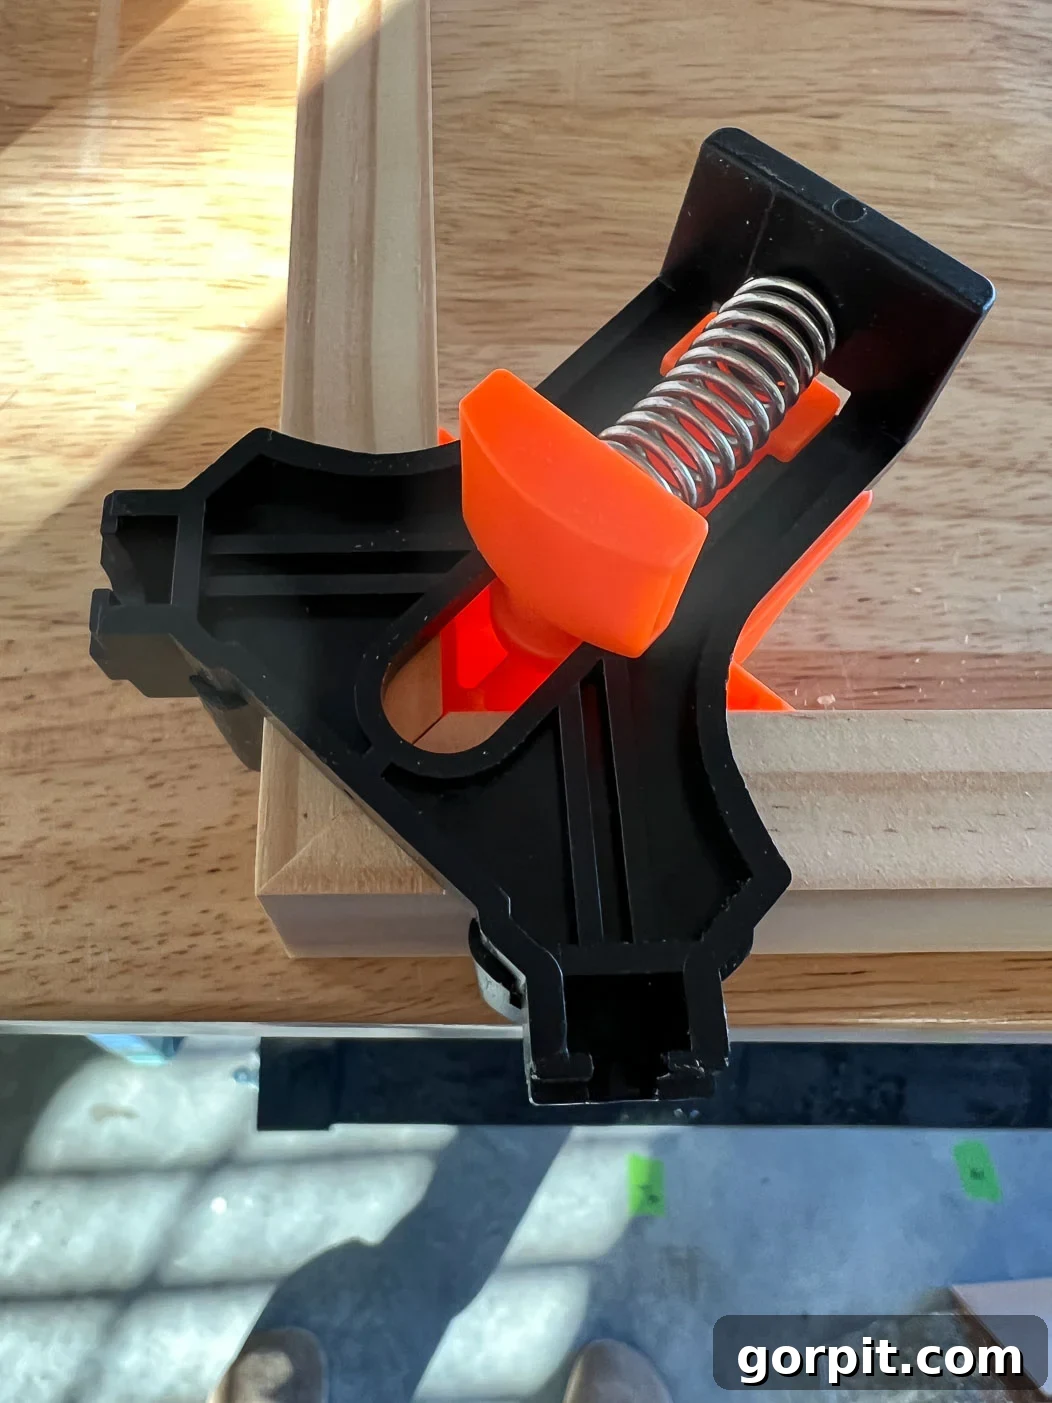
- Corner Clamps: These specialized clamps are invaluable for holding mitered corners at a perfect 90-degree angle while the glue sets, preventing any slippage.
Having all these items ready before you start will streamline the process and allow you to complete your frame efficiently and effectively. Now, let’s move on to the exciting part: building your custom canvas frame!
Step-by-Step Guide: Building Your DIY Canvas Frame
Follow these detailed steps to construct an elegant and affordable flush mount canvas frame in approximately one hour, all for under $50! This project is not only cost-effective but also incredibly rewarding.
-
1. Precise Measurements: Ensuring Your Canvas is Square
The foundational step for any successful framing project is accurate measurement. Begin by carefully measuring the length and width of your canvas. Record these measurements precisely. Equally important is to verify that your canvas is perfectly square. This might seem minor, but if your canvas is even slightly out of square, your mitered cuts (which should ideally be 45 degrees) will not align perfectly, leading to visible gaps in your frame corners. To check for squareness, measure the canvas diagonally from corner to opposite corner. Both diagonal measurements should be identical. Fortunately, our 70″ x 48″ canvas was perfectly square, ensuring a smooth framing process. If yours isn’t, you might need to make minor adjustments to your miter angles during cutting, but for most standard canvases, a perfect 45-degree cut will suffice.
-
2. Mastering the Miter Cut for a Seamless Frame
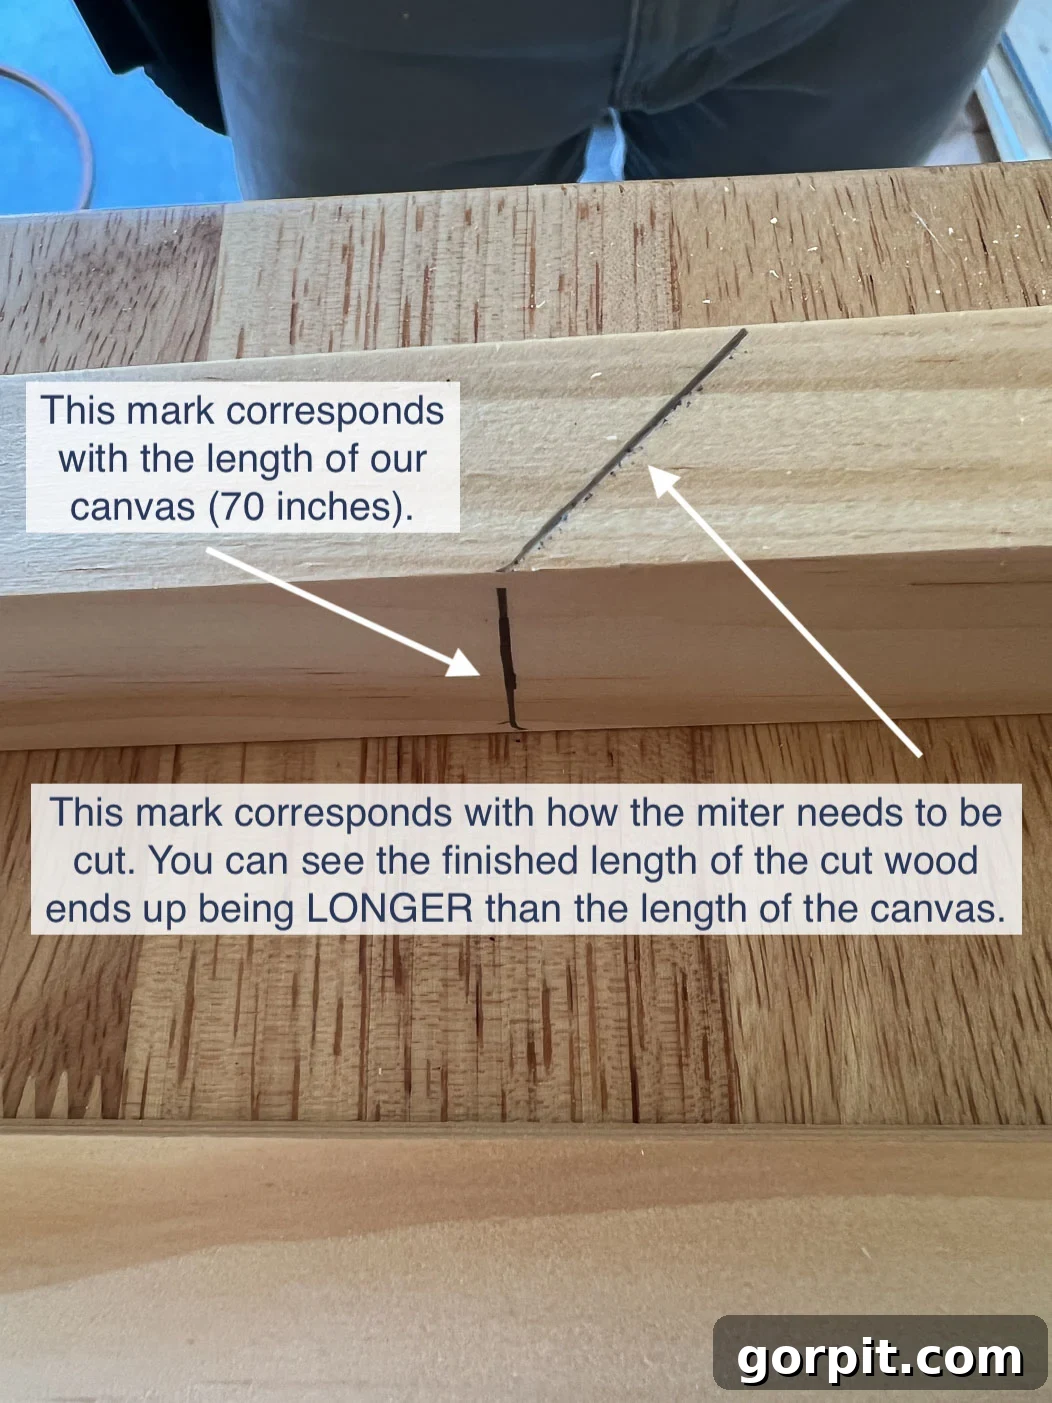
This step is crucial for achieving clean, professional-looking corners. When making mitered cuts for a frame, always remember that the shortest part of your miter cut must correspond to the exact length of your canvas side. This is a common point of confusion for beginners. If you cut your wood so that the *longest* portion of the mitered edge matches your canvas length, your frame pieces will end up too short, leaving unsightly gaps when assembled. To avoid this costly mistake, we strongly recommend marking your wood carefully. Place the wood on your canvas, mark the canvas measurement directly onto the wood, and then draw your 45-degree miter line, ensuring the marked measurement aligns with the *shortest* edge of the miter cut. Trust me, learning this the hard way is not fun! Use your miter saw to make clean, precise 45-degree cuts. If using a hand saw and miter box, take your time and ensure steady, even pressure.

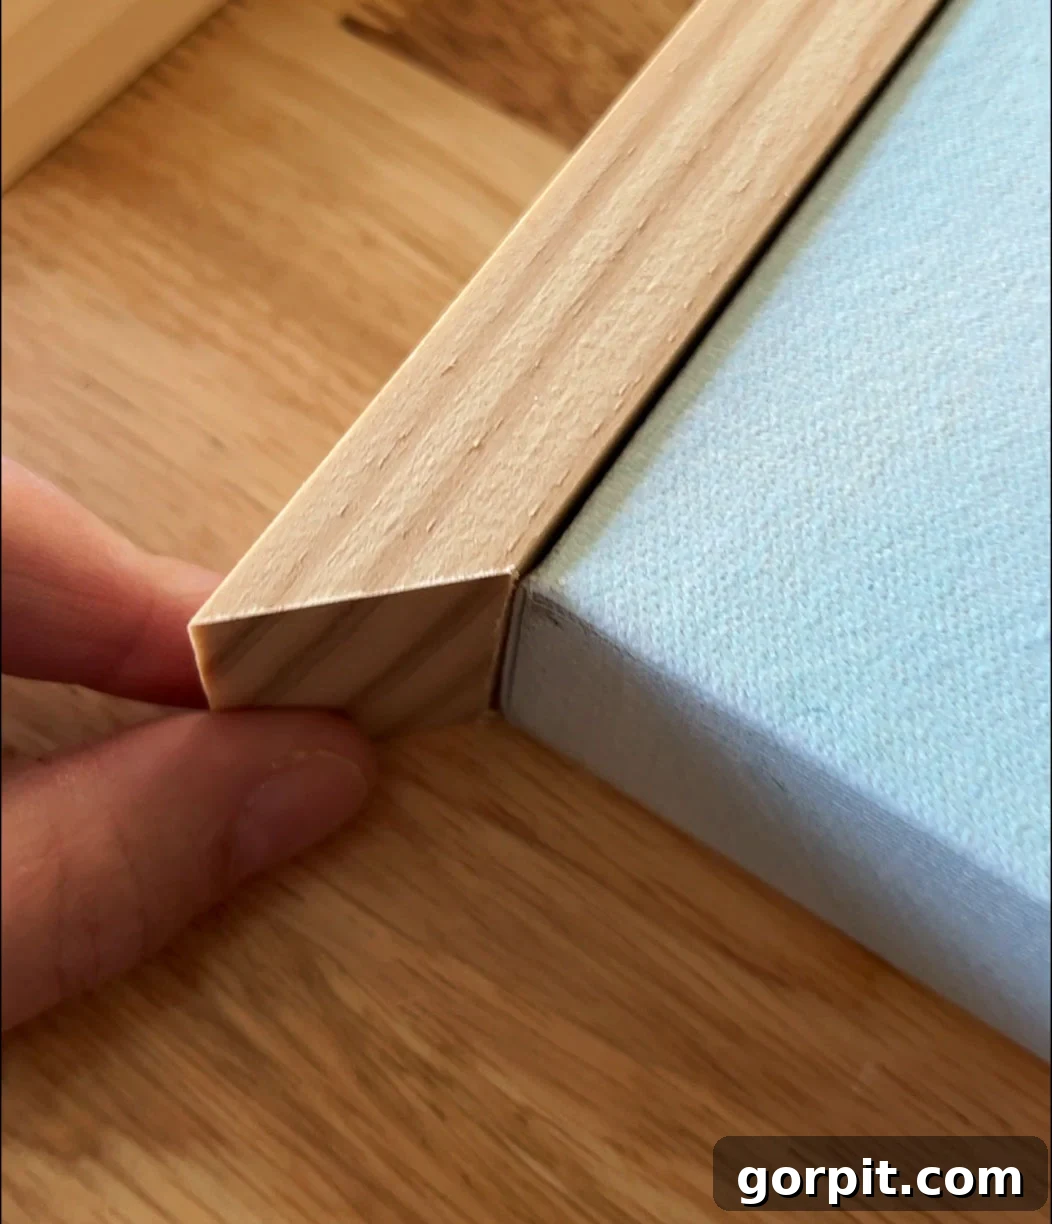
Once cut, each mitered piece should fit perfectly when positioned around the canvas, as shown below, forming the corners of your flush-mount frame.
-
3. Assembling the Frame with Glue and Clamps
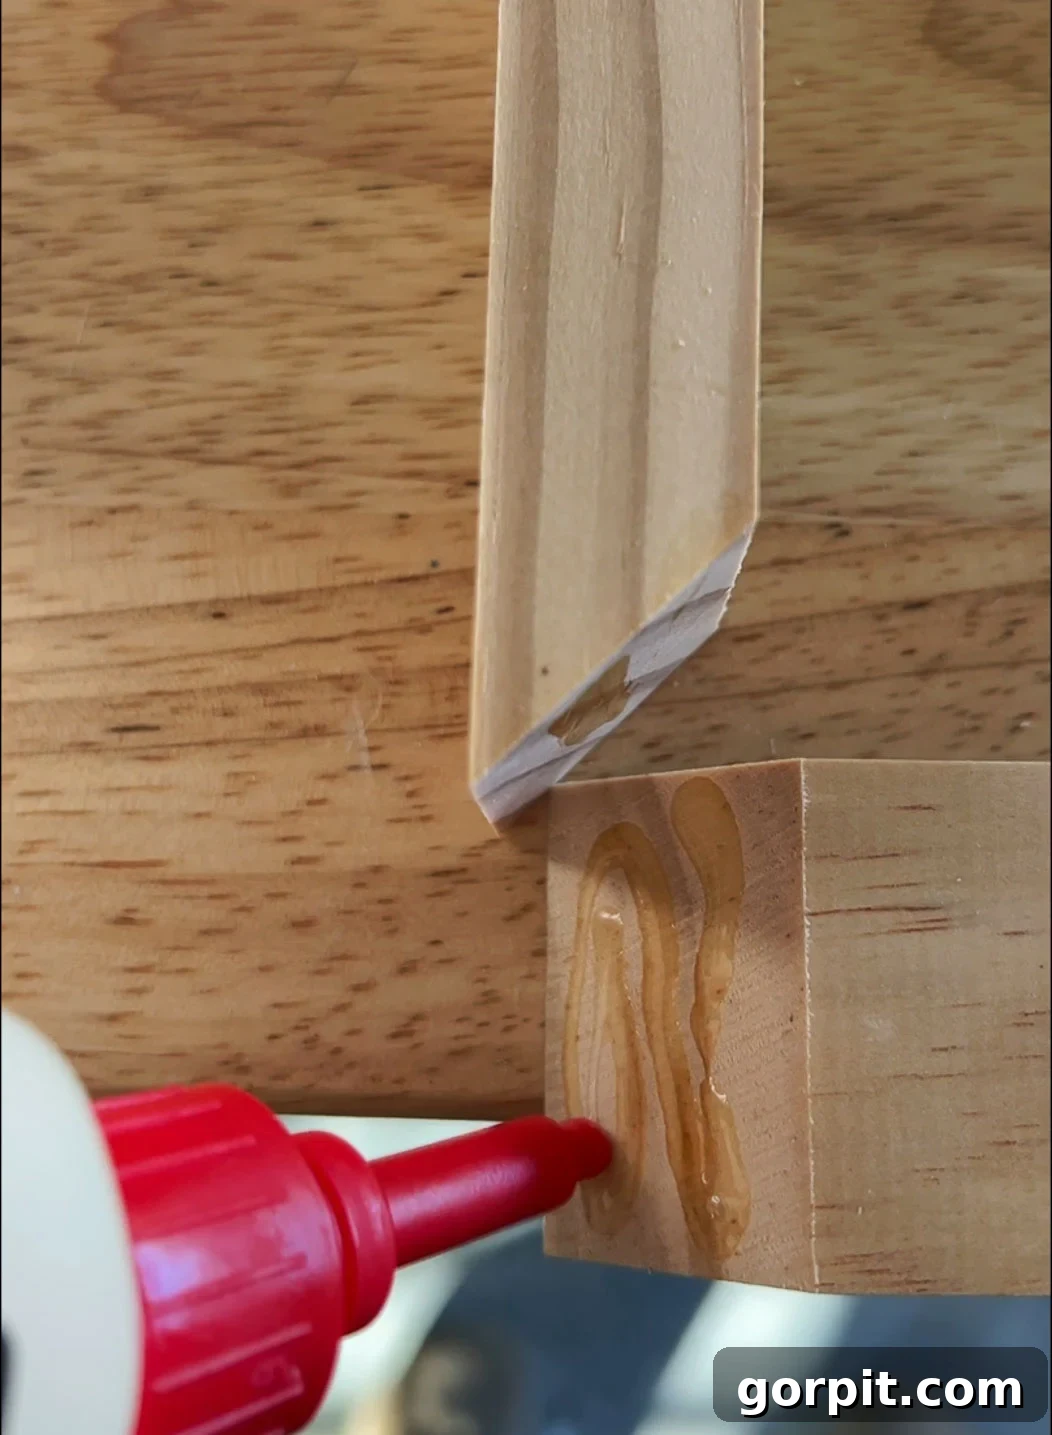
With all your wood pieces accurately cut, set your canvas aside. It’s time to assemble the frame itself. Apply a generous bead of DAP Weldwood Instant Adhesive to each mitered edge. This instant adhesive is excellent for this project because it cures much faster than traditional wood glue, allowing you to proceed to the next steps without a long waiting period. After applying the glue, bring two adjacent pieces together to form a corner. Immediately secure the corner with your corner clamps. The clamps are essential for holding the pieces perfectly square and tight while the adhesive sets, preventing any movement or misalignment. Repeat this process for all four corners, creating a complete, rigid frame. Wipe away any excess glue that squeezes out with a damp cloth before it dries to ensure a clean finish.
Ensure each corner is held firmly and squarely in place by the clamps, allowing the glue to set effectively.
-
4. Reinforcing Your Frame with Nails
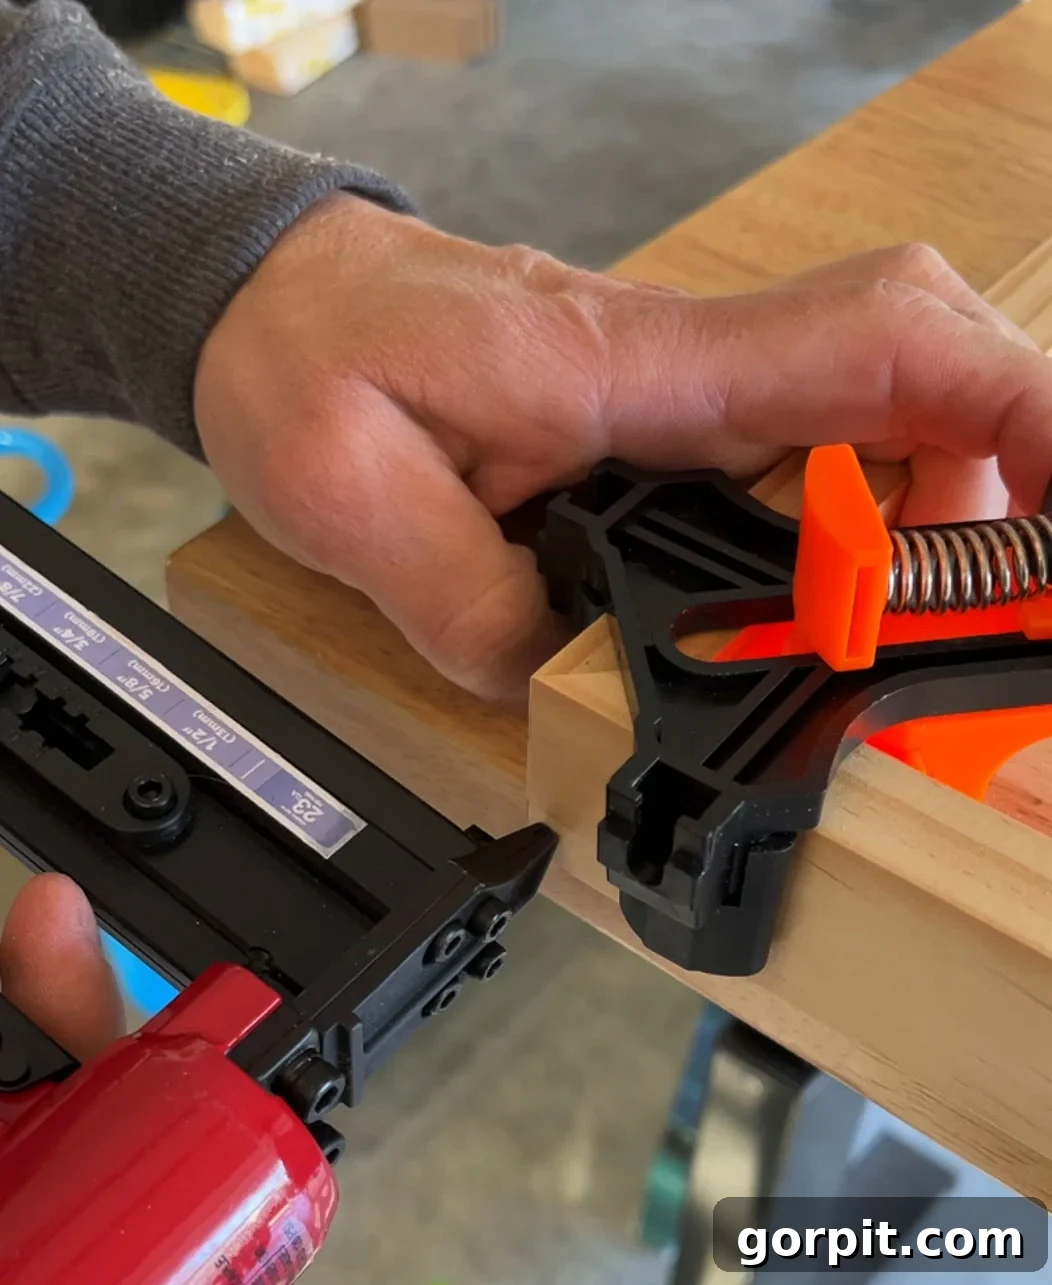
While the adhesive provides a strong bond, adding nails significantly enhances the durability and longevity of your frame. For a clean finish, we recommend using small finishing nails or, even better, 1-inch pin nails (23 gauge) with a nail gun. The small gauge of these nails makes them nearly invisible once filled and stained. Carefully drive two to three nails into each corner, ensuring they pass through both pieces of wood. If using a nail gun, make sure to adjust the depth so the nail heads are slightly recessed. If using a hammer and finishing nails, use a nail set to recess the nail heads just below the surface of the wood. This reinforcement prevents any potential separation of the mitered joints over time and provides a robust structure for your artwork.
-
5. Achieving a Flawless Finish: Filling and Sanding
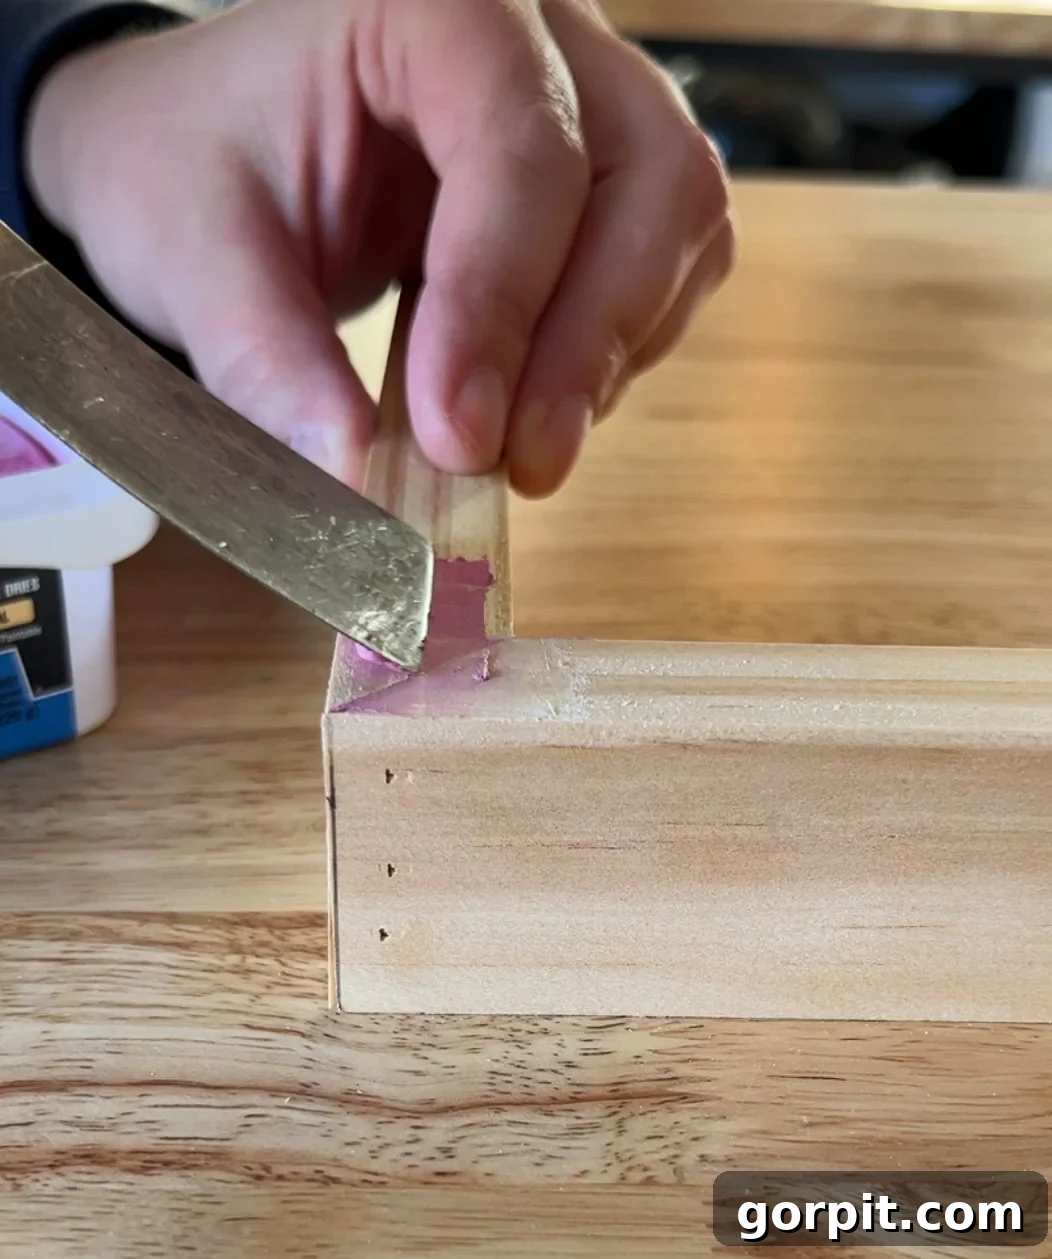
For a truly professional-looking frame, filling nail holes and any minor gaps in your mitered joints is an essential step. Apply DAP Plastic Wood-X to all nail holes and any imperfections. This product is fantastic because it goes on pink and dries to a natural wood color, making it easy to know when it’s ready for sanding. It also accepts stain beautifully, ensuring a consistent finish across your frame. Once the wood filler is completely dry (check the product instructions for drying times), use sandpaper to smooth the filled areas. Start with a medium-grit sandpaper (e.g., 120-grit) to remove any excess filler, then follow with a finer grit (e.g., 220-grit) for a silky-smooth finish. Always sand with the grain of the wood to avoid scratching. This careful preparation is key to a high-quality final appearance.
-
6. Personalizing Your Frame: Staining or Painting
Now for the fun part: customizing your frame to match your aesthetic! We applied one coat of this specific stain, aiming for a beautiful raw, light wood look. The stain provided a subtle darkening, which was exactly the effect we desired, allowing the natural grain of the pine to shine through. To apply stain, use a brush or a clean rag, wiping off any excess after a few minutes to achieve your desired shade. For a richer color, apply additional coats, allowing each to dry completely. If you prefer a painted look, ensure your wood is clean and dry, then apply a primer followed by your chosen paint color. Allow adequate drying time for all finishes before proceeding to the final step.
-
7. Final Assembly: Securing Your Canvas into Its New Frame
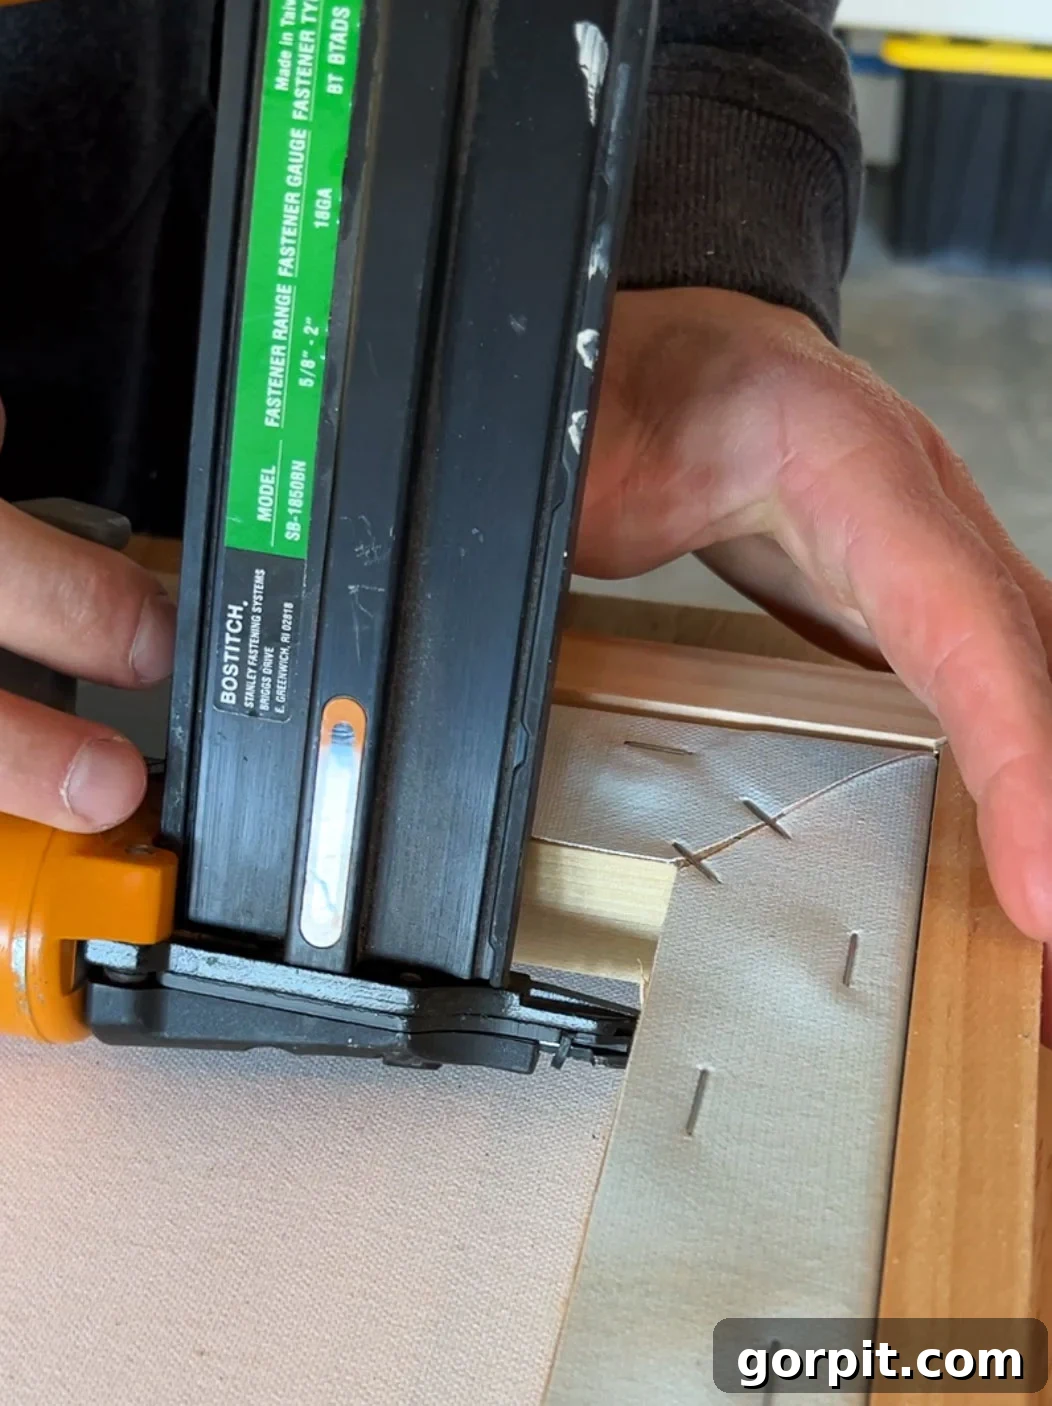
Once your frame is stained (or painted) and completely dry, it’s time to unite it with your canvas. Carefully place your canvas into the framed opening. Ensure it sits snugly and evenly within the frame. To secure the canvas without creating additional visible nail holes on the front of your beautiful new frame, we recommend nailing from the back, through the canvas stretcher bars into the frame. We used 1 1/2-inch, 18-gauge nails for this step. Position your canvas frame face down on a clean, soft surface to protect the finish. Gently push the canvas into place, ensuring it’s centered and flush. Then, using your nail gun (or hammer and finishing nails), drive nails through the canvas stretcher bars directly into the inner edge of the wooden frame. Space them evenly, typically every 6-8 inches along each side, to ensure the canvas is held securely in place. This method keeps the front of your frame pristine and professional.
And there you have it! Your stunning, custom-built canvas frame is complete. What once looked unfinished and potentially blended into the wall is now a high-end, gallery-worthy piece of art. The best part? This entire transformation cost us less than $40, a remarkable saving compared to the staggering $902 quoted for custom framing. It’s a testament to the power of DIY and smart budgeting.
Showcasing Your Framed Masterpiece: Hanging Tips
Now that your canvas art is beautifully framed, the final step is to display it proudly! For large, heavy pieces like our 70″ x 48″ canvas, robust hanging hardware is essential. We often use D-rings and picture wire attached to the back of the frame, which allows for slight adjustments once on the wall. Alternatively, heavy-duty sawtooth hangers can be effective for a more direct mount. Ensure you use appropriate wall anchors or hang into wall studs for maximum security. Our framed canvas now gracefully adorns our DIY art ledge in the family room, but as you saw in a previous image, it would look equally impactful hanging on a wall, such as our DIY board and batten accent wall in the upstairs hallway. Take a moment to step back and admire your handiwork – the transformation is truly satisfying!
Final Thoughts on Your DIY Art Journey
We are absolutely thrilled with how this DIY canvas frame turned out. It perfectly encapsulates our philosophy of achieving high-impact design on a budget. In just about an hour and for less than $40, we transformed an otherwise lovely but unfinished canvas into a sophisticated centerpiece. This project proves that you don’t need to be a seasoned woodworker or spend a fortune to create beautiful, custom elements for your home. It’s an accessible and rewarding way to infuse your personality into your living spaces and truly make your art shine.
Ready for more inspiring DIY projects? Explore these related posts to continue your journey in creating beautiful, budget-friendly home decor:
- Huge DIY Art Frames For Less than $20 Each
- How to Make a Picture Frame for LARGE Prints
- How to Display Art On Any Smart TV + Affordable TV Update
- DIY Art Ledge: An Easy Step-by-Step Tutorial
If you’re eager to learn more about my systematic approach to transforming rooms and spaces, be sure to check out Designer in a Binder® – your affordable and simple guide to decorating your home with confidence.
For exclusive content, behind-the-scenes sneak peeks, and fresh DIY inspiration delivered straight to your inbox, don’t forget to subscribe before you go! Join our community and keep transforming your home, one beautiful project at a time.