
Thank you to DAP Products for sponsoring this post. As always, all opinions are 100% my own based on personal experience.
Hello creative friends! If you’ve been following our journey here on the blog, you know that our home has been a whirlwind of transformations lately. We’re currently in the exciting, albeit challenging, process of reconfiguring several rooms to better suit our growing family’s needs. This means our twin girls are finally getting their separate bedrooms, my office is relocating to their former playroom, and the playroom itself is finding a new home in a cozy corner of our family room. It’s a lot of moving parts, but the results are truly worth it!
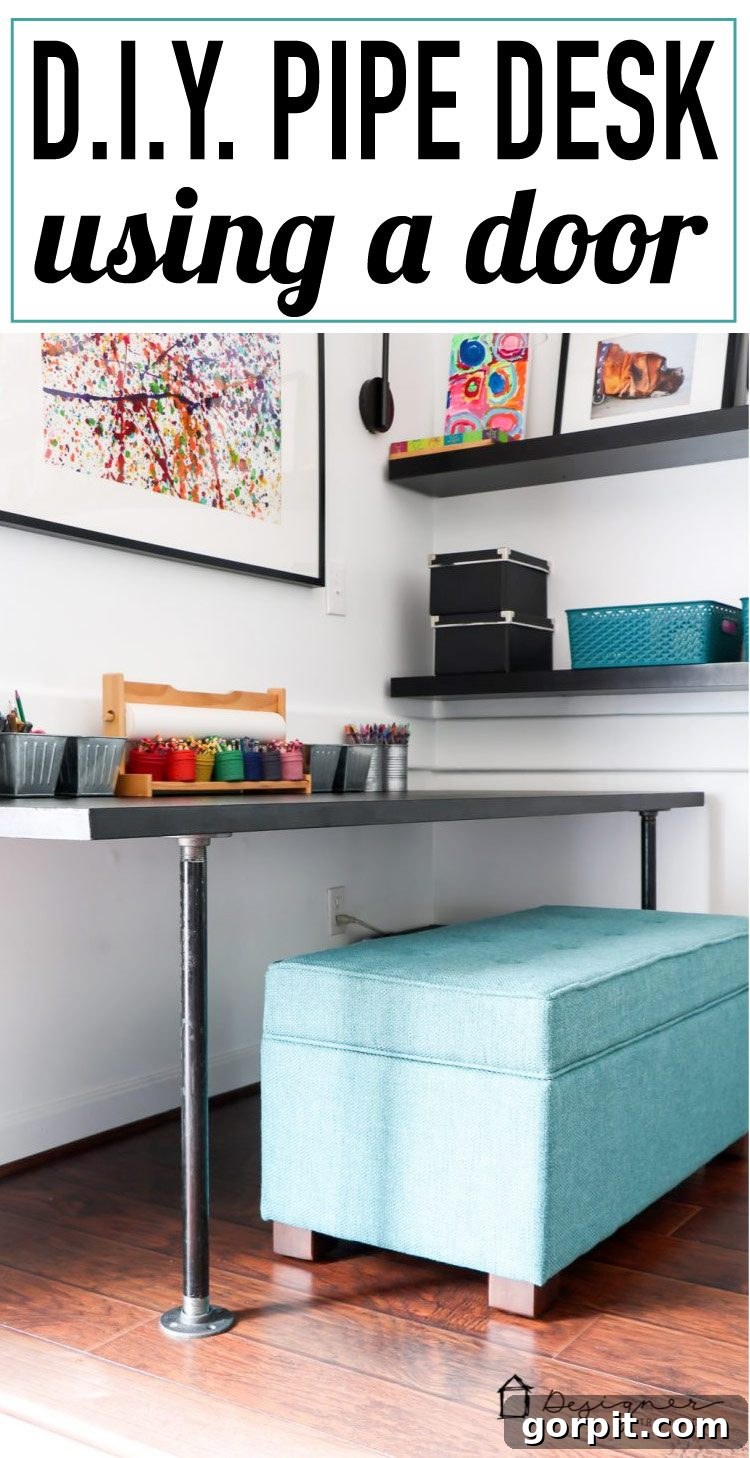
I’m thrilled to report that we’ve made significant progress, especially with the playroom’s new setup. A key element of this transition was creating a dedicated workspace for the girls – a spot where they can tackle homework, unleash their artistic talents, and engage in imaginative play. And I couldn’t be happier with what we’ve designed: a custom DIY pipe desk that is not only incredibly easy to build but also surprisingly affordable. This project truly embodies a double win, offering both style and functionality without breaking the bank!
Building a robust and stylish desk doesn’t have to be complicated or expensive. Our innovative approach utilizes readily available materials, making it accessible for any DIY enthusiast. This tutorial will guide you through each step, ensuring you can replicate this fantastic project in your own home. Whether you need a new office desk, a spacious craft table, or a durable study area for your children, this industrial pipe desk offers remarkable versatility and an eye-catching aesthetic. Get ready to transform a simple hollow core door and some plumbing pipes into a functional masterpiece!
This post contains some affiliate links for your shopping convenience, meaning I may earn a small commission if you make a purchase through my links, at no extra cost to you. Click here to read my full disclosure policy.
Create Your Own Stylish & Affordable DIY Pipe Desk
Are you searching for an easy-to-build, budget-friendly desk that boasts an industrial-chic aesthetic? Look no further! This comprehensive DIY pipe desk tutorial will walk you through crafting a durable and spacious workstation perfect for any room – from a kids’ playroom to a home office. Discover how to transform common materials into a stunning piece of furniture.
DIY Pipe Desk Tutorial: Step-by-Step Guide
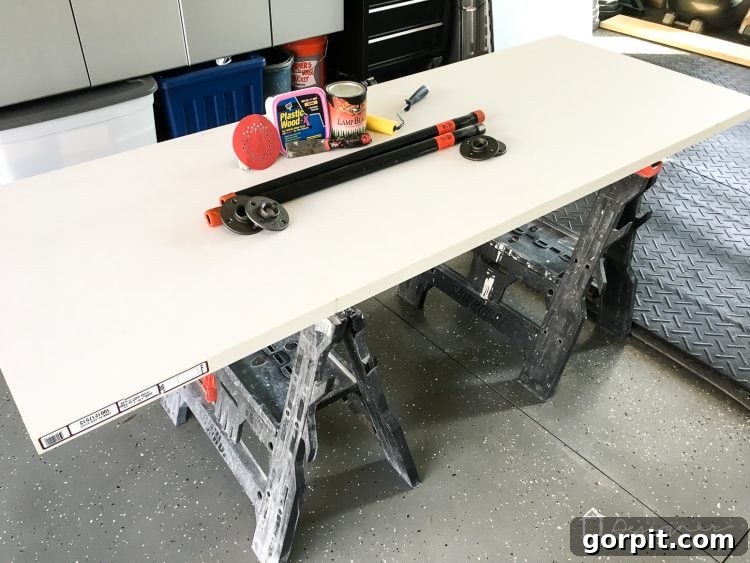
Materials Needed for One DIY Industrial Pipe Desk:
- 1 Hollow Core Door: We specifically used this 80″ x 30″ primed composite interior door slab. Our door cost around $30, but you might find even better deals at local Habitat for Humanity ReStores or Goodwill. Opting for a hollow core door is a fantastic way to keep costs down significantly compared to solid wood alternatives.
- DAP Plastic Wood-X: An essential for smoothing out the rough edges of an inexpensive door, giving it a high-quality finish.
- Sandpaper: Various grits (e.g., 120-grit for initial smoothing, 220-grit for final finish) for preparing the door surface.
- Paint: Choose a durable paint in your desired color. We used black for a sleek, modern look. Consider a semi-gloss or satin finish for easy cleaning, especially for a kids’ desk.
- DAP Rapid Fuse: This incredible adhesive is the secret weapon for securely attaching the pipe flanges to the hollow core door. It creates an incredibly strong bond quickly.
- Clamps: Essential for holding the floor flanges in place while the Rapid Fuse cures, ensuring a strong and stable connection.
- (2) 24″ Lengths of 1″ Diameter Steel Pipe: These will form the main front legs of your industrial pipe desk. Find them here.
- (4) Floor Flanges: Used to attach the steel pipes to both the desk surface and the floor (if desired). Ensure they match the 1″ pipe diameter. Click here for a similar option.
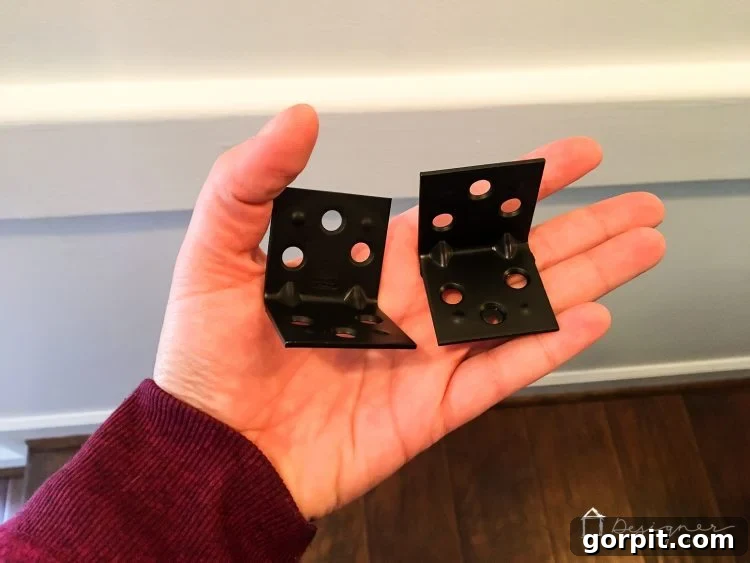
- (2) Right Angle Brackets: For mounting the back of the desk to a wall, adding stability and a built-in look. Check out these brackets.
- Screws: Appropriate length and type for attaching flanges and brackets (e.g., wood screws for the door, wall anchors/wood screws for wall studs).
- Drill/Driver: For pre-drilling holes and driving screws.
- Stud Finder: If mounting to a wall, to locate secure anchor points.
- Measuring Tape and Pencil: For accurate measurements and markings.
- Safety Gear: Gloves, eye protection, and a mask (especially when sanding or painting).
Detailed Steps to Construct Your Industrial Pipe Desk:
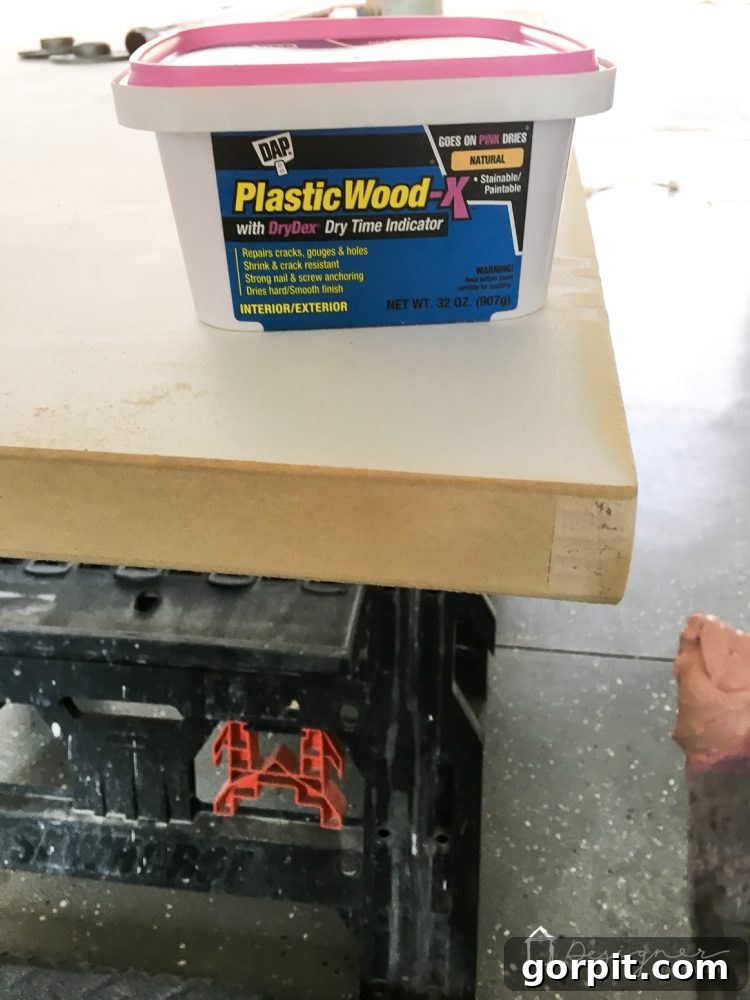
1) Prepare the Door Edges with Wood Filler: The beauty of using a hollow core door is its affordability, but often, the edges can be quite rough and unfinished. To achieve a polished, high-end look without the high-end price tag, we start by addressing these imperfections. Begin by thoroughly cleaning the edges of your door. Then, generously apply DAP Plastic Wood-X to all four edges. This product is fantastic for filling gaps, smoothing out rough spots, and creating a seamless surface. Apply it in thin, even coats, allowing each coat to dry completely according to the manufacturer’s instructions before applying the next. Once dry, use sandpaper (starting with a medium grit like 120, then moving to a finer grit like 220) to sand the edges until they are perfectly smooth to the touch. This step is crucial for giving your inexpensive door a professional and durable finish, making it indistinguishable from a more costly solid wood alternative.
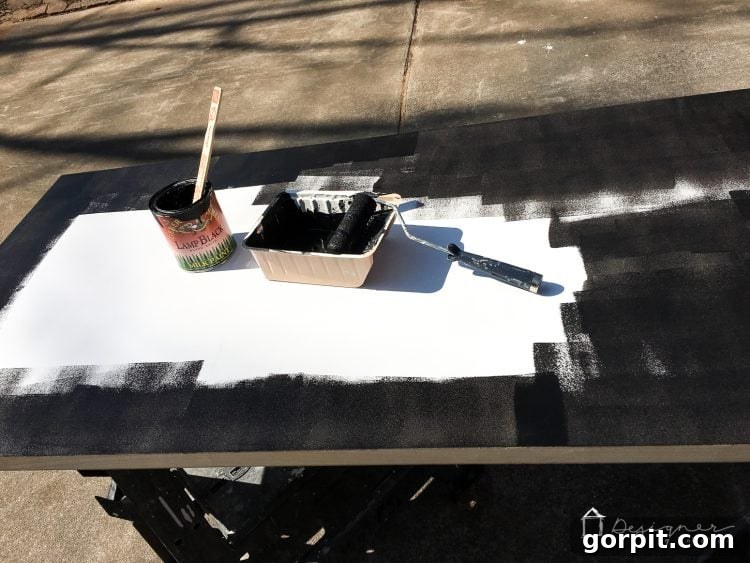
2) Paint Your Desk Surface: With the edges perfectly smooth, it’s time to add some color! Prepare your door for painting by wiping it down to remove any sanding dust. If your door is primed (like the one we used), you might not need a separate primer. We opted for a classic black paint, which we already had on hand, to give the desk a sophisticated, industrial contrast against the metal pipes. However, the color choice is entirely yours! Consider a vibrant hue to inject personality into a playroom, or a neutral shade for a more understated office look. Apply your paint in thin, even coats, allowing adequate drying time between each coat. For optimal durability, especially for a surface that will see a lot of use, apply at least two to three coats and consider a protective topcoat if your paint doesn’t include one.
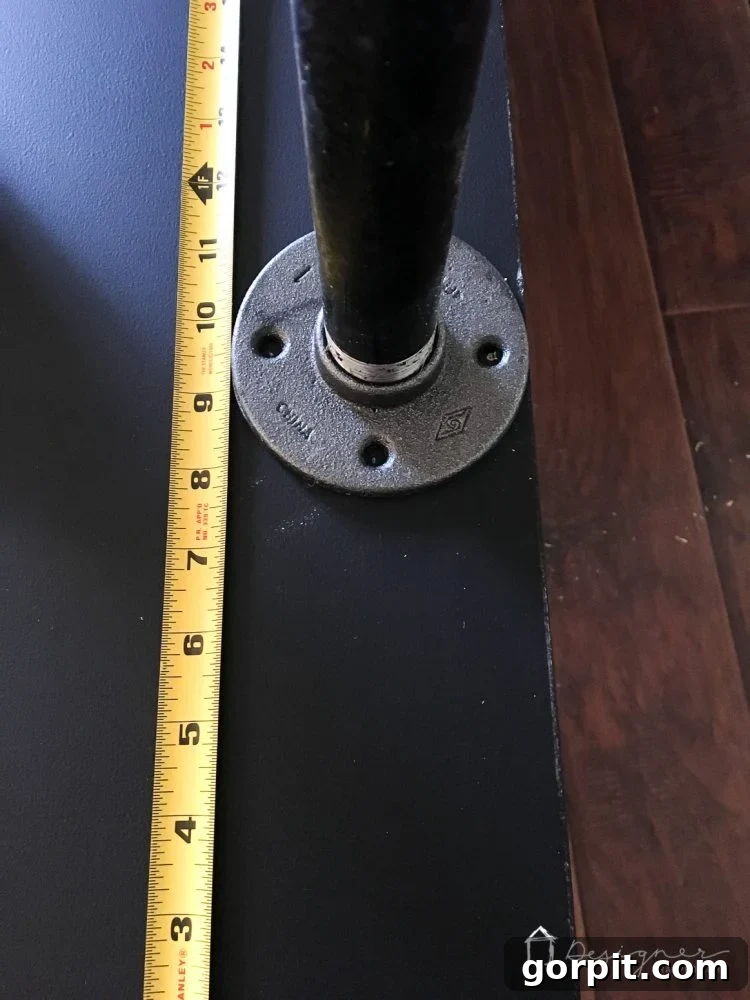
3) Attach the Floor Flanges to the Desk Top: Once your paint is completely dry and cured, it’s time to attach the pipe legs. Flip your desk top upside down. Decide on the aesthetic placement of your legs – we chose to measure 9 1/2 inches in from each edge for a balanced look, but feel free to adjust this based on your preference. Now, here’s where the hollow core door presents a unique challenge: traditional screws have very little wood to grip onto. This is where DAP Rapid Fuse truly shines as one of my all-time favorite inventions!
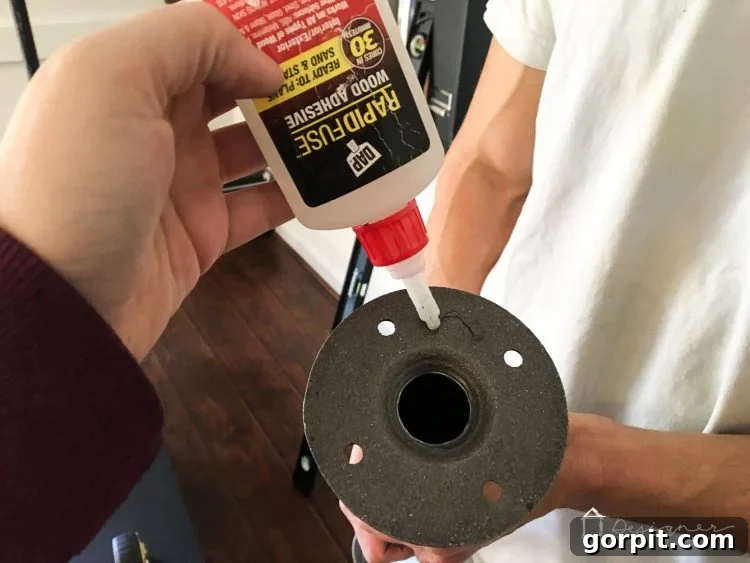
Apply a generous bead of DAP Rapid Fuse to the bottom of each floor flange. Position the flanges precisely where you marked them on the underside of the desk. While the Rapid Fuse begins to bond almost instantly, we still reinforced it by driving one screw into the small perimeter of wood available at the edge of the hollow core door. This single screw helps hold the flange in place while the adhesive fully cures. For maximum strength and to prevent any shifting, use clamps to hold the floor flanges firmly against the desk surface until the Rapid Fuse has completely set. This ingenious method allows us to confidently use an affordable hollow core door, saving us over $100 compared to a solid wood slab. I’ve even relied on this powerful adhesive for unexpected repairs, like fixing my shoes, which you can read more about in this post!
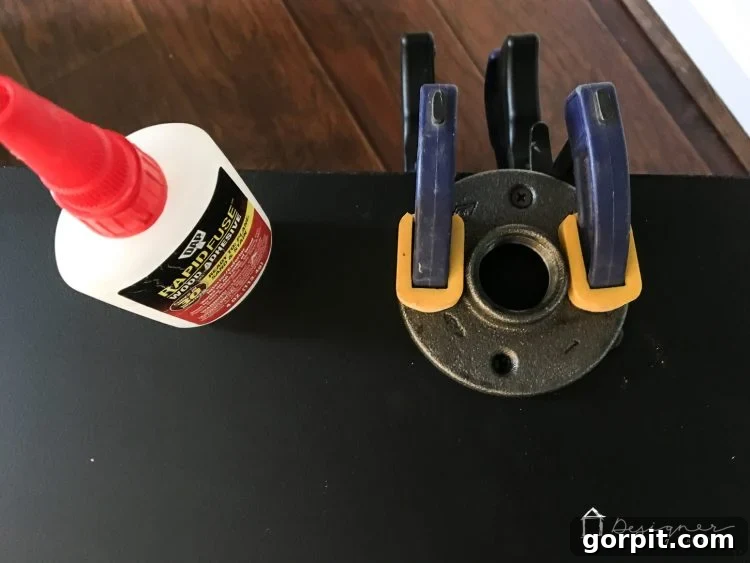
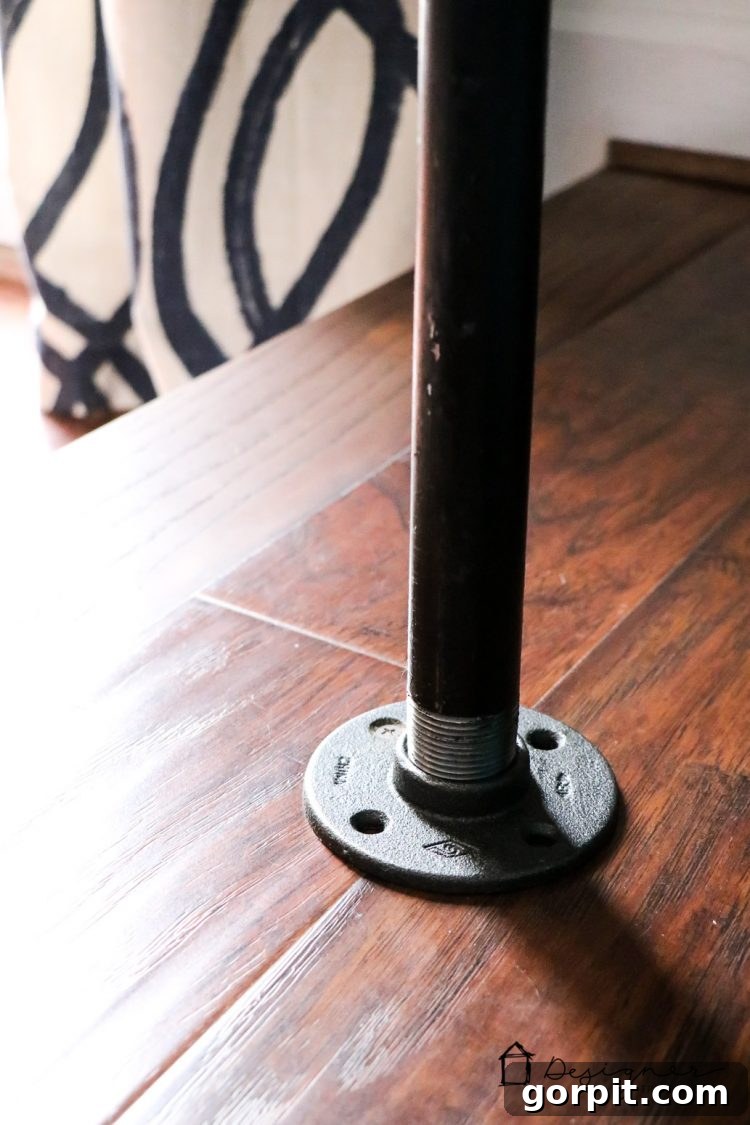
4) Assemble the Pipe Legs: After the DAP Rapid Fuse has fully cured and created an incredibly strong bond (it truly works like a charm!), it’s time to assemble the full pipe legs. Take your two 24″ steel pipe lengths and carefully screw them into the floor flanges that are now securely attached to the underside of your desk. Hand-tighten them firmly. Next, take the remaining two floor flanges and screw them onto the bottom end of each pipe leg. These bottom flanges will serve as the feet of your desk, providing stability and protecting your floor. Once both pipes are securely attached with their respective top and bottom flanges, you can flip your desk upright.
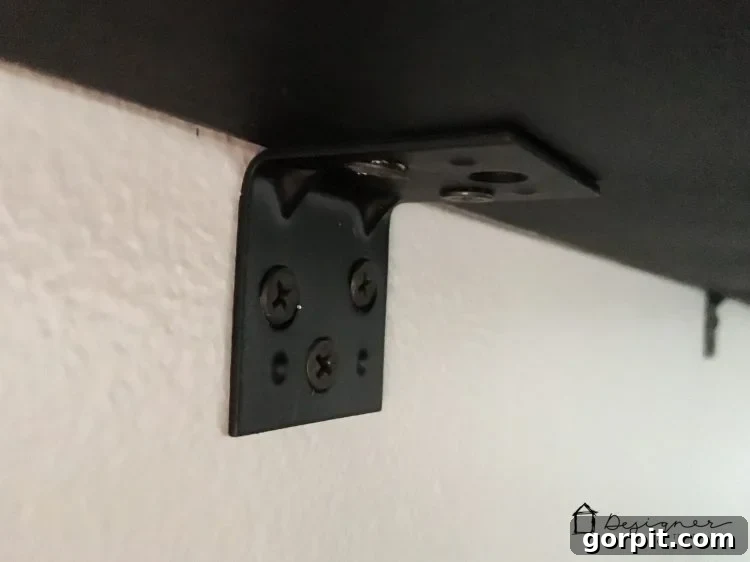
5) Position and Secure to the Wall (Optional but Recommended): With the desk now standing on its two front pipe legs, move it into its final desired position. We chose to mount the back of our desk to the wall using right angle brackets, which we spray-painted black to match the desk. This step is entirely optional; you could certainly add two more pipe legs to the back for a freestanding desk. However, mounting it to the wall offers several benefits: it significantly enhances stability (especially important for a kids’ desk!), reduces material costs by eliminating two additional pipe legs, and creates a stylish, built-in, industrial aesthetic that looks incredibly intentional. When attaching the brackets, always aim to screw into wall studs for the strongest hold. Use a stud finder to locate these. If studs aren’t an option in your desired location, make sure to use appropriate heavy-duty wall anchors designed for the weight of your desk and any items it will hold. Securely fasten the brackets to both the wall and the underside of the desk. This final step ensures your DIY pipe desk is rock-solid and ready for action.
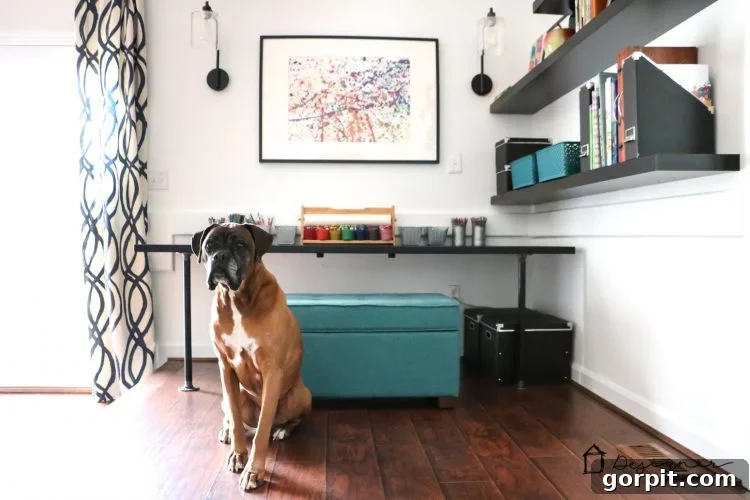
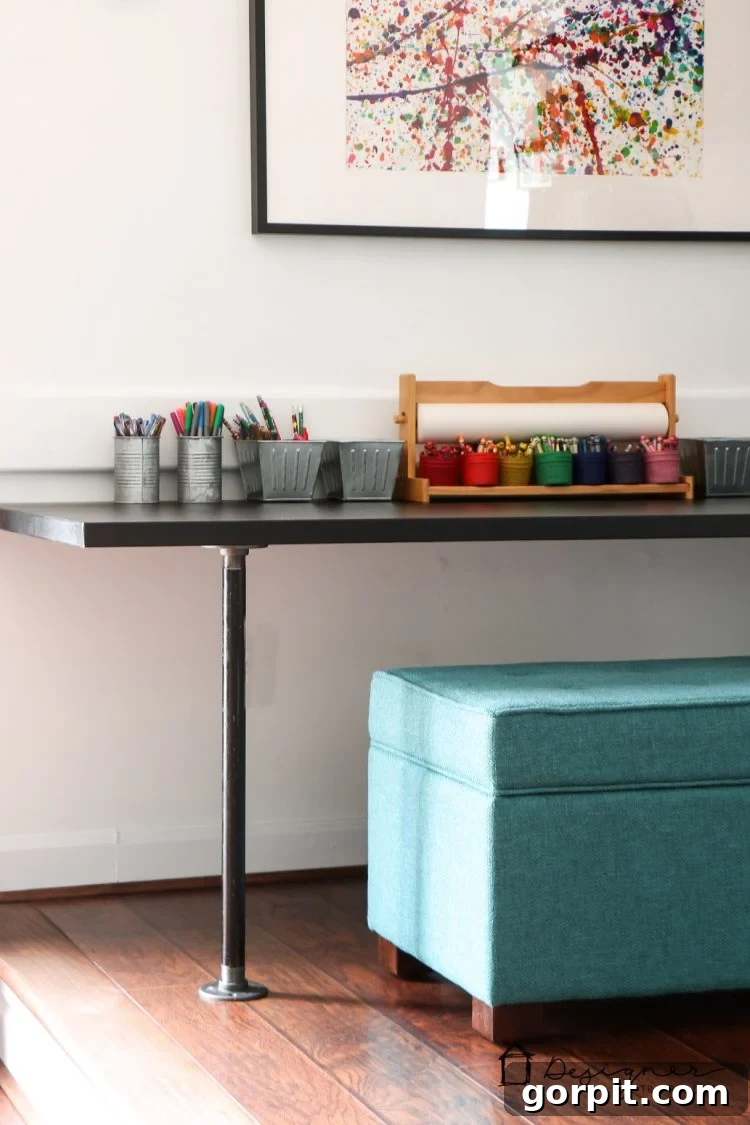
That’s it! Your spacious, sturdy, and stylish DIY industrial pipe desk is complete! This entire project cost us an astonishingly low $60 and took approximately an hour of hands-on work (excluding drying times for the wood filler and paint). We now have an expansive and durable surface perfect for our twin girls to tackle their homework, engage in art projects, assemble puzzles, and so much more. It’s the ideal blend of functionality, cost-effectiveness, and modern industrial design. Take a look at our finished DIY pipe desk, ready and waiting for its enthusiastic users!
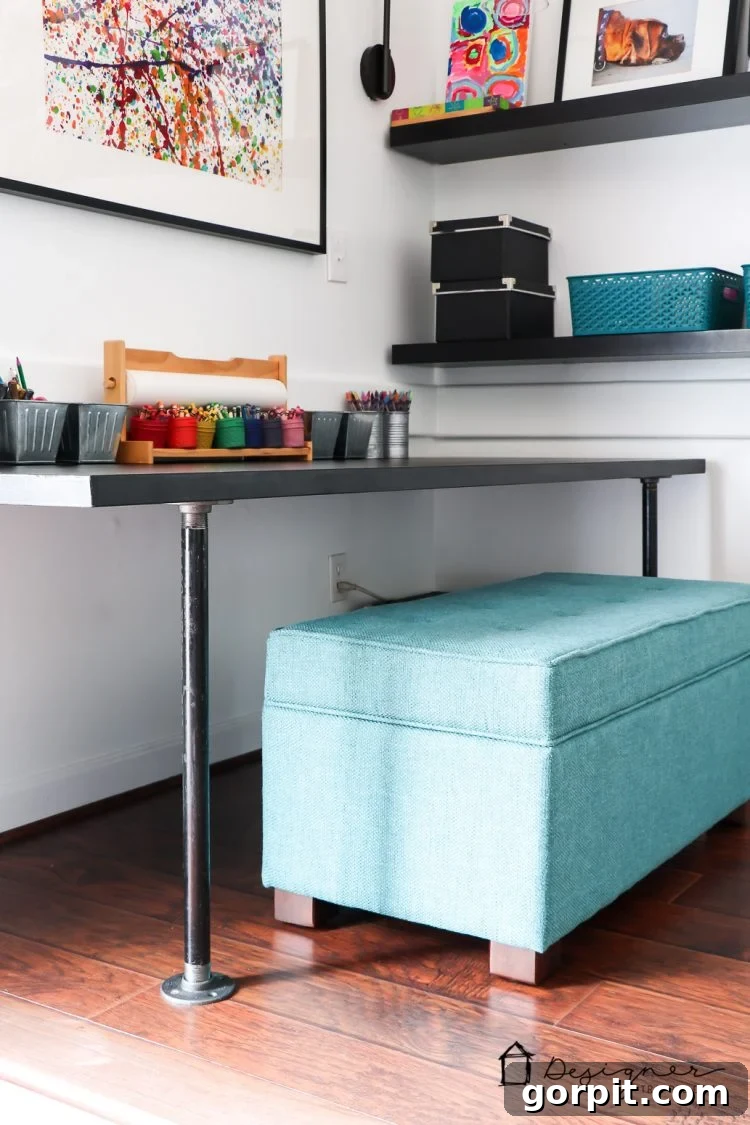
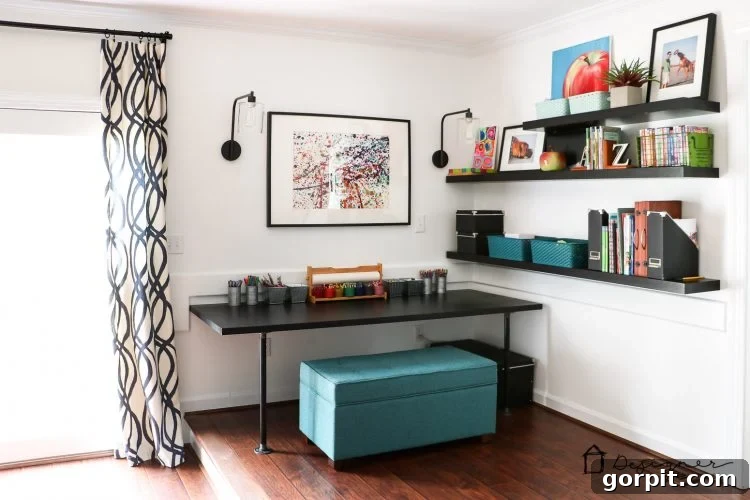
You might be wondering why we opted for a bench rather than traditional chairs to complement our new DIY pipe desk. The answer is simple and incredibly practical: storage! This fantastic storage ottoman provides ample space to neatly tuck away all of our board games, art supplies, and other playroom essentials, keeping the area tidy and organized. It’s a smart solution that maximizes both seating and storage in one stylish piece. Here’s a link to the exact storage ottoman we purchased if you’re looking for a similar versatile addition to your space.
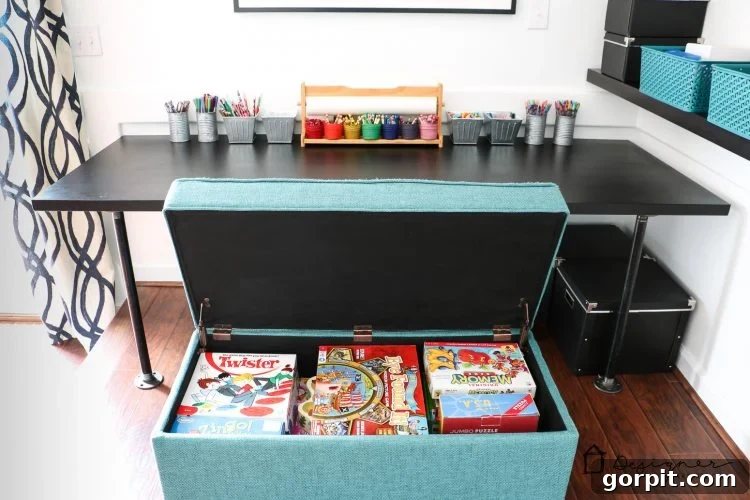
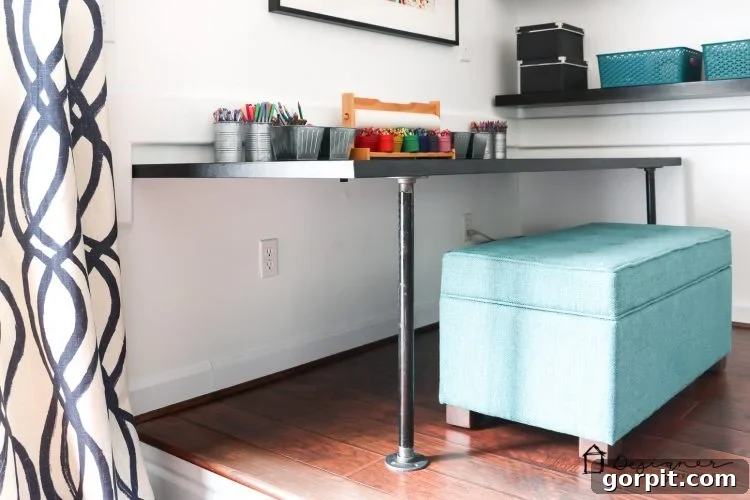
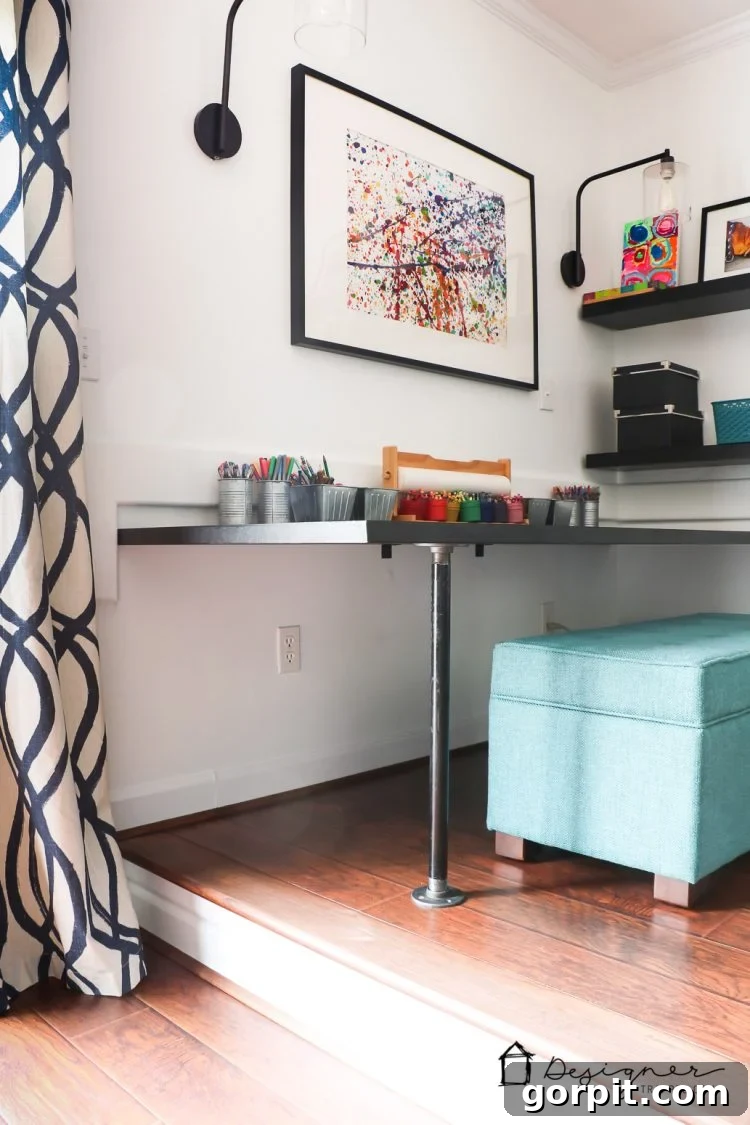
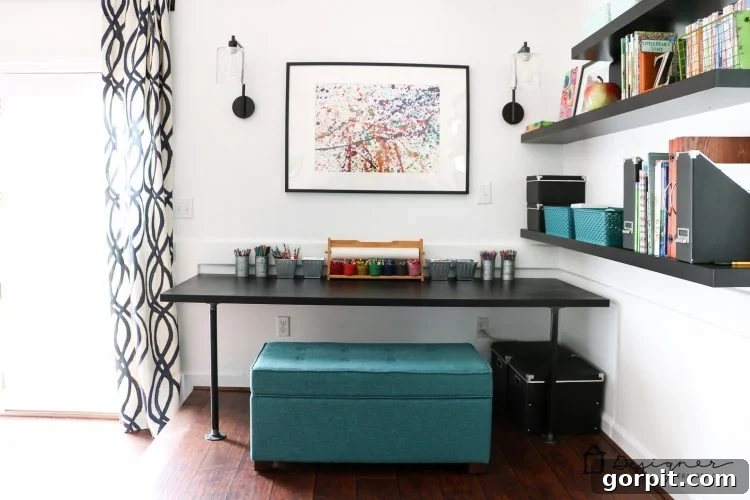
My sweet dog, Titan, couldn’t resist photo-bombing a few shots, so I had to include one of his charming appearances!
Let’s take a moment to appreciate the finer details of this project. The industrial aesthetic created by the sleek metal pipe legs is undoubtedly one of its most appealing features. The stark contrast between the black painted door and the dark steel pipes gives the desk a contemporary edge that perfectly complements various interior styles, from modern minimalist to rustic industrial. It’s a statement piece that’s both functional and visually striking.
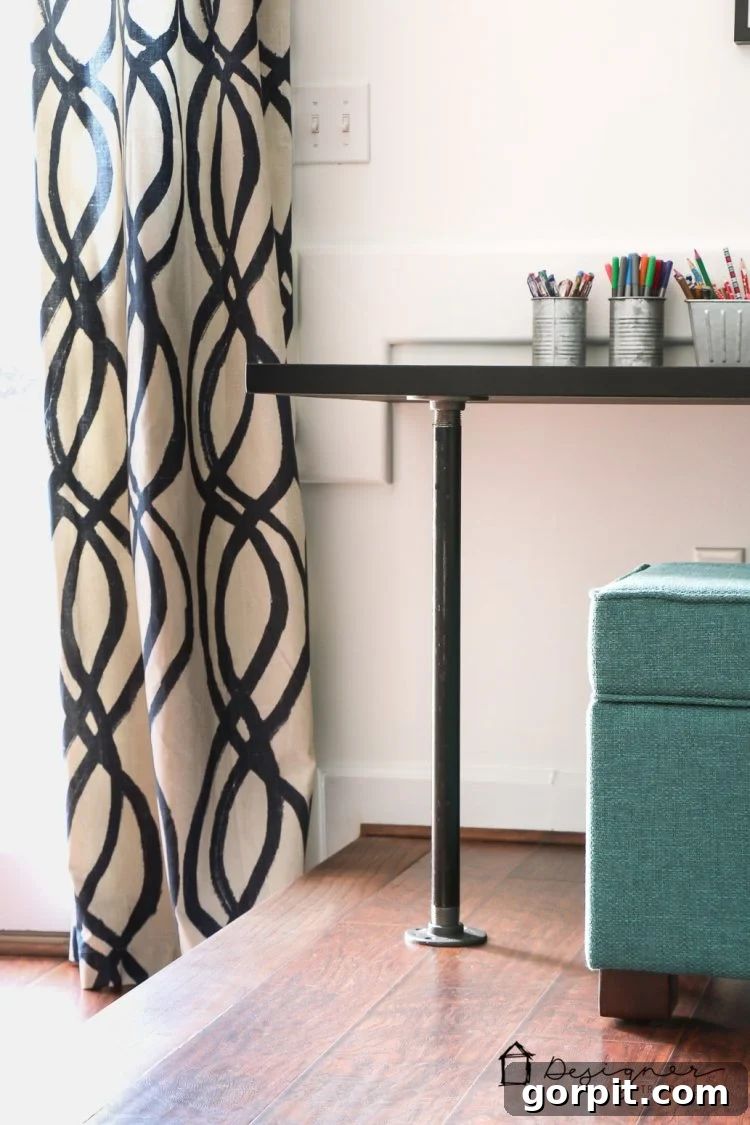
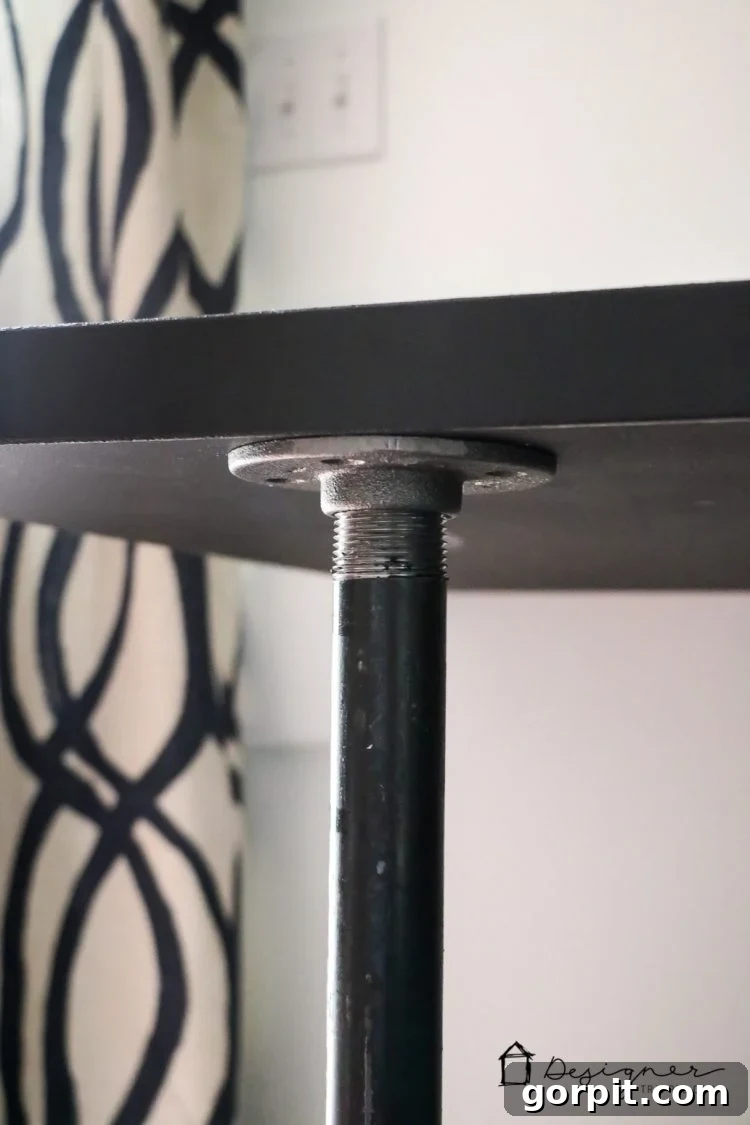
Given that this table will be a hub of activity for our energetic kids, safety was a top priority. In addition to securing the back of the desk to the wall, we took an extra step by drilling one screw into the floor through the bottom floor flanges. This additional anchor point ensures the desk remains absolutely immobile, preventing any accidental tipping or shifting during enthusiastic play or study sessions. When it comes to our children’s safety, there’s simply no compromise.
Well, there you have it, friends! I’m just putting the finishing touches on this post, perfectly in time to go help my girls with their homework – right at their fantastic new DIY industrial pipe desk, of course! We hope this tutorial inspires you to create your own functional and stylish workspace. If you have any questions or decide to tackle this project, be sure to share your results with us. Happy building!