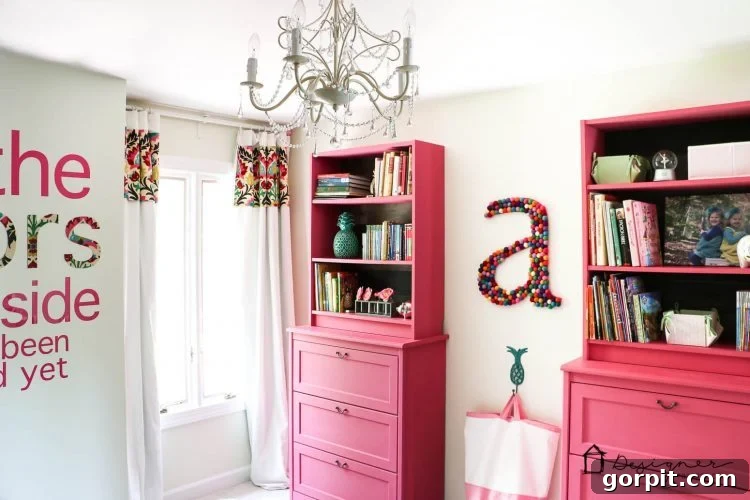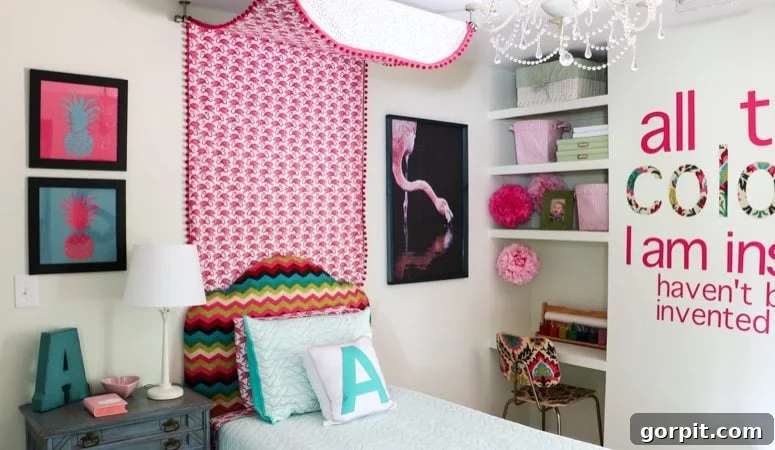
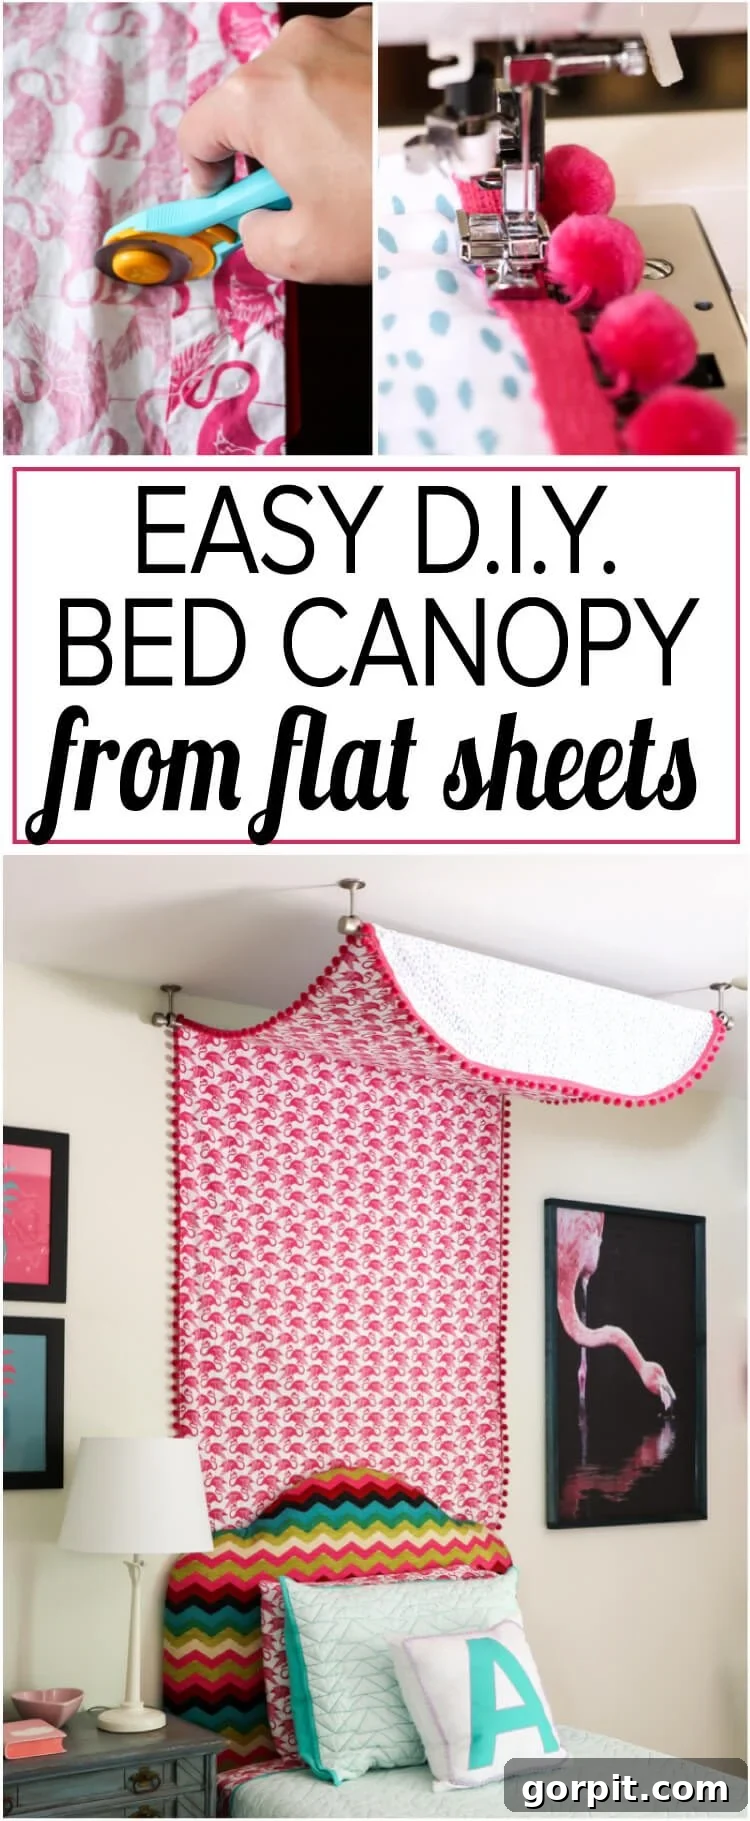
Get ready to transform a simple bedroom into a magical escape! I’ve been absolutely overwhelmed with questions about the enchanting DIY bed canopy I crafted for Attley’s room. Every glimpse in photos seems to capture your hearts, especially those adorable flamingos, and I couldn’t be more thrilled! After much anticipation, I’m finally sharing the complete, step-by-step tutorial for creating this dreamy girl’s bed canopy. Before we dive into the fun, let me share a little backstory on how this project came to life.
My journey began with a clear vision: a beautiful bed canopy that felt truly special and perfectly suited for a child’s room. However, I found myself searching endlessly for a ready-made option that perfectly matched my aesthetic and budget. Everything I encountered felt either too expensive, lacked personality, or simply wasn’t quite right. That’s when the “DIY” lightbulb went off! I realized that to achieve the exact look and feel I desired, starting from scratch was the only way.
The second, equally important challenge was keeping costs down without compromising on style or quality. Purchasing new fabric for a project of this size can quickly add up, so I got creative. The brilliant and resourceful solution? Utilizing the unused flat sheets from our girls’ sheet sets! We rarely use flat sheets under their quilts – they tend to get tangled, making it harder for the girls to make their own beds independently. This meant I had a readily available, budget-friendly material that was not only practical but also came in a variety of fun patterns, perfect for this project.
As luck would have it, using twin flat sheets for this DIY bed canopy proved to be an absolute stroke of genius. Not only did it keep the project incredibly affordable, leveraging materials we already had, but it also simplified the entire sewing process. The sheets were the ideal size and weight, making this seemingly elaborate project surprisingly accessible for anyone with even basic sewing skills. So, if you’re ready to create a whimsical focal point and a cozy haven in your child’s room without breaking the bank, let’s get started with this easy bed canopy tutorial!
This post contains some affiliate links for your convenience (which means if you make a purchase after clicking a link I will earn a small commission which helps keep my blog up and running but it won’t cost you a penny more)! Click here to read my full disclosure policy.
Craft Your Dream: The Ultimate DIY Bed Canopy Tutorial
Creating a beautiful and inviting space for your child doesn’t have to be complicated or expensive. This DIY bed canopy project offers a fantastic way to add a touch of magic and coziness to any room, transforming an ordinary bed into an extraordinary sanctuary. It provides a semi-enclosed, private nook where children can read, play, or simply drift off to sleep feeling secure and special. Imagine the pure joy and wonder on their face when they see their bed transformed into a charming, personal retreat!
Why You’ll Love This Flat Sheet Bed Canopy:
- Budget-Friendly Decor: By reusing existing flat sheets, you significantly cut down on fabric costs, making this an incredibly economical way to update a room.
- Easy to Customize: The beauty of using sheets is the endless variety of patterns, colors, and themes available. You can perfectly match your room’s existing decor or introduce a bold new style.
- Simple Sewing Project: Designed with beginner to intermediate sewers in mind, this tutorial breaks down each step, making it an achievable weekend project for most skill levels.
- Instantly Adds Whimsy & Coziness: A canopy instantly elevates the aesthetic of a child’s bedroom, creating a warm, inviting, and playful atmosphere that sparks imagination.
- Versatile Design: While this guide focuses on a twin bed canopy, the underlying principles and techniques can be easily adapted to fit full, queen, or even king-sized beds with minor adjustments to sheet size.
- Unique & Personal Touch: A handmade canopy adds a personal, heartfelt touch that store-bought items simply cannot replicate, making it truly special for your child.
Essential Materials Needed for Your DIY Bed Canopy Project:
- Sewing Machine: (This is the current version of the machine I have and I LOVE it!) A reliable sewing machine is key. Modern machines make stitching smooth and efficient, turning what might seem like a daunting task into a truly enjoyable crafting experience.
- Rotary Cutter & Cutting Mat: These tools are invaluable for achieving perfectly straight, clean cuts through multiple layers of fabric quickly and safely, far superior to scissors for long lines.
- Plenty of Straight Pins: Crucial for securely holding your fabric layers together precisely before and during sewing, preventing shifting and ensuring accurate, even seams.
- Pom Pom Trim: (I used trim with 1/2″ balls) This delightful decorative trim adds a playful, charming, and polished finish to the edge of your canopy. Don’t hesitate to choose any color or style that perfectly complements your chosen sheets!
- Two Flat Sheets: (I used the twin flat sheets from this flamingo sheet set and this dash sheet set) Twin flat sheets are ideal for a twin bed canopy. Opt for sheets with fun patterns, like my beloved flamingos, or a solid color for a more minimalist and serene look.
- Two Ceiling Mounted Curtain Rods: These sturdy rods will provide the elegant structure and support for the graceful drape of your canopy. (These are the exact curtain rods and ceiling mounting brackets I used.) Ensure they are robust enough to comfortably hold the weight of your sheets and any added embellishments.
- Measuring Tape or Long Ruler: Absolutely essential for taking precise measurements to ensure your canopy fits your bed perfectly.
- Fabric Chalk or Washable Marker: To accurately mark your cutting lines and curves on the fabric.
- Large Mixing Bowl (or similar round object): Used as a template to create smooth, consistent rounded corners for the top of your canopy, adding a touch of elegance.
- Iron & Ironing Board: For pressing seams flat and smoothing out wrinkles, which is critical for a professional and crisp finish.
- Double-Sided Tape (optional but highly recommended): A small strip applied to the top of the curtain rods will help prevent the canopy from slipping and maintain its perfect drape.
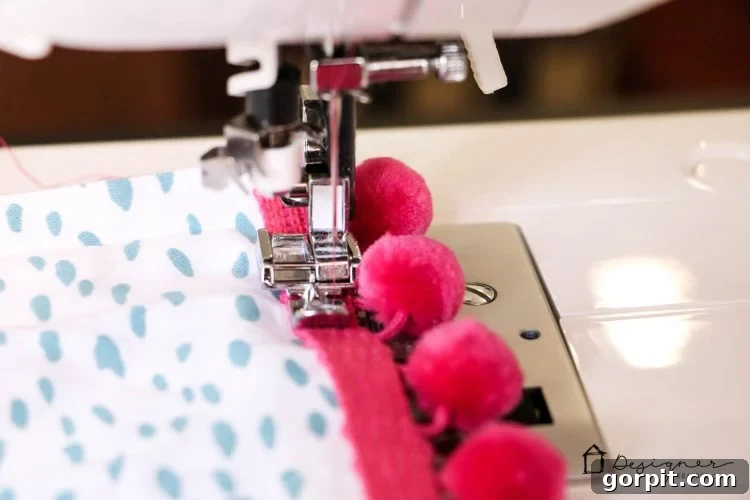
- Zipper Foot for Sewing Machine: This specialized presser foot is incredibly helpful, almost essential, for easily attaching the pom pom trim right next to the edge without crushing the pom-poms.
Step-by-Step Guide to Making Your Dream DIY Bed Canopy:
Follow these detailed instructions carefully to construct your beautiful flat sheet canopy. Paying close attention to each step will ensure a professional-looking, sturdy, and long-lasting result that you and your child will adore.
1) Prepare and Align Your Sheets with Precision
The very first and most crucial step is to lay your two chosen flat sheets on top of each other. It is imperative that the finished sides (the “right” sides with the vibrant print or smooth texture) are facing each other. This means the sheets will appear to be inside out as you work, which is exactly what you want for a clean finish. If your sheets feature a vertical pattern, like my charming flamingos, pay extremely close attention to the orientation. You’ll want to ensure the pattern faces the correct direction when the canopy is eventually hung in the room. Double-check this alignment now to avoid any delightful, but unintended, upside-down flamingos or patterns later!
2) Measure and Cut Sheets to the Perfect Width
Next, you’ll need to tailor your sheets to the specific dimensions of your bed. Begin by accurately measuring the exact width of your mattress. For a standard twin bed canopy, a twin mattress typically measures 38 inches wide. To allow for a proper seam, I added an extra 1/2 inch to this measurement, marking 38.5 inches across both stacked sheets. This 1/2-inch allowance will be precisely used for the seam when you stitch the sheets together, ensuring the canopy fits perfectly over the bed without being too snug or having excessive slack.
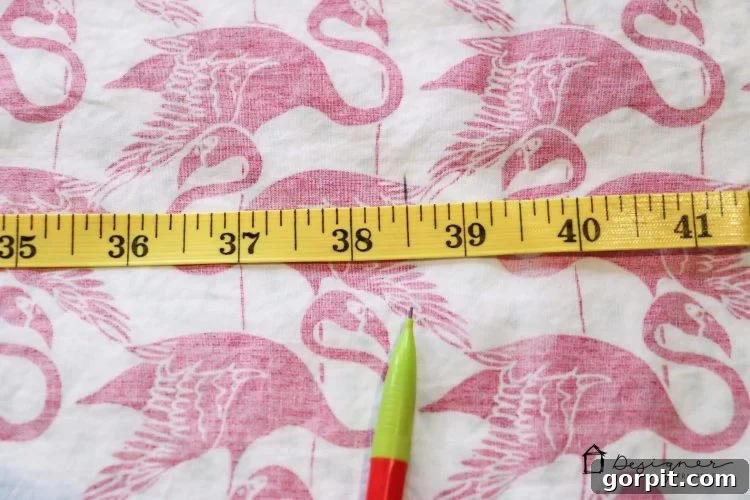
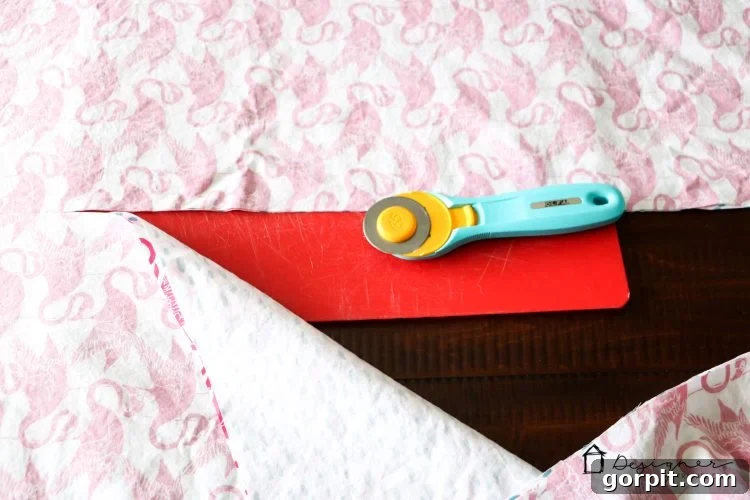
With your measurement clearly marked on the fabric, use your rotary cutter (always paired with a cutting mat for safety and to protect your work surface) to cut straight through both sheets simultaneously. This technique guarantees that both panels of your canopy will be identical in width, which is vital for a symmetrical and professional appearance.
3) Elegantly Shape the Canopy Top
While I didn’t need to adjust the overall length of my twin sheets for this specific project, I wanted to add a graceful, soft, and rounded edge to the top of the canopy for a more finished and elegant look. To achieve this smooth curve, simply grab a large mixing bowl or any appropriately sized round object from your kitchen. Position it at the top corners of your stacked sheets and meticulously trace the curve directly onto the fabric with a fabric marker or chalk. Once again, if your sheets feature a distinct vertical pattern with a clear “right side up,” be absolutely certain you’re marking the “top” end of the canopy correctly. Incorrect orientation here would result in a parade of upside-down flamingos, which, while perhaps quirky, isn’t usually the desired aesthetic!
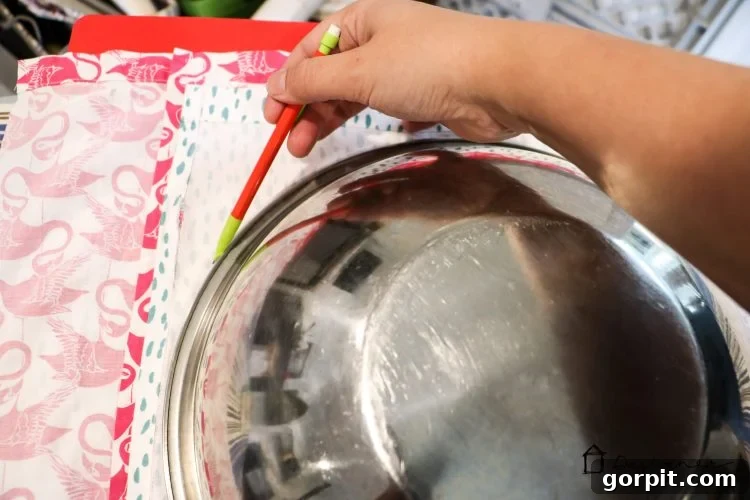
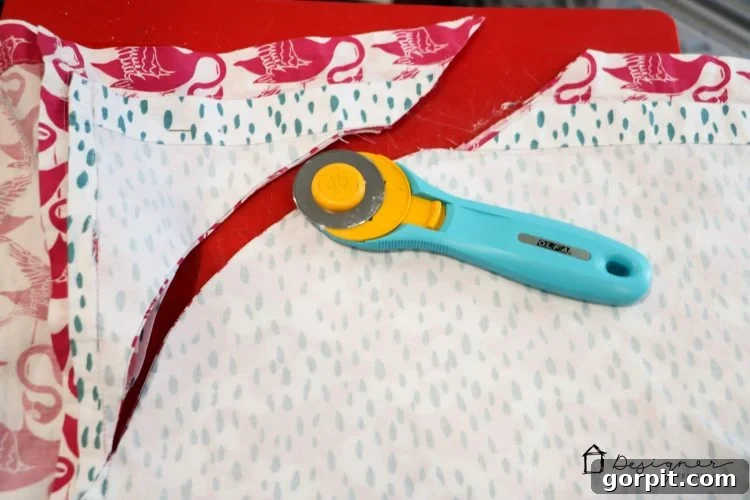
After carefully tracing the curves, use your rotary cutter once more to precisely cut through both sheets along your marked curve. This method ensures both sides of your canopy will have perfectly matching rounded corners, contributing to the overall polished appearance.
4) Securely Pin the Edges Together for Sewing
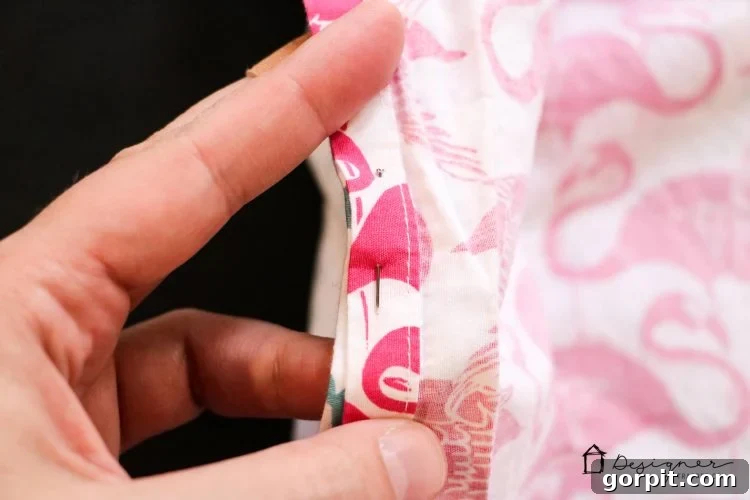
Now that your sheets are perfectly cut to size and shape, it’s time to prepare them for the sewing machine. Carefully align all the raw edges of the two sheets, double-checking that the finished sides are still facing each other (meaning the sheets are inside out). Use plenty of good quality straight pins to secure the edges all the way around the canopy. Start pinning from one bottom corner, proceed up along the straight side, around the elegantly rounded top, and then down to the other bottom corner. For now, leave the very bottom edge unpinned, as this section will serve as your crucial opening for turning the canopy right side out. Proper and generous pinning is essential to prevent the fabric from shifting during sewing, which will result in smoother, more professional, and even seams.
5) Sew the Canopy Body, Turn, and Finish with a Professional Touch
You’re now ready for the exciting part – sewing! Using your sewing machine and a standard straight stitch, carefully sew around the entire pinned perimeter of your stacked sheets. Maintain a consistent 1/2-inch seam allowance throughout this step. Remember to leave an unsewn opening of approximately 12 inches at the very bottom edge of the canopy. This opening is absolutely crucial for easily turning your canopy right side out. Once sewn, carefully trim any excess fabric from the seam allowances, especially around the curves, to reduce bulk and ensure a smooth curve. Next, reach through the 12-inch opening and gently pull the entire canopy right side out. Use a blunt object (like a chopstick or turning tool) to gently push out the rounded corners and seams for a crisp, neat finish. Give your newly formed canopy a good press with a warm iron to smooth out any wrinkles and crisp up all the seams, giving it a truly polished look. Finally, carefully hand-stitch the 12-inch opening closed with an invisible stitch, or machine-stitch it very close to the edge, for a seamless and undetectable closure.
6) Artfully Attach the Pom Pom Fringe
Adding the delightful pom pom trim is where your canopy truly begins to sparkle and come to life! While you could spend time painstakingly pinning the fringe on first, I’ve found it much easier and quicker to simply hold it accurately in place as I sew. The secret to getting it just right, and avoiding flattened pom-poms, is to use a zipper foot on your sewing machine. This specialized foot allows you to sew incredibly close to the actual pom-poms without catching or flattening them. You’ll want to sew the webbing of the pom pom trim onto the “back” side of your canopy – meaning, when the canopy is hanging, only the charming pom-poms should be delightfully visible from the front. Align the trim so that its webbing is perfectly flush with the raw edge of the sheet, ensuring no part of the webbing hangs over. Stitch slowly and steadily, making sure your stitches are secure and evenly spaced for a beautiful, long-lasting finish.
7) Expertly Mount the Ceiling Curtain Rods
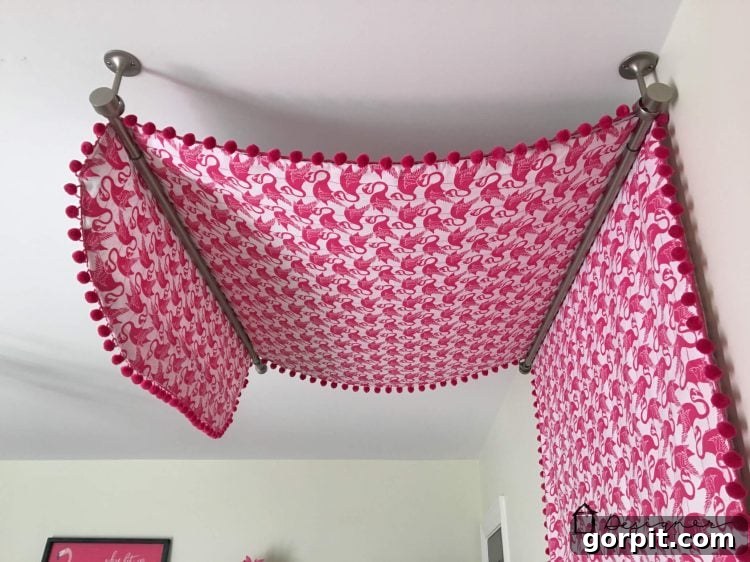
Now it’s time to install your ceiling-mounted curtain rods, which will give your canopy its beautiful shape and drape. Begin by securely attaching the first rod to the ceiling as close to the wall as possible, directly above the head of the bed. Use appropriate anchors for your ceiling type (drywall, plaster, etc.) to ensure stability. The precise placement of the second rod is entirely flexible and depends on the desired drape and elegant overhang of your DIY bed canopy, as well as the specific height and style of your headboard. I highly recommend enlisting a helper for this crucial step: have them hold the second rod in various positions while you drape your finished canopy over it. This hands-on method allows you to visually determine the ideal placement that achieves the perfect “flow” and aesthetic for your space. Once you are completely satisfied with the drape and appearance, mark the position and securely install the second rod. To prevent the canopy from slipping off the rods and to keep it perfectly styled, a small strip of double-sided tape applied discreetly to the top surface of the second curtain rod works wonders – it’s a simple trick that delivers fantastic, lasting results!
8) The Final Styling: Tuck and Artfully Arrange
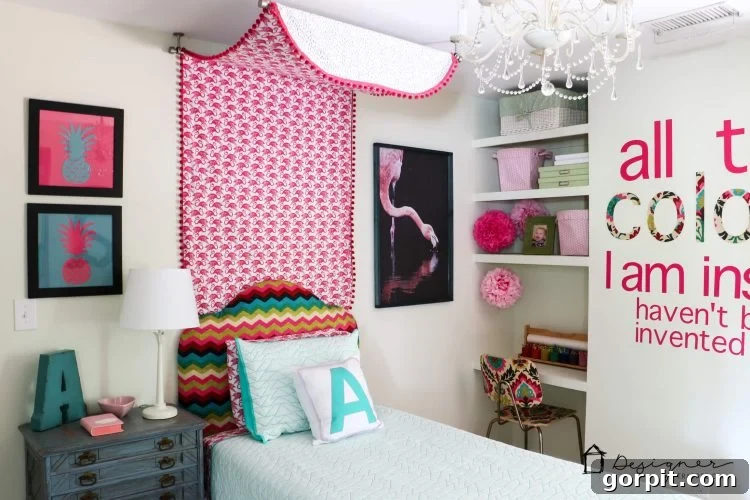
With your rods securely installed and your canopy gracefully draped, the final step is to style it beautifully, bringing the entire look together. Gently tuck the bottom edge of the DIY canopy behind your bed’s headboard. This creates a neat, polished, and integrated look, ensuring the canopy flows seamlessly from the ceiling. Once tucked, carefully adjust the fabric folds to create a soft, inviting cascade. Experiment with how much fabric you want to gather at the sides or let hang loosely. Step back and admire your magnificent handiwork – your child’s magical new space is complete!
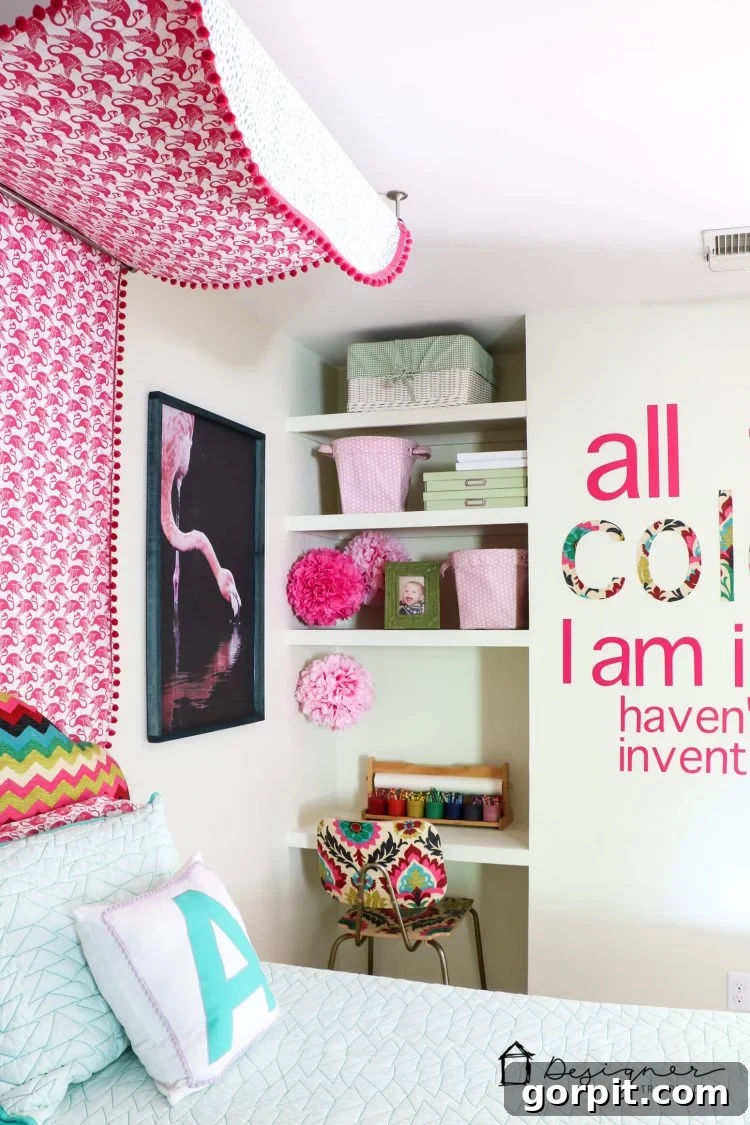
And just like that, you’ve created a truly enchanting girl’s bed canopy! I can tell you from personal experience that Attley absolutely adores her new bed space; she feels incredibly “fancy” and special every time she enters her room. I promise you, despite how impressive and professional it looks, this DIY bed canopy is incredibly simple and straightforward to make. I am by no means an expert sewer or a master seamstress, and if I can achieve these results, you absolutely can too! It’s a remarkably rewarding project that adds so much charm, personality, and a touch of whimsy to any child’s room, making it a place they’ll love to spend time in.
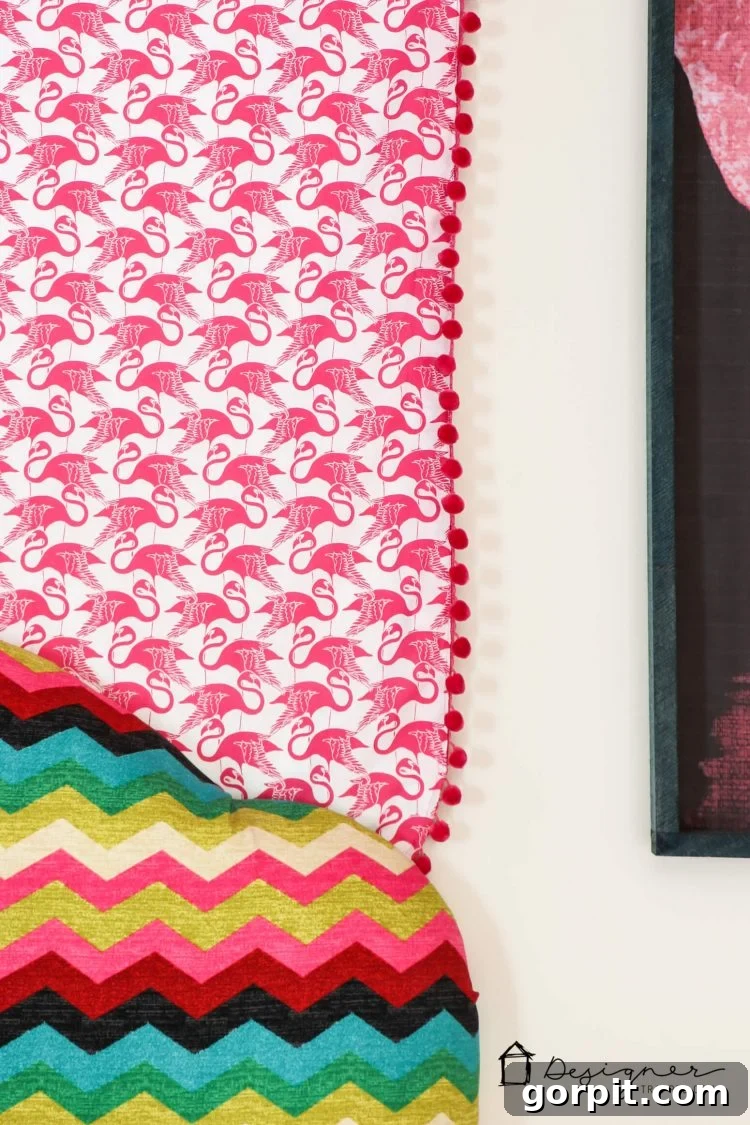
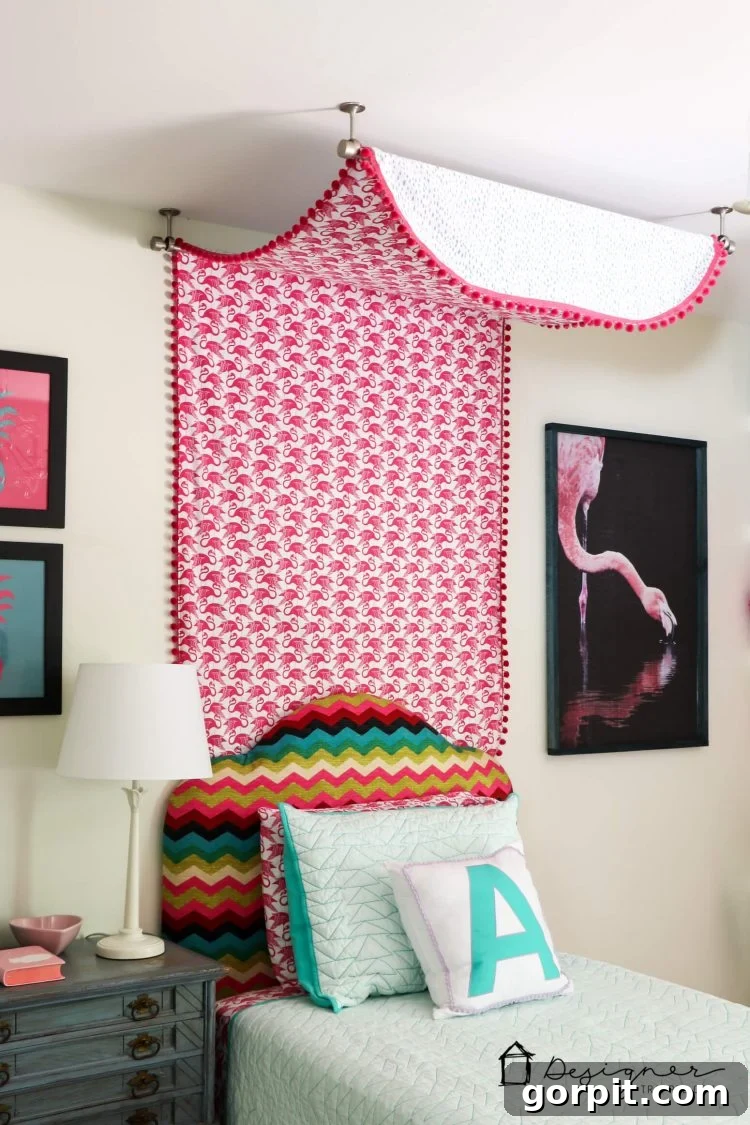
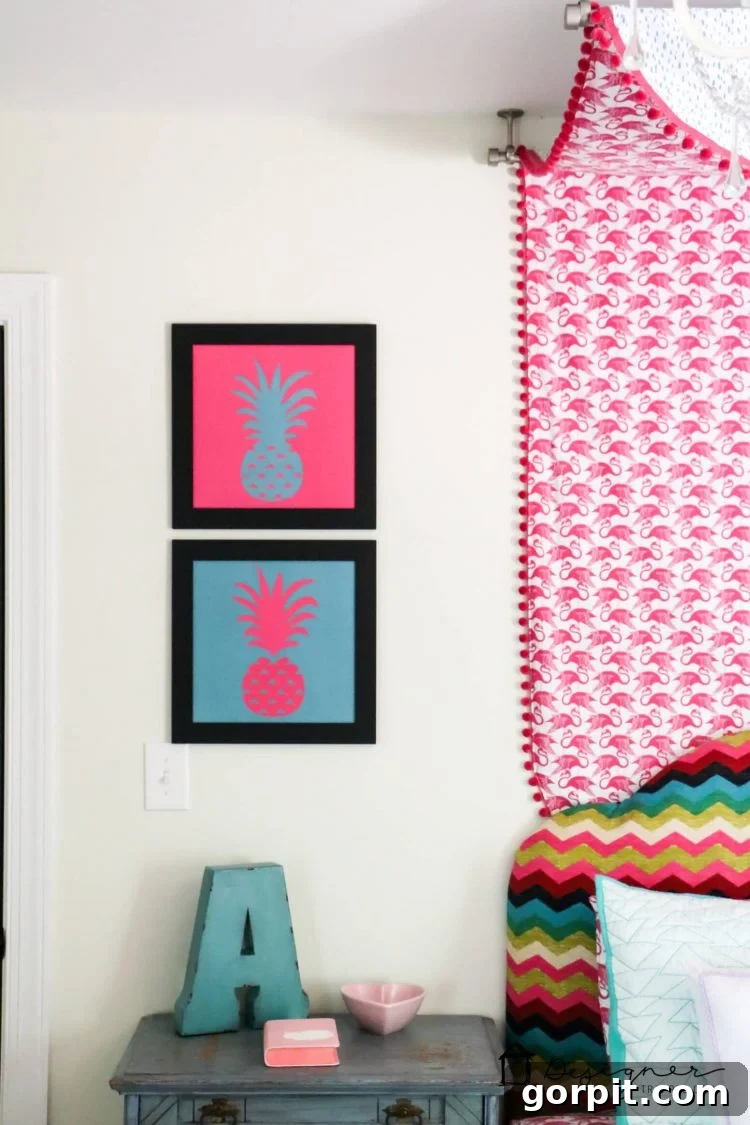
Personalize Your DIY Bed Canopy: Endless Customization Ideas
One of the greatest advantages of making your own bed canopy is the incredible freedom to personalize it entirely to your taste and your child’s preferences. Don’t feel limited to my flamingo sheets – let your creativity soar! Here are a few ideas to make your flat sheet canopy uniquely yours:
- Diverse Fabric Choices: While flat sheets are a brilliant starting point, you can experiment with a myriad of different sheet patterns, colors, or even lightweight drapery fabric. Sheer curtains, for instance, could create a lighter, more ethereal, and airy feel, perfect for a fairy-tale theme.
- Variety of Trim Embellishments: Instead of classic pom poms, consider adding ruffles made from coordinating fabric, whimsical tassels, elegant decorative ribbon, or a simple contrasting fabric trim for a more sophisticated edge.
- Magical Lighting & Embellishments: String delicate fairy lights inside the canopy for a magical, soft glow that creates an enchanting ambiance, especially at night. You could also hang fabric flowers, colorful garlands, or attach small, lightweight decorative ornaments for extra charm and thematic coherence.
- Size Adaptability: While this detailed tutorial focuses on creating a twin bed canopy, the core principles and steps are highly adaptable. You can easily adjust the measurements for a full, queen, or even king-sized bed. Just ensure you use larger flat sheets or purchase enough fabric to accommodate the wider dimensions.
- Matching Room Themes: Choose sheets and trims that perfectly complement your child’s existing room theme. Whether they dream of whimsical unicorns, adventurous dinosaurs, outer space, or a calm ocean, the possibilities for creating a cohesive and captivating space are truly endless!
Maintaining Your Beautiful Handcrafted Bed Canopy
Since your DIY bed canopy is primarily constructed from flat sheets, caring for it is as simple and straightforward as caring for your regular bedding. When it’s time for a refresh, carefully remove the canopy from the ceiling curtain rods. Always check the care labels on your original sheets for specific washing instructions to ensure longevity. Most cotton sheets can be safely machine washed on a gentle cycle with cold water and tumble dried on a low setting. For delicate trims, like certain types of pom poms, it might be wise to consider hand washing or spot cleaning specific areas to prevent damage. Re-iron if necessary to remove any wrinkles before gracefully re-draping it over your ceiling rods, bringing back its fresh, clean look.
What do you truly think of this charming and practical DIY bed canopy? I sincerely hope this detailed, easy bed canopy tutorial inspires you to create your own unique and magical space! Do you know any little ones, or even adults, who would absolutely adore a magical, cozy retreat like this in their room? If so, please be sure to share this post on Facebook or pin it prominently on Pinterest so others can discover this fun, affordable, and incredibly rewarding project too! Your shares help spread the joy of DIY!
And while you’re busy planning your next project, don’t forget to explore other fantastic DIY kids room decor ideas to complement your new canopy! You can find the inspiring tutorial for that adorable pineapple art here and for the creative DIY wall quote here. Also, be sure to check out this super cool Ikea hack transforming a basic Billy bookcase on the other side of Attley’s room – it’s another brilliant way to personalize a space and maximize functionality, all while sticking to a budget!