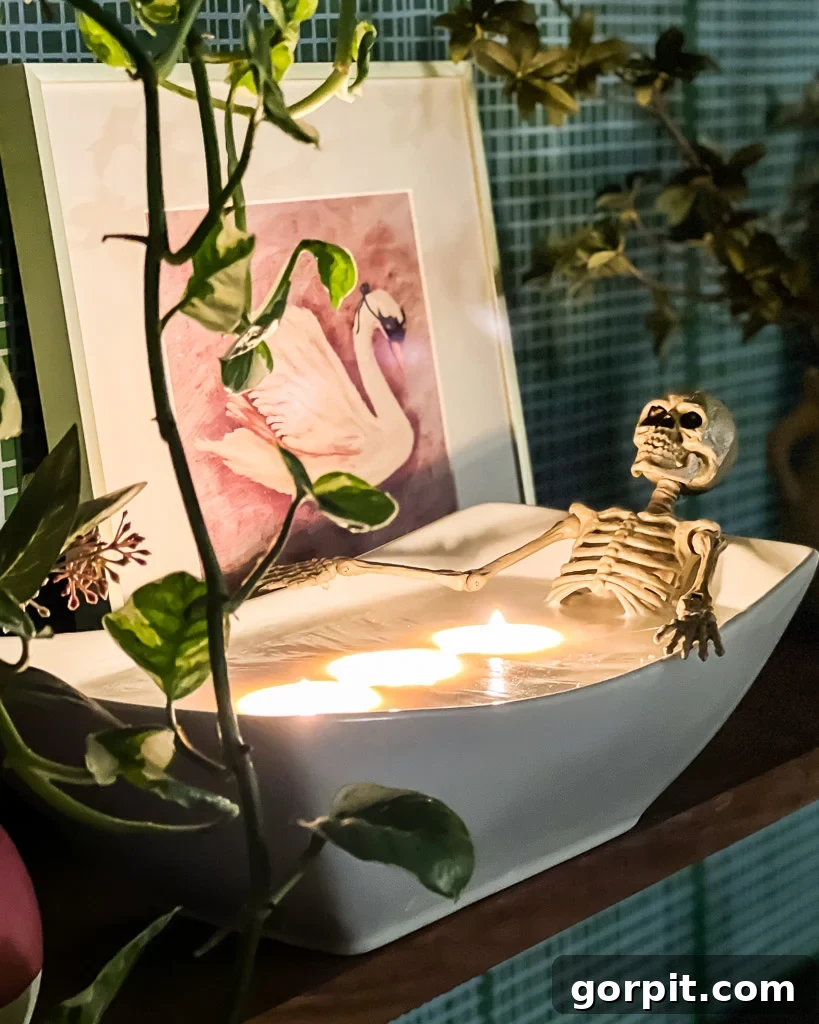
DIY Supersized Skeleton in a Bathtub Candle: The Ultimate Guide to Spooky & Scented Halloween Decor
Last Halloween, I stumbled upon a skeleton-in-a-bath candle on Amazon that seemed like the perfect quirky addition to our holiday decor. The concept was undeniably charming – a miniature skeleton casually lounging in a tiny tub, ready to add a touch of macabre whimsy to any space. However, upon its arrival, I was met with a few disappointments. While “adorable” was an accurate description, its minuscule size made it practically disappear amidst our other decorations, failing to create any real impact. What truly sealed its fate, though, was the uninspiring fragrance. For a price tag of $33, I expected more than a fleeting scent and an almost invisible presence.
This experience, however, sparked an idea. Why settle for tiny and underwhelming when I could create my own grand, statement-making version? Thus began my mission to craft a supersized skeleton in a bathtub candle, one that would not only command attention but also fill our home with a captivating aroma. The best part? This DIY project was surprisingly simple, cost-effective in the long run, and yields a decoration that will last for years, becoming a cherished part of our annual Halloween traditions.
Table of Contents
For many years, our home remained untouched by the festive spirit of Halloween decor. It wasn’t until a couple of years ago, when our daughters began to eagerly request outdoor Halloween decorations, that we finally embraced the spooky season. Moving into a new house provided the perfect opportunity to make this change exciting for them, so we dove headfirst into exterior Halloween decorations.
This year, their enthusiasm extended to the interior of our home, and despite my initial reluctance, I’m thrilled we decided to go for it! Decorating indoors for Halloween has been an absolute blast, bringing so much joy and creative energy into our space. If you’re curious to see how we transformed our home, you can take a tour of our affordable and classy interior Halloween decor here.
This post contains affiliate links for your convenience. Click here for my full disclosure policy.
While browsing for interior Halloween inspiration, I encountered this adorable skeleton in a bath candle on Amazon. Despite its slightly steep price tag of $33 at the time of purchase, I was captivated by its unique charm and decided to order it. My excitement quickly turned to mild disappointment upon its arrival. It was, indeed, adorable, but significantly smaller than anticipated – a lesson learned about always checking product dimensions! More importantly, the fragrance was far from what I had hoped for; it simply lacked that captivating aroma that makes a candle truly special. In essence, I felt it didn’t justify its price and was too small to make a noticeable impact in any room. As a general rule, I believe decorative objects should be larger than the size of your fist to truly stand out.
However, the core concept of a skeleton lounging in a bathtub candle was something I absolutely adored! This spurred me to take matters into my own hands and create my own, much larger, more impressive, and deliciously scented version. And guess what? You can easily do it too! Get ready to dive into this fun and rewarding DIY project that promises to elevate your Halloween decor.
How to Make a Skeleton in a Bath Candle
Crafting your own skeleton in a bath candle is a fantastic way to personalize your Halloween decorations. It allows you to control the size, fragrance, and overall aesthetic, ensuring it perfectly complements your spooky style. Follow these detailed steps to bring your unique vision to life.
Materials Needed for this DIY Halloween Candle
Gathering your supplies is the first exciting step in any DIY project. For this impressive Halloween candle, you’ll need a few key items. Choosing quality materials will ensure a beautiful, long-lasting, and safe candle.
- **A ceramic piece that looks like a bathtub:** This is your foundation! I opted for this rectangular serving bowl, which offered ample space for my supersized vision. Look for something that is heat-safe, non-porous, and has a good depth. Estate sales, thrift stores, or even kitchenware sections can yield perfect candidates.
- **A plastic skeleton that fits your chosen ceramic piece:** The star of the show! Ensure your skeleton is proportionate to your “bathtub.” This is the exact skeleton I used, which was articulated enough to pose convincingly. Consider the size and flexibility of the skeleton to achieve the lounging effect.
- **Soy wax flakes:** I used a substantial 4.5 pounds to fill my large container. Soy wax is an excellent choice for candles as it’s natural, burns cleaner and longer than paraffin, and holds fragrance beautifully.
- **Wicks:** For a large candle like this, you’ll likely need multiple wicks to ensure an even burn pool. I used 3 wicks to accommodate the width of my ceramic bowl. Ensure your wicks are appropriate for soy wax and the diameter of your container.
- **Essential oil or fragrance oil of your choosing:** This is where you customize your candle’s scent profile. I used this amazing essential oil blend, which has a delightful fall aroma that we even diffuse throughout our home. Choose a fragrance that evokes the Halloween spirit or simply one you love!
- **Double Boiler Wax Melting Pot:** While optional, a dedicated melting pot makes the process much easier and cleaner. If you use a regular pot or bowl, be aware that wax residue can be difficult to remove. A double boiler provides gentle, even heating, which is crucial for wax.
- **Meat thermometer or candy thermometer:** Essential for monitoring wax temperature to ensure proper fragrance adhesion and a smooth pour.
- **Wick clips or clothes pins (optional):** To hold wicks upright while the wax hardens.
- **Hot glue gun:** For securing wicks to the bottom of the container.
- **Stirring utensil:** A metal spoon or wooden craft stick works well.
You can watch the video below to see an overview of how I made the candle. I’ve also written out the instructions below the video 🙂
Step 1: Melt the wax.
The foundation of any great candle is perfectly melted wax. Begin by placing your soy wax flakes into your double boiler wax melting pot. If you don’t have a dedicated double boiler, you can create one by placing a heat-safe bowl (one you don’t mind potentially having wax residue in) over a saucepan filled with about an inch or two of simmering water. Ensure the bottom of the bowl does not touch the water.
Heat the wax over medium heat, stirring occasionally with a metal spoon or wooden stick. The goal is to melt the wax slowly and evenly. Monitor the temperature using a meat or candy thermometer. You want the wax to reach approximately 175 degrees Fahrenheit. This temperature ensures that all the wax is fully melted and ready to incorporate fragrance effectively. If you don’t have a thermometer, simply heat until the wax is completely liquid and free of any solid flakes, making sure it’s hot enough to be easily pourable.
Keep in mind the yield of soy wax flakes. As a general rule of thumb, soy wax flakes melt down to about half their starting volume. For example, if you start with 2 cups of solid flakes, you’ll end up with roughly 1 cup of melted wax. This is crucial for calculating how much wax you’ll need to fill your container, especially for larger projects like this one.
Step 2: Add your fragrance.
Once your wax has reached the desired temperature and is fully melted, remove it from the heat and allow it to cool slightly. It’s important not to add your fragrance oils when the wax is too hot, as this can cause the scent to burn off and weaken. A good temperature range for adding fragrance to soy wax is typically between 170-185 degrees Fahrenheit. This allows the oil to bind effectively with the wax.
Now comes the fun part: adding your chosen essential oils or fragrance oils. The essential oil blend I used smells absolutely amazing and instantly creates a cozy, inviting, and perfectly autumnal ambiance. When adding fragrance, I tend to be quite generous, especially for a large candle that needs to fill a room. While I didn’t meticulously count drops (who has the patience for that during a creative project, right?), I poured until the aroma was distinct and satisfying. For reference, a typical fragrance load for soy wax is around 6-10% of the wax by weight, but feel free to adjust to your personal preference. Stir the fragrance oil gently but thoroughly into the melted wax for about 1-2 minutes to ensure it’s evenly distributed.
Step 3: Place your skeleton and attach your wick(s) to the container.
This step is where your candle truly begins to take shape and personality. Carefully place your plastic skeleton into your ceramic “bathtub.” Experiment with different poses until you find one that looks natural and a little bit spooky, as if he’s casually lounging or even taking a relaxing, albeit skeletal, soak. I positioned mine to look like he was enjoying a casual bath, limbs gracefully splayed within the vessel.
Next, it’s time to secure your wicks. Since this is a significantly larger candle than your average store-bought variety, I opted for three wicks to ensure an even and consistent burn. For wider containers, multiple wicks prevent tunneling and create a more complete melt pool. Use a hot glue gun to firmly attach the metal base of each wick to the very bottom center of your serving bowl, spacing them out evenly. This crucial step prevents the wicks from shifting or floating when the hot wax is poured in. To keep your wicks perfectly upright and centered as the wax hardens, use metal skewers, clothespins, or specialized wick holders. Simply clip or tie the wicks to the skewers, which can then rest across the rim of your container, holding the wicks taut and straight.
Step 4: Pour the wax into your container.
With your skeleton in place and wicks secured, you’re ready to pour the scented wax. Slowly and carefully pour the melted wax into your container, aiming for the center to avoid disturbing the skeleton or wicks. Take your time with this step to minimize air bubbles and ensure a smooth surface.
Given the generous size of our “skeleton in a bath” candle, I found it necessary to repeat steps 1, 2, and 4 multiple times. This involves melting new batches of wax, adding fragrance, and then carefully pouring them into the container until it reaches the desired level. Don’t rush the process; allow each layer to slightly cool if you’re pouring multiple large batches, though for simple top-ups, it’s generally fine to pour directly. Make sure your final pour fills the ceramic tub nicely, leaving a small amount of space at the top (about half an inch) for safety and a clean appearance when burning.
Step 5: Let the wax harden overnight.
Patience is a virtue, especially in candle making! After your final pour, allow your candle to cool and harden completely. This typically takes a minimum of 6-8 hours, but for a large candle like this, it’s best to let it cure overnight. Resist the urge to move or disturb the candle during this time, as premature handling can lead to an uneven surface or cracks in the wax. A slow, steady cooling process ensures a strong structure and minimizes “wet spots” (areas where the wax pulls away from the container).
Once the wax is fully hardened and cool to the touch, you can remove any wick holders or skewers. Using a sharp pair of scissors or a wick trimmer, carefully trim each wick to approximately 1/4 inch in length. Trimming the wicks before the first burn is essential for a clean, even flame and to prevent excessive soot and mushrooming. Long wicks can lead to a larger flame, faster burning, and potential safety hazards.
Now, your magnificent, supersized skeleton in a bath candle is ready to be displayed and enjoyed!
The Finished Masterpiece: A Spooky & Scented Statement
The journey from a tiny, uninspiring store-bought candle to this impressive DIY creation was incredibly rewarding. While the initial supplies for this project amounted to around $50, considering the tiny Amazon candle was $33, the value is undeniable. This handmade centerpiece is not only significantly larger and more fragrant, but it’s also designed for longevity. We can simply add more wax as needed, meaning this unique Halloween decor piece will grace our home for many seasons to come, making it a truly worthwhile investment in festive cheer.
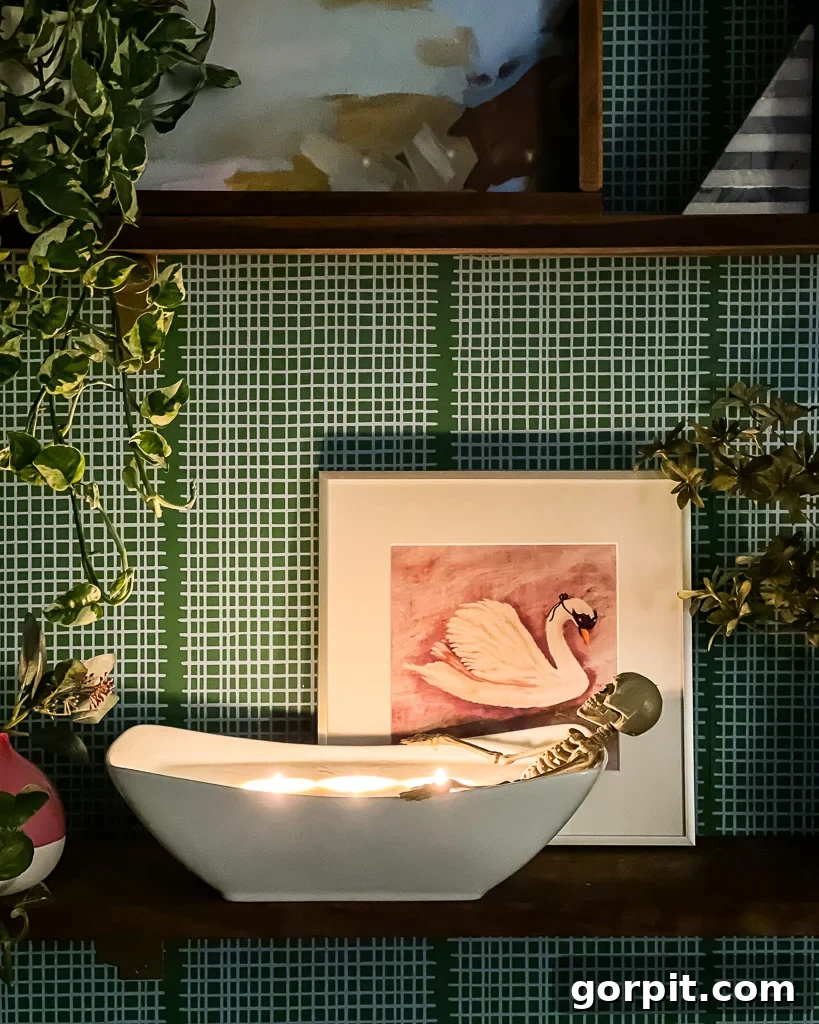
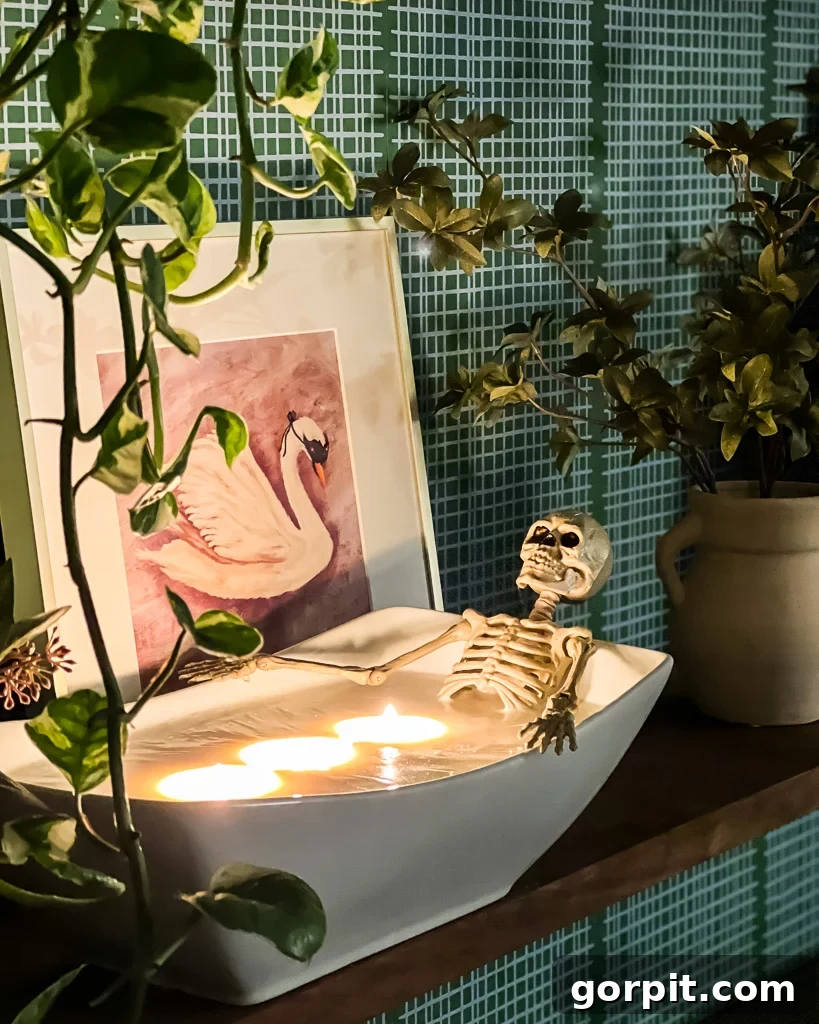
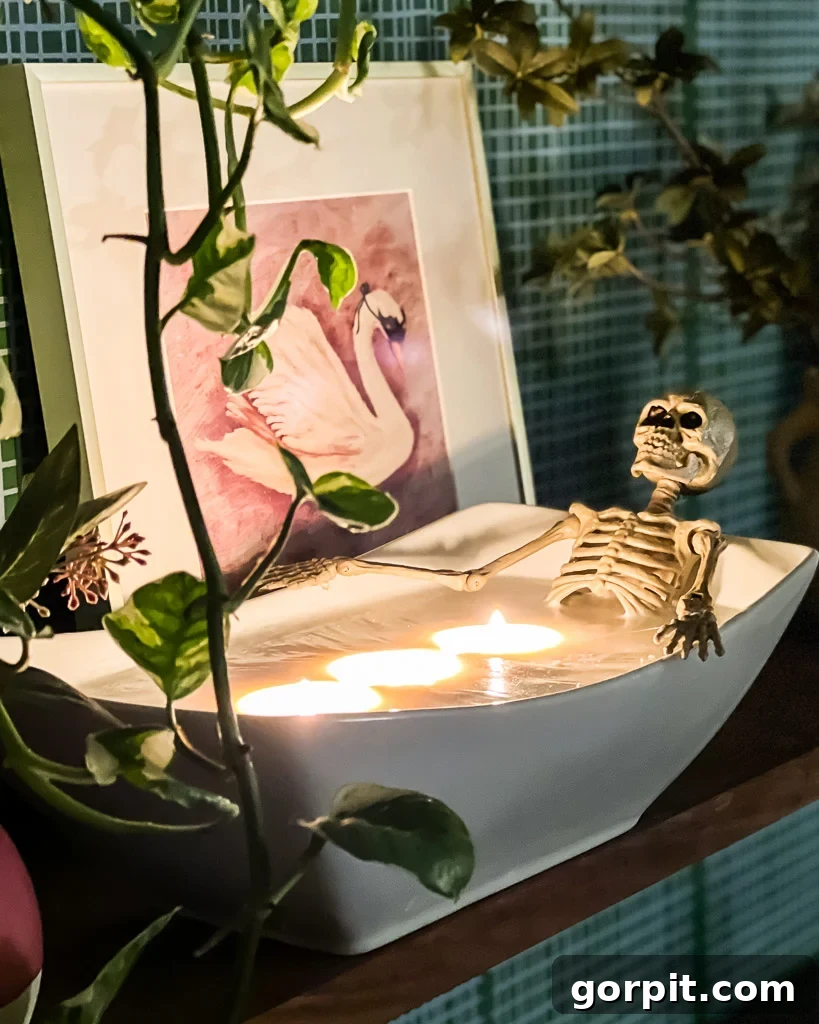
I proudly placed our skeleton in a bath candle on the shelves in front of our freshly wallpapered wall (and if you’re curious, you can see how to make any wallpaper removable and renter-friendly here). The impact is exactly what I envisioned. Its generous size ensures it’s a true focal point, drawing the eye and sparking conversation. And the scent? Absolutely divine – a perfect blend of cozy and mysterious that beautifully complements the Halloween aesthetic. But perhaps the most heartwarming part is how much my girls adore it. They love lighting it every single night, and I hope someday they’ll share stories with their own children about making this special skeleton in the bath candle with their mom. It’s more than just a decoration; it’s a memory in the making.
Customizing Your Skeleton Bathtub Candle
One of the greatest advantages of DIY is the ability to infuse your personal style into every project. Your skeleton in a bathtub candle can be easily customized to fit any theme or preference:
- Color the Wax: Add a few drops of liquid candle dye or a small piece of dye block to your melted wax to create colored “bathwater.” Think eerie green, deep purple, or even a spooky black.
- Add Embellishments: Before the wax fully hardens, you could carefully place small, flat, heat-safe decorations around the skeleton, such as tiny plastic spiders, glitter (use candle-safe glitter), or even a miniature rubber ducky for a touch of ironic humor.
- Vary the Container: While a rectangular bowl works wonderfully, consider other heat-safe ceramic or glass vessels. A large teacup, a vintage soup tureen, or even a deep decorative plate could offer a different aesthetic. Just ensure it’s wide enough for your skeleton and allows for proper wick placement.
- Experiment with Scent Blends: Don’t be limited to one essential oil. Try combining different fall or Halloween-themed fragrance oils like pumpkin spice, crisp apple, smoky campfire, or earthy cedarwood to create your signature spooky scent.
Candle Care and Safety Tips
To ensure your magnificent DIY candle burns beautifully and safely for years to come, here are a few essential tips:
- Trim Your Wicks: Always trim your wicks to 1/4 inch before each burn. This prevents excessive soot, a flickering flame, and ensures a clean, even burn.
- Allow for a Full Melt Pool: On the first burn, let the candle burn long enough for the entire surface of the wax to melt, reaching the edges of the container. This prevents “tunneling,” where the wax only melts down the center, leaving unburnt wax around the edges. For a large candle, this might take several hours.
- Burn in a Safe Location: Always place your candle on a heat-resistant surface, away from drafts, flammable objects, children, and pets.
- Don’t Burn Too Long: Avoid burning your candle for more than 4 hours at a time. Overheating can lead to excessive heat buildup and potential safety issues.
- Know When to Stop: Discontinue use when about 1/2 inch of wax remains in the container. Burning candles down to the very bottom can overheat the container and cause it to crack or break.
- Replenish Your Candle: The beauty of this DIY project is its reusability! Once your candle has burned down, you can carefully remove the old wicks and any remaining wax (a gentle warm bath can help loosen it), clean the container, and pour in a fresh batch of wax and fragrance. Your skeleton can continue to enjoy his endless bubble bath!
Take a look at how it turned out!
What Do You Think?
This DIY skeleton in a bath candle has become an absolute favorite in our home. It’s not just a decoration; it’s a conversation starter, a source of delightful fragrance, and a testament to the joy of creative crafting. We all love it so much, and I hope this guide inspires you to create your own!
More Inspiration for Your Home Decor
Looking for more ways to add charm and personality to your space? Explore these other popular posts for additional seasonal inspiration and DIY projects:
- No-Carve Pumpkin Decorating Ideas We Love!
- My 2022 Halloween Decor Picks from Target, Amazon and More
- Inspiring DIY Thanksgiving Crafts and Decor
- Colorful & Modern Free Fall Printables
- The Absolute BEST Fall Printables (for FREE)
- Stylish & Inexpensive Fall Decorating Ideas
- DIY Halloween Costumes for Toddlers and Kids
Curious about my unique approach to transforming rooms and spaces in our home? Discover the secrets and strategies behind my designs with Designer in a Binder® – your ultimate guide to an affordable and simple way to decorate your home with confidence.
For exclusive content, behind-the-scenes sneak peeks, and fresh DIY ideas delivered straight to your inbox, be sure to subscribe before you leave!