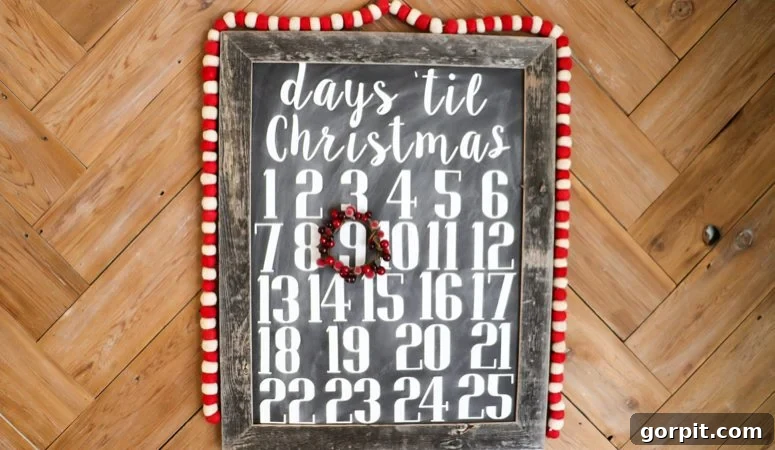
Crafting Holiday Magic: Your Guide to an Easy DIY Christmas Countdown Calendar
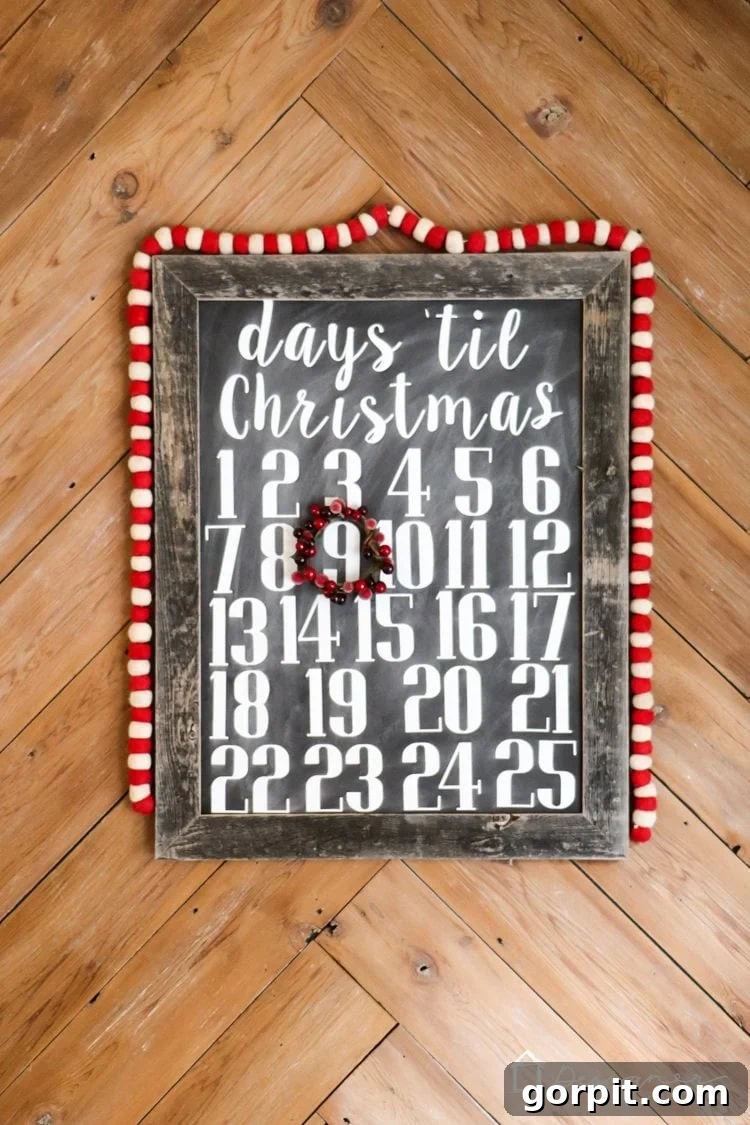
The holiday season brings an undeniable buzz, especially when there are excited children eagerly anticipating Christmas morning. Imagine their delight as they watch each day tick closer to Santa’s arrival with a beautiful, handmade Advent calendar. This comprehensive guide will walk you through creating a charming and easy DIY Christmas countdown calendar that your entire family will adore. Not only is this project incredibly fun to make, but it also transforms into a cherished piece of festive decor that perfectly complements any home.
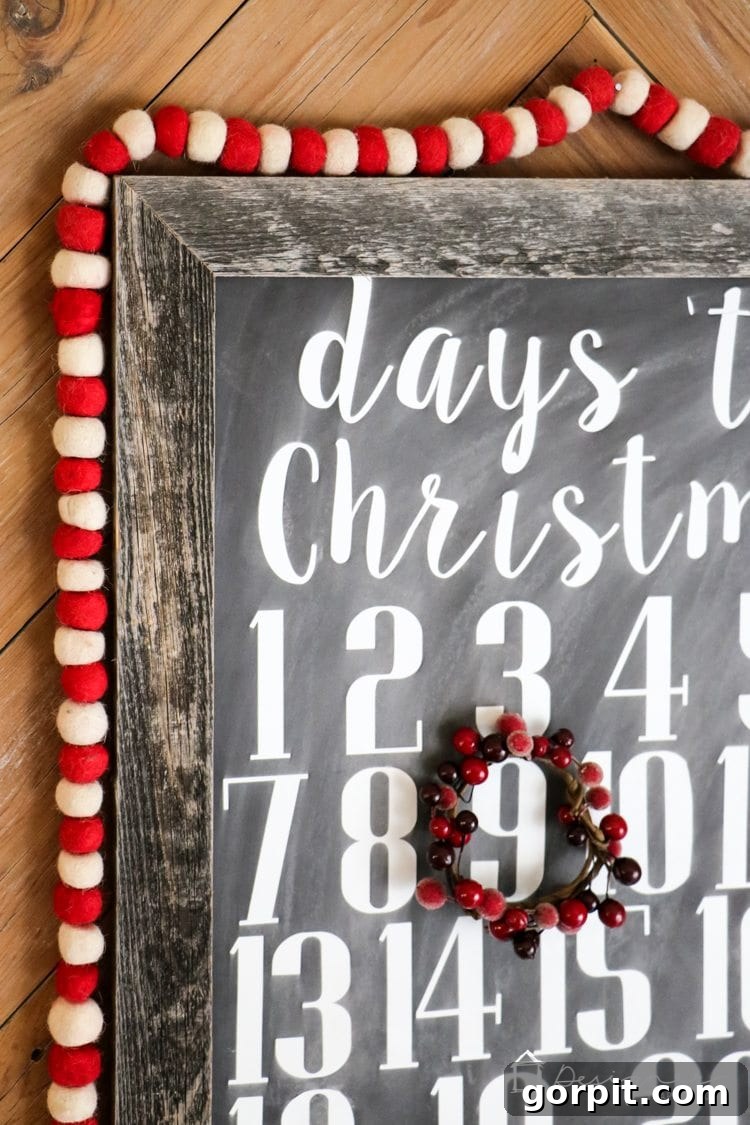
There’s something truly special about a homemade Christmas countdown. It’s more than just a functional item; it’s a daily ritual that builds anticipation and creates lasting family memories. Our design, featuring a movable mini wreath, has become a beloved tradition in our home. Each morning, my girls take turns moving the wreath to the next day, a simple act that fills their hearts with joy and adds a touch of magic to our routine. And for me? I simply adore how seamlessly it blends with our holiday decorations, especially when displayed in our kitchen on our DIY herringbone wall. Paired with our festive DIY mini wreaths adorning the cabinet doors, our kitchen truly comes alive with holiday spirit.
This project stands out as one of the simplest yet most rewarding crafts I’ve ever undertaken. The inspiration for this particular Christmas countdown calendar struck me after spotting a similar item at Target. While it was charming, I envisioned something larger, with a different wood tone that better suited my aesthetic. Deciding to create my own proved to be the perfect choice, allowing for complete personalization and a result that exceeded my expectations. You’ll find that making your own allows for unparalleled customization.
The beauty of this DIY project lies in its adaptability. Whether you prefer to use a cutting machine for intricate designs or readily available stickers for simplicity, you can effortlessly tailor this calendar to your unique style. Choose your favorite Christmas color palette, select fonts that capture the festive mood, and create a countdown that truly reflects your home’s decor. You’ll be amazed at how inexpensive and straightforward it is to bring this delightful creation to life. Let’s dive into the details and learn how to craft your very own Christmas countdown calendar!
Please note: This post includes affiliate links for your convenience, meaning I may earn a small commission if you make a purchase through them, at no extra cost to you. Click here for my full disclosure policy.
Your Ultimate DIY Christmas Countdown Calendar Guide
Why Create a DIY Christmas Countdown Calendar?
Beyond the joy of crafting, a homemade Christmas countdown calendar offers numerous benefits:
- Builds Excitement: For children and adults alike, a daily countdown heightens the anticipation for Christmas Day, making the wait more enjoyable.
- Personalized Decor: Unlike store-bought options, your DIY calendar can be perfectly customized to match your existing holiday decor and personal style.
- Family Tradition: Moving the marker each day can become a cherished family tradition, creating lasting memories year after year.
- Budget-Friendly: Crafting your own calendar is often significantly more affordable than purchasing a high-quality, customizable one from a retail store.
- Creative Outlet: It’s a wonderful opportunity to express your creativity and add a unique, handmade touch to your holiday decorations.
Materials You’ll Need:
Gathering your supplies before you begin ensures a smooth and enjoyable crafting experience. Most of these items are readily available at craft stores or even dollar stores, keeping your project budget-friendly.
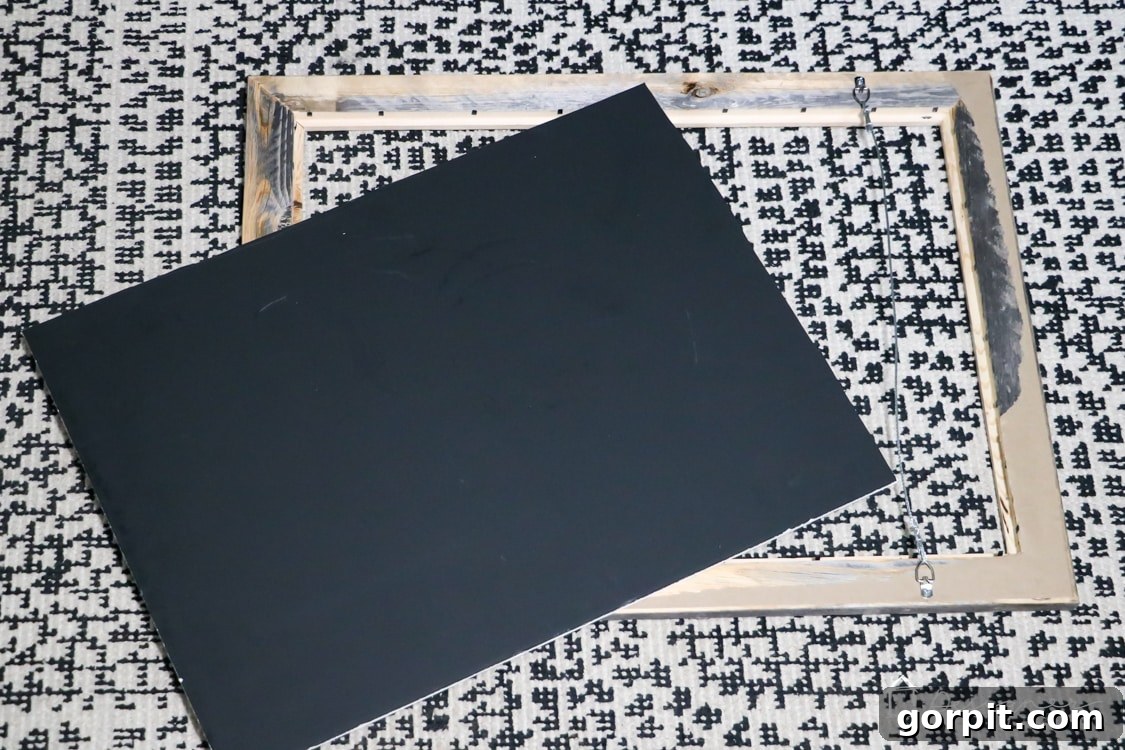
- Black Foam Core Board: This lightweight yet sturdy material forms the base of your calendar. I often find great deals on these at dollar stores, making them a very economical choice. Its smooth surface is ideal for applying vinyl.
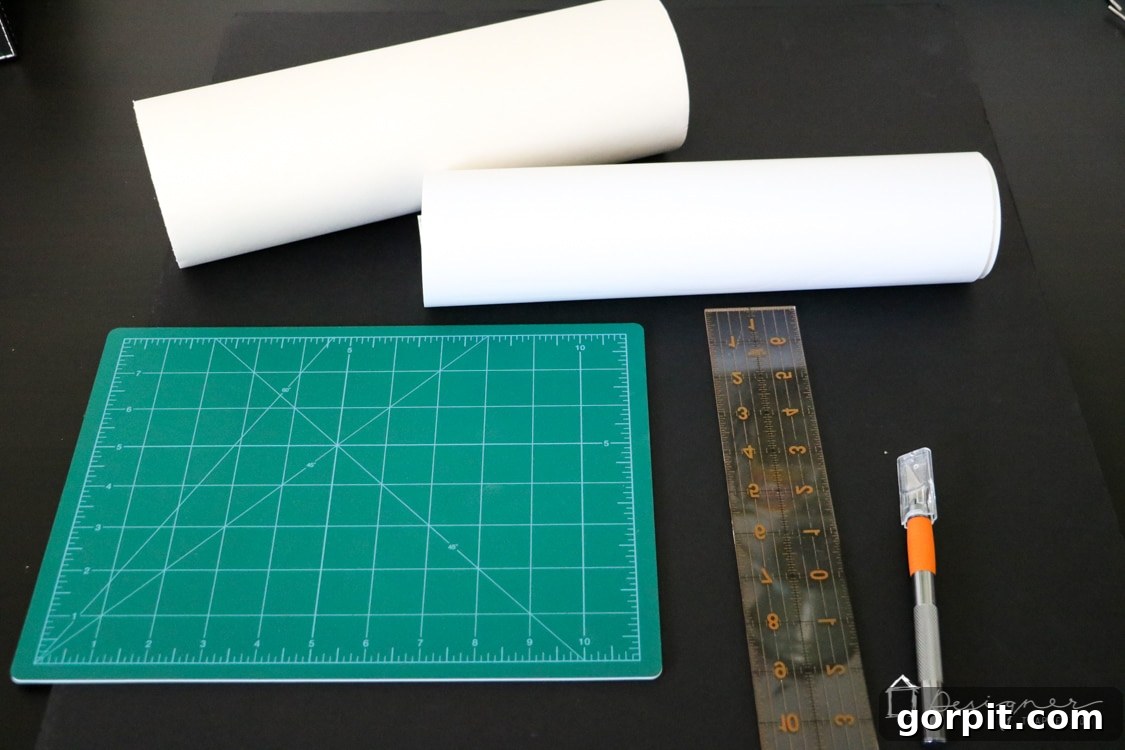
- White Adhesive Vinyl: Essential for creating your numbers and text. I highly recommend Silhouette Brand vinyl due to its superior quality and ease of peeling from the backing paper, which can save a lot of frustration during the weeding process.
- Cutting Machine (Optional but Recommended): A Silhouette CAMEO or Cricut Explore will make cutting intricate designs quick and precise. If you’re deciding between the two, check out my full review of Silhouette vs Cricut.
- Stickers or Stencils: If you don’t own a cutting machine, high-quality number and letter stickers or stencils provide an excellent alternative for creating your design.
- Transfer Paper: This sticky paper is crucial for accurately transferring your vinyl design to the foam board, ensuring proper spacing and alignment. While the Silhouette brand is reliable, less expensive off-brand options often work just as perfectly.
- White Chalk: Used to create the authentic “chalkboard” effect on your finished calendar.
- Chalk Eraser or Paper Towel: For evenly distributing the chalk dust.
- Craft Knife: Essential for precise cutting of the foam core board. A sharp blade is key for clean edges.
- Wood Frame without Glass: This will house your calendar and give it a finished, polished look. Most craft stores carry a variety of frames suitable for this purpose. Look for one where the foam core will fit snugly once the glass is removed.
- Berry Spray or Mini Wreath: For the movable marker. You can find artificial berry sprays at any craft store during the holiday season.
 |
 |
Step-by-Step Guide to Crafting Your Countdown Calendar:
Follow these detailed steps to create a beautiful and functional Christmas countdown calendar that will bring joy to your home year after year.
Step 1: Prepare Your Foam Core Board
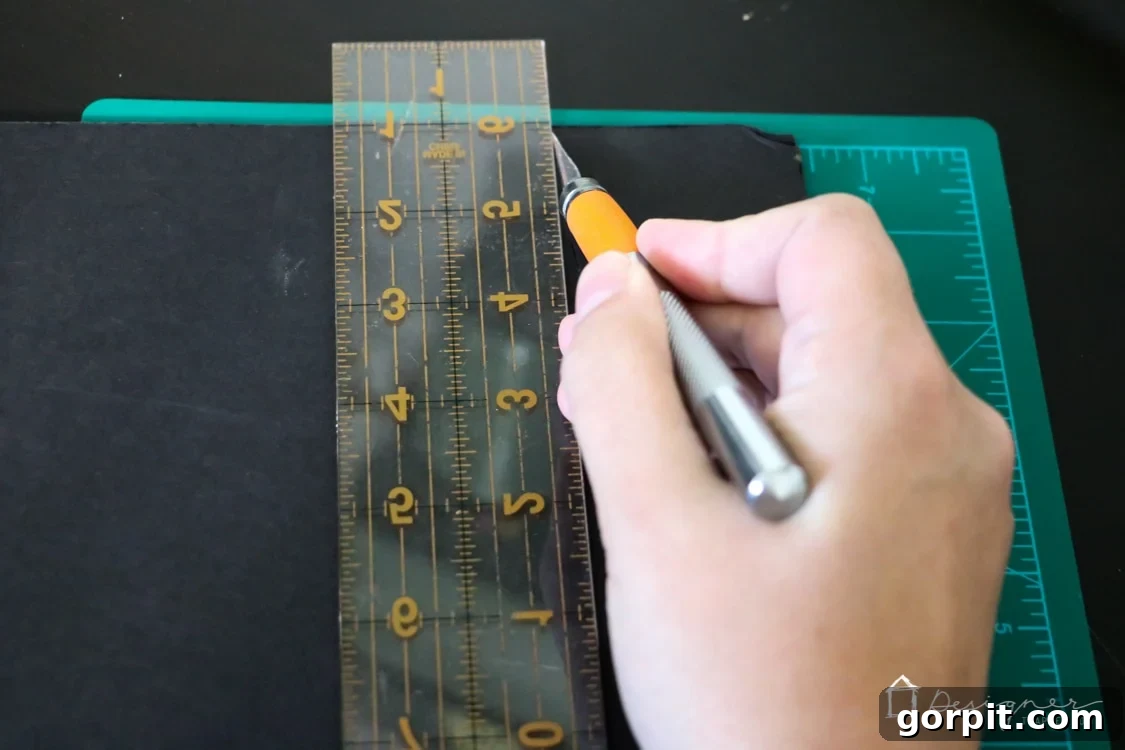
The foundation of your calendar is the foam core board. Start by accurately measuring the inside dimensions of your chosen wood frame. This ensures a perfect fit. Using your craft knife and a straight edge, carefully cut the black foam core board to size. Take your time to make clean, straight cuts; a sharp blade will prevent jagged edges and ensure a professional finish. Precision here is key for a polished final product.
Step 2: Design Your Calendar Layout
If you’re using a cutting machine, open your design software (such as Silhouette Studio or Cricut Design Space). Create your sign design, including the phrase for the top (e.g., “Days Until Christmas”) and the numbers 1 through 25 (or 31, depending on your desired countdown length). For the script at the top, I used the elegant “Sugar Plums” font, and for the numbers, the classic “Pottery Barn” font. Remember to ensure these fonts are installed on your computer. Carefully arrange your design to fit aesthetically on your foam core board, keeping ample space around the numbers for the wreath marker. Plan your layout strategically to maximize vinyl usage if desired.
Step 3: Cut Your Vinyl Design
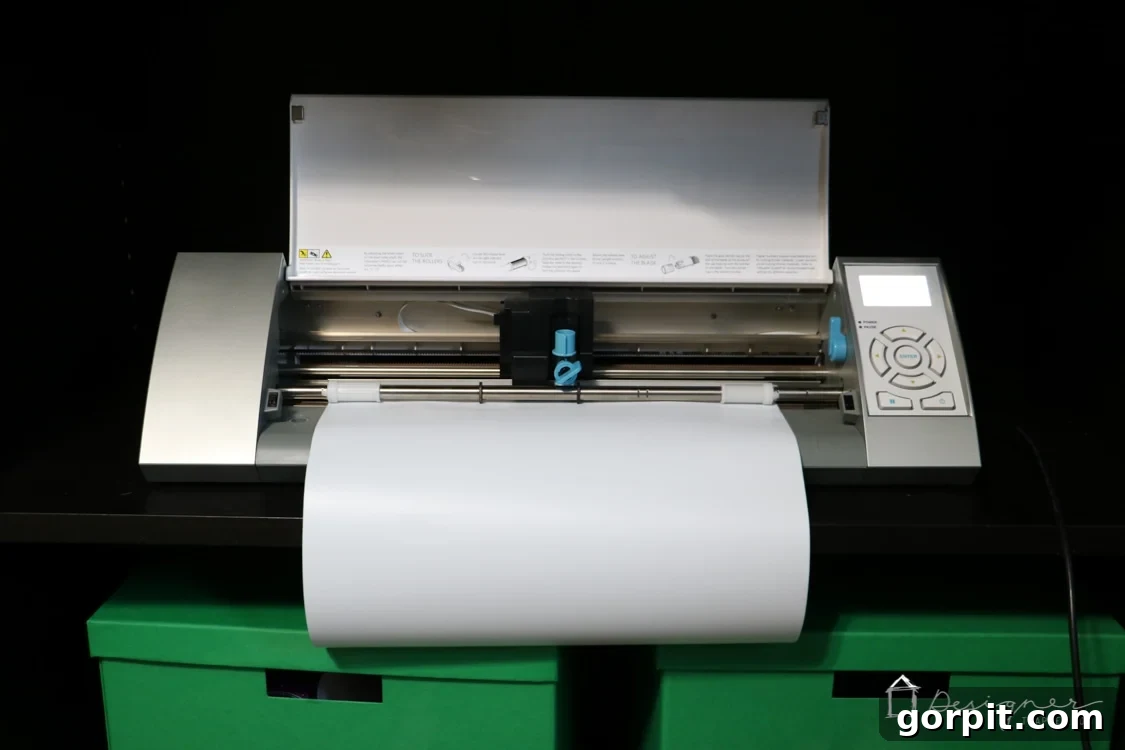
Load your white adhesive vinyl into your cutting machine, ensuring it’s properly aligned. Adjust your machine’s settings for vinyl and send your design to cut. Once the cutting is complete, carefully unload the vinyl. If you’re not using a cutting machine, this is the step where you would apply your chosen number and letter stickers directly to the foam board, or use stencils and paint to create your design. Ensure everything is centered and straight for the best appearance.
Step 4: “Weed” Your Vinyl Design
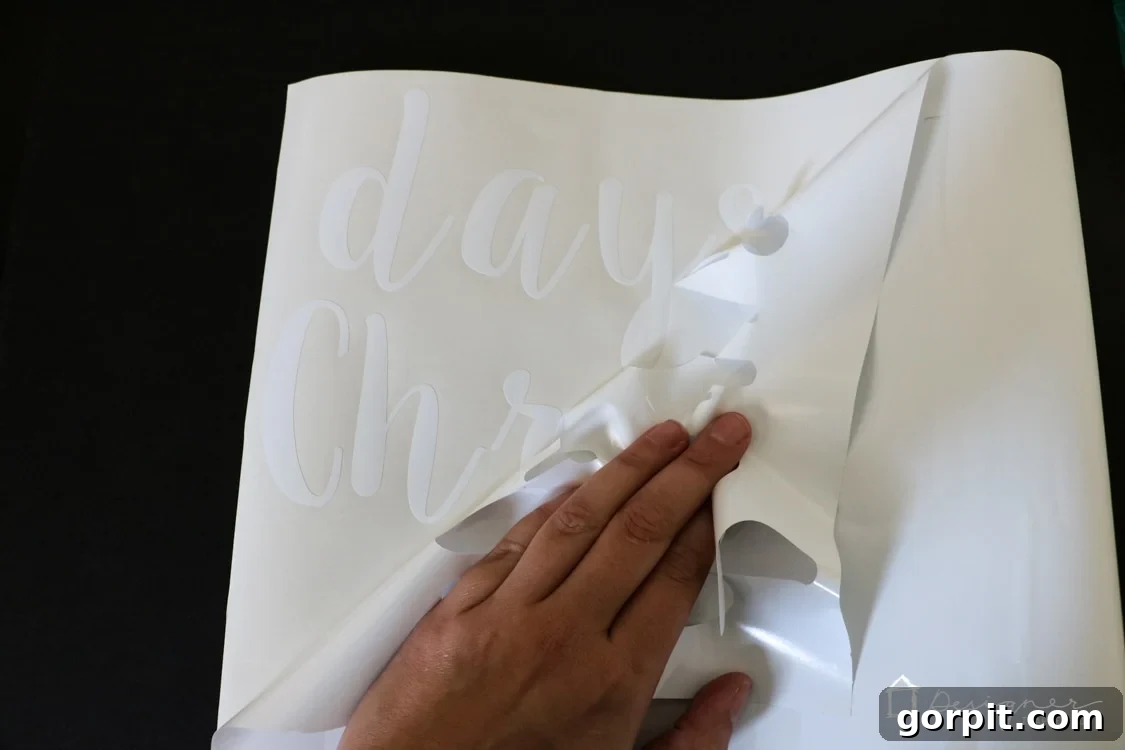
The term “weeding” in vinyl crafting refers to the process of removing all the excess vinyl that is not part of your final design. This is a meticulous step that requires patience. Using a weeding tool (or a sharp, pointed object like tweezers), carefully peel away the vinyl around your letters and numbers, leaving only your desired design on the backing paper. Take your time to ensure all small internal pieces, like the centers of “A”s or “O”s, are also removed. The image below illustrates this process perfectly.
Step 5: Transfer Your Design to the Foam Board
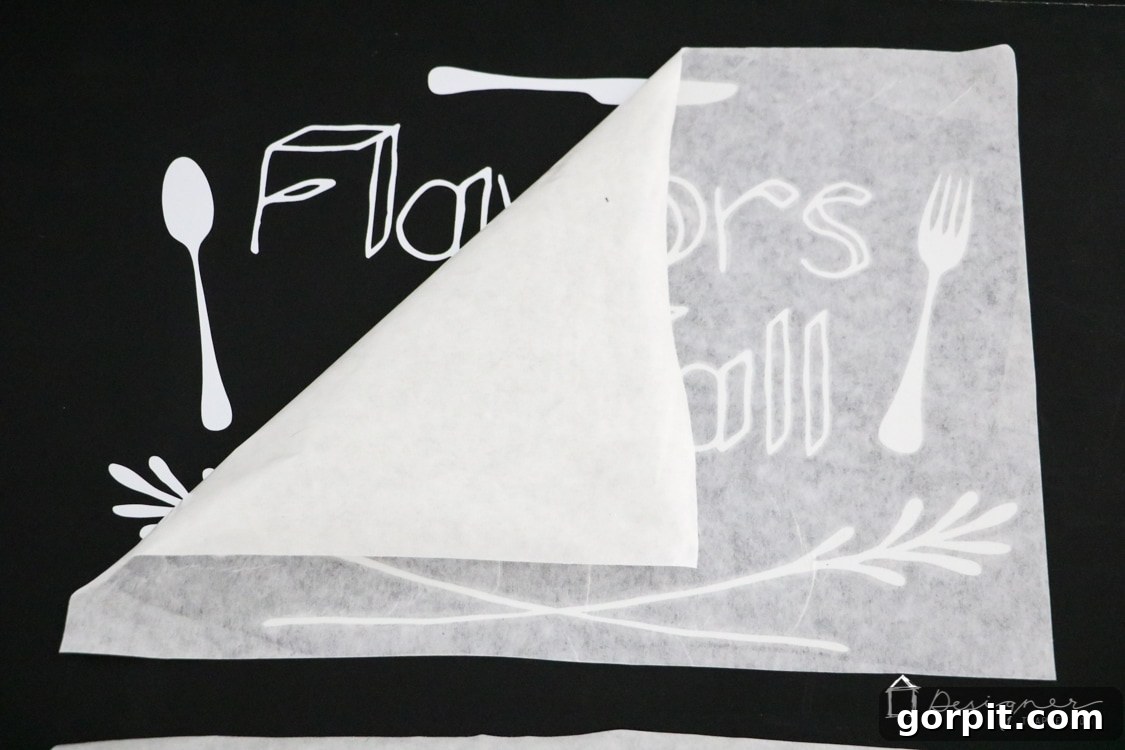
This is where transfer paper comes in handy. Cut a piece of transfer paper slightly larger than your design. Place the transfer paper over your weeded vinyl design, smoothing it down firmly with a scraper tool or a credit card to ensure the vinyl adheres well. Slowly peel the transfer paper away from the vinyl’s backing, making sure all parts of your design lift with it. Position your design carefully onto the foam board, ensuring it’s straight and centered. Press down firmly, then slowly peel back the transfer paper, leaving the vinyl design perfectly applied to your foam board. Using transfer tape for the entire design helps maintain correct spacing, especially for multiple numbers or words. While this might use a bit more vinyl, the resulting professional look is worth it. If you’re aiming for maximum vinyl economy, arrange your digits and letters as closely as possible in your cut file. (While I missed photographing this exact step for this project, the principle is clearly demonstrated in the image from a similar vinyl project below).
Step 6: Create the Authentic Chalkboard Effect
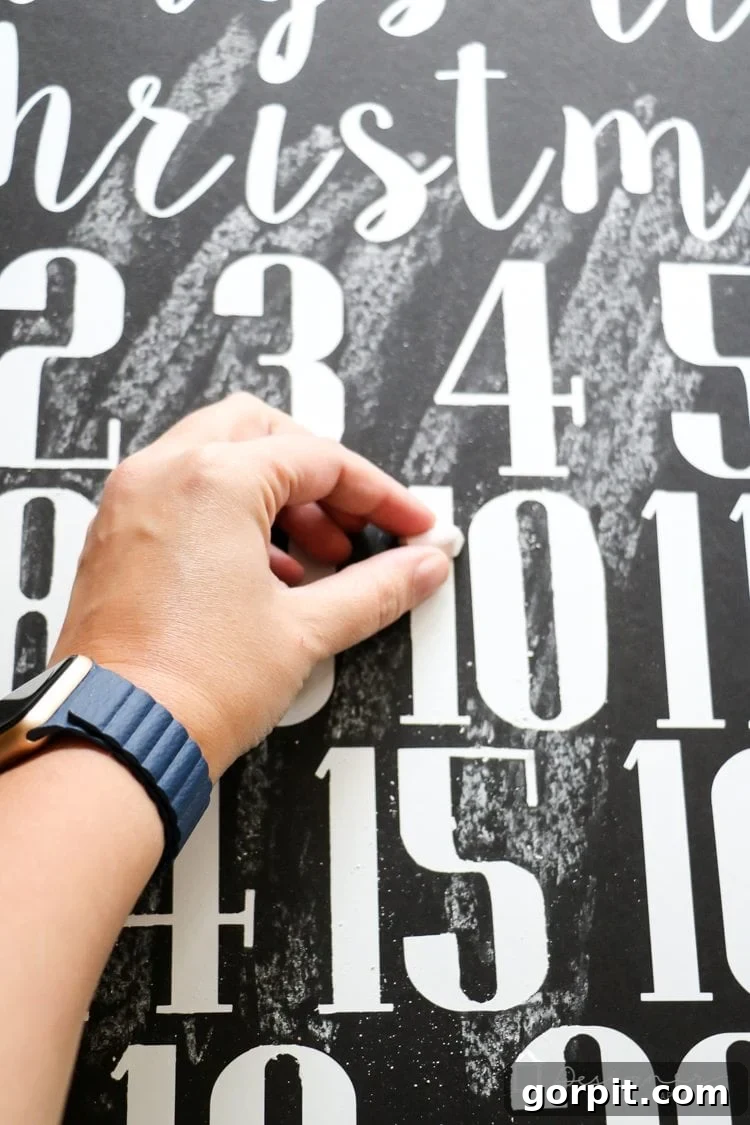
This step is crucial for giving your calendar that charming, rustic chalkboard appearance. With the vinyl design already firmly in place, take a piece of white chalk and rub its side all over the entire surface of your Christmas countdown calendar. Don’t worry about being too neat; the goal is to create an even layer of chalk dust. Then, use a paper towel or a chalkboard eraser to gently rub and spread the chalk dust across the surface, coating everything, including the vinyl letters and numbers. This process “seasons” the board and gives it that authentic, slightly worn, matte chalkboard look. It’s essential not to skip this step, but also remember to do it *after* attaching your vinyl. Applying chalk dust beforehand would prevent the vinyl from sticking properly.
Step 7: Craft Your Mini Wreath Marker
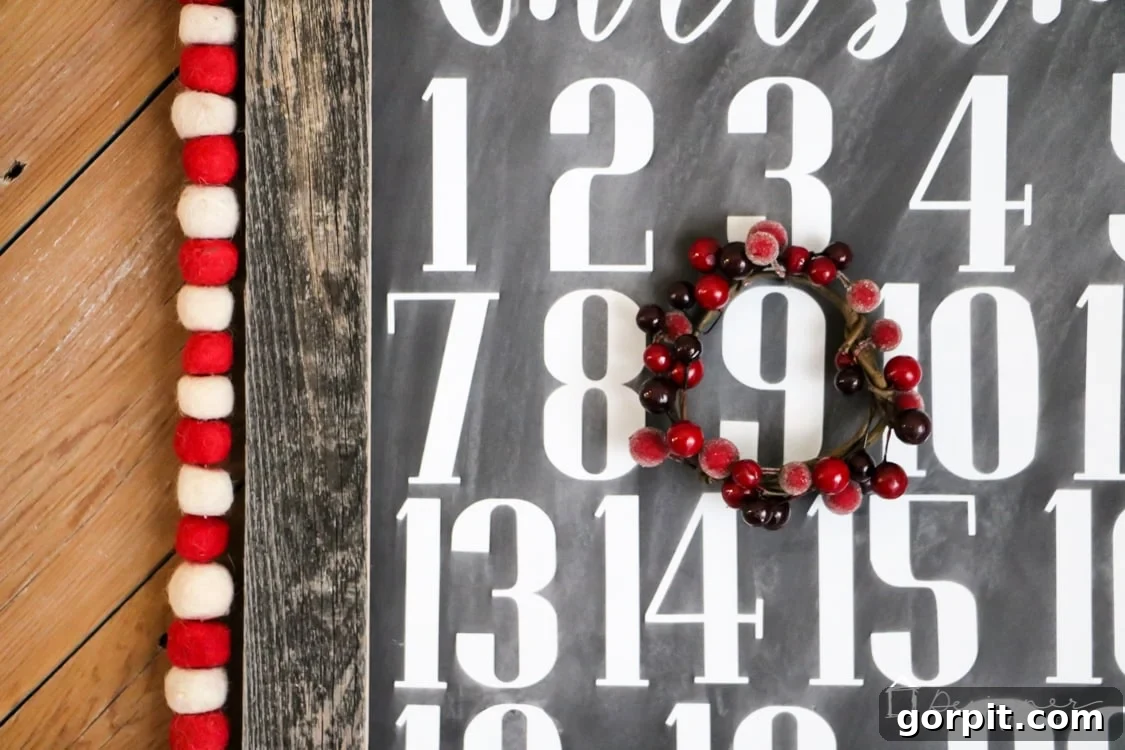
For the movable marker, a mini wreath adds a delightful touch. I purchased an artificial berry spray from a craft store, which offers flexibility in shaping. Carefully bend the spray into a small circle, trimming any excess length with wire cutters to form a neat wreath. To create a hook for hanging, cut a very short piece from the remaining berry spray and bend it into a hook shape, ensuring some of the wire is exposed at one end. This small wire hook can then be gently pushed into the foam core board, just like a push pin, allowing you to easily move your wreath marker from day to day. Alternatively, you could use a small felt ornament, a miniature bauble, or even a small clothespin with a festive embellishment.
Step 8: Frame, Hang, and Enjoy Your Countdown!
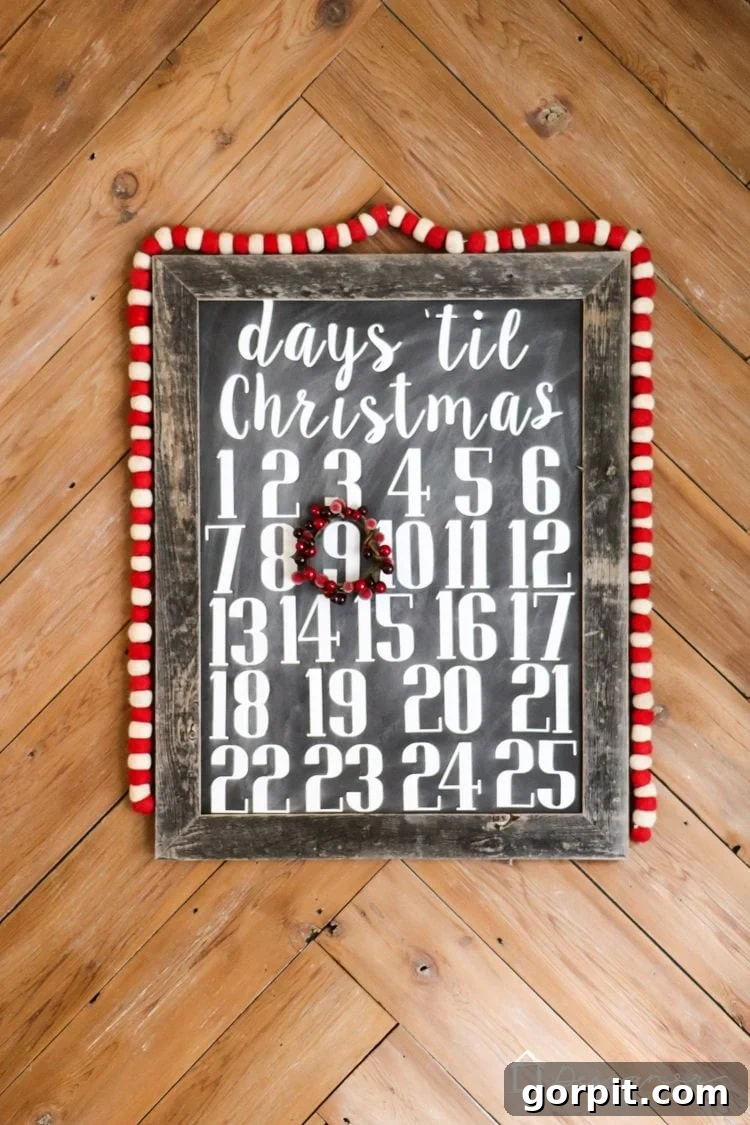
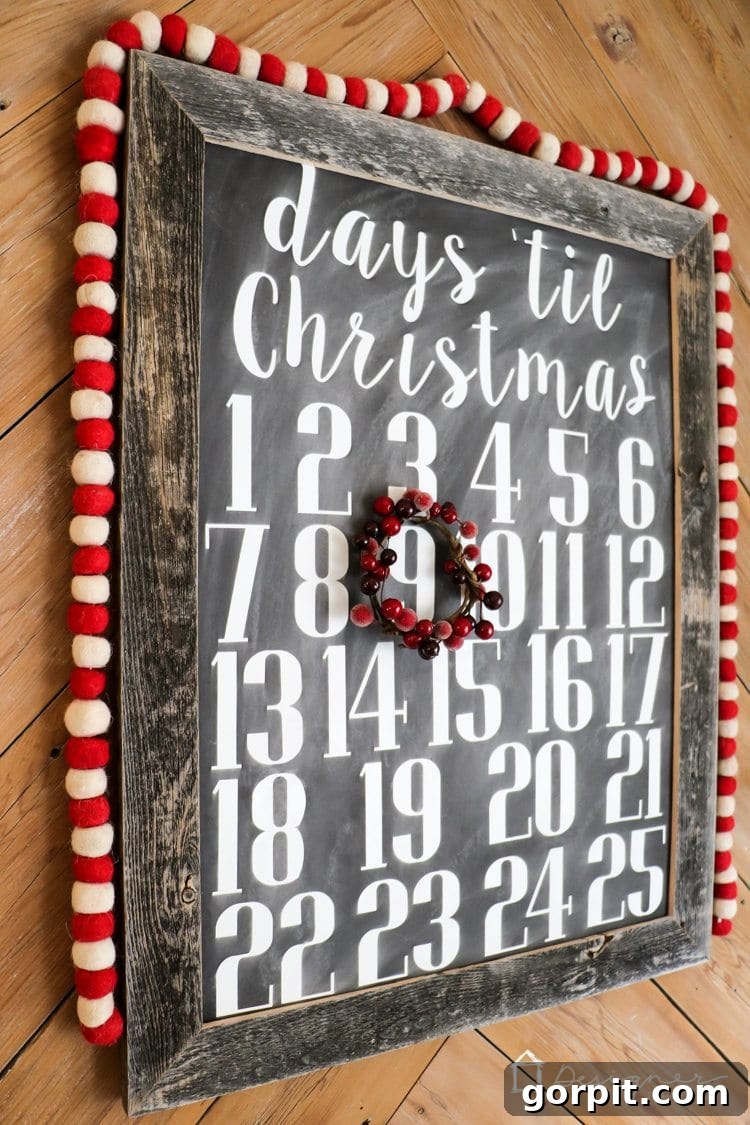
With all the elements prepared, it’s time to assemble your beautiful Christmas countdown calendar. Carefully place your finished foam core board into the wood frame, ensuring it sits securely. If needed, you can use small pieces of tape on the back to hold the foam core in place. Choose a prominent spot in your home – perhaps in the kitchen, living room, or entryway – and hang your new calendar. Step back and admire your handiwork! My twin girls absolutely adore our calendar and are always eagerly awaiting December to begin the magical daily countdown. This simple project is guaranteed to bring smiles and festive cheer to your family throughout the holiday season.
Customization Ideas to Make It Truly Yours
The beauty of DIY is the endless potential for personalization. Here are some ideas to make your Christmas countdown calendar uniquely yours:
- Color Palette: While black and white offer a classic chalkboard look, don’t hesitate to experiment! Use a colored foam core board (red, green, blue) and contrasting vinyl colors (gold, silver, glitter vinyl) to match your specific holiday theme.
- Font Choices: Explore different font styles for your numbers and text. Whimsical, elegant, rustic, or modern – the possibilities are endless and can drastically change the calendar’s aesthetic.
- Embellishments: Add small bows, glitter, tiny bells, or even a string of battery-operated fairy lights around the frame for an extra touch of sparkle and magic.
- Alternative Markers: Instead of a berry wreath, consider a small star ornament, a miniature felt stocking, a tiny wooden sleigh, or even a magnetic piece if you’re using a metal sheet behind your foam core.
- Interactive Elements: Behind each number, you could add small pockets or envelopes to hold tiny treats, advent activities, or daily messages for your family.
The simple addition of fun felt balls draped above mine adds even more holiday cheer. Get creative and design the perfect holiday countdown calendar that reflects your family’s style and enhances your Christmas decor!
Looking for More Holiday Crafting Inspiration?
If you enjoyed making this festive countdown, you’ll love these other DIY holiday projects that add charm and personality to your home:
- DIY Magical Christmas Lanterns
- The Most Realistic Faux Garlands for 2022
- DIY Christmas Art That Lights Up
- How to Make a Christmas Reindeer from Logs!
- DIY Santa Sacks Your Kids Will Love
- How to Make a Gift Bag Out of Wrapping Paper
Curious about my approach to transforming spaces in our home? Explore Designer in a Binder®, my comprehensive guide to affordable and simple home decorating.
Don’t miss out on exclusive content, behind-the-scenes sneak peeks, and more DIY inspiration! Be sure to subscribe before you go for all the latest updates and creative ideas directly in your inbox.