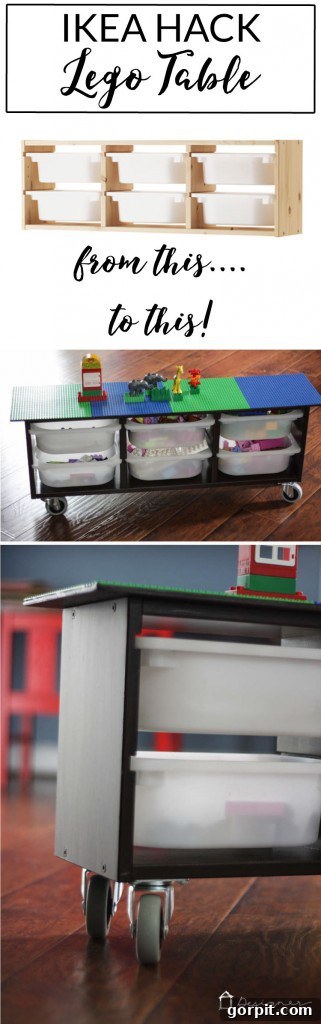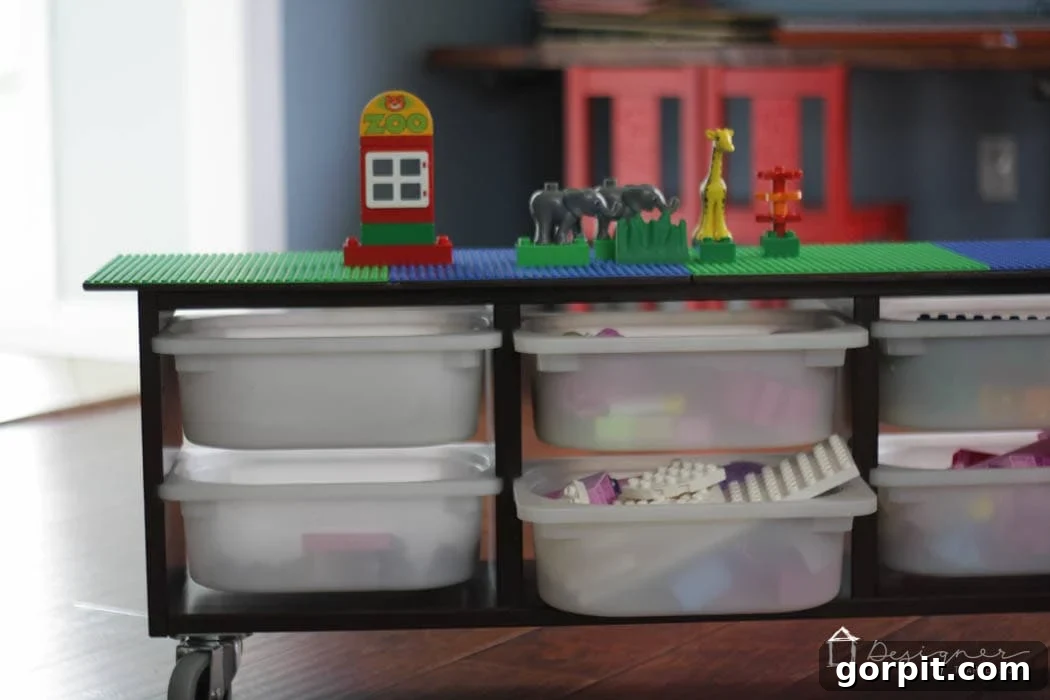
Welcome to our latest DIY project, where we tackle one of the universal challenges of parenthood: toy organization, especially the notoriously tiny and abundant world of LEGOs! For months, we’ve been on a mission to create a truly organized and functional playroom for our twin girls. While our previous project of building industrial pipe bookshelves and built-in desks provided much-needed storage and a dedicated workspace, we still faced the daunting task of corralling those countless LEGO bricks. Loose LEGOs can quickly turn any play area into a minefield, leading to frustration for both kids and parents. The lack of a designated, accessible spot for these beloved building blocks often meant they ended up scattered, unused, or worse, lost in the depths of toy bins.
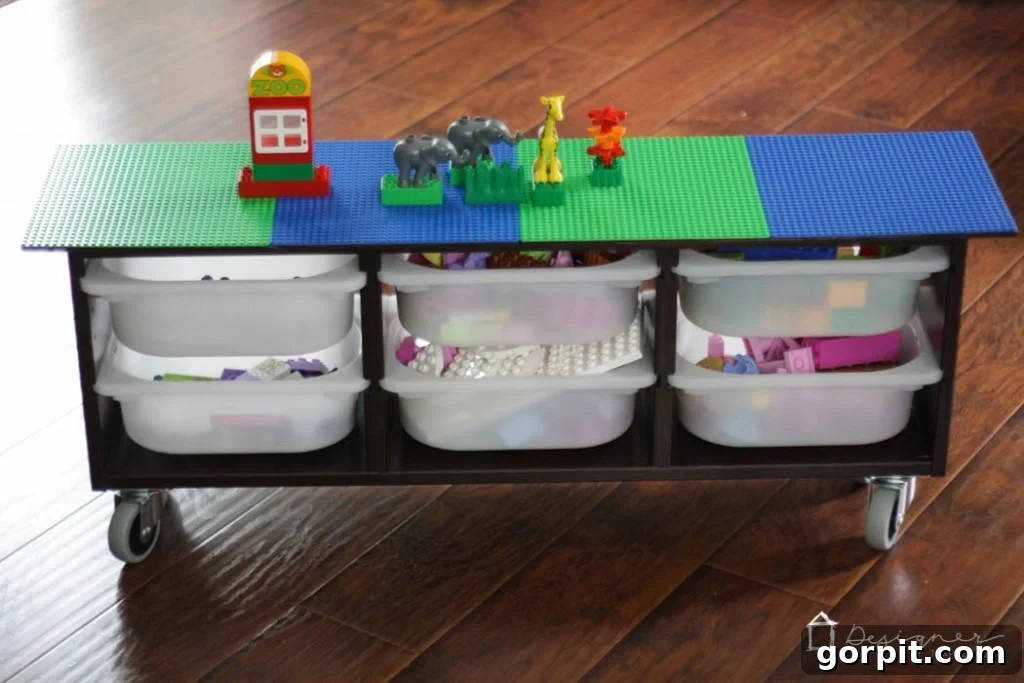
But fear not, fellow parents and DIY enthusiasts! We’ve finally discovered an ingenious, budget-friendly solution that not only keeps LEGOs impeccably organized but has also sparked an unprecedented level of creative play in our daughters. This game-changing project is a DIY LEGO table, an incredibly simple yet effective IKEA hack that anyone can replicate. Say goodbye to scattered bricks and hello to a tidy, inviting play space that encourages imagination and structured fun. This custom-built table offers the perfect blend of storage, play surface, and mobility, making it an indispensable addition to any child’s room or playroom. Get ready to transform your LEGO chaos into an organized, inspiring building zone!
Please note: This post contains some affiliate links for your convenience. Click here to read our full disclosure policy.
How to Build an Ultimate DIY Lego Table: An Easy IKEA Hack for Creative Play & Organization
Are you tired of LEGOs taking over your home? Do you dream of a dedicated space where your children can build, play, and store their LEGO creations without creating a mess? Our ultimate DIY LEGO table is the answer! Combining the simplicity of an IKEA hack with thoughtful design, this project creates a mobile, functional, and aesthetically pleasing play station. It’s perfect for encouraging imaginative play while ensuring every brick has its place. Follow our step-by-step guide to build a custom LEGO table that your kids will adore, and you’ll love for its organizational prowess.
Essential Materials for Your DIY Lego Table
Gathering the right materials is the first step to a successful DIY project. This IKEA hack leverages the versatility of the Trofast storage unit, combining it with a sturdy top and mobile casters to create the perfect LEGO play station. Here’s everything you’ll need to bring this fantastic project to life:
- Ikea Trofast wall storage unit: This is the foundation of your LEGO table. The Trofast system is renowned for its robust construction and compatibility with various storage bins, making it ideal for holding a vast collection of LEGO bricks. Choose a unit that fits your space and storage needs.
- Gel wood stain (if desired): To customize the look of your Trofast unit and plywood top, a gel wood stain can add warmth and depth. We opted for a darker finish to match our existing playroom decor, but you can choose any color to complement your space. This step is entirely optional but allows for a personalized touch.
- 1/8 inch plywood, cut to size: This will form the top surface where the LEGO base plates will be attached. Plywood is an excellent choice for its durability and relatively smooth surface. You’ll need enough to create a slightly overhanging top for the Trofast unit. You can have it cut at your local hardware store or do it yourself with appropriate tools.
- 4 Lego base plates: These are crucial for building. Standard green or gray base plates work perfectly, providing ample surface area for multiple builders to create simultaneously. Ensure they are genuine LEGO brand for optimal brick adhesion.
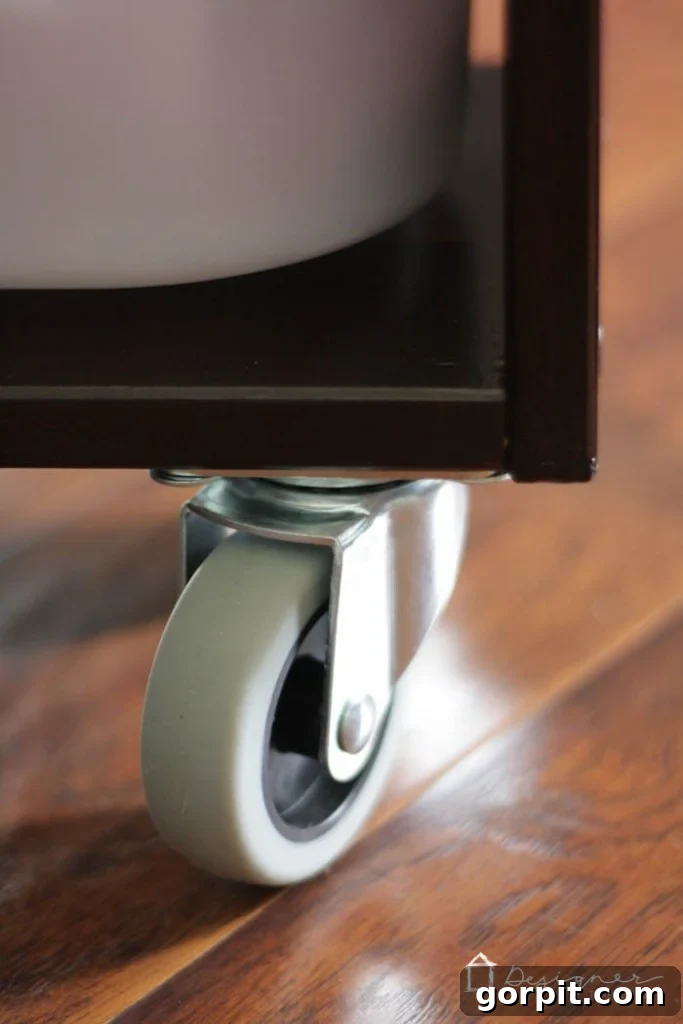
- 4 casters (we used 3-inch casters): Mobility is key for this LEGO table, allowing it to be moved effortlessly between rooms or tucked away when not in use. Casters transform the stationary Trofast unit into a portable play hub. We recommend sturdy, locking casters for stability during play.
- Multi-surface glue (we used Elmer’s Probond): A strong, multi-surface adhesive is essential for securely attaching the plywood top to the Trofast unit and, most importantly, for bonding the LEGO base plates to the plywood. Choose a glue that offers a strong, permanent bond and dries clear.
Having all your materials organized before you begin will make the building process smooth and efficient!
Step-by-Step Guide: Building Your DIY Lego Table
Creating this custom LEGO table is an incredibly rewarding project, designed to be straightforward and accessible for DIYers of all skill levels. Follow these detailed steps to construct a durable, functional, and aesthetically pleasing LEGO station for your kids.
1) Prepare Your Trofast Unit with Stain (Optional Customization)
The first step involves personalizing your IKEA Trofast unit, which serves as the base of your LEGO table. If you desire a specific aesthetic that differs from the natural finish of your Trofast unit, now is the time to apply wood stain. We wanted a richer, darker look to complement our playroom’s existing decor, so we opted for a General Finishes Gel Stain in Mahogany finish. Gel stains are excellent for IKEA furniture as they provide good coverage and adhesion without extensive prep. Apply the stain evenly with a brush or cloth, following the grain of the wood. Allow it to penetrate for a few minutes before wiping off any excess for a smooth, consistent finish. Always refer to the manufacturer’s instructions for drying times and additional coats. If the natural finish of your Trofast unit suits your taste, you can happily skip this step and move directly to cutting your plywood. This optional staining process allows you to seamlessly integrate your new LEGO table into any room’s design scheme.
2) Outline Your Lego Base Plates on Plywood
With your Trofast unit prepared, it’s time to create the tabletop. Lay your four LEGO base plates onto your piece of 1/8 inch plywood, arranging them in the configuration you desire for your final play surface. Typically, this would be a 2×2 grid, but you could arrange them in a line or an ‘L’ shape depending on your plywood size and preference. Once you have them positioned, use a pencil to carefully draw an outline around the perimeter of the base plates. This outline will serve as your guide for cutting the plywood, ensuring a precise fit for your LEGO building surface. This step is crucial for maintaining a neat and professional look for your tabletop.
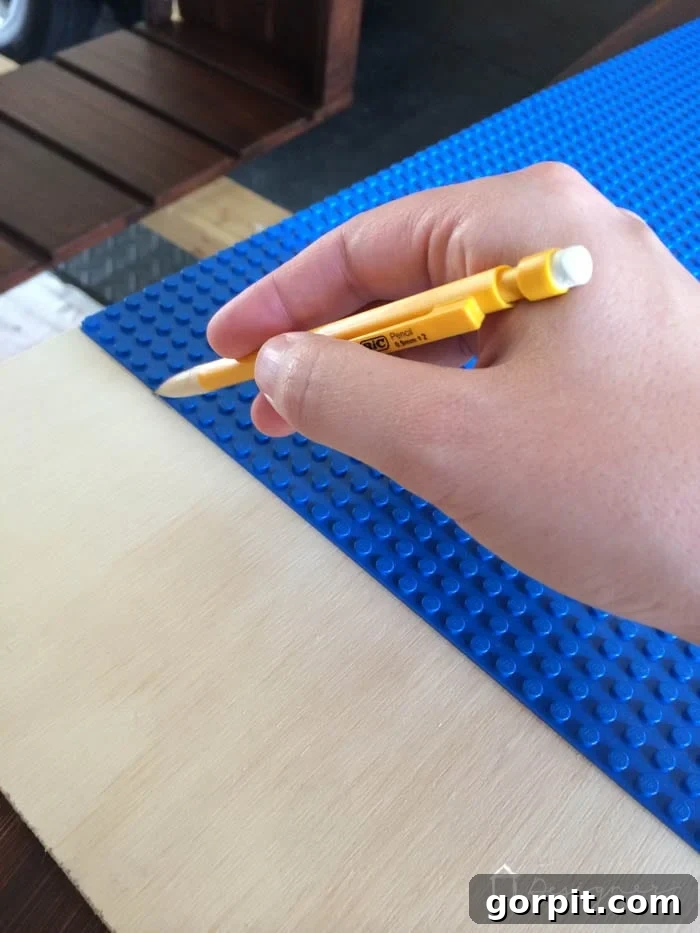
3) Cut Your Plywood for the Tabletop
Now, using the pencil lines you just drew as your guide, carefully cut your plywood to size. You can use a jigsaw, circular saw, or even a utility knife for this, depending on your comfort level and the tools available. For this particular project, we utilized scrap plywood pieces we already had on hand. This meant we actually used two smaller pieces of plywood instead of a single continuous piece to achieve the desired surface area. This approach highlights the adaptability of this DIY project—don’t be afraid to work with what you have! Because we planned to glue the LEGO base plates directly on top, we didn’t measure with a ruler; instead, we relied entirely on the outlines of the four LEGO base plates to dictate our cuts. This method ensures that the base plates will fit perfectly on the cut plywood. Always prioritize safety when operating power tools, wearing appropriate eye and hand protection.
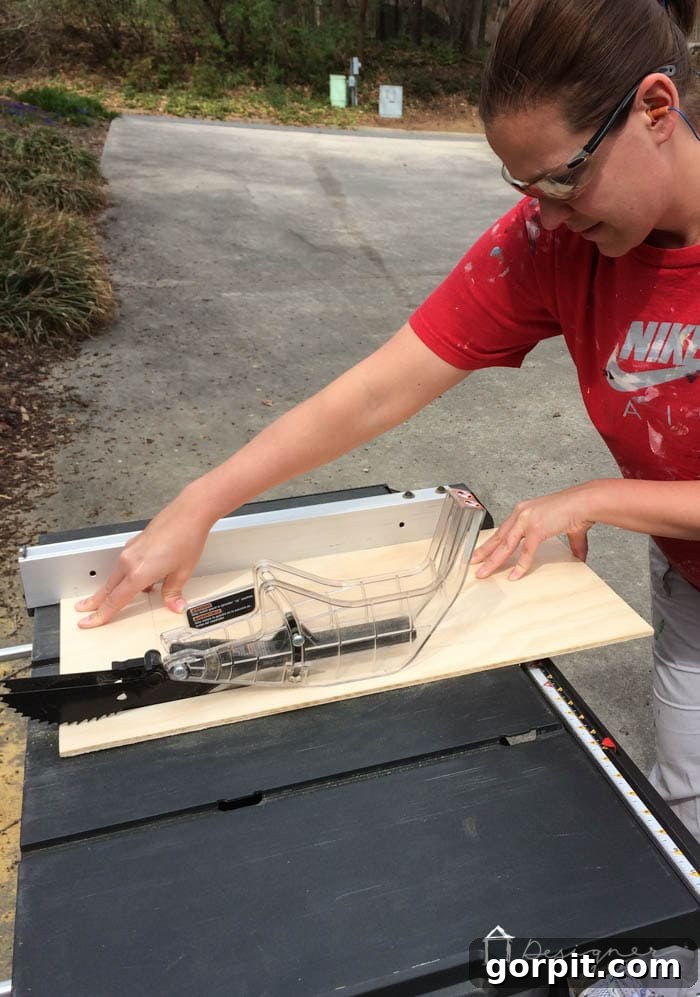
4) Stain the Underside of Your Plywood (Visibility Consideration)
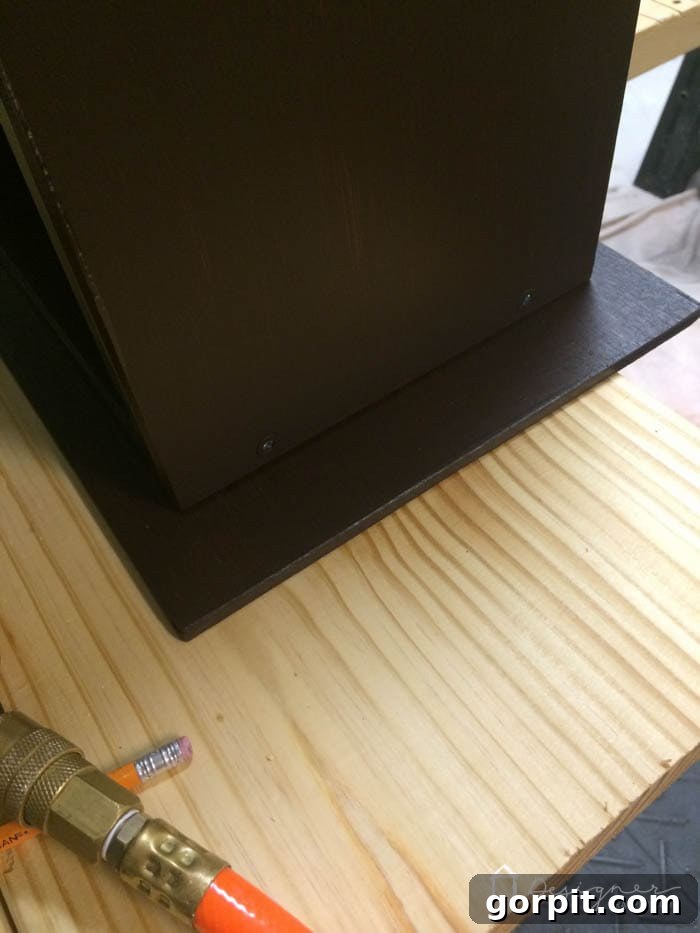
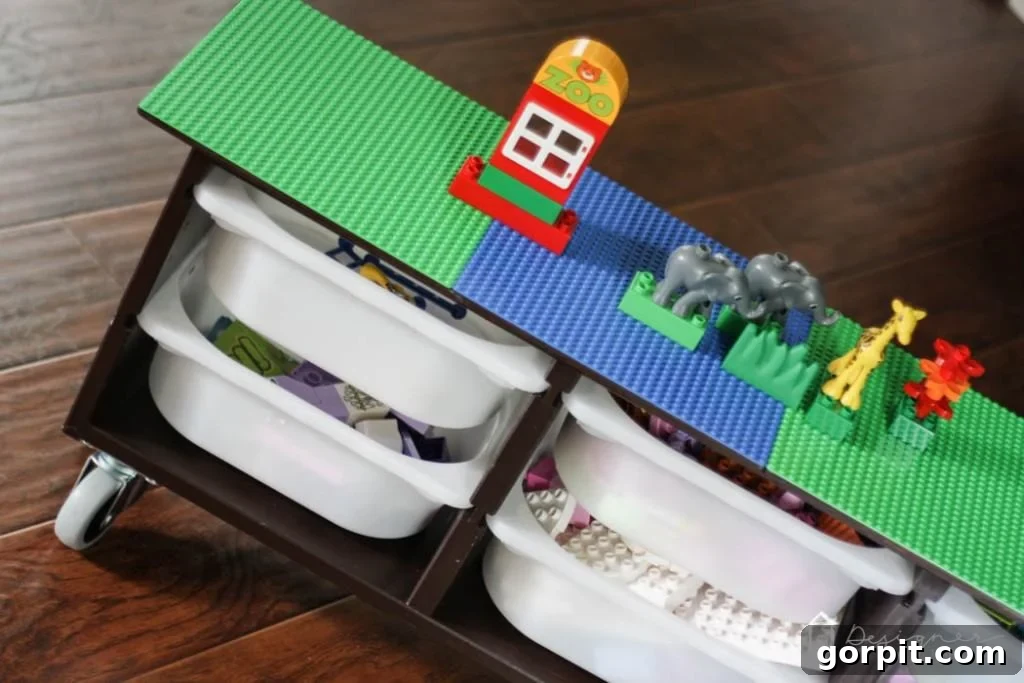
If you opted to stain your Trofast unit in step 1, you should now consider staining the bottom side of your freshly cut plywood top. This might seem counterintuitive since the top surface will be covered by LEGO base plates, but there’s a practical reason for it. When the plywood is attached to the Trofast unit, it will intentionally overhang the edges slightly. This overhang will be visible from underneath and from various angles in the room. Staining the bottom side ensures a cohesive and finished look, preventing any unfinished wood from being exposed and maintaining the high-quality appearance of your custom table. There is absolutely no need to stain the top surface of the plywood, as this area will be completely covered by the LEGO base plates. Apply the stain following the same method as with the Trofast unit, allowing adequate drying time.
5) Attach Casters for Mobility
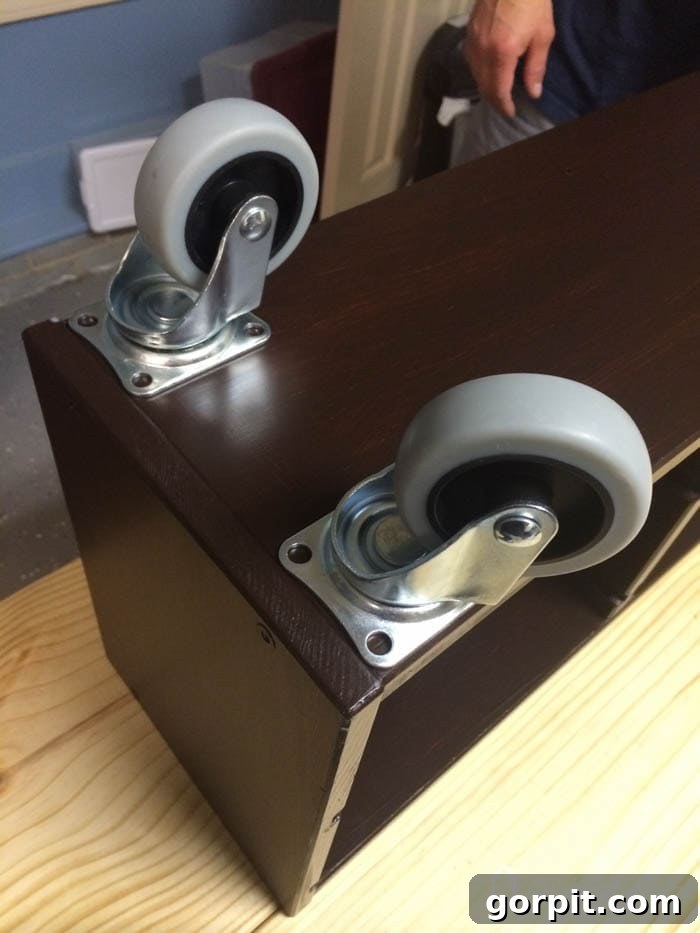
To give your LEGO table its incredible mobility, it’s time to attach the casters to the base of the Trofast unit. Turn the Trofast unit upside down, carefully placing it on a protected surface. Position one caster near each of the four bottom corners of the unit. Ensure that the casters are aligned properly and are not placed too close to the very edge, where the wood might split. Using a drill and appropriate screws (usually provided with the casters), securely fasten each caster in place. We chose 3-inch casters for robust support and smooth movement across various floor surfaces. This step is a game-changer, allowing your children to easily roll their LEGO table from one area of the playroom to another, or even into a different room, encouraging more flexible and spontaneous play. Double-check that all casters are firmly attached before flipping the unit upright.
6) Secure the Plywood Tabletop to the Trofast Unit
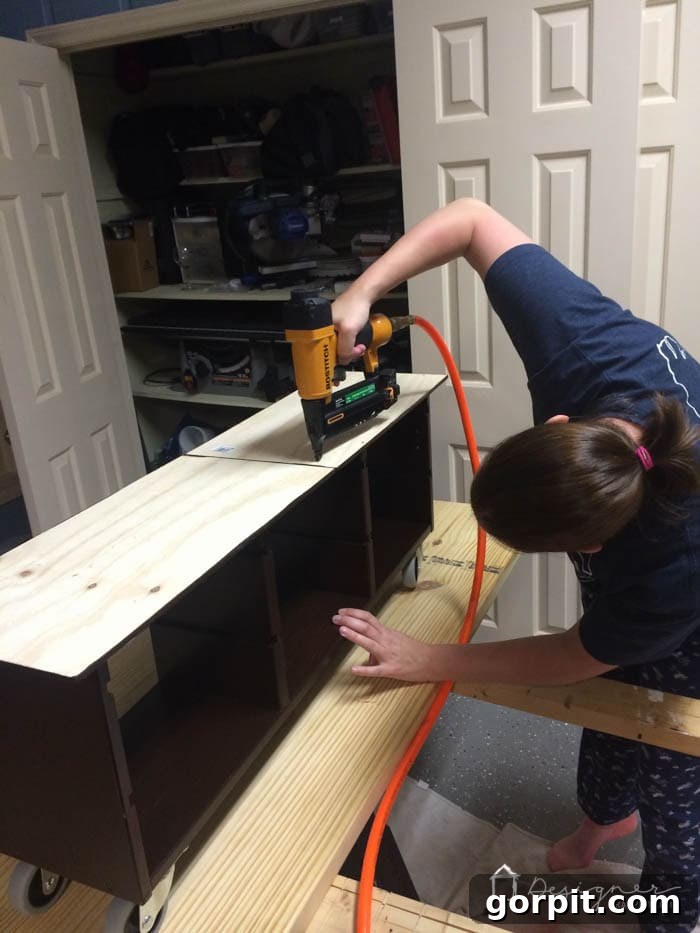
With the casters attached, flip your Trofast unit upright. Now, carefully position your stained (or unstained) plywood tabletop onto the top surface of the Trofast unit. Take your time to center the plywood perfectly, ensuring an even overhang on all sides. This slight overhang is deliberate, providing a more aesthetically pleasing finish and a slightly larger play surface. Once you are satisfied with the alignment, use a strong multi-surface glue, like the Elmer’s ProBond Advanced we used, to permanently attach the plywood to the Trofast. Apply a generous bead of glue along the top edges of the Trofast unit and in the center for maximum adhesion. Press the plywood firmly onto the glued surface. For optimal bonding, place heavy objects evenly across the entire surface of the plywood and allow the glue to cure completely, ideally overnight. You might notice me in my pajamas in some photos; this is a common sight as many of our DIY projects are lovingly completed late at night after our girls are tucked into bed, making the most of those quiet hours!
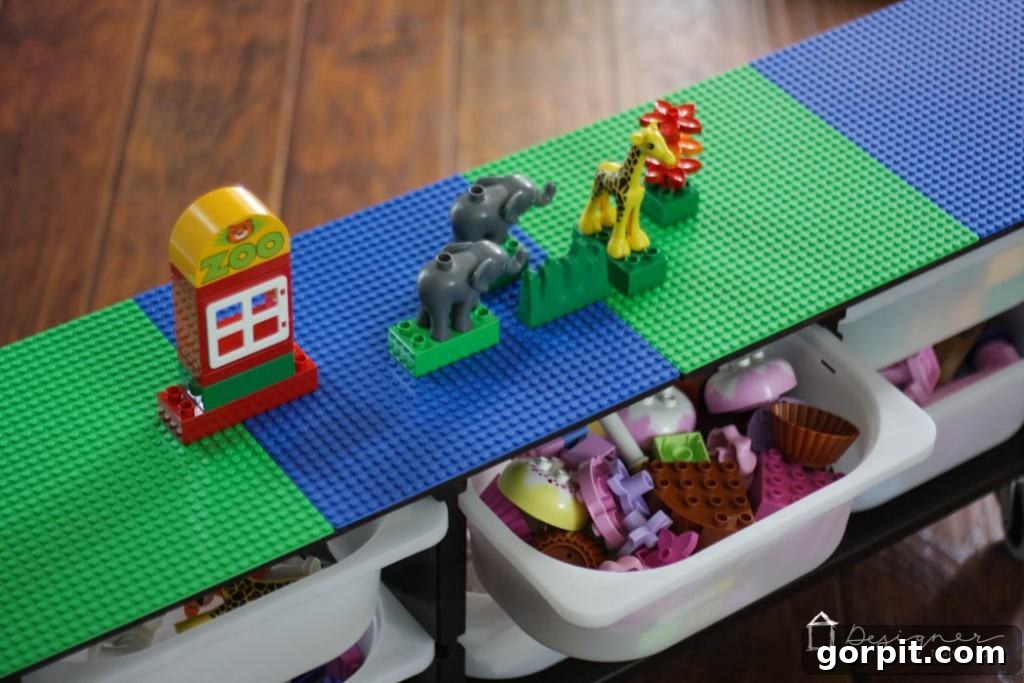
The image below clearly illustrates why we took the extra step to stain the bottom side of the plywood in Step 4. The overhang portion is distinctly visible from underneath, showcasing the importance of a finished look from every angle. This small detail significantly enhances the overall quality and craftsmanship of your DIY LEGO table.
7) Glue Your Lego Base Plates into Place
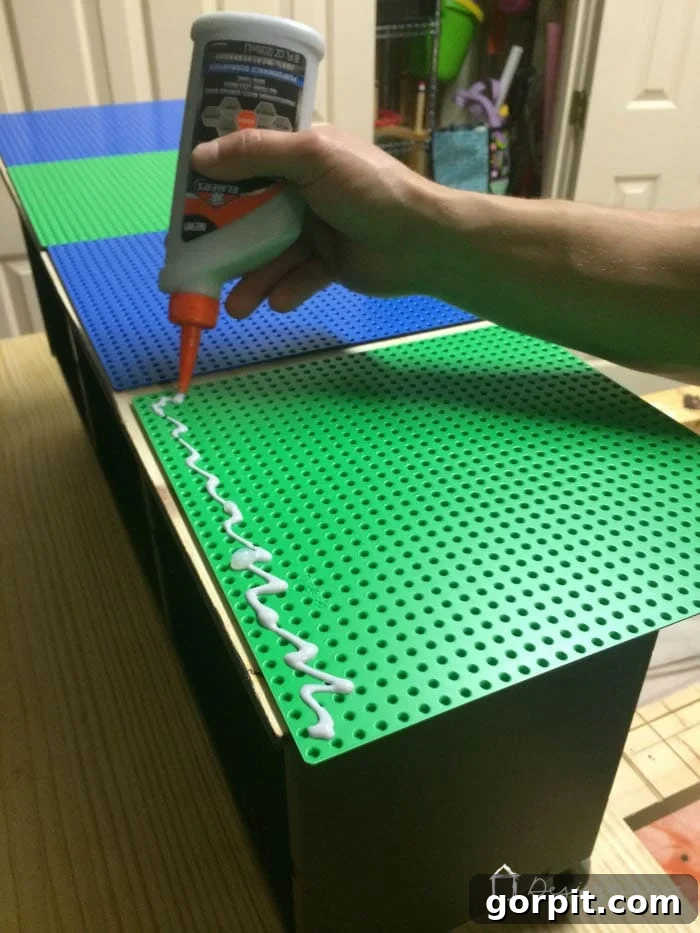
The final and most exciting step is to attach your LEGO base plates to the plywood tabletop. Ensure the plywood surface is clean and dry. Apply a robust, multi-surface glue like Elmer’s ProBond Advanced to the entire underside of each LEGO base plate. Spread the glue evenly to ensure full adhesion and prevent any lifting. Carefully place each base plate onto the plywood, aligning them precisely according to your initial pencil outlines. Press down firmly on each plate to ensure good contact with the glue. Once all four base plates are in position, place something heavy and flat on top of them – a stack of books, heavy cutting boards, or even small weights can work. This pressure is critical for creating a strong, lasting bond between the base plates and the plywood. Allow the glue to dry and cure completely overnight, or as recommended by the glue manufacturer. Patience here will ensure that your LEGO base plates are securely fixed, ready for countless hours of building and creative play.
The Transformative Power of Your New DIY Lego Table
That’s it! Can you believe how simple yet impactful this IKEA hack is? The transformation in our playroom has been nothing short of amazing. This DIY LEGO table has become an instant hit, not just as a piece of furniture, but as a catalyst for enhanced creativity and organization.
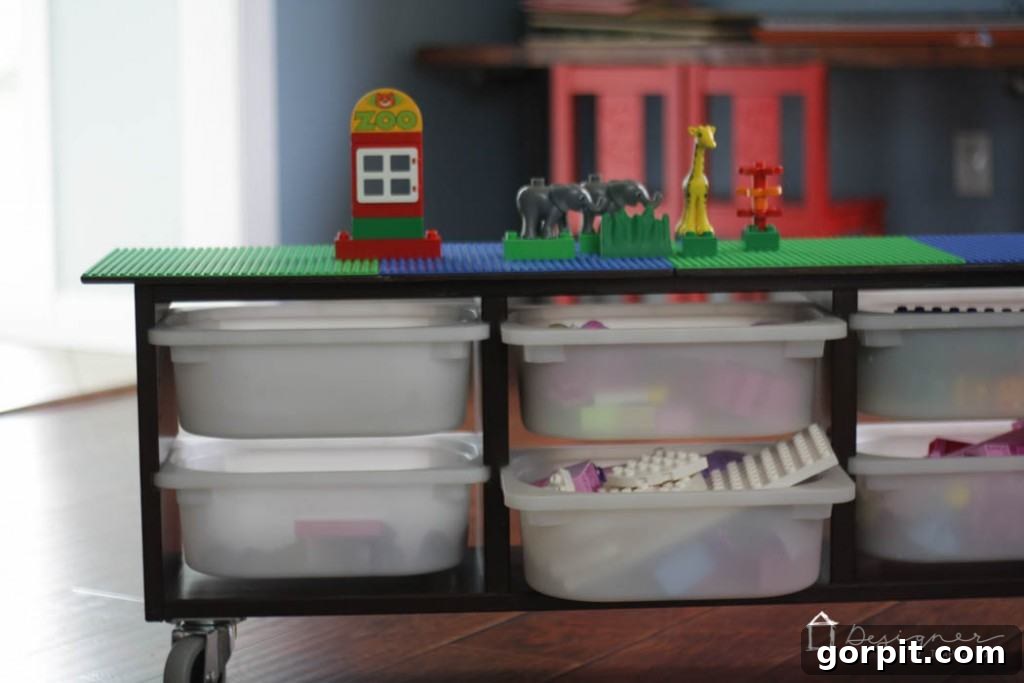
First and foremost, it keeps our girls’ LEGOs beautifully organized. The Trofast bins beneath the tabletop are perfectly sized to sort bricks by color, type, or even by specific sets. This dedicated storage means no more scattered bricks underfoot, making cleanup a breeze and reducing the constant hunt for that one specific piece. Everything has its place, fostering a sense of order that wasn’t possible before.
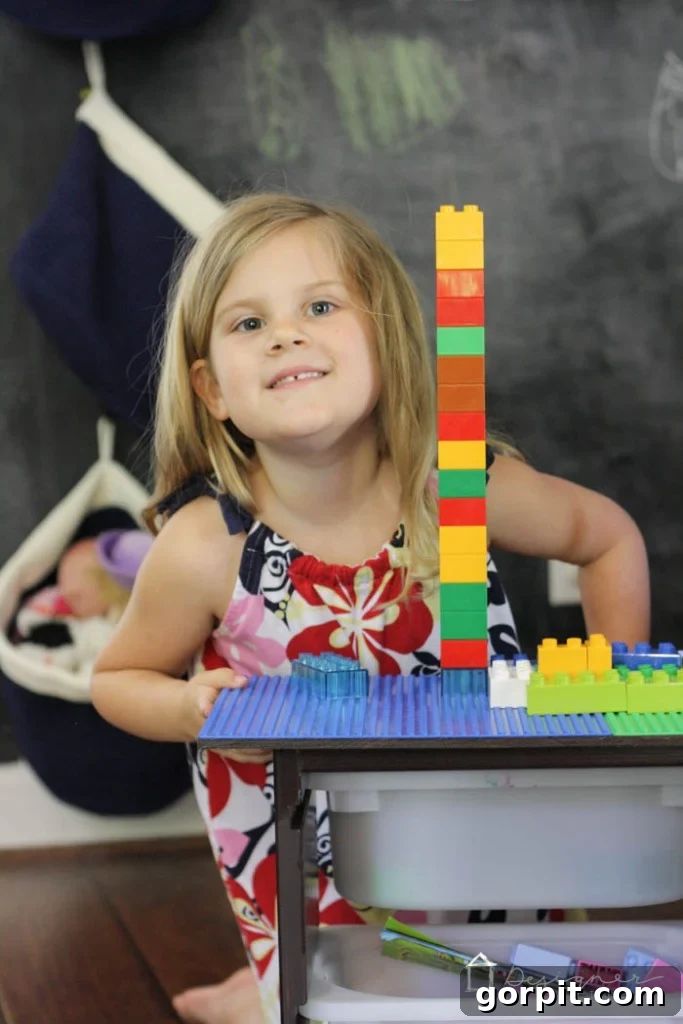
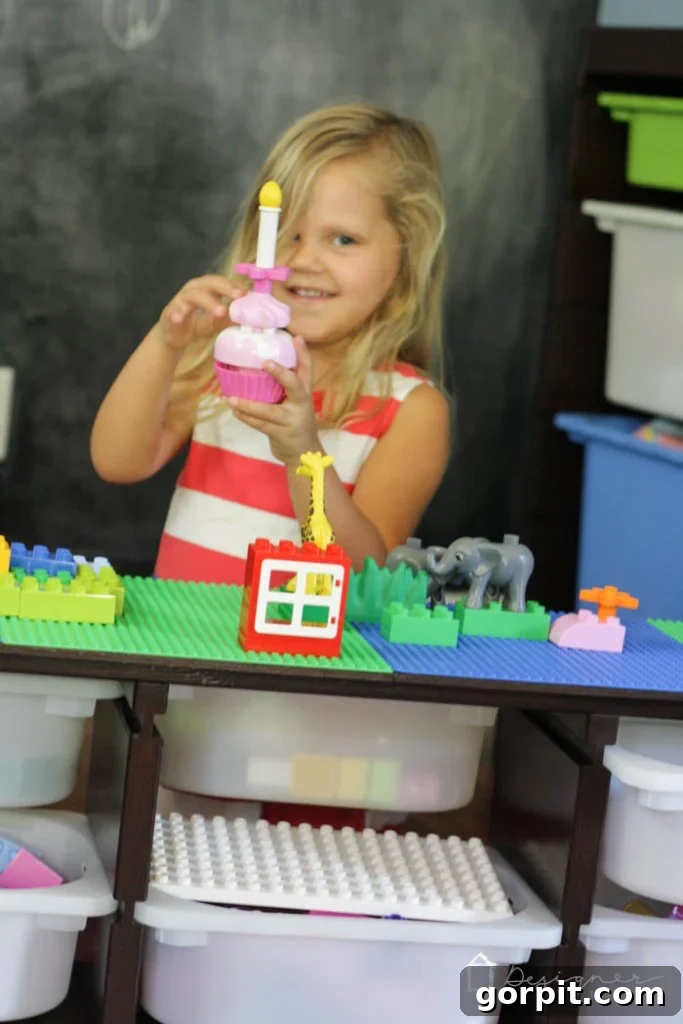
But the biggest win? Our girls are playing with their LEGOs far more than ever before! The dedicated, always-ready building surface invites them to sit down and create. The mobility of the table, thanks to the casters, is a feature they absolutely adore. They love moving the table around to different areas of the room – closer to a window for better light, next to a comfy armchair for collaborative building, or even into the living room for family play time. This freedom to relocate their creative hub makes playtime more dynamic and engaging.
Moreover, the structured play surface and organized storage have made them genuinely excited to engage in sorting activities. They eagerly separate LEGOs by color or return pieces to their respective kit bins, treating it as part of the fun rather than a chore. This teaches valuable organizational skills in a playful, unintrusive way. It’s a genuine win-win: a tidy room for us, and endless, imaginative fun for them!
What do you think of the finished product? We are absolutely thrilled with how it turned out and the positive impact it has had on our children’s play habits and our home’s organization.
Explore More Playroom Organization Solutions
If you’re continually seeking innovative and practical toy storage and playroom organization solutions, we invite you to explore some of our other popular posts. Creating a functional and inspiring play space can significantly enhance your child’s development and bring a sense of calm to your home. Discover more ways to keep clutter at bay and foster creativity:
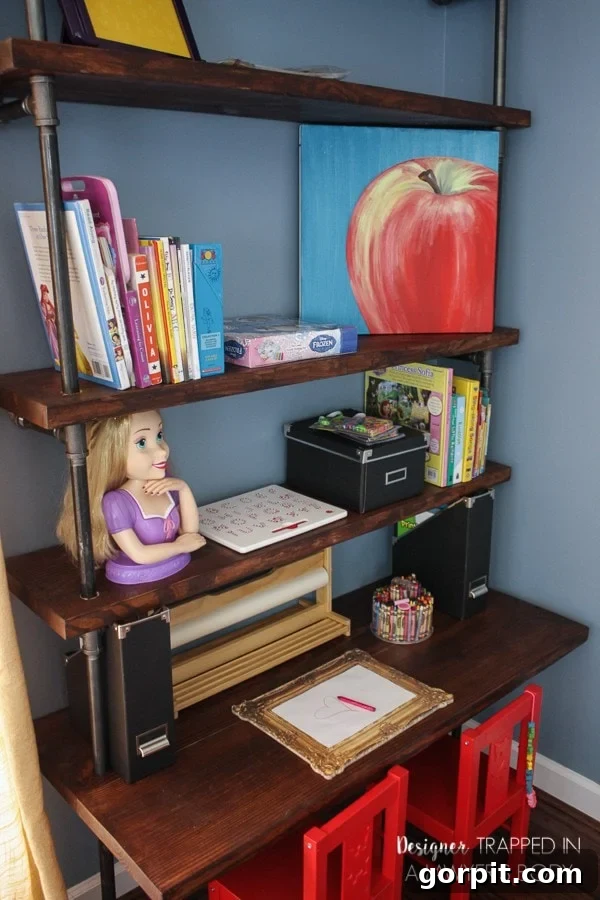
DIY Industrial Pipe Shelves and DesksThis project offers a stylish and robust solution for storage and study areas. Learn how to build custom shelves and integrated desks using industrial pipes, perfect for organizing books, toys, and craft supplies while providing a functional workspace for homework or creative projects.
|
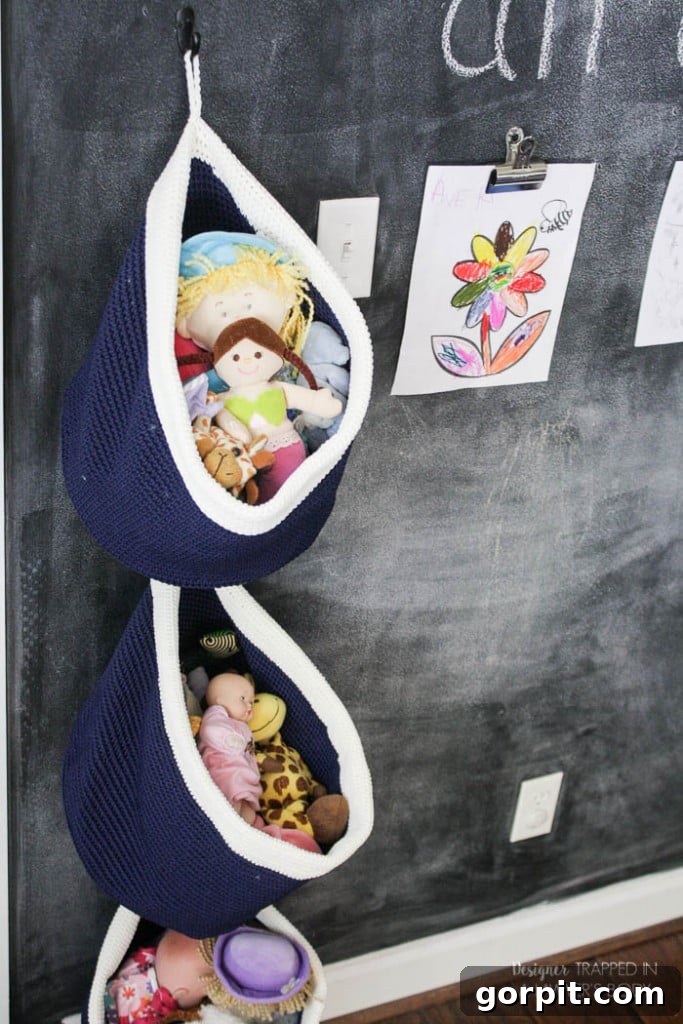
Easy Hanging Toy Storage SolutionsDiscover a brilliant and incredibly easy method for hanging toy storage that utilizes simple baskets. This vertical storage solution is ideal for any kid’s space, helping to free up floor space and keep toys accessible yet tidy. It’s a quick and effective way to manage clutter with minimal effort.
|
We hope these projects inspire you to create even more functional and beautiful spaces in your home! Don’t forget, if you found this DIY LEGO table project helpful and inspiring, be sure to pin it to your favorite Pinterest board so you can easily refer back to it later. Happy building and organizing!