
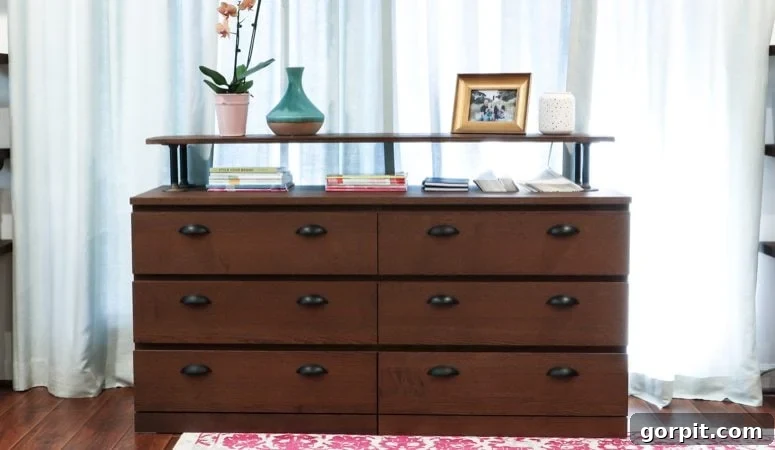
Stunning Ikea Malm Hack: High-End Industrial Dresser on a Budget
Hello, fellow DIY enthusiasts and budget-savvy decorators! I am absolutely thrilled to pull back the curtain on one of my most satisfying furniture transformations yet. If you’ve ever found yourself dreaming of designer pieces but cringing at the price tags, you’re in the right place. This project came from a familiar frustration, and the solution turned out to be an incredibly easy and affordable Ikea Malm hack that delivers an undeniably high-end industrial look.
Let’s be honest, furnishing a home can be an incredibly expensive endeavor. The hunt for quality, stylish pieces often leads to immediate sticker shock, making the dream of a beautifully curated space feel distant. When I embarked on setting up my new home office, I quickly realized the critical need for efficient storage. My craft supplies, camera equipment, and various tools needed a dedicated home, and drawers consistently outperform shelves for keeping clutter out of sight and organized. I envisioned a dresser that was not only functional but also visually striking.
My search inevitably led me down the rabbit hole of high-end furniture retailers. I stumbled upon this magnificent piece from Pottery Barn, and I was instantly captivated by its rugged charm and sophisticated industrial aesthetic.
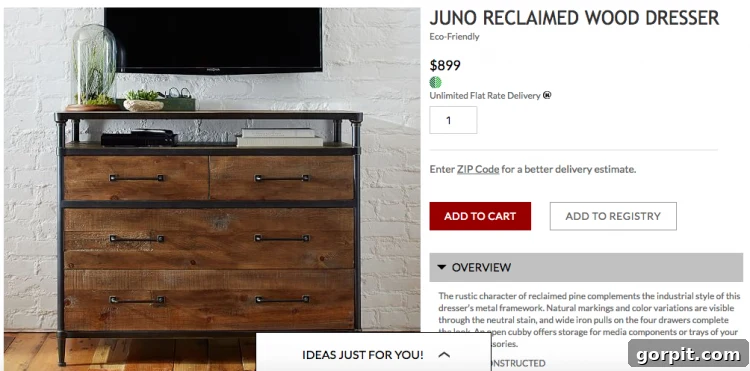
The dark wood, the robust metal accents, the clean lines – it was everything I wanted. However, reality quickly set in. The size wasn’t quite right for my needs, and the price tag? Absolutely prohibitive for my budget. It was clear I needed to find a creative way to achieve that sought-after industrial dresser look without breaking the bank. This challenge sparked the idea for what would become one of my favorite DIY projects to date. The best part? It was not only easy to execute but also incredibly budget-friendly, costing me a mere $286! That’s a fraction of the cost of its high-end inspiration. Stick around to the end for a full cost breakdown.
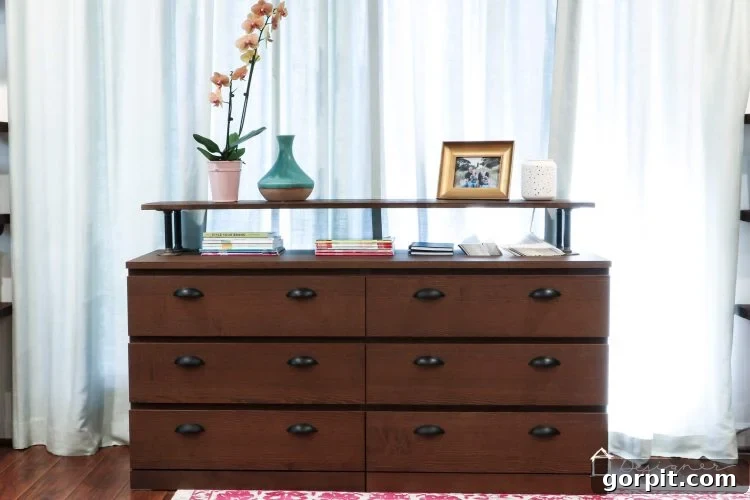
Who would have thought that a humble, ubiquitous Ikea Malm dresser could be transformed into such a sophisticated, high-end industrial statement piece? Its minimalist design makes it a perfect canvas for customization, offering endless possibilities for creative expression. This hack demonstrates just how versatile and adaptable Ikea furniture can be when you approach it with a little imagination and elbow grease. Ready to learn exactly how I achieved this incredible industrial dresser transformation? Let’s dive into the details!
This post contains some affiliate links for your convenience (which means if you make a purchase after clicking a link I will earn a small commission which helps keep my blog up and running but it won’t cost you a penny more)! Click here to read my full disclosure policy.
DIY Ikea Malm Hack: Crafting Your Industrial Masterpiece
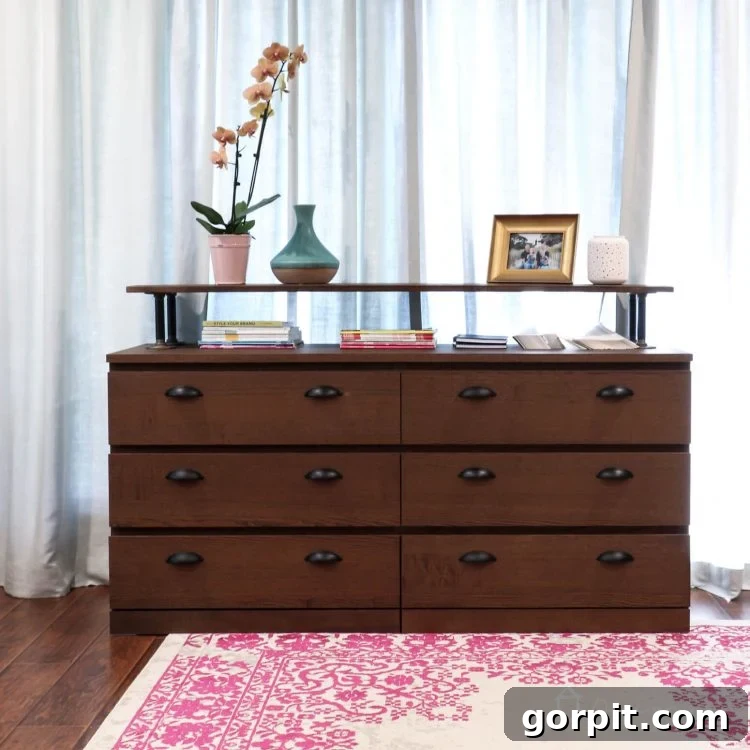
The beauty of this project lies in its simplicity and the dramatic impact it delivers. We’re taking the clean lines and sturdy structure of the Ikea Malm dresser and elevating it with industrial-inspired elements – a sturdy wooden top, rugged steel piping, and modern drawer pulls. The result is a piece that looks custom-made and far more expensive than its actual cost. This is more than just a dresser; it’s a testament to the power of DIY to create bespoke furniture that truly reflects your style.
Essential Materials for Your Industrial Malm Hack
Gathering all your materials before you start is key to a smooth and efficient DIY process. Here’s a detailed list of everything you’ll need to replicate this striking industrial dresser:
- 6-Drawer Ikea Malm Dresser: This is our foundation. I opted for the brown stained ash veneer finish, which provides a rich base color that complements the industrial aesthetic perfectly. Its sturdy construction and clean facade make it an ideal candidate for transformation.
- (12) Drawer Pulls: Specifically, I used this style of 2.5-inch pulls. Two pulls per drawer add a sophisticated, double-handle look that enhances the high-end feel. Choose a finish that matches your desired industrial vibe – matte black or brushed nickel are excellent choices.
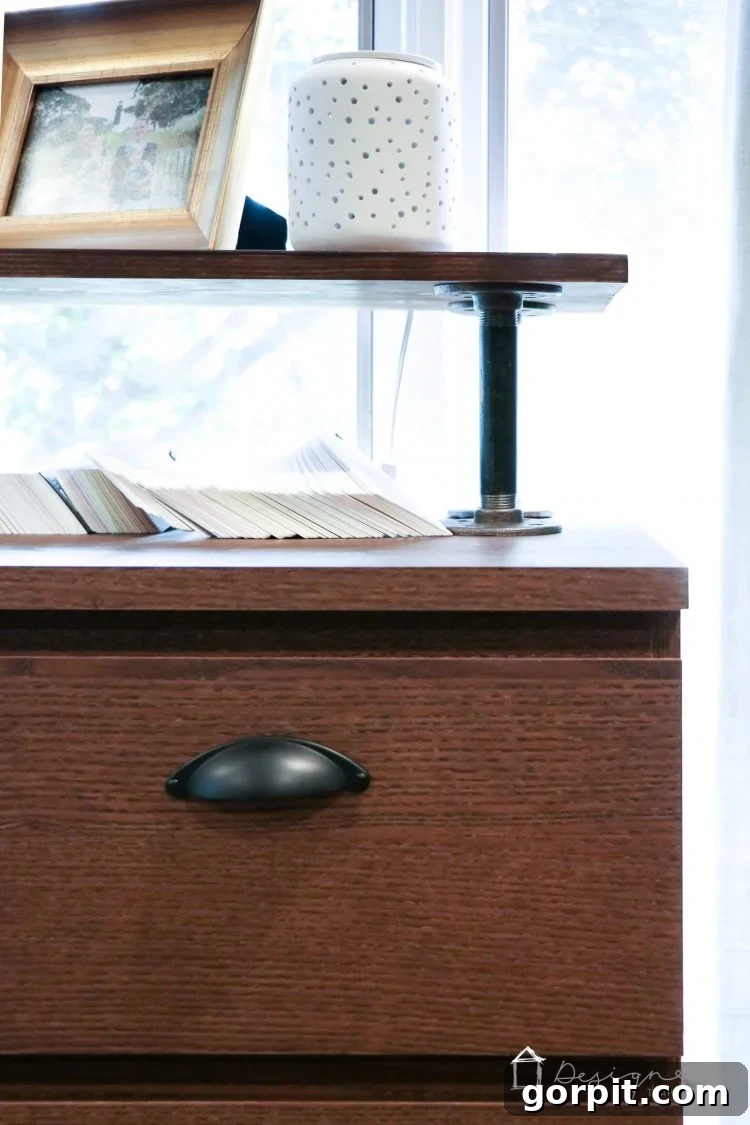
- (4) 3/4″ x 6″ Steel Pipes: These are the core of our industrial leg structure. The 6-inch length provides the perfect height for a substantial look without making the dresser too tall. Steel pipes add that authentic, raw industrial edge.
- 1 Piece of Wood for the Top: This will serve as a substantial and stylish top for your dresser. I found a piece of utility shelving for just $14.98, proving you don’t need expensive hardwoods. The key is to cut and stain it to the exact length of your Malm dresser for a seamless fit. Custom mixing stains I had at home helped me achieve a color that closely matched the Malm’s existing finish, creating a cohesive design.
- (8) 3/4 inch Steel Floor Flanges: These flanges are essential for securely attaching the steel pipes to both the wooden top and the top of the Malm dresser. They provide a stable base and contribute significantly to the industrial aesthetic.
- Self-Tapping Screws: You’ll need these for attaching the flanges securely. Self-tapping screws are ideal as they create their own hole as they’re driven into the material, making installation easier, especially when dealing with the Malm’s particle board.
- Drill Driver: An indispensable tool for drilling pilot holes for your drawer pulls and for driving in the self-tapping screws for the flanges. Make sure you have the appropriate drill bits.
Step-by-Step Guide to Your Malm Industrial Makeover
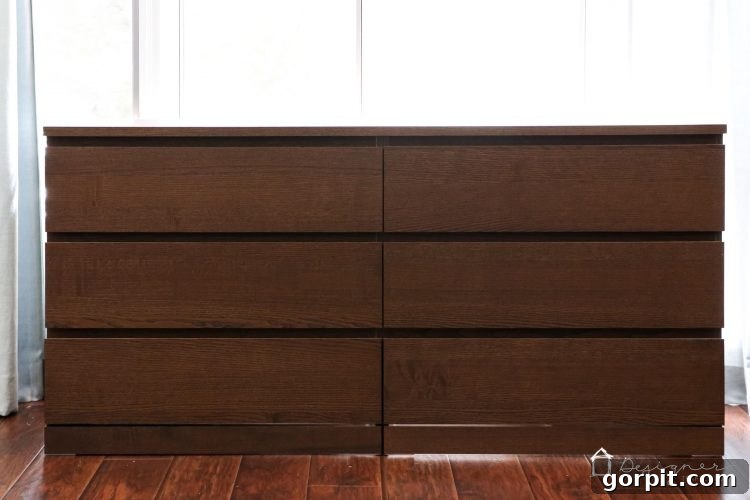
Before we dive into the hack, let’s take a moment to appreciate the humble beginnings. Here’s the Ikea Malm dresser in its original, assembled form. It’s undeniably plain and functional, but its robust construction makes it an excellent candidate for a dramatic transformation!
1) Prepare Your Industrial Components: Clean Your Pipes and Flanges
Before assembly, it’s crucial to thoroughly clean your steel pipes and flanges. These components often come coated with a protective layer of oil or grease from the manufacturing process. Failing to remove this residue can prevent paint or stain from adhering properly and might leave unsightly marks on your finished piece. Use a strong degreaser, mineral spirits, or even dish soap and hot water, scrubbing vigorously to ensure a pristine surface. Dry them completely afterwards to prevent rust.
2) Customize Your Dresser Top: Cut and Stain Your Wood Shelf
Take your utility shelving or chosen piece of wood and cut it to the precise length and width of your Ikea Malm dresser. This custom top will instantly elevate the look, adding weight and a more bespoke feel. Once cut, it’s time to stain. I custom-mixed a few stains I had on hand to achieve a rich, deep color that complemented the Malm’s brown stained ash veneer. Apply your stain evenly, wiping off any excess, and allow it to dry completely according to the product instructions. Consider adding a clear coat for extra durability and protection.
3) Precise Placement: Mark the Location for Your Drawer Pulls
Accuracy is key here for a professional finish. Each drawer on the Malm dresser will receive two 2.5-inch drawer pulls. Measure carefully to ensure they are evenly spaced and centered on each drawer front. I recommend marking the drill points with a pencil. A good trick is to create a template with painter’s tape or cardboard once you’ve found the perfect spacing for the first drawer, then reuse it for the rest to ensure consistency across all twelve pulls.
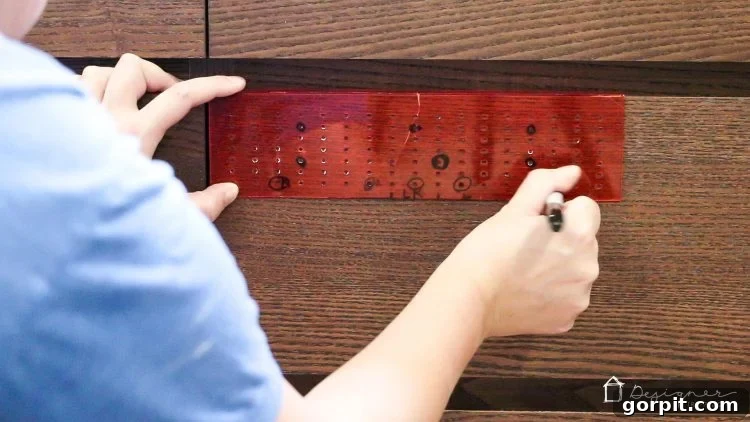
4) Secure Your Hardware: Drill Holes and Attach Drawer Pulls
With your marks in place, use your drill driver with an appropriately sized drill bit to create the holes for your drawer pulls. Always drill slowly and steadily to avoid splintering the veneer. Once all holes are drilled, carefully attach your drawer pulls from the inside of the drawer, tightening the screws firmly but not overly so, to prevent stripping. The addition of these sleek pulls immediately begins to transform the dresser, adding a touch of tailored elegance.
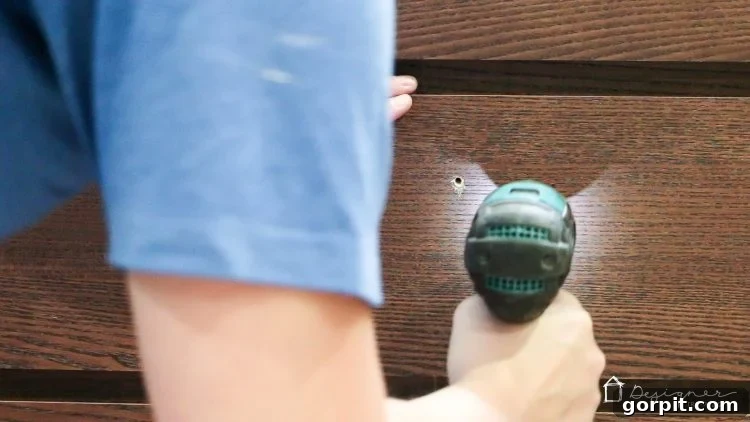
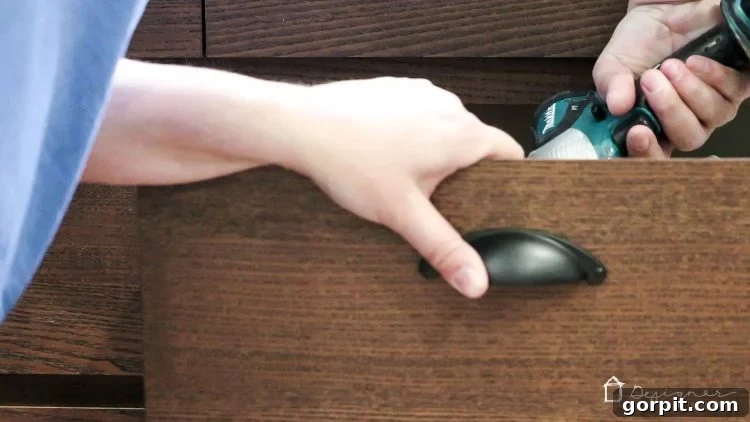
5) Build the Base: Attach Floor Flanges to the Wood Board
Flip your newly stained wood board upside down. Take four of your steel floor flanges and position one in each corner of the board. Ensure they are evenly spaced and positioned slightly in from the edges to provide a stable and aesthetically pleasing base for your pipes. Use self-tapping screws and your drill driver to firmly attach each flange to the wood. These will be the top anchoring points for your industrial legs.
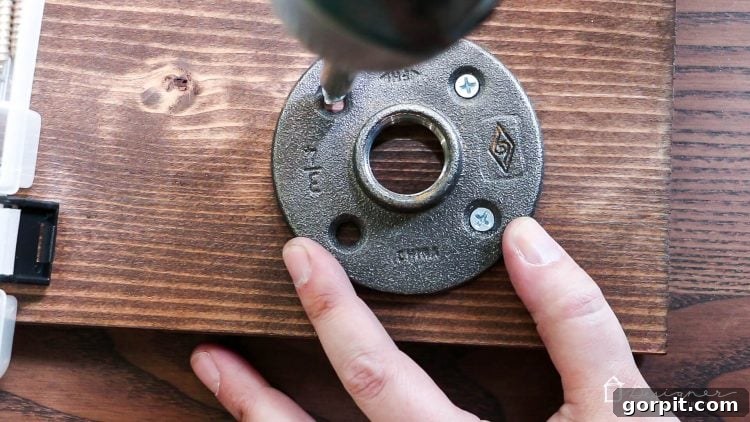
6) Assemble the Legs: Screw Pipes into the Flanges
Now, take your four 3/4-inch steel pipes and screw one into each of the flanges you just attached to the wooden board. Twist them until they are snug and secure. Make sure they are screwed in straight and evenly. This forms the upper section of your industrial leg structure, giving the dresser its distinctive floating appearance.
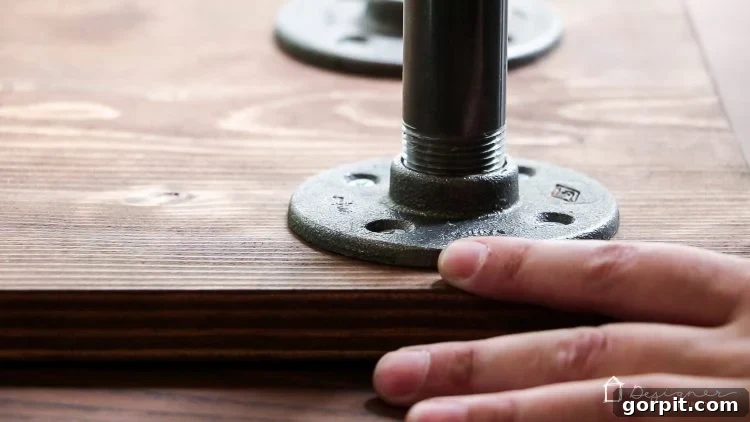
7) Prepare for Attachment: Attach More Flanges to the Pipes
On the free end of each of the four pipes, screw on the remaining four steel floor flanges. These flanges will serve as the attachment points to the top surface of your Ikea Malm dresser. Ensure these are also screwed on tightly and are facing in the correct orientation for securing.
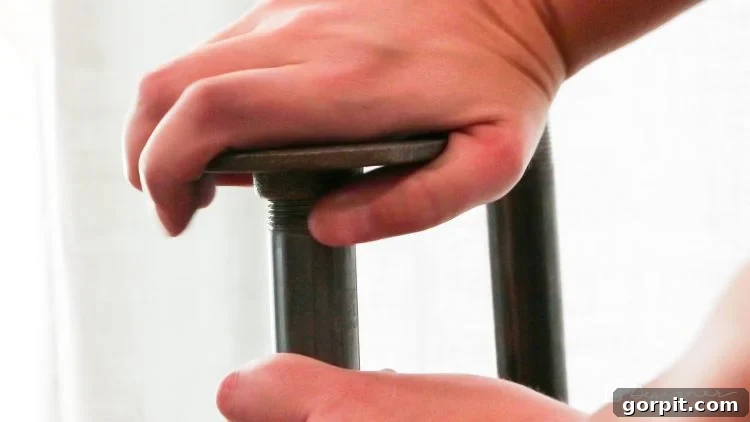
8) Final Assembly: Secure to the Malm Dresser
Carefully flip the entire assembly (wooden top with pipes and flanges) over. Position it on top of your assembled Ikea Malm dresser. This step requires precision: before you screw in the final set of flanges, use a level to ensure that each pipe is perfectly plumb (vertically level). This critical step prevents your dresser from looking lopsided or unprofessional. Once everything is perfectly aligned, use self-tapping screws to securely fasten the flanges to the top of the Ikea Malm dresser. Distribute the screws evenly for maximum stability.
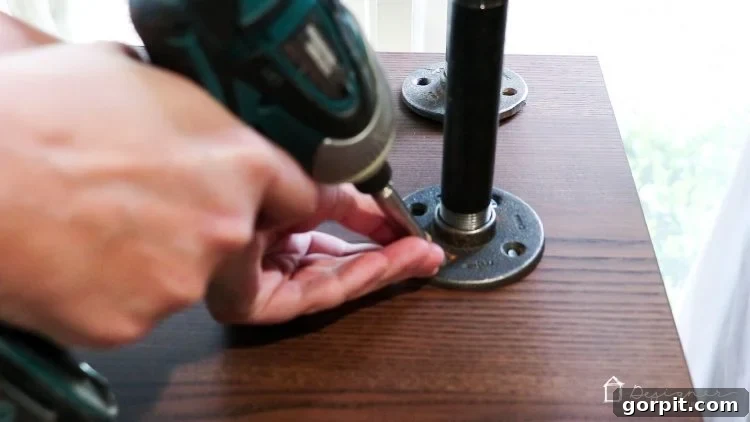
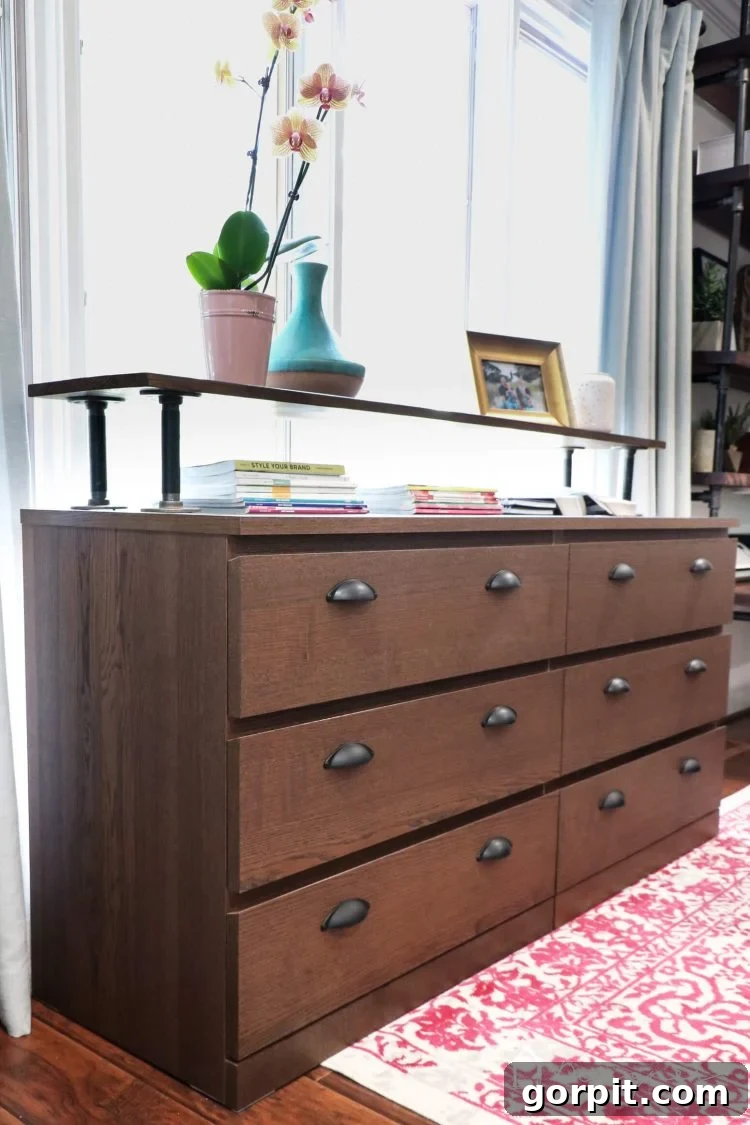
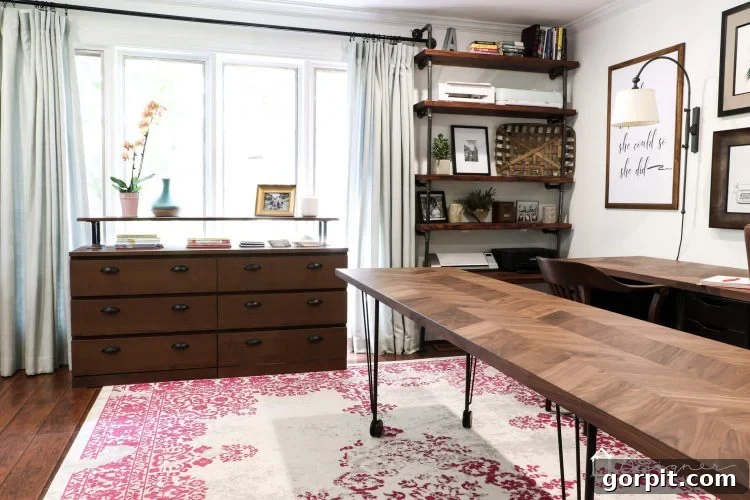
That’s it! In just a few straightforward steps, you’ve transformed a basic Ikea Malm dresser into a stunning industrial-chic storage solution. Isn’t this one of the most impactful and surprisingly easy Ikea Malm hacks you’ve ever come across? I’m absolutely smitten with the finished look, and I know you will be too!
Cost-Effective Design: A Detailed Cost Breakdown of This Ikea Malm Hack
One of the most compelling aspects of this DIY project is its incredible affordability, especially when compared to designer alternatives. Here’s a transparent look at exactly how much this high-end industrial dresser cost to create:
- Ikea Malm Dresser: $179 (The foundation of our project, offering great value even before the hack!)
- 12 Drawer Pulls: $28 (These small details make a massive impact on the overall aesthetic.)
- Wood Utility Shelf: $14.98 (An affordable piece of wood dramatically elevates the top surface.)
- 6 Pieces of Pipe: $13.12 (For clarity, the original list specified 4 pipes. If 6 were used for an alternative configuration, this reflects that. Assuming 4 pipes at approximately $3.28 each based on this total. Always double-check quantities based on your design for accuracy.)
- 8 Floor Flanges: $51.04 (These provide the crucial structural and aesthetic industrial elements.)
- TOTAL COST: $286.14
For just under $300, you get a robust, stylish, and highly functional storage piece that easily rivals furniture costing thousands more. This is an incredible value for a piece that offers so much storage and character, far surpassing the expense of the Pottery Barn inspiration that originally sparked this ingenious Ikea Malm hack!
The success of this project lies not just in the cost savings, but in the satisfaction of creating something truly unique with your own hands. It’s a perfect example of how strategic DIY can bring high-end design into your home without the premium price tag. The industrial elements, combined with the sleekness of the Malm, create a versatile piece that would look fantastic in a home office, a modern bedroom, or even a chic living room space.
If this project has sparked your creativity and inspired you to tackle your own Ikea Malm hack, be sure to pin it to Pinterest! This way, you can easily find these instructions again when you’re ready to transform your own space. Happy hacking!
