Transform Your Kitchen on a Budget: A Complete DIY Makeover Guide
Unleash Your Kitchen’s Potential with Paint: Our Budget-Friendly Renovation Story
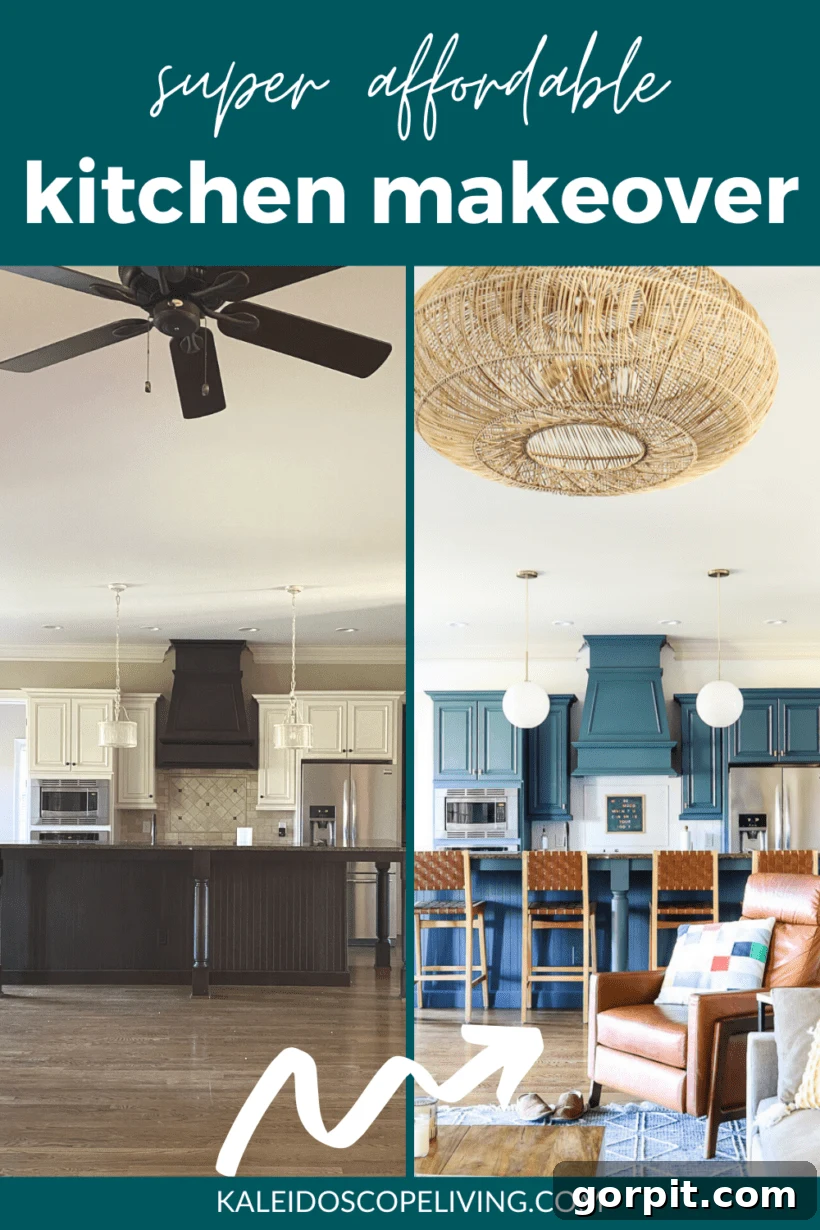
There’s nothing quite like the excitement of a home reveal, especially when it’s a project you’ve poured your heart into! Today, I’m thrilled to share our incredibly successful budget-friendly kitchen makeover. Moving into a new home always presents a canvas of possibilities, and our latest residence, which we acquired just three months ago, certainly had its share of renovation potential. Among the many changes we envisioned, transforming the kitchen was at the top of our list. If you followed our initial Part 1 and Part 2 house tours, you already know the prevalent beige and brown tones throughout, and our kitchen was no exception. It was a space yearning for a fresh, modern update, but without the hefty price tag and disruption of a full-scale renovation.
Our goal was to demonstrate that you don’t need an unlimited budget to achieve a dream kitchen. With strategic planning, a lot of paint, and a focus on functional upgrades, we completely revitalized our kitchen. We tackled everything from painting the existing kitchen cabinets and the tile backsplash to updating the hardware and light fixtures. The result? A kitchen that looks entirely new, vibrant, and perfectly aligns with our personal style, all while being incredibly budget-conscious.
The Drab Before: A Beige & Brown Kitchen’s Plea for a New Look
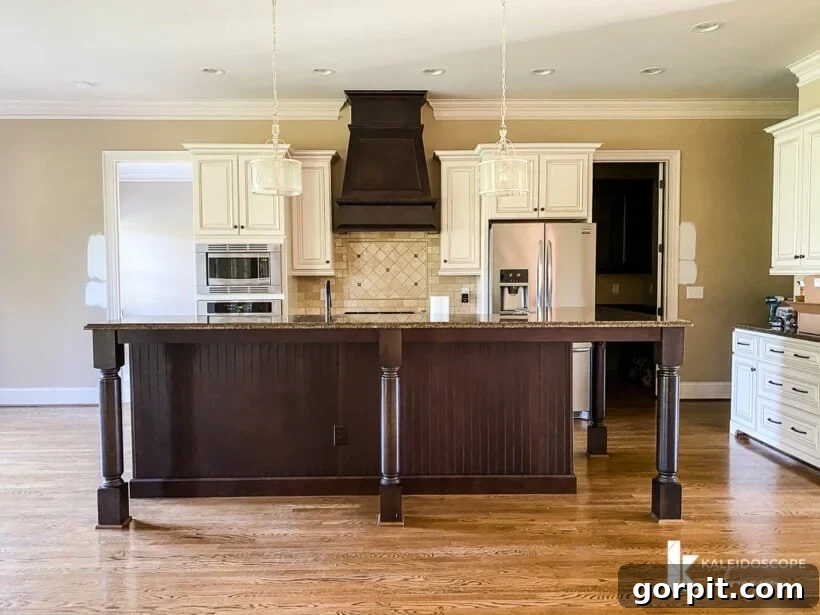
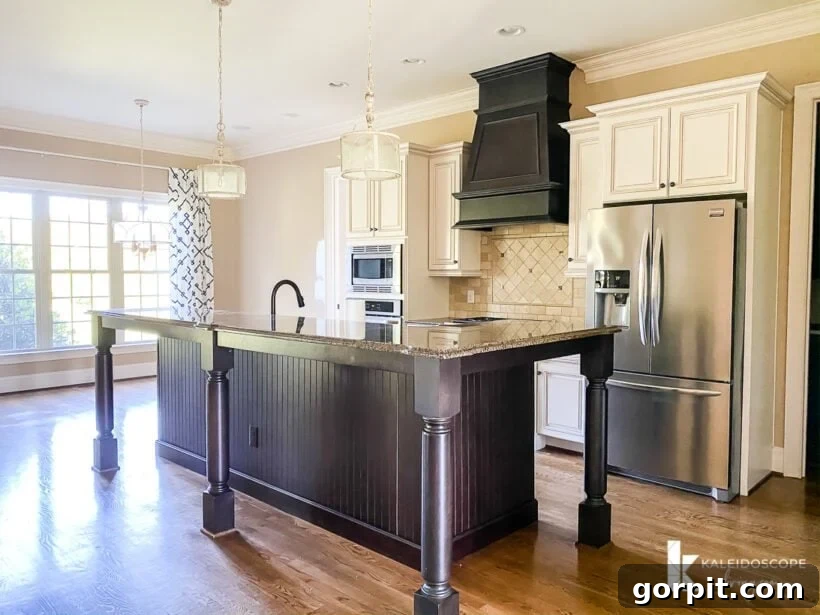
When we first closed on the house, the kitchen presented a rather dated aesthetic, dominated by a palette of brown and beige. The walls, cabinetry, and even the backsplash contributed to a heavy, somewhat uninspired atmosphere. It felt enclosed and lacked the bright, airy feel we desired for our main living space. This wasn’t just about color preferences; it was about creating a functional, inviting heart for our home, which the original design simply didn’t achieve.
This post contains affiliate links for your convenience. Click here for my full disclosure policy.
Small Changes, Big Impact: Brightening Our Kitchen Piece by Piece
Our kitchen transformation began with a series of smaller, yet impactful, updates. Even before we officially moved in, we had the brown walls repainted a crisp white. This single change instantly breathed new life into the space, making it feel significantly larger and brighter. It was a foundational step that allowed us to better visualize the next phases of our makeover.
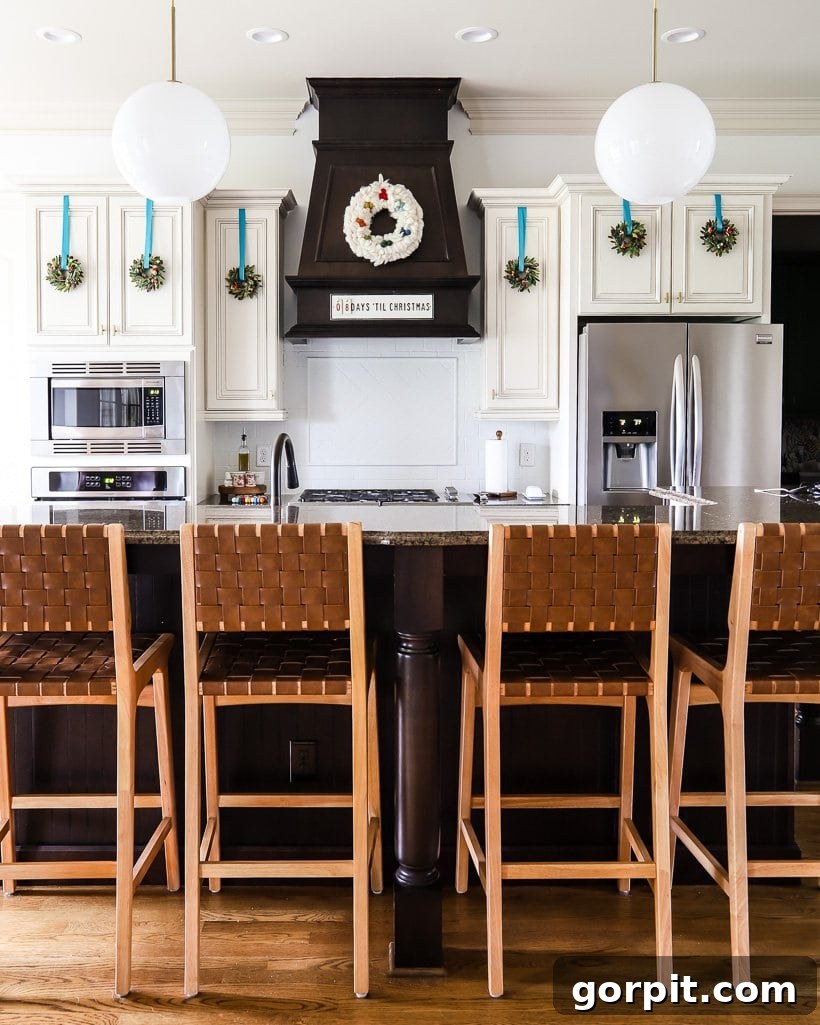
Just a few days before Christmas, my daughters and I tackled another significant project: painting the brown stone tile backsplash white. This DIY effort dramatically lightened the entire kitchen, providing a clean, modern backdrop that perfectly complemented the newly painted walls. If you’re curious about the process, I even shared a fun Instagram Reel documenting our backsplash painting adventure, and you can find my comprehensive tutorial for painting tile backsplashes here. Around the same time, we also updated the cabinet hardware and replaced the outdated pendant lights with more contemporary fixtures. These early adjustments worked wonders, allowing the kitchen to begin reflecting “us” just in time for the holidays.
The new cabinet hardware and pendant lights below were carefully chosen to enhance the fresh aesthetic we were building. They provided subtle yet powerful touches that modernized the entire look without requiring extensive demolition or expense.
Click on any image for full product details.
The Ultimate Transformation: Painting Kitchen Cabinets with Fusion Mineral Paint
While the initial tweaks made a significant difference, the ultimate plan for our kitchen makeover always revolved around one major undertaking: painting the kitchen cabinets. I knew this step would be the “BIG TRANSFORMATION,” and I was absolutely right! The impact was nothing short of incredible. For those eager to replicate this process, I diligently followed my established method for painting kitchen cabinets, which includes step-by-step instructions. Additionally, you can delve deeper into the process by watching this IGTV video where I answered common questions about cabinet painting, or check out this Instagram story highlight dedicated entirely to my cabinet painting journey. Plenty of resources are available to guide your own cabinet painting project!
For this project, I chose Fusion Mineral Paint in the exquisite shade of Seaside. This paint proved to be an absolute game-changer. I achieved full, beautiful coverage with just a single coat, requiring only four pints to transform every cabinet in our entire kitchen. For the crucial topcoat, I opted for the Natural Stain and Finishing Oil, which, impressively, only took one small can for the entire space. I completed the entire painting process by myself over three partial days – a remarkably efficient timeline for such a dramatic transformation. The minimal prep required, typically just a clean surface and a light hand-sanding, makes Fusion Mineral Paint an ideal choice for DIY enthusiasts looking for professional-looking results without extensive labor.
EXCLUSIVE DISCOUNT
While I’ve never been sponsored or paid by Fusion Mineral Paint, they have graciously extended a special offer to my readers: a 10% discount. This discount will be automatically applied to your order when you click and order directlyhere. Remember, a little Fusion Mineral Paint goes a very long way. As mentioned, we only used four pints for the entire wood surface of our kitchen cabinets as part of this budget-friendly makeover. The durability of this paint is also exceptional; I’ve used it in other projects, like Thea’s kitchen, where a light sanding was the only prep, and her cabinets remain in perfect condition with no peeling or chips years later. It’s truly a testament to the paint’s quality and ease of use.
Click on any image for full product details.
Fusion Mineral Paint stands out as one of only two paints I confidently recommend for kitchen cabinets. While you can read about the other highly effective paint method I’ve used for cabinets in this post, I must admit a strong preference for Fusion Mineral Paint since discovering it. Its streamlined process, requiring fewer steps and only a single layer of topcoat, makes it incredibly efficient for DIY projects. Both methods, however, deliver exceptional durability and a beautiful finish, ensuring your painted cabinets will stand the test of time and daily use.
Now, let’s dive into the exciting part: seeing the stunning transformation!
Our Stunning Kitchen Makeover Reveal: A Fresh & Functional Space
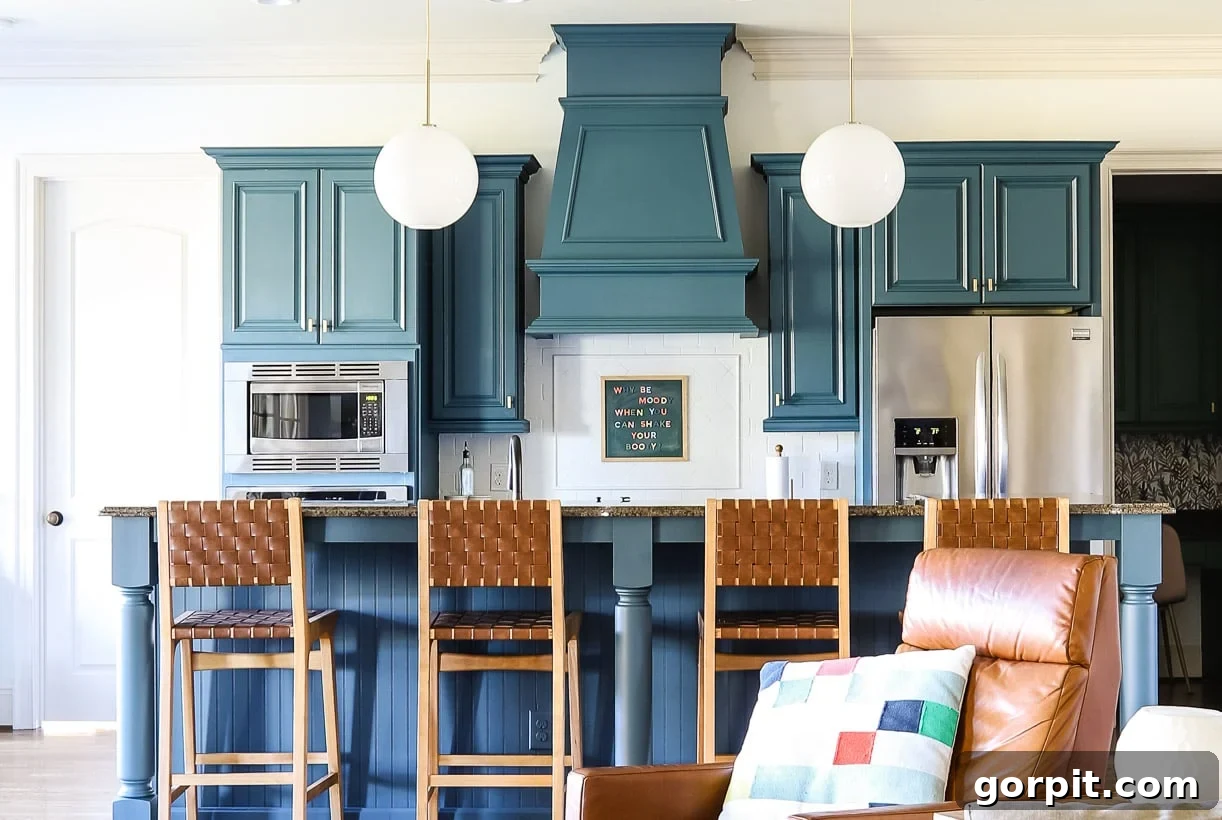
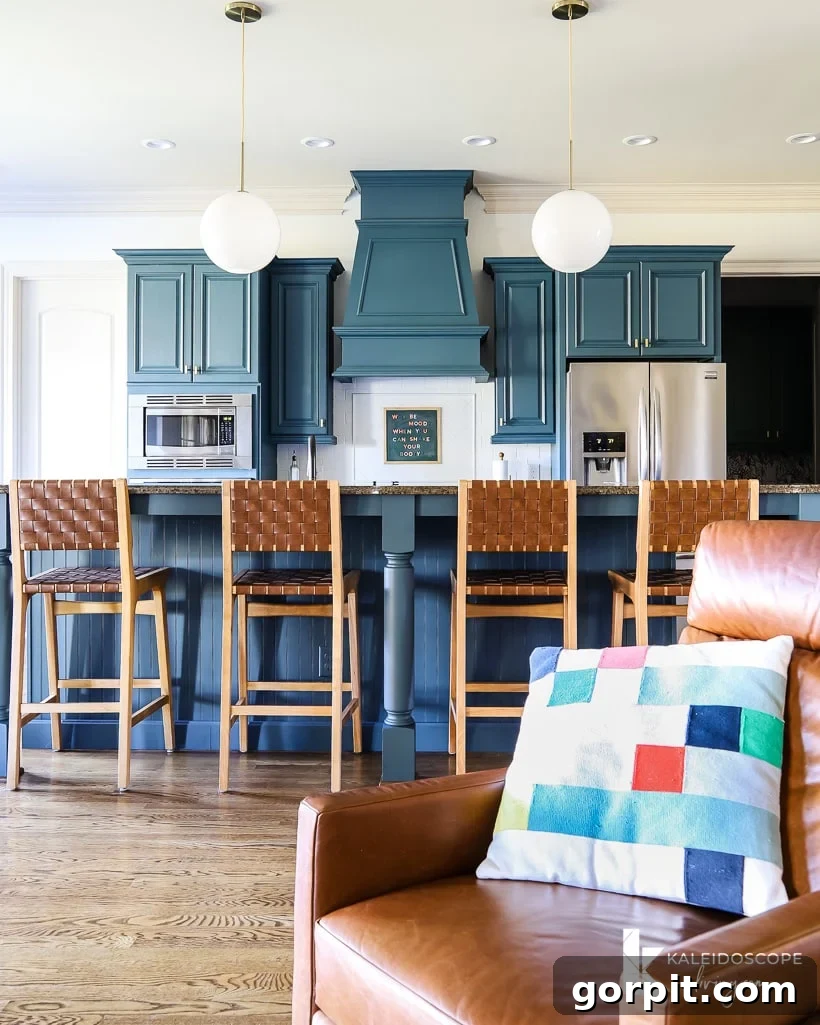
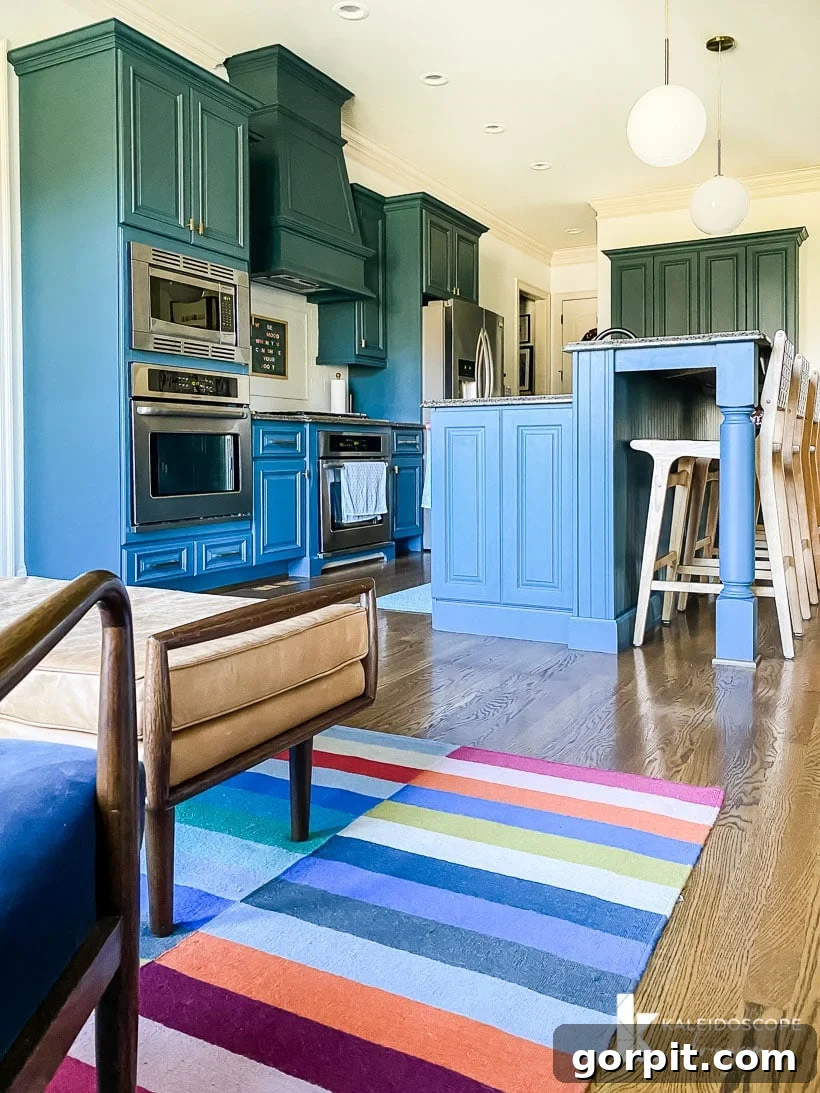
Prepare to be amazed by the “after” shots of our kitchen! The Seaside color, which is one of my absolute favorite blue paint colors, truly comes to life in this space. It’s a gorgeous greenish-blue shade that possesses a captivating chameleon-like quality, subtly shifting its hue depending on the time of day and how the natural light strikes it. Our cabinets can appear more green or more blue, entirely influenced by the lighting and the angle from which they are viewed. These variations are incredibly subtle and utterly lovely in person, adding depth and interest to the kitchen’s palette.
However, I must offer a small disclaimer about photography: for some inexplicable reason, these subtle shifts appear much more pronounced and even “harsh” through a camera lens. You’ll likely notice this phenomenon in some of the photos below! The cabinets might even seem to be different colors within the *same* photograph, purely due to how the light interacts with them. While I wish I possessed the skills of a professional photographer to perfectly capture what my eyes perceive, I don’t. So, please take my word for it: your eyes will experience the color of these cabinets quite differently and much more beautifully than what a camera can sometimes convey.
The first two photographs are perhaps the most accurate representations of the true Seaside color, closely matching how the paint chip itself appears.
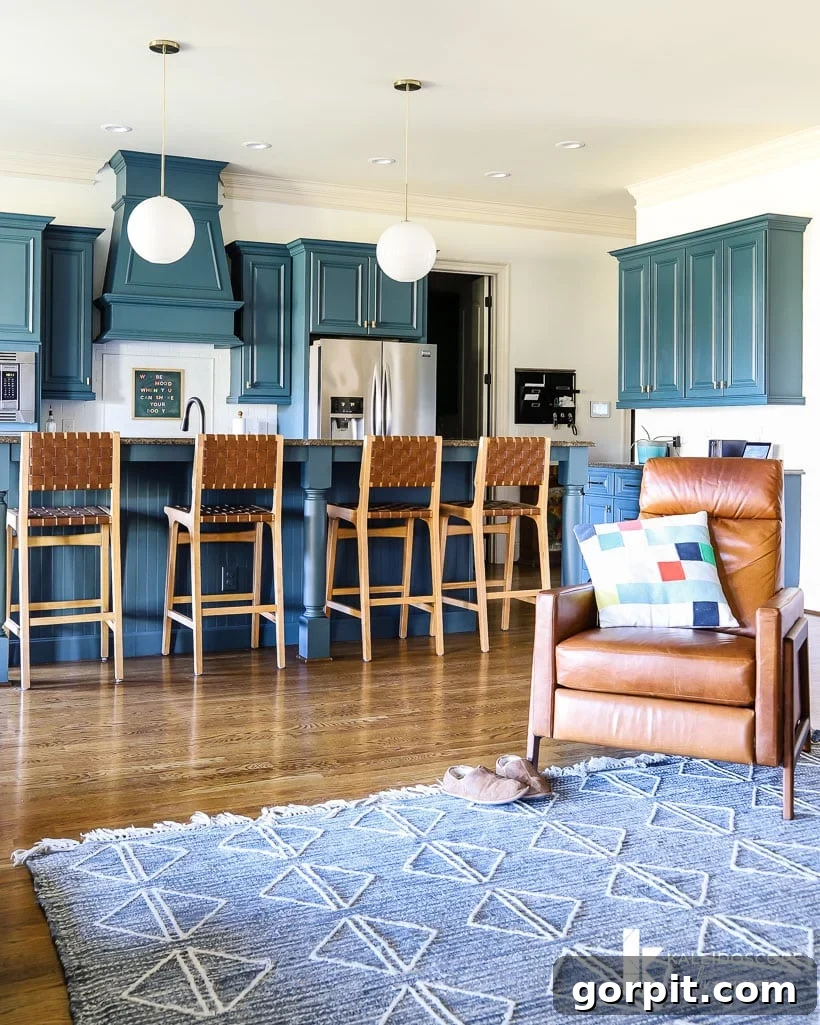
I absolutely adore the view below, which offers a delightful glimpse into our built-in office area, a space I also updated with a makeover back in November. In this shot, the upper cabinetry accurately displays the true Seaside color. However, notice the bright light streaming onto the island and the cabinets to the right? See how it makes them appear distinctly bluer? It’s a photographic anomaly that doesn’t reflect the actual color in person, but I wanted to be transparent about it!
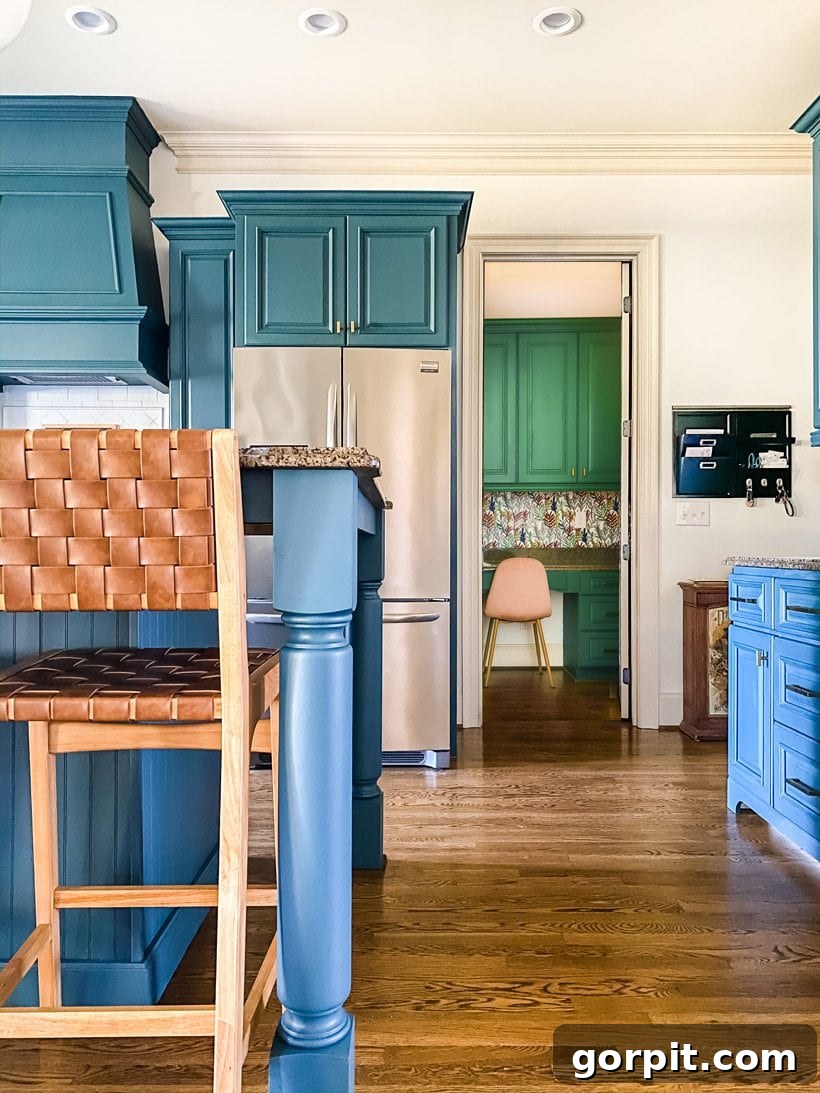
The photos below exhibit a similar lighting/color discrepancy, but I couldn’t resist sharing these additional angles so you could appreciate the overall transformation from various perspectives.
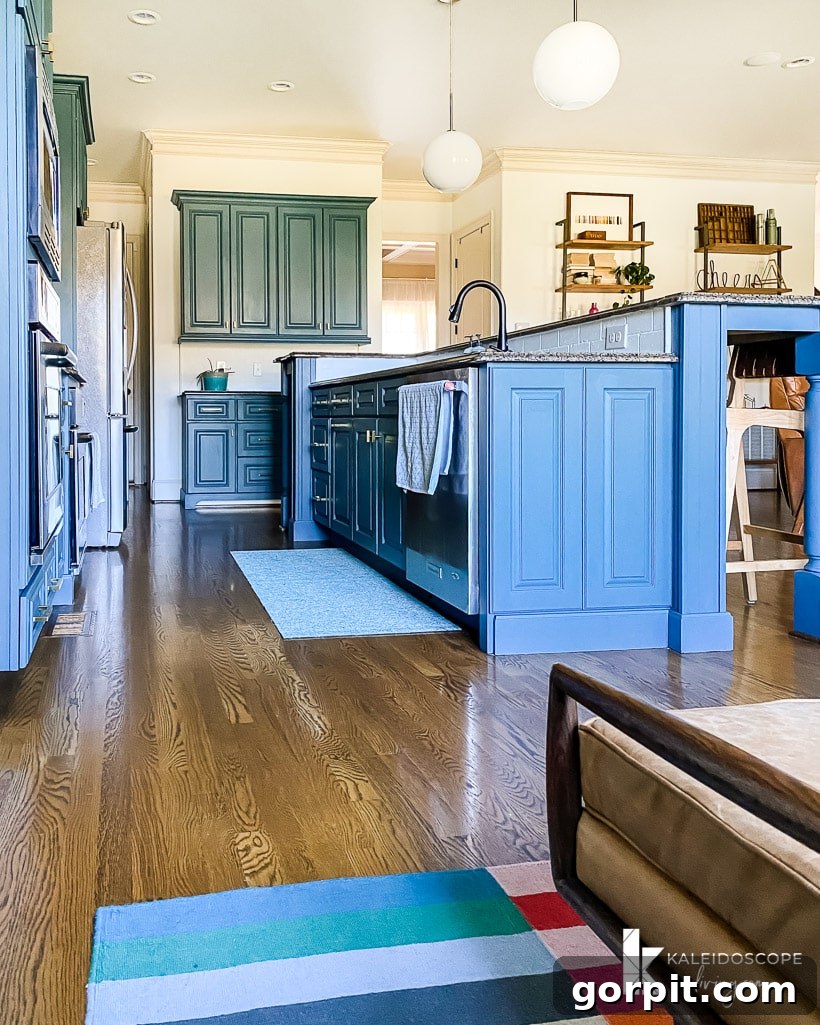
Alright, let’s get back to a photo that beautifully captures the true essence of our kitchen without any strange lighting or color issues!
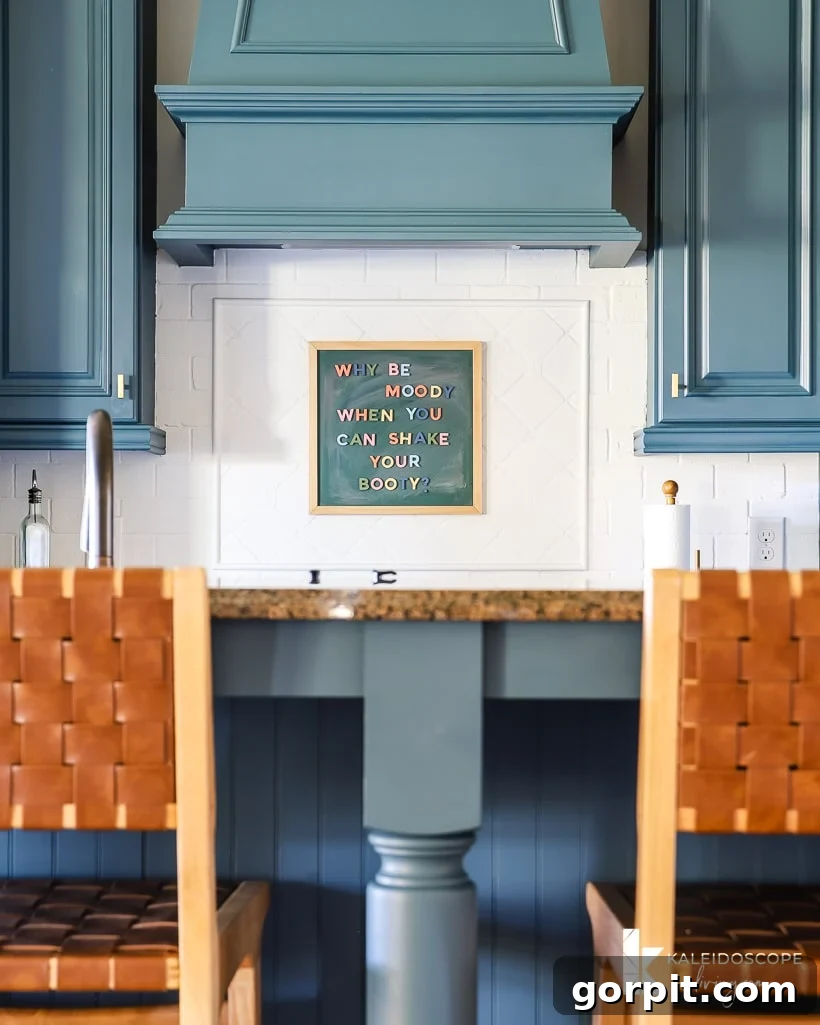
Beyond Aesthetics: Maximizing Kitchen Functionality with Smart Organization
If you’re following me on Instagram, you already know that our budget-friendly kitchen makeover wasn’t solely about making it visually appealing. We placed a substantial focus on enhancing its function, a crucial decision given that we don’t plan a full gut renovation for this kitchen, unlike our previous house. This meant embarking on a quest for the perfect interior drawer and cabinet organizers, and I’m proud to say, we absolutely nailed it! Even Joe, who can be quite discerning, was thoroughly impressed.
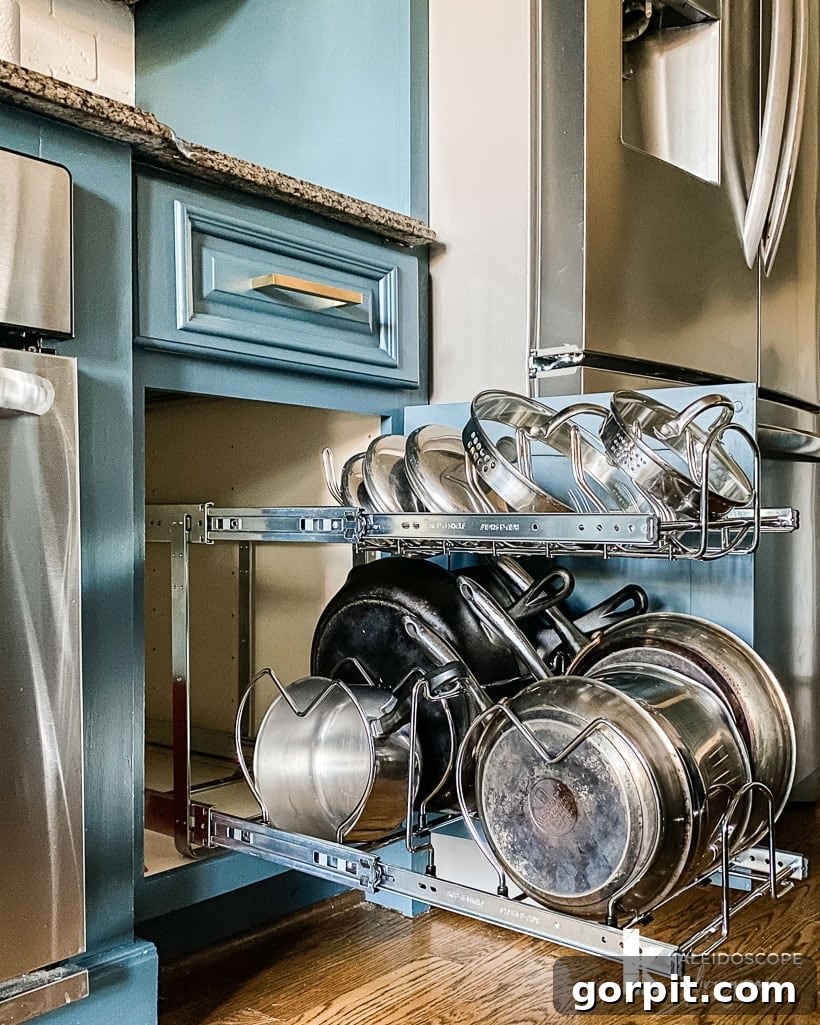
Our strategy involved implementing several innovative organizing solutions that have completely transformed how our kitchen operates day-to-day. We started by installing a brand-new pull-out trash can and recycling system, which instantly tidied up the area and made waste management effortless. The under-the-sink area, often a chaotic catch-all, was transformed with a dedicated organizer, reclaiming valuable space and making essentials easily accessible. For our cookware, we introduced both a pots and pans organizer and a double-pull out system for larger items, eliminating the dreaded stack-and-rummage routine. These additions have dramatically improved the flow and efficiency of our kitchen.
You can view photos of all these incredible organizing solutions in action below. For a more interactive experience, be sure to watch this story highlight where I demonstrate and discuss how everything is used! Links to all the cabinet organizers are also provided below for your convenience.
Click on any image for full product details.
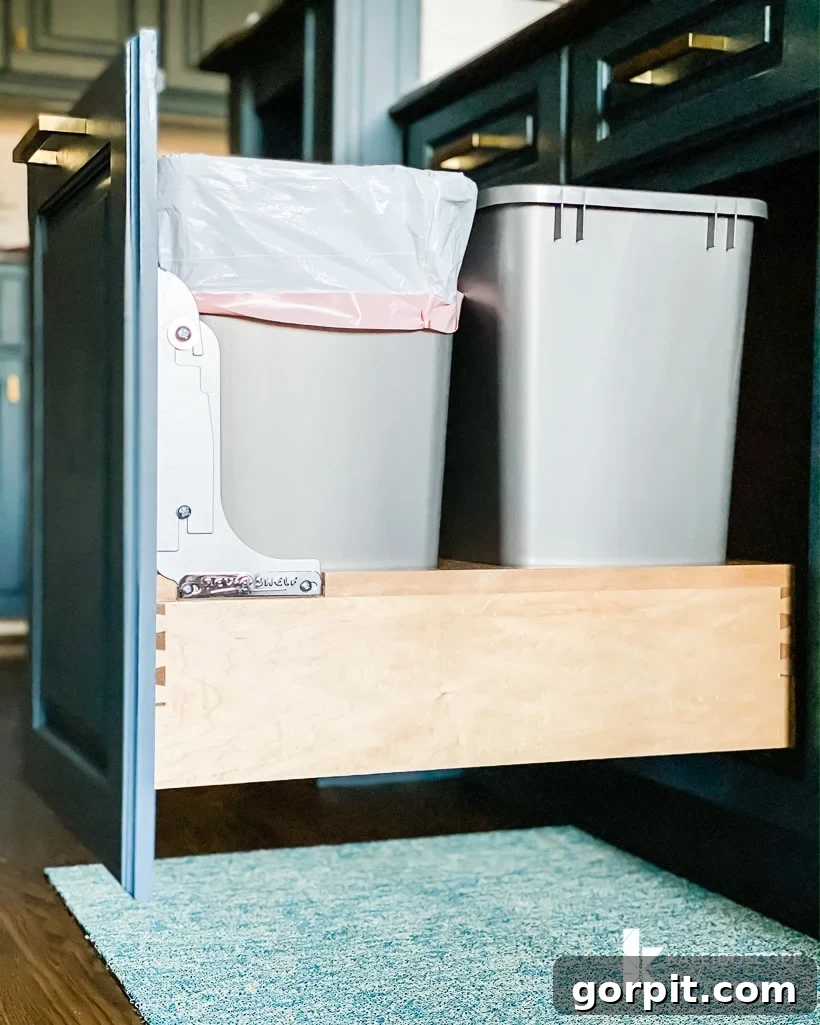
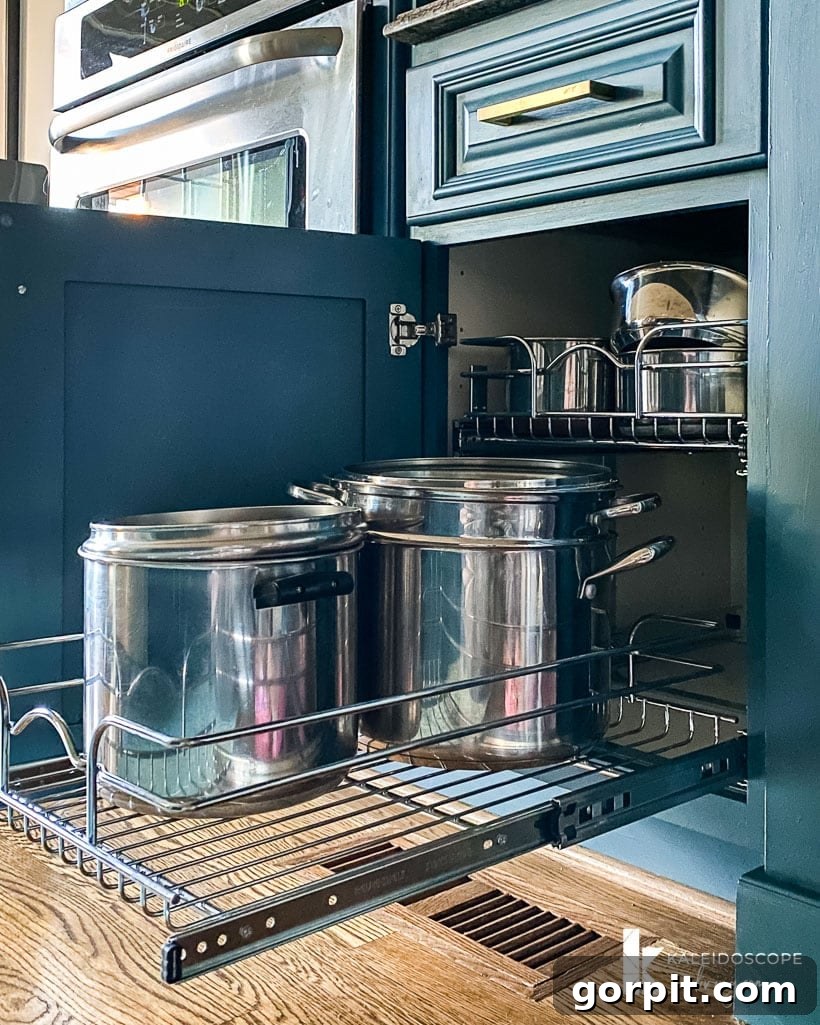
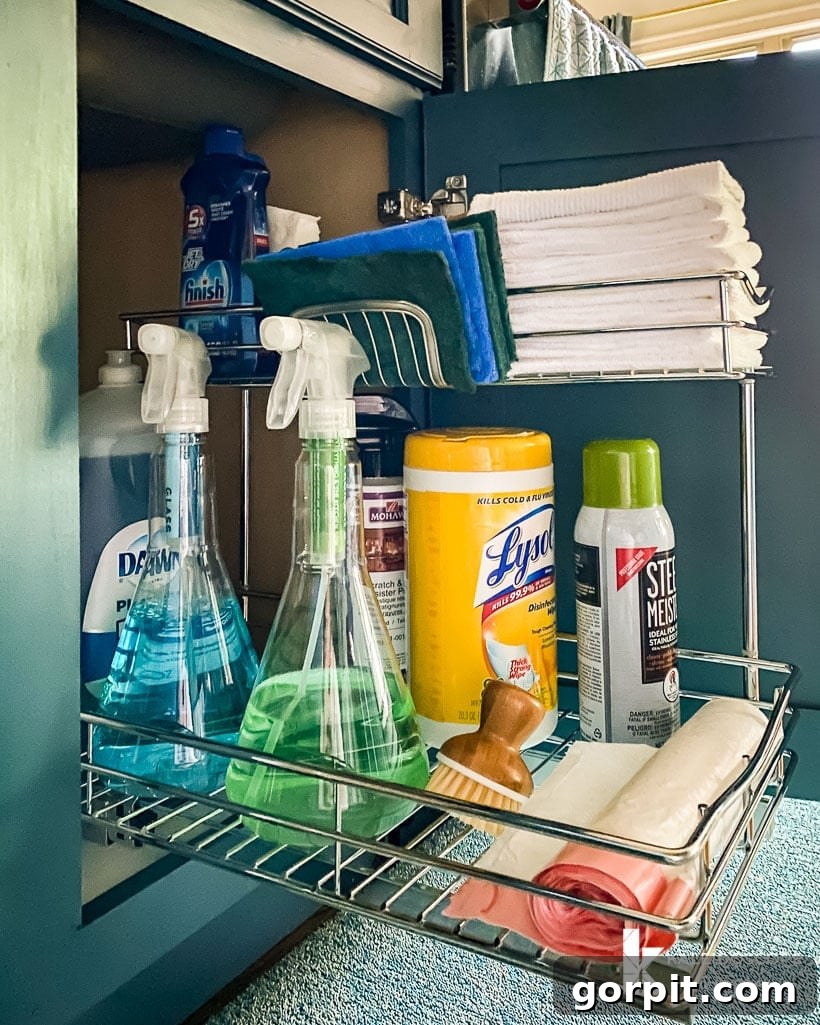
We also put considerable effort into maximizing our drawer storage, a critical need given the limited number of drawers in the main work zone of our kitchen. Finding the right solutions here was paramount to creating a truly efficient space. These are the drawer organizers that allowed us to make every inch count:
Click on any image for full product details.
My standout discovery was the most AWESOME space-saving utensil and knife storage system. This ingenious product allowed us to consolidate two full drawers’ worth of items into a single, compact drawer! Yes, you read that right – all of our utensils AND knives now reside neatly in one small drawer. And, critically, the drawer still opens and closes with perfect ease. I even demonstrate this seamless functionality in my Instagram stories, which you can watch HERE.
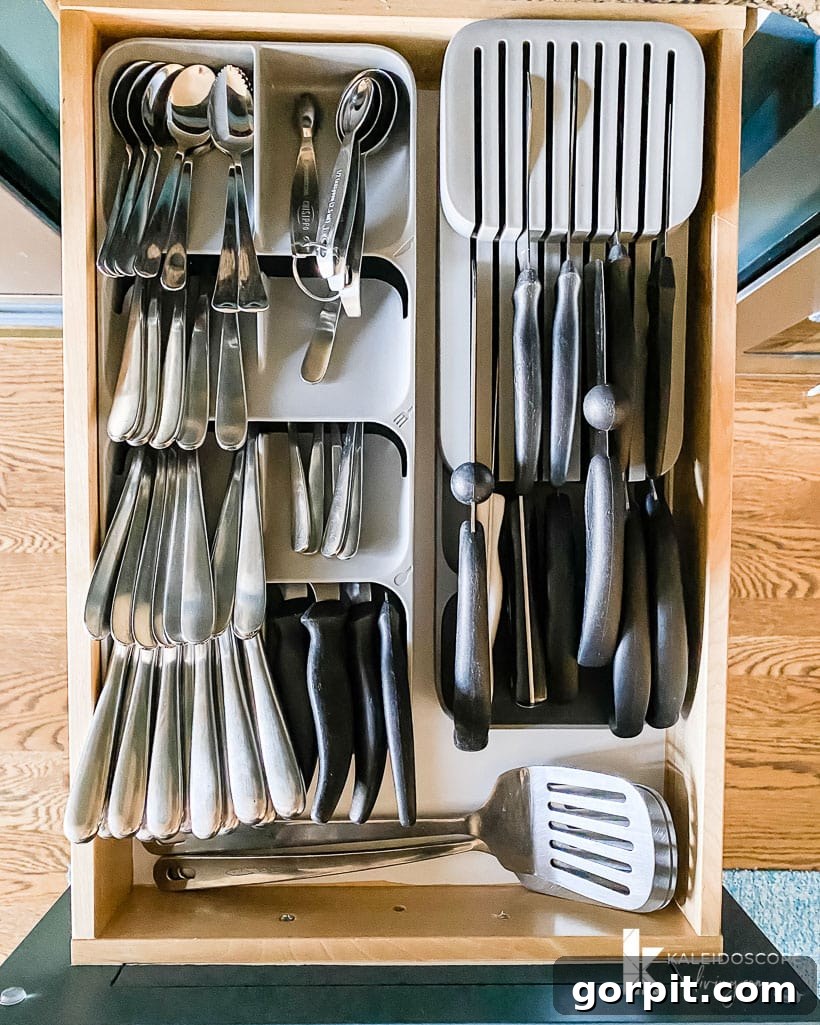
I also stumbled upon these incredibly practical clear stacking organizers. They proved invaluable for condensing a variety of our miscellaneous kitchen items. Their clever design features a top stack that smoothly slides back and forth, and can even be completely removed, providing effortless access to the contents stored below. These organizers have been a true revelation for tidying up those odds and ends that often clutter kitchen drawers.
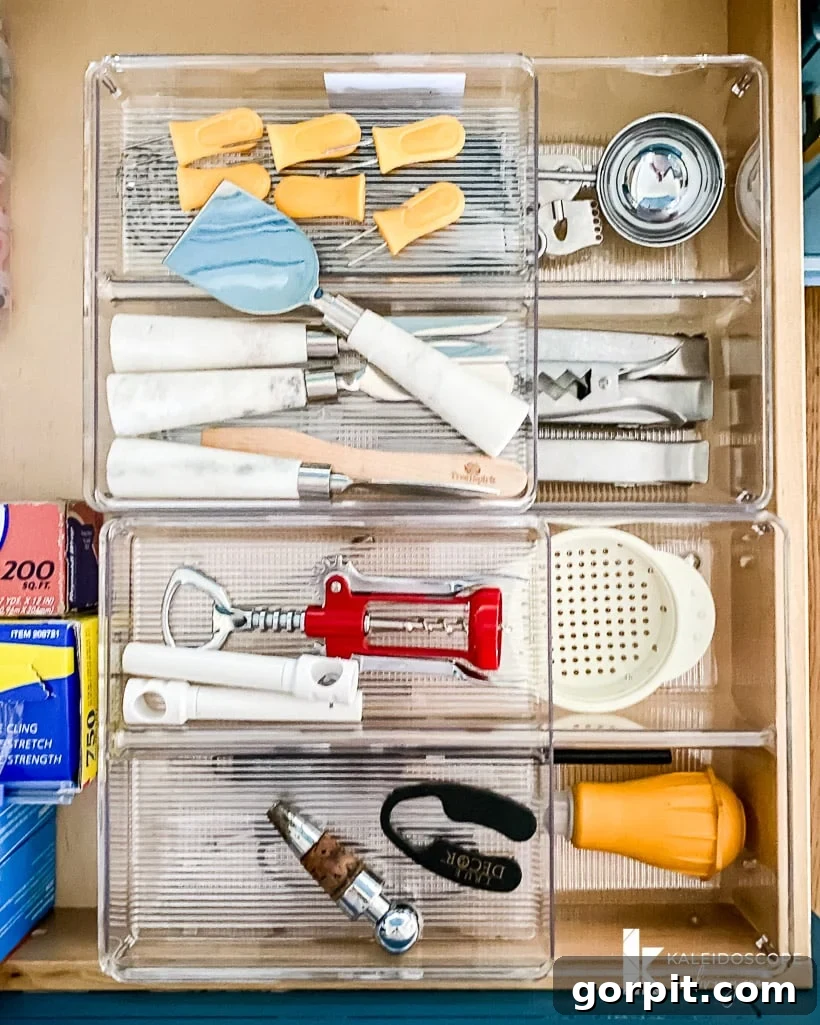
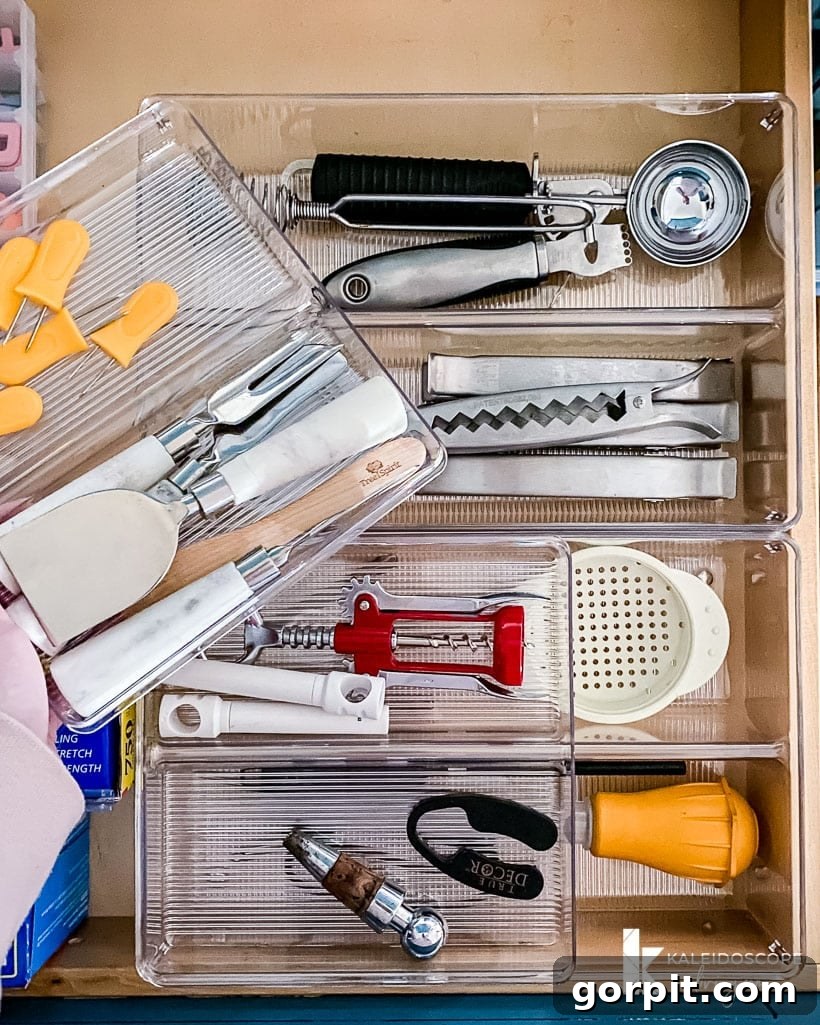
And finally, no kitchen organization project would be complete without taming the notorious “junk drawer.” With the help of this simple yet effective set of drawer organizers, even our junk drawer is now a beacon of order. It’s a small victory, but one that brings immense satisfaction every time we open it.
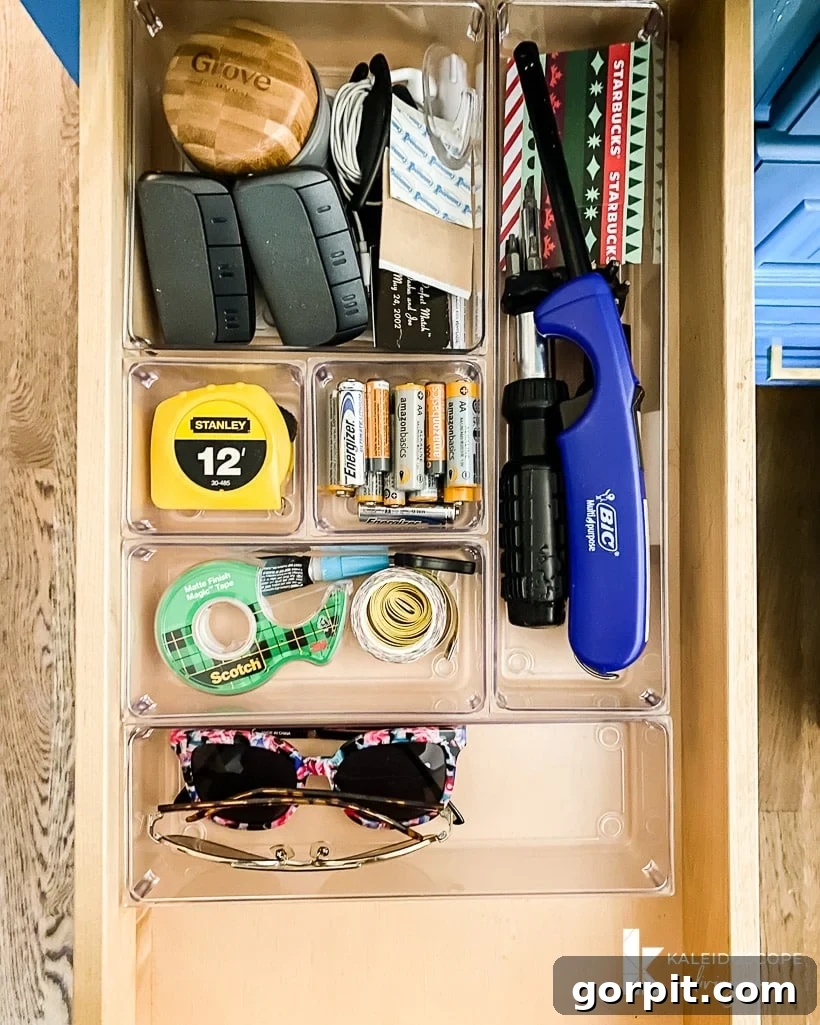
We truly couldn’t be happier with our kitchen now. We LOVE it! It’s not just aesthetically pleasing and perfectly aligned with our evolving home style; it also functions exceptionally well for our family’s daily needs. This makeover stands as a powerful testament to what can be achieved with a vision, some paint, and smart organizing solutions. Never underestimate the transformative power of a budget-friendly approach to home renovation!
Beyond the core makeover elements, you might have spotted a few other items in the photos that pique your interest, such as our barstools. I’ve conveniently linked those and other visible products below for you.
Click on any image for full product details.
Essential Resources for Your Home Transformation
If our kitchen transformation has inspired you and you’re wondering how to approach transforming rooms and spaces in your own home with confidence and ease, then you absolutely must check out Designer in a Binder®. It’s a comprehensive, affordable, and straightforward method designed to empower anyone to decorate their home beautifully and effectively.
For exclusive content, behind-the-scenes sneak peeks of our ongoing projects, and all my latest DIY tips and tricks, be sure to subscribe to our newsletter before you leave! You won’t want to miss out on future inspiration.