
Hello, wonderful readers! I’m Ashley, the creative spirit behind 3 Little Greenwoods, where I passionately share a treasure trove of easy crafts, inspiring DIY home decor projects, stress-free entertaining tips, and heartwarming Southern recipes. Today, I’m thrilled to be a guest here at Designer Trapped in a Lawyer’s Body, bringing you an ingenious and budget-friendly solution to a common home decor dilemma that has long “plagued” homeowners everywhere: how to elegantly hide an unsightly phone jack.

Transforming Home Eyesores into Decorative Highlights
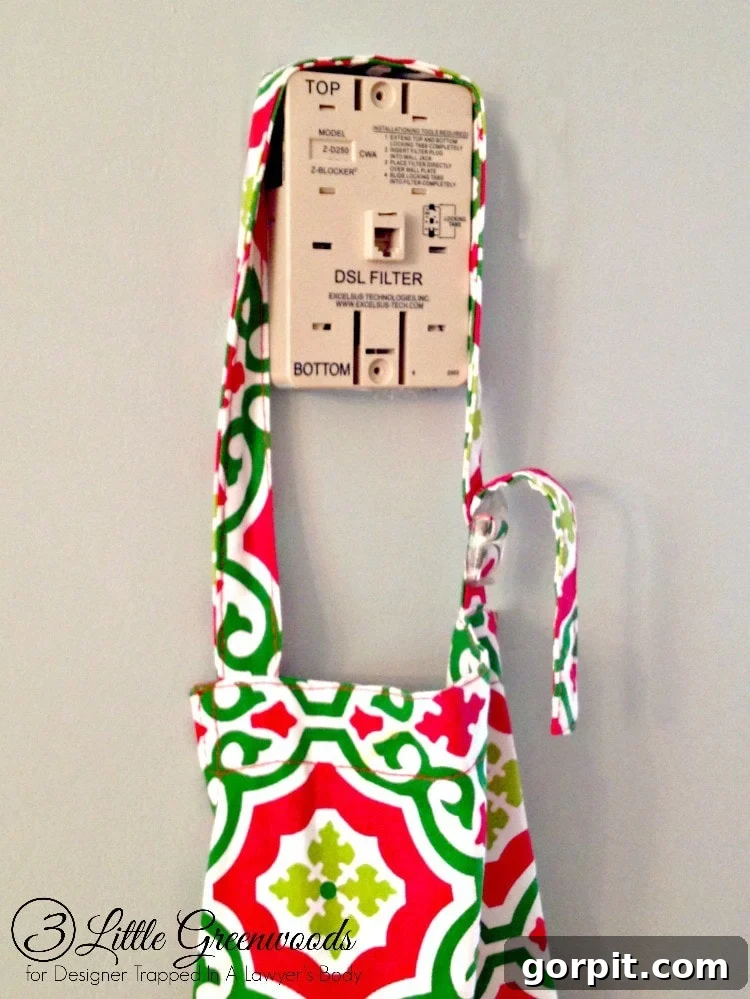
Every home, no matter how perfectly designed, often has that one small detail that sticks out like a sore thumb. For many of us, it’s an outdated wall fixture – an old intercom, an unused cable outlet, or, in my case, a particularly stubborn phone jack. While my kitchen boasts generous cabinets, expansive countertops, and all the modern conveniences I could wish for, a relic from a bygone era stubbornly marred the wall leading from the kitchen to the dining room: an old-school phone jack.
This antiquated phone jack was a constant eyesore, disrupting the visual flow of an otherwise lovely space. I tried various quick fixes, even attempting to camouflage it behind my favorite apron, but it always felt like a temporary patch rather than a genuine solution. It simply refused to blend in, demanding attention where none was desired. This unsightly fixture reminded me daily that sometimes, even in the most functional spaces, aesthetics matter immensely.
Why Not Just Remove It? The Challenge of Phone Jack Removal
You might be wondering, “Why not simply remove the phone jack from the wall instead of going through the trouble of covering it?” Believe me, that was my first thought and a persistent endeavor! I attempted to remove it on several occasions, hoping to reclaim that small patch of wall. However, each attempt quickly revealed that this phone jack was deeply entrenched and wouldn’t yield without significant resistance. Removing it outright would have meant grappling with potential wall damage, intricate wiring, and the inevitable need for costly drywall repairs and repainting. For many homeowners, the thought of cutting into walls, dealing with plaster dust, and then patching and repainting is enough to deter them from tackling such a project. This experience cemented my resolve to find a less intrusive, more decorative solution that would hide the phone jack beautifully without requiring extensive home renovations.
Introducing the Ingenious Solution: A Decorative Wall Box
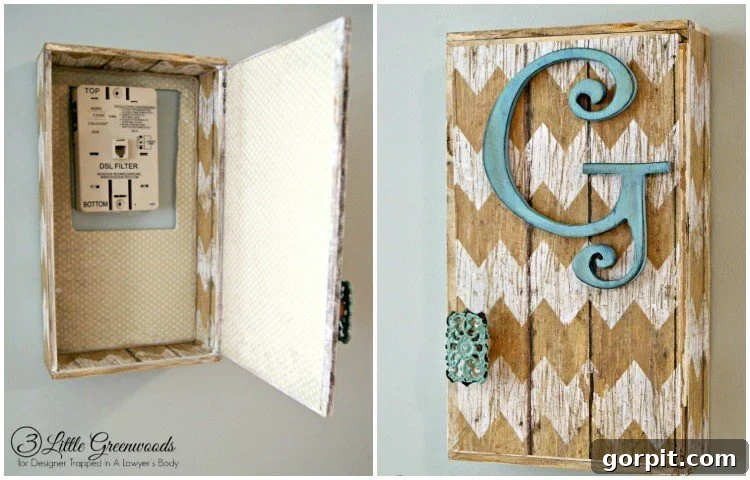
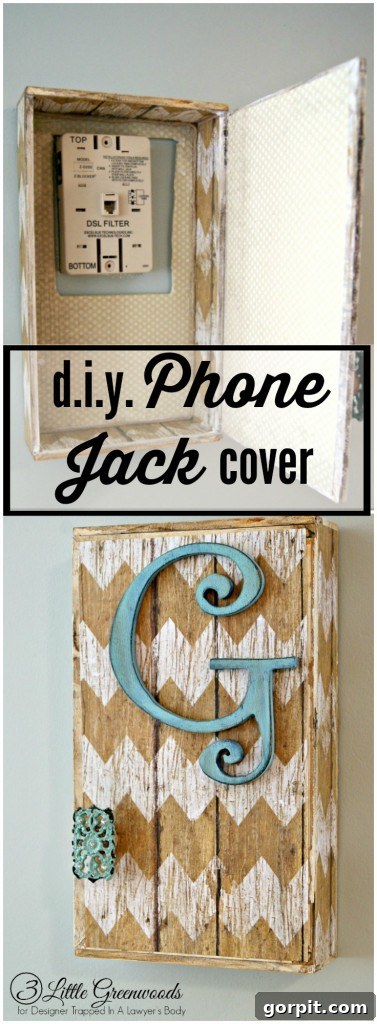
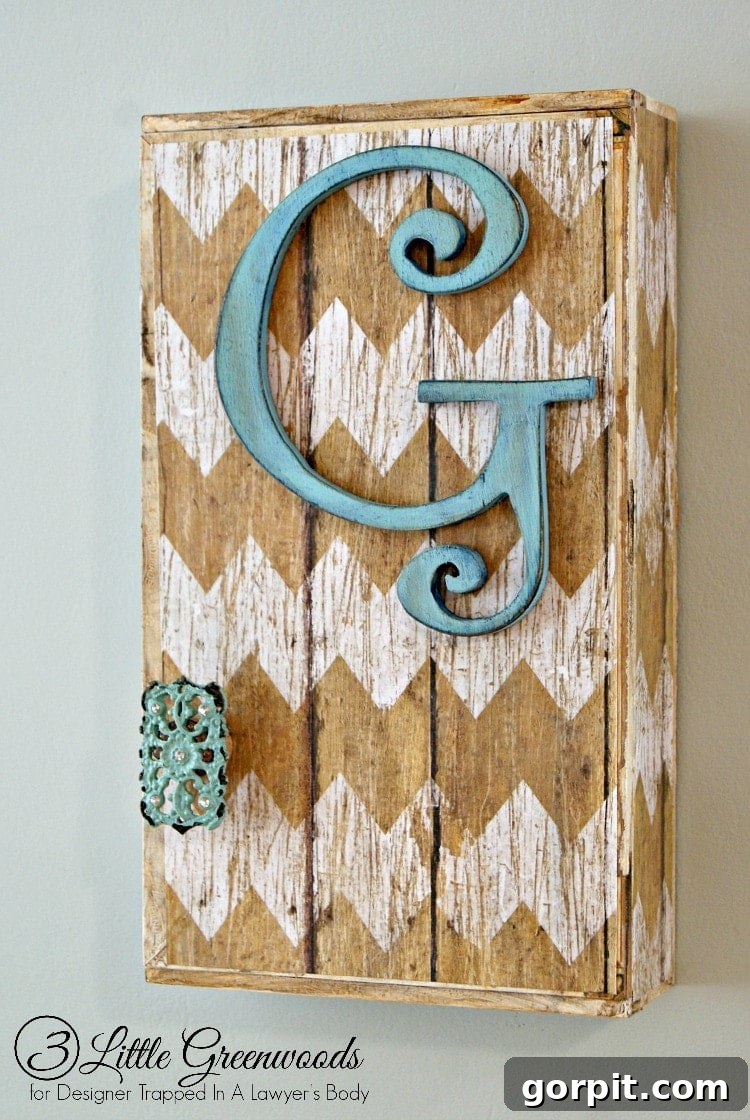
Driven by the desire for a seamless and attractive living space, I embarked on a creative journey to find a perfect disguise. The result? A charming decorative wall box that completely conceals the phone jack, transforming it from an unsightly nuisance into a delightful piece of personalized home decor. The best part? This entire DIY home decor project cost me less than $10! Crafted from a repurposed cigar box, it’s not only eco-friendly but also exquisitely decorated to perfectly complement our kitchen’s aesthetic. Beyond its primary function of hiding the phone jack, this clever creation also offers a discreet, hidden storage compartment – a bonus that always comes in handy in a busy household.
How to Hide a Phone Jack: Materials and Tools Needed for Your DIY Decorative Box
Before diving into the steps, let’s gather all the essential materials for this simple yet impactful DIY project. Most of these items can be found around your home, at a local craft store, or even repurposed from other sources, keeping the cost wonderfully low.
- Cigar Box (made from thin wood): The star of our project! Opt for a lightweight wooden cigar box, as its dimensions are often ideal for covering standard phone jacks, and its thin wood makes it easy to modify. Plus, repurposing is always a win for sustainability.
- Marker: Essential for precise measurements and marking the cutout area on the back of your box.
- Retractable Knife (or utility knife): A sharp knife is crucial for scoring the wood. Always use with caution and a cutting mat.
- Hammer: Used for cleanly breaking out the scored section of the box, making the opening for the phone jack.
- Craft Paint (white, browns, or colors of your choice): Choose colors that blend with or accent your existing decor. White provides a good base, and browns can create a beautiful weathered or distressed look.
- Scrapbook Paper: Select a pattern and texture that resonates with your home’s style. There’s an incredible variety of designs available, many of which mimic natural textures like wood, stone, or fabric.
- Mod Podge (or other decoupage medium): This versatile adhesive and sealant will be used to attach the scrapbook paper smoothly and securely to your box, giving it a durable finish.
- Wooden Monogram (optional): A lovely personal touch! Choose a letter that represents your family name or a decorative initial.
- Homemade Knob or Decorative Pull: Instead of a traditional heavy knob, we’ll create a lightweight alternative that perfectly suits our box.
- Hot Glue Gun and Glue Sticks: For quick and strong adhesion of decorative elements.
- Command Strips (or similar removable adhesive strips): For safely and securely mounting the finished box to the wall without causing damage.
Why a Cigar Box is the Perfect Choice
You might be asking, “Why a cigar box specifically?” The answer lies in its unique attributes that make it perfectly suited for this project. Firstly, its lightweight construction ensures it will hang easily and securely on the wall without requiring heavy-duty anchors. Secondly, the typical depth of a cigar box is just right to completely enclose and disguise most standard phone jacks, allowing the box to sit flush against the wall. Finally, cigar boxes are often readily available, either through reuse or at low cost, making this an incredibly budget-friendly and sustainable DIY venture. Many come in beautiful woods or with interesting embellishments, providing a fantastic starting point for your creative transformation.
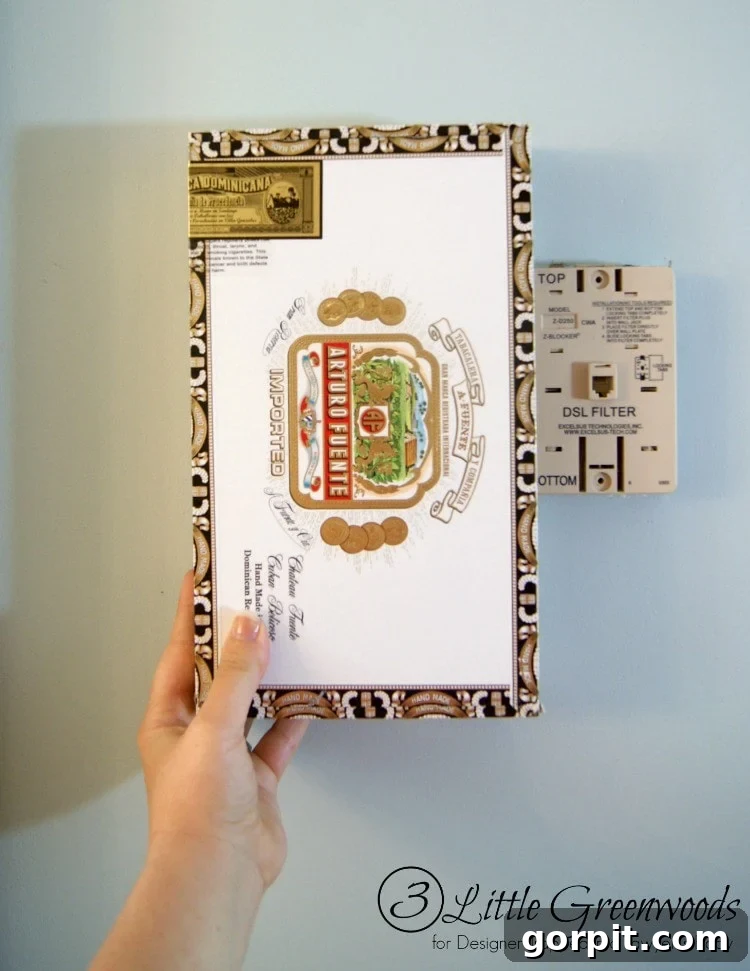
Step-by-Step Guide: Crafting Your Decorative Phone Jack Cover
Let’s get started on transforming that plain cigar box into a stylish concealment piece!
Step 1: Preparing the Box for a Flush Fit
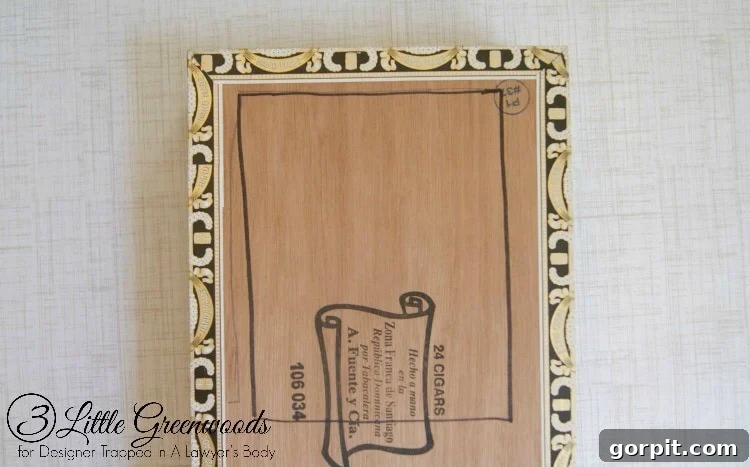
The crucial first step is to create an opening in the back of the cigar box that precisely accommodates the phone jack. This ensures the box can sit perfectly flush against your kitchen wall, completely hiding the unsightly fixture. Begin by carefully measuring the dimensions of your phone jack – its height, width, and any protruding elements. Transfer these measurements onto the back of your wooden cigar box using a marker, drawing a clear outline of the shape you need to remove. Precision here is key for a snug fit. Once your outline is drawn, take your sharp retractable knife or utility knife and carefully score along the lines. The goal isn’t to cut all the way through the wood initially, but to create deep grooves. Apply steady pressure, making several passes along each line to deepen the score marks. This process weakens the wood fibers, preparing it for the next step.
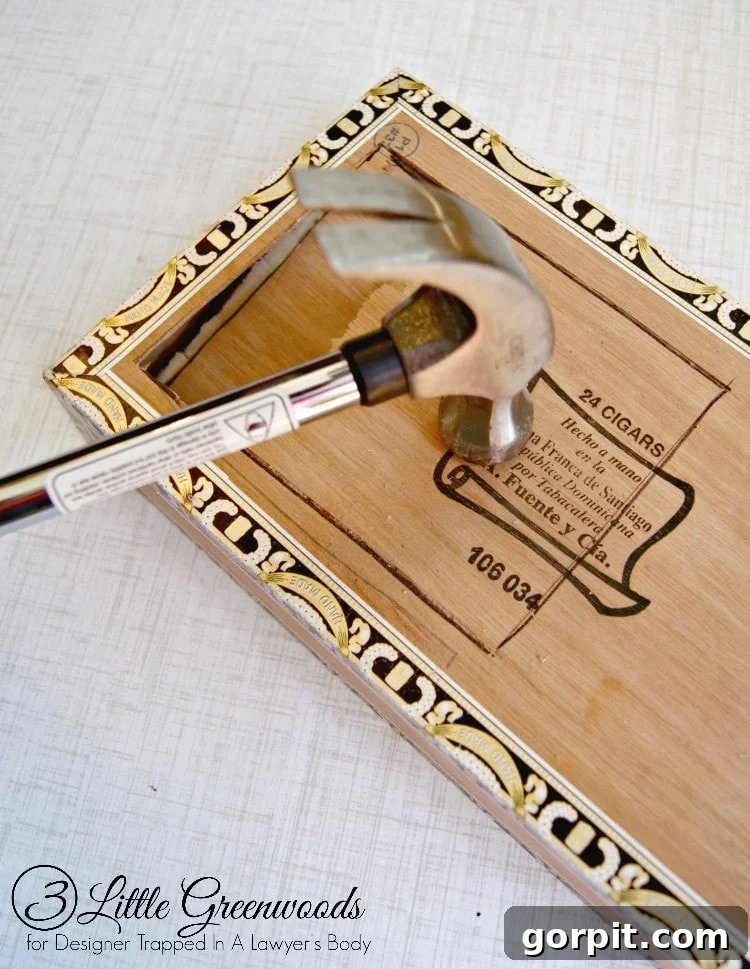
With the scoring complete, it’s time for a bit of controlled force. The knife won’t cut entirely through the thin wood, but the deep scores will allow you to break out the section. Place the scored area over a stable surface, ensuring nothing valuable is beneath. Then, using a hammer, apply firm, well-placed taps directly onto the scored section. You’ll find that a couple of strategic whacks with the hammer will cause the cutout for the phone jack to pop right out, leaving a clean opening. This method is incredibly efficient for thin wooden boxes, yielding a much cleaner edge than trying to cut all the way through with a knife.
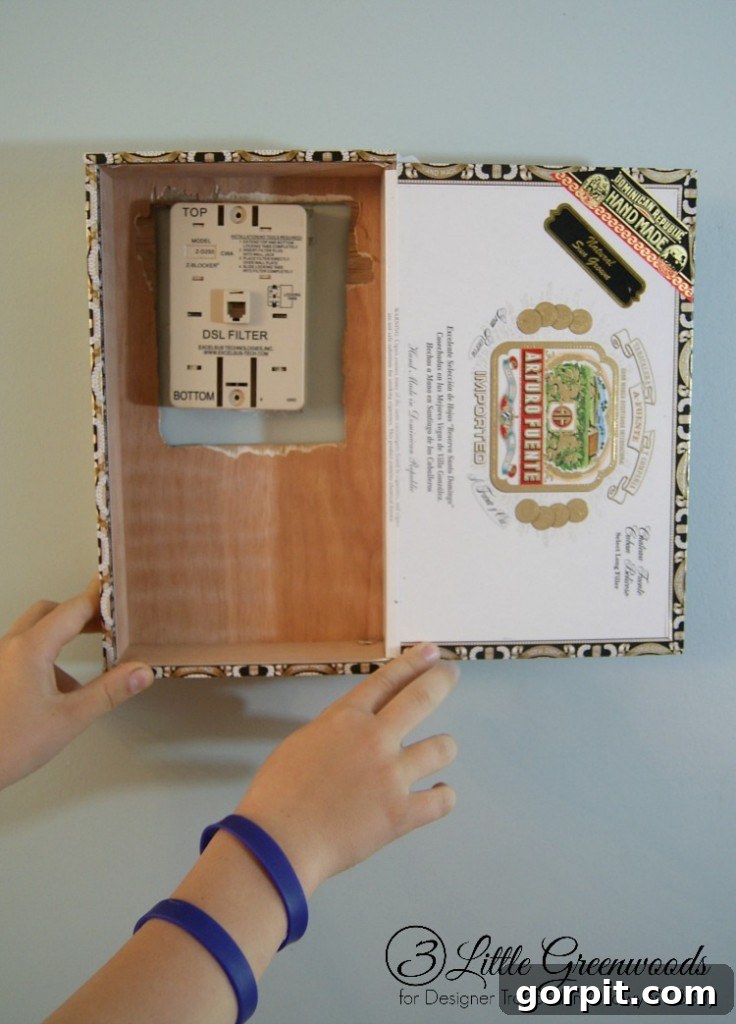
Once the section is removed, carefully test the fit by placing the cigar box over your phone jack on the wall. The cutout should align perfectly, allowing the box to settle flush against the wall surface. This snug fit is essential for the illusion of a seamless decorative piece. Seeing the phone jack completely disappear inside the box is incredibly satisfying, instantly validating this clever DIY approach.
Step 2: Adding a Touch of Paint for Character
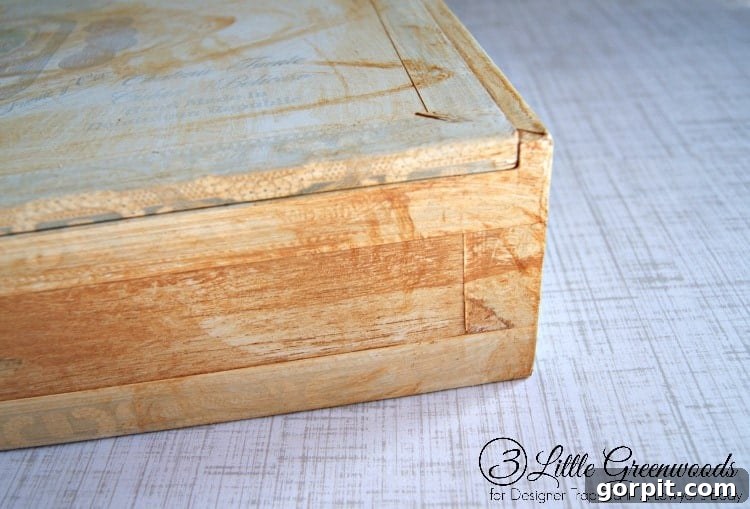
With the cigar box now perfectly prepped to conceal the phone jack, it’s time to unleash your creativity and make it truly beautiful with a little paint. The aim here is to complement your existing decor. Start by applying a light, even coat of white craft paint to the exterior of the cigar box. The intention isn’t to achieve full, opaque coverage, but rather to subtly tone down the original colors or patterns of the cigar box, providing a neutral canvas. A few thin coats will be sufficient to achieve this gentle softening effect, allowing some of the original wood grain or texture to peek through. Let this base coat dry completely.
Next, for that coveted weathered, rustic look, take some brown craft paint and dilute it slightly with water. The consistency should be thin, almost like a wash. Apply this watered-down brown paint over the white base coat. Work in small sections, and immediately – and I mean immediately – wipe off the excess brown paint with a soft cloth or paper towel. This technique allows the brown pigment to settle into the wood grain and any imperfections, creating a beautiful, aged, and weathered appearance that adds depth and character to your decorative box. Experiment with different shades of brown or even a hint of gray to match your desired aesthetic.
Step 3: Decoupaging with Scrapbook Paper and Adding a Monogram
While your painted box is drying, turn your attention to the scrapbook paper. Carefully measure and cut pieces of your chosen scrapbook paper to fit both the outside and inside surfaces of the cigar box. For my kitchen, a weathered wood chevron pattern was absolutely perfect, adding a subtle texture and modern touch. It’s truly astonishing how realistic some scrapbook papers can look, instantly elevating the perceived value of your DIY project!
This is also the time to consider any additional embellishments. I picked up a painted wooden monogram from my favorite craft store, planning to add it to the front of the box for a personalized touch. You could opt for a different motif, a small plaque, or even leave it plain, depending on your style.

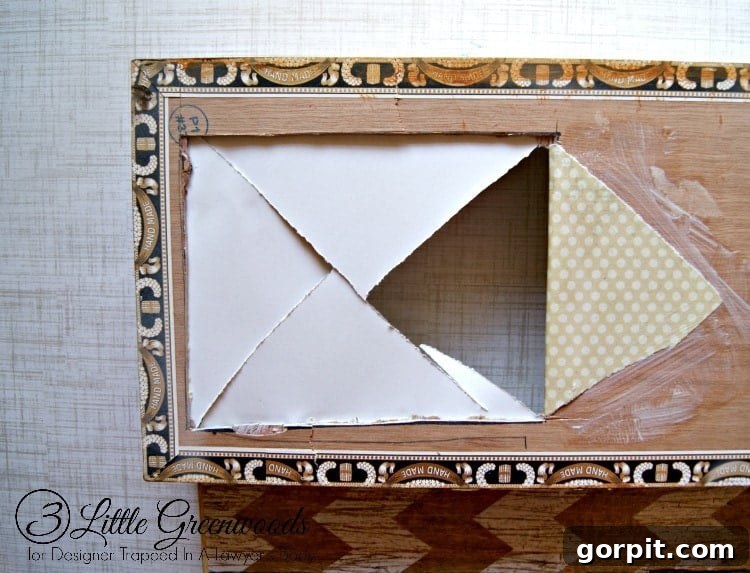
Now, let’s adhere the scrapbook paper. Apply a thin, even layer of Mod Podge to the back of each piece of scrapbook paper and carefully position it onto the desired surface of the decorative box. Smooth out any air bubbles or wrinkles using your fingers or a craft brayer for a flawless finish. Pay special attention to the inside of the box: for the piece covering the internal back, first apply Mod Podge and secure the paper. Then, using your retractable knife, carefully cut an “x” across the phone jack opening in the paper. Gently fold back the resulting triangular flaps and glue them securely to the back of the box, creating a neat, finished edge around the cutout. This ensures a professional look from every angle. Allow the Mod Podge to dry completely and cure according to the manufacturer’s instructions before proceeding to the next step, ensuring maximum durability.
Step 4: Crafting a Unique, Lightweight Knob
Every beautiful box needs a decorative knob, but given the lightweight nature of our cigar box, a traditional, heavy knob wouldn’t be suitable – it might pull away or overwhelm the delicate structure. This challenge led to a fun treasure hunt at my favorite craft store. I ventured into the jewelry supply aisle, where I discovered a small, elegant metal plaque. It struck me that combined with a small piece of cork, it would make the perfect lightweight and charming knob for our little decorative box.
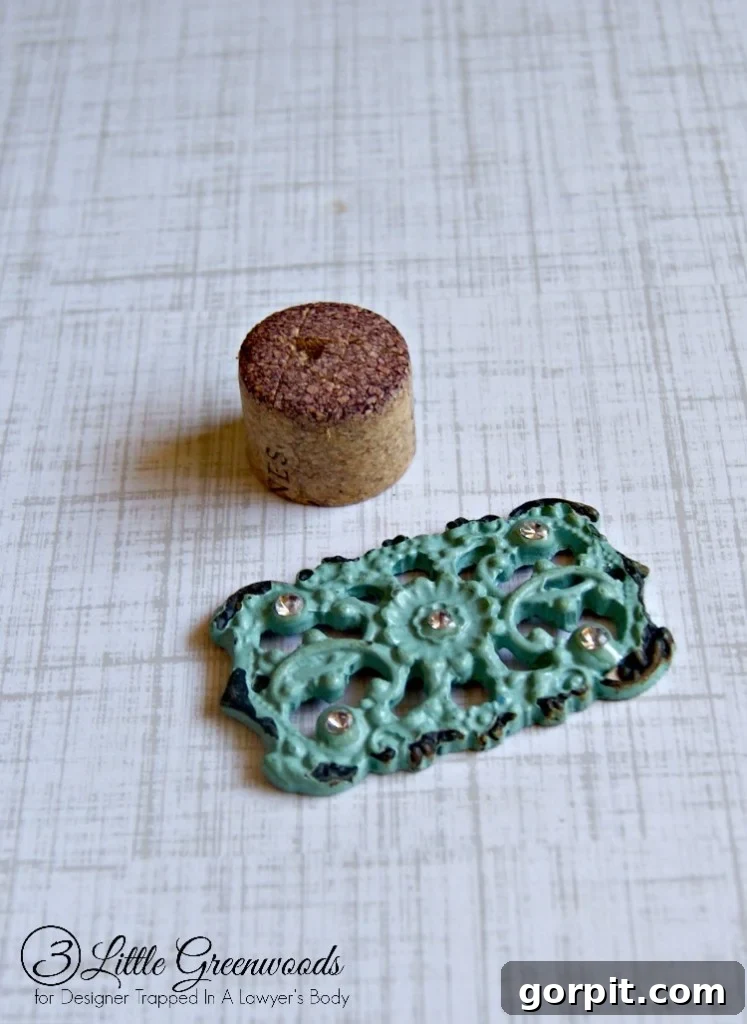
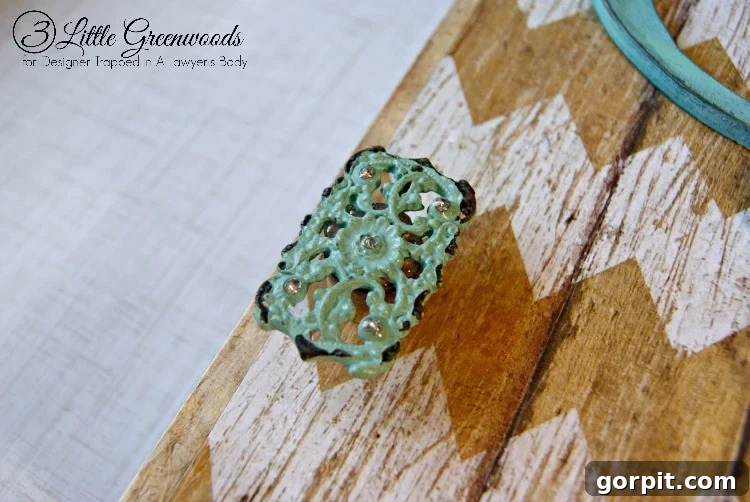
To assemble this custom knob, a small dab of hot glue was all it took to firmly attach the metal plaque to the cork. Then, with a bit more hot glue, this newly created homemade knob was secured to the front of the cigar box. The beauty of hot glue is its instant adhesion, making this a quick and fuss-free step. The final flourish was to hot glue the painted monogram letter to the front of the box, completing its personalized and polished look. This creative approach to hardware not only solves a practical problem but also adds an element of bespoke charm to the entire piece.
Beyond the Cover: Hidden Storage and Effortless Installation
One of the delightful bonuses of this decorative wall box is the discreet storage space it provides. We’re still having a lively family debate about what best deserves to be stored inside! My boys believe it’s the perfect hiding spot for the Monopoly money their sister uses in her imaginary store games, while she, in turn, is keen on tucking away her favorite miniature dolls. Ultimately, it’s a versatile little cubby, ideal for stashing away keys, small notes, spare change, secret treats, or even small remote controls – anything that benefits from being out of sight but easily accessible.
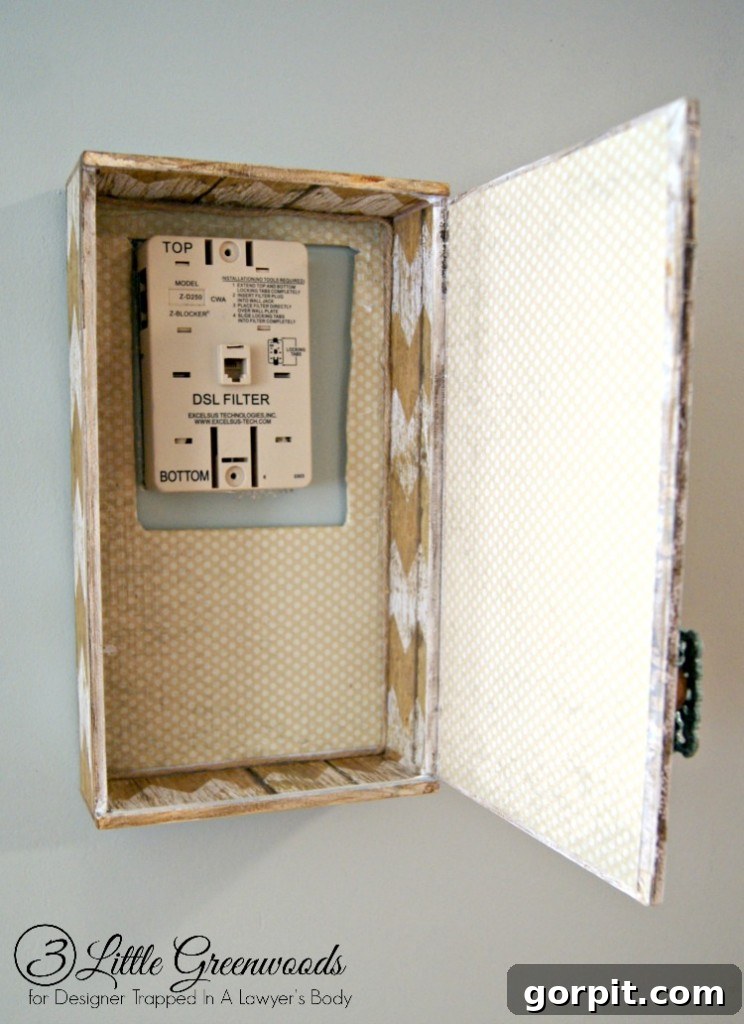
The transformation is truly remarkable. That unsightly old-school phone jack, which once glared defiantly from the wall, is now completely obscured by a beautifully crafted, personalized box. The best part? The entire project, from start to finish, came in at an incredible cost of less than $10, proving that elegant home solutions don’t have to break the bank. Installation couldn’t be simpler or more damage-free. Two trusty Command Strips are all it takes to securely hold the decorative box in place on the wall. These ingenious adhesive strips are fantastic for renters and homeowners alike, offering a strong hold without leaving any sticky residue or damaging paint when removed. I absolutely adore them for quick and easy decor updates!
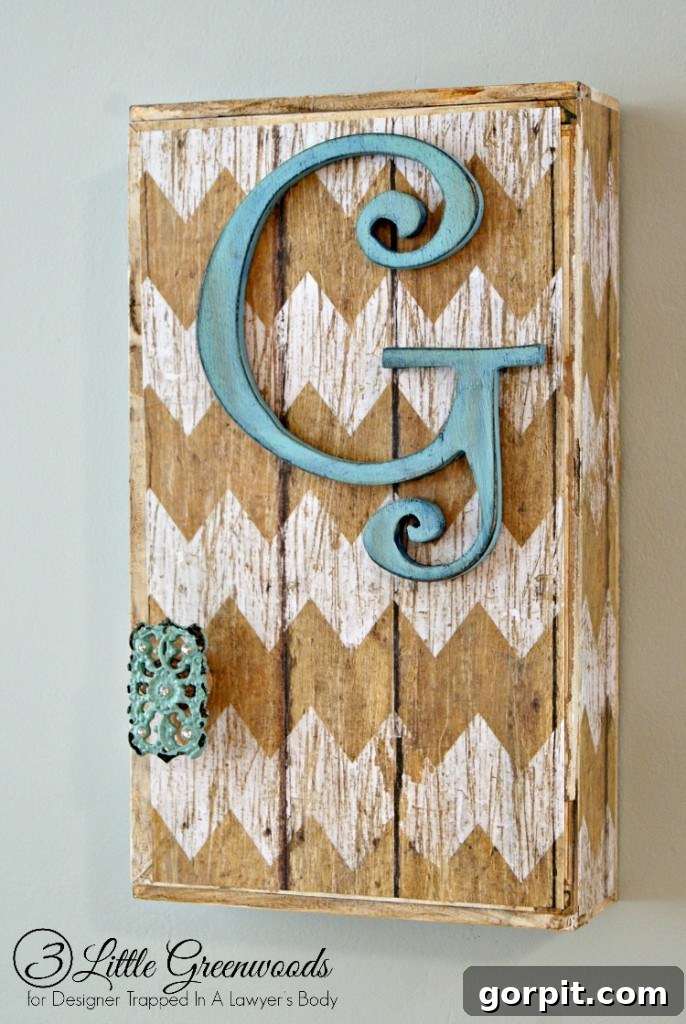
We all have that one minor imperfection in our homes that constantly nags at us. For me, it was that bothersome phone jack. I am absolutely thrilled that my personal “one thing” is now completely disguised behind this charming piece of DIY home decor. It’s incredibly satisfying to discover an effective and attractive solution to hide a phone jack that didn’t necessitate messy and time-consuming sheetrock repair. This project embodies the spirit of creative problem-solving and adds a unique, personalized touch to your living space.
More Home Decor Inspiration from 3 Little Greenwoods
If you’ve enjoyed this tutorial and are inspired to tackle more home decor challenges with creative DIY solutions, you’re in luck! I have plenty more ideas to share. You might want to explore my post about the Cheapest DIY Curtain Rods EVER! This popular tutorial will show you how to craft beautiful and functional curtain rods from simple, budget-friendly supplies, complete with stylish finials.

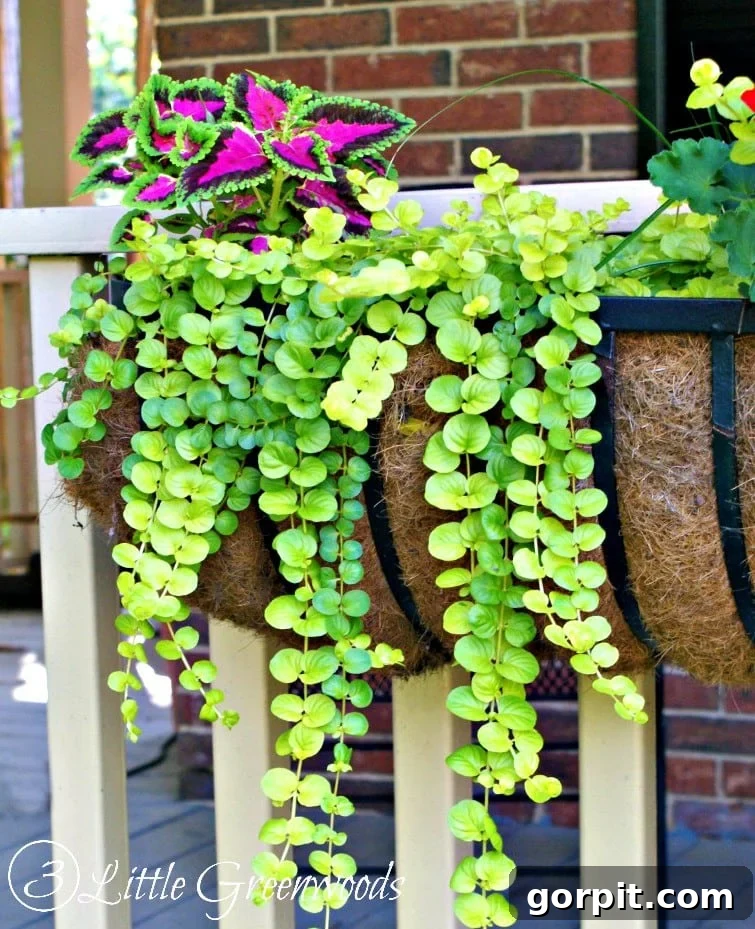
Alternatively, if you’re looking to enhance your home’s exterior and add fabulous curb appeal this summer, be sure to check out my comprehensive guide on the best plants for hanging baskets. Learn which varieties thrive, offering vibrant color and lush foliage to transform your outdoor spaces.
Your Home, Your Style: Embrace Creative Solutions
A heartfelt thank you to Tasha for graciously allowing me to share my simple yet effective solution for how to hide an ugly phone jack with all of you today! I sincerely hope that this project has sparked your imagination and inspired you to “think outside the cigar box” when it comes to finding clever, personalized ways to disguise any unsightly features or minor imperfections in your own home. Remember, every challenge in home decor is an opportunity for creativity.
In the meantime, I would absolutely love for you to come and hang out with me over at my blog! You can discover more easy crafts, DIY projects, and lifestyle tips at 3 Little Greenwoods, or connect with me on your favorite social media platforms. I always enjoy hearing from fellow DIY enthusiasts!
But before I go, I have one last question for you: What’s that one thing in your home that consistently drives you crazy and that you would absolutely love to hide or transform? Is it in your kitchen, like my phone jack was, or somewhere else in your living space? Share your thoughts and inspire others!