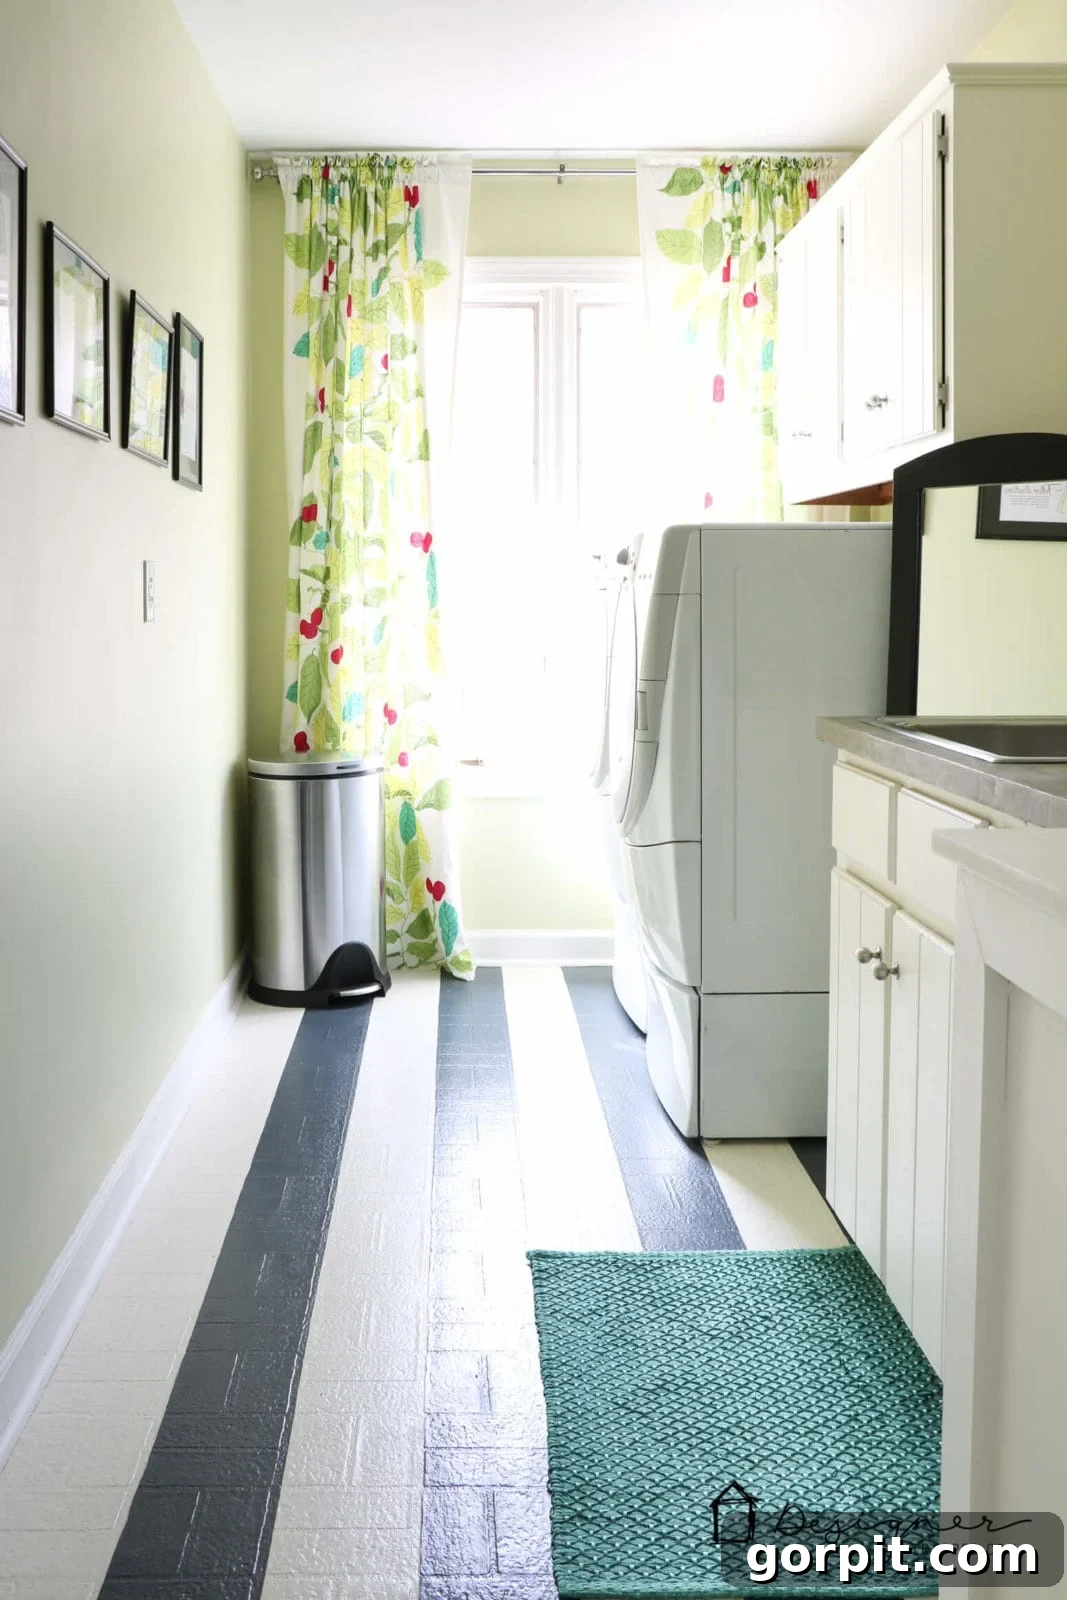
Unbelievable $71 DIY Laundry Room Makeover: Transform Your Space on a Budget!
Can you believe it? I transformed my entire laundry room for an astonishingly low cost of just $71.00! This isn’t a trick; it’s the power of creative solutions, smart repurposing, and a touch of DIY magic. If you’ve been dreaming of a brighter, more functional, and stylish laundry space without breaking the bank, then this incredible budget laundry room makeover is living proof that you can absolutely do it too!
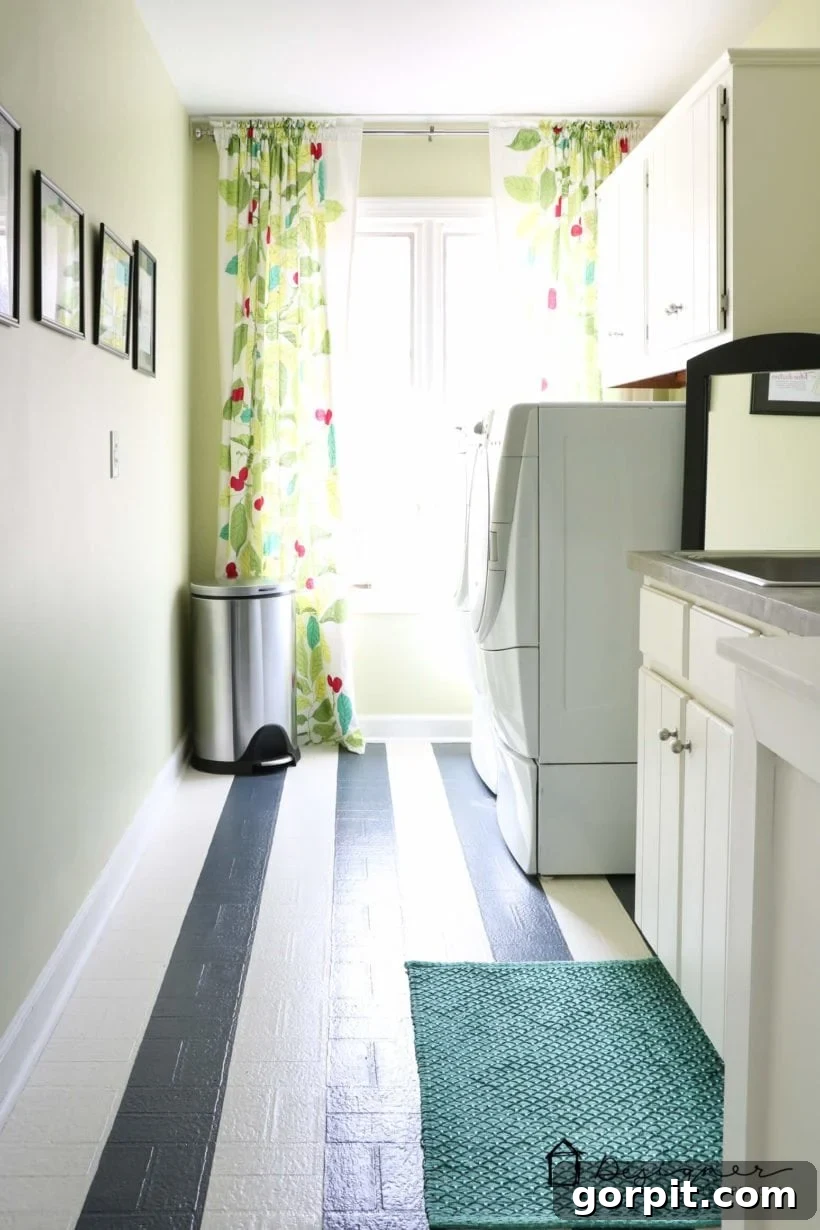
Alright, folks, the moment we’ve all been waiting for: the grand laundry room reveal! It might sound a bit unconventional to be utterly thrilled about a laundry room, especially a space often considered the least exciting corner of the house. For many, it’s merely a functional area where laundry day chores unfold. But let me tell you, I am genuinely, head-over-heels in love with this revitalized room. What makes it even more exhilarating is that I managed to complete this total transformation in just a few days, spending only $71.00 out of my own pocket!
This isn’t just about a fresh coat of paint; it’s about reclaiming a space that once felt neglected and turning it into an inspiring, cheerful environment. Before we dive into the details of this budget-friendly laundry room renovation, let me take you back to where we started. The “before” state of this room was, frankly, a bit dreadful. It was a space that spoke volumes about how little pride we took in its appearance. It was purely utilitarian, a place to get in and out of as quickly as possible. The blinds were crooked, the walls were drab, and every surface seemed to scream for attention it never received. It would have taken mere seconds to straighten those blinds, yet we never bothered, reflecting a deeper apathy towards the room’s overall vibe. It was a chore to be in there, and that’s precisely what I wanted to change.
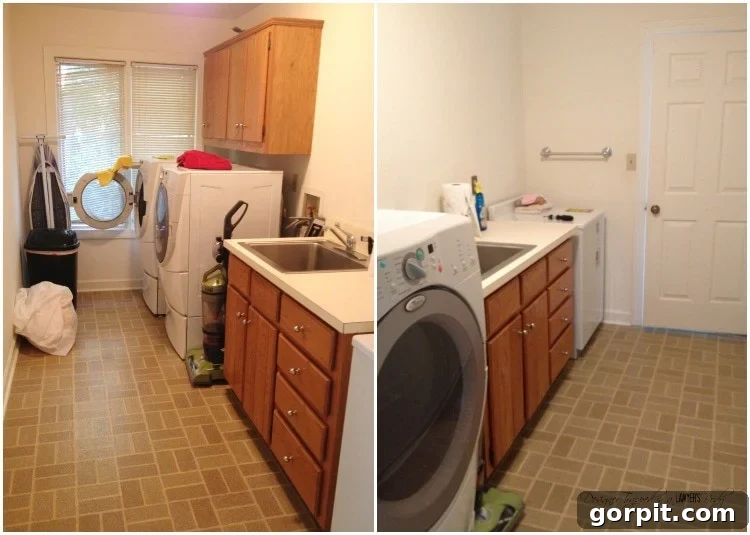
BUT NOW?! It’s colorful, bright, and happy!
The transformation is truly remarkable. From a dreary, ignored corner, it has blossomed into a vibrant, inviting space that actually makes laundry less of a chore and more of a pleasant experience. The difference is night and day, and it all comes down to smart choices and a commitment to DIY.
This DIY laundry room renovation serves as a powerful testament to the concept of “shopping in your own house.” We all accumulate items from past projects, forgotten decor pieces, or even remnants of materials that are no longer actively used. Before you rush to the store, take a thorough inventory of your home. You might be surprised by the hidden treasures you already possess – leftover paint from another room, decorative accessories tucked away in a closet, or curtains that no longer fit their original space. The key is to see these items with fresh eyes and imagine how they could be repurposed to create a cohesive and stylish new look.
For this specific laundry room makeover, the initial spark came from a set of beautiful curtains that I already owned but weren’t currently being utilized. They had been stored away, waiting for their next act. Once I identified these curtains as my inspiration, they became the jumping-off point for the entire design scheme. From there, I “shopped” my house for paints and other decorative elements that would complement the curtains’ colors and patterns, ensuring a harmonious and intentional final result. This method not only saved a significant amount of money but also imbued the space with a unique, personalized character that store-bought items simply can’t replicate.
This post contains some affiliate links. Please click here to read my full disclosure policy.
So, what exactly did I do to achieve this stunning laundry room transformation?
Here’s a breakdown of the key projects and how I managed to keep the costs incredibly low:
-
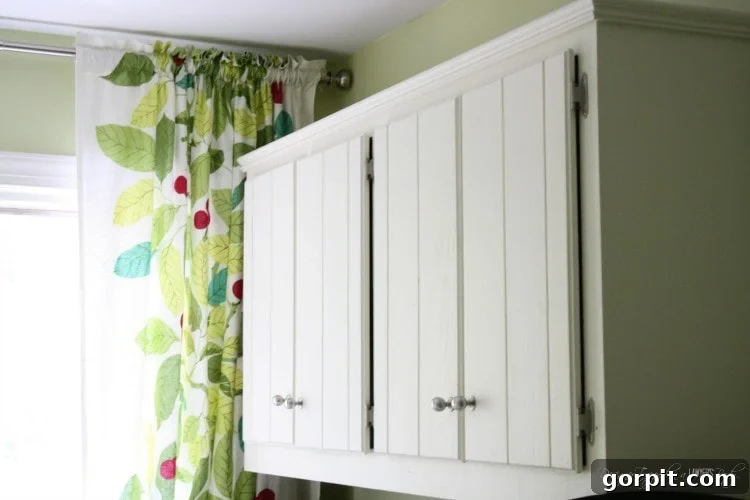
Painted the cabinets: The existing cabinets were perfectly functional but lacked character. I decided to give them a fresh, bright look using an antique white paint that I had leftover from a previous home project. This meant zero cost for paint. I also already had primer on hand, making this a completely free upgrade. Painting cabinets is an excellent way to update a room without the expense of new cabinetry, and it truly makes a dramatic difference in brightening the space.
Cost: $0
-
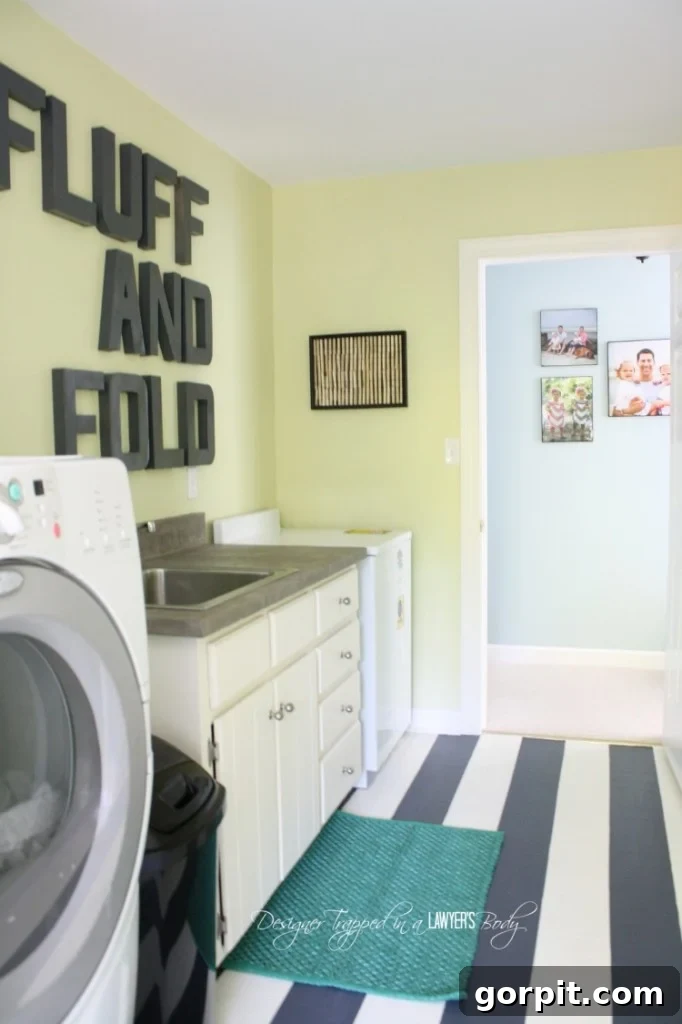
Painted the walls: Just like the cabinets, the walls received a much-needed refresh. I used leftover paint from my girls’ room, which happened to be a lovely, cheerful shade that perfectly complemented the curtains and overall vision for the laundry room. A fresh coat of paint instantly rejuvenates a space, and by using what I already had, this step incurred no additional cost.
Cost: $0
-
Painted the floors: This might sound unconventional, but painting the vinyl floors was arguably the most impactful and budget-friendly change in the entire room! We purchased two quarts of porch paint (one grey, one off-white) specifically for this project, which was more than enough to cover the entire floor. The process was surprisingly easy, and the visual change was absolutely transformative. If you’re looking for a dramatic yet inexpensive upgrade, I highly recommend exploring this option. It completely altered the feel of the room from the ground up! You can find a detailed, step-by-step tutorial on how to paint your vinyl floors here. This project has been incredibly popular, having been pinned over 40,000 times!
Cost: $30
-
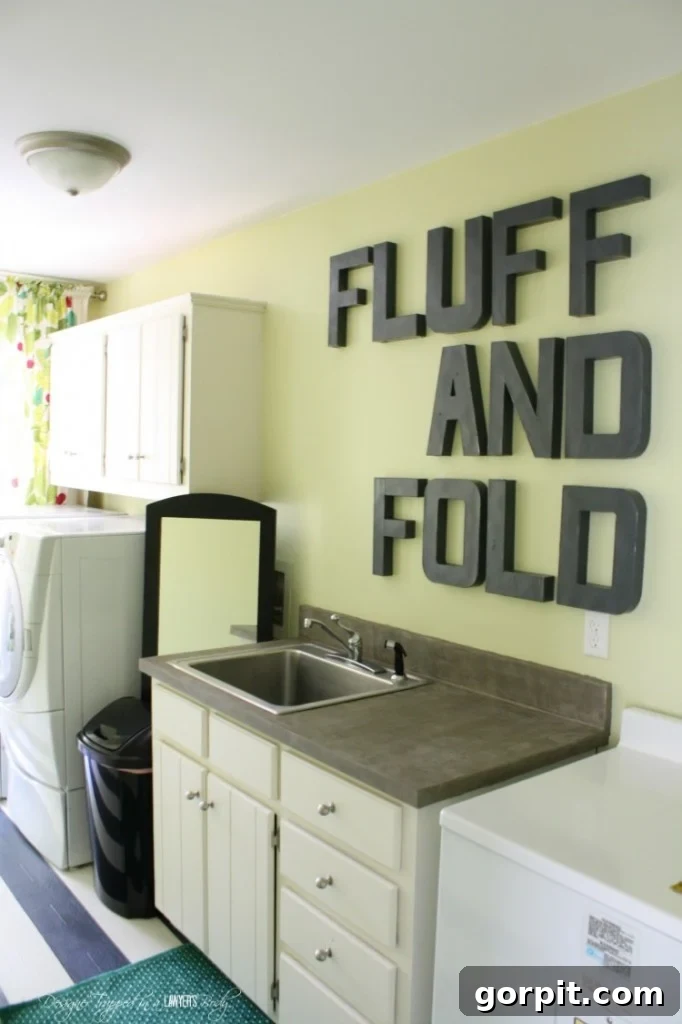
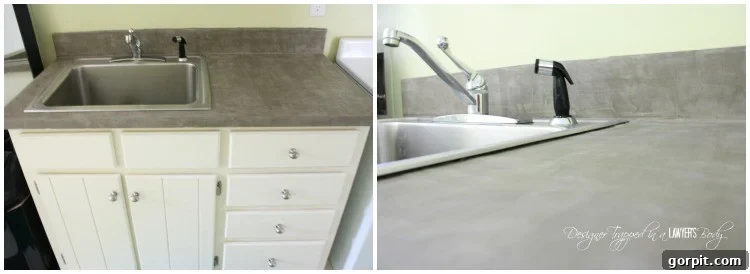
DIY Concrete Countertop: The original laminate countertop was an eyesore. To create a modern, high-end look without the high-end price tag, I covered it with Ardex Feather Finish. This product is truly amazing for creating a seamless, concrete-like finish, and it’s a completely doable DIY job even for beginners. I already had a bag of Ardex Feather Finish leftover from another project, keeping the cost at zero for me. If you’re interested in tackling this project, you can see our comprehensive tutorial for how to apply it in this post. If you can’t find Ardex Feather Finish locally, it’s conveniently available for purchase on Amazon. This DIY concrete countertop truly elevates the space, providing a sleek and durable surface that looks far more expensive than it was!
Cost: $0
-
Added decorative details: Small details often make the biggest difference. I added the “FLUFF AND FOLD” paper mache letters, which cost a total of $35 for both the letters and the spray paint to customize them. These add a playful and thematic touch. A small rug from Pier One was placed in front of the sink, adding warmth and texture. I purchased it using a gift card, so my out-of-pocket cost was $0 (though its “actual” cost was $19). Lastly, I repurposed an old, shabby shadow box and added $6 worth of clothespins to create charming, personalized wall art that hangs by the door. These elements collectively contribute to the room’s character and make it feel more thoughtfully designed.
Cost: $41
-
Hung curtains: As mentioned earlier, the curtains were the initial inspiration for the entire makeover. These beautiful drapes were previously used in another room and had been stored away, waiting for their moment to shine. Repurposing them meant no additional cost and instantly added color, pattern, and softness to the hard-working space. I love how they tie everything together!
Cost: $0
-
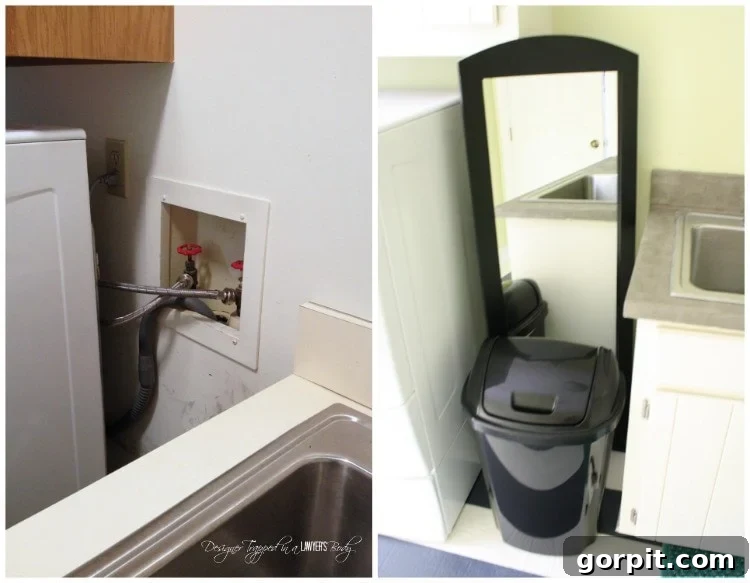
Creatively placed a mirror to hide plumbing: An ingenious solution for an unsightly problem! I used a mirror, which was a gift and had been stored in another room, to conceal all the ugly plumbing connections behind the sink. This serves a dual purpose: it hides what you don’t want to see and reflects light, making the small room feel larger and brighter. It’s a perfect example of using what you have in a clever, functional, and aesthetically pleasing way.
Cost: $0
GRAND TOTAL OUT OF POCKET COST: $71.00
The entire makeover process took me approximately 12 hours from start to finish. I did all the work myself, with one minor exception: my husband helped put new hinges on the cabinet doors and rehung them while I was at work one day. So, we’re talking about maybe a total of 13 man-hours for a complete room transformation! That’s incredibly efficient for such a dramatic change.
While the room is largely complete, I still have a few finishing touches in mind. For instance, the large, blank wall opposite the washer/dryer and sink area is currently empty, and I plan to add some artwork or shelving to further personalize and complete the space. But even as it stands, I couldn’t be happier with the outcome.
What do you think of this budget-friendly DIY laundry room makeover? What’s your favorite part of the transformation? Is it the eye-catching painted vinyl floors, the modern DIY concrete countertop, or perhaps one of the clever decorative details? Share your thoughts below – I’d love to hear them!
More INTERIOR Design Tips
SEE ALL design POSTS
-
Designer Tips for Choosing Perfect Kitchen Rug Runners
-
How to Make a Small Room Look Bigger: 9 Simple Tricks
-
Stylish Boob Light Alternatives to Elevate Your Home
-
How to Choose the Best Rug Size for Your Living Room
-
Is the Samsung Frame TV Worth It? Maybe Not.
-
6 Tips for Decorating With Color When You Are Used to Neutrals
Wondering how I approach transforming rooms and spaces in our home, consistently achieving stunning results on a budget? My proven strategies and design philosophy are all compiled in Designer in a Binder®. It’s an essential resource for anyone looking to design their home confidently and affordably, without the need for expensive designers.
And if you crave exclusive content, behind-the-scenes sneak peeks into upcoming projects, and more budget-friendly design inspiration, be sure to subscribe to my newsletter before you head out! You won’t want to miss out on future tips and reveals.