
From Drab Living Room to Dream Playroom: Our Complete Home Transformation Reveal
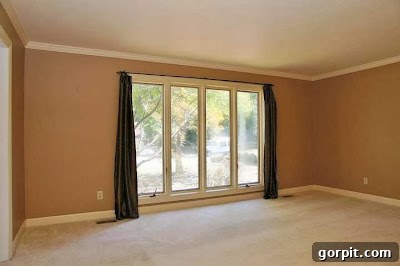
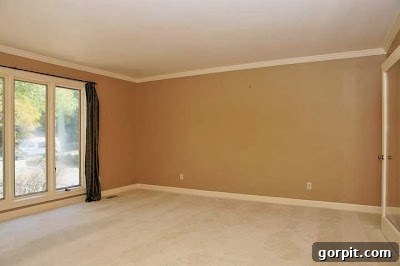
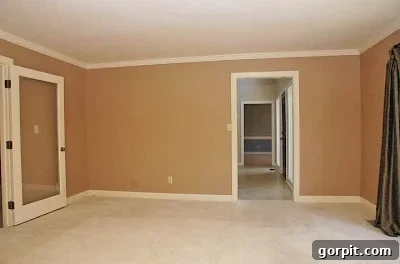
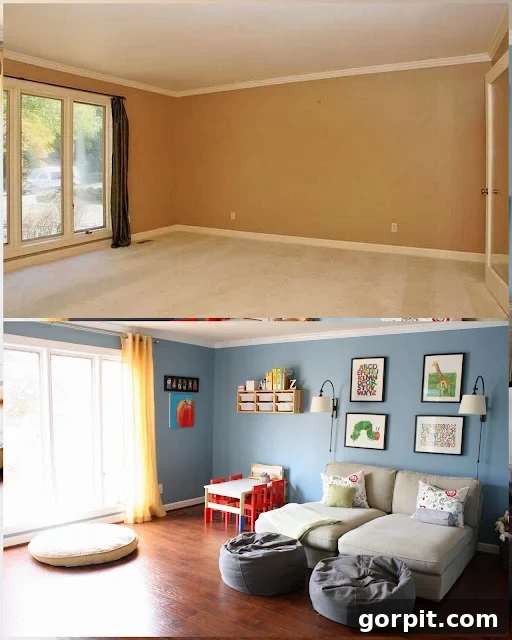
Are you ready for an exciting home renovation journey? We certainly are thrilled to share it with you! Today marks the much-anticipated reveal of a space in our home that underwent a truly remarkable transformation: our formal living room, reborn as a vibrant, functional, and joy-filled playroom. To truly appreciate the “after,” let’s rewind and take a moment to recall the “before.” When we first moved into this house, the designated living room left much to be desired. Only two words truly captured its essence: BORING and DEPRESSING. It was a space begging for purpose, and we were eager to give it one.
A Glimpse into the Past: The Uninspiring “Before”
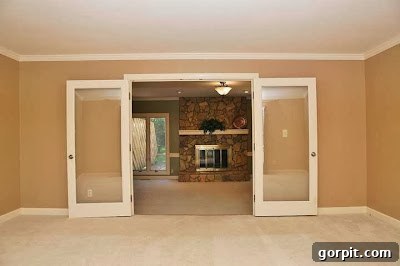
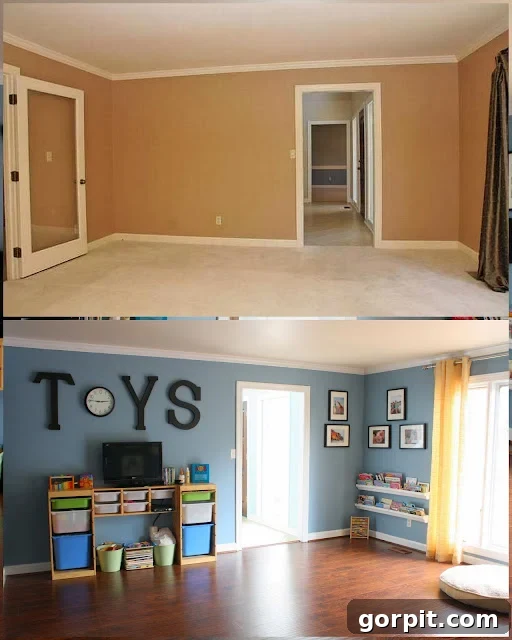
Imagine walking into a room that lacked warmth, personality, and any real sense of invitation. That was our living room. Its walls were painted a dreary, muted tone that offered no cheer, and the carpet beneath was dingy, contributing to an overall uninviting atmosphere. This was not the space we envisioned for our family’s daily life.
Our Vision: Creating a Dedicated Kids Playroom
As detailed on our Tour My Home page, our family isn’t driven by the need for a “fancy room.” Instead, our priorities lie in creating functional, comfortable, and joy-inducing spaces. This formal living room, while aesthetically standard, didn’t align with our lifestyle. What we deeply desired was a dedicated playroom for our twin girls. From the moment we first toured the house, I knew this particular room held immense potential for a children’s play area.
Several features immediately stood out as ideal for a playroom environment. Firstly, the room boasts fabulously large casement windows, flooding the space with an abundance of wonderful natural light. Natural light is, in my opinion, paramount for a playroom, fostering a bright, uplifting, and inviting atmosphere where creativity can flourish. Secondly, I absolutely adored that it features elegant glass French doors that open directly into our family room. This layout allows for seamless connection between the two core living spaces, enabling parental supervision while providing the girls with their own defined area. (A quick note for those with keen eyes: the outdated and rather unsightly fireplace previously visible in the family room is now GONE! Don’t worry, the full family room reveal is coming soon, and I purposely kept any “after” shots of the playroom from revealing too much of the family room. Patience will be rewarded!) UPDATE: Our Family Room Reveal is now complete! Click here for all the exciting details!
Addressing the Foyer View: Playroom Visibility Considerations
One aspect that wasn’t entirely ideal was the room’s direct visibility from the foyer. A playroom, typically a hub of delightful chaos, might not be the first room one wishes visitors to encounter upon entering. However, our friends, family, and other guests are far from the “stuffy” type, so exposing our lively playroom to them was perfectly fine by us. In fact, this layout offered an unexpected practical benefit: for our girls, who were in the midst of potty training shortly after we moved in, the playroom’s proximity provided quick and easy access to the downstairs powder room. (For those curious about the overall layout, our first-floor floor plan is available on the Tour My Home page).
The Makeover Begins: From Drab to Delightful
The path to transforming this uninspired room into a vibrant playroom was clear: the dated, “baby poop brown” walls and the dingy carpet had to go. And that’s precisely what we tackled. But before we delve into the detailed process, allow us to present the truly glorious results of this significant renovation!
Welcome to Our Happy Playroom! The Stunning Reveal
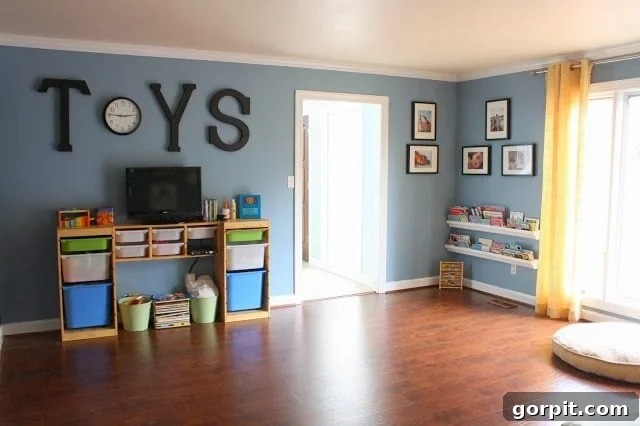
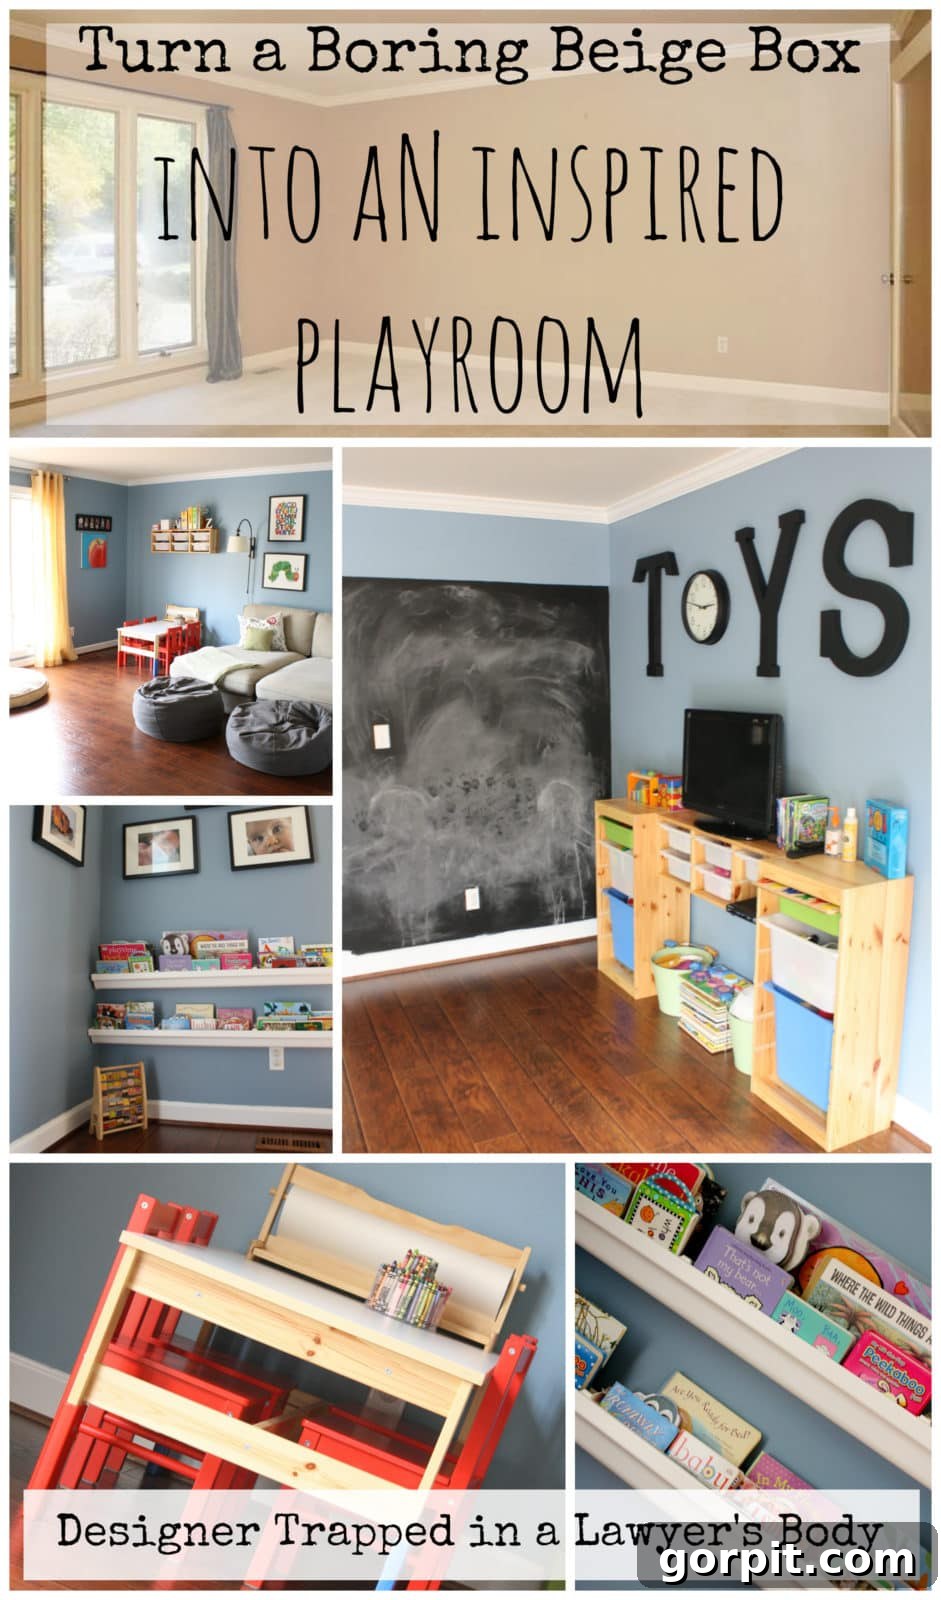
Prepare to be inspired! We are absolutely thrilled with the outcome of this playroom makeover. The space now radiates joy and functionality, a stark contrast to its former self. While I did “tidy up” some for these photographs, it’s important to emphasize that I did not remove any toys from the room or clean the chalkboard specifically for the shoot. What you see here is a genuine representation of how our playroom looks on a day-to-day basis, a testament to the effectiveness of our design choices and storage solutions.
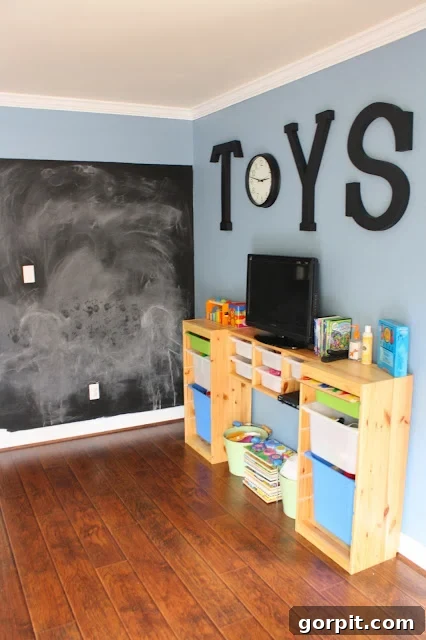
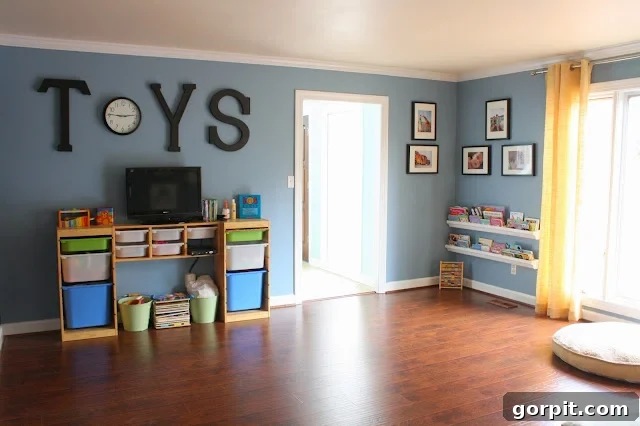
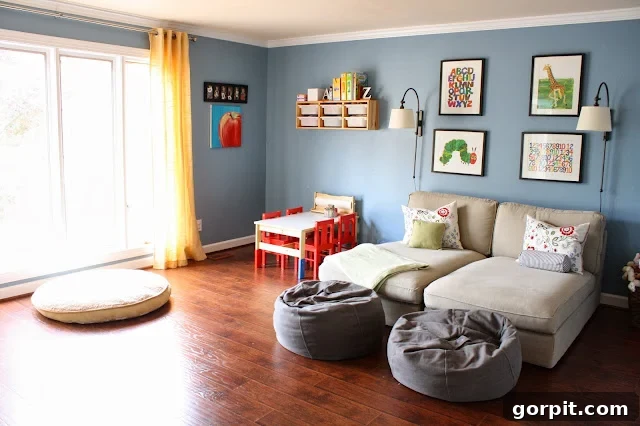
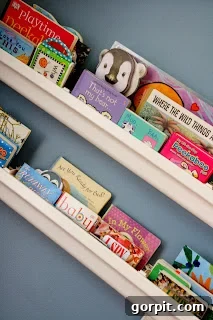
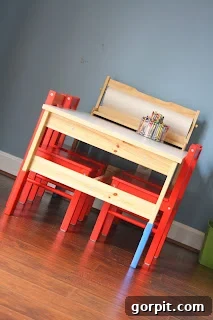
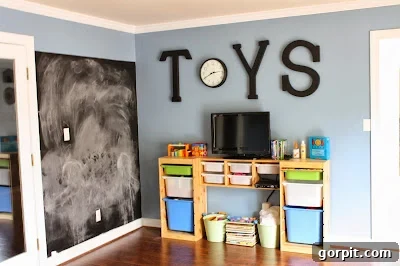
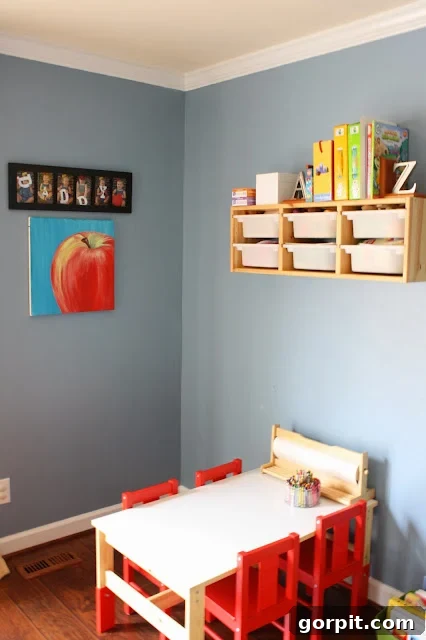
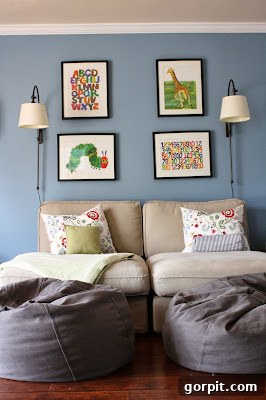
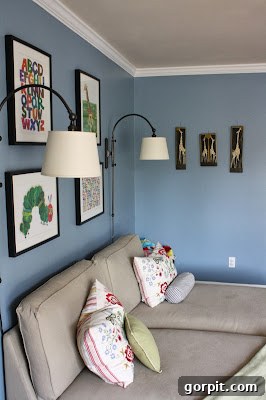
Isn’t this a truly happy playroom?! The thoughtfully integrated storage solutions genuinely accommodate all of the girls’ toys, making it incredibly easy for us to maintain tidiness and organization. More importantly, this design empowers the girls to retrieve and put away their books and toys independently, fostering a sense of responsibility and self-sufficiency. The few items that are stored higher up are placed there intentionally, as they require supervision (such as markers or toys with small pieces). For those curious minds wondering if we genuinely leave crayons on the table all the time, the answer is a resounding yes! By some miraculous stroke of luck, Attley and Avery consistently color only on the paper we provide, earning our complete trust with the crayons.
Phase 1 Details: Bringing Color, Comfort, and Creativity to Life
Our initial phase of the playroom transformation focused on foundational changes and the introduction of color and character. This stage truly laid the groundwork for the playful atmosphere we envisioned.
Walls, Trim, and Electrical Upgrades
The first significant step was painting the walls a gorgeous, calming blue color. This vibrant yet soothing hue instantly brightened the room and created a cheerful backdrop for play. Complementing the new wall color, we hung golden yellow grommet curtains, adding a touch of sunshine and softness while providing essential light control. We also took the opportunity to paint all the trim a crisp, true white. This was a welcome change from the dated taupe/beige color that previously made the room feel dull. My wonderful partner, Joe, also meticulously updated all the electrical outlets and light switches from an almond shade to a clean white. It’s genuinely shocking what a profound difference such a seemingly small detail can make in a room’s overall aesthetic.
The Interactive Chalkboard Wall: A DIY Experience
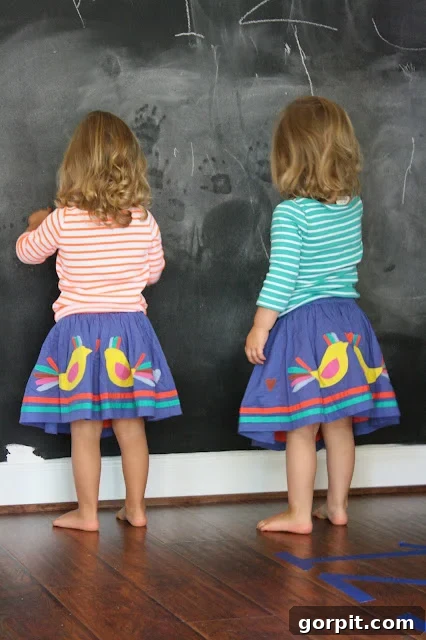
To the right of the French doors, I embarked on a fun DIY project: creating an interactive chalkboard wall. The process involved first applying magnetic primer, followed by a chalkboard top coat – a feature the girls absolutely adore for drawing and imaginative play. DISCLAIMER for fellow DIY enthusiasts: If I had the chance to do this project over again, I would unequivocally skip the magnetic primer. While a good idea in theory, it proved to be quite messy to apply and the magnetic holding power is barely sufficient for a single magnetic letter. Ultimately, it wasn’t worth the time or effort involved.
Thoughtful Furniture Selection: Comfort Meets Functionality
For furniture, we thoughtfully integrated pieces that prioritize both comfort and utility. We already owned the chaise lounges, which we deliberately chose over a traditional couch. We find them significantly more comfortable for snuggling up to read stories with the girls or enjoying family movie nights, offering a cozy and inviting seating option. The highly practical and reasonably priced Trofast storage system from Ikea was another existing piece we incorporated. This system is truly amazing for keeping toys organized and accessible. The charming little table and chairs also hail from Ikea, providing a perfect spot for crafts, drawing, or tea parties. The unique bookshelves, a favorite feature, are ingeniously crafted from rain gutters – a creative and budget-friendly project we plan to detail in a future post. Finally, the wonderfully comfortable bean bag chairs are from The Land of Nod {affiliate link below*}. Their best feature? The covers are entirely removable and washable, a crucial detail for any kids’ playroom!
(includes Cover and Insert)
Free embroidered personalization.
Decorative Details: Adding Personality and Playfulness
Now, for the best part – the decorative details that truly infuse the playroom with personality and charm! These elements, carefully chosen, add visual interest without breaking the bank.
I ordered paper mache letters to spell out “TOYS,” which, in conjunction with an inexpensive clock from Target, create a focal point. These letters, sourced from Consumer Crafts, were very inexpensive and offer a high visual impact. I simply spray-painted them black for a clean, bold look. Easy and effective!
To further enhance the walls without spending a fortune, I ordered a set of 12 Eric Carle Decorative Prints {*affiliate link} and framed four of them. The vibrant illustrations from Eric Carle’s beloved books add a classic, child-friendly artistic touch that I absolutely adore in the room. We already had the wall lamps from Pottery Barn, which were repurposed from a different room in our previous home. All the frames you see were also purchased from Ikea – yes, I truly love Ikea, especially for creating functional and stylish kid spaces on a budget. Frankly, I think the room could benefit from a cozy area rug to tie everything together, but that enhancement isn’t in the budget right now, a project for another day!
Phase 2: The Foundation – Gorgeous Hand-Scraped Laminate Floors
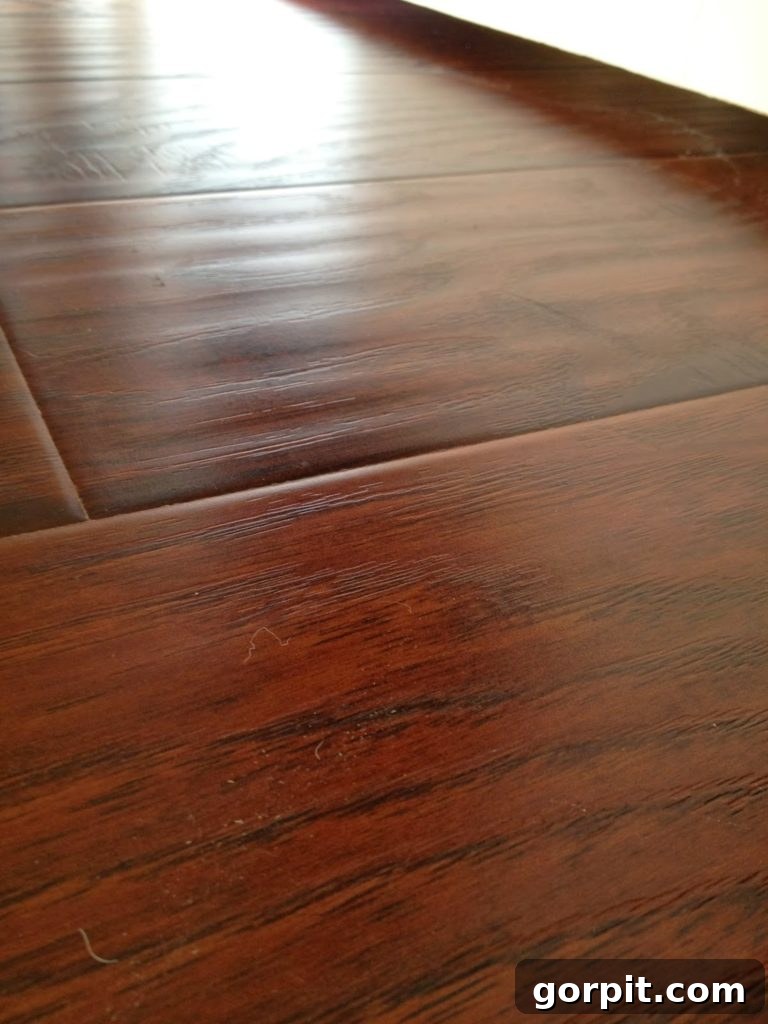
Several months after completing Phase 1, we embarked on Phase 2, which involved a monumental and truly transformative upgrade: tearing out the nasty old carpet and replacing it with the most GORGEOUS hand-scraped laminate floors I have ever seen. Yes, you read that right – laminate! These floors have exceeded all our expectations in terms of both aesthetics and durability, making them an ideal choice for a high-traffic playroom. A huge thank you goes out to Sarah at The Yellow Cape Cod for introducing us to these incredible floors. They offer an amazing combination of quality and price. We’ll be sharing more detailed information about these specific floors, along with the installation and finishing process, in an upcoming post – so stay tuned!
The DIY Journey: From Mess to Masterpiece
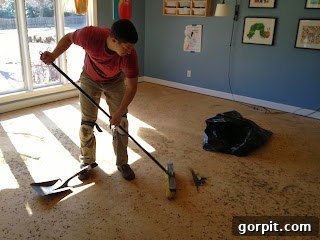
As many of you dedicated DIYers already know, the “getting there” process of any home renovation can be pretty darn ugly and messy. Yet, it’s an important part of the story to share the reality of the transformation. The wonderful, handsome, and incredibly handy man you see in these process photos is my beloved husband, Joe. You can clearly see how gross the floor looked after we meticulously ripped out the old carpet and its padding. It was a dusty, dirty job, but the anticipation of the beautiful new floors kept us motivated.
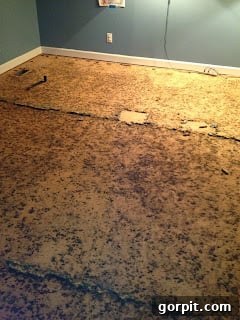
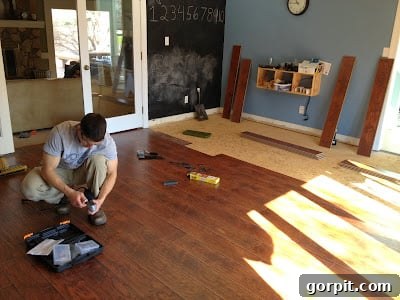
Just look at these GORGEOUS hand-scraped laminate floors up close! The texture and richness truly mimic natural wood, adding immense character and warmth to the room. I bet you can’t wait to hear more about them and our experience with the installation process, can you? Make sure to check back frequently or follow us on social media so you don’t miss that detailed post!
The Dramatic Transformation: Before-and-After Comparisons
Sometimes, the best way to truly grasp the extent of a transformation is through direct comparison. Here are a few side-by-side shots that beautifully illustrate the incredible journey this room has taken, from its uninspired beginnings to its current vibrant form as a beloved playroom.
Real Life in the Playroom: Attley and Avery in Action
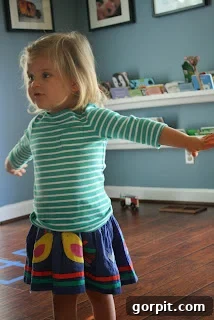
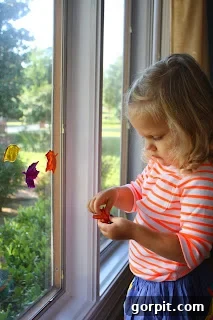
And now for the most heartwarming part – two more photos, because I simply cannot resist showing you Attley and Avery actually USING their wonderful new space! Seeing their joy and engagement makes every bit of the effort worthwhile. These images capture the true essence of what this playroom was designed for: imaginative play, happy memories, and endless learning.
Your Thoughts?
So, what do you think of our living room turned playroom transformation? We poured our hearts into creating this dedicated space for our girls, and seeing their happiness makes it all worth it. We hope our journey inspires you to rethink unused spaces in your own home and transform them into areas that truly serve your family’s needs and bring joy.
* This post contains affiliate links, which means I may receive a (very) small commission if you click a link and purchase something. It does NOT result in additional charges to you or cost you anything extra. The small amount of affiliate money I earn per month is how I pay the fees to keep this site up and running. Thanks so much for your support!
I am thrilled to report that this playroom reveal was proudly featured on:
Artsy Fartsy Mama