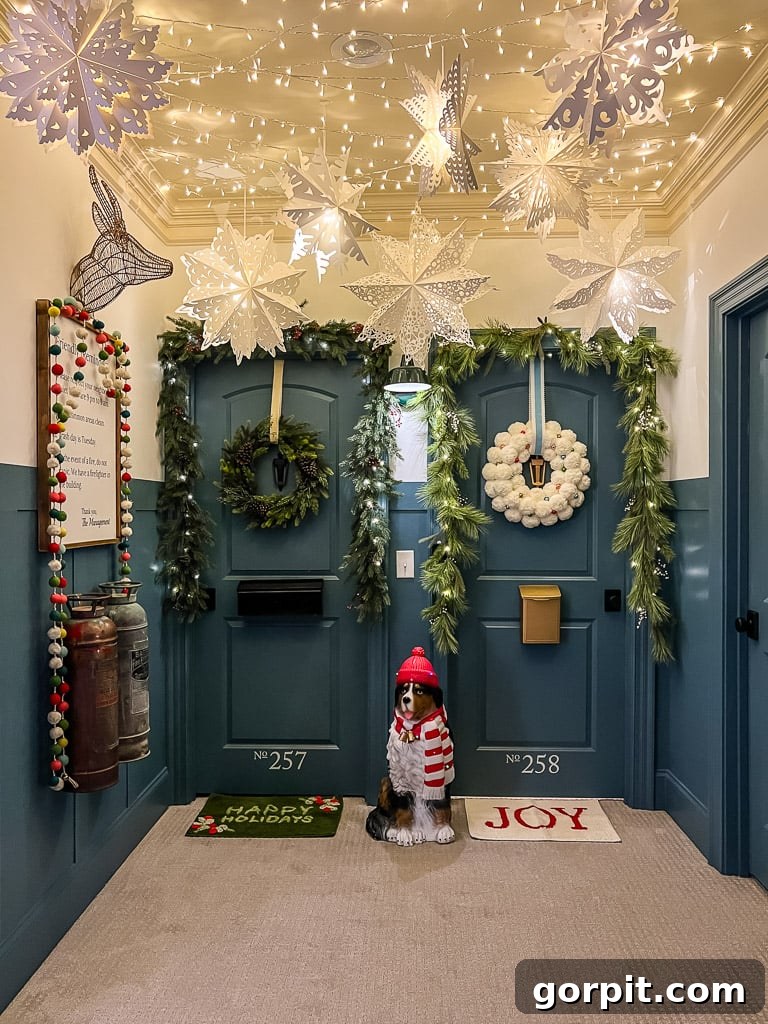
Transforming your home into a sanctuary of magic and wonder is a joy I advocate for all year round, but especially as the festive season approaches. The good news? Crafting a breathtakingly beautiful and dramatic holiday ambiance doesn’t have to be a daunting task. Imagine a cascade of radiant, glowing paper snowflakes, suspended gracefully, casting a soft, enchanting light throughout your space. This stunning visual can be yours with remarkably little effort, requiring just a few simple supplies and less than an hour of your time. Dive in to discover the effortless secret to infusing your home with this captivating, ethereal glow, perfect for creating unforgettable holiday memories.
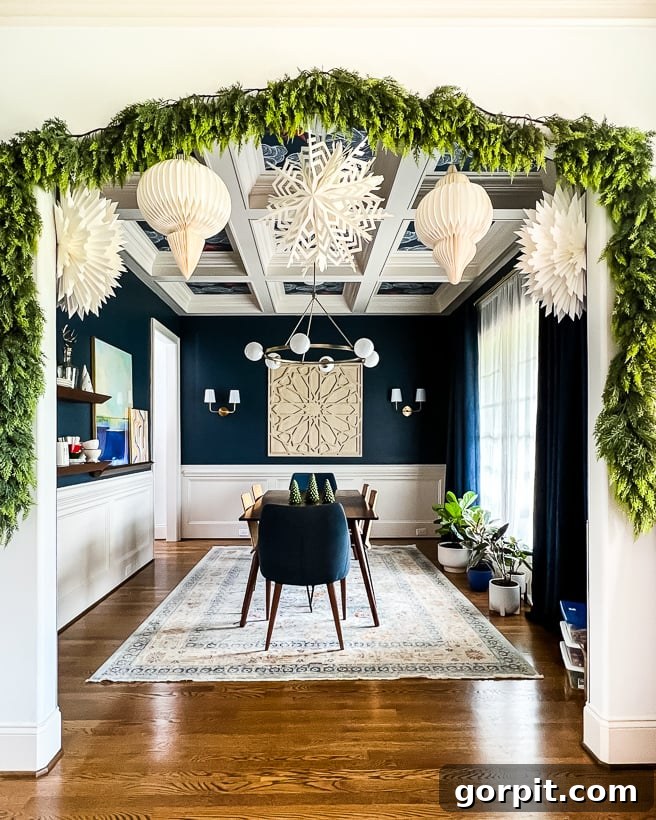
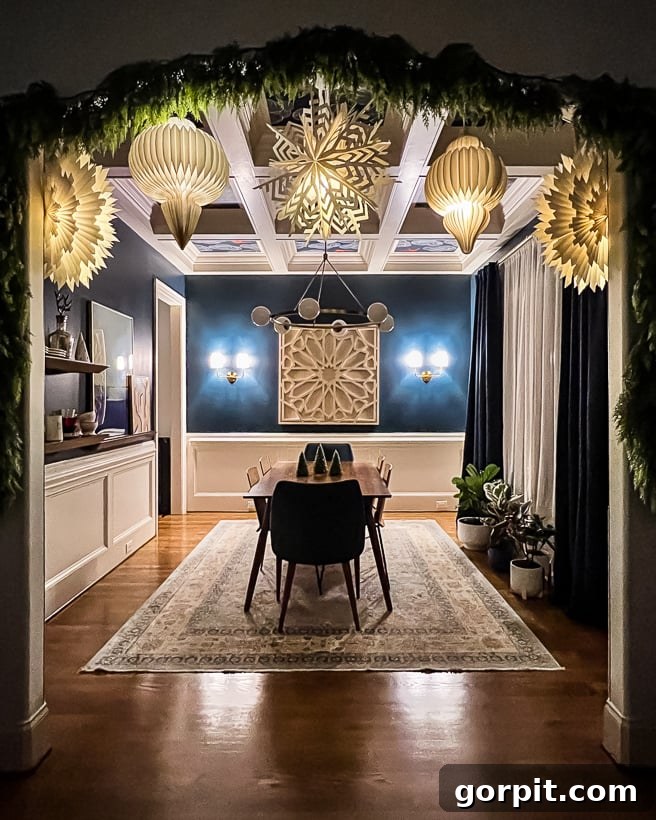
My fascination with light-up paper decorations, particularly snowflakes and ornaments, began in 2021. That year, I adorned the elegant cased opening to our dining room, pairing exquisitely realistic faux garlands with these very magical light-up lanterns. The moment I shared photos and videos of this display on Instagram, the response was overwhelming! While beautiful during daylight hours, they truly came alive after dusk, transforming the space into a luminous wonderland.
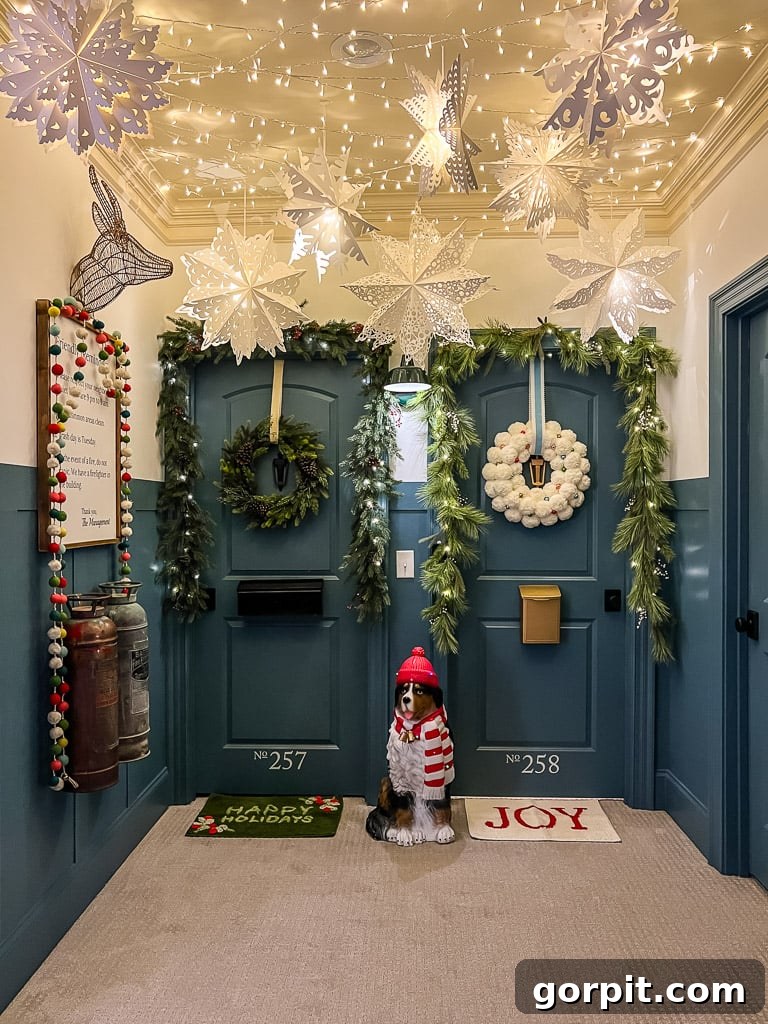
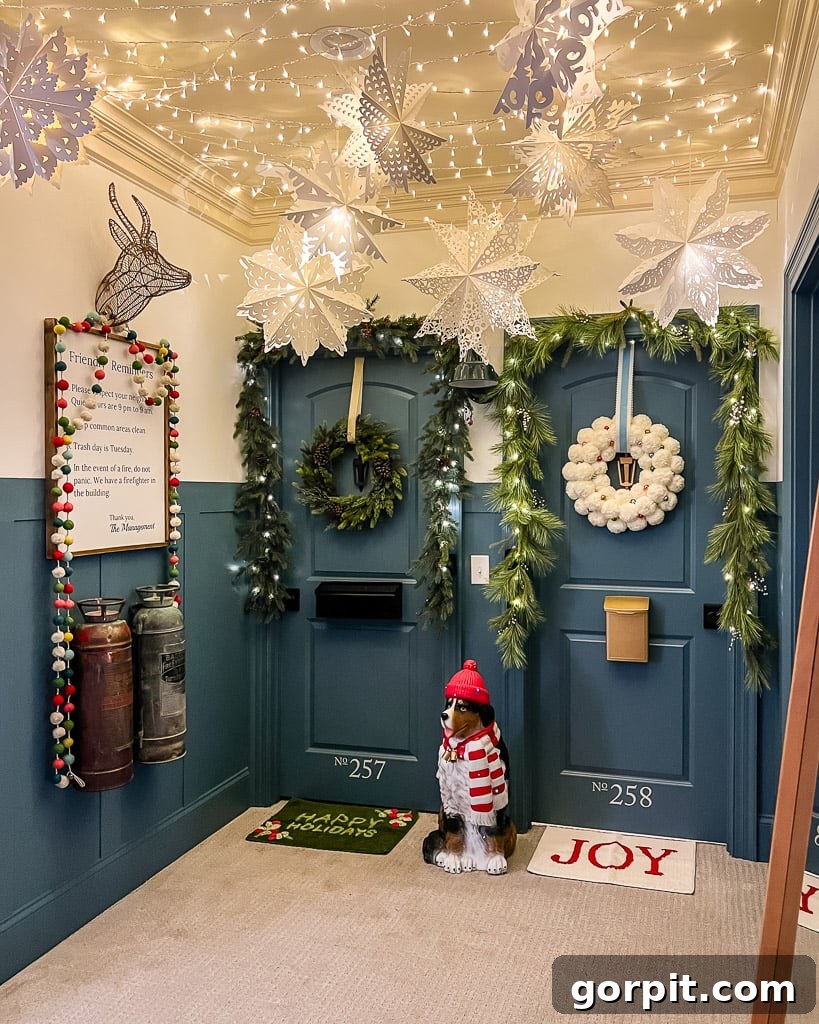
This holiday season, inspired by the immense popularity of that initial project, I decided to replicate the enchantment for my daughters’ bedroom doors. These doors, which we creatively transformed to resemble charming apartment entrances several years ago, receive a special Christmas makeover each year. I envisioned an array of illuminated lanterns hanging gracefully from the hallway ceiling, directly in front of their doors, to add an extra layer of magic to their festive décor. While the specific paper ornament and snowflake lanterns I used for the dining room are no longer available, I was thrilled to discover a new collection of paper snowflake lanterns that I find even more captivating!
Please note: This post may contain affiliate links, meaning if you click and make a purchase, I may earn a small commission at no extra cost to you. You can read my full disclosure policy here.
Essential Materials for Your Enchanting Snowflake Lanterns
Creating these dazzling light-up paper snowflake lanterns is surprisingly straightforward, requiring just a few key components. Here’s a detailed list of what you’ll need to gather:
- Hollow Paper Lanterns: These form the base of your magical display. Once assembled, they should provide a cavity for the light source.
- In 2021, I sourced the lanterns for our dining room from World Market, but they are unfortunately no longer stocked.
- For my daughters’ hallway display, I used this fantastic set of 10 light-up paper snowflake lanterns. I absolutely adore their intricate designs and the charm they bring!
- Remote-Controlled LED Lights: These are crucial for effortless operation, allowing you to turn your entire display on and off with a simple click.
- Important Note: While the set of 10 light-up paper lanterns does include LED lights, they require manual operation for each lantern. For a ceiling display, this isn’t practical. Therefore, I highly recommend investing in separate remote-controlled LED lights for maximum convenience.
- Clear Command Hooks: Ideal for discreetly hanging your lanterns directly on walls, ensuring easy removal without damage. You can find them here.
- Command Ceiling Hooks: Perfect for suspending your lanterns from the ceiling, creating a whimsical floating effect. Get them here.
- OPTIONAL: Additional Twinkle Lights: For an extra layer of sparkling ambiance, consider stringing 99-foot long LED twinkle lights across your ceiling in a random, artistic pattern. This adds depth and a truly ethereal glow to your display.
Step-by-Step Guide: Crafting Your Enchanting Snowflake Lanterns
While I highly recommend finding a visual guide (like the video that was originally here, demonstrating the assembly process in just a couple of minutes), I’ve also meticulously outlined each step below to ensure you can easily create your stunning lanterns.
It’s interesting that the snowflake lanterns I acquired didn’t come with any assembly instructions. Having worked with similar lanterns before, I initially thought it would be self-explanatory. However, after sharing my assembly process on Instagram stories, I received numerous comments from people who struggled to get their snowflakes to fully open or stay closed. This made me realize that while simple, the technique isn’t immediately obvious to everyone. But don’t worry, I promise it’s incredibly easy! Here are the written instructions, which complement any visual tutorial you might watch:
Step 1: Gently Unfold Each Snowflake. Begin by carefully taking one snowflake lantern. Gently pull its ends towards each other, allowing the paper segments to start separating and the snowflake to open. Handle it with care to avoid any tears or creases in the delicate paper.
Step 2: Insert Your LED Light. Once the snowflake is about halfway open, you’ll notice a hollow cavity in its center. This is where your LED light will go. Carefully insert one remote-controlled LED light into this space. After the light is in place, continue to gently open the snowflake until it’s nearly fully expanded. If you find your LED light tends to fall out of larger snowflakes due to a more spacious cavity, refer to the “Hot Tips” section below for a clever solution.
Step 3: Secure the Snowflake with the Cord. This step is crucial for both opening and securing your lantern. Each snowflake features a cord, which serves a dual purpose beyond just hanging: it’s what fully opens the snowflake and holds it securely in its expanded form. You’ll observe a plastic cord stopper on each cord. Once you’ve opened your snowflake as much as you can by hand, you’ll need to tighten this cord. While holding the snowflake closed in its desired open position, press down on the spring toggle of the cord stop and slide it as far down the cord as possible, cinching the snowflake tightly. For larger snowflakes, an extra pair of hands can be very helpful here to keep the snowflake open while you adjust the cord. Release the spring toggle to lock the cord in place. Your snowflake should now appear fully open and feel stable. If it resists staying open or doesn’t look completely expanded, consult the “Hot Tips” below for troubleshooting.
Step 4: Understand the Role of Velcro (if present). Some snowflake designs may include small velcro tabs. It’s important to understand that these velcro tabs are NOT designed to hold the snowflake closed. Their purpose is to help the two paper ends of the snowflake meet and align properly, ensuring a seamless and beautiful spherical shape. The primary mechanism for keeping the snowflake open and secure is the cord and cord stop, as detailed in Step 3.
Hot Tips for Perfect Snowflake Lanterns
If you’re struggling to get your snowflake to fully open or stay securely closed, double-check that every single segment of your snowflake is completely expanded. I encountered this issue with a couple of lanterns, only to discover that one or two segments hadn’t fully unfurled. Once I ensured each individual paper segment was properly opened and unfurled, I had no problem tightening the cord sufficiently to hold the snowflakes wide open and secure.
If your LED light tends to fall out of some of the larger snowflakes because their central cavities are too spacious, here’s a simple trick: wait until after you’ve hung your snowflakes to insert the lights. At that point, it becomes much easier to find a stable spot inside the lantern where the light can balance without falling out. If needed, a small dab of museum putty can provide extra stability, though we found ours balanced perfectly without it.
Step 5: Hang Your Magical Display. Once your lanterns are assembled and illuminated, it’s time to hang them! Use clear command hooks for walls or command ceiling hooks for suspending them from above. After hanging ours, I made minor adjustments to ensure the LED lights inside were pointing upwards. This orientation helps to distribute the light more evenly throughout the snowflake, creating a beautiful, consistent glow.
And there you have it! A truly effortless and profoundly magical way to decorate your home for the holidays. What are your thoughts on this enchanting DIY project?
Frequently Asked Questions About Light-Up Paper Snowflake Lanterns
I’ve provided direct links to the exact paper lantern sets I used in the “Materials Needed” section earlier in this post. You’ll find options for both wall and ceiling displays there!
Storing them is a breeze! At the end of the holiday season, we carefully take down each lantern, remove the LED lights, and gently collapse the paper snowflakes back to their flat, original form. This makes them incredibly compact for storage. We then tuck them neatly into a plastic storage bin along with our other cherished Christmas decorations, ready for next year’s festivities.
This is precisely why I emphasize using remote-controlled LED lights! The lights I recommend come with a convenient remote, allowing you to easily switch your entire display on and off without having to individually access each lantern. While I initially wished I could find remote-controlled LEDs that also included a timer function (it would be wonderful for them to automatically turn on for 4 to 6 hours each evening), I haven’t had luck finding that specific feature. Nonetheless, using the remote for nightly operation is simple and efficient!
We decided not to use the included LED lights primarily because they required manual switching for each individual lantern. Given that our lanterns were intended for a ceiling display, reaching each one to turn it on and off would have been highly impractical. Additionally, the included lights were quite small, and I suspected they might not provide the sufficiently bright and magical glow we were aiming for. However, for tabletop displays or smaller arrangements, they could certainly be a perfectly good option for others!
I’m so glad you noticed it! The board and batten in our upstairs hallway is one of my favorite DIY projects. I’ve dedicated an entire comprehensive post to it, covering all the specifics of our easy DIY board and batten accent wall, including the exact brand and color of the paint we used. It’s a fantastic way to add architectural interest and charm to any space!
More Seasonal Posts
SEE ALL HOLIDAY POSTS
-
The Most Realistic Faux Garlands for 2025
-
Stunning Light-Up Paper Snowflake Lanterns
-
How to Decorate Bedroom Doors to Look Like Apartment Doors
-
DIY Santa Sacks Your Kids Will LOVE!
-
Magical Light-Up Paper Christmas Lanterns
-
Inspiring Front Porch Christmas Decorations & Tips
Are you curious about my comprehensive approach to redesigning and transforming rooms and spaces throughout our home? You absolutely must explore Designer in a Binder®. It’s my ultimate guide to creating a cohesive, stylish home with confidence.
And for those who love exclusive content, behind-the-scenes glimpses, and early access to new projects and tips, be sure to subscribe to my newsletter before you go! You won’t want to miss out on any of the magic we create.