
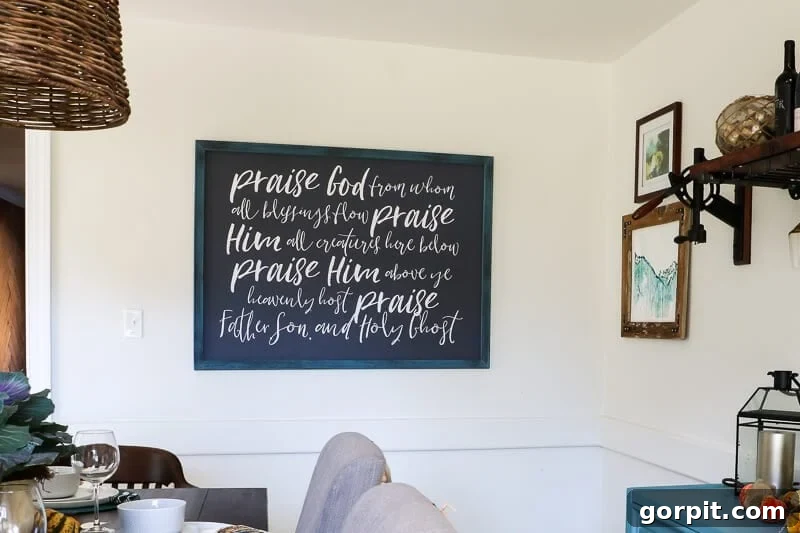
Craft Your Own Stunning DIY Picture Frame: No Tools, No Fuss, Just Beautiful Art!
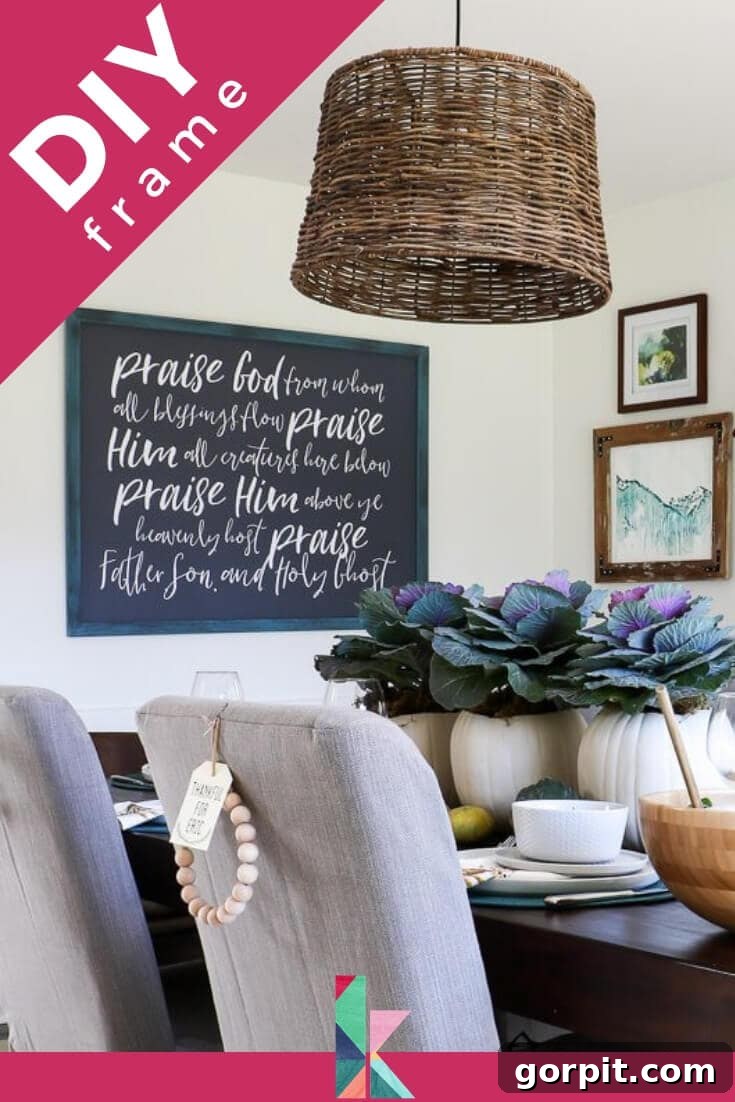
Hello creative enthusiasts! Are you tired of the endless search for the perfect picture frame – one that fits your aesthetic, your artwork’s size, *and* your budget? The struggle is real, especially when it comes to framing large-scale art and photographs. Custom framing can be prohibitively expensive, often costing more than the artwork itself. And off-the-shelf frames for oversized pieces? They’re either hard to find, lack character, or still break the bank.
But what if we told you there’s a revolutionary way to frame your favorite pieces without the need for complex tools, intricate joinery, or a hefty price tag? Forget about sawing, drilling, or using power tools! Today, we’re thrilled to unveil an incredibly simple yet stunning method to create your own DIY picture frames. This tutorial will guide you through crafting elegant frames that look professionally made but are surprisingly affordable, often costing less than $20! It’s an ideal solution for anyone wanting to display large prints, posters, or even lightweight canvas art beautifully and economically.
We’ve explored various framing techniques in the past, from frames built with 1×2 pine boards to those crafted from reclaimed wood. While those methods offer fantastic results, they typically require a saw and other power tools, which can be a barrier for many DIYers. This new approach changes everything. It’s designed for absolute beginners and seasoned crafters alike, proving that you don’t need a workshop full of equipment to achieve high-end results. Get ready to transform your walls with custom frames that perfectly complement your decor, all while saving a significant amount of money!
Why This No-Tool DIY Picture Frame Method is a Game-Changer
The beauty of this DIY picture frame tutorial lies in its sheer simplicity and accessibility. Literally anyone can do it, regardless of their crafting experience or tool collection. If you’ve ever felt intimidated by power tools or found yourself without a saw, this project is tailor-made for you. You don’t need any specialized equipment – not even a hand saw! The only “heavy-duty” tool required is a stapler, and even that could potentially be substituted in a pinch, though it makes the job much quicker and more secure.
This method is particularly brilliant for large-scale art. We all know how impactful a large piece of art can be in a room, drawing the eye and setting the mood without overwhelming the space. However, the cost of framing oversized prints can quickly become astronomical. This tutorial offers an elegant workaround, allowing you to create impressive, gallery-worthy frames for a fraction of the cost. While we’ll focus on large frames here, remember that this versatile technique can be easily adapted to make frames of almost any size.
Large graphic art holds a special place in our hearts for many reasons. Beyond its visual impact, it’s an incredibly budget-friendly way to decorate expansive wall space. The prints themselves can be incredibly cheap to produce (we’ve even shown you how to create your own large-scale art for around $10). The real challenge, historically, has been the framing. That’s where this secret comes in! We’ve cracked the code to making professional-looking frames yourself with minimal money and even less effort. Say goodbye to expensive custom framing forever!
For those looking to frame canvas art specifically, you might also find our dedicated tutorial for making a DIY canvas frame insightful, though today’s project is designed for prints mounted within a frame structure.
A special thank you to DAP Products for their generous sponsorship of this post. This content also includes affiliate links for your convenience. To understand our full disclosure policy, please click here.
How to Construct a DIY Picture Frame Without Any Power Tools
Creating a beautiful, custom frame doesn’t have to be a daunting task. With our simplified approach, you’ll be amazed at how quickly and easily you can bring your artistic visions to life. This method focuses on efficiency, affordability, and accessibility, ensuring a rewarding DIY experience for everyone.
Essential Supplies for Your DIY Picture Frame Project
Gathering your materials is the first step towards a successful DIY project. The items on this list are readily available at craft stores, hardware stores, or online, making it easy to get started. We’ve chosen these specific supplies for their ease of use and effectiveness in achieving a durable and aesthetically pleasing frame.
- Heavy-Duty Stapler: Essential for securely attaching your print to the frame. A good quality stapler will make this step quick and easy.
- DAP Rapid Fuse: This super-fast-acting adhesive is a game-changer for assembling the frame corners without clamps or long waiting times. Its strong bond ensures a sturdy structure.
- Paint or Stain and Paint Brushes: Choose colors or finishes that complement your artwork and home decor. This is where your frame gets its unique character!
- Canvas Stretcher Bars: These are the core of your frame. Available in various lengths, they are designed to interlock easily. (I purchased mine at Hobby Lobby – the 36″ bars were $3.99 and the 48″ bars were $4.99, demonstrating their incredible affordability).
- Eye Hooks: Small screw-in hooks used for attaching the hanging wire to the back of the frame.
- Picture Hanging Wire: Strong wire designed to hold the weight of your framed art securely.
- An art print: The star of your frame! (You can find the exact print that I framed here, or explore many other options in our shop).
Before you begin, ensure you have all these items ready. Having everything at hand will streamline the process and allow you to focus on the creative aspects of your project.
Step-by-Step Guide to Assembling Your DIY Picture Frame
Now that you have all your materials, let’s dive into the simple steps to create your beautiful, custom frame. Each step is designed to be straightforward and achievable, even for those new to DIY projects.
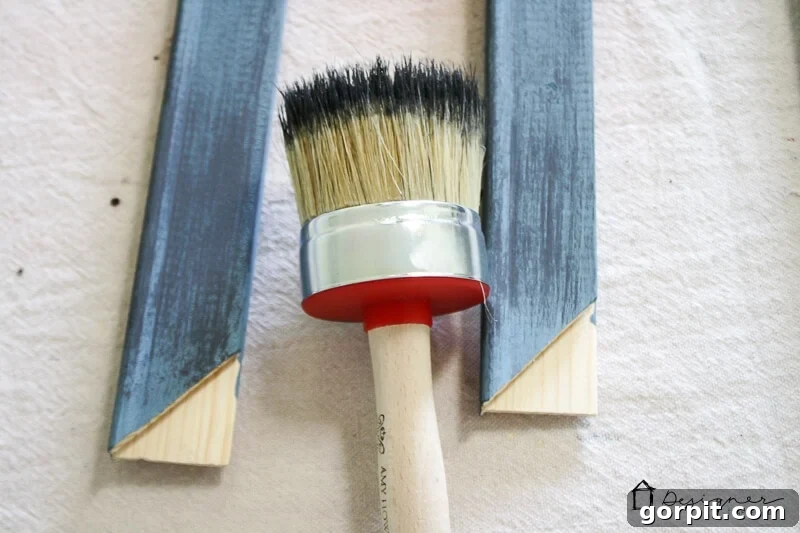
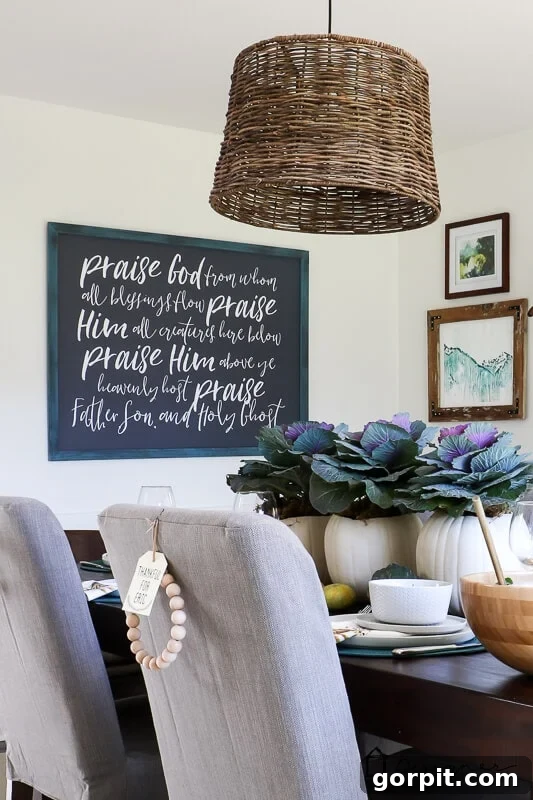
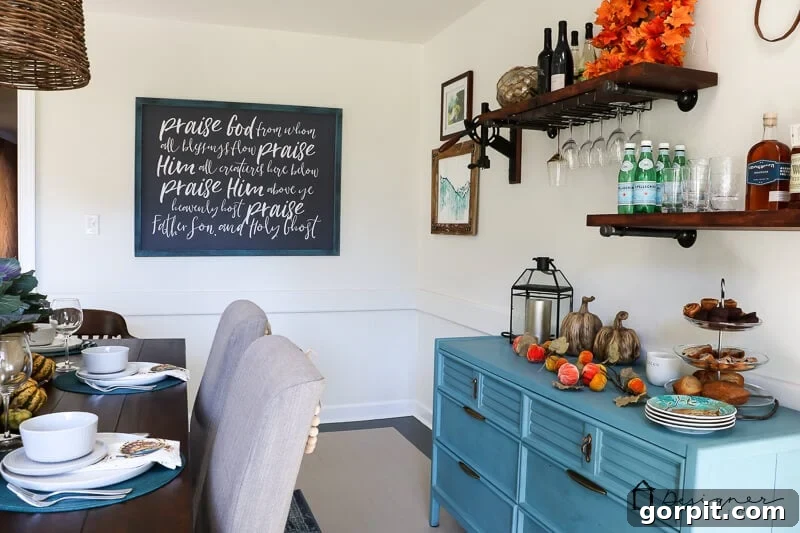
1) Personalize Your Frame with Paint or Stain: Begin by taking your canvas stretcher bars and applying your chosen paint or stain. This is your opportunity to infuse the frame with your personal style. For this particular frame, I opted for a rich base coat of “Enchanted Evening” by Clark+Kensington, a beautiful deep blue. Once this layer was completely dry, I added another dimension by dry brushing some “Relic” (a dark gray color) Americana Decor Chalky Finish paint. This technique creates a wonderful distressed texture and depth, adding character and interest to the frame. Consider your artwork’s colors and the room’s decor when making your selection. You might also consider sanding lightly between coats for a super smooth finish, or even using a primer first, especially if your stretcher bars are very porous or you’re using a light paint color. Allow ample drying time for each coat to ensure durability and a professional finish.
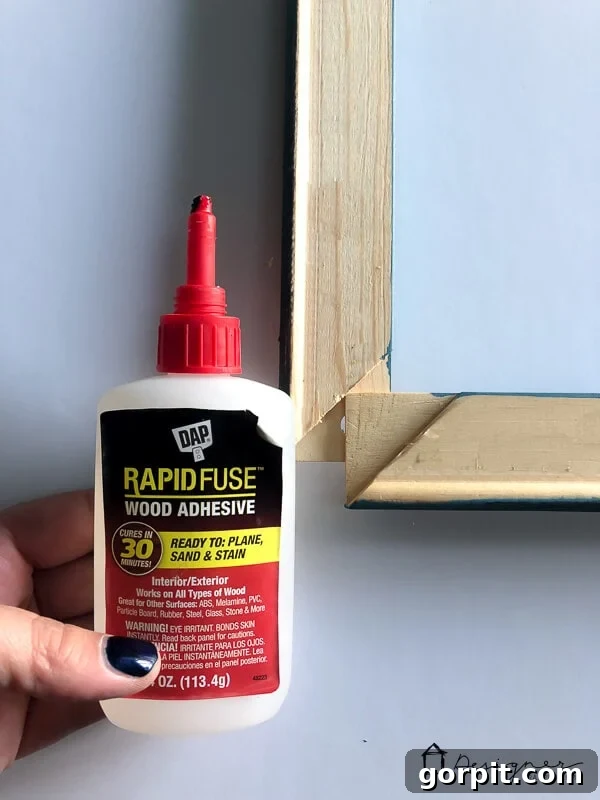
2) Assemble the Frame Structure with Ease: After your paint or stain has thoroughly dried, flip your painted canvas stretcher bars over. Now comes the incredibly easy assembly! The stretcher bars are designed to interlock perfectly at the corners. Apply a small amount of DAP Rapid Fuse to the ends of the bars before pushing the corners firmly together. This powerful adhesive forms a strong bond almost instantly, eliminating the need for clamps or long waiting periods. Ensure each corner is snugly joined and forms a square angle. You’ll be amazed at how quickly and securely your frame takes shape. This rapid bonding is one of the key benefits of using DAP Rapid Fuse – it truly speeds up the entire crafting process.
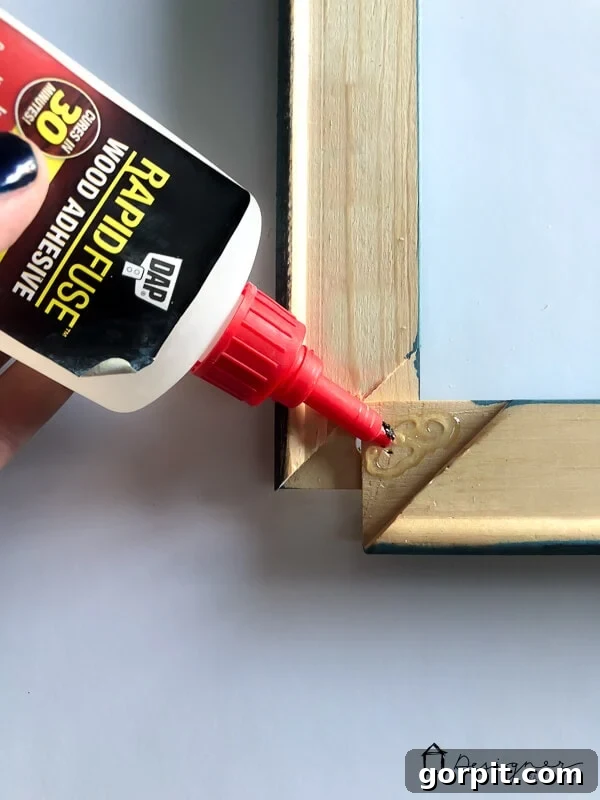
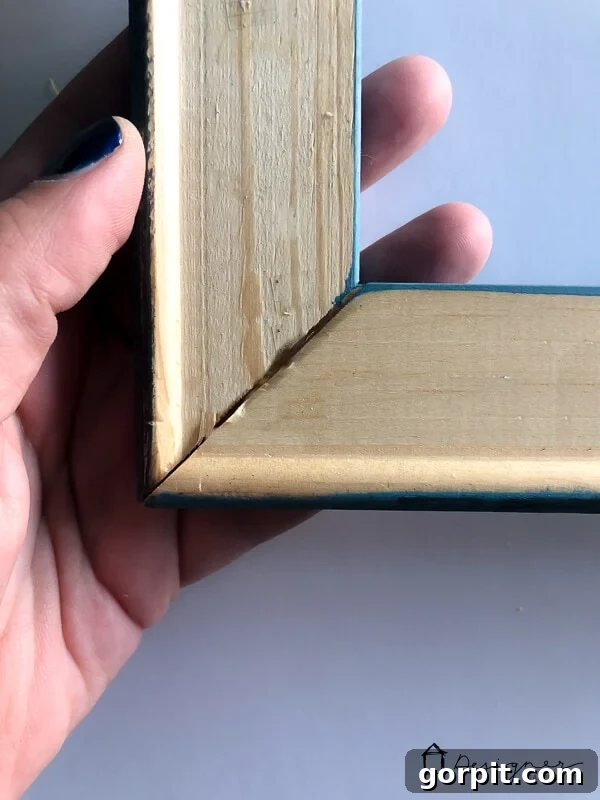
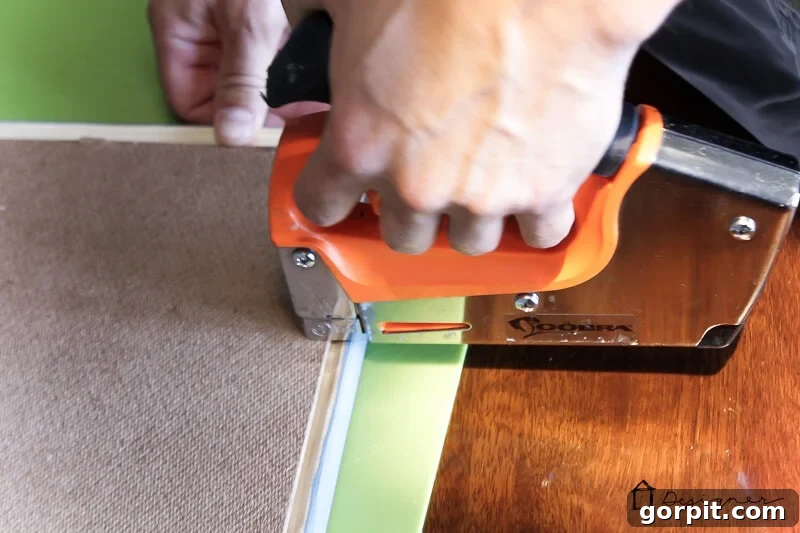
3) Mount Your Art Print Securely: Once the DAP Rapid Fuse has fully cured – which happens incredibly fast, one of its greatest advantages – it’s time to incorporate your artwork. Carefully place your photo or print inside the back of the newly assembled frame. Take your time to center it perfectly. Then, using your heavy-duty stapler, staple the print in place around the edges of the stretcher bars. Make sure your staples are long enough to grip both the print and the wood, but not so long they pierce through the front. Distribute staples evenly to hold the print taut and smooth, preventing any sagging or wrinkles. For detailed guidance on mounting large prints securely and without damage, refer to this post, which provides additional tips and techniques. If your print is very delicate, you might consider placing a thin piece of acid-free foam core or cardboard behind it for added rigidity and protection before stapling.
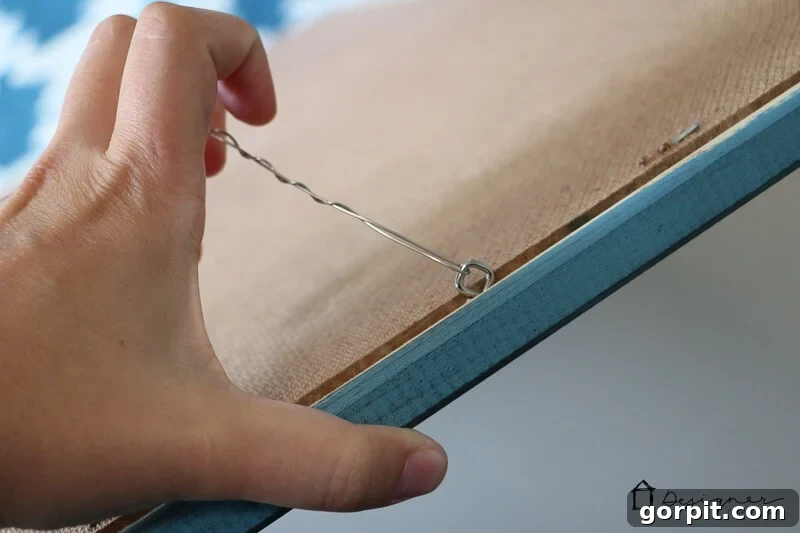
4) Prepare Your Frame for Hanging: The final step is to add the hanging hardware. Screw small eye hooks into the backside of each vertical piece of your frame, approximately one-quarter to one-third of the way down from the top. Ensure they are aligned evenly on both sides. Next, thread your picture hanging wire through both eye hooks. Leave a generous amount of excess wire at each end. This extra length allows you to twist the wire securely around itself multiple times, ensuring a strong, reliable connection. A good rule of thumb is to create a loop large enough so that when hung, the top of the wire loop reaches about a third of the way down the frame, making it easy to hang and adjust. Double-check that all connections are firm and that the wire is taut enough to hold the frame’s weight without excessive sag.
And just like that, you’re done! We told you it was incredibly easy, didn’t we? Step back and admire your handiwork. With both the impressive print and the custom-made frame, this huge 36 x 48-inch art piece came in right at around $30. Imagine the impact this will have on your living space, all while keeping your budget firmly in check. This isn’t just about saving money; it’s about the satisfaction of creating something beautiful and personalized with your own hands.
Tips for Success and Customization
While the basic steps are straightforward, here are a few extra tips to elevate your DIY picture frame project:
- Experiment with Finishes: Don’t limit yourself to paint or stain. Consider using decoupage, fabric wraps, or even metallic leafing for a truly unique frame that perfectly matches your home’s aesthetic.
- Ensure Square Corners: When gluing the stretcher bars, use a carpenter’s square or even a large book to press the corners flat against a surface while the glue sets. This helps ensure your frame is perfectly square.
- Protect Your Artwork: If your print is precious, consider applying a thin coat of UV-protective spray to the print surface before framing to prevent fading over time.
- Scaling for Different Sizes: Remember, the beauty of this method is its adaptability. Simply purchase stretcher bars in the appropriate lengths for your desired frame size. Always make sure you buy two pairs of identical length bars (e.g., two 36-inch and two 48-inch bars for a 36×48 frame).
- Heavy-Duty Staples are Key: While any stapler might work in a pinch, a heavy-duty stapler with 1/4 inch or 3/8 inch staples will provide the most secure hold for your print.
- Think Beyond Art Prints: This framing technique isn’t just for paper prints! You could frame lightweight fabric art, large photographs, posters, or even thin mirrors (with appropriate backing).
Find Your Perfect Art Print to Frame!
If you’re now inspired and looking for incredible, affordable large print options to fill your newly crafted frame, be sure to explore my printable art shop. We offer a vast collection of unique designs that cater to various styles and tastes. You can even find the exact “Praise God from Whom All Blessings Flow” print that is beautifully hanging in our dining room here.
The best part? You purchase a digital print, which means you can have it printed locally or through an online service in sizes as large as 36″ x 48″ for less than $10 each! It’s an incredibly cost-effective way to achieve the sophisticated look of high-end art without the prohibitive price tag. This combination of DIY framing and printable art makes decorating on a budget not just possible, but stylish and fun.
You can click here to see my entire inventory. Creating these art prints has been a true passion project of mine for quite some time, and I genuinely love sharing my creations with my wonderful readers and helping them make their homes more beautiful and personal.
Join Our Creative Community!
Before you head out to gather your supplies and get started on your amazing DIY picture frame project, we invite you to become a Kaleidoscope Living VIP! By signing up, you’ll gain exclusive access to a treasure trove of resources, including all of my printable art designs, comprehensive design guides, exclusive tutorials, and so much more! Everything is conveniently organized in one digital library, making it easy to find inspiration and tools for all your home decor endeavors. Don’t miss out on unlocking even more creative potential for your home!

Conclusion: Beautiful Art, Simplified Framing
You’ve now learned the easiest, most affordable, and most accessible way to frame your favorite large art prints. This no-tool DIY picture frame method, utilizing readily available canvas stretcher bars and strong adhesive, empowers you to create custom, professional-looking frames that would otherwise cost a fortune. It’s perfect for adding personal touches to your home, updating your decor, or simply displaying your cherished artwork with pride. Say goodbye to the frustrations of expensive framing and hello to a world of endless creative possibilities.
We hope this tutorial inspires you to tackle your next home decor project with confidence. Remember, great design doesn’t have to come with a hefty price tag or require advanced carpentry skills. Sometimes, the simplest solutions are the most brilliant. Happy crafting!
[mv_create key=”1″ type=”list” title=”Most Popular Projects” thumbnail=”