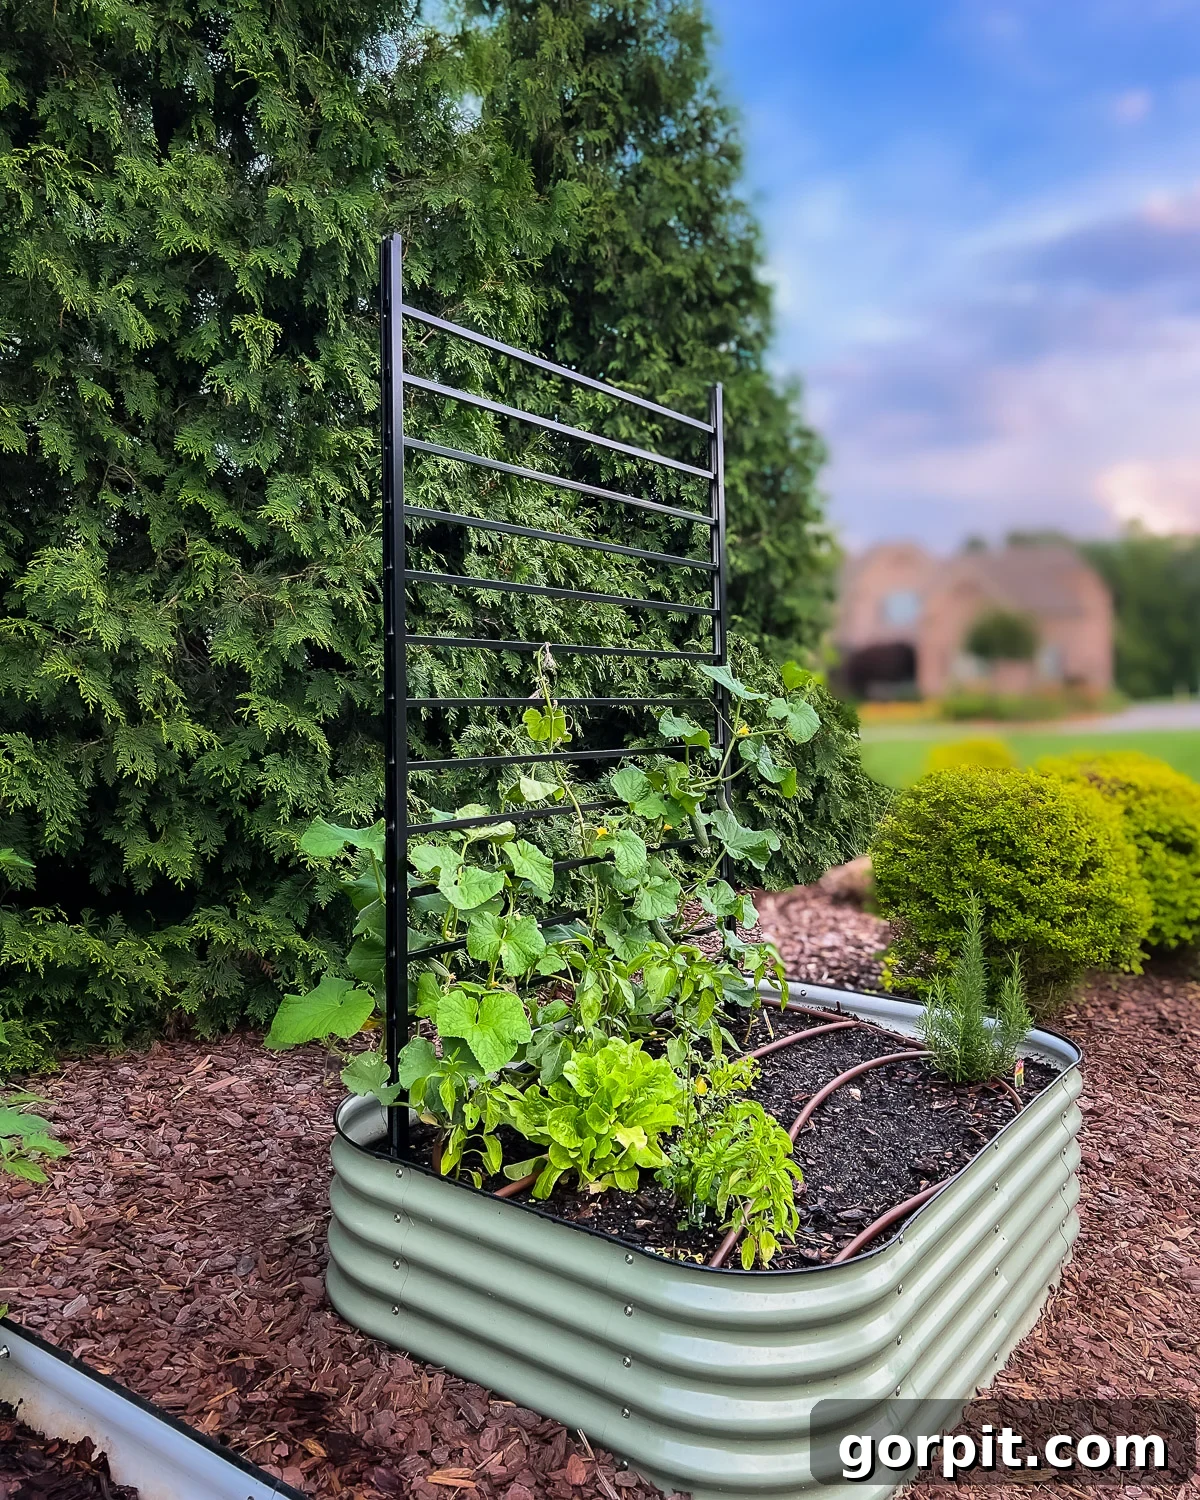
Tired of searching endlessly for the perfect garden trellis that combines modern aesthetics with robust functionality? We certainly were! For homeowners and garden enthusiasts, finding a trellis that complements your outdoor space without compromising on style or durability can be a real challenge. Many off-the-shelf options fall short, either lacking the contemporary design flair or failing to withstand the elements and the weight of flourishing plants. This common frustration often leads to a desire for custom solutions, but the thought of a complex DIY project can be daunting.
But what if we told you there’s an incredibly simple, quick, and stunning way to create your own high-quality garden trellis? Our journey began with a similar dilemma, as we sought an attractive and sturdy trellis for our Vego raised garden beds. When store-bought options proved unsatisfactory, we rolled up our sleeves and designed a DIY trellis that not only looks absolutely gorgeous but is also exceptionally sturdy and built to last. The best part? This project can be completed in under an hour, making it perfect for even the most novice DIYer. Get ready to transform your garden with a sleek, modern, and incredibly durable trellis using a standard metal fence panel!
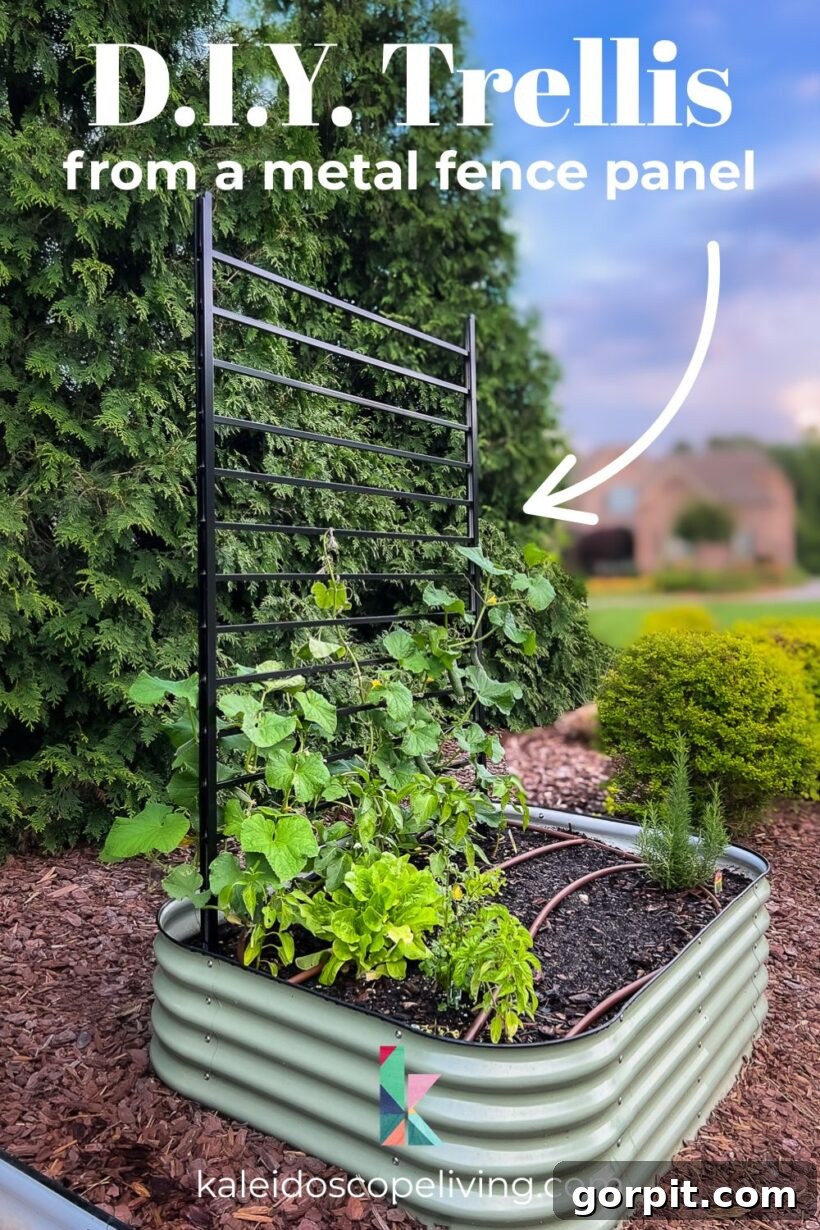
Our venture into elevated gardening truly took root in June 2023 when we introduced Vego Garden Beds to our backyard. These raised beds quickly became a game-changer for growing a variety of vegetables, and we’ve been absolutely thrilled with their performance and ease of use. If you’re curious about our experience, you can delve into our unbiased review of Vego Garden Beds here. While Vego offers its own line of trellises designed to integrate with their raised beds, we found their aesthetic didn’t quite align with the modern, minimalist look we envisioned for our garden space. This led us on an extensive search for alternatives, but nothing on the market offered the perfect blend of contemporary style and robust construction we desired.
Frustration eventually gave way to inspiration. We realized the solution lay in a simple, innovative approach: repurposing a readily available metal fence panel. This seemingly unconventional material proved to be the ideal foundation for crafting a stunning, modern DIY trellis. The beauty of this method lies in its simplicity and efficiency. We were able to construct two of these beautiful trellises in less than an hour, transforming our garden beds into stylish, productive zones. This project truly embodies our favorite kind of DIY – quick, easy, and yielding spectacular results!
This post contains affiliate links for your convenience. Click here for my full disclosure policy.
How to Create a Modern DIY Trellis from a Metal Fence Panel
Crafting a stylish and durable trellis for your garden doesn’t have to be complicated or expensive. With just a few basic materials and tools, you can build a striking modern trellis that elevates your garden’s aesthetic and provides excellent support for climbing plants. This method leverages the inherent strength and contemporary look of a metal fence panel, making it an efficient and rewarding project. Follow these detailed instructions to construct your own custom garden trellis, perfect for raised beds or in-ground gardens.
Essential Materials & Tools You’ll Need
Before you begin, gather all your supplies. Selecting the right materials is crucial for the longevity and stability of your DIY trellis. We’ve chosen items that are widely available and known for their durability in outdoor conditions.
- 4 x 6 black metal fence panel: Look for a fence panel designed for residential use, typically featuring a powder-coated black finish. This specific size (4 feet by 6 feet) is ideal for providing substantial climbing surface while maintaining a manageable footprint. The black finish offers a sleek, modern appearance that beautifully contrasts with green foliage. Ensure the pickets are evenly spaced to provide ample gripping points for your plants. You can usually find these at home improvement stores or local fencing suppliers.
- Two pieces of 1/4 inch x 4 foot rebar: Rebar (reinforcing bar) provides the critical anchoring for your trellis, ensuring it remains stable even in strong winds or when laden with heavy plants. The 1/4-inch diameter is sufficient for this project, offering excellent strength without being overly cumbersome to install. Four-foot lengths allow for deep insertion into the ground, providing superior stability. You can typically purchase rebar in various lengths from hardware stores, often sold in bundles or cut to size.
- Heavy-duty zip ties: These are essential for securely attaching the fence panel to the rebar. Opt for outdoor-grade, UV-resistant zip ties to ensure they withstand sun exposure and weather conditions without degrading. Black zip ties will blend seamlessly with your fence panel for a cohesive look.
- Heavy-duty mallet: A sturdy mallet is indispensable for driving the rebar firmly into the ground. A rubber or plastic mallet with a heavy head will provide the necessary force without damaging the top of the rebar. A sledgehammer can also work, but be cautious to protect your hands and the rebar while striking.
- Optional Tools: You may also need a grinder or bolt cutters to remove pickets (see Step 1), a level to ensure plumb installation, and a measuring tape for precise placement. Safety gloves and eye protection are always recommended when working with tools and materials.
Step-by-Step Guide to Building Your Trellis
The key to this project’s elegant design is installing the fence panel horizontally. This means the individual metal pickets, which normally run vertically, will now create horizontal climbing rungs for your plants. The fence panel’s structural rails will then run vertically, with their bottom ends buried below the soil line for superior stability and a clean, integrated look. This unconventional orientation not only provides an attractive modern aesthetic but also maximizes the climbing surface for your vining plants. Refer to the diagram below for a visual representation of how the components will fit together.
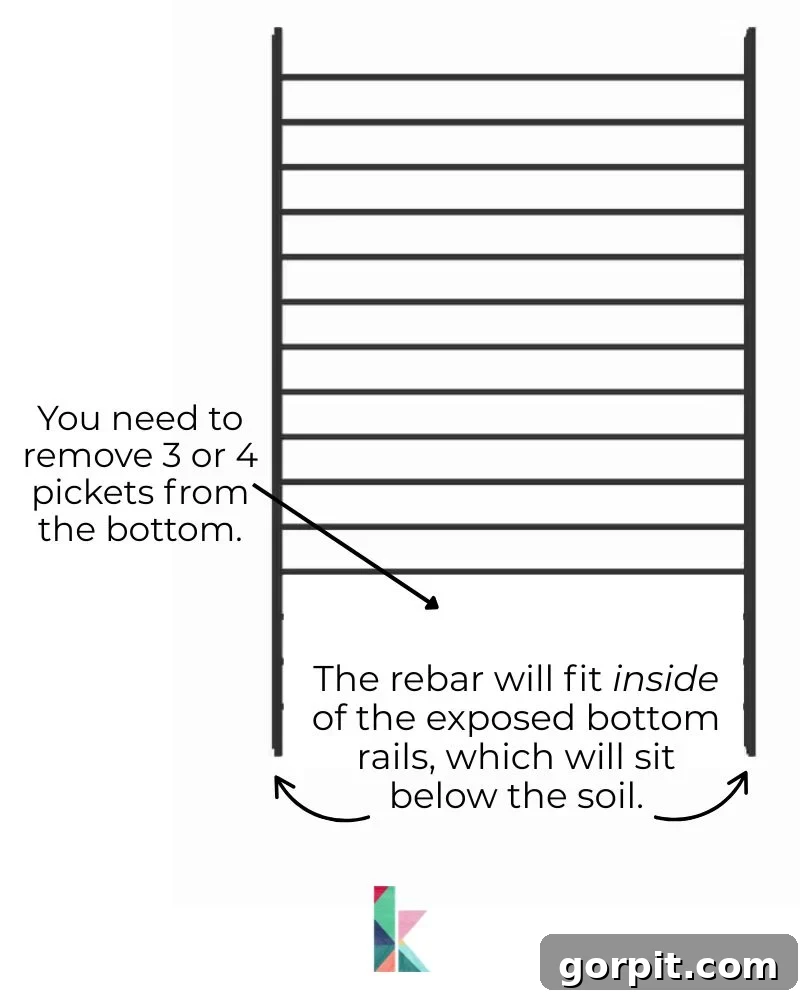
Step 1: Prepare Your Fence Panel by Removing Bottom Pickets. To achieve the desired stability and aesthetic, you’ll need to remove approximately 3 or 4 of the horizontal pickets from one of the 6-foot edges of your fence panel. This creates a clear space at the bottom of the panel, allowing the fence rails (which will now be vertical) to extend below the soil surface when installed. The number of pickets to remove will depend on how deep you want the trellis to sit. You can use an angle grinder with a metal cutting wheel for a clean cut, or heavy-duty bolt cutters for a quicker but potentially less precise removal. Be sure to wear appropriate safety gear, including eye protection and gloves, during this step. This small modification is crucial for the embedded installation and clean finish.
Step 2: Determine Trellis Placement and Mark the Installation Points. With your fence panel prepared, it’s time to decide its exact location in your garden. Consider sun exposure, the types of plants you plan to grow, and the overall layout of your garden beds. Once you’ve chosen the perfect spot, place the modified fence panel where you envision it standing, ensuring the pickets are horizontal. Mark the soil precisely where the two vertical fence rails (now at the bottom of your horizontally oriented panel) will need to be anchored. These marks indicate where your rebar will be driven. Take a moment to step back and ensure the positioning aligns with your garden design.
Step 3: Drive Rebar into the Ground for Secure Anchoring. This step provides the foundational stability for your trellis. Using your heavy-duty mallet, drive one piece of 1/4-inch rebar vertically into the soil at each of the two marks you made in Step 2. It’s imperative to keep the rebar perfectly plumb (straight up and down) as you drive it. A level can be helpful here to ensure accuracy. Drive the rebar deep enough to provide substantial anchoring; for our raised garden beds, we ensured the rebar extended below the bed itself into the undisturbed ground for maximum stability. Aim to leave approximately 12 inches of rebar exposed above the soil surface. This exposed section will serve as the attachment point for your fence panel’s vertical rails.
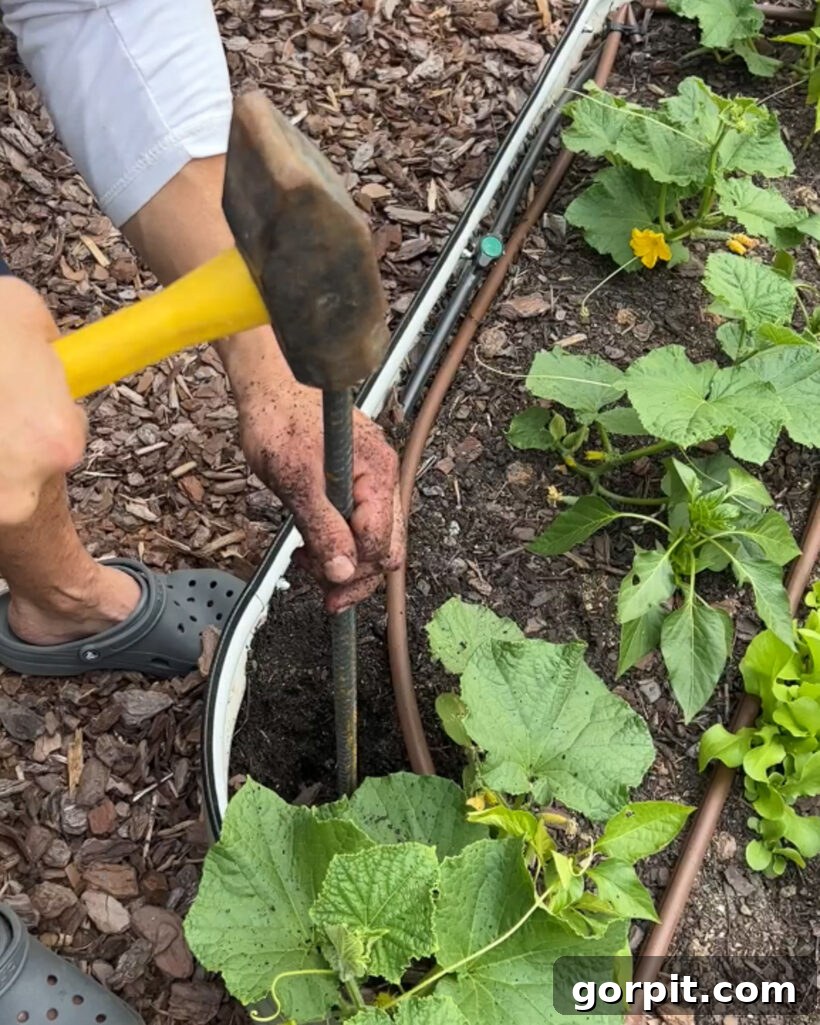
Step 4: Position and Level the Fence Panel onto the Rebar. With the rebar securely in place, carefully lift and position your modified fence panel. The goal is for the exposed 12 inches of rebar to fit *inside* the hollow bottom rails of the fence panel. Gently slide the fence panel down, allowing the rebar to nestle snugly within the rails. This creates a strong, invisible connection. Once the panel is resting on the rebar, use a level to ensure the entire trellis is perfectly level and plumb. This might require some slight adjustments – don’t hesitate to lift the panel, make minor tweaks to the rebar’s position or depth, and reposition the panel until everything sits perfectly straight and true. Precision in this step ensures a professional finish and optimal structural integrity.
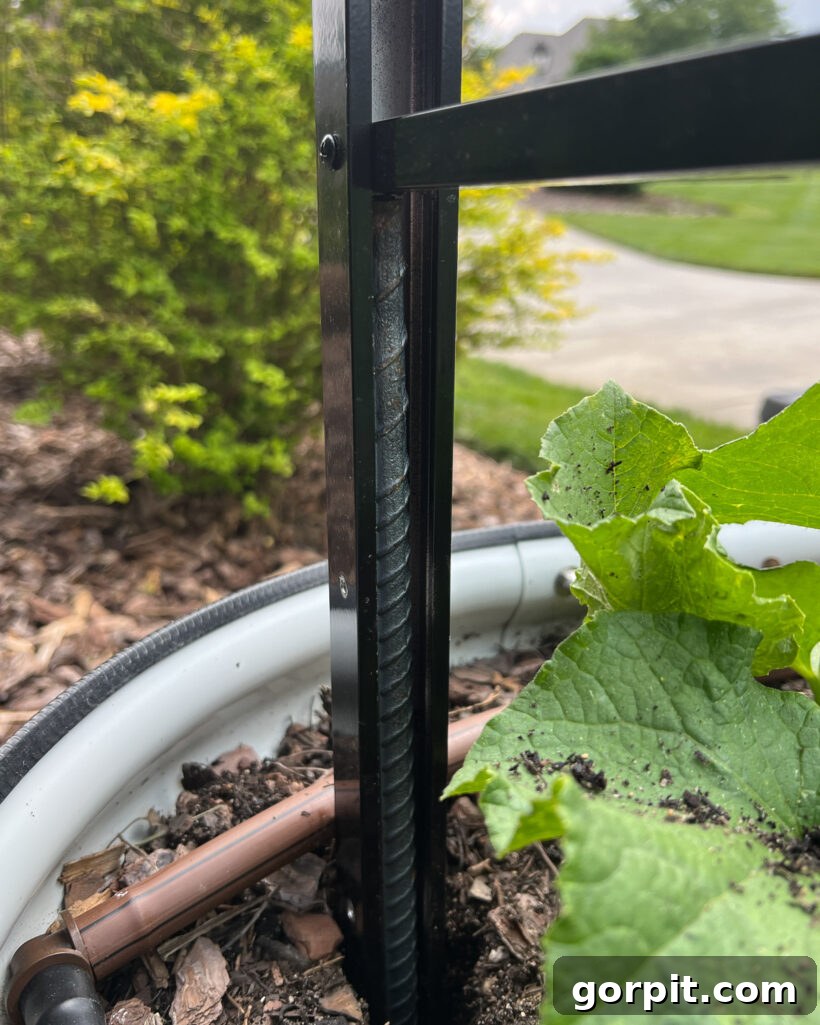
Step 5: Secure the Trellis with Heavy-Duty Zip Ties for Added Reinforcement. Although the rebar provides substantial support, adding heavy-duty zip ties offers an extra layer of security, especially in areas prone to high winds or heavy rainfall. This step is a quick and effective way to ensure your trellis remains steadfast against the elements and the increasing weight of growing plants. Wrap the zip ties around the fence panel’s vertical rails and the rebar, pulling them taut to create a firm connection. We recommend using several zip ties per rebar, spaced evenly along the exposed section. This small, quick step (taking mere seconds per trellis) provides peace of mind, knowing your beautifully crafted trellis is robustly secured for years to come.
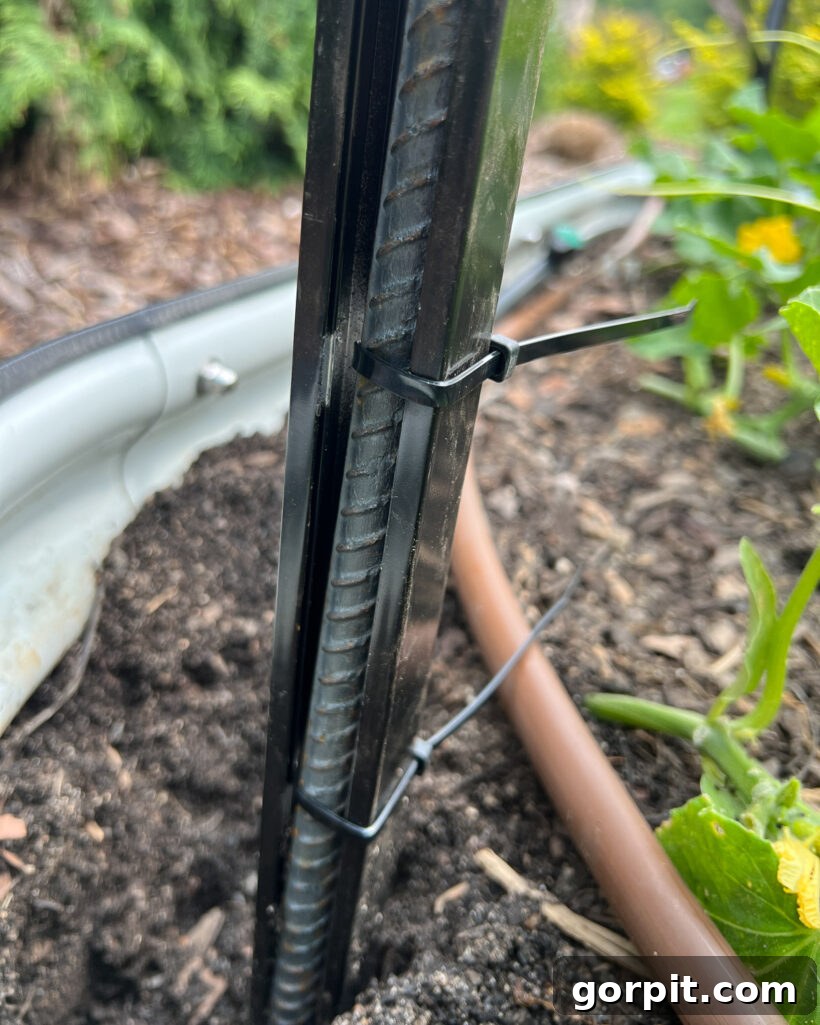
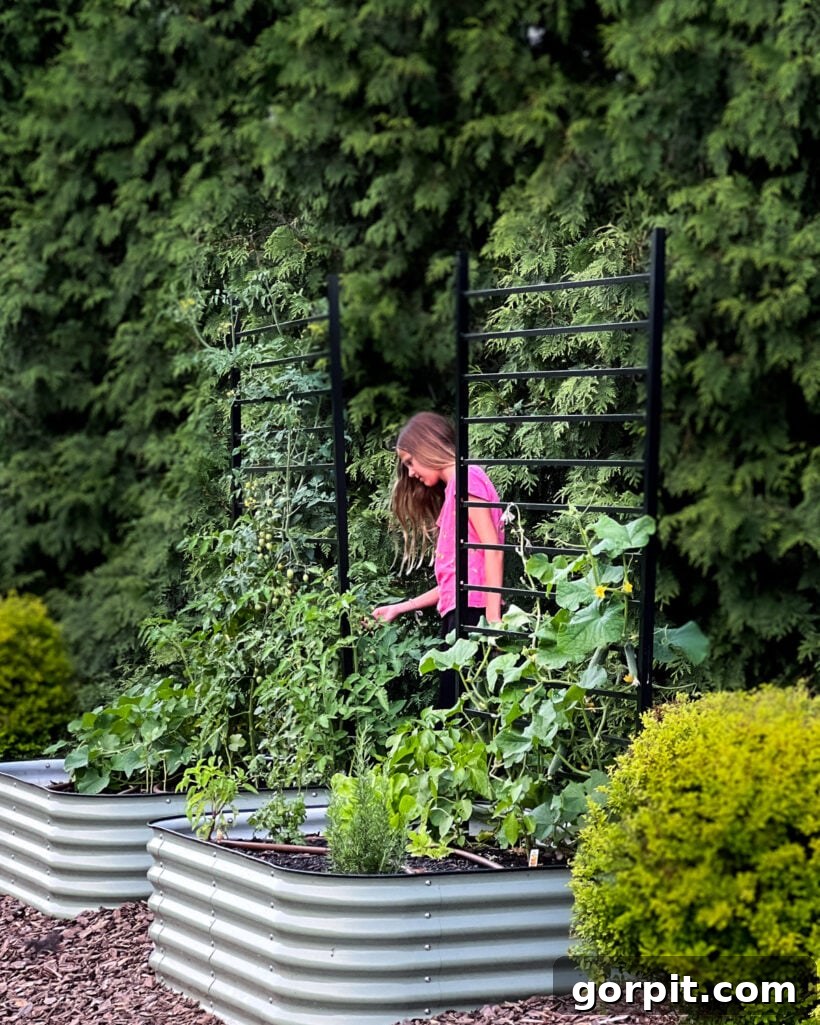
And there you have it! We weren’t kidding when we said this was an incredibly easy DIY project. The transformation in our garden is remarkable, and we couldn’t be more pleased with the outcome of our DIY trellises. Having installed them nearly two years ago, we can confidently attest to their exceptional durability and resilience. They have held up perfectly through various seasons – no signs of rust, peeling paint, fading, or any structural issues whatsoever! This testament to their longevity truly showcases the effectiveness of this simple construction method. Here’s a closer look at how seamlessly they integrated into our garden space.
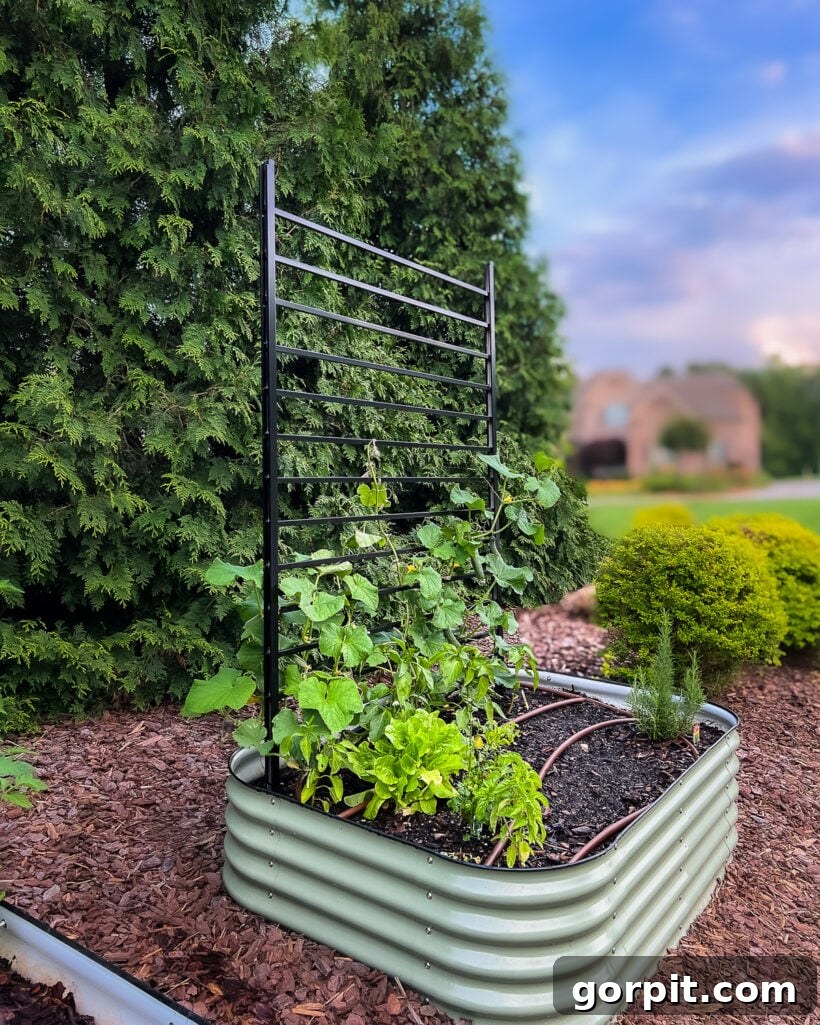
Let’s take a moment to admire one of these DIY trellises from a different vantage point. The sleek black lines and horizontal structure offer a contemporary elegance that truly elevates the overall aesthetic of our raised garden beds. It’s more than just a functional support for plants; it’s a design feature that adds significant visual appeal to the entire garden. The clean lines provide a striking backdrop for climbing vegetables and flowers, making your garden not just productive but also a true work of art. Isn’t it just stunning?
We sincerely hope this comprehensive guide has been invaluable if you’ve been on the hunt for a modern garden trellis but have struggled to find options that meet your needs. This DIY trellis project is genuinely one of the most straightforward yet impactful transformations we’ve ever undertaken, making it exceptionally beginner-friendly. The minimal effort involved yields an incredible payoff in both functionality and aesthetic appeal, proving that beautiful garden solutions don’t always require expert skills or a hefty budget. Dive into this project, and prepare to be amazed by how easily you can enhance your outdoor space. Happy gardening, and enjoy the beauty and bounty your new trellis brings!
More OUTDOOR IDEAS
SEE ALL outdoor POSTS
-
Fire Pit Ideas for Every Outdoor Space
-
How to Make a DIY Outdoor Chandelier
-
Modern DIY Garden Trellis
-
DIY Outdoor Electrical Box Cover
-
DIY Diamond Wire Trellis for a Vine
-
A Complete Review of Vego Garden Beds: Pros, Cons, and Everything In-between
Curious about how we approach transforming rooms and spaces throughout our home, creating cohesive and beautiful designs? You can discover our proven strategies and methods by checking out Designer in a Binder®. It’s an affordable and straightforward system designed to help you decorate your home with confidence and style, demystifying the design process for everyone.
And for those who love exclusive content, behind-the-scenes glimpses, and early access to our latest projects and tips, don’t forget to subscribe to our newsletter before you leave! Join our community of DIY enthusiasts and design lovers to stay inspired and informed.