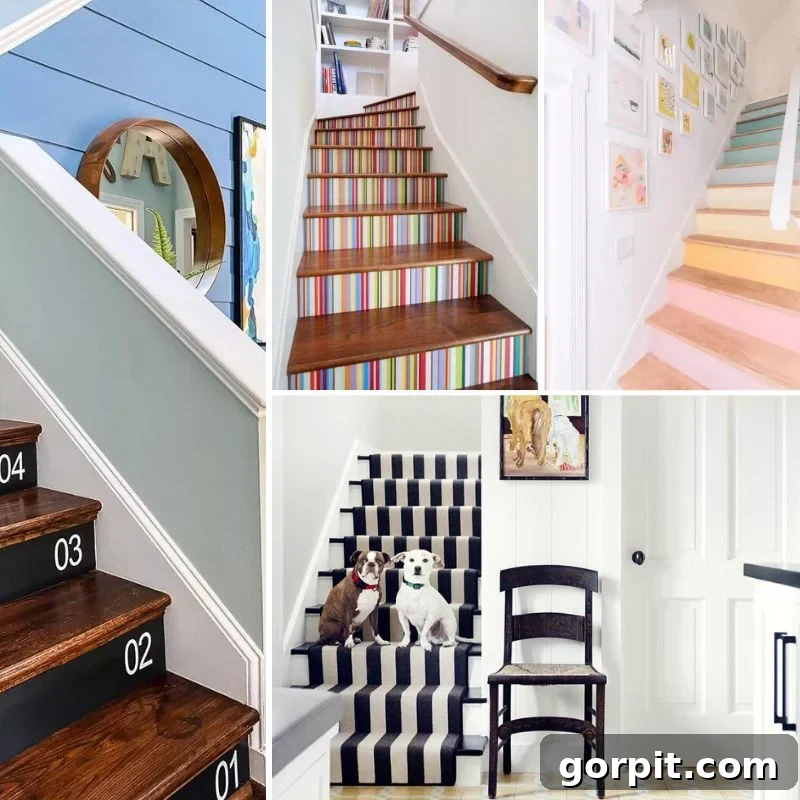
Stairs are far more than just functional pathways connecting the levels of your home; they represent a significant design opportunity. Often overlooked, stair risers, the vertical panels between each step, offer a unique canvas for adding character, style, and a personal touch to your living space. Far from being a mere transition, your staircase can become a captivating focal point with creative and budget-friendly decoration ideas. This guide explores a variety of stylish stair riser transformations that can elevate your home’s aesthetic without breaking the bank.
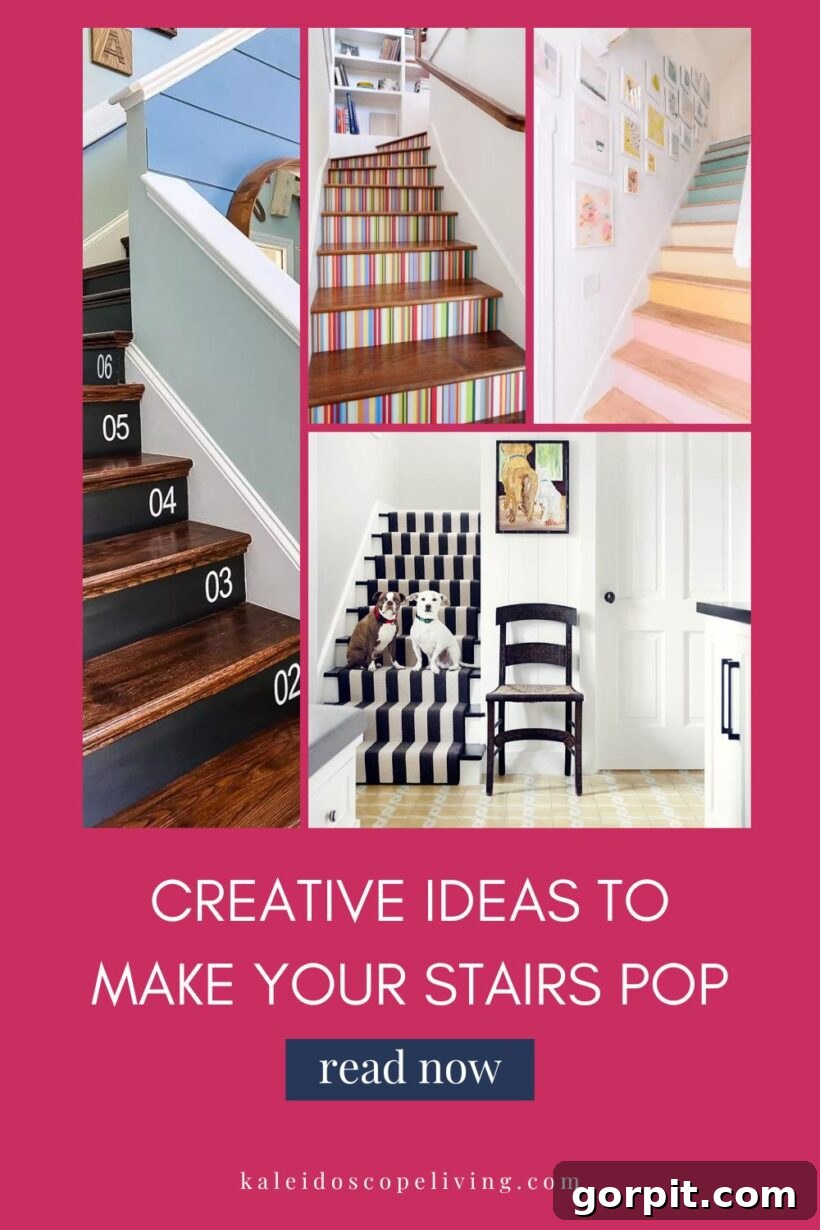
While classic wood stairs possess an undeniable beauty and timeless appeal, they can sometimes appear a bit understated, missing an opportunity to truly shine as a central design element within your home. One well-known method to infuse style into your staircase is by installing a stair runner, a project many homeowners can confidently tackle themselves with a DIY tutorial. However, stair runners aren’t for everyone. An increasingly popular and exciting trend is to embellish the stair risers themselves, transforming them into artistic statements. This approach opens up a world of creative possibilities, allowing you to customize your staircase to perfectly reflect your unique style. We’ve gathered some of the most inspiring and effective stair riser ideas to help you envision your next home improvement project.
Add Stripes to Your Stair Risers
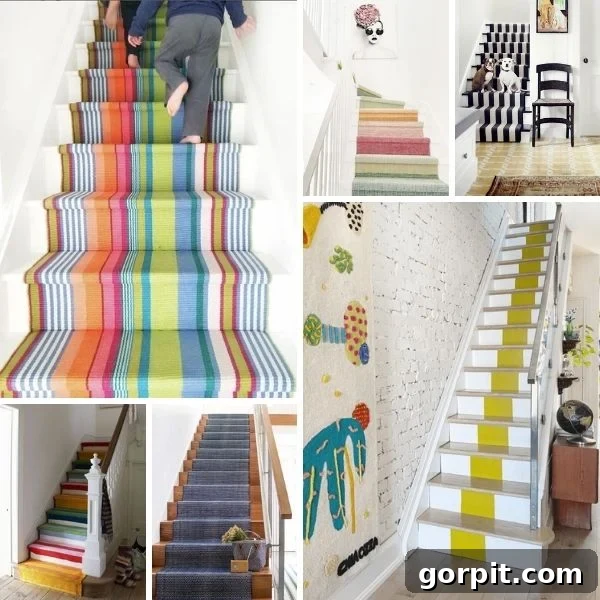
Injecting a sense of dynamism and modern flair into your staircase can be as simple as adding stripes to your stair risers. This versatile design choice offers a myriad of possibilities, from bold, contrasting lines that make a strong statement to subtle, tone-on-tone patterns that add understated elegance. Stripes can visually alter the perception of your staircase; wider horizontal stripes can make a narrow staircase appear broader, while vertical stripes can create an illusion of height. Consider a monochromatic scheme for a sophisticated look, or introduce a vibrant pop of color to an otherwise neutral space, instantly drawing the eye and adding playful energy. The beauty of stripes lies in their adaptability, allowing them to complement various interior design themes, from contemporary minimalist to classic traditional. This relatively inexpensive update requires little more than paint, painter’s tape, and a steady hand, promising a dramatic visual impact for minimal effort.
This post contains some affiliate links for your convenience. Click here to read my full disclosure policy.
Add Graphic Wallpaper to Your Stair Risers
Graphic wallpaper provides an incredible opportunity to infuse your staircase with personality and intricate design. We particularly admire how Rachel from Sprucing Up Mamahood transformed her stairs using graphic peel & stick wallpaper, achieving a remarkable level of visual interest and charm. She even offers a comprehensive tutorial to guide you through the process, making this seemingly complex project surprisingly accessible for DIY enthusiasts. The advantage of removable wallpaper is its ease of installation and versatility. It’s a fantastic solution for those who love to experiment with design trends or who live in rental properties, as it can be updated or removed without damaging the underlying surface. From geometric patterns and intricate mandalas to delicate florals and abstract motifs, the array of graphic wallpaper options is virtually limitless, allowing you to create a truly bespoke staircase that stands out. When selecting wallpaper, consider the overall aesthetic of your home and how the pattern will interact with existing colors and textures. Remember to carefully measure each riser to ensure a perfect fit and a seamless, professional finish.
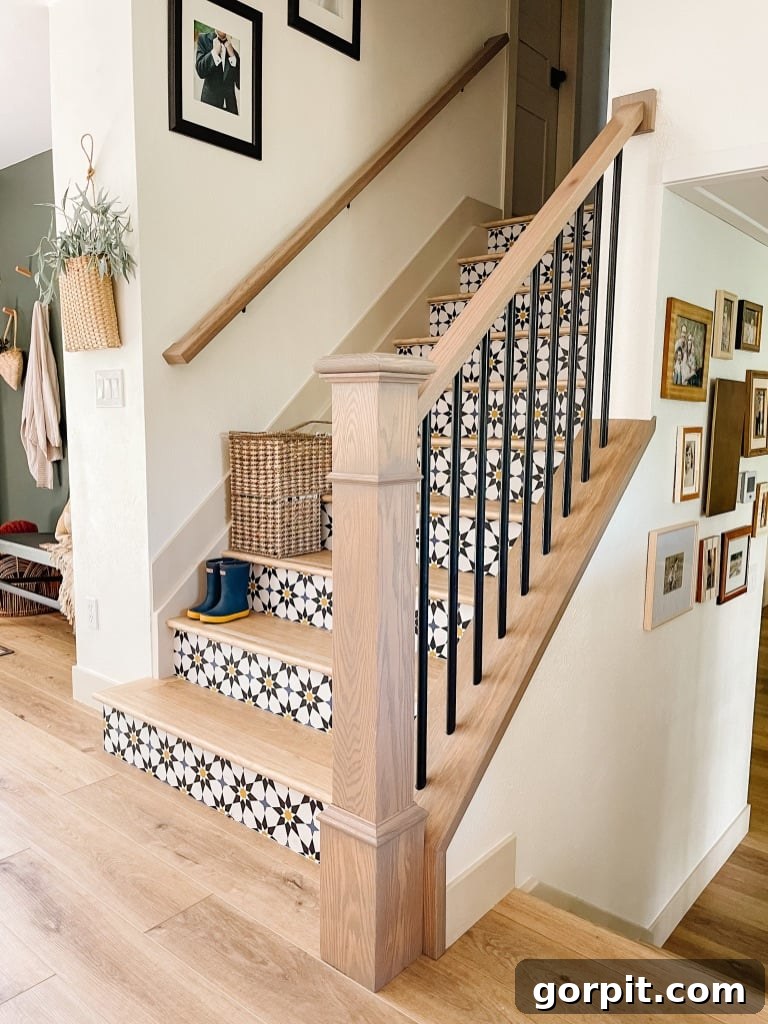
Removable wallpaper is remarkably easy to install, making it an ideal choice for a DIY stair riser makeover. You can explore various high-quality removable wallpaper options from numerous online retailers, offering patterns and textures to suit any design preference. These products often come with clear instructions, further simplifying the application process.
Browse a wide selection of peel-and-stick wallpaper designs to find your perfect match.
Tile Your Stair Risers
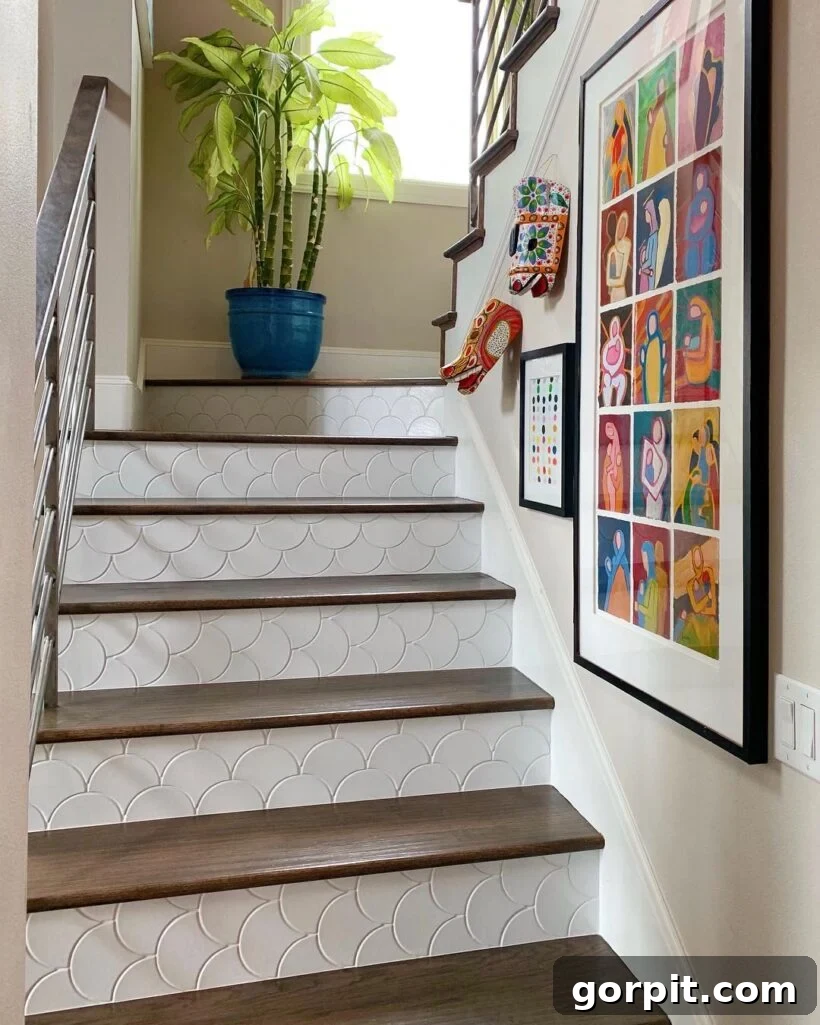
Tiling your stair risers is a sophisticated and durable way to add a unique texture and pattern to your staircase. It creates a striking visual impact, often evoking a sense of old-world charm, Moroccan artistry, or contemporary elegance, depending on your tile choice. We have long admired the work of designer Shauna Glenn, who masterfully tiled her stair risers. Her ingenious approach included alternating the orientation of the tiles, which introduced an additional layer of visual intrigue and craftsmanship to an already beautiful design. Tiling offers exceptional durability and is particularly well-suited for high-traffic areas like staircases, providing a surface that is both aesthetically pleasing and easy to maintain. When choosing tiles, consider materials like ceramic, porcelain, or even cement tiles for different looks. The grout lines themselves can also be a design element, contrasting or blending with the tiles to define the pattern. While traditional tiling can be a more involved project, the enduring beauty and robust finish it provides make it a worthwhile investment for a lasting transformation.
Add Tile Stickers to Your Stair Risers
The idea of tiling stairs is undeniably appealing, offering a bespoke and elegant look. However, traditional tiling can be a labor-intensive endeavor and often comes with a significant cost. Fortunately, tile stickers present an outstanding and budget-friendly alternative. These adhesive decals are designed to mimic the appearance of real tiles, complete with intricate patterns and textures, but without the need for messy grout or specialized tools. They are incredibly affordable, making a high-impact design accessible to everyone, and are exceptionally DIY-friendly, even for those with limited crafting experience. Tile stickers are perfect for creating a temporary refresh or testing out a bold pattern before committing to permanent tiling. They come in a vast array of designs, from classic geometric patterns to vibrant Mediterranean-inspired motifs, allowing for endless customization. Applying tile stickers is often as simple as peeling and sticking, making it a quick weekend project that can dramatically alter the look of your staircase.
Explore a fantastic selection of tile sticker options to easily update your stair risers.
Tile stickers are incredibly simple to install, allowing for a quick and impactful DIY transformation. While the process might vary slightly for stair risers compared to flat surfaces, understanding the general application technique highlights just how straightforward it is.
Paint Your Stair Risers Interesting Colors
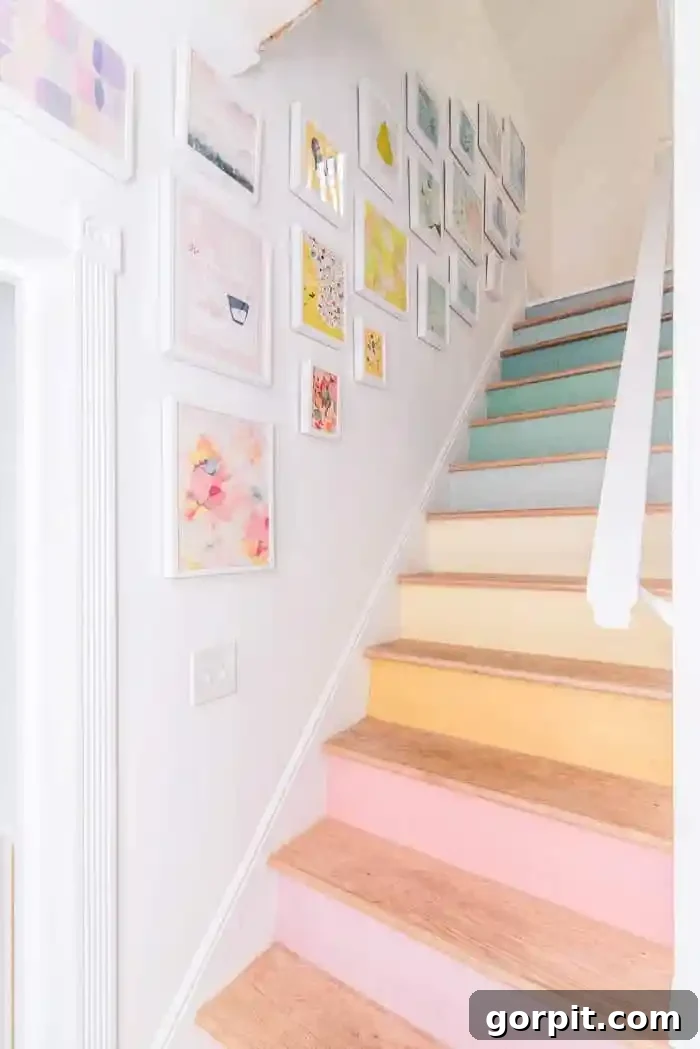
Painting your stair risers is perhaps the most accessible and customizable method to transform your staircase. The sheer affordability and ease of this DIY project make it a top choice for homeowners looking to make a big impact without extensive effort or expense. Ashley from At Home With Ashley’s pastel rainbow stair risers are a perfect example of how a simple paint job can create an absolute showstopper, consistently captivating viewers with their joyful and unique design. Beyond a full rainbow, you could opt for a gradient effect with shades of a single color, a bold two-tone design, or even individual risers painted in contrasting hues for an eclectic look. Consider deep, moody tones for a dramatic statement, or bright, airy colors to lighten up a dimly lit entryway. Preparation is key: clean the risers thoroughly, sand lightly for adhesion, and use painter’s tape to achieve crisp lines. Selecting a durable, high-quality paint formulated for high-traffic areas will ensure your colorful creation stands the test of time, providing a long-lasting and vibrant addition to your home decor.
Add an Interesting Stair Runner
While this article focuses primarily on riser embellishments, it’s worth reiterating the powerful impact an interesting stair runner can have on your staircase’s overall aesthetic and functionality. Beyond its undeniable ability to add immediate style and warmth, a stair runner serves several practical purposes that are especially beneficial in busy households. For families with young children or pets, a runner significantly enhances safety by providing traction, thereby reducing the risk of slips and falls on potentially slippery wood stairs. Furthermore, a well-chosen runner helps to dampen sound, contributing to a quieter home environment, and it protects your beautiful wood stair treads from wear and tear over time. The variety of stair runners available is immense, ranging from luxurious wool options to durable synthetics, with patterns that span from classic Persian motifs to contemporary geometric designs. Installing a stair runner yourself is a surprisingly manageable DIY project, as we discovered firsthand, proving that a professional-looking finish is well within reach for the average homeowner.
Number Your Wood Stairs
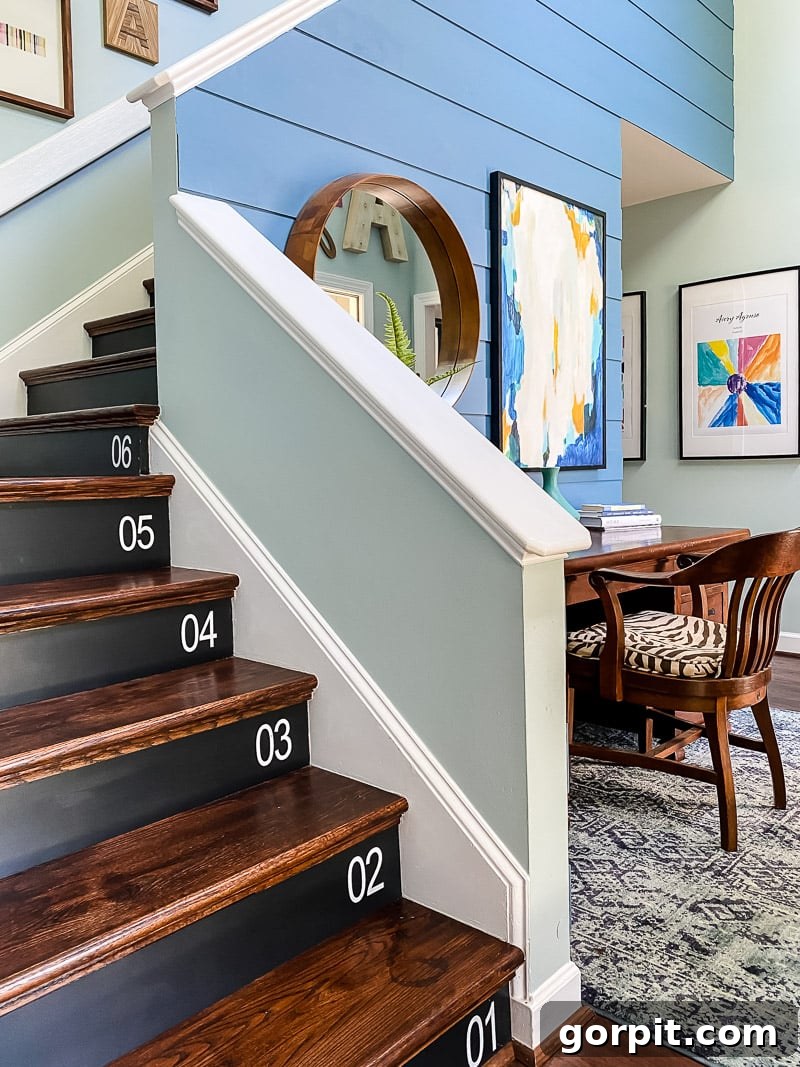
Adding numbers to your wood stair risers is a wonderfully unique and personalized way to infuse character and a touch of whimsy into your home’s entryway. This is precisely the path we chose for our old house, a decision born from a desire to go beyond basic decor. After undertaking the rewarding project of removing the old carpet and installing pristine hardwood stairs, we knew that plain white stair risers wouldn’t fully capture the renewed charm of our space. While we explored numerous stair runner ideas, we ultimately decided against covering too much of our beautiful new stair treads. Instead, we opted for a striking contrast: painting our stair risers a sophisticated black and then adorning them with crisp, white numbers. This simple yet impactful detail transformed our staircase, adding a layer of unexpected personality and modern charm that we absolutely adore. It’s a design choice that marries functionality with playful aesthetics, guiding the eye up the stairs in a truly memorable fashion. Read on for a detailed tutorial on how you can achieve this captivating look in your own home.
Materials needed to number your wood stairs:
- Vinyl and a cutting machine (e.g., Silhouette CAMEO or Cricut Explore) OR pre-made house number stickers
- If opting for vinyl, we highly recommend Silhouette Brand vinyl due to its superior ease of peeling from the backing paper compared to other brands.
- For cutting machines, the Silhouette CAMEO is a fantastic choice, and we’ve also heard excellent reviews about the Cricut Explore for similar tasks.
- Please note that if you choose pre-made address stickers, their adhesive quality, potential for paint damage upon removal, and compatibility with transfer paper may vary. However, it’s certainly worth considering if you do not have access to a vinyl cutting machine.
- Transfer paper (while Silhouette brand is reliable, a large, cost-effective roll like this one works perfectly and saves money)
- Craft knife (essential for weeding vinyl or making precise adjustments)
Steps to number your wood stairs:
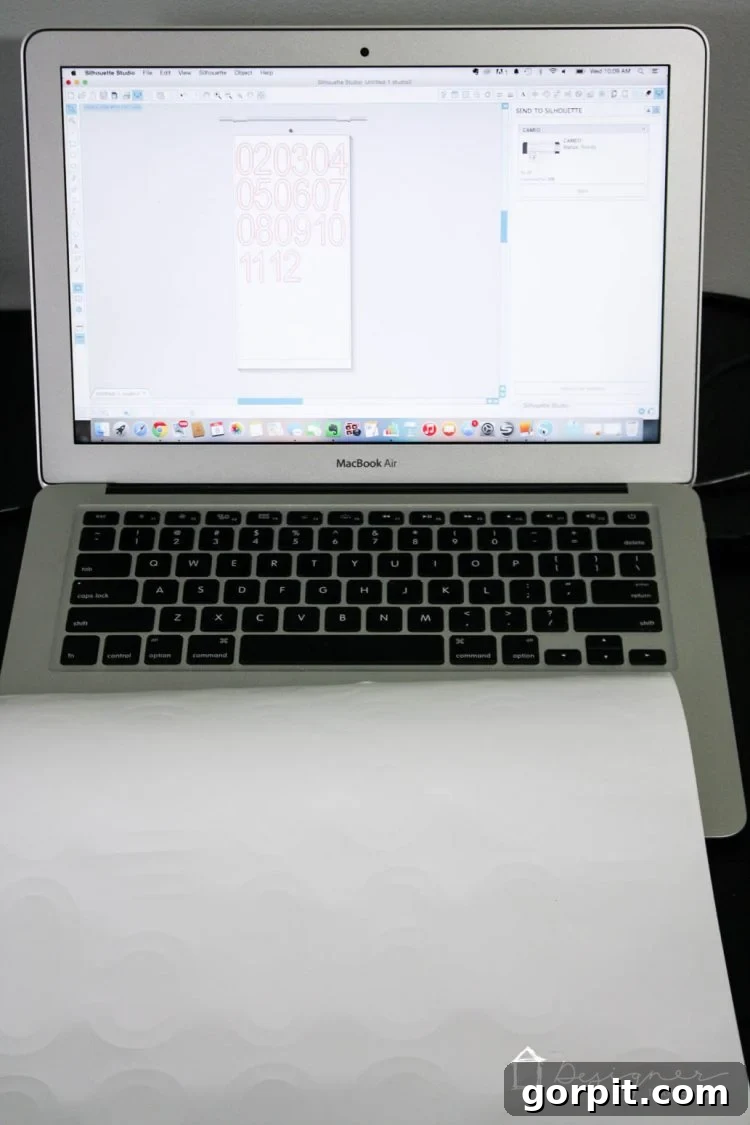
1. **Prepare Your Numbers:** If you are using pre-made stickers, you can proceed directly to Step 2. For those utilizing vinyl and a cutting machine, begin by designing your desired numbers within your cutting machine’s software. It’s crucial to accurately measure your stair risers beforehand and ensure your digital design corresponds to these dimensions for a perfect fit. Once designed, cut out your vinyl numbers and carefully “weed” the excess vinyl, leaving only your chosen design.
|
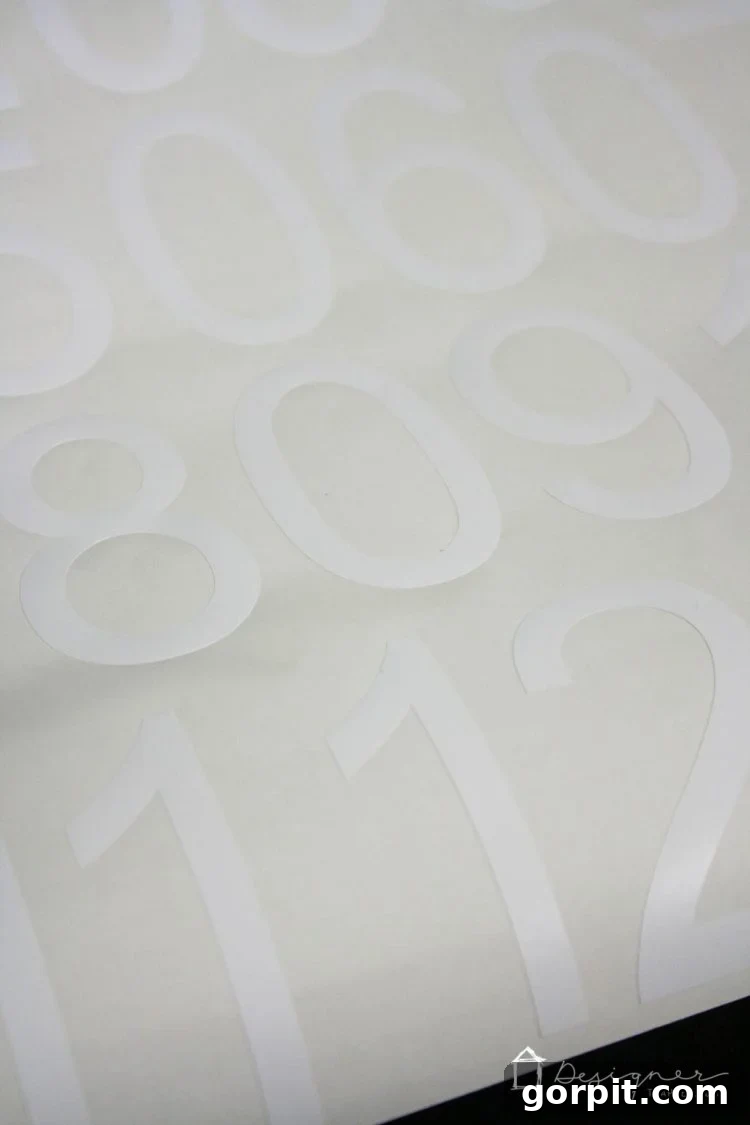
|
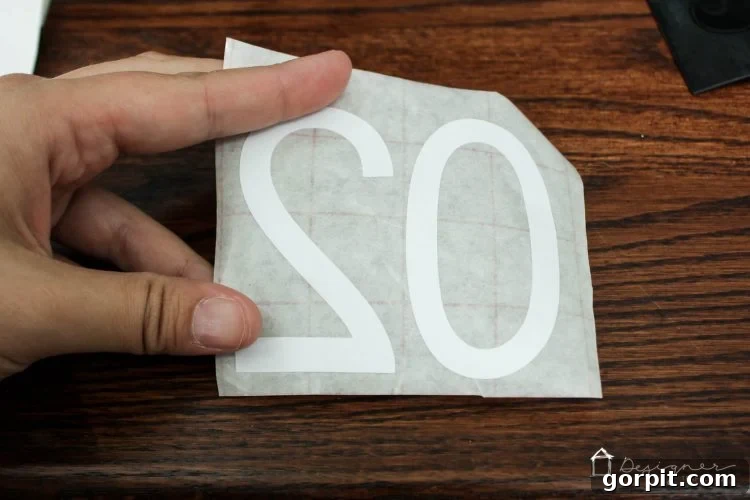
2. **Apply Transfer Paper for Precision:** This is arguably the most critical step, irrespective of whether you’re using store-bought stickers or self-cut vinyl. Apply your numbers onto a piece of transfer paper that has been cut to a size roughly equivalent to your number’s dimensions. This technique is invaluable for achieving perfectly straight and centered placement on your stairs. Attempting to position individual numbers directly is significantly more challenging than aligning a rectangular piece of transfer paper. Trust us on this; we learned the hard way with our initial attempts without transfer paper!
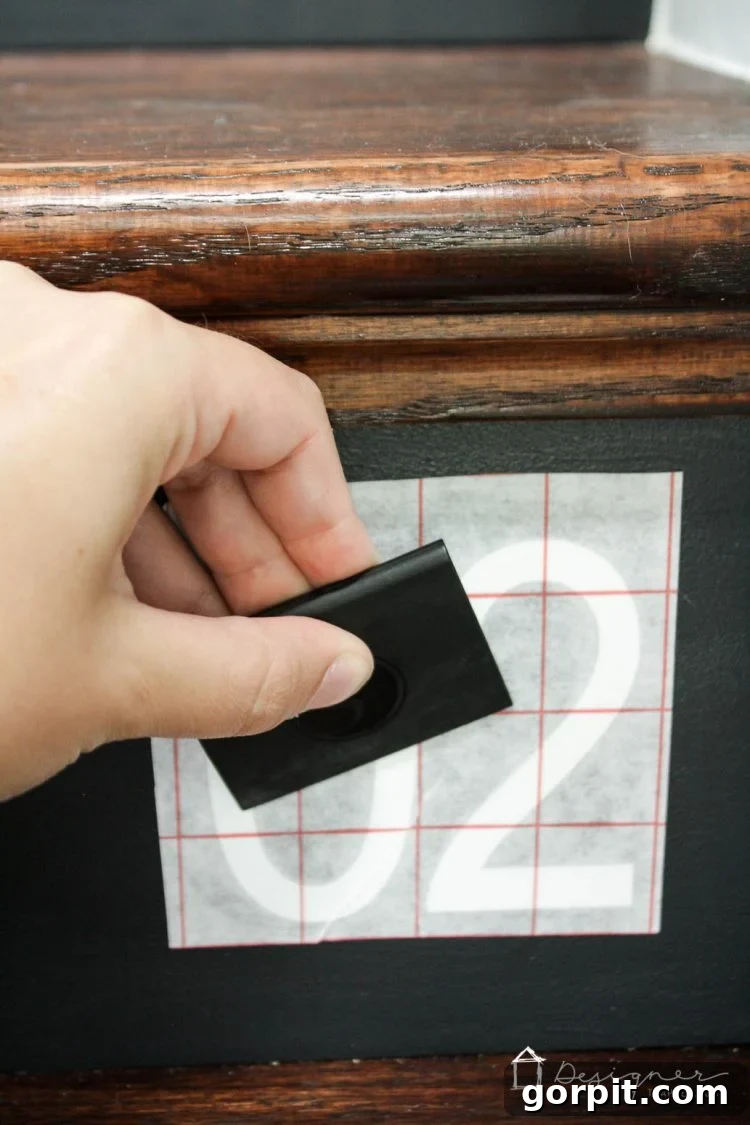
3. **Secure the Number to the Riser:** Once the transfer tape is in position and you are confident in the number’s alignment, use an old credit card or a designated scraper tool to firmly rub across the entire surface of the transfer tape. This action ensures that your number adheres securely to the stair riser. A significant advantage of working with vinyl (over some sticker types) is its forgiving nature; if you make a slight mistake, vinyl can often be gently peeled off and repositioned without causing damage to the paint underneath. Be cautious with non-vinyl pre-made stickers, as they may potentially lift or damage paint when removed.
4. **Carefully Remove Transfer Paper:** After thoroughly rubbing the vinyl into place, slowly and carefully peel the transfer paper away from the stair riser. Take your time during this step to ensure the vinyl remains adhered to the painted surface and does not lift with the transfer paper. If any part of the vinyl begins to lift, gently press it back down with your finger or the scraper and continue peeling slowly.
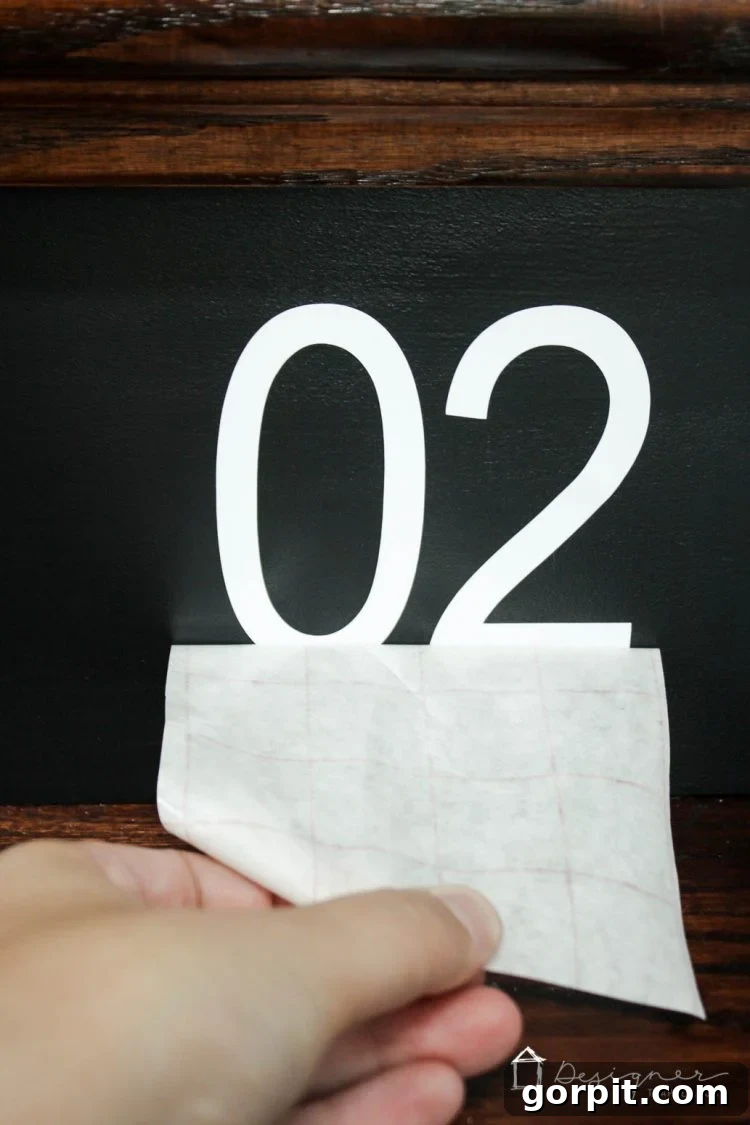
That’s it! This straightforward process yields a truly impressive and personalized touch to your wood stairs. The numbered risers provide not only a unique aesthetic but also a subtle, intriguing detail that visitors are sure to notice and admire.
More STAIR Posts
SEE ALL stair POSTS
-
15 Chic Stair Railing Ideas to Update Your Staircase
-
How to Install a Stair Runner: A Step-by-Step Tutorial
-
15+ Inspiring DIY Staircase Makeover Ideas
-
From Carpet to DIY Hardwood Stairs: Step-by-Step Tutorial
-
How to Replace Balusters to Update Your Stair Railing
-
Stair Riser Ideas to Make Your Stairs More Stylish
Other posts you may enjoy:
- 15+ DIY Staircase Makeover Ideas
- How to Replace Balusters to Update Your Stair Railing
- 15 Chic Stair Railing Ideas to Update Your Staircase
- 15 Genius Hallway Decor Ideas
- How to Install a Stair Runner Yourself
Curious about our philosophy and method for transforming rooms and spaces within our home? Discover the structured and approachable design process outlined in Designer in a Binder®.
For those seeking exclusive content, behind-the-scenes glimpses, and the latest design inspirations, be sure to subscribe before you leave!