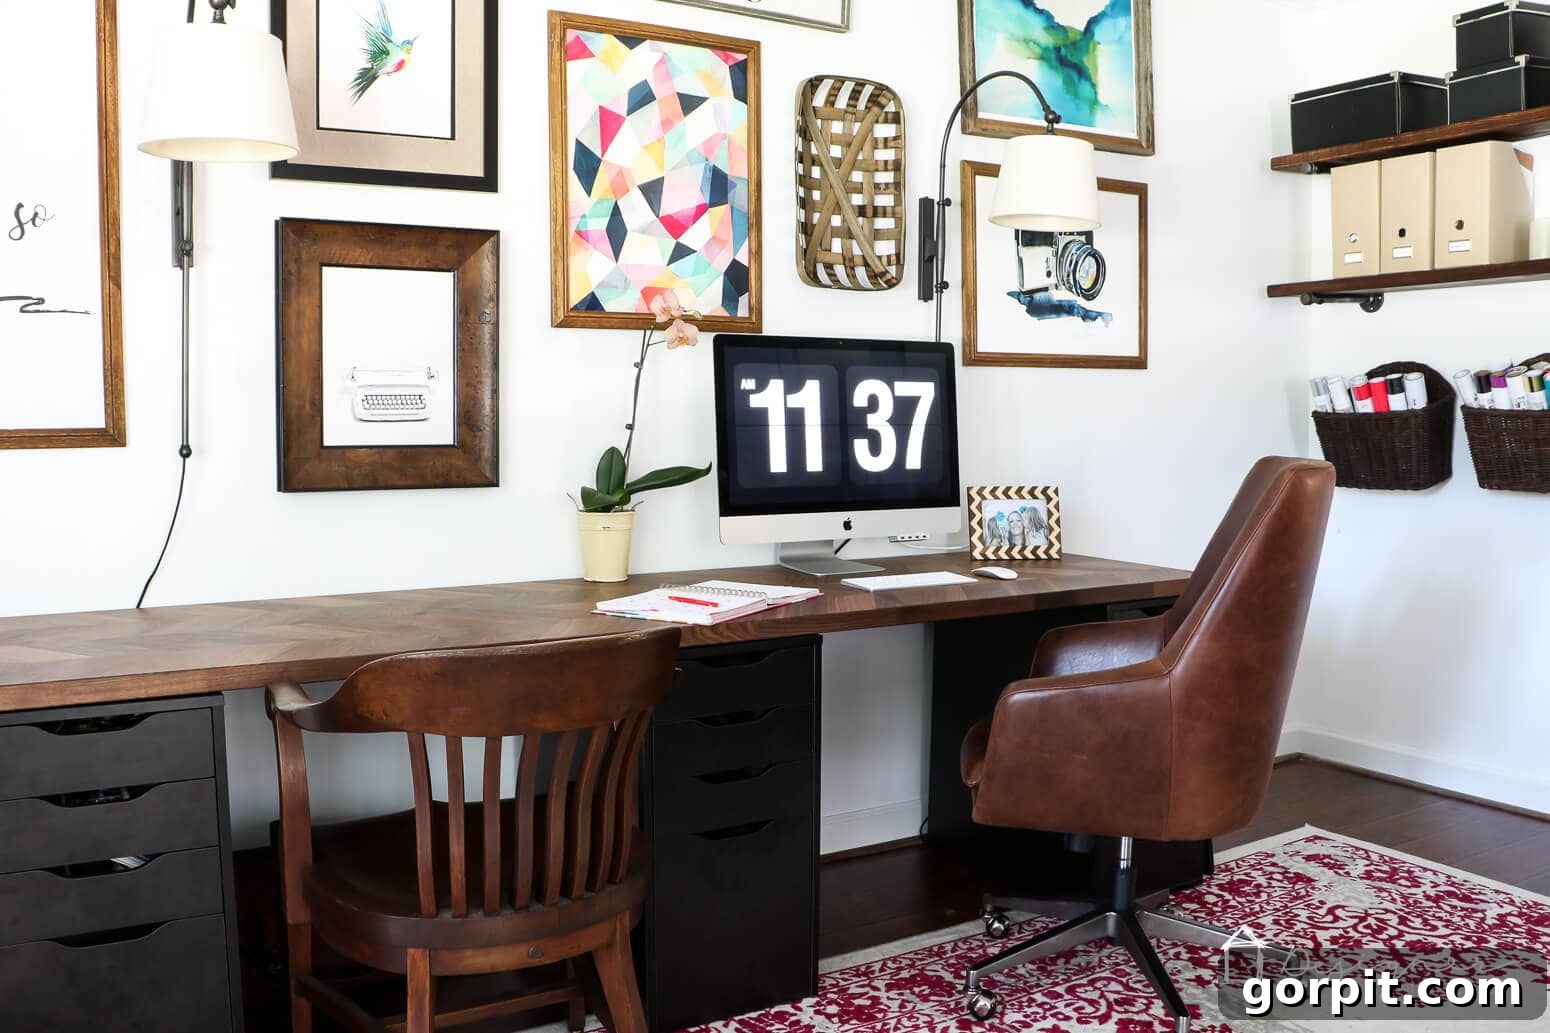
Have you ever found yourself on the hunt for a new desk, only to be met with sticker shock and a disheartening lack of stylish options? It’s a frustrating reality many of us face. When I was recently planning my new home office, I quickly discovered that modern, functional desks often come with exorbitant price tags, and frankly, many of them lack the contemporary flair I was seeking. Traditional, fussy designs seemed to dominate the market, leaving me feeling uninspired and unwilling to compromise on style or budget.
But what if there was a way to create a gorgeous, highly functional, and genuinely affordable desk that perfectly fits your aesthetic and workflow? I’m thrilled to share a brilliant solution I discovered for my own office setup that I absolutely adore! This innovative IKEA desk hack is not just easy to implement; it’s also stunningly beautiful and drastically more budget-friendly than most stylish desks you’ll find in retail stores. Get ready to transform your workspace and create the custom desk of your dreams without breaking the bank. I’ll walk you through every step of how I achieved this modern marvel.
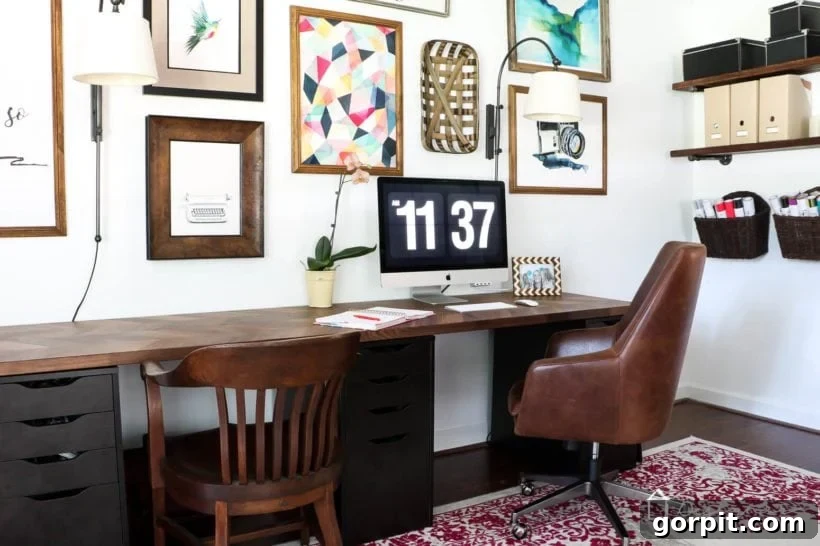
Table of Contents
The Enduring Appeal of IKEA Hacks for Home Offices
IKEA hacks have become a beloved trend for a reason: they offer an incredible balance of affordability, style, and customization. The beauty of leveraging IKEA’s modular components lies in their versatility. You’re not just buying a piece of furniture; you’re acquiring building blocks for a personalized solution that can often outperform ready-made, higher-priced alternatives. For a home office, this means crafting a workspace that truly meets your specific needs – whether that’s ample storage, a vast surface area for spreading out projects, or a sleek, minimalist aesthetic.
When it comes to desks, the standard options often fall short. They might be too small, too clunky, or simply not aesthetically pleasing. By combining the sturdy and practical Alex drawer units with a gorgeous, durable kitchen countertop, we’re not just assembling furniture; we’re designing a high-end looking desk that offers exceptional functionality and style, all while keeping costs significantly lower than what you’d expect for a custom piece or a high-end retail model. This approach empowers you to create a workspace that feels custom-built for you, reflecting your personal style and supporting your productivity.
Crafting Your Dream Desk: The IKEA Desk Hack Tutorial
This IKEA desk hack is surprisingly straightforward, yet the results are incredibly impactful. You’ll end up with a substantial, stylish desk that provides an expansive workspace, perfect for individual use or even for sharing. Let’s gather our components and get started on building your perfect home office centerpiece.
Materials Needed for Your Custom IKEA Desk
- IKEA Alex Drawer Units (I used 3 for my double desk setup. These are essential for robust support and integrated storage, keeping your workspace clutter-free.)
- IKEA Barkaboda Kitchen Countertop (I utilized one 98-inch countertop for my main desk, and another for the bonus work table. These countertops offer exceptional durability and a beautiful wood veneer finish. IKEA also offers a 74-inch length, or you can cut them down to perfectly fit your space.)
- Oil-Rubbed Bronze Spray Paint (Optional, but highly recommended if you choose to include the work table and wish to customize the leg finish for a cohesive look.)
Step-by-Step IKEA Desk Assembly
Time needed: 3 hours
Transforming your space with this desk hack is simpler than you might imagine. Follow these detailed steps to bring your custom office desk to life:
-
Assemble Your Drawer Bases
This is often the most time-consuming part of any IKEA project, but it’s crucial for a sturdy foundation. Carefully assemble your IKEA Alex drawer units following the manufacturer’s instructions. Take your time with each unit, ensuring all screws are tightened and drawers glide smoothly. While it requires patience, a well-assembled base will make the entire desk feel more premium and last longer. Consider playing some music or a podcast to make the process more enjoyable!
-
Strategically Place Your Drawer Bases
Once all your Alex units are assembled, position them in your desired office space. For a 98-inch countertop and three units, you’ll place one unit at each end and one in the middle. Carefully space all three units out evenly. Ensure that the total distance from the outer edge of one end unit to the outer edge of the other end unit measures precisely 98 inches, matching the length of your countertop. This precision ensures your countertop will sit perfectly. Before placing the countertop, affix non-slip bumper pads (small rubber or silicone adhesive pads work perfectly) to the top corners of each drawer unit. This prevents the countertop from shifting and protects the surfaces.
-
Secure Your Countertop to Form the Desktop
Carefully lift and place your IKEA Barkaboda kitchen countertop on top of the positioned Alex drawer bases. The Barkaboda countertop is quite substantial and heavy, which provides excellent stability; in many cases, its weight alone is sufficient to hold it securely in place without needing to screw it down. However, if you have concerns about movement or if children will be using the desk, you can opt to secure it with L-brackets or small screws from underneath the countertop into the drawer unit tops. One important detail to note is that these kitchen countertops are typically deeper than the Alex drawer units. To achieve a clean, flush look from the front, gently pull the drawer bases and countertop away from the wall slightly, ensuring the front edge of the drawer bases aligns perfectly with the front edge of the countertop. This creates a beautifully integrated and intentional design.
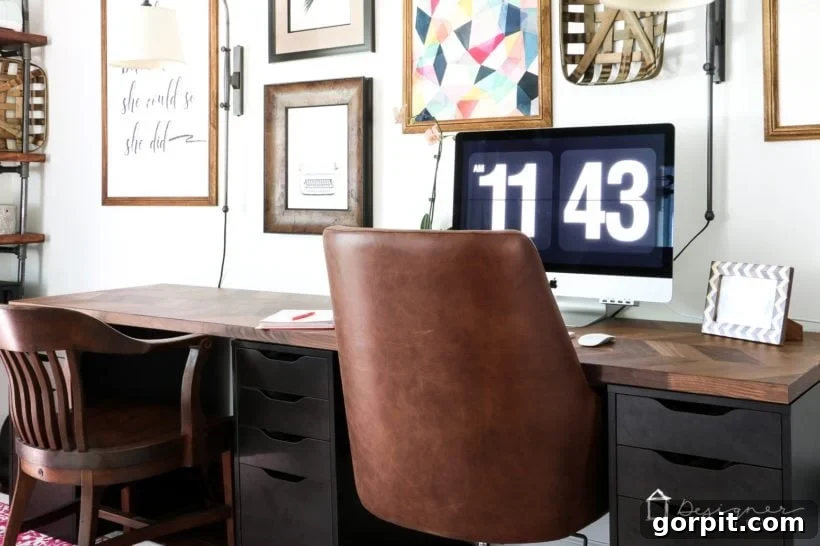
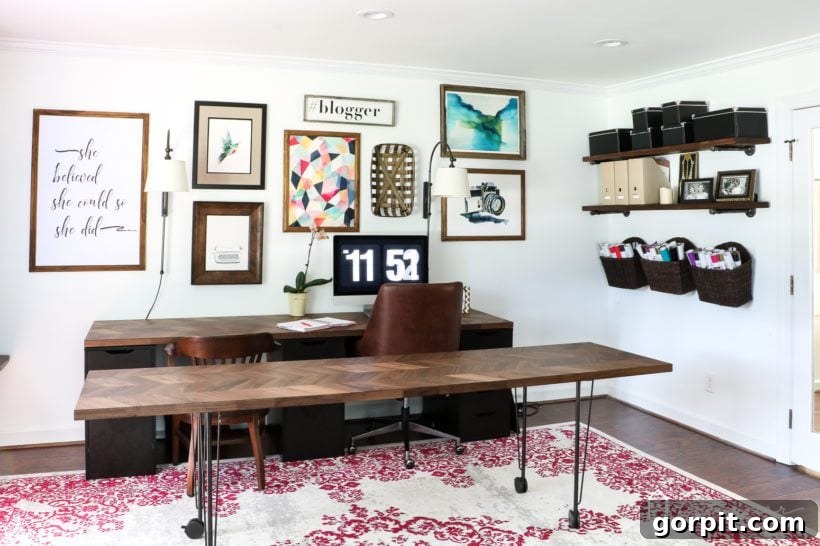
And just like that, you’ve created a magnificent, spacious double desk! Utilizing a 98-inch countertop with three Alex units provides an impressive amount of surface area. The thoughtful spacing between the units ensures there’s ample room for two chairs to slide comfortably underneath, making it an ideal setup for collaborative work or for a primary user to have an expansive work zone. This configuration has been absolutely perfect for my home office, especially when my friend and assistant join me for workdays, allowing us both plenty of space without feeling cramped.
BONUS: Elevate Your Workspace with a Matching Work Table
To further enhance the functionality and versatility of your home office, consider adding a complementary work table. This is an excellent addition for spreading out blueprints, crafting projects, or simply having a dedicated space for non-computer tasks. A separate work table prevents clutter from accumulating on your main desk and offers incredible flexibility in your office layout, especially if it’s mobile.
Work Table Materials and Steps
- IKEA Krille Legs (I used 4 for my work table. These legs come in white and are equipped with casters, offering excellent mobility. Previously, I had spray-painted them gold, but for my new office aesthetic, I opted for a darker finish, as described below.)
- Oil-Rubbed Bronze Spray Paint (As mentioned earlier, for customizing the Krille legs to match or complement your office decor.)
- IKEA Barkaboda Kitchen Countertop (The second 98-inch countertop or a shorter one, depending on your space and needs.)
-
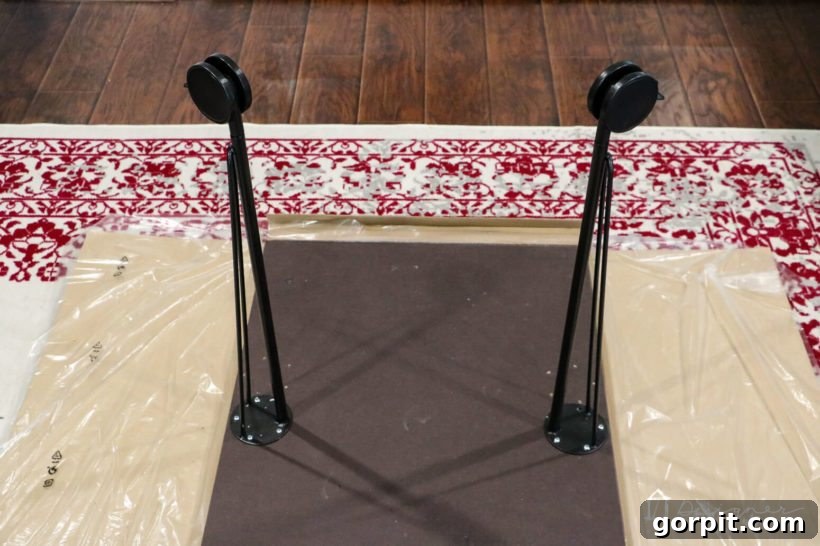
Customize Your Krille Legs (Optional): If you desire a different look for your Krille legs beyond their standard white finish, now is the time to spray paint them. I chose an oil-rubbed bronze to match the sophisticated, modern aesthetic of my new office. For best results, clean the legs thoroughly, apply several light, even coats of spray paint in a well-ventilated area, allowing adequate drying time between coats. This small step can significantly elevate the overall appearance of your work table.
-
Attach Legs to the Countertop: Carefully place your chosen countertop upside down on a protected surface. Position the Krille legs. For a 98-inch countertop, I recommend placing each leg approximately 16 inches in from the short edges. This strategic placement ensures robust support and stability, distributing the weight evenly across the countertop. If you’re using a shorter-length countertop, you might not need to inset the legs quite as far, but always aim for balanced support. Secure the legs firmly to the underside of the countertop using the provided hardware.
-
Flip and Enjoy Your New Work Table: With the legs securely attached, carefully flip your newly assembled work table upright. And just like that, you have a versatile, mobile work surface ready for use!
The combination of this expansive IKEA desk hack and the bonus mobile work table has truly perfected my home office setup. I love the flexibility of positioning my work table directly in front of my main desk. This arrangement allows me to effortlessly swivel between my computer work and dedicated tasks like planning, writing, or reviewing documents. With the work table, I have a vast, clear surface to spread out my planner, books, and other materials without a keyboard getting in the way. Plus, the Krille legs, equipped with casters, make the work table incredibly easy to move around. This mobility is a huge advantage, especially when I need to reconfigure my space for filming videos for my blog or simply desire a fresh layout.
Designing Your Ultimate Productive Home Office
Achieving a productive home office goes beyond just the desk; it’s about creating an environment that fosters focus, creativity, and comfort. This IKEA desk hack is a fantastic starting point for building such a space. The clean lines and natural wood finish of the Barkaboda countertop offer a contemporary and inviting aesthetic, while the Alex drawers provide essential, discreet storage, keeping your workspace streamlined and free from visual clutter.
Consider integrating ergonomic principles into your setup. Ensure your chair is supportive, your monitor is at eye level, and your keyboard and mouse are positioned to minimize strain. Personalize your space with elements that inspire you: a few carefully chosen plants, inspiring artwork, or functional organizational tools. With such a robust and stylish foundation, you have the freedom to design an office that is not only highly efficient but also a joy to spend time in.
What are your thoughts on this straightforward yet incredibly stylish IKEA desk hack? It’s a testament to how simple components can be combined to create a sophisticated and highly functional solution. Who would have thought that humble kitchen countertops could be repurposed to form such magnificent and durable desks? This project truly exemplifies the power of creative DIY to achieve high-end results on a budget, perfectly suited for any modern home office.
Other posts you may enjoy for further inspiration:
- Inspiring IKEA Desk Hacks You Will LOVE
- L-Shaped & Corner Desks to DIY or Buy
- Easy DIY Floating Desk
- Office Space Ideas You Can Do Right Now
- DIY Pipe Desk (a.k.a. the easiest desk EVER)
Curious about my unique approach to transforming rooms and spaces in our home? Be sure to check out Designer in a Binder®, my comprehensive guide to decorating with confidence and ease.
For exclusive content, behind-the-scenes sneak peeks, and more design inspiration, don’t forget to subscribe to my newsletter before you go!