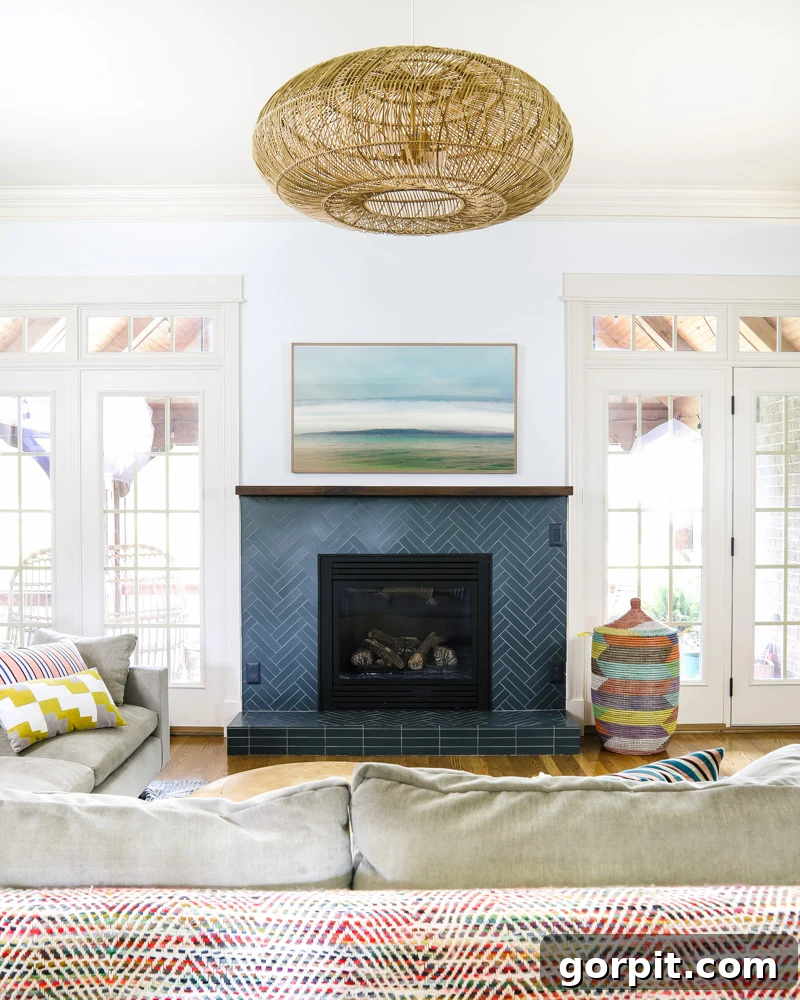
Our Fireplace Makeover is FINALLY Done: Witness the Transformation from Outdated Beige to a Stunning Teal Showstopper!
Phew, what a journey it has been! If you’ve been following along on our renovation adventures, especially over on Instagram, you might have thought this fireplace makeover project would never reach its conclusion. We certainly felt that way at times! This endeavor officially kicked off with demolition on June 24th and we meticulously wrapped it up on August 27th. So, for anyone out there who sometimes feels discouraged by the pace of their own room makeovers or home projects, please know you are not alone! It’s perfectly normal for transformations like these to take time. Our project extended over two months for several very valid reasons:
Firstly, this wasn’t just a simple paint job; it involved numerous intricate steps, from initial demo to complex tiling. Secondly, the quest for the perfect tile was a marathon in itself, involving several weeks and over 30 tile samples before we settled on ‘the one.’ Thirdly, life happened! We took a much-needed vacation to Hawaii for nearly two weeks in July, pausing all progress. And finally, the tiling itself was exceptionally challenging and complicated. That’s just the reality of ambitious DIY, and we embrace every lesson learned along the way!
Finding Your Fireplace Inspiration: More Than Just a Tutorial
While I won’t be providing a traditional step-by-step tutorial for this specific project – mainly because every fireplace and home has its unique dimensions and quirks – my biggest hope is that this reveal ignites a spark of inspiration within you. If you have an outdated fireplace that currently feels more like a burden than a blessing, please believe that its potential is limitless. You absolutely have the power to transform it into a focal point that you genuinely adore and that perfectly reflects your personal style.
Our History with Fireplace Transformations
This isn’t our first foray into fireplace renovations. We’ve tackled these architectural features in several of our previous homes, each time bringing a fresh perspective and overcoming unique challenges. In our last home, we completely revamped an eyesore fireplace by ripping off improperly sealed, outdated stone and giving it a sleek, smooth concrete finish, all for under $100. It was an incredible transformation on a budget!
Furthermore, in our old bedroom, we proved that if a fireplace doesn’t exist, you can create one! We successfully installed a beautiful electric fireplace where there was previously just a blank wall. These experiences have taught us that when it comes to reinventing fireplaces, the possibilities are truly endless. The world is your oyster, and with a bit of vision and elbow grease, you can achieve remarkable results.
The ‘Before’: A Glimpse at Our Outdated Fireplace
Now, let’s cast our minds back to the beginning of this most recent fireplace transformation. It’s always essential to appreciate the starting point to truly understand the scale of the change. Here’s a review of what the fireplace looked like before we laid a single hand on it:
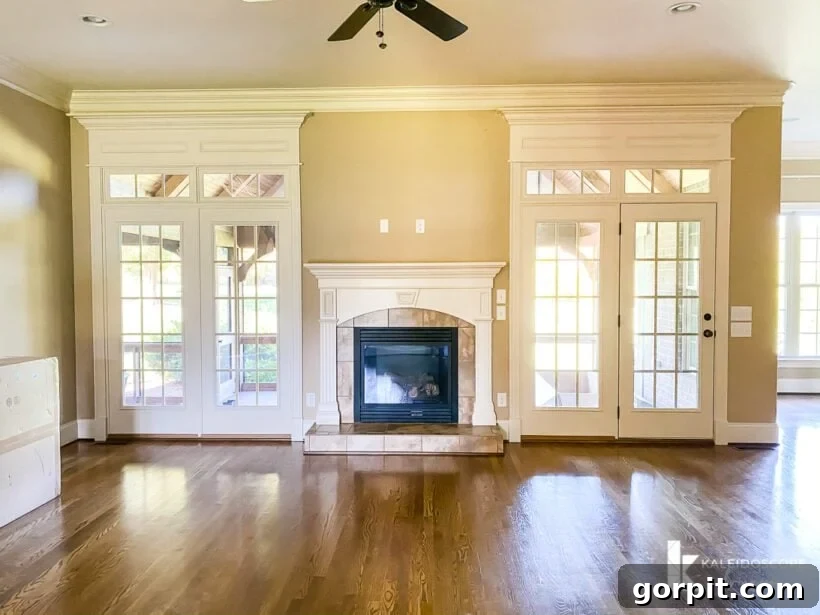
To put it mildly, nothing about its original state resonated with our evolving design aesthetic. The pervasive beige color scheme felt incredibly dated and lacked any personality. Beyond the color, the mantel’s ornate details struck us as overly “fussy” and traditional, clashing with our preference for cleaner lines and a more modern, yet inviting, look. And let’s not even get started on the beige tile – it was far from inspiring.
Another significant design flaw that consistently bothered us was the proportions. The existing hearth and surround didn’t extend across the entire width of the wall between the windows. This made the fireplace appear somewhat undersized and diminished its potential to be a grand feature within the family room. We knew we wanted something that commanded attention and felt more substantial in the space.
Addressing Architectural Imbalances: Beyond the Fireplace
The fireplace wasn’t the only element on that wall begging for an update. There was also a notable issue with the trim work above the transom windows. It felt excessively heavy and almost touched the crown molding, creating a visual squeeze that made the entire wall feel a bit “extra” and out of balance. Our vision extended beyond just the fireplace; we aimed for a cohesive, lighter, and more intentional architectural statement for the whole wall.
Visualizing the Dream: The Power of Design Mockups
True to my usual design process, before diving into any demolition or major purchasing, I started by playing around with digital mockups. This crucial step allows us to visualize our ideas, experiment with different concepts, and make informed decisions without costly mistakes. This initial concept provided a clear roadmap for our transformation. You can clearly see our intentions to simplify the trim above the windows, creating a more harmonious flow, alongside our ambitious plans for the fireplace itself.
Once Joe and I were fully aligned on the general design direction and aesthetic goals – a critical step for any couple tackling a home renovation – the truly challenging part began: the hunt for the perfect tile. Little did we know, this quest would become an epic saga in itself.
The Epic Tile Quest: A Month-Long Search for the Perfect Shade
Holy cow, picking tile turned out to be far more arduous than I ever imagined! I genuinely never dreamed it would be so incredibly difficult to make a decision. We ordered countless samples, debating over colors, textures, finishes, and shapes. Below, you can see the third tile sample I ordered – a “kit kat” shape that I absolutely adored and was initially set on using. I just loved its unique, playful yet sophisticated linearity.
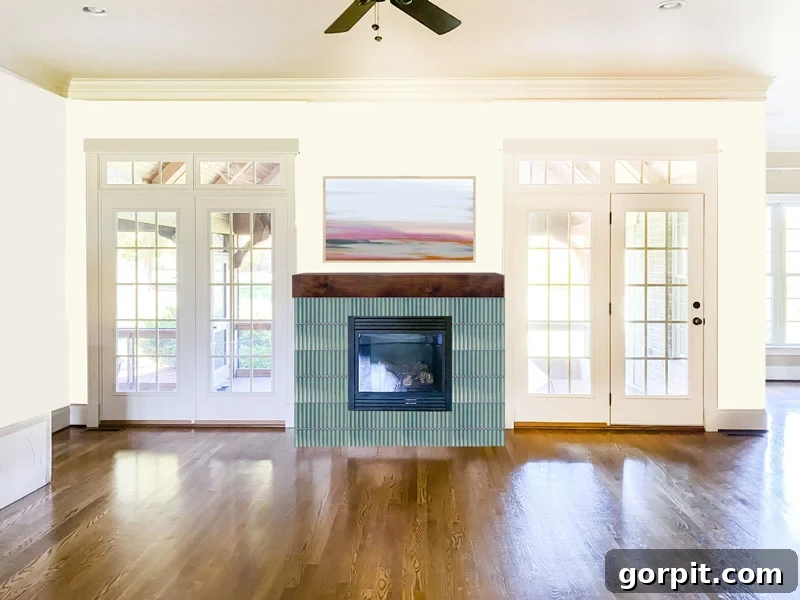
Despite my strong preference for the kit kat tile, Joe wasn’t a fan. In a desperate attempt to sway him, I even created a detailed mockup of the fireplace with the kit kat tiles, hoping to visually convince him of its greatness. Alas, even with the visual aid, he remained unconvinced, holding firm in his dislike! So, our search continued.
Indeed, our relentless hunt for the perfect fireplace tile carried on for approximately an entire month. No, that is not an exaggeration – it was a genuine test of patience and perseverance! If you’re curious to see the extensive array of other tile samples we considered, debated over, and ultimately rejected, you can get a glimpse of many of them by clicking HERE.
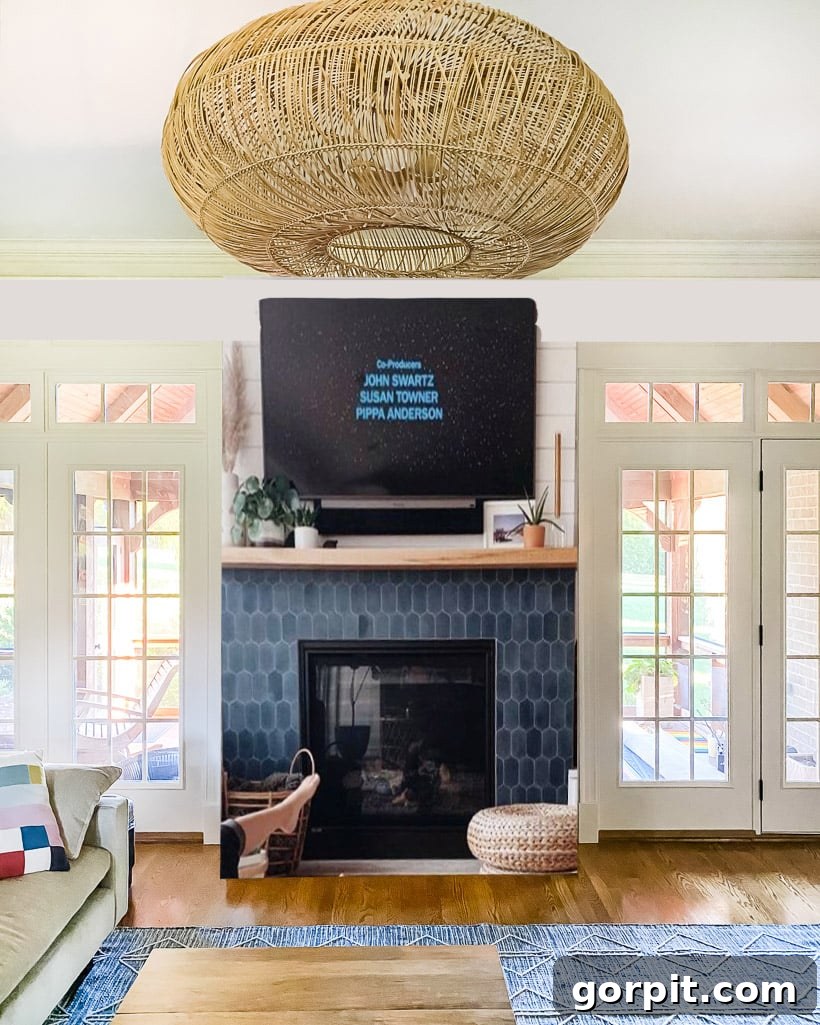
In the end, after much deliberation, countless samples spread across our floor, and numerous discussions, we finally decided on this absolutely gorgeous matte ceramic tile by Zia Tile. Its rich, deep hue and elegant finish immediately captivated us. For the installation pattern, we opted for a sophisticated double herringbone, a choice that promised to add dynamic visual interest and a touch of bespoke craftsmanship. *NOTE: The specific tile we used is called Pacific Blue. In person, its color leans more towards a vibrant teal than a conventional navy, which is exactly what we were hoping for. The photograph I took below offers a much more accurate representation of its true color compared to what might appear on the product page.*
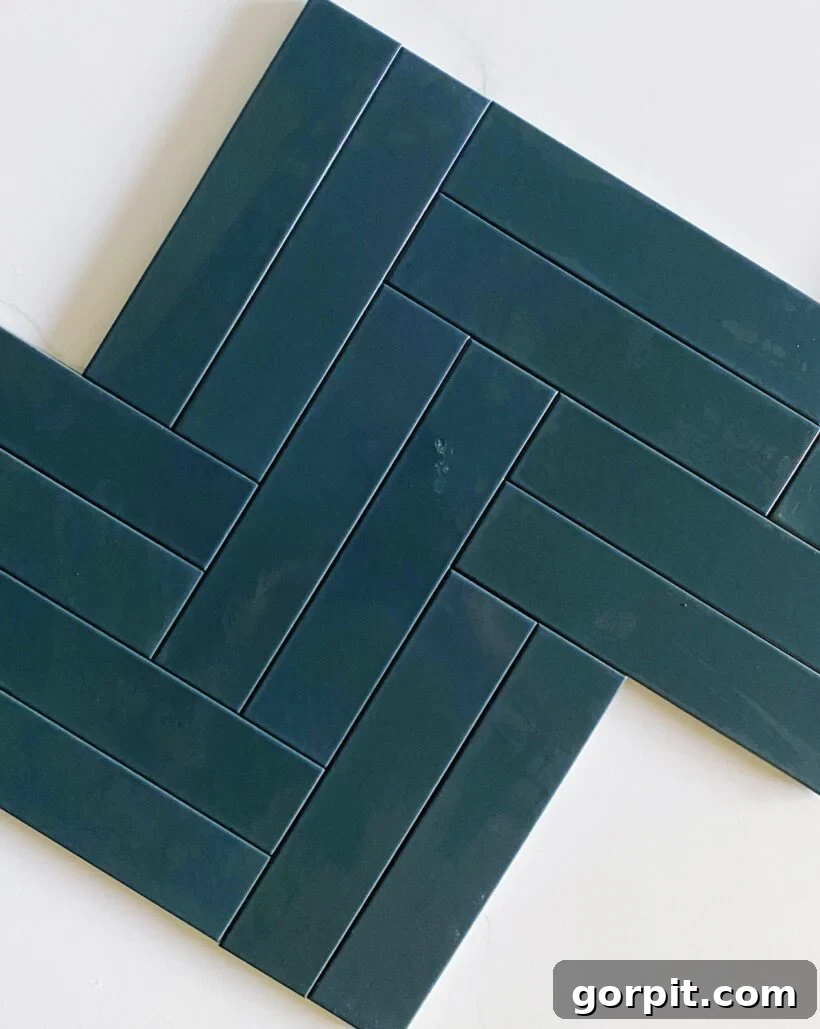
The Ultimate Tiling Challenge: A Double Herringbone Fireplace Installation
Now, let’s talk about the actual tiling process. Joe and I have a fair amount of tiling experience under our belts. I personally tiled every single inch of our girls’ bathroom in our last house entirely by myself – a project I’m still immensely proud of. We also tackled the powder room in our old house, and have installed numerous backsplashes, including the challenging backsplash in our last kitchen. I mention this extensive background to emphasize a crucial point: when I tell you that this fireplace tiling was THE MOST DIFFICULT AND COMPLEX TILING PROJECT WE HAVE EVER UNDERTAKEN, please understand that I do not say that lightly.
Working around the specific contours of a fireplace box, precisely cutting tiles to accommodate outlets and existing trim, all while maintaining the intricate alignment of a double herringbone pattern, was incredibly demanding. It required an almost surgical level of precision and patience. Frankly, if you’re considering a similar project, I don’t recommend DIYing such a complex tile job unless you have a high tolerance for frustration and a lot of time. In hindsight, if we had to do it all over again, we probably would have seriously considered hiring a professional tile installer for this particular aspect of the renovation.
Patience and Precision: Unfolding the Transformation
Despite the immense difficulty and the temptation to rush, we made a conscious decision to take our time, ensuring that every tile was placed as perfectly as possible. This commitment to quality meant the installation took significantly longer than we had initially anticipated. Progress was painstakingly slow, but we knew the final result would be worth every extra moment. Here’s a little visual glimpse into how this challenging, yet rewarding, project unfolded over those many weeks:
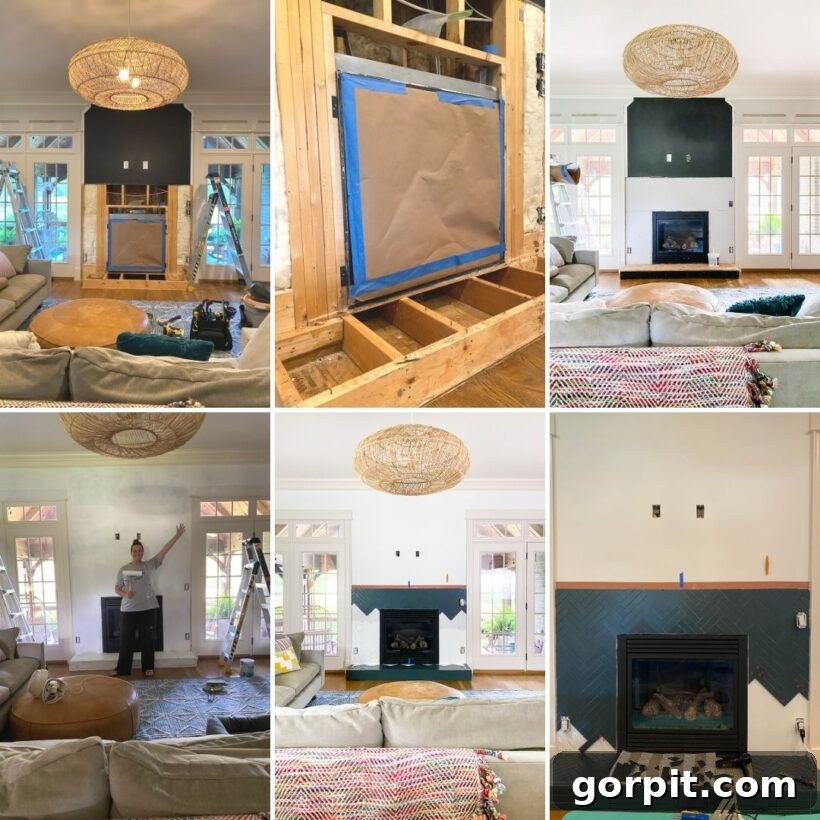
But oh, was it worth it! The sense of accomplishment and the sheer beauty of the finished product make every struggle fade into memory. We are absolutely head-over-heels in love with how our fireplace makeover turned out. The transformation is truly dramatic. Please, take a look for yourself and see the stunning difference!
The Grand Reveal: A Fireplace Transformed into a Modern Statement
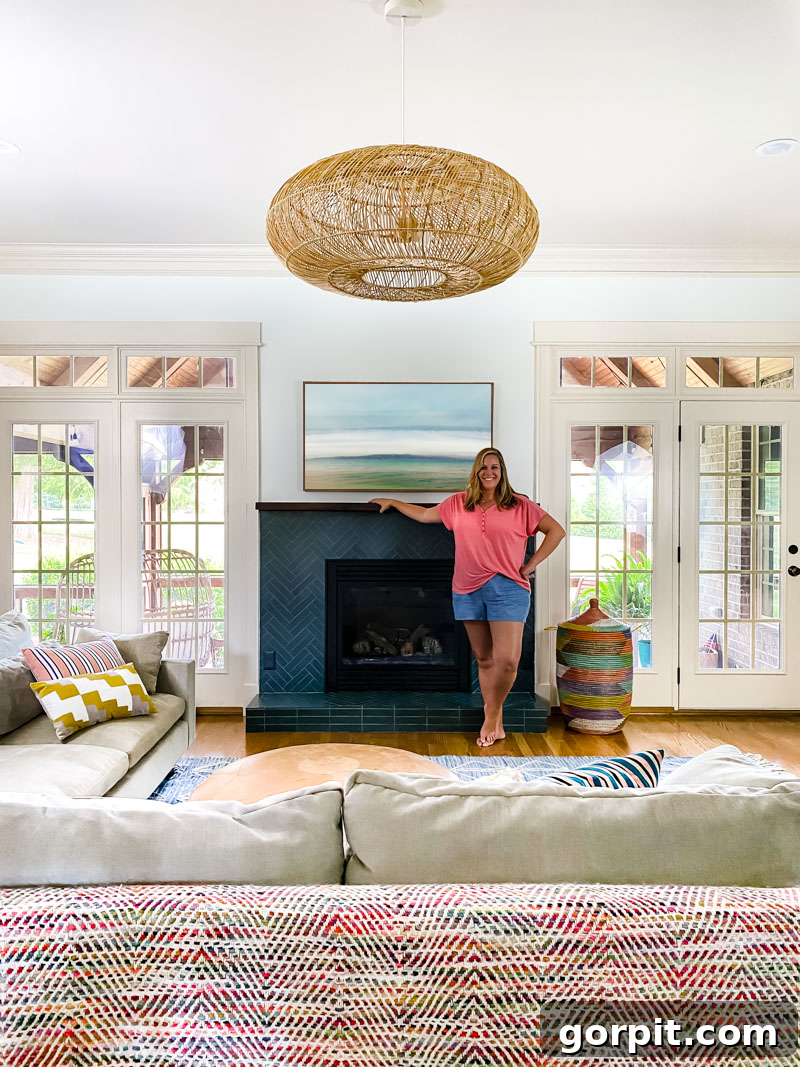
The new fireplace anchors the room with a bold yet sophisticated statement. The rich teal of the Zia Tile, laid in that captivating double herringbone pattern, creates an undeniable focal point that draws the eye and infuses the entire space with vibrant energy. It’s exactly the showstopper we envisioned, a far cry from its beige and bland predecessor.
Seamless Integration: Blending Outlets and Switches
One of the practical considerations for a functional fireplace is the necessity of outlets and switches – especially since this operates our gas fireplace. We couldn’t eliminate these essential elements, but we certainly wanted them to blend seamlessly into the new, striking tile design. My solution involved using paintable outlet covers. I then custom-mixed paint to match the specific teal hue of the Zia Tile as closely as possible, allowing them to disappear against the tile and minimize their visual impact. It’s those small details that truly elevate a DIY project to a professional finish.
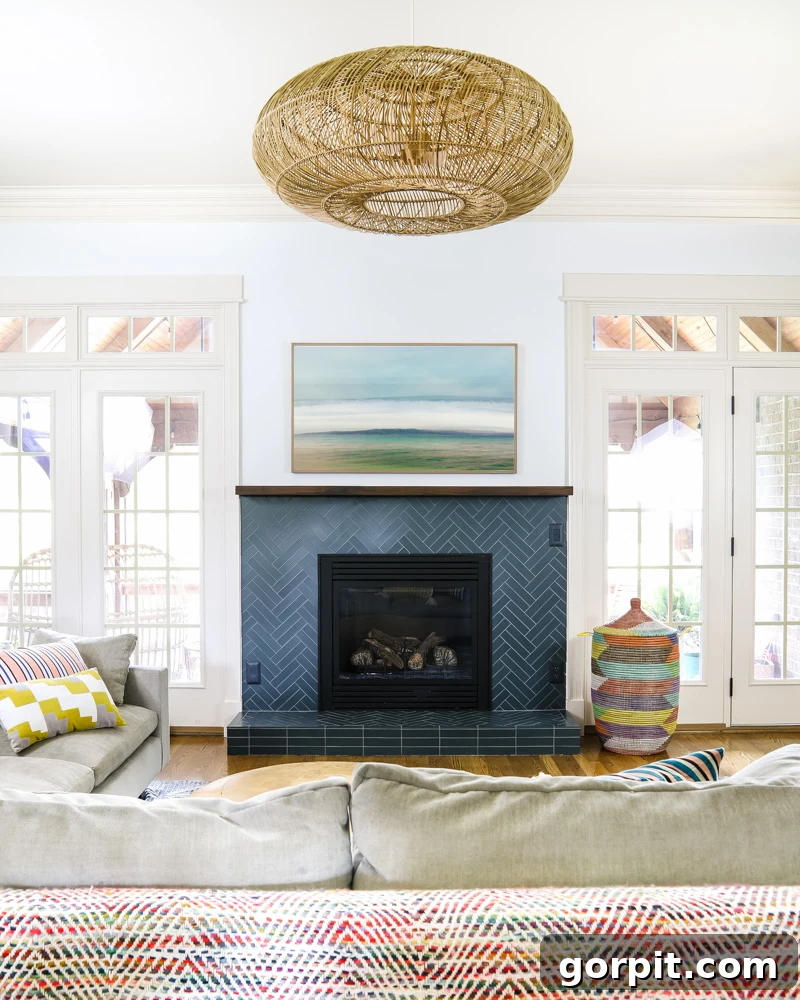
As you can see, the room immediately feels more cohesive and intentional with this grand new feature. The fireplace now acts as the true heart of the family room, reflecting our personal style and creating a space that feels both inviting and visually dynamic. We are absolutely loving the dramatic change this makeover has brought!
The Art of Styling: Bringing the Vision to Life
While the structural and aesthetic transformation of the fireplace itself is complete, I haven’t yet undertaken the crucial step of styling it. This is a deliberate choice, as I’m still mulling over exactly what I want to do to complement its new grandeur. I plan to take my time hunting through our home for the perfect selection of books, vases, perhaps some interesting sculptures, and ambient candles to create a layered and personalized display. The right styling will complete the look, adding warmth, character, and visual interest that ties into the rest of our home’s decor. But even unstyled, the sheer impact of the teal tile is undeniable!
Before & After: A Dramatic Visual Journey
What are your thoughts on this incredible transformation? We are absolutely thrilled with the outcome! To truly appreciate the dramatic shift, here’s a fun and compelling before and after comparison for you:
That’s it for this epic reveal! To all of you who diligently followed along every step of the way in my Instagram stories, offering words of encouragement and cheering us on through the frustrating moments, THANK YOU! Your support truly means the world and keeps us motivated. Y’all are truly the best!
Unlock Your Design Potential with Designer in a Binder®
Are you wondering about my comprehensive approach to transforming rooms and spaces throughout our home? If you’re looking for a structured, yet simple, way to tackle your own interior design projects, be sure to check out Designer in a Binder®. It’s designed to help you organize your thoughts, plan your projects, and achieve beautiful results without the overwhelm.
And if you’re eager for even more exclusive content, behind-the-scenes sneak peeks, and direct insights into our next projects, be sure to subscribe to our newsletter before you head out! You won’t want to miss what’s coming next.