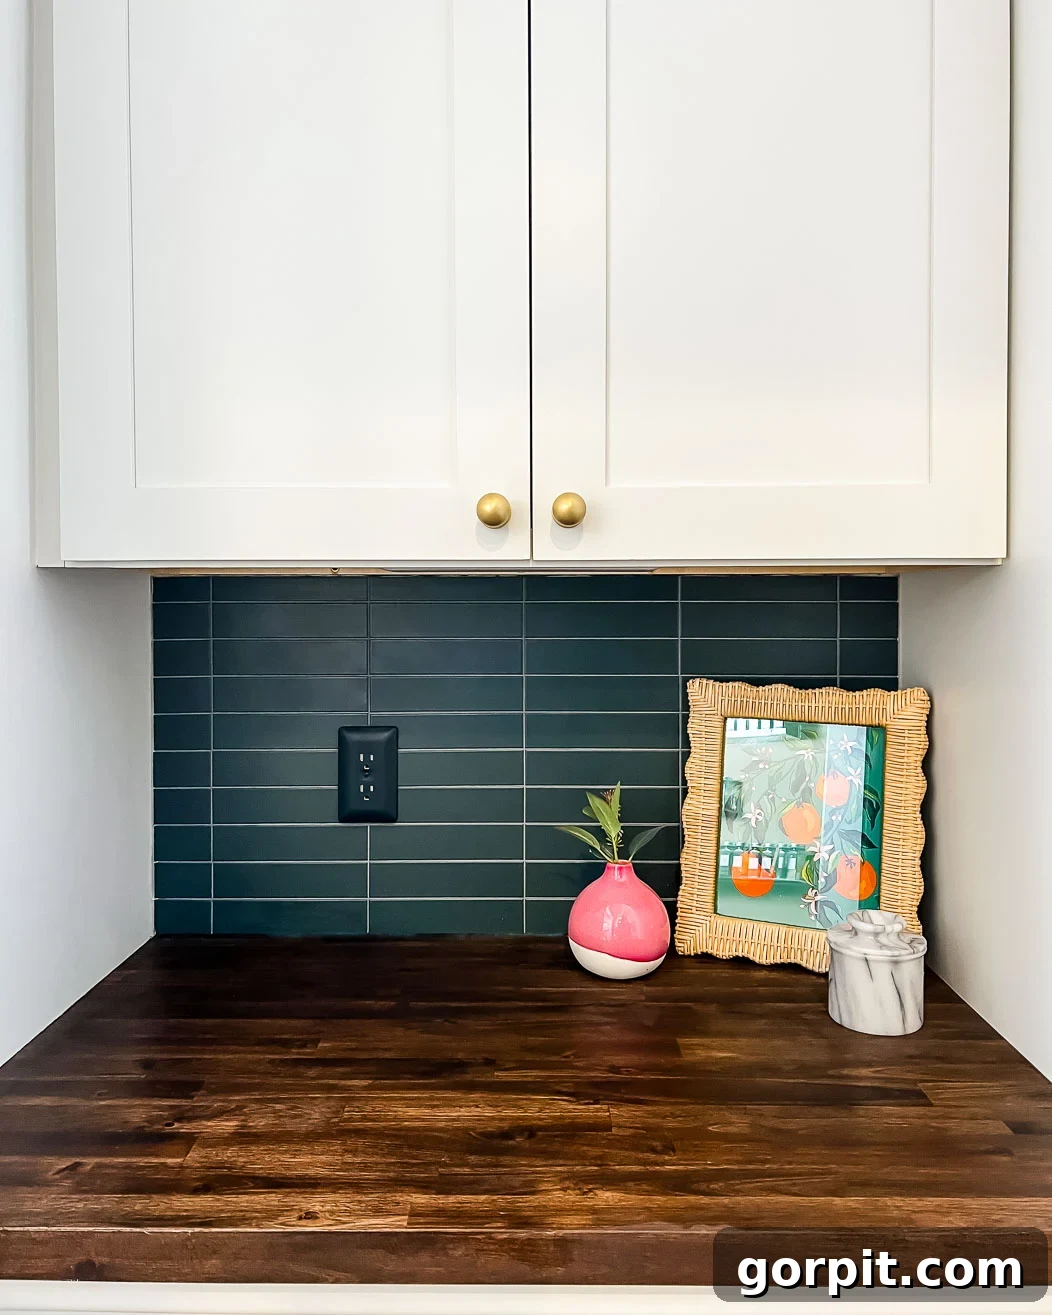
Transforming your kitchen, butler’s pantry, or home bar doesn’t require a complete overhaul. One of the most impactful and budget-friendly upgrades you can make is installing a tile backsplash. A beautifully chosen and expertly installed backsplash can dramatically elevate the aesthetic appeal of your space, adding character, texture, and a touch of elegance that truly stands out. Beyond its striking visual effect, a backsplash also offers crucial protection for your walls against splashes, spills, and daily wear and tear, making it a functional addition to any busy area.
The versatility of tile backsplashes is immense. The market offers a vast array of options, ensuring there’s a perfect style for every taste and budget. From luxurious marble mosaic tiles, offering intricate patterns and sophisticated finishes, to classic ceramic subway tiles known for their timeless simplicity and durability, and even innovative peel-and-stick tiles for the ultimate easy DIY project, the choices are endless. Whether you dream of a sleek, modern look or a rustic, farmhouse charm, selecting the right tile allows for unparalleled personalization.
Having successfully installed numerous tile backsplashes, I can confidently tell you that this project is far less daunting than it might appear. In fact, it’s a remarkably beginner-friendly DIY project that yields professional-looking results with a bit of patience and the right guidance. This comprehensive guide will walk you through every step of installing a tile backsplash over drywall, focusing on simple techniques and smart product choices to make the process as smooth and stress-free as possible. Prepare to discover just how easy it is to achieve a stunning upgrade that revitalizes your home!
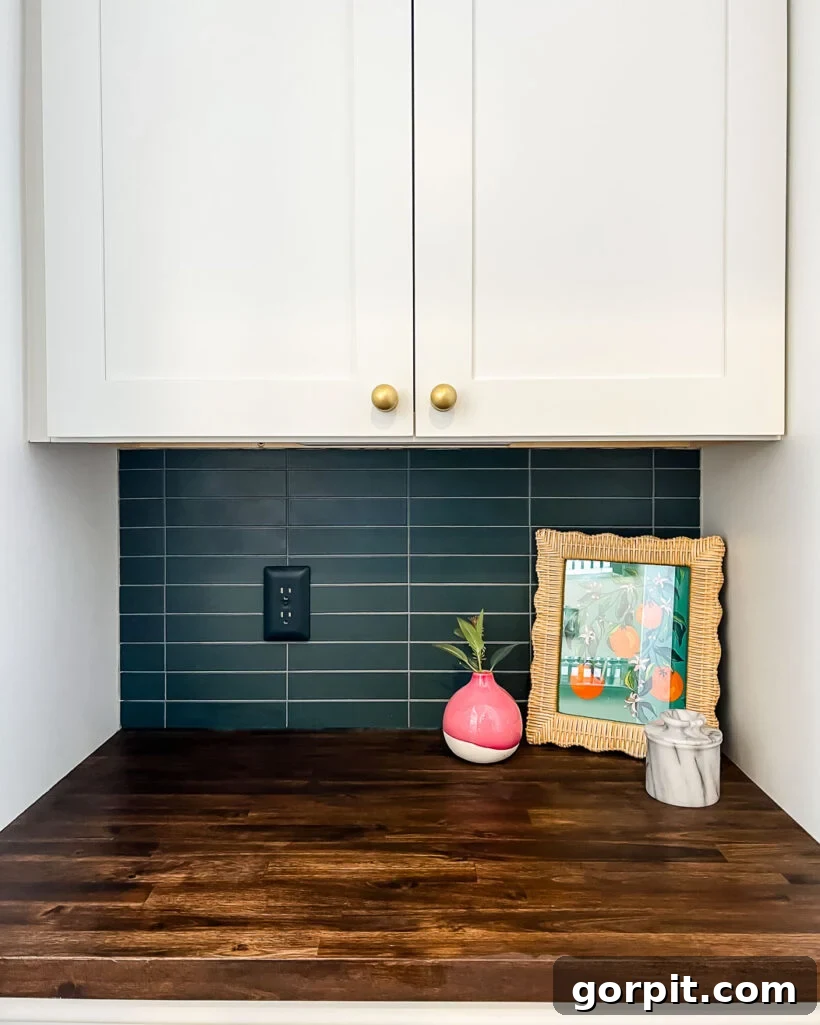
If you’ve followed my recent Instagram stories, you might have caught a glimpse of the ceramic tile backsplash installation in our new Butler’s pantry. This area, once an underutilized built-in office space, now boasts a beautiful and functional tile feature, and you likely observed how straightforward and quick the installation process was!
For this project, we ingeniously repurposed gorgeous tiles leftover from our fireplace makeover. Not only did this thoughtful reuse save us money on new materials, but it also allowed us to incorporate a design element we absolutely adore. The clean, contemporary aesthetic of a stacked tile pattern is a personal favorite, though this comprehensive tutorial is designed to guide you through installing any tile pattern you choose, ensuring your vision comes to life seamlessly.
How to Install a Tile Backsplash the Easy Way
Materials Needed
- Tile of your choosing: Select a tile that complements your space and style. Consider materials like ceramic, porcelain, glass, or natural stone. (We opted for these stunning 2×8 pacific blue tiles)
- Level: Essential for ensuring your tile lines are perfectly straight and your entire backsplash is visually appealing.
- Measuring tape: For accurate measurements of your backsplash area and precise tile cuts.
- Tile saw or manual tile cutter and tile nippers: A wet saw offers clean, precise cuts, while a manual cutter and nippers are great for smaller projects and intricate shapes.
- MusselBound tile adhesive mat: Our preferred choice for a mess-free and efficient installation, offering powerful adhesion.
- Utility knife: For cutting the adhesive mat to size and around obstacles.
- Grout: Choose a color that enhances your tile. Pre-mixed, pre-sealed options save time and simplify the process. (We used Pearl Gray for a subtle contrast)
- Sponge: Crucial for cleaning excess grout and achieving a smooth finish.
- Bucket: For mixing grout (if not pre-mixed) and rinsing your sponge frequently.
- Grout float: A rubber float designed for pressing grout firmly into joints.
- Tile spacers: Vital for maintaining consistent grout lines between tiles. (We used 1/16 inch spacers for a tight, modern look)
- Caulk: To seal the perimeter of your backsplash, particularly where it meets countertops and corners, preventing moisture infiltration.
- Painter’s tape & plastic or paper: For protecting surrounding surfaces from grout, thinset, or adhesive.
Time needed: 4 hours
Learn how to install a tile backsplash with ease and confidence by following these clear, step-by-step instructions. Achieve a stunning, professional finish that elevates your space without the need for professional help!
-
1. Prepare the Walls for Tile
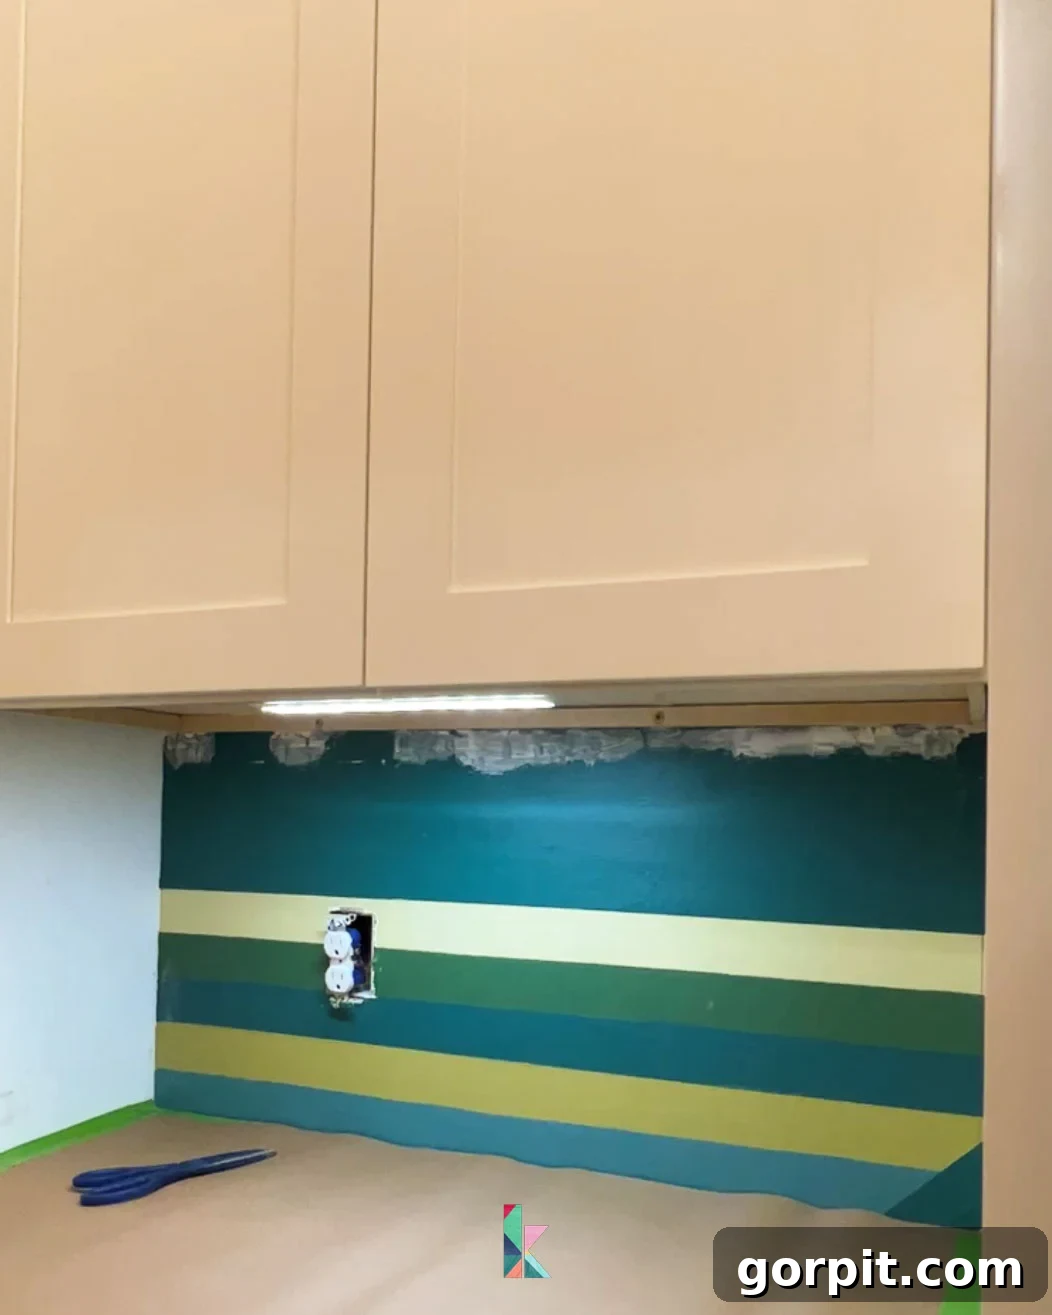
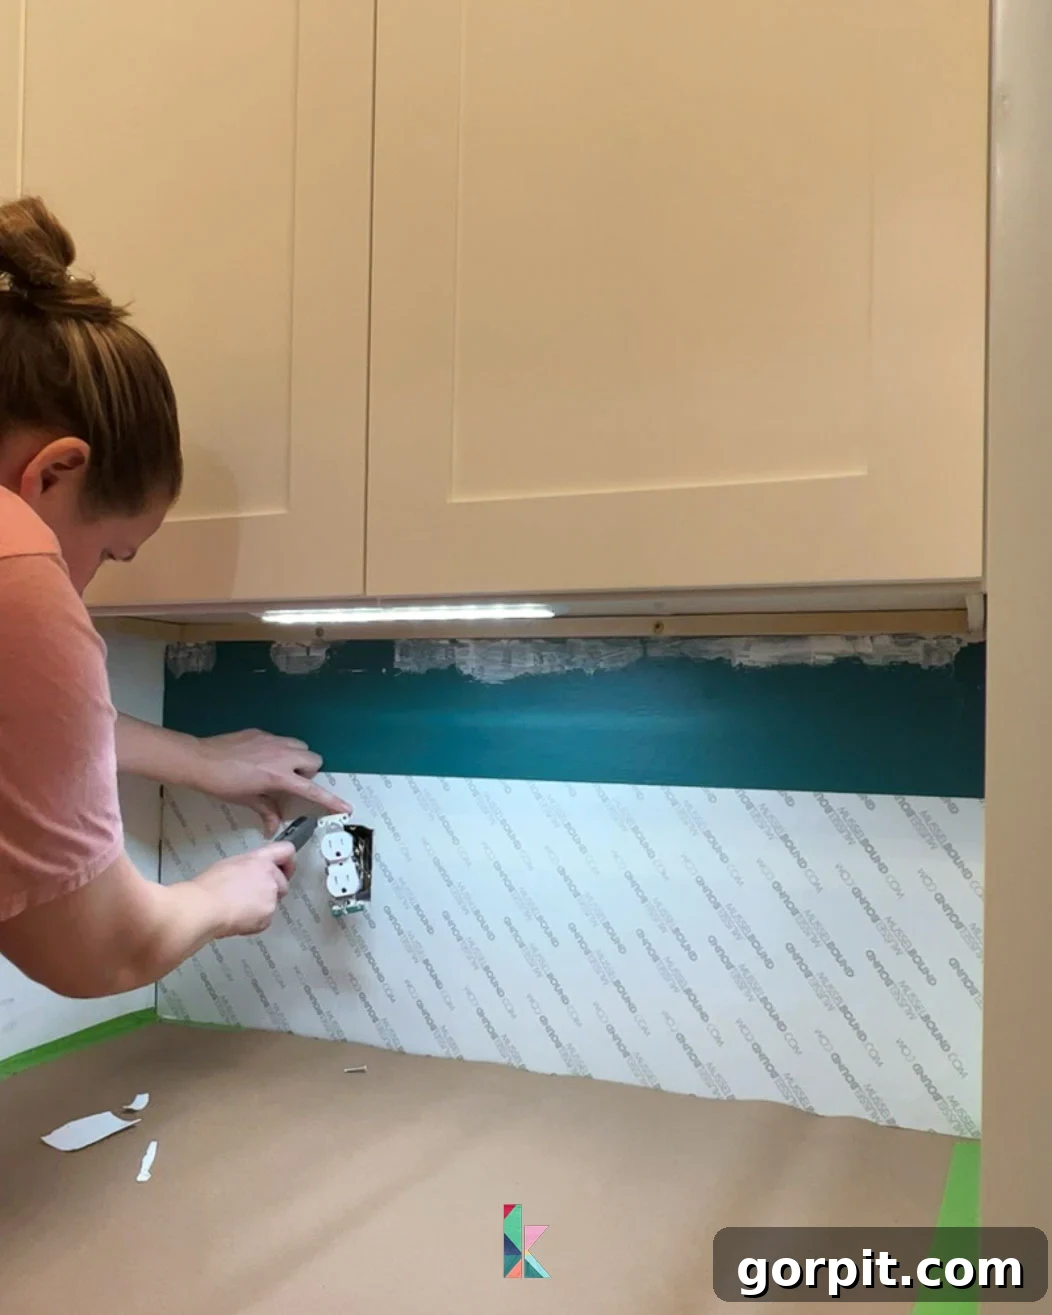
Before you begin, thoroughly clear the entire workspace, removing any appliances, decor, or loose items that might obstruct your efforts. Next, inspect your walls for any imperfections such as holes, cracks, or gouges. It’s crucial to address these first; fill any drywall damage and sand smooth for a perfectly flat surface. Once repairs are complete and dry, meticulously clean your walls to ensure they are free of dust, grease, and grime, which can interfere with adhesive bonding. If your backsplash area includes electrical outlets or light switches, prioritize safety: turn off the power to these circuits at your main breaker panel. Remove all outlet covers and switch plates, taping off any exposed wiring with electrical tape. Finally, protect adjacent surfaces like countertops, cabinets, and flooring with painter’s tape and plastic sheeting or paper. This proactive step will save you considerable time and effort during cleanup. In our project, our wall had a unique painted design, but as you can see, I performed some minor drywall repair beneath the upper cabinet to ensure a pristine foundation.

-
2. Check for Level and Install a Ledger Board if Needed
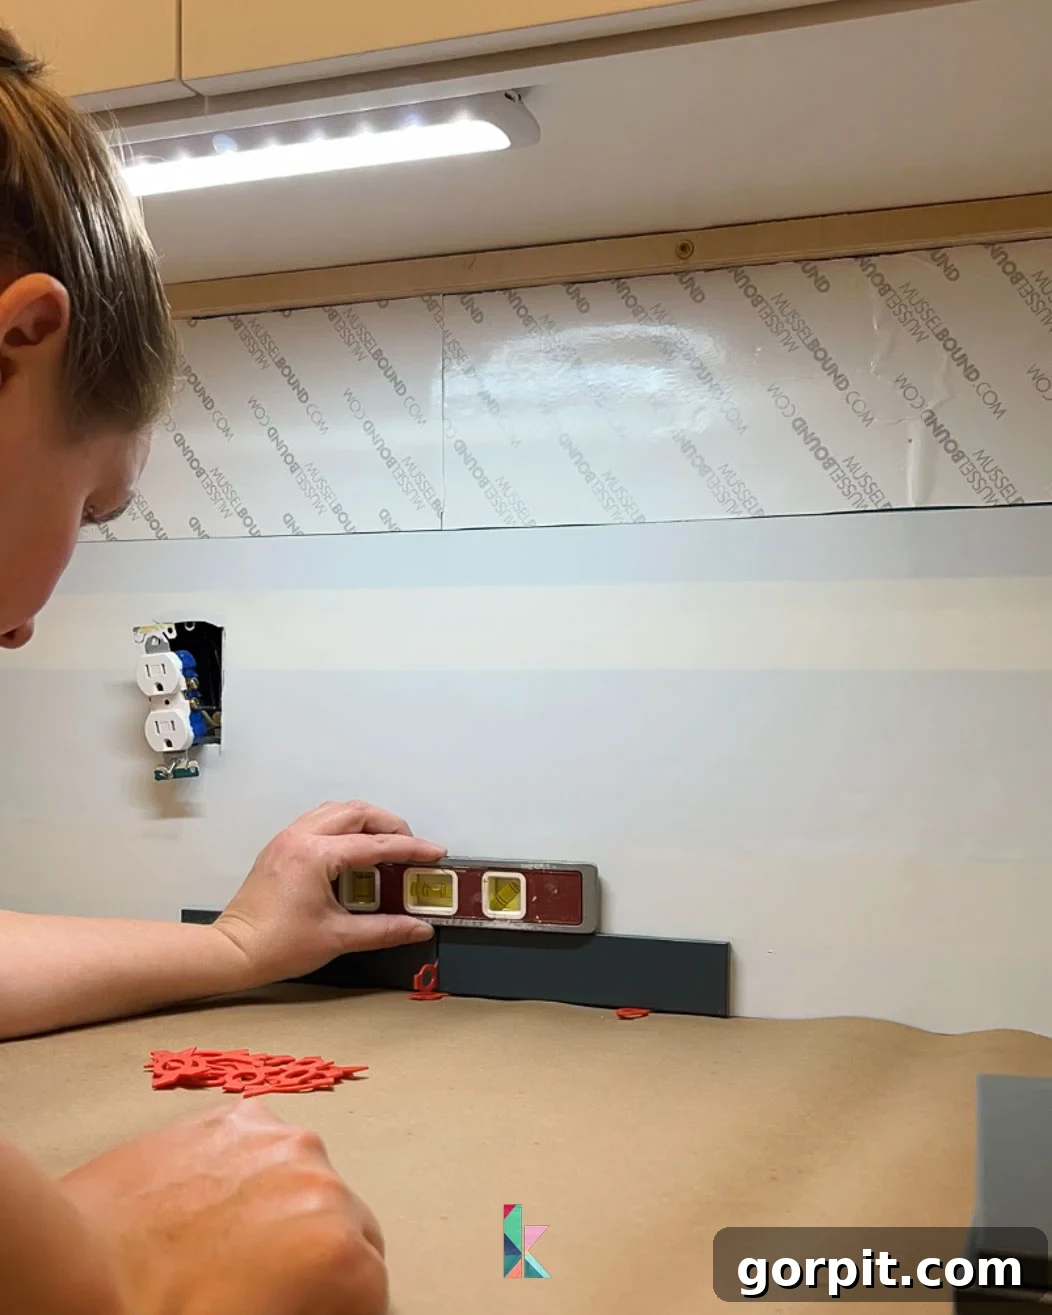
A perfectly level base is paramount for a professional-looking tile backsplash. Use a long level to check your countertop’s straightness; ideally, it should be perfectly level from end to end. If your countertop is indeed level (as ours fortunately was – hurray!), you can proceed using it as your guide. However, if your countertop is uneven, or if you’re tiling an area without a countertop (such as behind a freestanding range or in a pantry nook), you’ll need to establish a level baseline. Mark a perfectly level line on the wall using your level and pencil. Then, securely attach a temporary ledger board—essentially a thin, straight strip of wood—along this line. This ledger board will serve as a crucial temporary support, ensuring your first row of tiles remains perfectly level and preventing them from sliding down until the adhesive fully cures. For areas without a countertop, this step is non-negotiable for a successful installation.
-
3. Plan Your Tile Layout
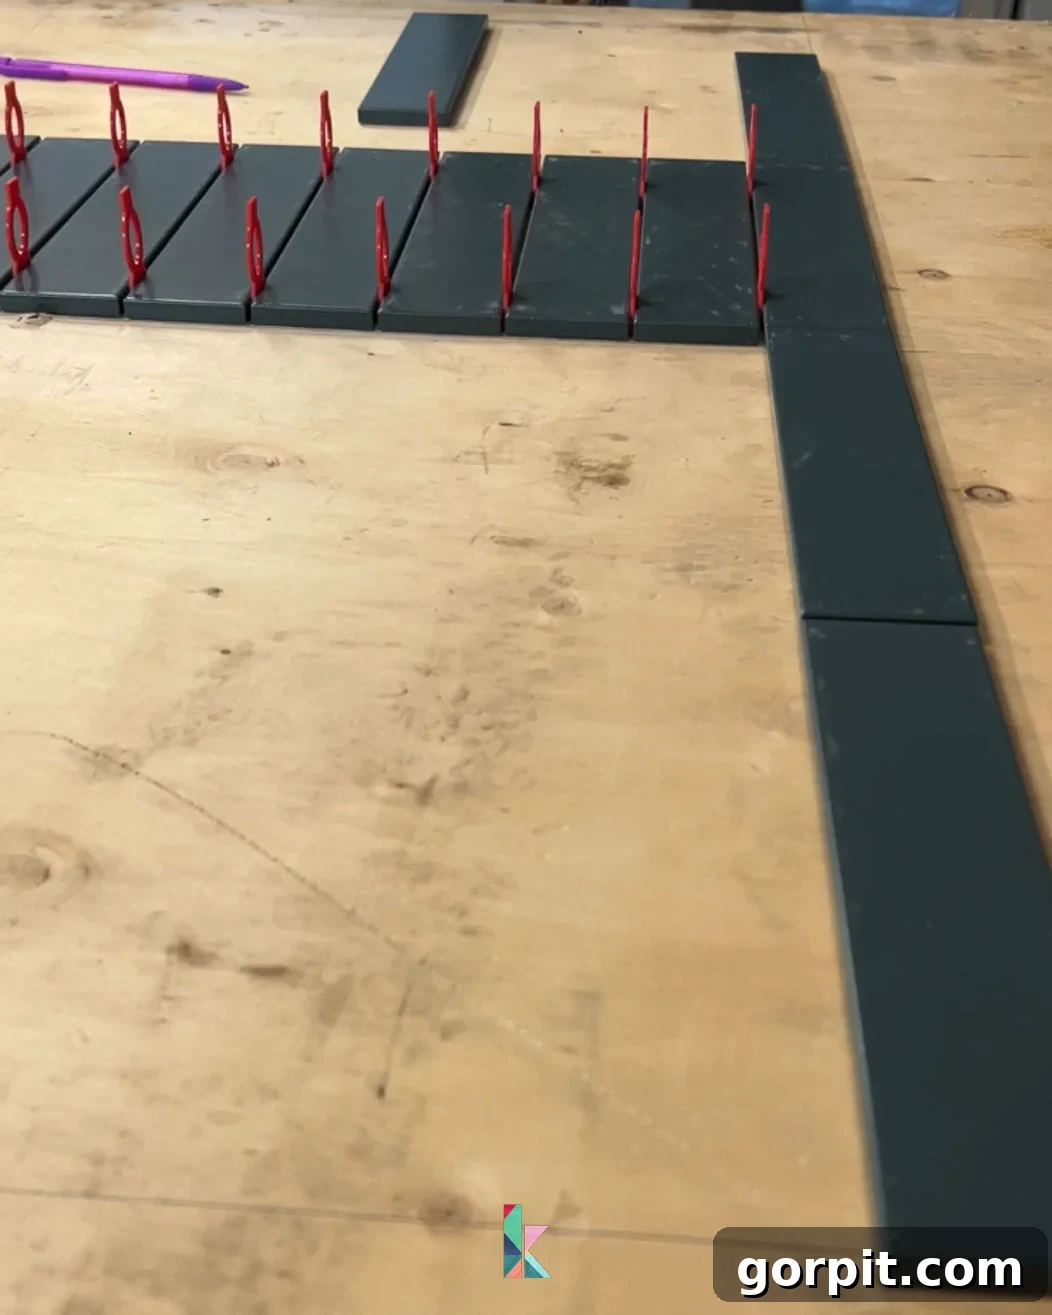
Careful planning of your tile layout is critical to avoid unsightly cuts and ensure a balanced design. Begin by accurately measuring the total length and height of your backsplash area. For intricate planning, you can sketch this area on a piece of scrap wood or cardboard. The next crucial step is to find the center of your backsplash area and mark a vertical line. Many tile patterns, especially stacked or subway patterns, look best when they radiate symmetrically from a central point. With your measurements and center point established, perform a ‘dry lay’ of your chosen tiles. This means arranging the tiles on the floor or a flat surface exactly as they will appear on the wall, complete with your chosen tile spacers. Start by laying them vertically, using your spacers to confirm that the vertical layout avoids any awkwardly small or thin tile slivers at the top or bottom edges. Next, dry lay them horizontally, extending outwards from your center mark. Pay close attention to the ends of each row. If the dry lay indicates that you’ll be left with very narrow cuts at the edges, adjust your starting point slightly to ensure that any cut pieces are substantial enough to be aesthetically pleasing and easy to handle. This dry run is an invaluable step for visualizing the final outcome and making necessary adjustments before any adhesive is applied.
-
4. Apply Adhesive to the Wall
Once your tile layout is meticulously planned and you’re confident in your design, it’s time to apply the adhesive. Traditional methods often involve using thinset mortar, which requires mixing and can be quite messy. However, for a much cleaner and faster application, I highly recommend the MusselBound tile adhesive mat. We’ve used it multiple times, for projects like our fireplace makeover and a DIY tile headboard, and its ease of use compared to thinset is remarkable. The primary advantage of MusselBound is its mess-free nature and instant grab. The only minor drawback is its incredibly strong adhesion; once a tile touches the mat, it’s very difficult to reposition without prying it off, which isn’t ideal. This means precision is key when placing your tiles. Despite this, the convenience and cleanliness make it our preferred method over messy thinset, which we’ve also used extensively in the past. To apply, simply cut the MusselBound mat to fit your backsplash area using a utility knife. Carefully peel off the backing and firmly press the adhesive mat onto your prepared wall, smoothing out any air bubbles. Use your utility knife to cut neatly around any obstacles like electrical outlets or light switches, ensuring a clean and continuous adhesive surface.
-
5. Install Your First Row of Tiles
With the adhesive mat securely in place, carefully peel back the protective paper from the MusselBound. This reveals the incredibly strong adhesive surface. Now, it’s time to place your first tile. Begin from your predetermined center point or a corner, depending on your layout. When positioning the first tile where it meets the countertop, be sure to leave a crucial 1/8-inch expansion gap. This gap allows for natural expansion and contraction of materials, preventing future cracking. We started from the center and worked our way outwards, diligently installing the first row. Even though I had previously confirmed our countertop was level and was using it as a reliable guide, I continuously checked the level of each tile as I proceeded with the first row. This vigilance is paramount; if your initial row isn’t perfectly level, every subsequent row will be compromised, resulting in a visibly uneven and ‘wonky’ backsplash. Take your time, be precise, and ensure this foundational row is flawless.
-
6. Install the Rest of Your Tiles
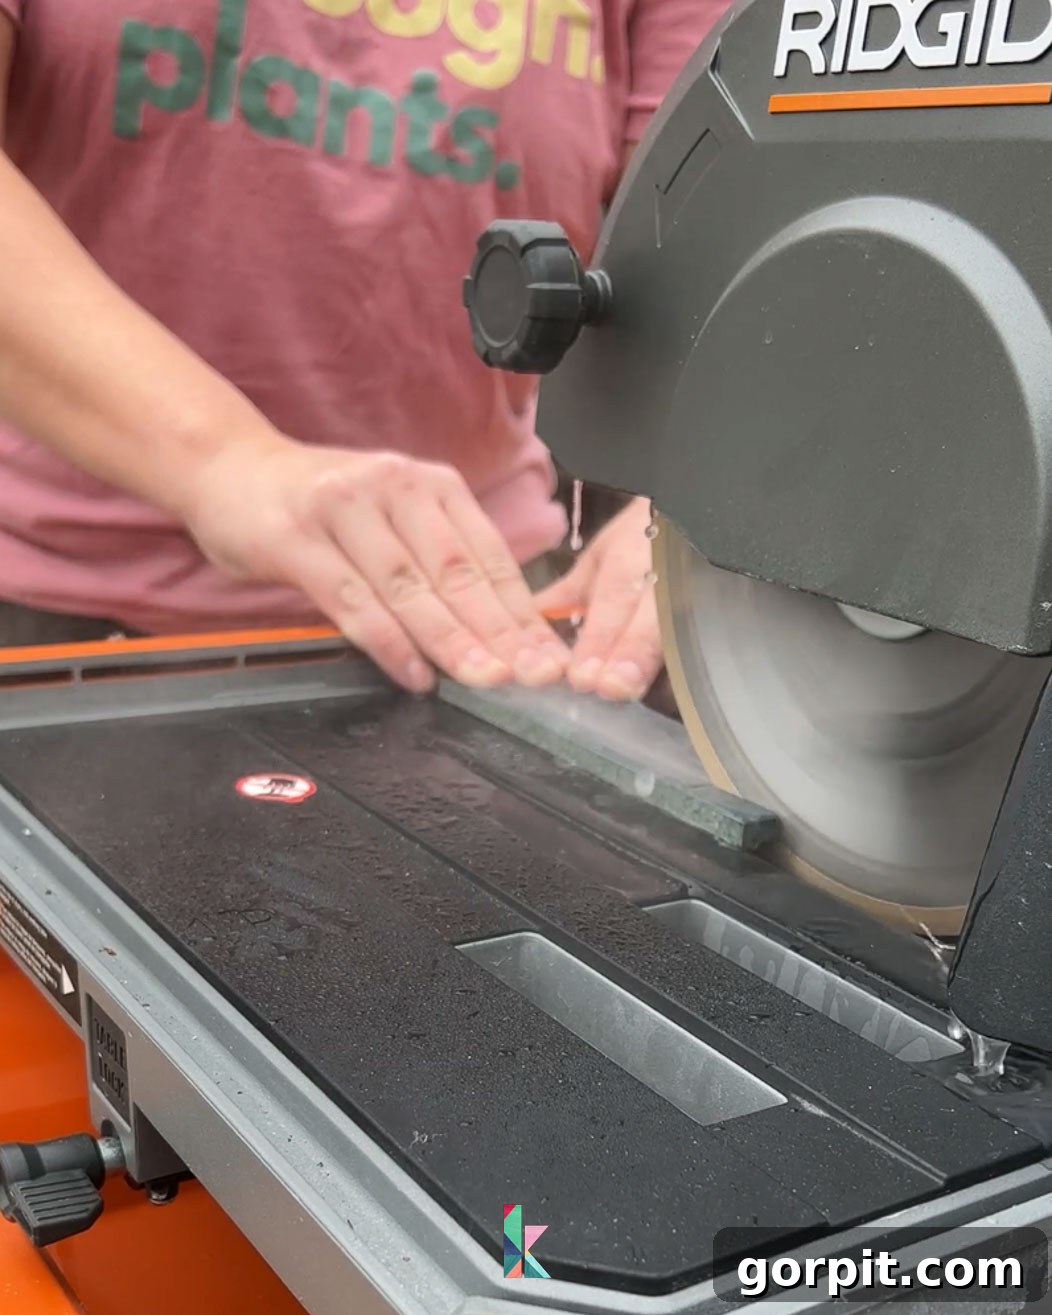
Continue placing your tiles, moving systematically across and up your backsplash area. Crucially, insert tile spacers between every tile to ensure perfectly uniform grout lines and a professional finish. It’s often most efficient to install all the full-sized tiles first. Once these are in place, you can focus on the cuts. Measure and mark each tile that needs trimming, accounting for any outlets, corners, or edges. While a wet saw provides exceptionally clean and precise cuts, making it ideal for large or complex projects, you can absolutely achieve great results using a manual tile cutter for straight lines and tile nippers for irregular shapes or small adjustments. Don’t be intimidated by a tile saw; it’s generally considered one of the safer power tools for DIYers, offering a smooth cutting experience due to its water-cooled blade. Take your time with each cut, measuring twice and cutting once for the best outcome.
-
7. Apply Your Grout
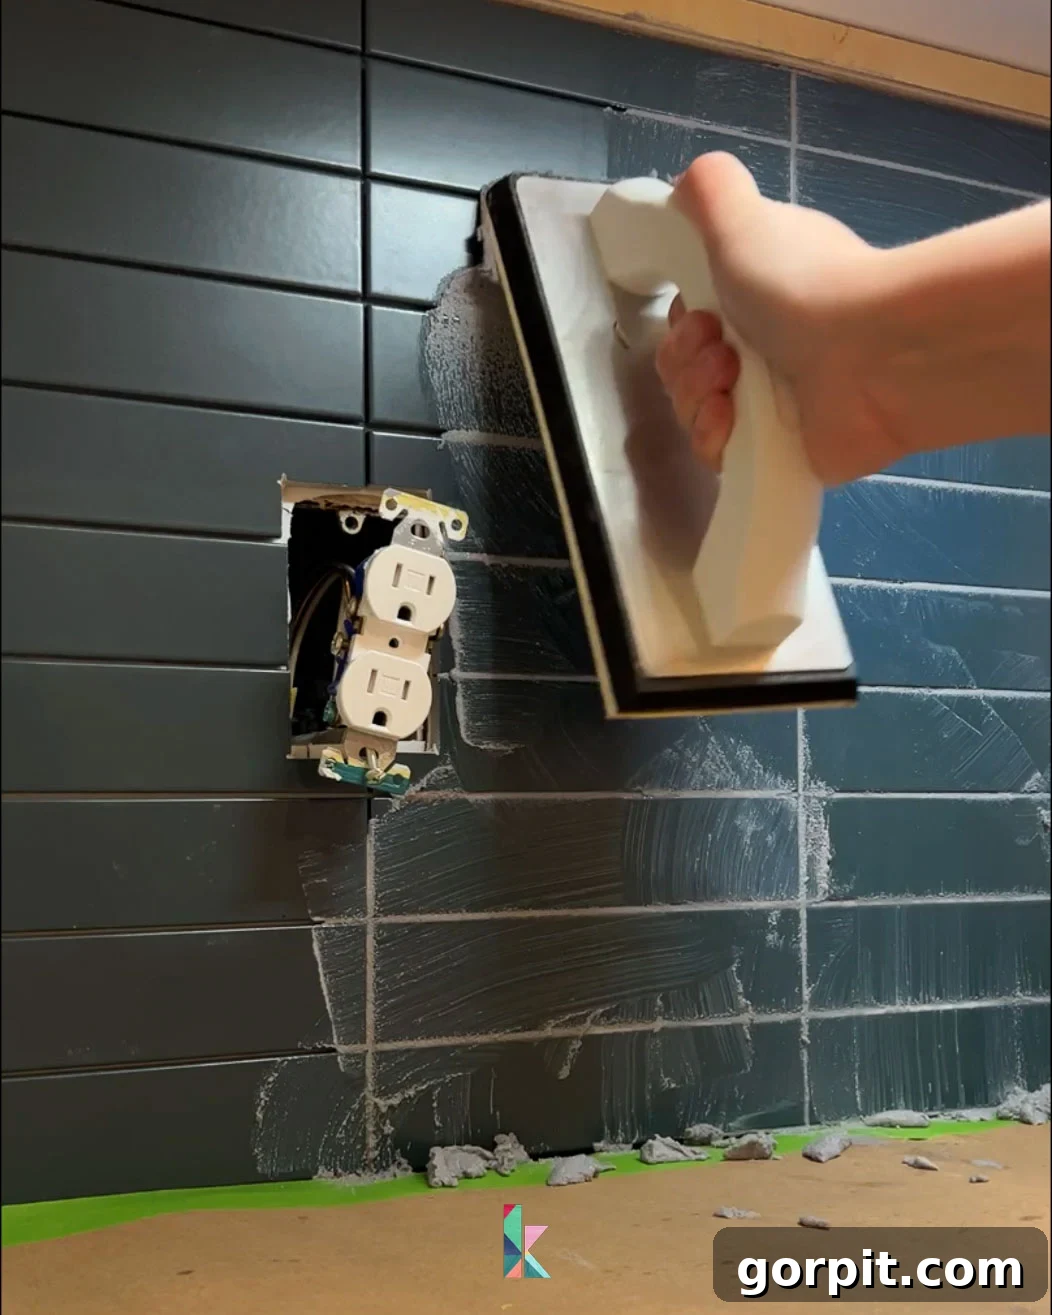
After your tiles are securely installed and the adhesive has fully cured (refer to your adhesive’s instructions for drying times), it’s time for grouting. For maximum convenience, I highly recommend using a pre-mixed and pre-sealed grout. This type of grout eliminates the need for separate mixing and sealing steps, significantly simplifying the process and saving time. While grouting can be a bit messy, it’s far from difficult. Using a rubber grout float, scoop a generous amount of grout and begin pressing it firmly into all the tile joints/grout lines. Hold your rubber float at a 45-degree angle to the tile surface, sweeping it diagonally across the tiles to ensure every gap is completely filled. Work in small sections, applying consistent pressure to force the grout deep into the joints. After covering an area, use the float at a steeper angle (closer to 90 degrees) to scrape off excess grout from the tile surface, leaving as much as possible in the joints. This technique helps minimize cleanup later.
-
8. Clean and Dehaze Your Tile
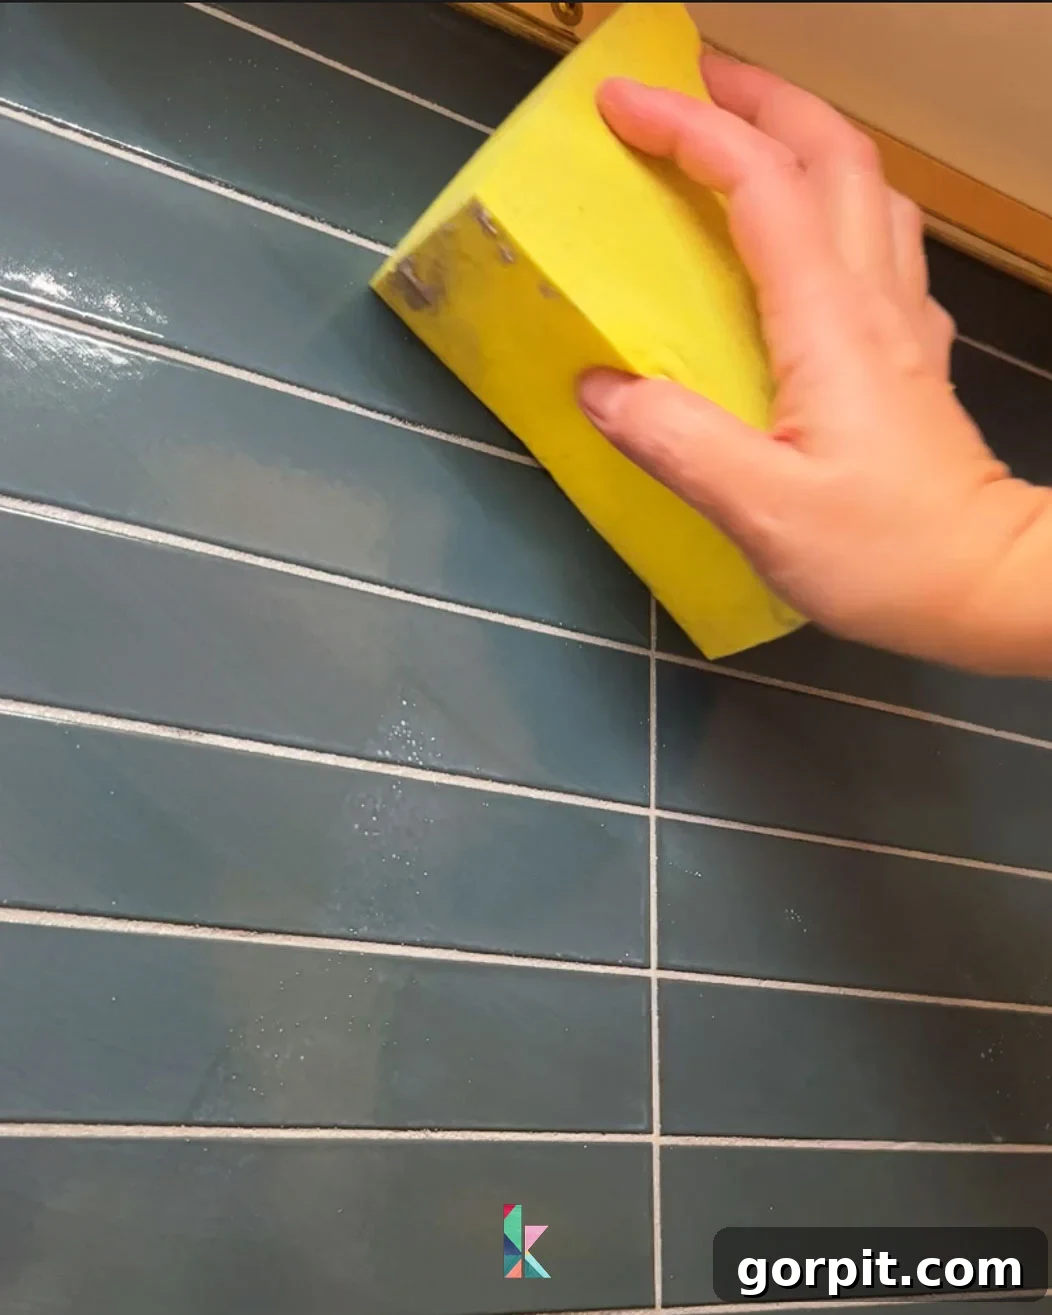
Once you’ve finished applying the grout, consult the manufacturer’s instructions for your specific grout type regarding the recommended waiting time before wiping away the excess. This crucial “curing” period allows the grout to begin setting. After the specified time, take a clean, damp sponge and gently wipe the tile surface to remove any excess grout. It’s imperative to rinse your sponge frequently in a bucket of clean water to avoid simply spreading the grout around. Continue wiping and rinsing until the tile surface is clean. After the initial cleanup, allow the grout to dry for another period, again according to the manufacturer’s guidelines, before performing a final cleaning. You might notice a slight haze or film on your tiles once the grout has dried; this is common grout haze. If you accidentally wait too long and the haze becomes stubborn, a specialized grout haze remover, available at most hardware stores, will effectively restore your tiles’ sparkle. Regular maintenance and proper cleaning at this stage ensure your new backsplash looks its absolute best.
-
9. Install Outlet Extenders & Replace Covers
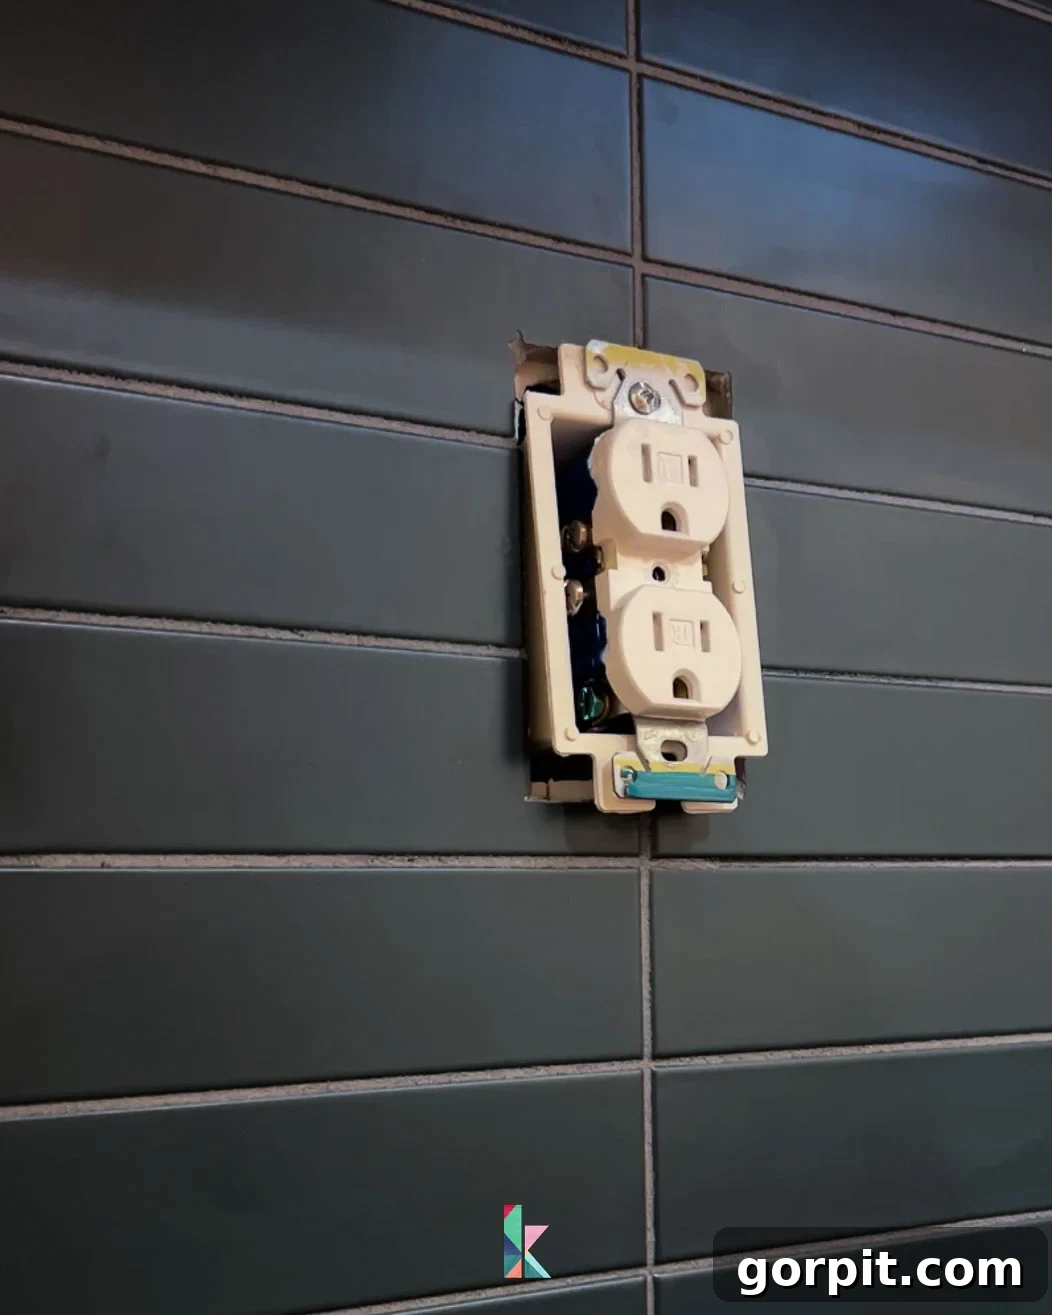
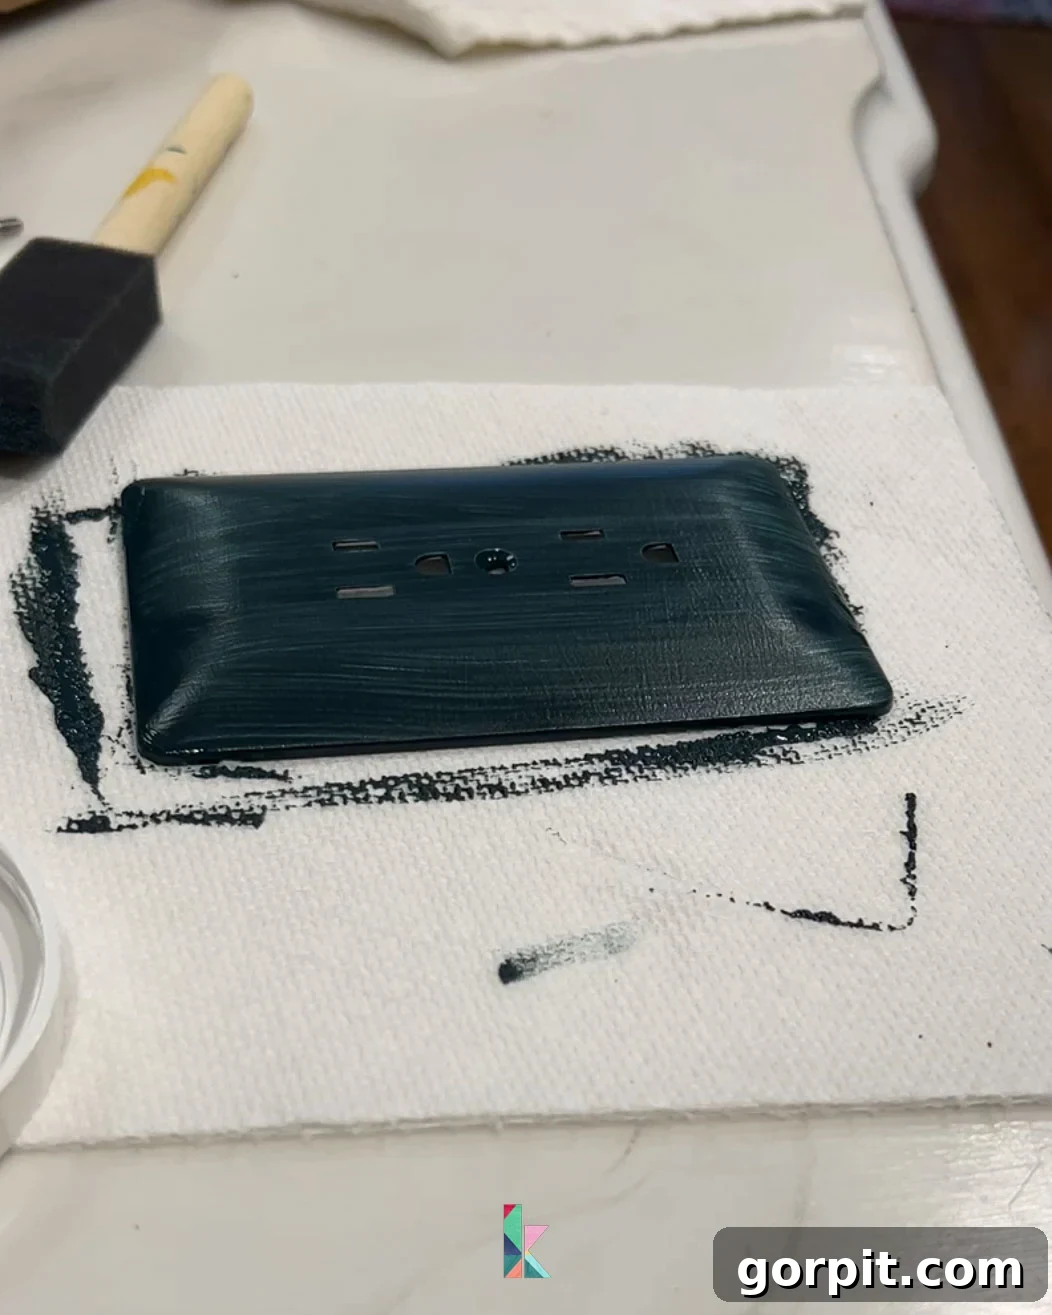
With your new tile backsplash installed, the electrical outlets and switches will likely be recessed due to the added thickness of the tile. To ensure they sit flush and safely with your new tiled surface, you’ll need to install outlet box extenders. These inexpensive plastic or metal rings fit inside the existing electrical box, extending its depth to be level with your tile. Once the extenders are in place, you can safely replace your outlet and switch covers. For an even more seamless and custom look, consider purchasing paintable outlet covers. As you can see from our project, I painted our outlet cover to perfectly match the color of our new backsplash tiles. This simple trick allows the outlets to blend into the tile, rather than standing out starkly, contributing to a truly integrated and high-end finish. This attention to detail significantly enhances the overall aesthetic.
I bought a paintable outlet cover and painted it to match our backsplash tiles so that it would blend in and not stick out like a sore thumb. So easy.
-
10. Caulk Your Joints
The final, yet incredibly important, step in completing your tile backsplash is caulking. Grout is rigid and prone to cracking where surfaces meet at different angles or might shift slightly. To prevent this, you need to apply a bead of caulk along the expansion gap between your countertop and the bottom edge of your tile backsplash. This provides a flexible, waterproof seal that accommodates minor movements and protects against moisture. Additionally, I highly recommend caulking any internal wall corners where the backsplash meets another wall. Choose a caulk color that matches your grout for a continuous and professional appearance. A smooth, even caulk line not only seals and protects but also gives your entire backsplash a polished, finished look.
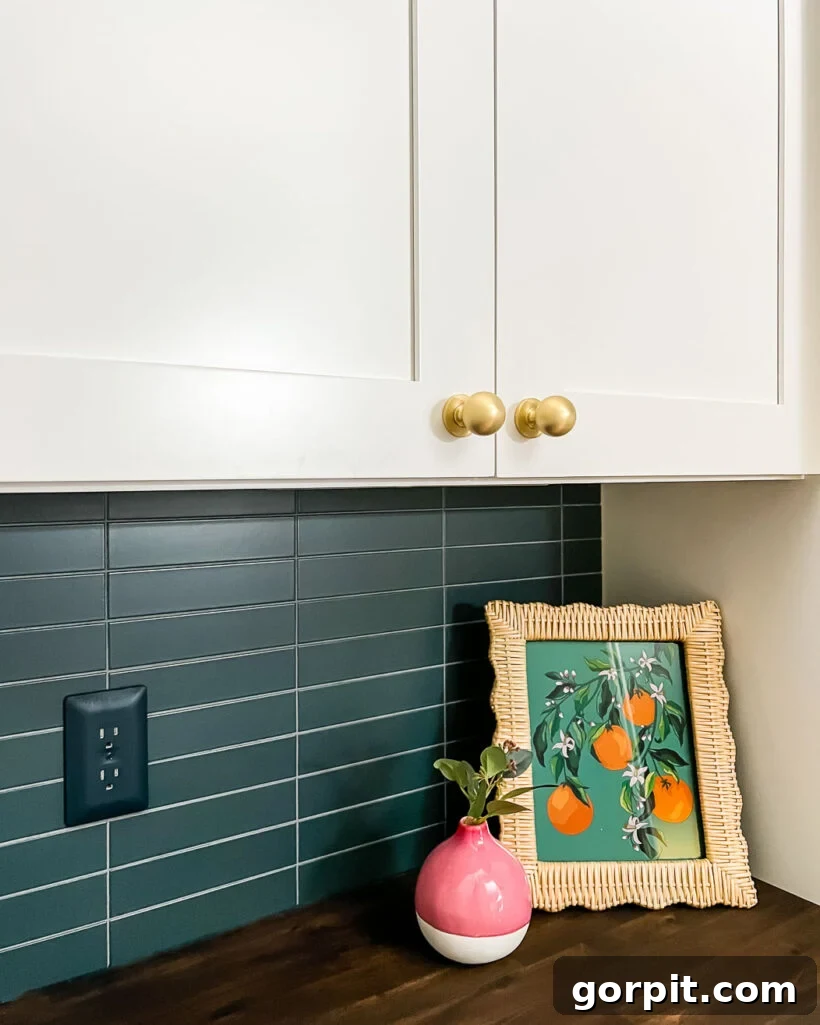
And just like that, your stunning new tile backsplash is complete! We couldn’t be more thrilled with the transformation it brought to our butler’s pantry. The fresh, modern look and enhanced functionality have made a significant difference in how we enjoy and utilize the space.
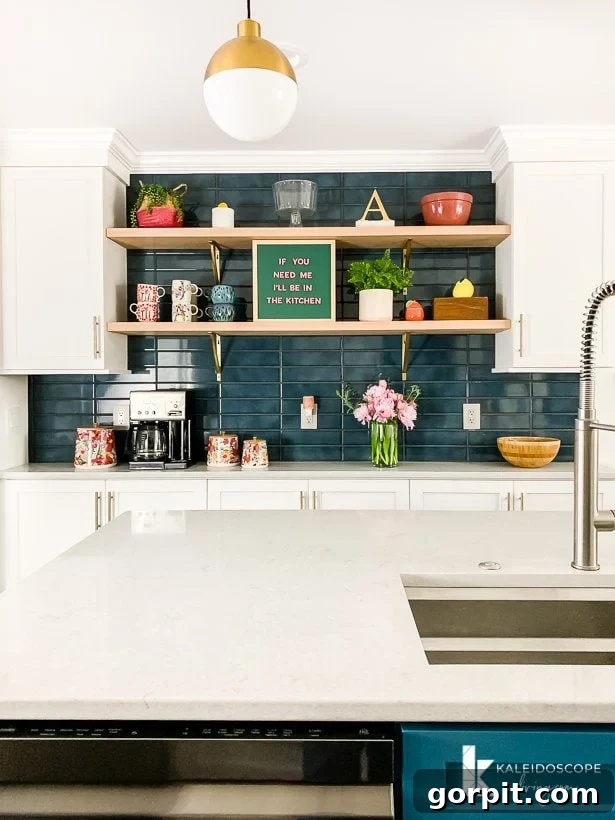
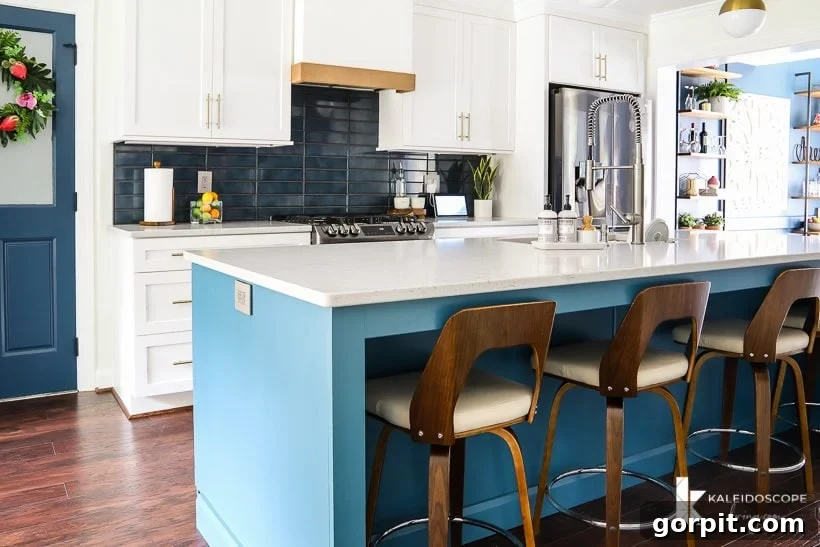
While this particular project in our butler’s pantry covered a relatively small area, the very same method and easy-to-follow steps outlined in this guide were successfully applied to much larger backsplash installations. For instance, when we undertook the extensive kitchen renovation in our previous home, we tackled two expansive backsplash areas using this identical technique. There, we opted for a larger, glossy ceramic tile, but notice the consistent preference for a horizontally stacked tile pattern? And, of course, our enduring love for this particular shade of blue color! It just goes to show, when you find a style you love and a DIY method that works, you stick with it.
If the idea of tiling a backsplash still feels a bit overwhelming, don’t despair! There’s an incredible alternative that can yield equally impressive results. You can always opt to paint your existing tile backsplash. I’ve successfully painted outdated tile backsplashes on several occasions, and each time, the transformation has been remarkable, providing a fresh, updated look without the complexities of tile removal and reinstallation.
Other posts you may enjoy for further home improvement inspiration:
- How To Paint Kitchen Cabinets Without Sanding or Priming
- Our Budget-Friendly Kitchen Makeover REVEAL!
- Affordable DIY Countertops That Will Blow Your Mind
- How to Paint Countertops & What You NEED to Know First
- The Easy Way to Update Bathroom Tile Without Replacing It!
- How to Install a Floating Tile Floor
Curious about my unique approach to transforming rooms and spaces within our home? Dive into Designer in a Binder®, my comprehensive system designed to simplify the decorating process.
For exclusive content, behind-the-scenes sneak peeks, and direct access to more DIY tips and design inspiration, be sure to subscribe to my newsletter before you go!