Are you envisioning a home transformation that’s both stunning and surprisingly simple? If you’re pondering whether tile stickers are the perfect solution for your next project, you’ve landed in the right place! These ingenious adhesive tiles offer an incredibly quick, easy, and budget-friendly route to a refreshed space, all without the customary mess and hassle of traditional tiling. However, in my experience, many homeowners and renters approach tile stickers with a healthy dose of skepticism, often accompanied by a multitude of questions.
In this comprehensive guide, I aim to address all your burning questions about tile stickers. Are they genuinely effective? How effortless is their removal? Are tile stickers truly waterproof? And perhaps most crucially, how long can you expect them to last? Having personally utilized tile stickers in two of our bathrooms and our laundry room, I’ve gathered extensive first-hand experience. I’ll share insights, tips, and even show you how our installations are holding up over time. Get ready to uncover everything you need to know to confidently decide if tile stickers are right for your home!
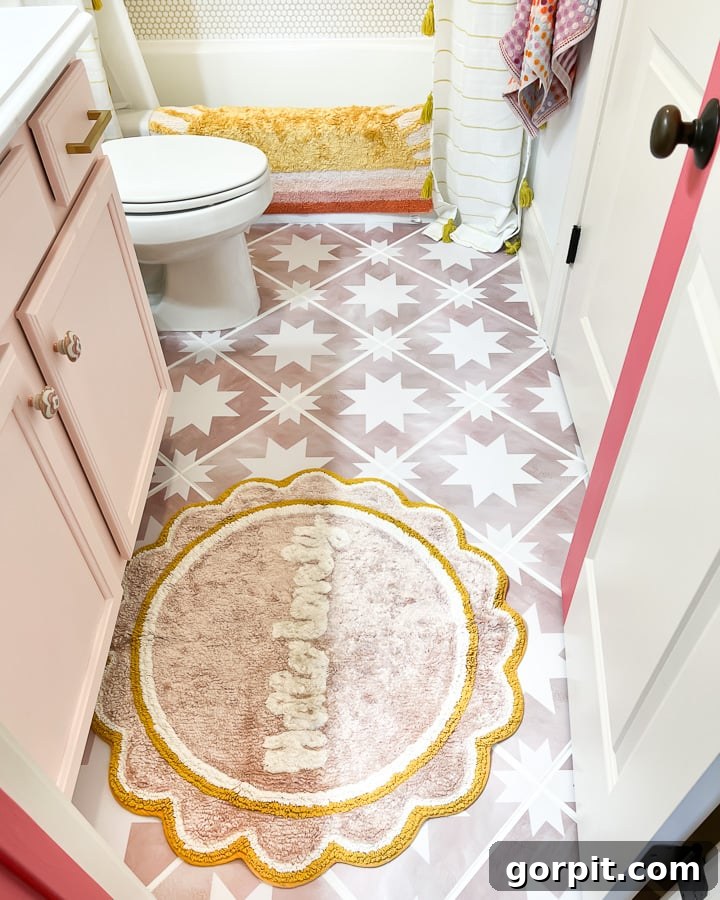
Table of Contents
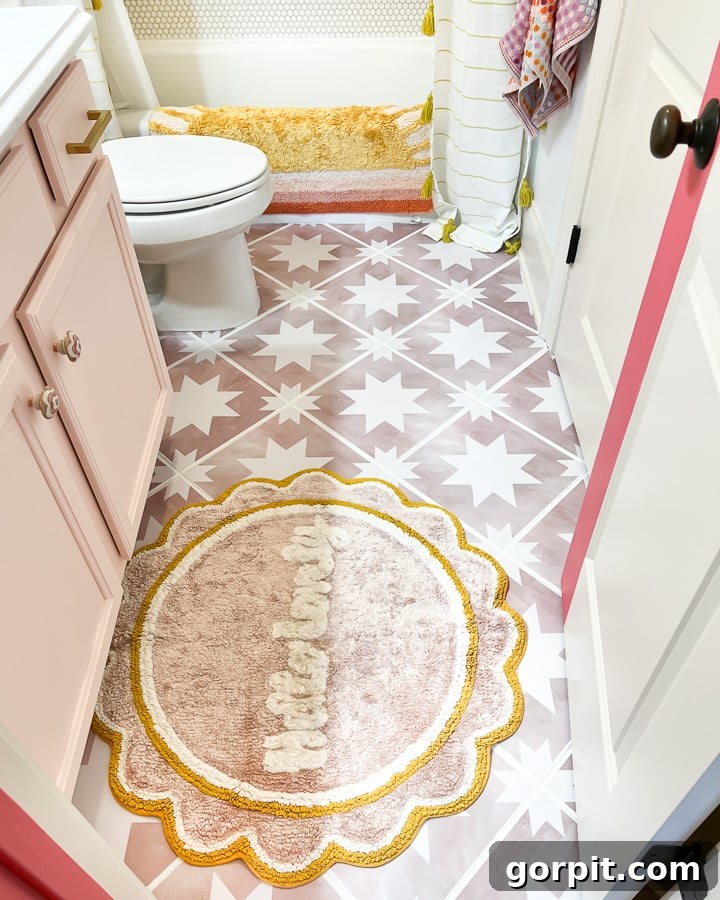
That stunning floor you admire above? Those are indeed floor tile stickers! Given our positive experiences using them in three different areas of our home, I consistently receive inquiries about their effectiveness and durability. This prompted me to compile this detailed article, dedicated to answering all your questions about vinyl tile stickers, making your decision-making process much smoother.
Need a link?
If you want to know what paint colors we have used in our current house or where we have found our furniture, art, rugs, etc., click below to find it on our home tour page!
This post contains affiliate links for your convenience. Click here for my full disclosure policy.
What are Tile Stickers?
Tile stickers, also commonly referred to as vinyl tiles, tile decals, or adhesive tiles, are incredibly thin, self-adhesive sheets crafted from waterproof vinyl. Typically, they boast a thickness comparable to a standard playing card, making them an unobtrusive yet impactful addition to any surface. These innovative products are designed to mimic the appearance of traditional tiles, offering a vast array of patterns, colors, and textures.
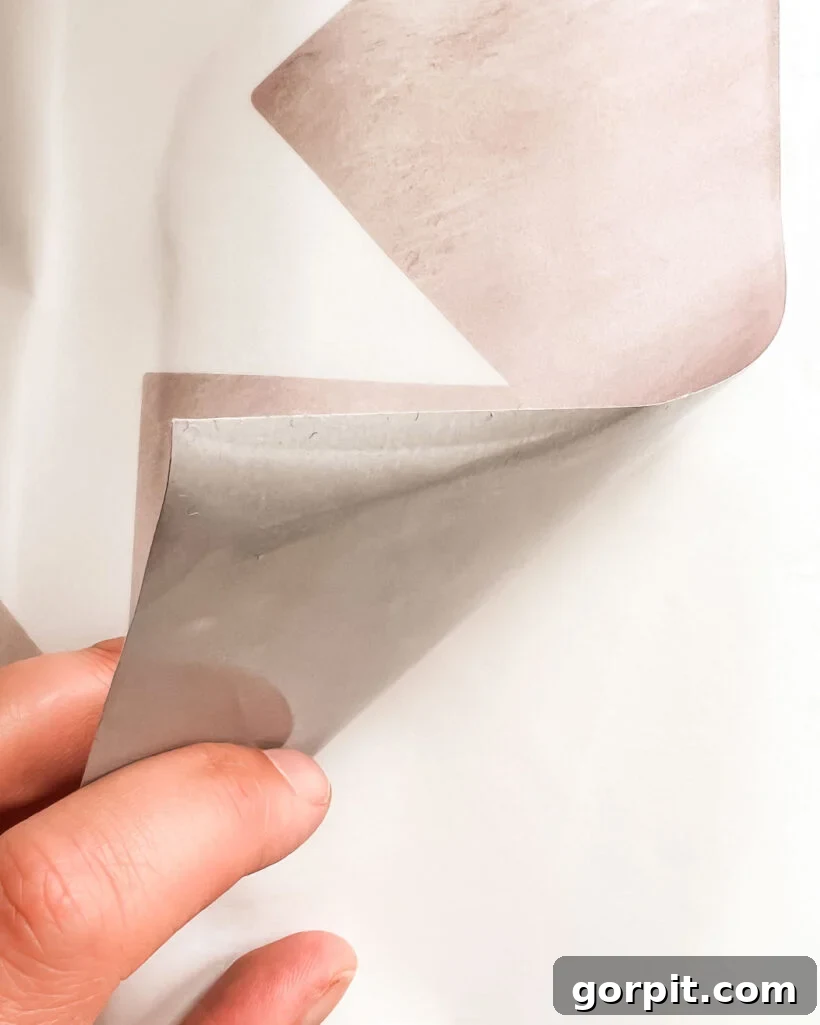
Beyond their aesthetic appeal, tile stickers are engineered for durability. They are inherently waterproof, highly scratch-resistant, and remarkably robust, making them suitable for various demanding environments within the home. One of their most compelling advantages is the installation process: absolutely no demolition, messy grout work, or specialized tools are required. Their simple peel-and-stick application makes tile stickers an ideal, DIY-friendly solution for anyone looking to quickly and easily update their living spaces.
It is crucial, however, not to confuse vinyl tile stickers with peel-and-stick tiles – they are distinct products. Peel-and-stick tiles are considerably thicker, often constructed from a material known as luxury vinyl plank (LVP) or luxury vinyl tile (LVT). While we successfully used this specific type of peel-and-stick tile in our previous laundry room and were thoroughly impressed with the results, it’s important to understand that its composition and application differ significantly from the thin, flexible tile stickers or decals we are discussing here.
Vinyl tile stickers have surged in popularity not only due to their ease of use but also because they come in an almost limitless array of colors, patterns, and designs. This versatility allows them to convincingly mimic the sophisticated look of much more expensive options, such as hand-painted cement tiles or intricate Moroccan tiles, all at a mere fraction of the cost. Furthermore, their removable nature makes them an exceptionally attractive option for renters seeking to personalize their homes without risking damage to the underlying surfaces.
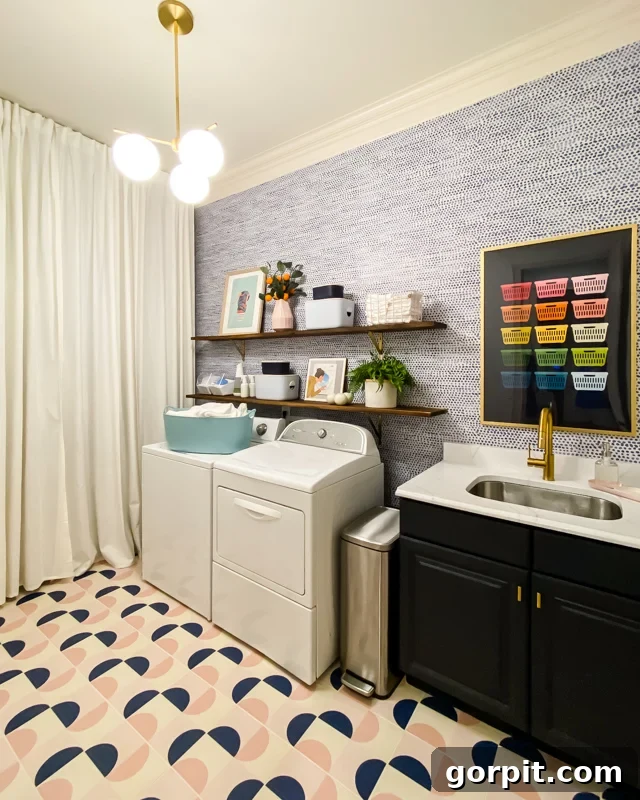
Where to Use Vinyl Tile Stickers and on What Surfaces?
A common question is: Can you put tile stickers over existing tiles? Absolutely, yes! This is one of their primary applications. However, the versatility of tile stickers extends far beyond just covering old tiles. They can adhere to a surprising variety of other smooth, clean, and dry surfaces. Leading manufacturers and sellers of tile decals, such as Quadrostyle, provide helpful guidelines on compatible surfaces, ensuring successful application and longevity.
According to their recommendations, tile stickers are generally suitable for:
- Smooth ceramic wall and floor tiles
- Drywall painted with a satin or gloss finish
- Laminated surfaces, including popular options like Formica, melamine, and IKEA furniture
- Existing linoleum, vinyl, and laminate flooring
- Parquet and varnished wood surfaces
- Sealed concrete floors
- Sealed polished stone, such as granite, marble, and terrazzo
- Glass panels
- Metal surfaces
- Various types of plastic
- Acrylic and Perspex materials
Conversely, it’s equally important to understand where tile stickers will not effectively adhere or perform optimally. Avoiding these surfaces will save you time and frustration:
- Rough or heavily textured wall and floor tiles
- Tiles with irregular edges or pocked surfaces, such as handmade tiles or tumbled marble
- Drywall painted with matte, velour, or chalk finishes, which lack the necessary smoothness for adhesion
- Cracked or peeling paint
- Old or damaged wallpaper
- Unsealed subflooring, unsealed plywood, or raw, untreated wood
- Waxed or oiled wood paneling
- Unsealed concrete or natural stone tiles
- Ceramic tiles that have a wax coating
- Porous surfaces like cork
- Damp, perpetually wet, or visibly cracked surfaces
- Rough materials like brick
- Natural slate surfaces
Kitchen Tile Stickers
Kitchens are prime candidates for tile sticker makeovers. You can effortlessly update an existing tile backsplash by applying tile stickers directly onto the individual tiles. For those without a backsplash, and only drywall behind countertops, these stickers offer an excellent way to create the illusion of a tiled backsplash directly on the wall. When considering kitchen tile stickers, especially near heat sources like stoves or ovens, it’s crucial to select products specifically labeled as heat-proof to ensure safety and durability. If concerns about heat persist, an alternative like painting your tile backsplash could be a more suitable option.
While theoretically possible, I generally wouldn’t recommend using tile stickers for a kitchen floor update. Although our bathroom tile stickers have performed exceptionally well, kitchen floors typically experience much higher foot traffic and wear, which could compromise the long-term integrity of the stickers. For a more robust and lasting solution in high-traffic kitchen areas, I would instead suggest installing a floating tile floor over your existing outdated one. However, if you’re looking for a very temporary or short-term aesthetic enhancement for a kitchen floor, tile stickers could still serve as a quick and impactful facelift.
Bathroom Tile Stickers
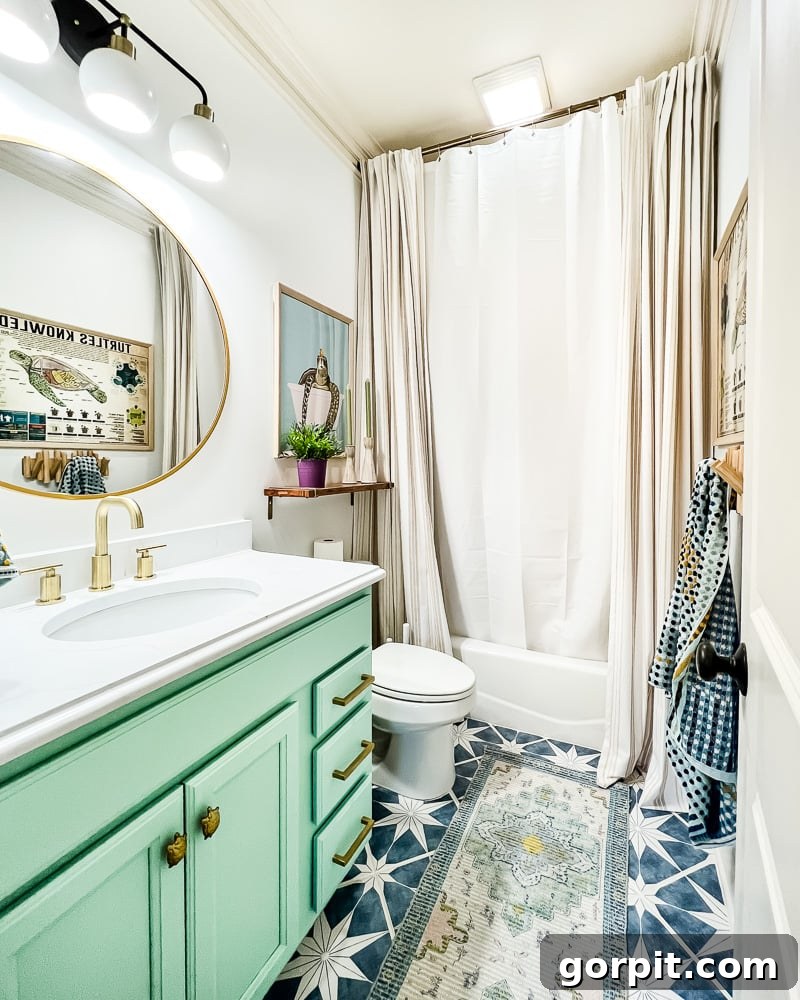
Bathrooms are another ideal space for tile decals. We’ve successfully used them to revitalize outdated bathroom tile floors in both Avery’s bathroom and Attley’s bathroom, achieving fantastic results. They are also an excellent option for covering linoleum or sheet vinyl flooring, instantly creating the sophisticated appearance of individual tiles. Naturally, bathroom tile stickers can also be applied to backsplashes, adding a fresh and modern touch.
Furthermore, most reputable tile sticker companies confirm that their vinyl tile decals are suitable for use within showers, thanks to their waterproof properties. While I haven’t personally installed them in a shower, a friend who rents in New York City successfully applied them to cover an unsightly row of accent tiles in her shower. She reports that they are holding up beautifully, maintaining their appearance and adhesion despite daily exposure to water.
What are the Pros and Cons of Tile Stickers?
Understanding the advantages and disadvantages of tile stickers is key to making an informed decision for your home renovation. Let’s break down the primary pros and cons based on extensive experience.
Pros: The benefits of tile stickers are numerous and significant. Firstly, they are exceptionally budget-friendly, offering a dramatic visual upgrade at a fraction of the cost of traditional tiling. Secondly, their installation process is incredibly straightforward and requires no special skills or heavy equipment, making them an ideal DIY home decor project. Thirdly, tile stickers come in an astounding, seemingly endless variety of colors, patterns, and styles, allowing for unparalleled design flexibility to match any aesthetic. Finally, they are a fantastic renter-friendly option because they can be easily removed without causing any damage to the underlying tile, linoleum, or other surfaces, making them perfect for temporary transformations.
Cons: Despite their many advantages, tile stickers do have a few limitations to consider. In my experience, they are generally not ideally suited for very heavy traffic areas, such as main entryways or high-use kitchen floors, where constant abrasion might compromise their longevity. Another critical factor is surface preparation; you must be meticulous in cleaning and prepping the surface before installation to ensure optimal adhesion. Most importantly, selecting the correct size tile stickers is paramount. If the stickers are too large or too small, especially around grout lines, the corners can begin to peel up, even if installed diligently. This crucial sizing detail is elaborated further in a later section. In essence, rushing the installation process or failing to order the precise size will almost certainly lead to disappointing results.
How Do Floor Tile Stickers Hold Up? How Long Will Tile Stickers Last?
The longevity and durability of floor tile stickers are common concerns, and I can confidently state that if you install the correct size tile stickers and meticulously prepare your surface, they should last indefinitely, providing years of beautiful, maintenance-free use. Trust me on this – I speak from direct, hard-earned experience.
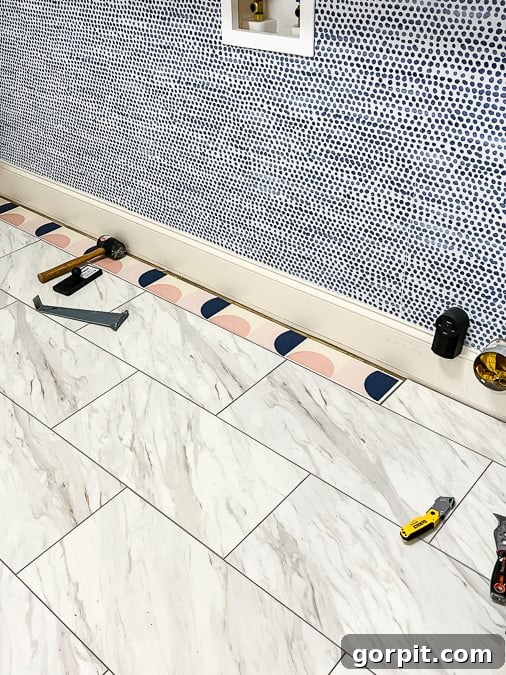
Our initial venture with tile stickers regrettably ended in failure. But this could have been entirely prevented! The issue stemmed from purchasing the wrong size tile stickers for our laundry room floor. We quickly encountered problems with the edges peeling up, which ultimately led us to admit defeat and install a floating tile floor over the original tile. This experience taught us a valuable lesson about precision in measurement.
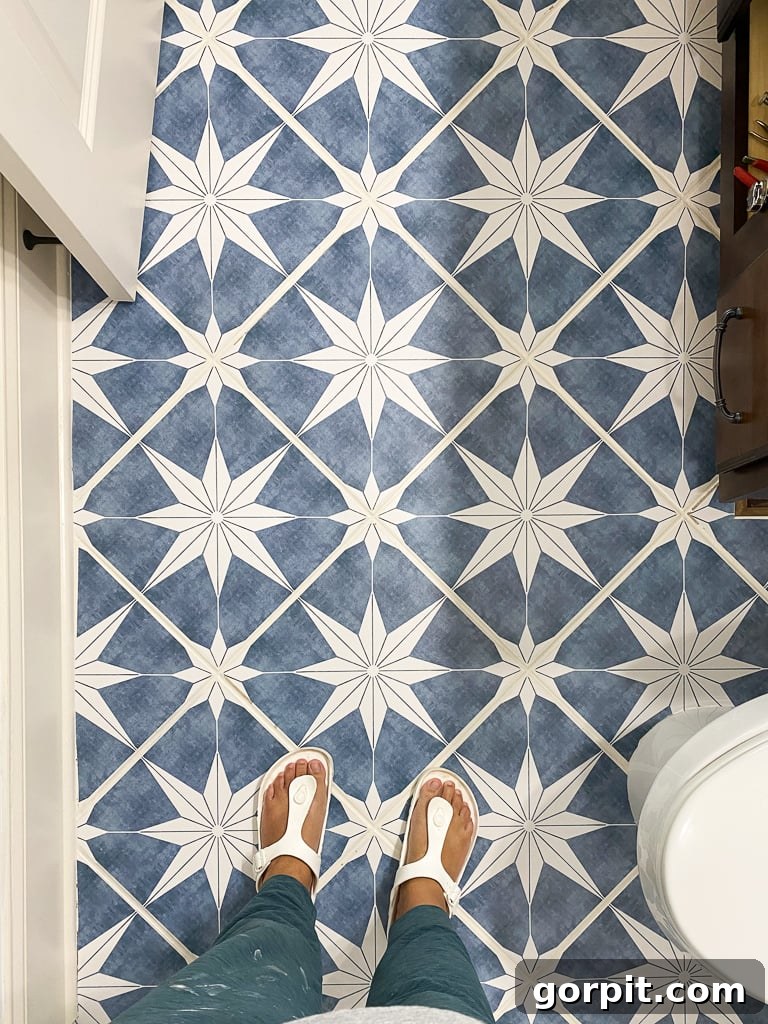
Following that unfortunate laundry room mishap, we have since used correctly sized vinyl tile decals on two subsequent projects, and I can unequivocally say I have zero regrets. The floor tile stickers in both of our daughters’ bathrooms have been installed and subjected to rigorous daily use for over 16 months, and they are holding up absolutely perfectly. There’s no peeling, no ripping, no signs of wear whatsoever. We are absolutely thrilled with their performance and appearance. The critical importance of accurately sizing your tile stickers will be explained in detail later in this post, as it is the single most important factor for long-term success.
I highly recommend watching the short video below to witness first-hand how our tile stickers are performing after more than 16 months of consistent use. It provides tangible proof of their impressive durability and sustained aesthetic appeal.
How to Install Tile Stickers
While each manufacturer typically provides its own specific installation instructions – which you should always read thoroughly – the general process for installing tile decals is quite similar across most brands. You can get a clear visual overview of the typical installation steps by watching the short video below, and by referring to my detailed post on how to update outdated tile without replacing it. Regardless of where you purchase your tile stickers, the fundamental process will generally remain consistent, empowering you to achieve a professional-looking finish with ease.
More FAQs About Tile Stickers
Tile stickers are primarily constructed from a robust, adhesive-backed vinyl film. This high-quality vinyl is then typically laminated, providing an extra layer of protection against common issues like fading from sunlight, surface scratches, and general wear and tear. When you opt for tile stickers from a reputable vendor such as Quadrostyle or Snazzy Decal, you’re investing in a material that’s often similar to what’s used for durable outdoor signage or vehicle wraps. This means the material is engineered to be exceptionally sticky, remarkably durable, and completely waterproof, ensuring long-lasting performance in various home environments.
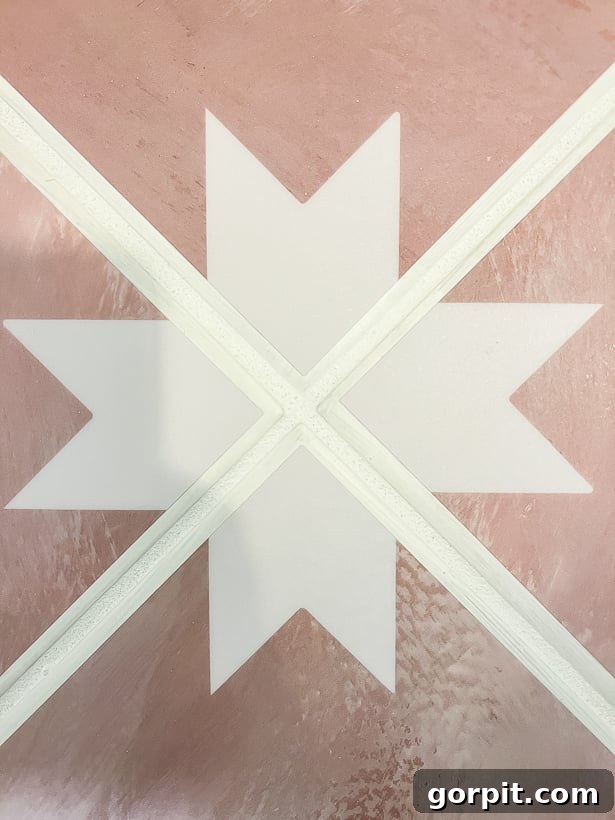
This is an absolutely critical step for successful tile sticker installation. When I first ordered tile stickers for our laundry room, I made the mistake of having them custom-cut to the exact dimensions of our ceramic tiles. This proved to be a significant error, one I only fully grasped after subsequently ordering from Snazzy Decal for Avery’s bathroom. They provided very clear and specific instructions for measuring your existing tiles. The key takeaway is to order your tile stickers approximately 1/8 inch smaller than your actual tiles on each side. This slight reduction creates a small, consistent border around each sticker, ensuring that the adhesive adheres entirely to a perfectly flat surface. Many tiles, particularly older ones, can have a slight slope or bevel towards the grout line, and if the sticker extends onto this bevel or directly into the grout, it becomes highly susceptible to peeling. Therefore, the tile sticker should never reach or overlap the grout line. As you can observe in the image below of Attley’s bathroom, the tile stickers intentionally do not extend all the way to the edge of the underlying tile, which is precisely the desired outcome for long-term adhesion. Keep in mind that most tile sticker companies offer custom-cutting services. So, even if you only see standard sizes listed (e.g., 12″ x 12″), don’t hesitate to contact them directly and inquire about custom dimensions. It’s highly probable they can accommodate your specific needs and guide you through the ordering process for personalized sizes.
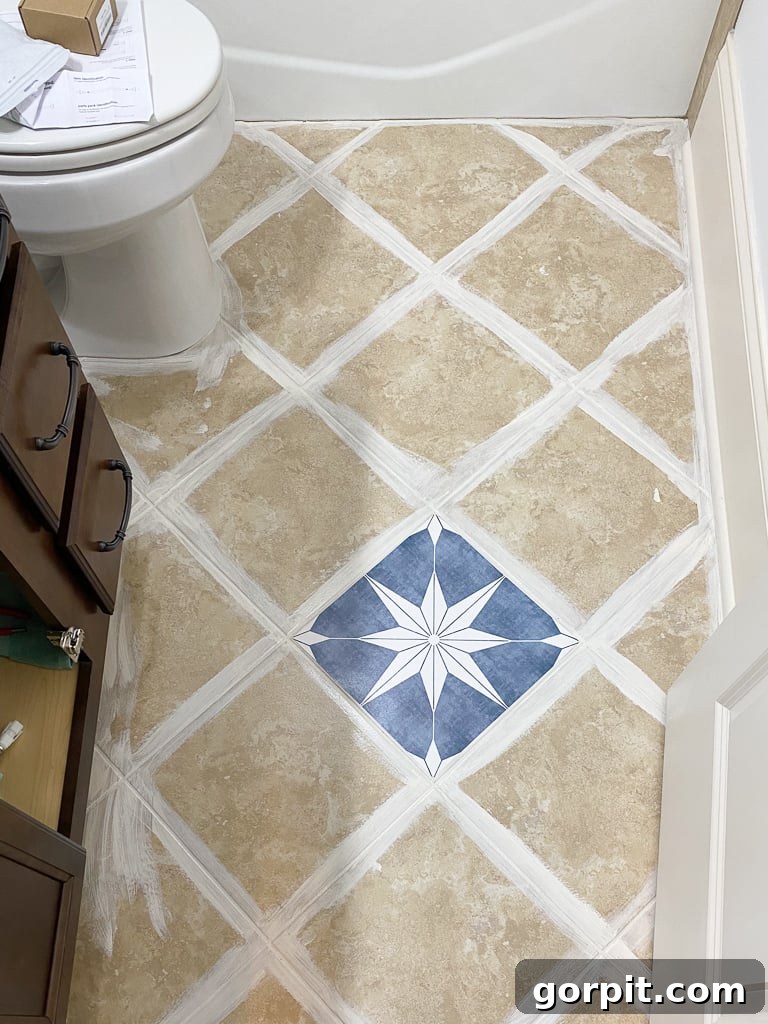
The preparation for installing tile stickers is surprisingly minimal but crucial for optimal adhesion and longevity. The first step is to thoroughly clean your surface. Begin by vacuuming or sweeping away any loose dirt, dust, or debris. Following this, deep clean the surface with a strong degreaser, such as TSP (trisodium phosphate), to remove any grime, soap scum, or oily residues. A pristine, dry surface is essential for the stickers to bond correctly. If you are applying floor tile stickers, you might consider painting your existing grout lines beforehand, especially if their current color clashes with your new tile sticker design. As I mentioned in one of the earlier videos, some of the paint on our grout lines eventually peeled, which wasn’t entirely surprising given I rushed the job and used leftover wall paint. For a more durable finish on grout lines, I highly recommend using a dedicated porch and floor paint. It’s a simple touch-up if it does wear, but better to get it right the first time!
This is a very frequent question! Due to their thin profile, typically about the thickness of a playing card, tile stickers are discreet once installed. You won’t perceive them as a raised layer on top of your existing tiles. While they are not perfectly smooth like glass, their texture is subtle, akin to the tactile feel of a high-quality vinyl binder cover – just the slightest bit of texture. This gives them a pleasant, soft, and smooth sensation underfoot, offering a comfortable alternative to the often cold and hard feel of traditional tile. They certainly don’t feel cheap or overly plastic-like; rather, they provide a refined and comfortable surface.
You can confidently use tile stickers on smooth ceramic tile and porcelain tile, which is precisely what we used as our base. Many individuals inquire whether tile stickers are suitable for textured tiles, such as slate or travertine. Based on the comprehensive list of compatible and incompatible surfaces provided earlier in this post, the definitive answer is NO. The surface of the existing tile must be relatively smooth, and its edges need to be straight and consistent for proper adhesion. However, tile stickers are also an excellent option for upgrading linoleum, vinyl, or hardwood floors. If applying to these non-tiled surfaces, you have the flexibility to eliminate grout lines altogether by butting the tile stickers directly against each other. Alternatively, if you desire the look of grout lines, you can paint the floor underneath a contrasting color and then space the stickers out accordingly to create custom grout lines of any color you wish.
Most reputable tile sticker manufacturers confirm that their vinyl tile decals are suitable for use in showers because they are genuinely waterproof. While I haven’t personally installed them in a shower, I have a friend who lives in a rented apartment in NYC who successfully used them to cover an accent tile row she disliked in her shower, and she reports that they are holding up beautifully. That being said, I would personally exercise caution and likely not use them in a shower myself. My primary concern isn’t about them peeling off due to water exposure, but rather the potential for mold and mildew to form along the tiny, exposed edges of the tile stickers over time. While tile stickers are thin (roughly the thickness of a playing card), they are not so thin that minuscule gaps wouldn’t exist where moisture could settle, potentially leading to fungal growth in a consistently damp environment.
Many of you have expressed concern about water exposure and how to properly clean vinyl tile stickers. Let me reassure you: vinyl tile stickers are unequivocally waterproof! You can confidently mop them and clean them with water without any issues whatsoever, just as you would with a traditional tile floor. However, I would advise against using overly caustic or abrasive tile cleaners, as these might degrade the surface finish over a prolonged period. For everyday spills or splashes, simply wipe them up promptly. It is crucial to note, though, that tile stickers should not be exposed to standing water for extended periods. If water is allowed to sit on the stickers for a significant amount of time, it could eventually seep under the edges, compromising the adhesive and causing the tiles to loosen. Regular cleaning and promptly addressing spills will ensure their longevity.
This is a very common scenario, but fortunately, it’s an easy hurdle to overcome. Nearly all reputable tile sticker companies are happy to custom-cut the stickers to your precise dimensions. So, even if the listings you browse only display standard, pre-set sizes (for example, 12″ x 12″) that don’t match your needs, do not despair. Simply send a message to the seller or company and inquire if they can custom-cut your desired size. The answer will almost certainly be yes, and they will typically provide clear instructions on how to accurately measure your tiles and how to proceed with placing your custom order. Don’t let a size discrepancy deter you from achieving your dream look!
Great question! We’ve had experience with several excellent tile sticker providers. The beautiful pink tile stickers in Attley’s bathroom were ordered from Tile Stickers With Soul. For Avery’s bathroom, we sourced our tile decals from Snazzy Decal. And for the original tile stickers we used in our laundry room (before our sizing mishap), we went with Mirth Studio. My personal favorite, in terms of ease of installation, were the ones from Snazzy Decal because each sticker was individually pre-cut, simplifying the application process. The products from Tile Stickers With Soul are of equally high quality, but they arrived on a single large roll of backing paper, making them slightly more challenging to handle during installation. You can explore some of my top tile sticker selections at the conclusion of this post.
Yes, one of the significant advantages of tile stickers is their removability, which makes them an ideal renter-friendly decor option. We had a real-world test of this feature when we needed to remove two tile stickers from Avery’s bathroom floor. This became necessary after we installed a new toilet (following a crack in the old one), as the base shape of the new fixture was different. You do need to apply a firm, steady pull to detach them, as the adhesive is quite strong, but they came off cleanly and in one piece! Crucially, there was no sticky residue or damage left behind on the original floor. Fortunately, we had two leftover tile stickers, which allowed us to easily replace them and restore the seamless look of the floor.
Having personally experienced this precise issue with our laundry room floor, I can tell you exactly what goes wrong if you don’t order the correct size tile stickers. The most common and frustrating problem is that the corners and edges of your tile stickers will begin to peel up. This typically occurs if the stickers are cut too close to the grout line, or even worse, if they slightly overlap the grout itself. Grout lines are not perfectly flat surfaces; they often have a slight bevel or textured finish, which prevents the sticker’s adhesive from forming a strong, lasting bond. The constant flexing and movement in these areas, combined with exposure to cleaning and foot traffic, will inevitably cause the edges to lift, leading to a messy and unsatisfactory result. To avoid this common pitfall, always remember the importance of leaving that small, consistent border around each sticker. This ensures the adhesive bonds entirely to the smooth, flat surface of your existing tile.
Both tile stickers and painted floors can dramatically transform a space, but they offer different advantages. I’ve had experience with both: I successfully painted and stenciled the floor in our old kitchen, and I also mastered how to paint a vinyl floor in our previous laundry room. We absolutely loved both of those painted floors; they looked fantastic and held up beautifully thanks to the use of durable floor and porch paint. You can indeed achieve intricate patterns similar to those found on tile stickers by using floor paint and a stencil. However, I can attest that this process is incredibly time-consuming and labor-intensive. Furthermore, the lines you achieve with a stencil, while good, often lack the crisp, clean precision that pre-cut tile stickers offer. Painting intricate patterns around obstacles like toilets, vanities, and tubs would also be exceptionally challenging with a stencil. For these reasons, I would primarily recommend a painted and stenciled floor for more open, unobstructed spaces. In comparison, installing tile stickers is generally quicker, significantly easier, and provides a level of durability that rivals a well-executed painted floor, making it a highly appealing option for many homeowners.
Tile stickers offer a distinct tactile experience compared to traditional tiles. They are noticeably less cold to the touch than ceramic or stone tiles, providing a more comfortable surface, especially for bare feet. Importantly, they do not feel like cheap, flimsy plastic. Instead, they possess a pleasantly soft and smooth texture, often likened to the subtle grain of a high-quality vinyl surface. This texture is generally understated, giving them a refined feel that belies their ease of application and affordability. The overall sensation is one of comfort and quality, without the harshness often associated with hard flooring materials.
The slipperiness of floor tile stickers is a valid concern for any flooring material. When dry, tile stickers are not slippery at all. They provide adequate grip, similar to most standard hard flooring surfaces. However, just like virtually any type of tile – ceramic, porcelain, or even natural stone – they can become a bit slippery when wet. It’s important to exercise the same caution you would with any wet hard floor. In our experience, the tile stickers we have used are no more or less slippery than the original tiles they covered, offering comparable safety characteristics under both dry and wet conditions.
When considering tile stickers for a fireplace surround, the critical factor is heat. Since vinyl material can melt or warp if exposed to excessive heat, I would strongly advise against using vinyl tile stickers on the tile surround of an operational fireplace. The radiant heat from a working fire could easily damage the stickers, leading to an unsightly and potentially unsafe situation. However, if your fireplace is purely decorative and never used for burning, then feel free to apply tile stickers to its surround. In such cases, they can be a fantastic way to update the look of an unused fireplace with minimal effort and cost.
The feasibility of using tile stickers behind a kitchen stove or cooktop hinges on the proximity to the heat source. Most tile sticker companies generally state that it should be acceptable if the tile stickers are positioned at least 4 inches away from any direct heat source. This buffer zone helps prevent the vinyl from being exposed to temperatures high enough to cause melting, warping, or adhesive failure. However, the exact heat resistance can vary depending on the specific materials and manufacturing processes of different brands. Therefore, it is always best practice to consult directly with the company you are considering ordering from. They can provide precise guidance based on their product specifications and ensure your kitchen tile sticker installation is both safe and durable.
Shop My Favorite Tile Stickers
Having explored the world of tile stickers in depth, I wanted to share some of my top recommendations. These are selections based on quality, design variety, and overall performance, drawing from both my personal experience and extensive research. Whether you’re seeking bold patterns, subtle textures, or classic designs, these options offer fantastic potential for your next DIY home decor project. Take a moment to browse through these favorites to find the perfect tile stickers to transform your space!
Click on any image below for full product details and purchasing information.
(Product images and links would typically appear here, dynamically loaded. For this HTML-only output, please imagine a curated selection of tile stickers with links.)
Phew! That was indeed a substantial amount of information, wasn’t it? I sincerely hope that this comprehensive guide has successfully answered all your questions and demystified the world of tile stickers for your home renovation aspirations. If, however, there’s a question I missed or a point that needs further clarification, please don’t hesitate to drop a comment below. I’ll do my very best to provide you with an answer and continue to share insights from our ongoing DIY home decor journey.
Here are some other posts you may enjoy for more budget-friendly renovation and DIY inspiration:
- Gorgeous But Cheap Flooring Ideas
- DIY Vanity Makeover: Concrete Overlay
- 15 Affordable DIY Countertops That Will Blow Your Mind
- 18+ Budget Friendly DIY Backsplash Ideas
- How to Paint a Tile Backsplash in 5 Simple Steps
Curious about my personal approach to transforming rooms and spaces within our home? Discover the secrets and strategies outlined in Designer in a Binder®, an affordable and straightforward method for decorating your home with confidence.
For exclusive content, behind-the-scenes sneak peeks, and the latest updates on our DIY projects, be sure to subscribe to our newsletter before you leave!
(Subscription form content would typically load here.)