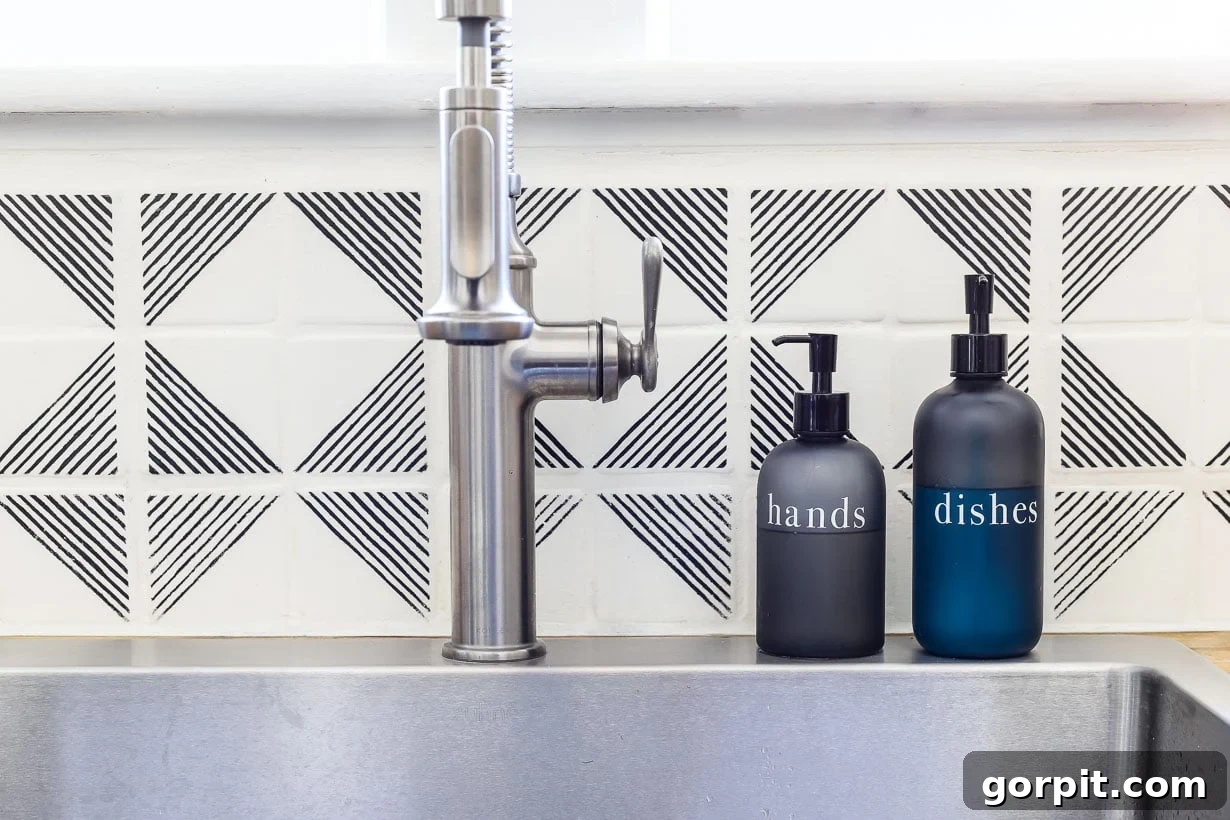
Painting Your Tile Backsplash: The Ultimate Budget-Friendly Kitchen Update Guide
Is your kitchen backsplash looking dull, dated, or simply not matching your evolving style? You’re not alone! Many homeowners cringe at the thought of a costly and time-consuming tile replacement project. But what if there was a simple, affordable, and incredibly effective alternative that could completely transform your kitchen’s aesthetic? The answer is a resounding YES! Painting your tile backsplash is a revolutionary DIY solution that delivers dramatic results without breaking the bank. This comprehensive guide will walk you through everything you need to know, from meticulous preparation to the final sealing, ensuring a durable, stunning, and long-lasting finish in just five easy steps.
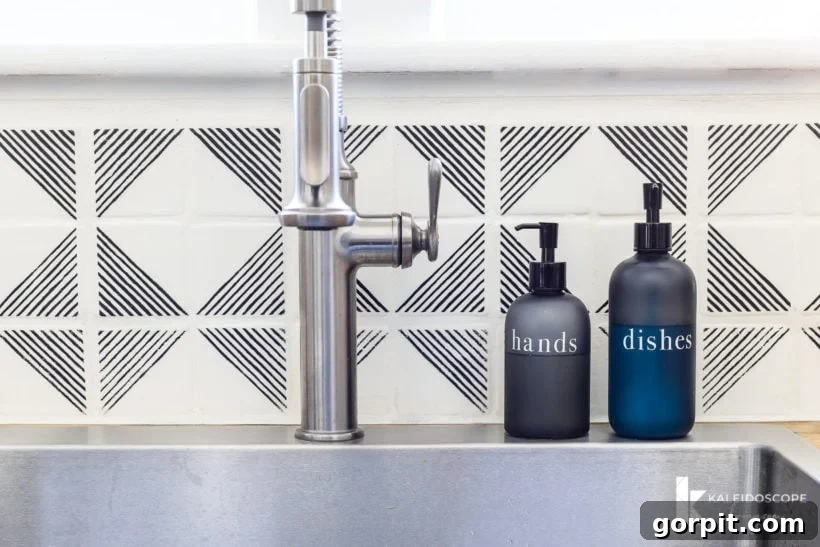
Table of Contents
Can You Paint a Tile Backsplash? Absolutely!
The short answer is a definitive YES! Painting a tile backsplash is not only entirely possible but also an incredibly rewarding home improvement project that many homeowners are successfully tackling. Unlike painting high-traffic areas like floor tiles (which I’ve also done with great success, as one of my favorite gorgeous but cheap flooring ideas) or shower tiles, which demand highly specialized, fume-heavy epoxy paints due to extreme wear and constant moisture exposure, backsplashes are relatively low-impact surfaces. They experience occasional splashes and wipes but don’t endure heavy foot traffic or continuous water submersion. This means you can achieve professional-looking results with standard, high-quality acrylic paints and primers, making the process much easier, more enjoyable, and significantly less toxic. It’s a fantastic way to revitalize your kitchen’s look with minimal effort and maximum visual impact!
What Types of Backsplash Tiles Can Be Painted?
This painting method is remarkably versatile and has been successfully applied to a wide array of tile types. Through my personal projects, I’ve achieved excellent, long-lasting results on both **ceramic** and **travertine** (a natural stone) tiles using the exact process detailed in this guide. Generally, smooth, glazed tiles like ceramic or porcelain are excellent candidates due to their consistent surface. Natural stone tiles like travertine can also be painted effectively, provided they are thoroughly cleaned and properly primed to ensure optimal adhesion, which is crucial for their porous nature. While highly textured tiles or those with deep, irregular surfaces might require slightly more meticulous prep work to ensure even coverage, the fundamental steps and recommended products remain the same. This method is designed to adhere robustly to most common backsplash materials, offering a fresh new look regardless of your existing tile material.
My Personal Experience: Painting Three Different Tile Backsplashes for Stunning Results
I am a firm, enthusiastic believer in the transformative power of painted backsplashes, not just because I advocate for budget-friendly DIY, but because I’ve witnessed and created these incredible transformations firsthand—three times over! Each project, spanning different homes and tile types, presented its unique starting point, but the consistent success cemented my confidence in this simple yet profoundly impactful update. My experiences have shown that this method is not only effective but also incredibly durable and versatile.
**Backsplash #1: Our Old Home’s Dated Kitchen (A Leap of Faith Project)**
Years ago, a full kitchen renovation was simply not in our budget, yet I faced an overwhelmingly unsightly tile backsplash in our old home. It was truly dreadful, screaming “outdated” from every angle, and the thought of replacing it seemed an impossible luxury. At that time, painting a tile backsplash wasn’t a widely known DIY trend, so finding reliable guidance or examples was incredibly tough. It felt like a significant risk, a real leap of faith, but I reasoned that even if the paint job didn’t turn out perfectly, it couldn’t possibly look worse than it already did! With a mix of excitement and trepidation, I embarked on the project. To my absolute delight, it worked wonders! The transformation was immediate, bright, and utterly impressive. What surprised me even more was its remarkable durability; the painted backsplash held up beautifully, without any chipping or peeling, for years before we eventually moved. This initial success was a powerful testament to the method’s effectiveness, proving that a little paint and a lot of confidence could go a very long way in a budget kitchen update. During this period, we also gave our kitchen cabinets a fresh coat of paint without priming or sanding, further enhancing the budget-friendly overhaul.
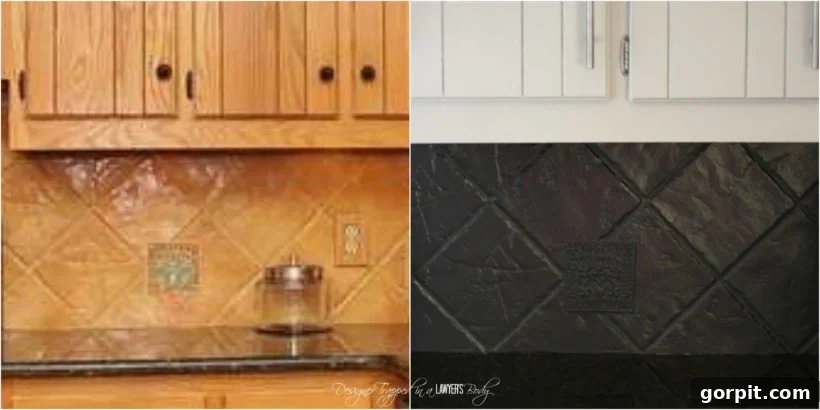
**Backsplash #2: Our Current Home’s Travertine Transformation (Embracing a New Style)**
Fast forward several years to when we settled into our current home. The kitchen was perfectly functional, but the existing travertine backsplash, while a natural stone, simply didn’t align with our preferred aesthetic. Its earthy tones felt heavy and dated. Replacing natural stone would have been an incredibly expensive, messy, and disruptive endeavor, so I confidently turned back to my trusted painting method. The process was just as straightforward and effective as I remembered, perhaps even more so with the added confidence of prior success. This time, the goal was to transform the rich, warm travertine into a brighter, more contemporary look that complemented our evolving home style. The freshly painted backsplash became a pivotal cornerstone of our larger kitchen makeover, which also included painting the kitchen cabinets and even ingeniously applying countertop paint to expertly mimic marble, collectively creating a cohesive, high-end feel on a truly minimal budget. The results were stunning and perfectly integrated with our vision.
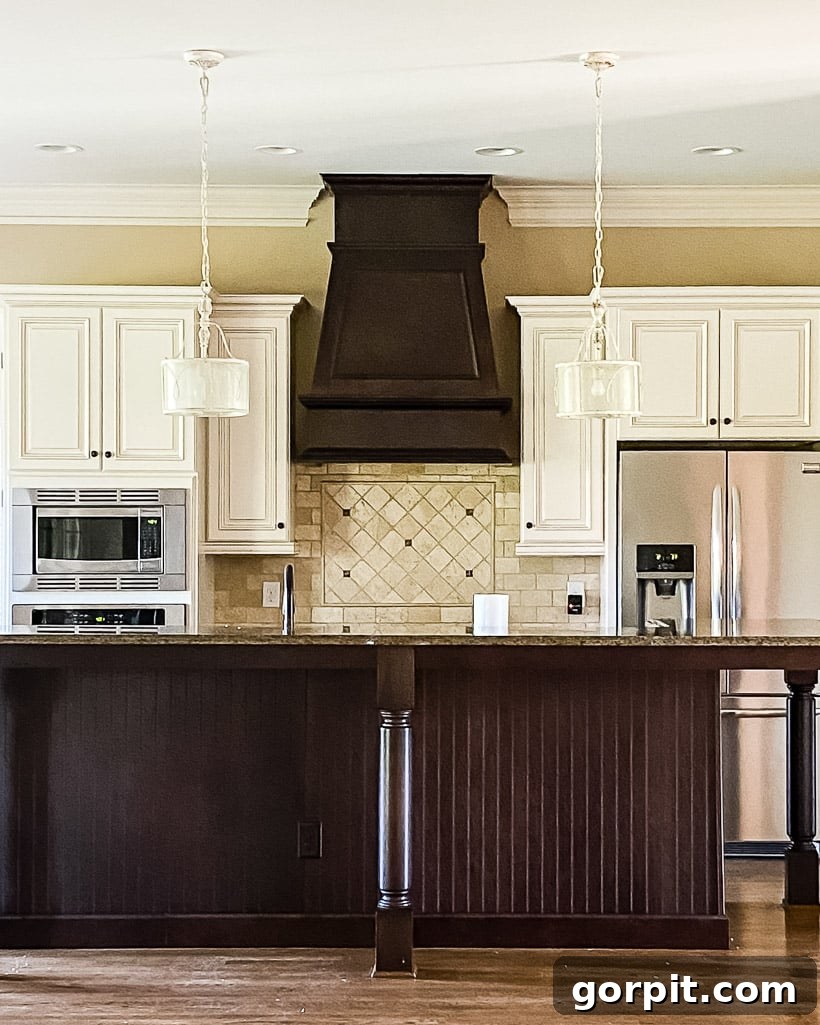
**Backsplash #3: Thea’s $1,000 Kitchen Makeover (Adding a Stylish Stencil Detail)**
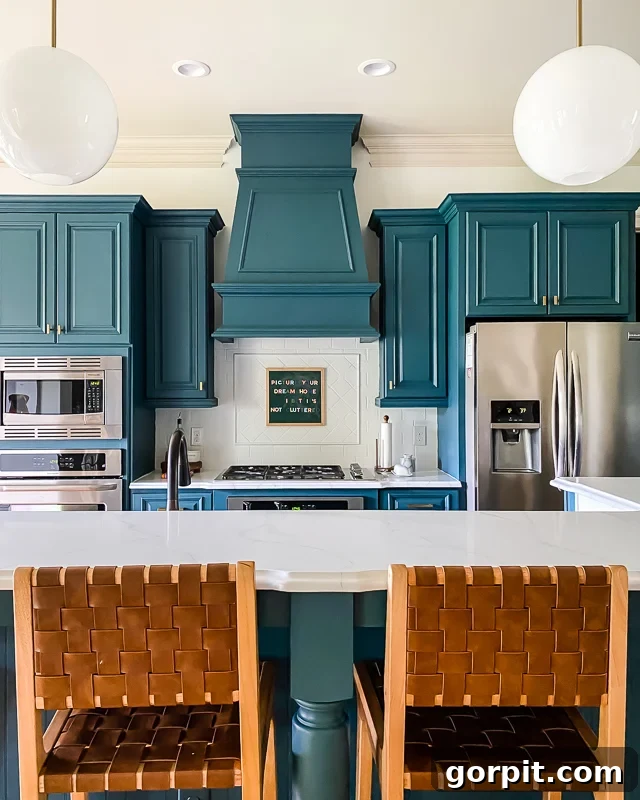
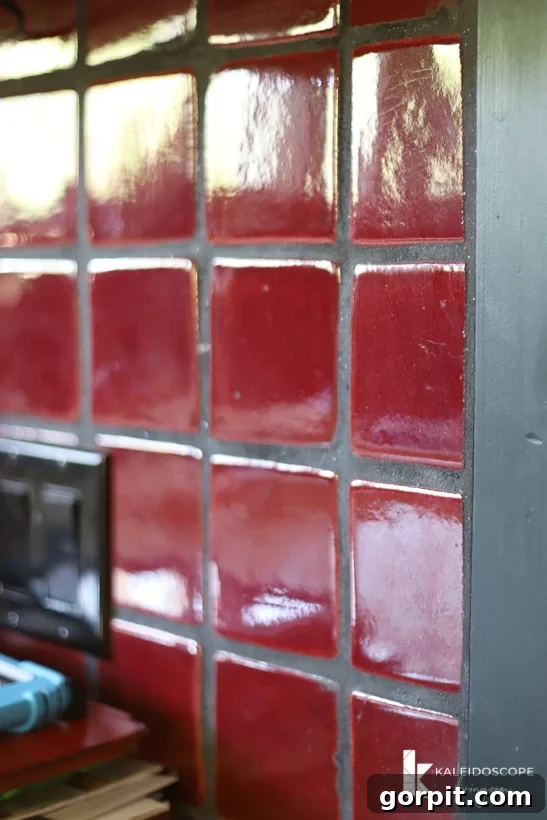
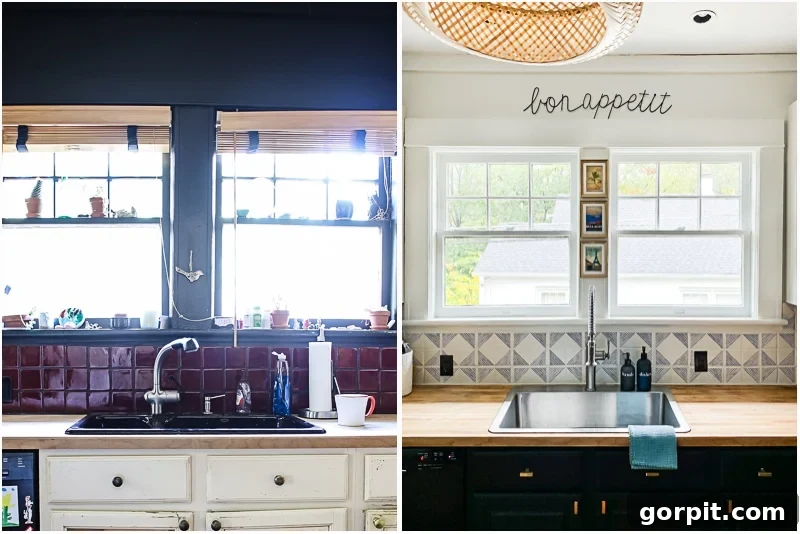
My most recent backsplash painting project involved helping a dear friend, Thea, with her ambitious $1,000 kitchen makeover. Her kitchen featured a vibrant, glossy red ceramic tile backsplash that, while certainly bold, didn’t fit her desired aesthetic at all. With an incredibly tight budget, every single dollar counted, meaning even cost-effective solutions like tile stickers were stretching the limits of our financial plan. This was the perfect opportunity to deploy the painted tile backsplash method for a third time, using the exact same reliable process I had developed and refined since 2014. For Thea’s kitchen, we decided to take the transformation a step further and incorporate a beautiful stencil design. This added an extra layer of sophisticated visual interest and personalized charm, proving that a painted backsplash can be as unique and creative as you desire. The result was nothing short of spectacular, transforming an overwhelming red into a chic, geometric focal point that completely redefined her kitchen’s character. The “before” image below clearly shows the dramatic difference!
Now that you’ve seen the incredible potential and versatility, let’s dive into the practical, step-by-step guide to achieving your own stunning painted tile backsplash!
The Ultimate DIY Guide: How to Paint a Tile Backsplash
Painting a tile backsplash is a surprisingly straightforward DIY project that doesn’t require advanced skills or expensive tools. With a few basic supplies, a little patience, and a commitment to following these detailed steps, you can achieve a stunning, durable finish that revitalizes your kitchen’s entire aesthetic. Let’s gather our materials and prepare to transform your space!
Essential Supplies and Tools for Your Backsplash Makeover
- T.S.P. (Trisodium Phosphate) Cleaner: This heavy-duty degreaser is absolutely critical for thoroughly cleaning your tile surface. It effectively removes stubborn grease, oil, food splatters, and any invisible residue that could inhibit paint adhesion. Ensure proper ventilation and wear protective gloves and eyewear during use.
- High-Quality Primer: A premium primer, such as Sherwin-Williams general-purpose primer, is non-negotiable. It creates a robust, sticky bond between your existing tile surface and the new paint, ensuring superior adhesion and preventing chipping or peeling. It also helps block any underlying tile colors from bleeding through, providing a clean canvas for your chosen paint color.
- General Finishes Milk Paint: This is my absolute top recommendation for painting backsplashes. It’s a high-quality, water-based acrylic paint renowned for its exceptional adhesion, remarkable durability, and incredibly smooth finish. A single quart is typically more than enough for most standard backsplashes. We often custom-mix shades (e.g., Snow White with a touch of Antique White) to achieve the perfect desired hue. It’s crucial to avoid regular latex paint, as it lacks the necessary bonding properties for non-porous tile surfaces.
- General Finishes High-Performance Water-Based Topcoat: This protective topcoat is indispensable for sealing and safeguarding your painted backsplash. It adds an extra layer of durability against splashes, daily wear, and makes cleaning effortless. It’s available in various finishes; we typically use satin for a subtle, natural tile-like sheen, but gloss or semi-gloss options can mimic traditional shiny tile.
- Small Foam Roller: Ideal for applying thin, smooth, and even coats of paint and primer over flat tile surfaces. A 4-inch roller is usually the perfect size for optimal control and coverage.
- High-Quality Paintbrush: Essential for precise application around edges, corners, and intricate areas that the roller cannot access, especially if your backsplash has uneven grout lines or decorative details.
- Optional: Stencil: If you’re looking to add a unique pattern or a decorative, personalized design to your backsplash, a quality stencil is a fantastic addition. (This is the exact stencil we used for Thea’s kitchen makeover, demonstrating its potential).
- Stencil Brushes: If you opt for stenciling, these specialized brushes are crucial for achieving crisp lines and effectively preventing paint from bleeding under the stencil.
- Painter’s Tape: For meticulously protecting adjacent surfaces like countertops, cabinets, and walls from any unintended paint splatters or drips. Choose a high-quality tape that offers clean lines and easy, residue-free removal.
- Drop Cloths or Old Towels: To provide comprehensive protection for your countertops, flooring, and appliances from any accidental spills or drips that may occur during the painting process.
- Safety Gear: Always wear protective gloves (especially when handling T.S.P.), safety glasses, and ensure the area is well-ventilated during all stages of the project.
Step-by-Step Process for Painting Your Tile Backsplash
While the visual aid of a video tutorial can be incredibly helpful for seeing each step in action, you’ll find the complete, detailed instructions written out below. Follow these steps carefully for a beautiful, long-lasting, and professional-looking finish that will revitalize your kitchen.
Time needed: Approximately 8-12 hours of active work (plus drying and curing time)
Transform your kitchen by painting and optionally stenciling your tile backsplash. Note that omitting the stenciling step will significantly reduce the project’s overall active time.
-
Step 1: Thoroughly Clean and Degrease Your Tile Backsplash
Preparation is the absolute cornerstone for any successful paint job, and painting a tile backsplash is no exception. Begin by meticulously cleaning your entire tile backsplash, including every grout line, with T.S.P. (trisodium phosphate). This powerful, heavy-duty degreaser is essential for removing stubborn grease, oil, food splatters, cooking fumes, and any other residues that may have accumulated over time. Even if your backsplash appears clean to the naked eye, invisible contaminants can severely prevent proper paint adhesion, leading to peeling or bubbling down the line. Mix the T.S.P. according to the manufacturer’s instructions, apply it generously with a sponge or cloth, and scrub all tile and grout surfaces. Pay extra attention to areas behind the stove or sink, which tend to collect more grime. After scrubbing, it is crucial to rinse the surface thoroughly with clean water multiple times to remove all T.S.P. residue. Failure to rinse adequately can lead to adhesion issues. Finally, allow the backsplash to dry completely before moving on to the next step. This method has proven effective on ceramic, terra cotta, and travertine tiles, demonstrating its broad applicability across various tile surfaces.
-
Step 2: Apply a High-Quality Primer for Optimal Adhesion and Durability
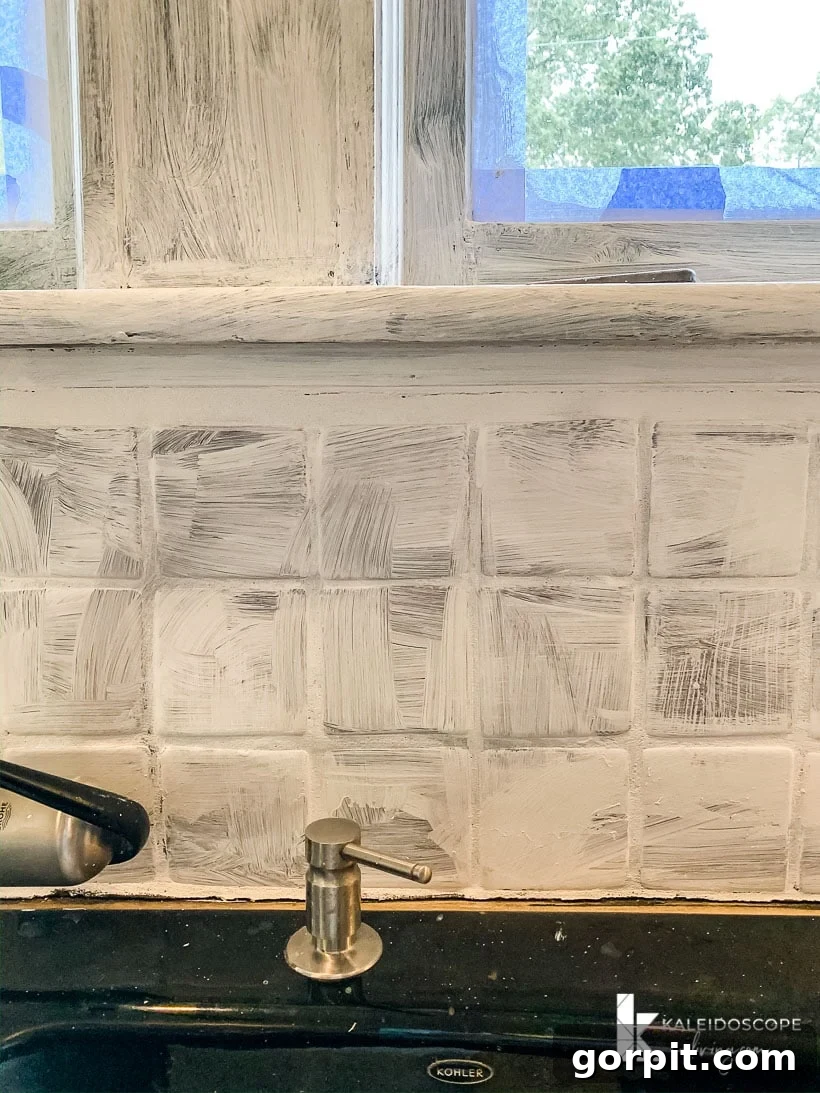
Before you even think about applying primer, it’s absolutely crucial to protect your surrounding surfaces. Lay down drop cloths or old towels generously over your countertops and flooring. Use high-quality painter’s tape to meticulously mask off adjacent cabinets, walls, electrical outlets, and any trim that you don’t want painted. While we weren’t overly concerned about our butcher block countertops during one project because we planned on refinishing them, this is a vital and often overlooked step for most kitchen painting projects. Now, apply a thin, even coat of high-quality primer (such as Sherwin-Williams general-purpose primer) to your entire tile backsplash, ensuring full coverage of both the tile faces and all grout lines. The primer creates a sticky, abrasive surface that your paint can firmly adhere to, acting as a crucial bridge between the non-porous tile and the paint, preventing peeling and ensuring a durable, long-lasting finish. Don’t be alarmed if the primer looks patchy, uneven, or even terrible at this stage; its primary purpose is adhesion and surface preparation, not aesthetics. Allow the primer to dry completely according to the manufacturer’s instructions. A well-primed surface is the fundamental foundation of a professional-looking and long-lasting painted backsplash.

The backsplash after priming – it looks bad now, but trust the process! -
Step 3: Apply Your Chosen Paint with Multiple Thin Coats
The choice of paint is paramount for a durable and aesthetically pleasing backsplash. You absolutely should not use regular latex wall paint, as it typically lacks the necessary adhesion and hardness for a tiled surface that might experience occasional splashes, wiping, and daily kitchen wear. Instead, opt for a high-quality acrylic paint known for its superior adhesion and durability. My unequivocal recommendation, based on extensive successful experience, is General Finishes Milk Paint. This is a premium, water-based acrylic paint that is incredibly durable, adheres exceptionally well to a vast array of surfaces (including tile), and provides a beautiful, smooth finish. A single quart is usually more than sufficient for most standard backsplash areas. For a custom look, we sometimes mix colors, like combining Snow White with a touch of Antique White, to achieve that perfect, nuanced shade.
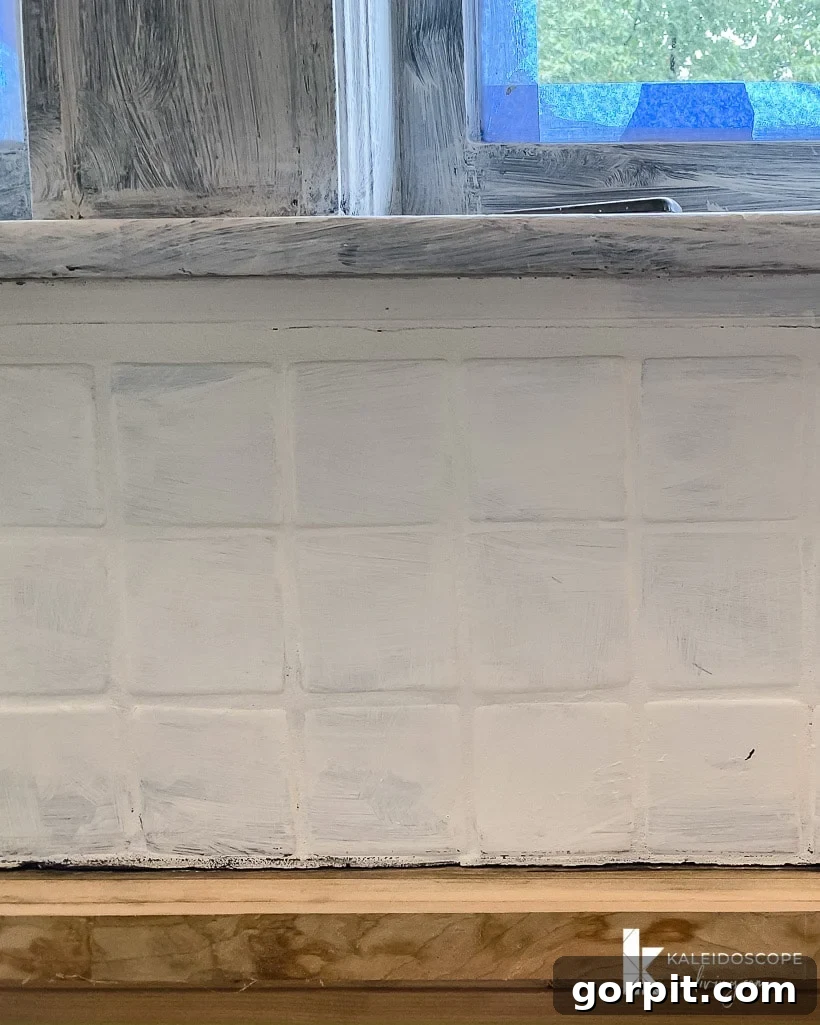
Using a small foam roller for flat tile surfaces and a high-quality paintbrush for grout lines, edges, and corners, apply thin, even coats of paint to your entire backsplash. It is always better to apply multiple thin coats rather than one thick coat; thin coats dry faster, reduce the risk of drips, brush marks, or unevenness, and build up a stronger, more resilient finish. We typically apply three thin coats to achieve full, opaque coverage and a rich color. One of the many benefits of General Finishes Milk Paint is its remarkably quick dry time, often allowing you to reapply subsequent coats within just 5-10 minutes, significantly speeding up the overall painting process. Don’t worry if the first coat looks translucent or streaky; subsequent coats will beautifully build up the color and opacity, revealing the stunning transformation. Ensure each coat is fully dry to the touch before applying the next.
The backsplash after its first coat of paint, beginning its transformation. -
Step 4: Add a Stencil for Custom Detail and Personality (Optional Step)
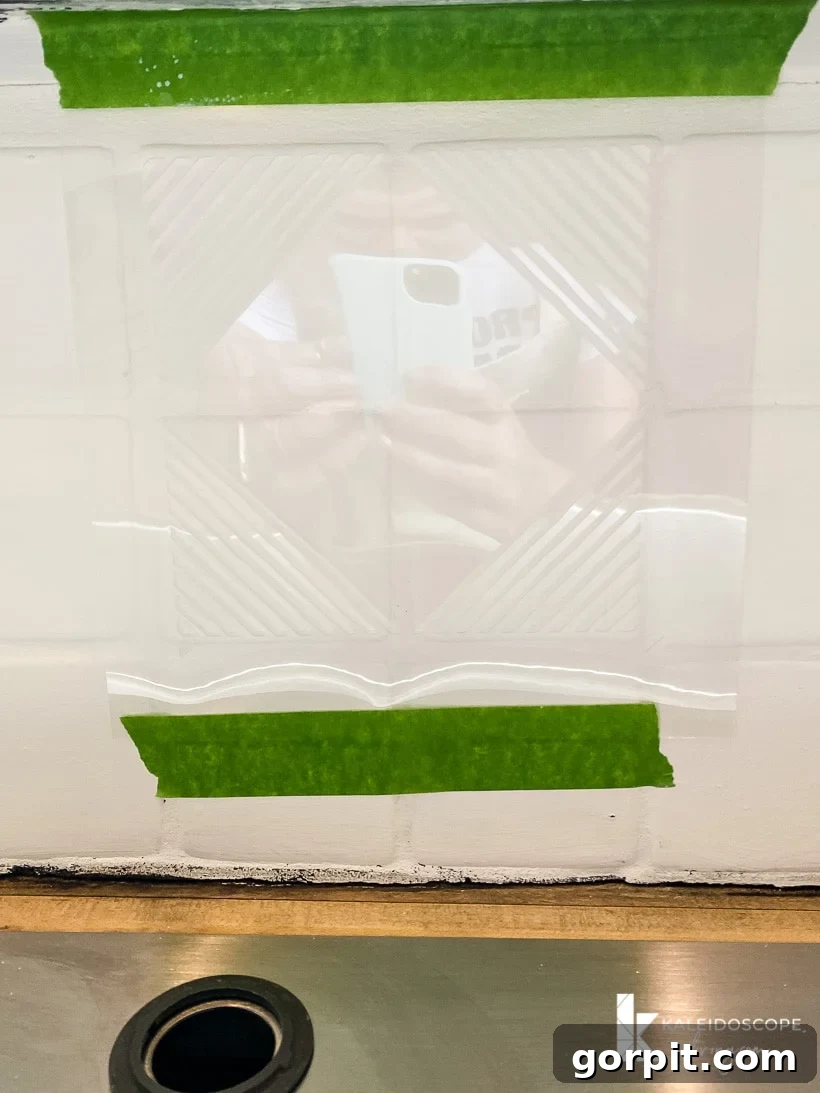
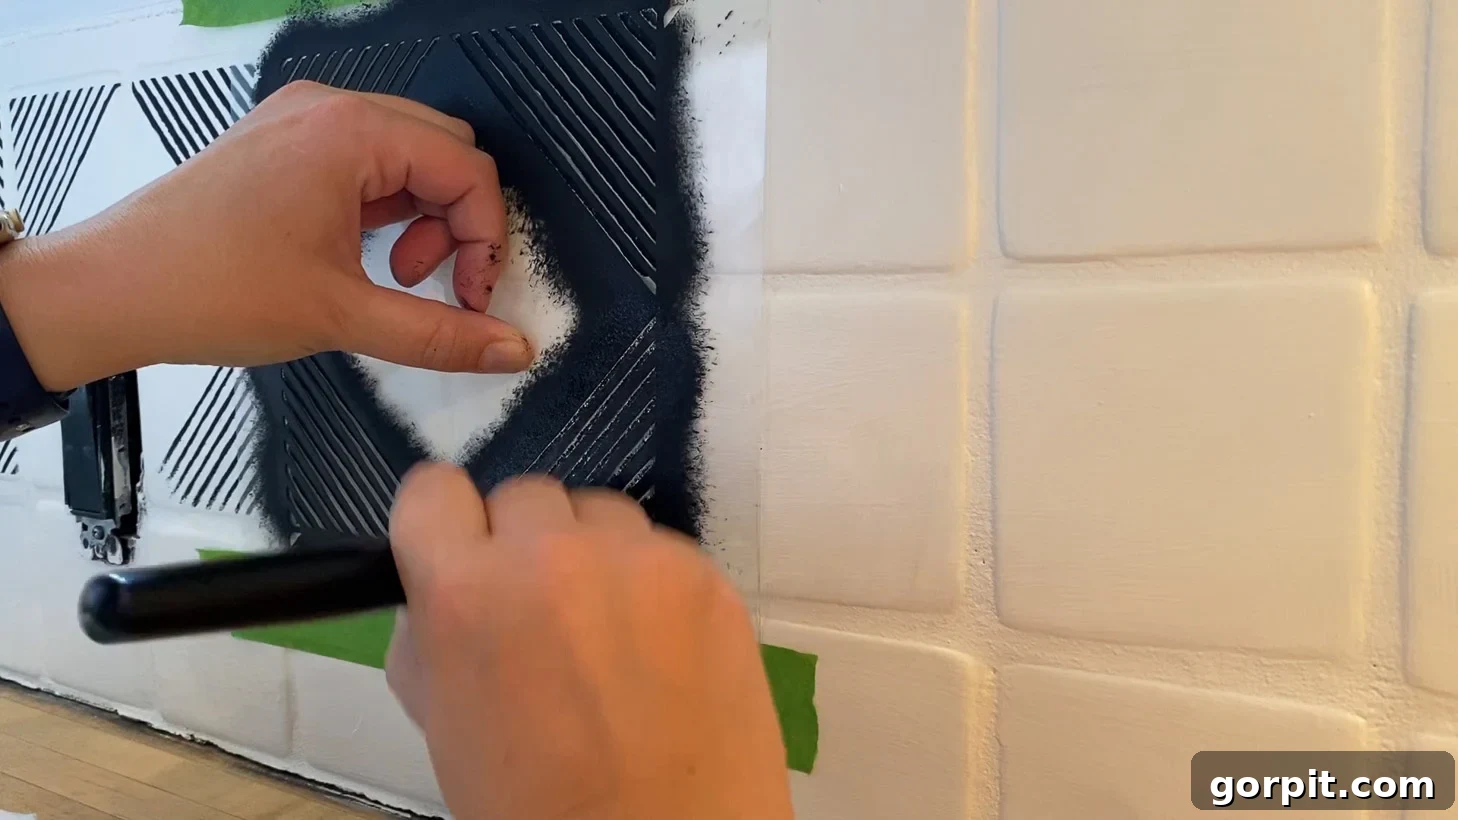
If you desire to add a personalized touch, a decorative pattern, or a unique design element to your backsplash, now is the perfect time for stenciling! This step can elevate your painted backsplash from a simple color change to a true statement piece. Ensure your base coats of paint are completely dry and cured before you begin stenciling – ideally, allow them to dry overnight. We utilized this specific stencil for Thea’s kitchen, custom-ordered to a 7-inch size to perfectly overlay four of her 3.5-inch square tiles, which created a seamless and beautifully integrated geometric pattern. When stenciling, secure your stencil firmly in place with low-tack painter’s tape to prevent any movement. Use a dedicated stencil brush and apply paint in light, dabbing motions, working from the outside of the stencil inward. This specialized technique helps prevent paint from bleeding under the stencil, ensuring crisp, clean lines. For best results, use minimal paint on your brush and apply multiple thin coats. Carefully remove the stencil while the paint is still slightly damp for the cleanest edges, then reposition and repeat the process across your backsplash. This step adds immense character and visual interest, allowing you to create a truly bespoke look. If you’re opting for a solid-color backsplash, simply skip this step and proceed to the final sealing.
Carefully applying the stencil to add a custom geometric pattern. A detailed view of the beautifully stenciled design. -
Step 5: Seal with a Durable Water-Based Topcoat for Long-Lasting Protection
Once all your paint, including any intricate stencil work, has thoroughly dried (I highly recommend allowing it to cure overnight for the strongest bond and best results), it’s time to apply the protective topcoat. This final step is absolutely crucial for ensuring the longevity, durability, and easy maintenance of your newly painted backsplash. My sole recommendation for a topcoat is General Finishes High-Performance Water-Based Topcoat. This product is incredibly effective, remarkably easy to apply, and provides a hard-wearing, water-resistant finish that will protect your backsplash against splashes, steam, daily kitchen wear and tear, and frequent cleaning.
You have the flexibility to choose your desired sheen for the topcoat: we often opt for a satin finish, which provides a subtle, elegant sheen that beautifully mimics the natural luster of traditional tile. However, gloss or semi-gloss options are readily available if you prefer a more reflective, high-gloss tile look for a bolder statement. Apply the topcoat in light, even coats using a good quality bristle brush. Avoid using foam brushes, as they can sometimes trap air and leave small bubbles in the finish. The topcoat dries remarkably fast, often quicker than the paint itself. Always adhere strictly to the manufacturer’s specific drying instructions between coats for optimal performance and adhesion. For general backsplash areas, two coats are usually sufficient to provide excellent protection. However, for high-splash zones like directly behind the sink or stovetop, applying a third coat offers enhanced protection and an extra layer of peace of mind. Once the topcoat is fully cured (which can take a few weeks to reach maximum hardness, so be gentle initially), your stunning, refreshed backsplash is ready to impress and withstand the rigors of kitchen life!
And there you have it – a remarkably simple yet profoundly impactful project! While the optional stenciling portion may require a bit more time and precision, it’s far from difficult and adds an incredible custom touch that elevates the entire space. The transformation from tired and dated to fabulous and fresh is truly satisfying, as you can see in our dramatic before and after:
Frequently Asked Questions About Painting a Tile Backsplash
The durability of a properly painted and sealed tile backsplash is truly impressive and often surprises people. Our current kitchen backsplash, along with Thea’s newly painted and stenciled backsplash, have both maintained their pristine appearance for over two years, showing absolutely no signs of chipping, peeling, or wear. The very first backsplash I painted in our old house also remained perfect for approximately 18 months of daily use before we eventually decided to remove it and install a laminate backsplash as part of a larger renovation. With the right products and careful application as outlined in this guide, you can confidently expect your painted backsplash to withstand the demands of daily kitchen life for many years, providing a beautiful, resilient, and easily maintainable surface.
No, contrary to popular belief and common misconceptions, you generally do not need a specific “tile paint” for kitchen backsplashes. While highly specialized, often epoxy-based, products are indeed required for high-traffic, high-moisture areas like painting shower tiles due to constant water exposure and heavy wear, a kitchen backsplash simply doesn’t face the same rigorous conditions. The true secret to success for a backsplash lies in using a high-quality, bonding primer to ensure excellent adhesion, followed by a durable acrylic paint with strong bonding properties, and finally, a robust water-based topcoat for comprehensive protection. This carefully selected combination creates a resilient, long-lasting finish without the need for expensive, hard-to-find specialty tile paints.
For achieving the best results and ensuring long-lasting durability, my absolute recommendation is General Finishes Milk Paint. This is a premium acrylic paint that stands out for its extraordinary adhesion capabilities on almost any surface, making it an ideal choice for challenging surfaces like tiles. It offers a beautiful, smooth finish and is incredibly durable against daily wear. For the essential protective layer, I strongly recommend the General Finishes High-Performance Water-Based Topcoat. This topcoat is a game-changer for sealing and protecting your painted surface, and it’s available in various sheens (satin, gloss, semi-gloss) to perfectly match your desired aesthetic. Please note that these recommendations are based purely on my extensive, positive personal experience with these products across multiple projects; I have never been sponsored or financially compensated by General Finishes.
Cleaning a painted tile backsplash is remarkably simple and doesn’t require any harsh or special products. Once the topcoat has fully cured (which can take a few weeks to reach its maximum hardness, so be gentle initially), you can treat it much like any other durable painted surface in your home. For everyday spills, splatters, and general grime, a soft cloth or sponge dampened with warm water and a mild dish soap will suffice beautifully. For more stubborn stains or for a deeper clean, a general multi-surface kitchen cleaner or even a common disinfectant wipe, like a Clorox wipe, works perfectly without causing harm. The key is to consistently avoid anything overly abrasive, such as steel wool, harsh scouring pads, or highly acidic/alkaline chemical cleaners, as these could potentially dull the finish, compromise the topcoat, or cause scratching over extended periods. Gentle and consistent cleaning will keep your painted backsplash looking fresh, vibrant, and impeccable for years to come.
The total time required for painting a tile backsplash can vary depending on several factors, including the size of your backsplash area, the number of paint coats you apply, and whether you choose to incorporate the optional stenciling step. Generally, if you’re just painting a solid color, you can realistically expect to complete the active painting and sealing process within a single weekend, requiring approximately 8-10 hours of hands-on work, excluding the necessary drying and curing times. This breakdown usually involves 1-2 hours for thorough cleaning and preparation, 2-4 hours for applying multiple thin coats of paint, and another 1-2 hours for applying the protective topcoat. However, if you opt to add a stencil pattern, this will add considerable time for careful alignment, precise application, and drying between stencil repeats, potentially extending the project’s active duration to 1-2 full days of focused work. Always factor in adequate drying and curing times between each step for the best, most durable, and long-lasting results.
Before you embark on your own incredible transformation, here are a few more inspiring views of Thea’s kitchen after we completed her amazing $1,000 kitchen makeover. It’s abundantly clear that the painted and stenciled backsplash truly became the vibrant, eye-catching focal point of the entire space, proving the immense power of a budget-friendly DIY.
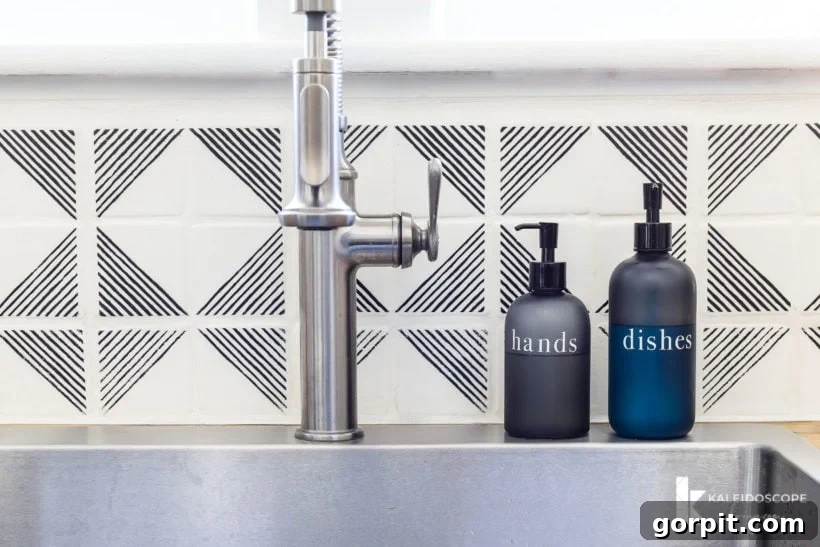
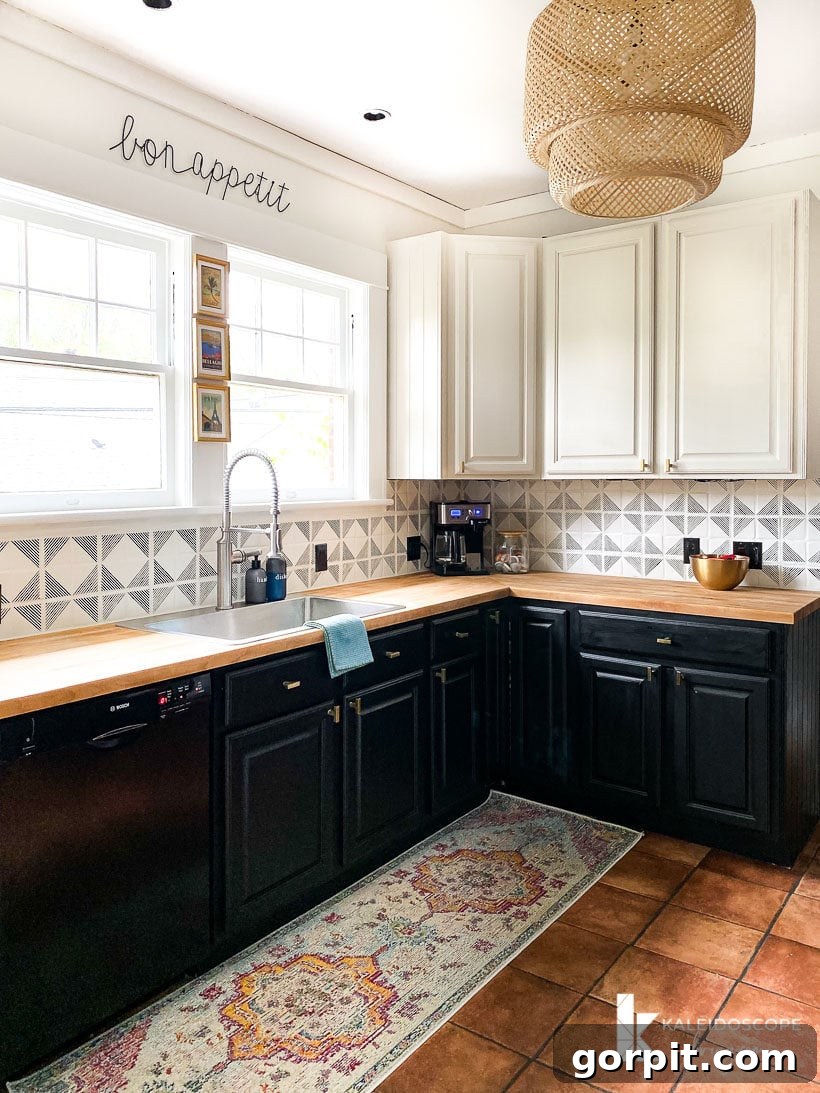
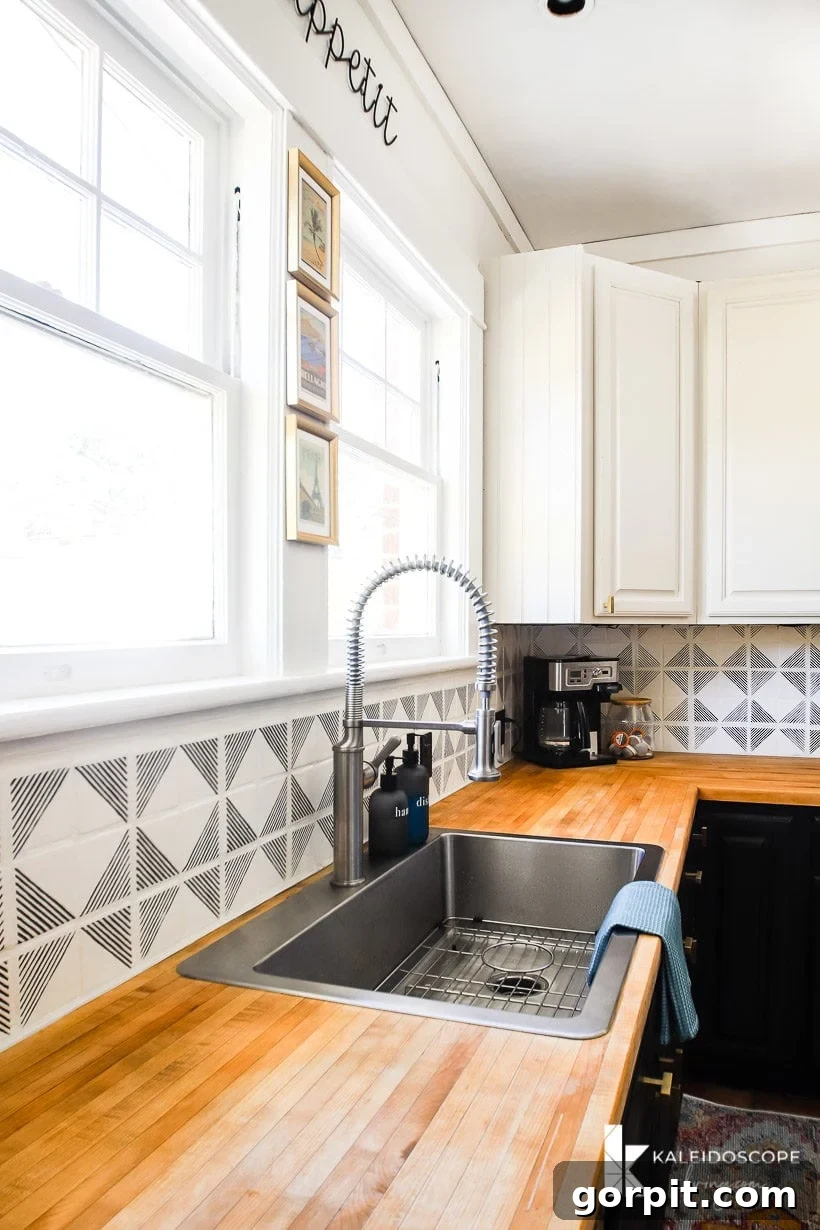
What do you think? The difference is truly remarkable and speaks volumes about the power of DIY, isn’t it?! A painted tile backsplash can be an absolute game-changer for any kitchen seeking a modern refresh, a personalized touch, or a dramatic update without the burden of a hefty renovation bill. It’s a testament to how creative solutions can lead to stunning outcomes.
Whether you choose a classic solid color to brighten and modernize your space, or decide to unleash your creativity with a detailed stencil for a unique design, painting your tile backsplash offers a high-impact transformation for very little effort and money. It’s a versatile, accessible solution that caters to various styles and budgets, proving that a dream kitchen is often just a few coats of paint away. Don’t let an outdated backsplash hold your kitchen back any longer!
Transform Your Kitchen: More Budget-Friendly Ideas
- Budget-Friendly Kitchen Makeover Reveal
- How to Paint and Seal Kitchen Cabinets the Easy Way (No Door Removal Needed!)
- How to Sand and Refinish Butcher Block Countertops
- How to Install a Tile Backsplash (The Easy Way)
- 15 Affordable DIY Countertop Ideas That Will Blow Your Mind
- Gorgeous But Cheap Flooring Ideas to Elevate Your Home
- 18+ Budget-Friendly DIY Backsplash Ideas for Every Style
- The Easy Way to Update Bathroom Tile Without Replacing It!
Wondering how I consistently approach transforming rooms and spaces in our home, always with a keen eye on budget and maximum impact? Dive into my proven strategies, comprehensive checklists, and step-by-step techniques with Designer in a Binder®. It’s your ultimate guide to decorating your home with confidence, achieving stunning results, and creating spaces you truly love, all without the need for an expensive designer.
We truly hope this comprehensive guide empowers you to tackle your own tile backsplash painting project with confidence and enthusiasm. It’s an incredibly satisfying DIY that brings immense value and style to your kitchen, proving that incredible transformations don’t always require immense expense!