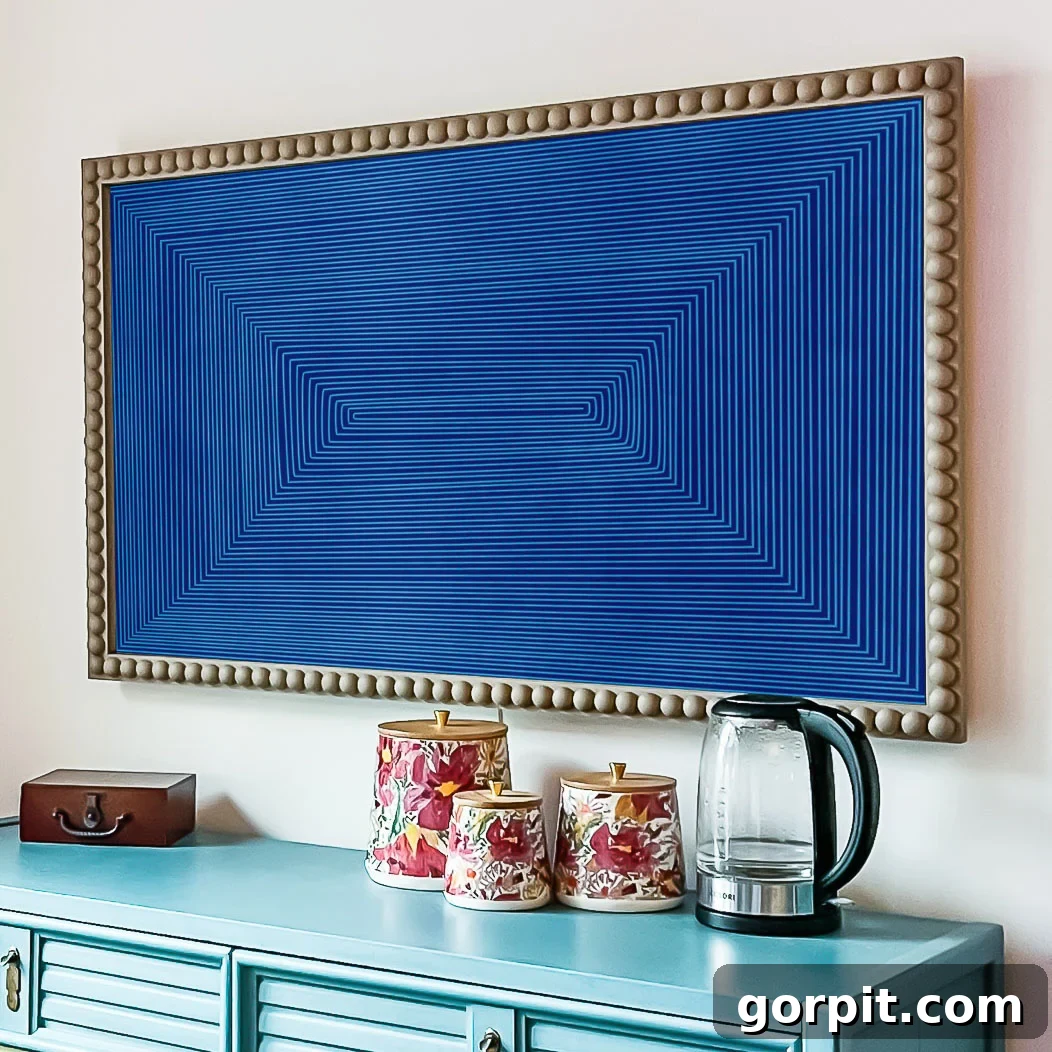
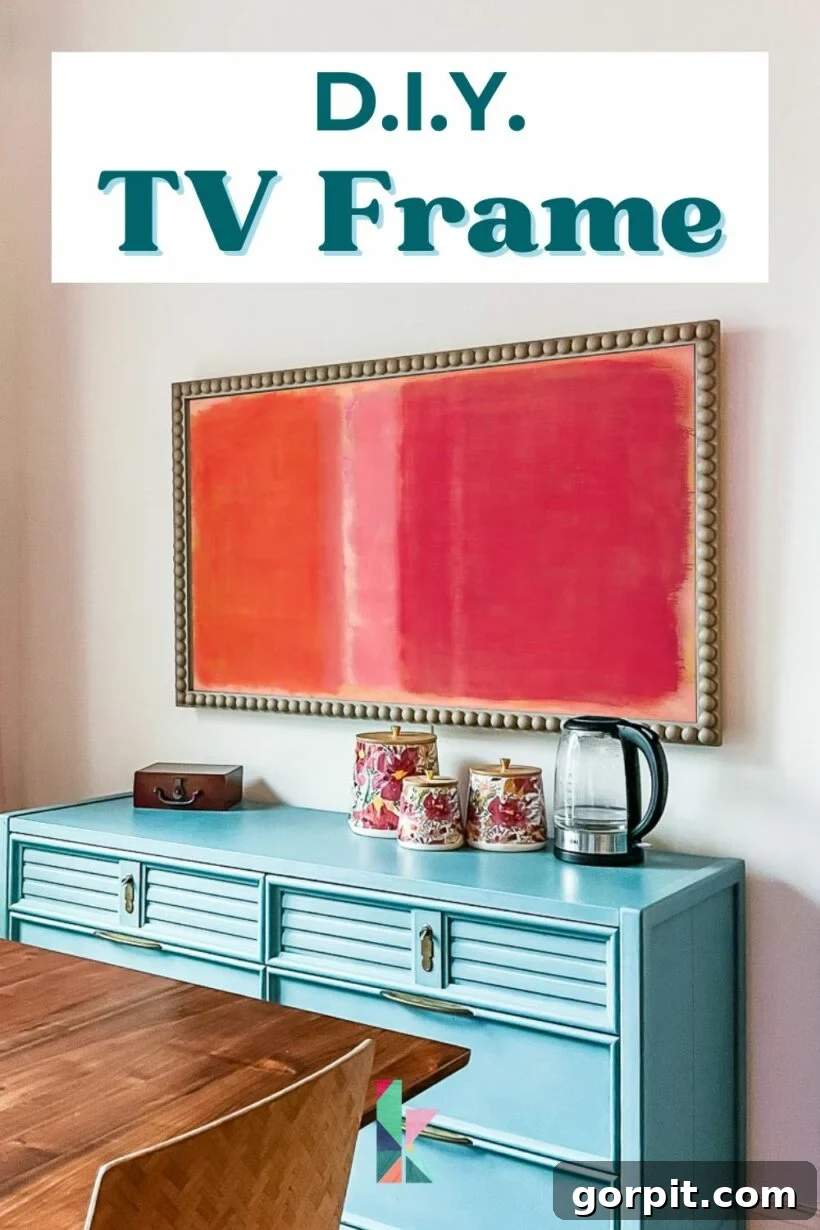
Transforming your television from a mere electronic device into a stunning piece of home decor is easier and more affordable than you might think. Whether you own a Samsung Frame TV or any other slim, wall-mounted flat-screen television, crafting a custom DIY frame can dramatically enhance its appearance. This project is a fantastic way to elevate your living space, turning what could be an ordinary black rectangle into an integrated, stylish feature that complements your home’s aesthetic. Forget the steep prices of commercially available frames and bezels – our DIY approach offers a beautiful, high-end look without breaking the bank. This comprehensive guide will walk you through creating a chic bobbin-style frame, a trending design that adds a unique, artisanal touch. Best of all, this project is simple enough for DIY enthusiasts of all skill levels, with options to complete it even without power tools. Let’s embark on this exciting journey to create your own personalized TV frame!
Thank you to DAP Products for sponsoring this post. This post contains affiliate links for your convenience. Click here for my full disclosure policy.
I’ve always been a proponent of integrating technology seamlessly into home decor, especially when it comes to televisions. Instead of letting a large screen dominate a room, why not make it a design feature? In our bedroom, I updated a standard smart TV and learned how to display digital art on any smart TV, allowing it to blend beautifully with our gallery wall. For our family room, we initially invested in a Samsung Frame TV several years ago, specifically for its ability to mimic artwork above our fireplace when not in use.
My unbiased review of the Samsung Frame TV candidly explores its value, concluding that while it’s not always worth the premium for every room (like a bedroom), its unique features can justify the cost in highly visible areas. When we decided to add a TV to our eat-in kitchen, we opted for another 55″ Samsung Frame TV, knowing it would be a focal point.
For the family room TV, we purchased a Samsung Frame TV Bezel. While functional, it was quite expensive (now around $250) and felt a bit insubstantial. I planned to get another for the kitchen, but then discovered the size and style we wanted were sold out indefinitely. I also considered Deco TV Frames, which many people love, but at approximately $600 for a 55″ frame, and not quite matching our aesthetic, it wasn’t the right fit. This led us to a brilliant and much more satisfying solution: a DIY bobbin frame for our TV!
The total cost for our custom bobbin frame was around $80, a fraction of the price of store-bought alternatives. What’s more, I absolutely adore it and find it far superior in both quality and style to the frames available online. Its substantial presence and unique design perfectly align with our desired look, making this DIY project a resounding success.
Can This DIY Frame Be Used for Any TV?
Absolutely! While this tutorial features our Samsung Frame TV, the techniques and principles shared here are universally applicable. This DIY frame design is perfectly suited for any slim or thin flat-screen television that is mounted flush against a wall. The key is to measure your specific TV accurately, and the process outlined will allow you to create a custom frame that fits perfectly, regardless of your TV’s brand or model.
Why Frame Your Television? Enhancing Your Home Decor
If you’re wondering why dedicate time to framing a TV, the answer lies in elevating your home’s aesthetic. An unframed, wall-mounted television often appears as a large, black void when turned off, disrupting the visual flow and ambiance of a room. It can feel like a functional necessity rather than an integrated element of your decor. By adding a frame, you instantly transform this utilitarian object into a cohesive part of your interior design scheme.
A well-chosen frame instantly brings a sense of intention and sophistication to your TV area. It adds texture, color, and character, making the television feel like a curated piece of art rather than just a screen. This is especially true when paired with digital art. If you’re interested in showcasing beautiful artwork on your screen when it’s idle, check out my tutorial on how to display digital art on any smart TV. The combination of a stylish frame and dynamic digital art truly elevates your space, proving that functionality and beauty can coexist harmoniously.
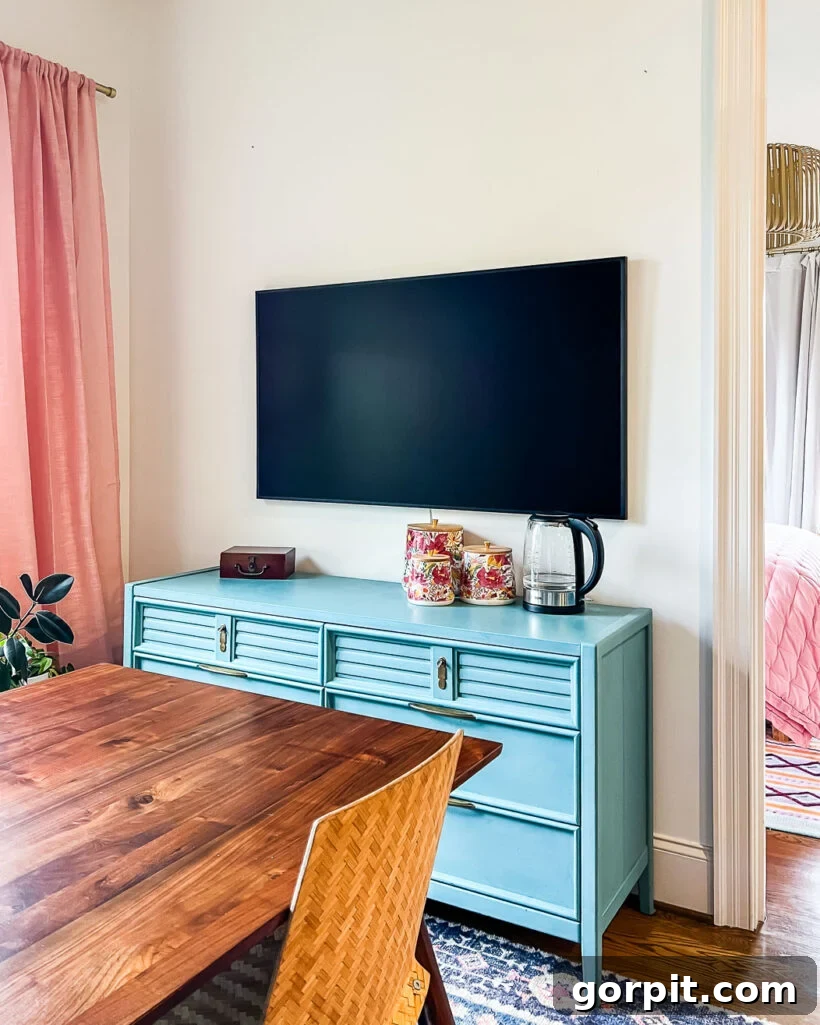
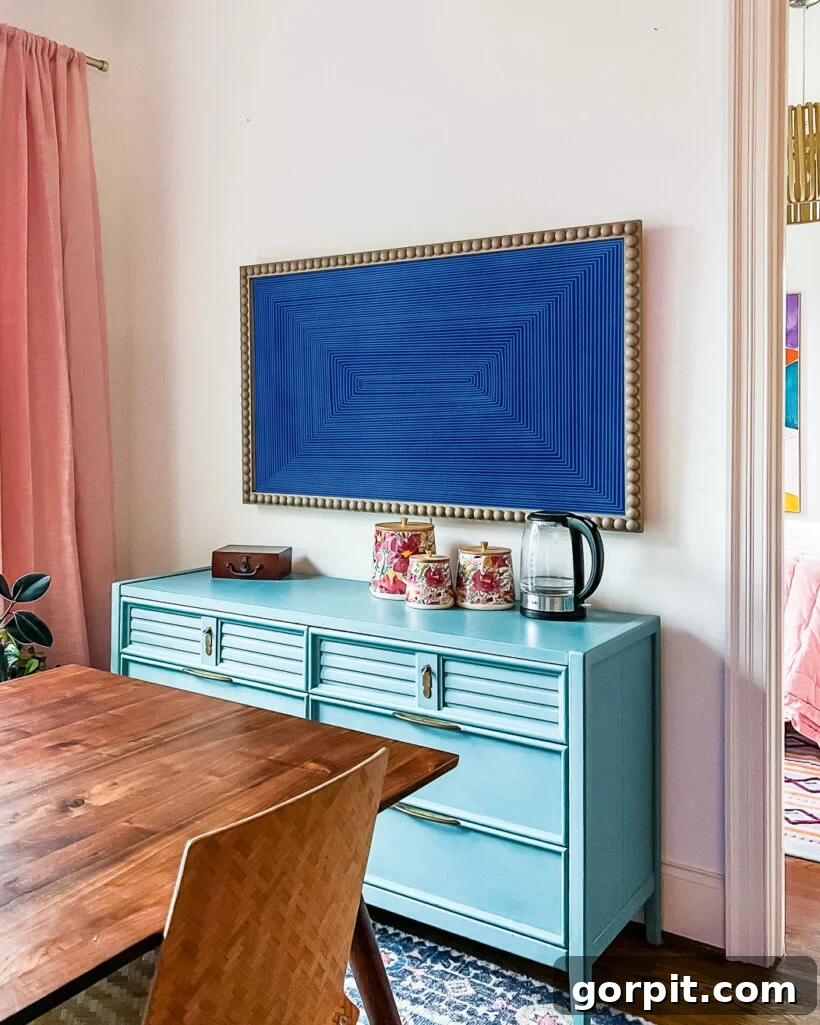
How to Make a DIY Bobbin Frame for Your TV
Before diving into the detailed instructions, I highly recommend watching the short overview video below. It provides valuable visual context that will make the written steps much clearer. The video will play after a brief advertisement.
Materials & Tools Needed for Your Custom TV Frame
Gathering all your materials and tools beforehand will ensure a smooth and efficient DIY process. Here’s what you’ll need to create your stunning bobbin TV frame:
- Tape measure: Essential for precise measurements of your TV and wood cuts.
- 1 x 2 inch pine boards: These will form the main front structure of your frame. For a 55″ Frame TV, we used three 8-foot boards. Always choose straight boards without significant warps or knots for the best finish.
- 1/2-in thick x 11/16-in wide pine lattice molding: This smaller molding will create the side profile of your frame, designed to cover the side of the TV. For a 55″ Frame TV, we also used three 8-foot lengths.
- 1.25″ / 30mm half wood balls: These are the key elements for the distinctive bobbin or beaded look. I ordered three bags of 50 balls and had about 20 left over for a 55-inch frame.
- Measuring gauge (optional, but highly recommended): A measuring gauge, such as a Kreg multi-mark, is incredibly helpful for accurately determining and setting the offset for your lattice molding.
- Paint: Choose a color that complements your room’s decor. Consider a good quality paint and primer for a durable finish.
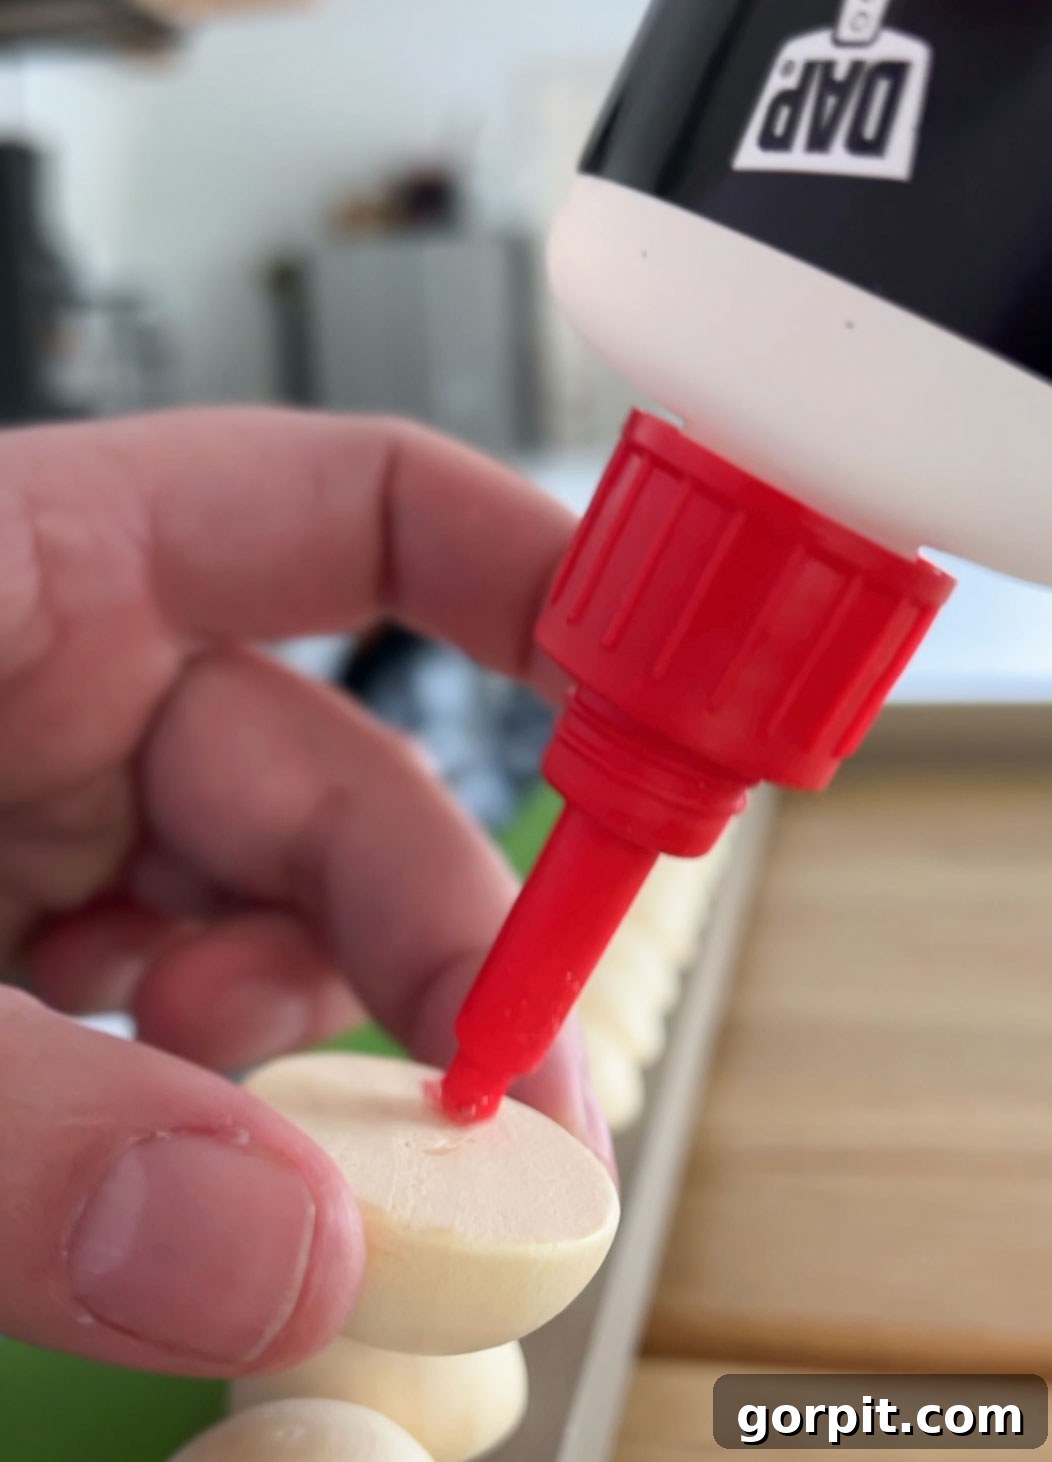
- DAP Weldwood Instant Adhesive: This quick-setting adhesive is excellent for securing wood pieces and the half-wood balls, drastically speeding up assembly time.
- DAP Premium Wood Filler: Essential for filling nail holes, minor gaps, and imperfections to achieve a flawless, smooth surface before painting.
- Sandpaper: Various grits (e.g., 120-grit for initial smoothing, 220-grit for fine finishing) to prepare the wood surfaces.
- Miter saw (or hand saw and miter box): For precise 45-degree angle cuts to form the frame corners. A hand saw and miter box are a great alternative if you don’t have power tools.
- Nail gun (or small finishing nails and hammer): To reinforce the mitered corners. A 23-gauge pin nailer is ideal for minimal holes, but small finishing nails work just as well.
DIY Bobbin Frame Cost Breakdown: An Affordable TV Frame Solution
One of the most compelling reasons to build your own TV frame is the significant cost savings. For our 55-inch Frame TV, the total expenditure was remarkably low. We already had basic supplies like glue, wood filler, and paint on hand from previous DIY projects, which helped keep our costs down. However, even if you needed to purchase all these items new, you would still likely stay under $150, making this a truly budget-friendly project compared to expensive commercial options.
- Wood: Approximately $51
- Wood half balls: Approximately $30
- Estimated Total: ~$81 (excluding tools and basic consumables you might already own)
Understanding the Anatomy of Your DIY TV Frame
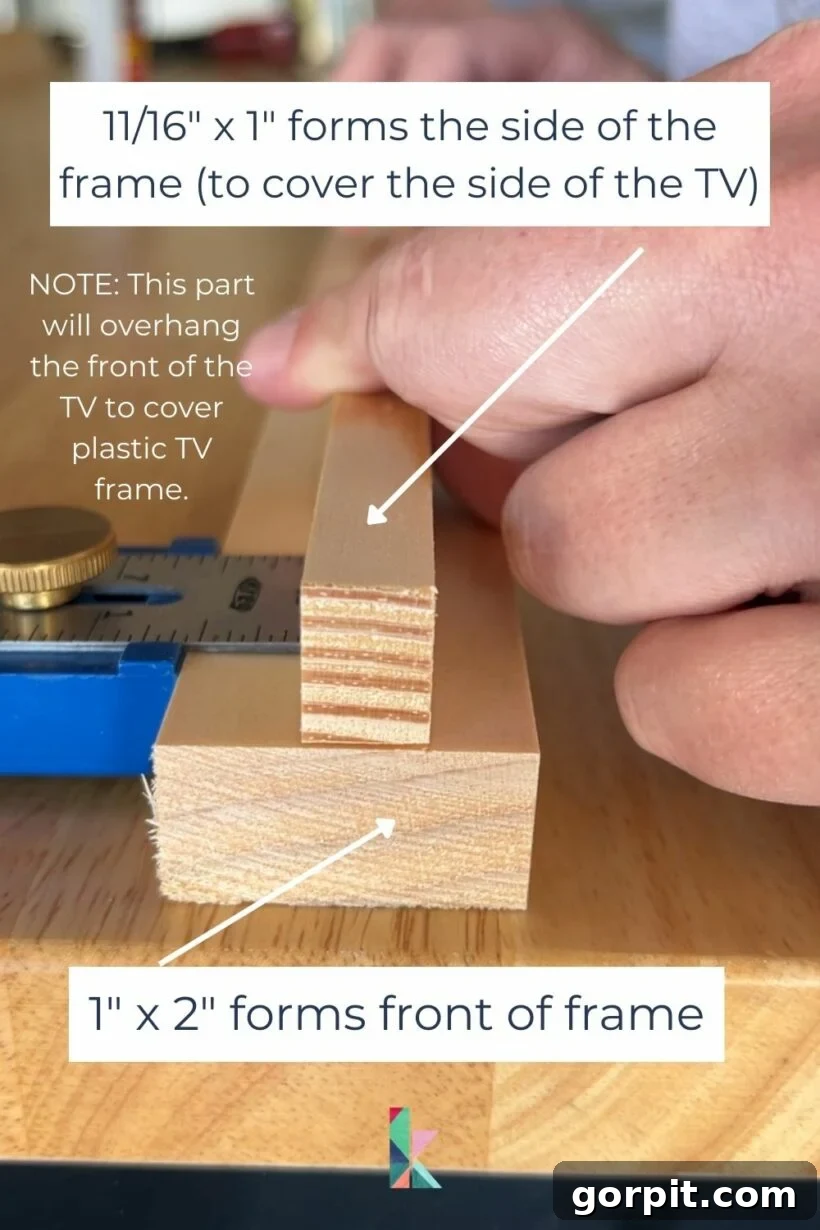
Before proceeding with the step-by-step tutorial, it’s crucial to understand the structural design of this DIY TV frame. The frame is constructed using two different sizes of wood, each serving a specific purpose in creating the finished look and fit for your Samsung Frame TV (or any other wall-mounted flat-screen TV). The larger 1×2 pine boards form the primary face of the frame, providing the visual breadth. The smaller lattice molding is attached to the back of these front pieces, creating an inset lip that sits behind the TV’s plastic bezel. This design ensures that the frame covers the TV’s plastic border without encroaching on the screen itself. Reviewing the diagram below will clarify how these two wood pieces are integrated to form the complete custom TV frame, making the subsequent instructions much easier to follow and visualize.
Time needed: 4 hours
Follow these detailed steps to create your own beautiful and affordable DIY TV frame, adding a touch of personalized elegance to your entertainment space in approximately 4 hours!
- Measure Your TV and Determine Overhang.
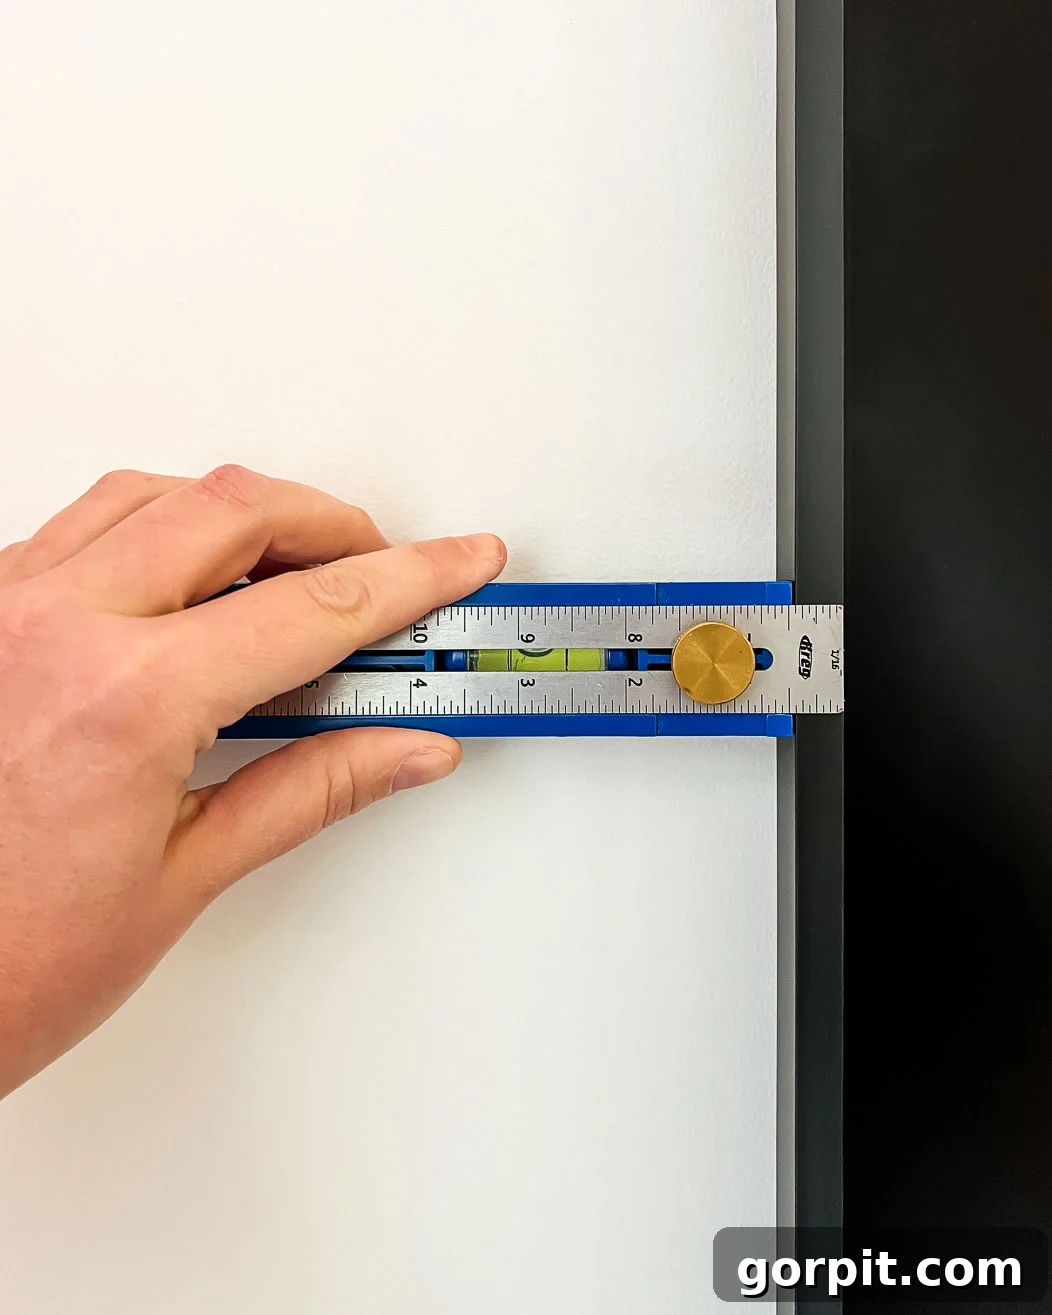
Accurate measurements are paramount for a professional-looking frame. Begin by taking precise measurements of both the length and width of your television screen, as well as the entire TV unit including its plastic bezel. This will help you determine the total amount of wood needed. Next, and critically, you need to establish how much the frame should overhang the front of your TV. The goal is to cover the TV’s plastic frame without obstructing any part of the actual screen. Most TVs have a slim plastic border around the display. We highly recommend using a measuring gauge to precisely measure the width and depth of this plastic TV frame. This will inform the placement of your lattice molding in the next step, ensuring a perfect fit and preventing any part of the screen from being covered.

- Glue Your Wood Pieces Together Before Cutting.
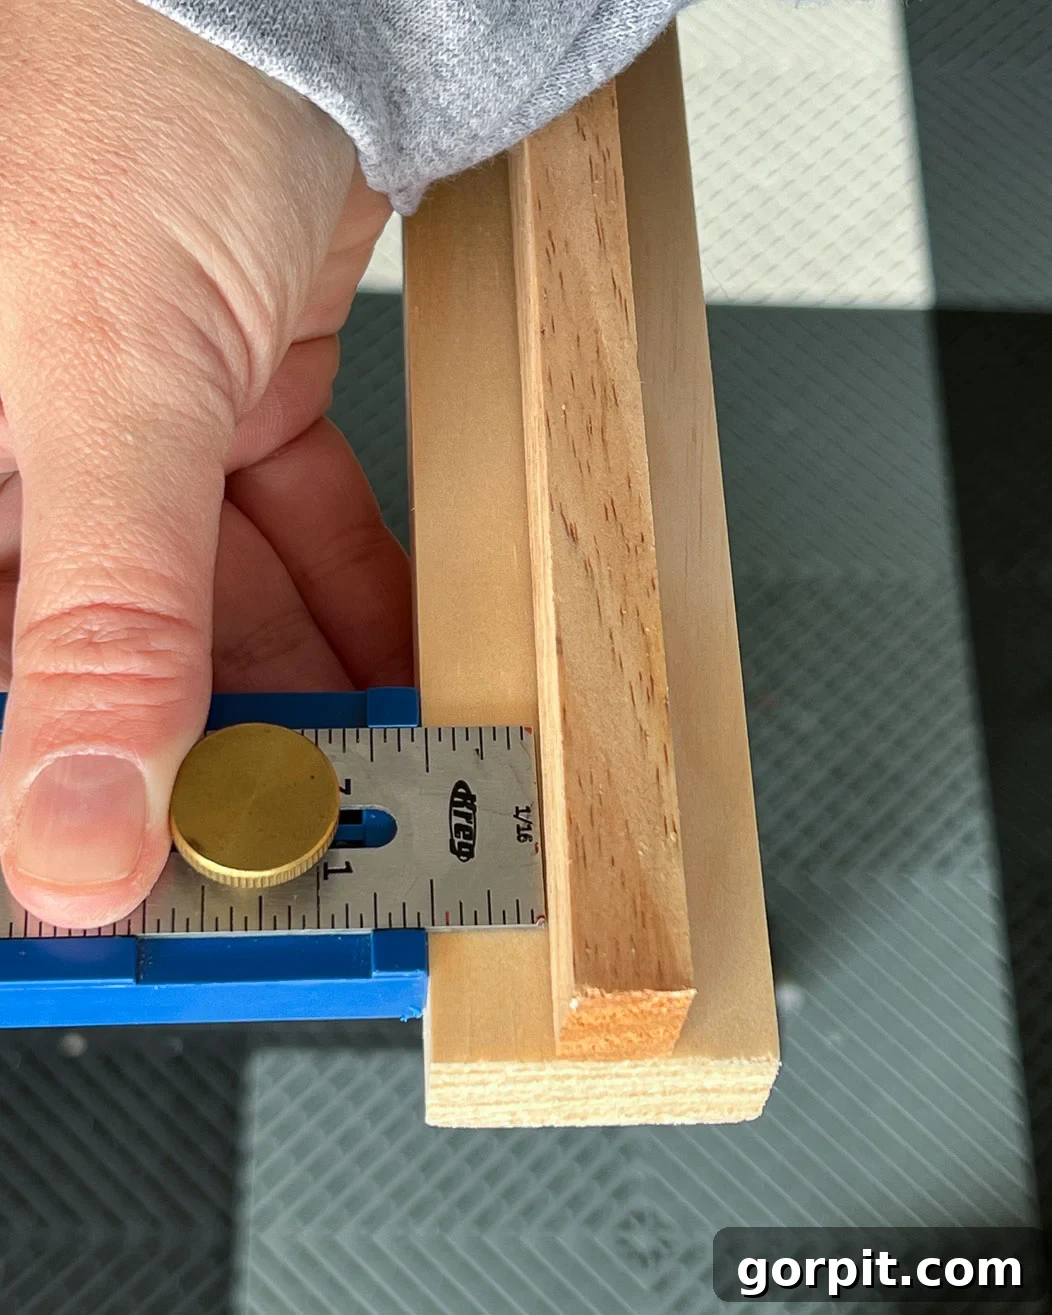
This ingenious step simplifies the cutting and assembly process significantly by minimizing the number of mitered joints you’ll need to handle later. We used the larger 1″ x 2″ pine boards to form the front face of our frame, and the smaller lattice molding to create the crucial side lip that will extend over the TV’s plastic bezel. Refer back to the “Anatomy of this DIY TV Frame” diagram above for a visual understanding of how these two pieces align. Given that the plastic frame around our TV was exactly 1/2″ wide, we applied DAP Weldwood Instant Adhesive to carefully attach the lattice molding to the back of the 1×2 pine boards, precisely 1/2″ from the inner edge. This precise alignment ensures that the finished frame will only cover the TV’s plastic border and will not accidentally obscure any part of the screen. Allow the adhesive ample time to set completely before moving on.
- Miter Cut Your Wood to Length.
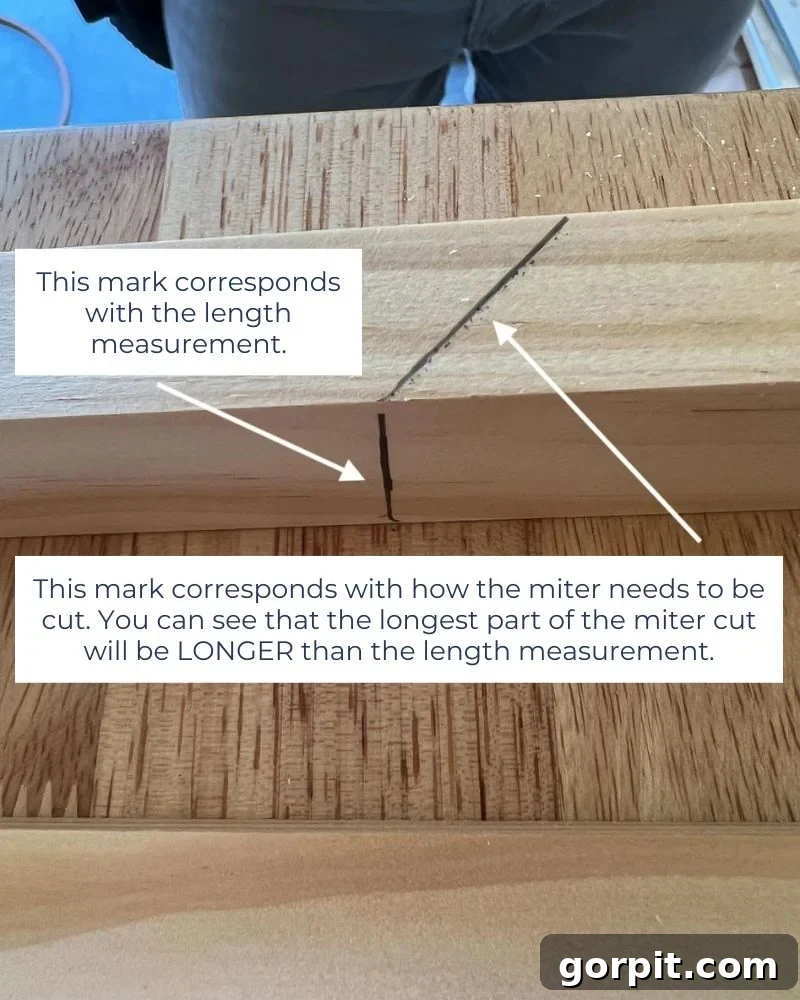
Once the glued pieces are fully set and dry, it’s time for the critical step of cutting your wood to length with mitered corners. Remember, for mitered cuts, the shortest part of your mitered cut must correspond to the exact length of your TV. This is a common mistake: if you measure and cut so that the longest point of the miter is the TV’s length, your frame pieces will end up too short. To prevent this, mark the precise TV dimension directly onto your pre-glued wood assembly. Then, carefully draw the 45-degree miter line *before* cutting. This visual guide will help you ensure the shortest edge of the miter aligns with your TV’s dimensions. Take your time, measure twice, and cut once. If you’re using a hand saw and miter box, practice on scrap wood first to get a feel for accurate angle cuts.
- Assemble and Glue Your Frame.
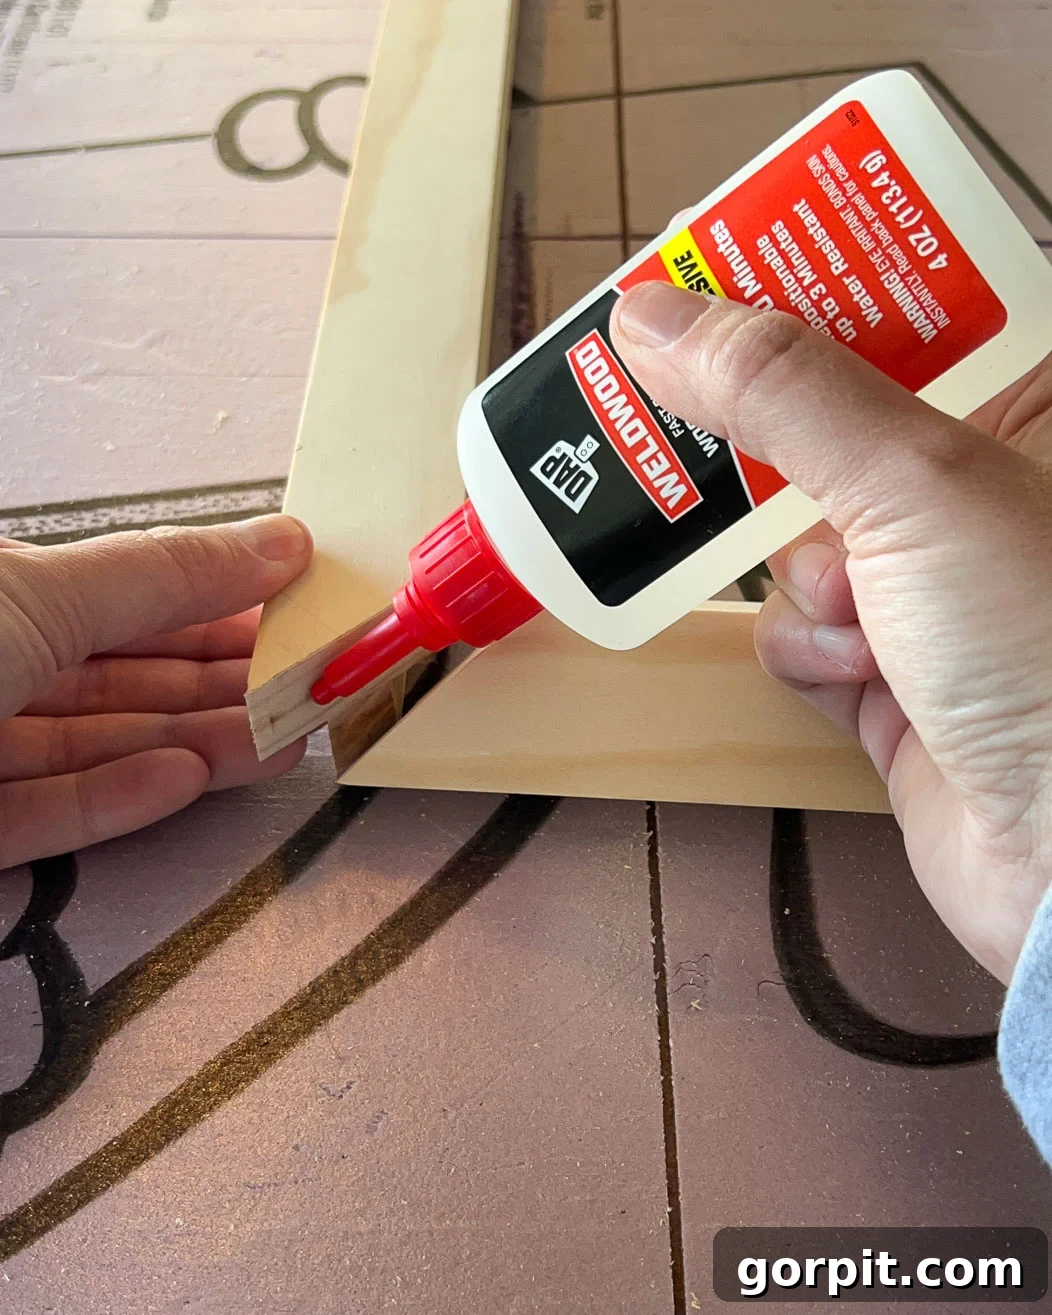
With all your wood pieces precisely cut, you are ready to assemble the frame. Apply DAP Weldwood Instant Adhesive to each mitered edge, then carefully join the corners together. The instant adhesive is fantastic for this step because it cures much faster than traditional wood glue, allowing you to work more quickly without long clamping times (a personal preference for impatient DIYers!). To ensure a strong and lasting bond, we reinforced the corners using 1-inch, 23-gauge pin nails with a nail gun. If you don’t have a nail gun, small finishing nails driven by hand or even strong clamps can also be used to hold the corners securely while the glue fully dries and achieves maximum strength. Ensure all corners are perfectly aligned before the adhesive sets.
- Fill Nail Holes and Any Gaps.
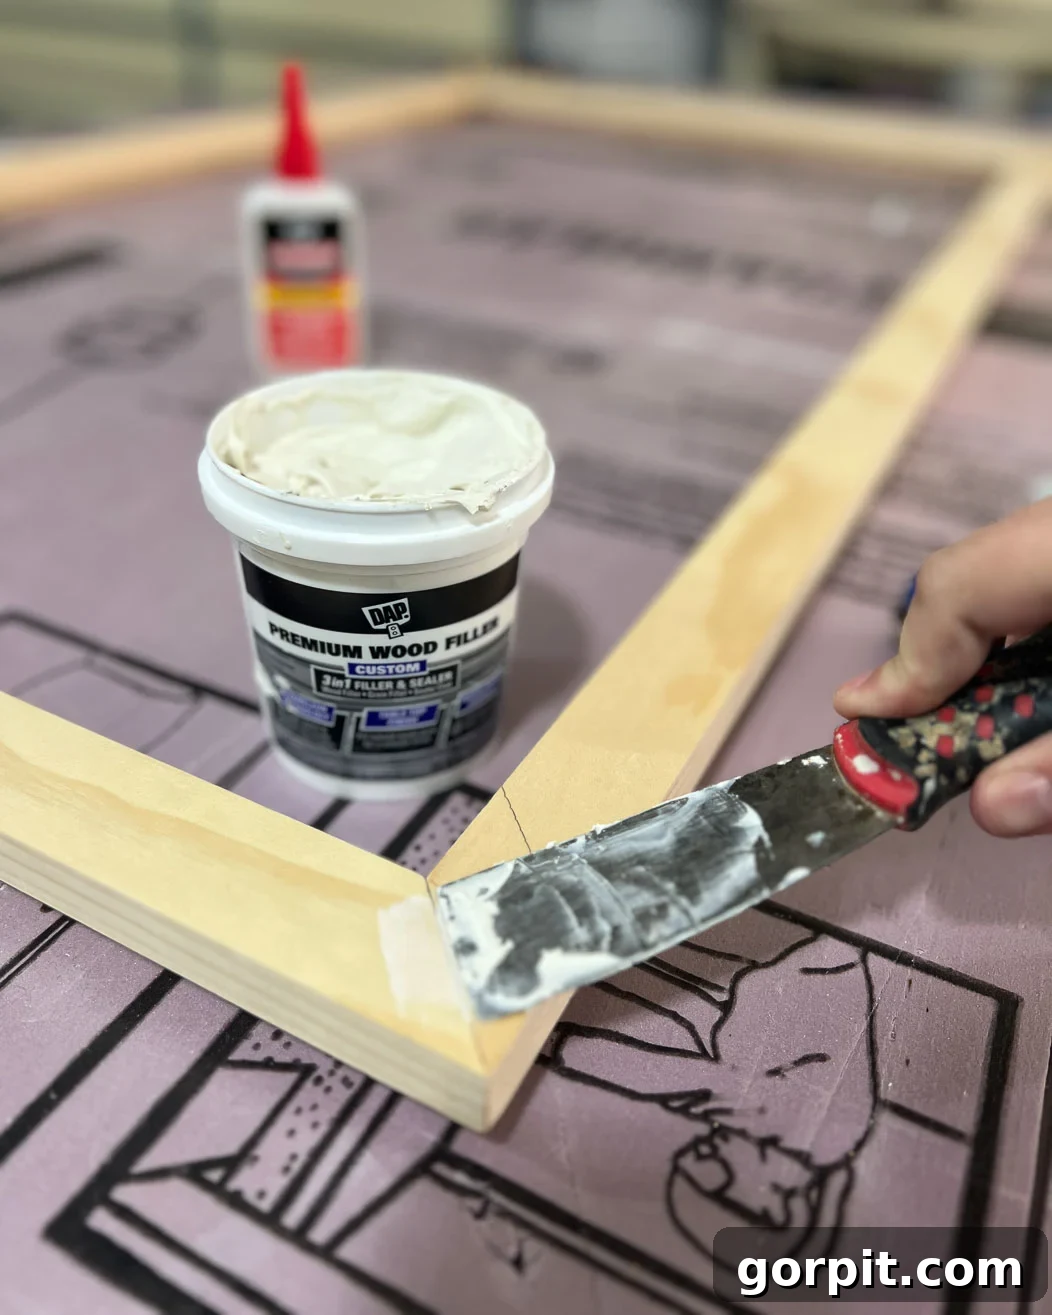
After the frame is assembled and the glue has fully cured, it’s time to create a seamless, professional finish. Use DAP Premium Wood Filler to meticulously fill all visible nail holes and any tiny gaps that might exist in your mitered joints. Apply the filler smoothly and slightly overfill the areas, as it will shrink slightly upon drying. Once the wood filler is completely dry (check the product instructions for drying times), use sandpaper (starting with a coarser grit like 120, then moving to a finer grit like 220) to sand the filled areas until they are perfectly smooth and flush with the surrounding wood. This step is crucial for achieving a flawless paint finish.
- Paint Your Frame.
Now for the exciting part: bringing your frame to life with color! I chose “Algonquin” by Fusion Mineral Paint for its beautiful hue and excellent coverage. Before painting, ensure your frame is clean and dust-free. Apply your chosen paint evenly, following the product’s recommendations for coats and drying times. Depending on your wood type and paint choice, a primer might be beneficial for adhesion and a smoother finish. At this stage, your TV frame will already look significantly upgraded and elegant. However, to truly create the unique “bobbin” or “beaded” frame look I envisioned, an extra decorative step awaits!
- Make Any Adjustments Needed to Accommodate Your TV Sensor.
This is a crucial, TV-specific step, particularly for Samsung Frame TVs. Many modern TVs, especially Frame TVs, have sensors that are vital for their functionality. The sensor on a Samsung Frame TV, for instance, isn’t just for remote control signals; it also detects ambient light and motion in the room. These detections are critical for the TV’s “Art Mode” to function correctly, adjusting brightness and turning off when no one is around. Carefully locate your TV’s sensor (usually a small, clear dot or rectangle on the bottom edge). You may need to create a small notch or chisel out a small section of your frame’s inner lip to ensure the sensor is completely unobstructed. Test the sensor’s functionality with your TV remote and by walking past it to ensure it operates correctly before moving on to the decorative elements.
- Plan the Spacing of Your Half-Wood Balls.
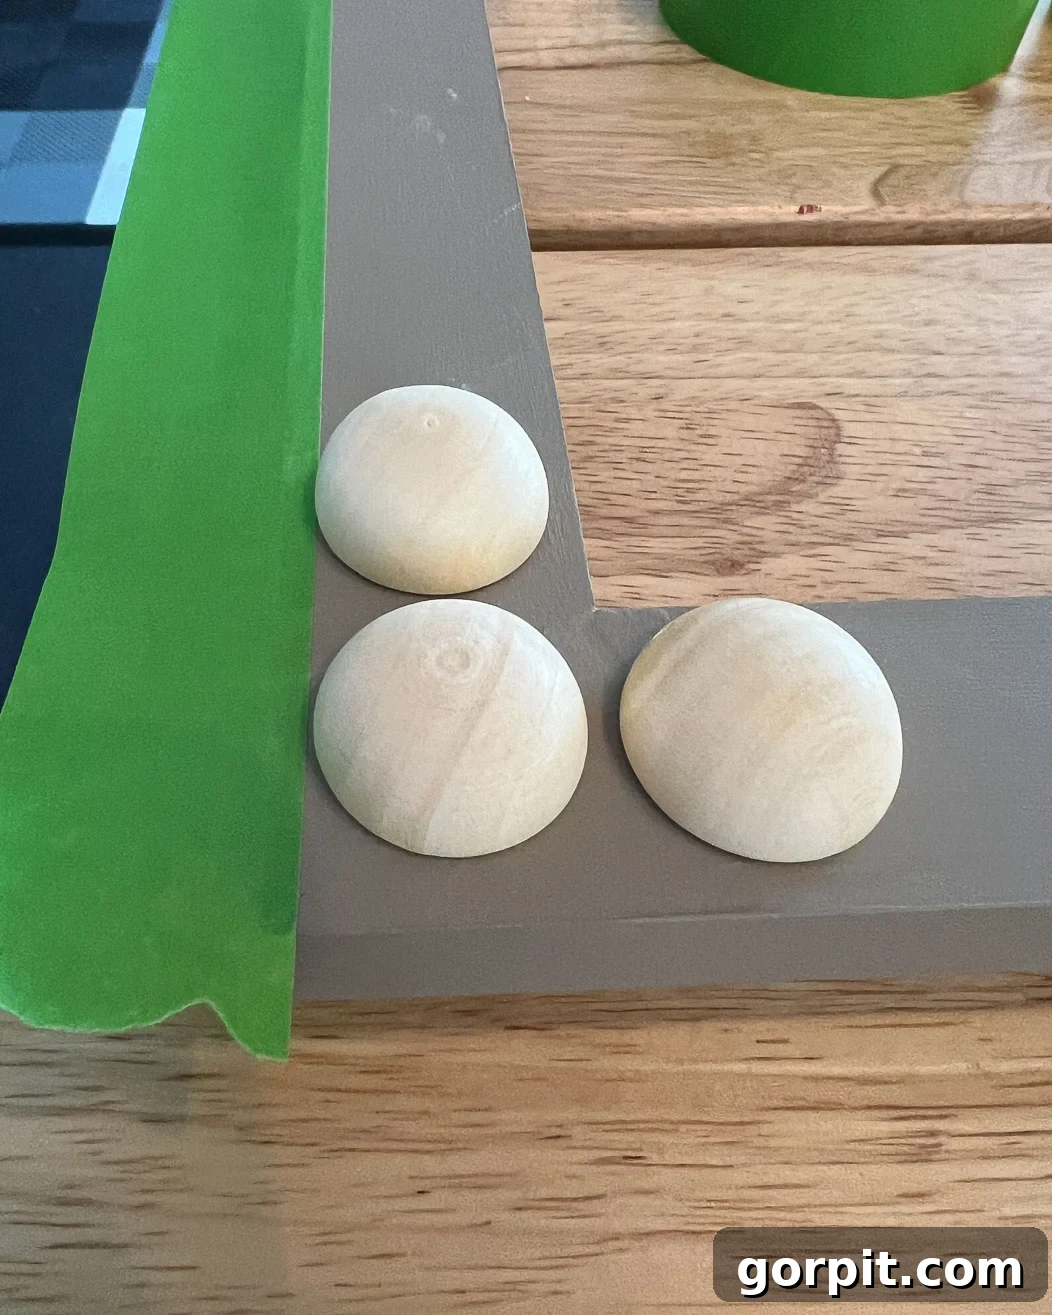
While a plain painted frame looks beautiful, adding half-wood balls creates that distinctive, on-trend bobbin or beaded frame style that elevates the piece further. The key to a professional look is consistent and symmetrical spacing. Start by dry-fitting one half-wood ball perfectly centered in each corner of the frame. These will act as your anchor points. Next, place additional balls along each side, ensuring they are centered on the wood frame. Use painter’s tape to temporarily hold these dry-fitted balls in place and adjust their spacing until you achieve an even, visually pleasing pattern. You want the gaps between the balls to be consistent. Do not glue them yet; this dry-fit step allows you to experiment and finalize the best layout before committing with adhesive.
- Glue the Wood Balls into Place.
Once you are completely satisfied with the dry-fitted spacing of your half-wood balls, you can begin to permanently attach them. For consistent alignment, consider running a strip of painter’s tape along the outer edge of the frame. This acts as a visual guide to help you center each ball precisely on the face of the frame. Apply a small amount of DAP Weldwood Instant Adhesive to the flat back of each half-wood ball. Press each ball firmly into its designated spot, holding it for a few seconds as the instant adhesive quickly sets. Work methodically around the frame, ensuring each ball is securely attached and perfectly aligned. The quick-setting nature of this glue is a huge time-saver here.
- Paint Again.
After all the half-wood balls are securely glued in place and the adhesive has fully cured, it’s time for the final coat of paint. This step ensures a uniform color and seamless integration of the balls with the frame, giving it a truly finished and professional look. This can be a bit tedious due to the rounded surfaces, but the effort is well worth it. I found it helpful to have painted the frame *before* adding the balls, as it ensured good base coverage and made the final coat more about blending the new elements rather than starting from scratch. Apply careful, even coats, allowing sufficient drying time between each. Pay attention to any crevices or hard-to-reach areas around the balls to ensure complete coverage.
- OPTIONAL: Staple Elastic onto the Back of Your Frame.
For added security, especially if your frame feels a bit loose or if you live in an area prone to tremors, you can add elastic straps to the back. This optional step provides extra peace of mind, ensuring your beautiful new frame stays firmly in place. Simply staple lengths of strong elastic band onto the back of the frame, strategically positioned to stretch over the top and bottom edges of your television. These straps will gently but securely hold the frame against the TV, preventing any accidental dislodgement.
- Position the Frame onto Your TV.
The final and most rewarding step! Carefully lift your newly crafted DIY bobbin frame and slide it onto your wall-mounted TV. The inner lip of the lattice molding should comfortably rest over the plastic bezel of your television, securing the frame in place without covering any part of the screen. Step back and admire your handiwork! Now, all that’s left is to select some captivating digital art to display on your screen (if using a Frame TV or smart TV with art capabilities) and enjoy the elegant, transformed look of your entertainment space. Your TV is no longer just a screen; it’s a statement piece!
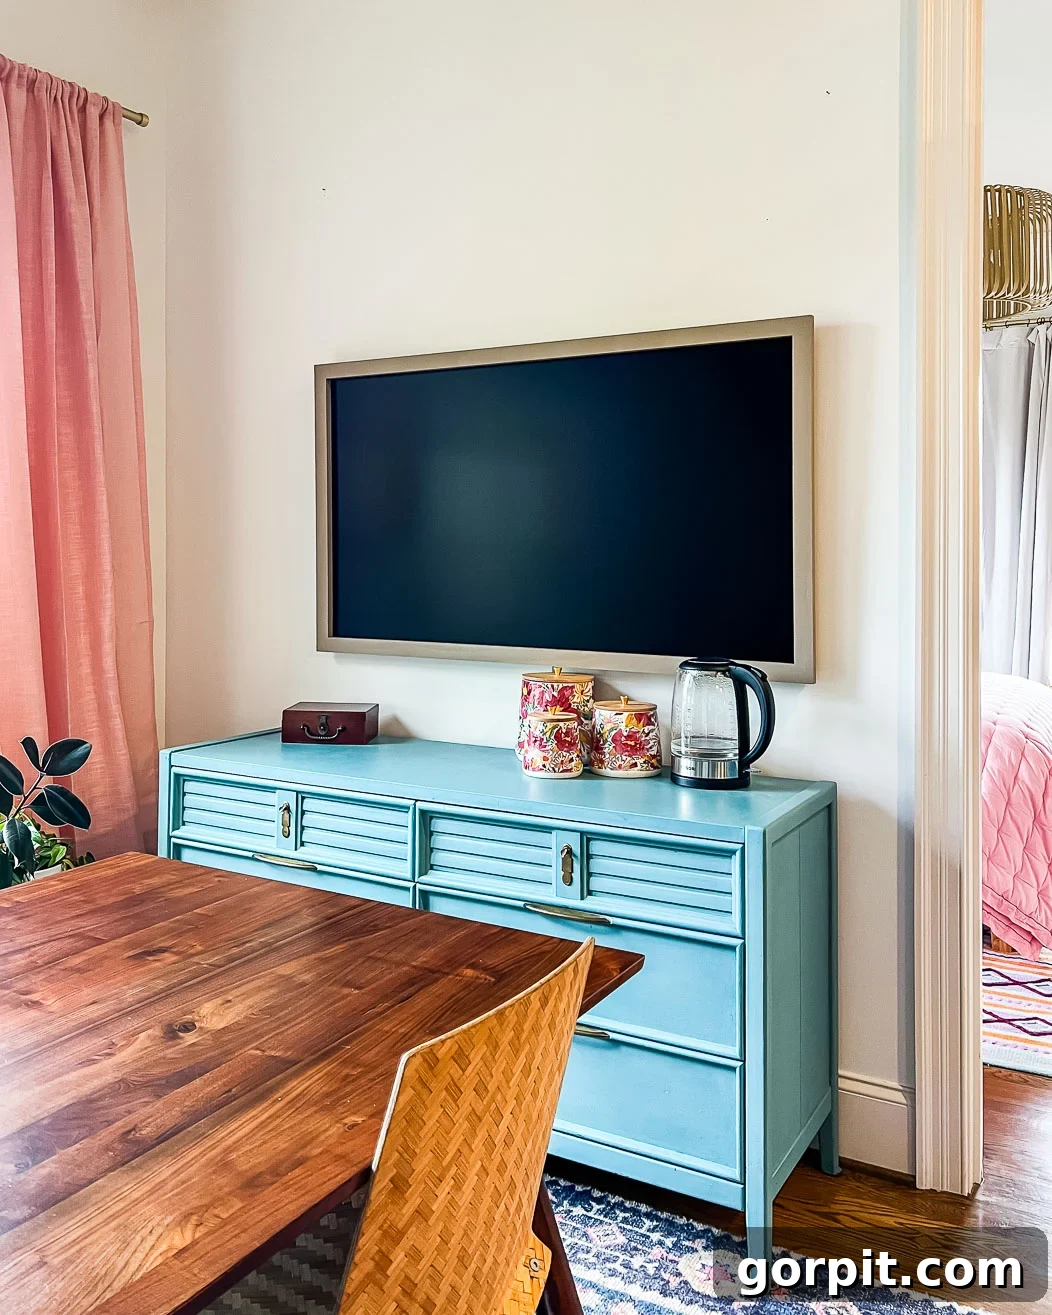
And there you have it! The transformation is truly remarkable. Our TV now boasts a finished, high-end appearance that seamlessly integrates into our kitchen decor. For those curious about my choice of a neutral paint color, it was a deliberate decision. I wanted the flexibility to display a wide array of colorful digital art on the TV without being constrained by the frame’s hue. The neutral frame provides a versatile backdrop, allowing the art to be the star. Stay tuned, as I’m excited to create a vibrant gallery wall around this TV very soon, further enhancing its role as a decorative focal point.
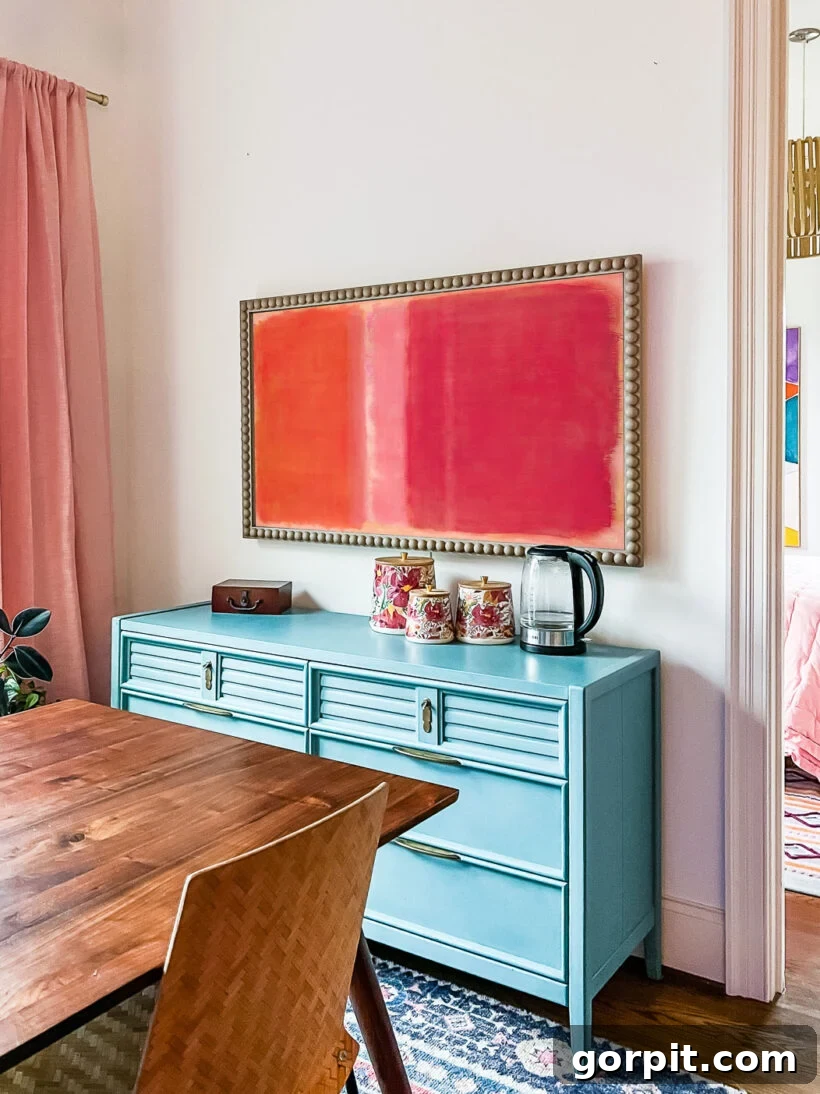
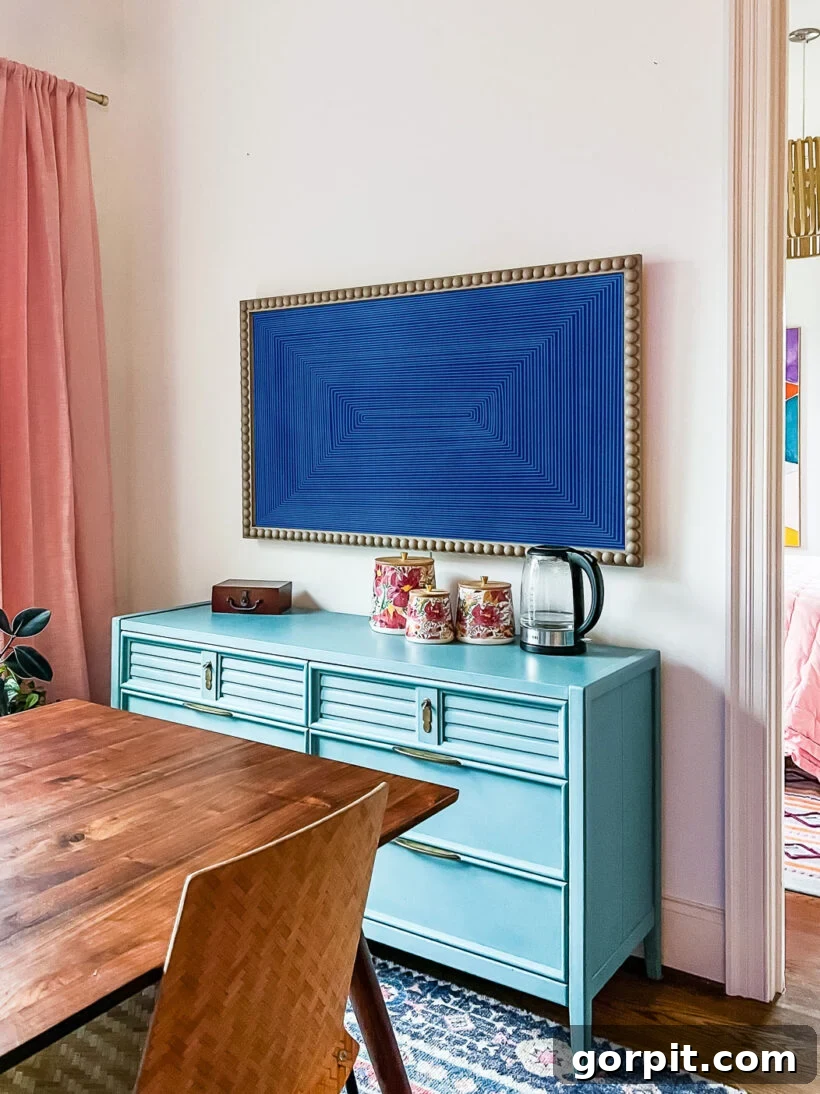
The financial savings are undeniable, with our DIY frame costing under $85, a stark contrast to the hundreds of dollars typically spent on store-bought options. Beyond the cost, I genuinely prefer its aesthetic and substantial feel compared to the simpler frame we purchased for our family room TV. The difference in presence is quite striking, as you can see by comparing our DIY bobbin frame to the more slender Samsung Frame TV Bezel. Our custom creation offers a much richer, more integrated look that truly makes the television feel like a custom art piece within the room.
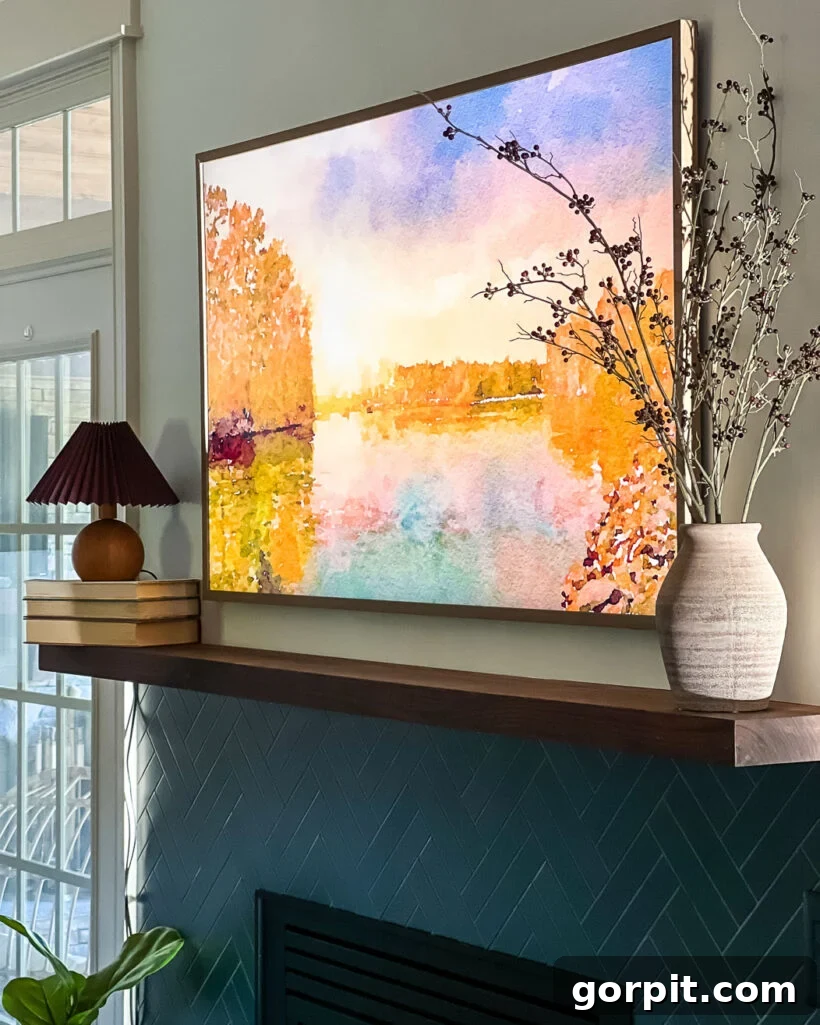
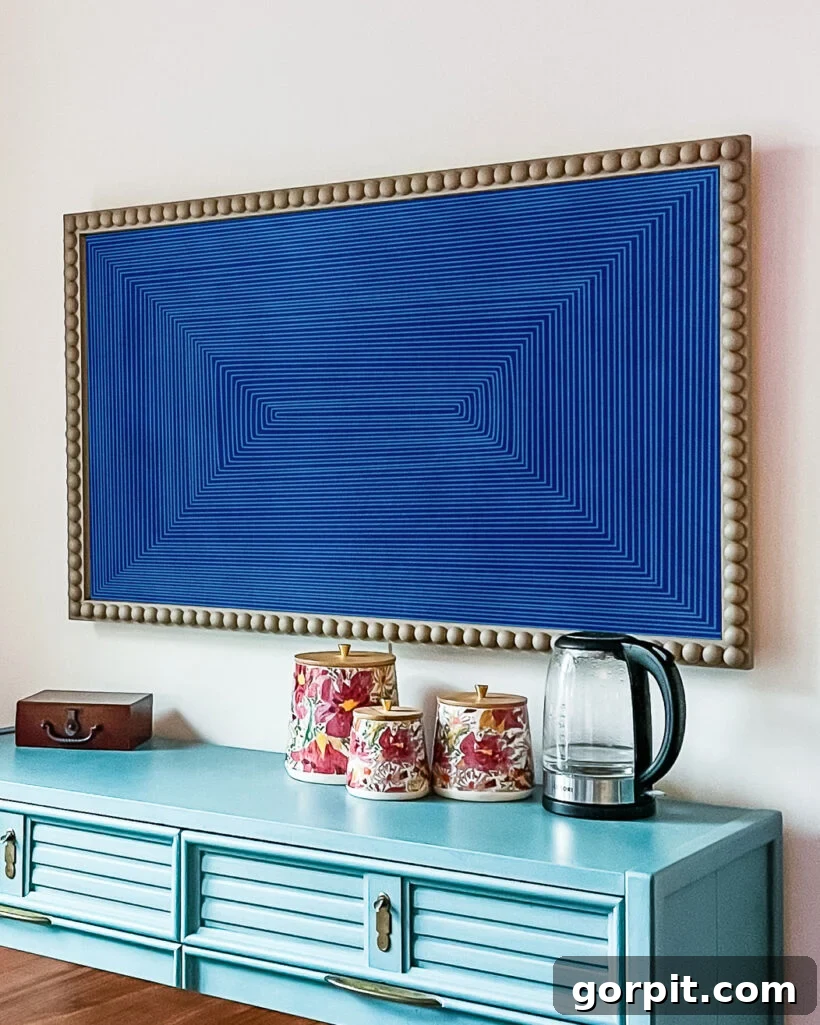
That concludes our guide to crafting a stunning, custom DIY frame for your television! I sincerely hope this tutorial has inspired you to undertake your own home improvement project and create a personalized TV frame that elevates your space. If you decide to make one, I would absolutely love to see your creations! Please feel free to DM me or tag me on Instagram (@tasha.kaleidoscope) so I can admire your unique designs. Happy DIYing!
More ART & Wall decor IDEAS
SEE ALL art POSTS
-
How to Display Art On Almost Any Smart TV
-
How to Make Faux Oversized Poster Hangers
-
DIY Light Up Wall Art
-
Make Large DIY Picture Frames For Less than $20 Each
-
DIY Magnetic Poster Hangers
-
27 Gallery Wall Ideas + Practical Tips to Inspire You
Curious about how I approach transforming rooms and spaces in our home? Explore Designer in a Binder® for an affordable and simple guide to decorating your home with confidence and style.
For exclusive content, behind-the-scenes sneak peeks, and fresh DIY and decor inspiration delivered straight to your inbox, be sure to subscribe to our newsletter before you go!