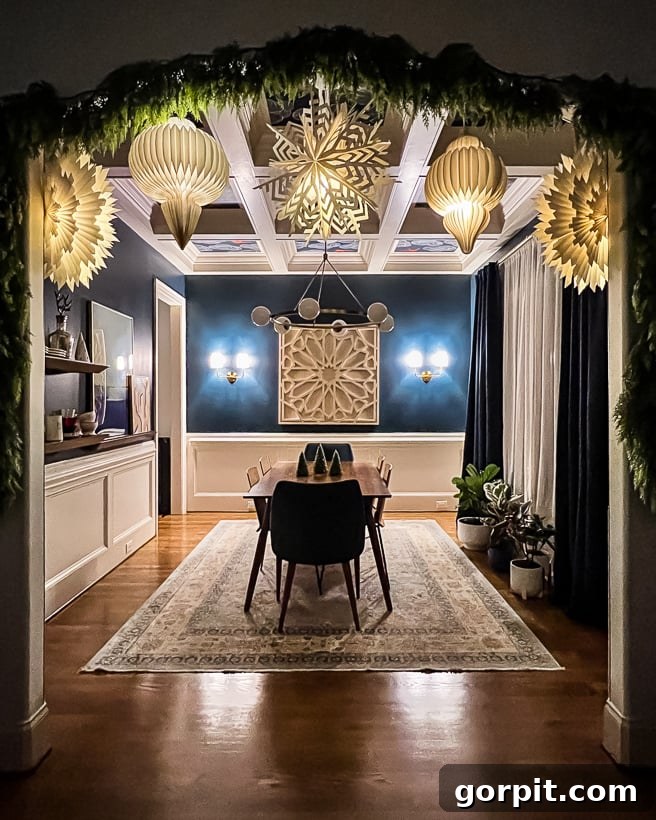
Create Magical Light-Up Paper Christmas Lanterns: An Easy DIY Guide
Transform your home into a magical winter wonderland this holiday season with these enchanting light-up paper Christmas lanterns! This incredibly simple DIY project offers a stunning glow and festive ambiance that will captivate everyone who sees it. Forget complicated crafts; we’re talking about an “easiest project EVER” that delivers maximum impact with minimal effort. Get ready to illuminate your space and spread holiday cheer!
Introduction to Magical Lanterns
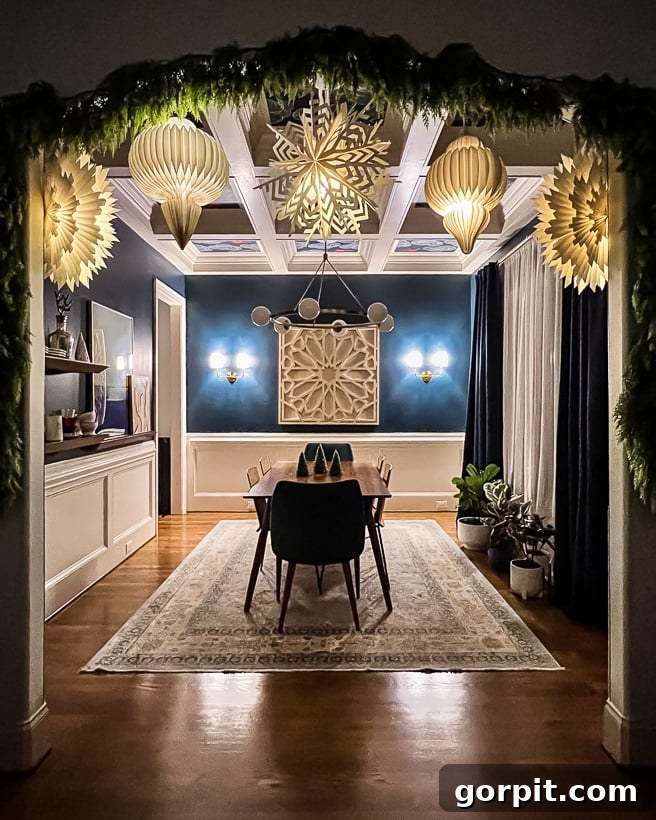
The enchanting appeal of these light-up paper Christmas lanterns first swept across Instagram in 2021, instantly capturing hearts and going viral. Since then, countless enthusiasts have embraced this simple yet spectacular holiday decoration. The secret lies in their versatility: they are undeniably charming by day, adding a whimsical touch to any room. However, it’s at night, when their soft, warm glow fills your space, that they truly become magical, transforming ordinary corners into extraordinary festive scenes.
This post is your ultimate guide to recreating this beloved display. We’ll walk you through every step, from gathering materials to hanging your luminous creations, ensuring you can bring this magical, glowy Christmas display into your own home with ease. Prepare to be amazed by how effortlessly you can elevate your holiday decor!
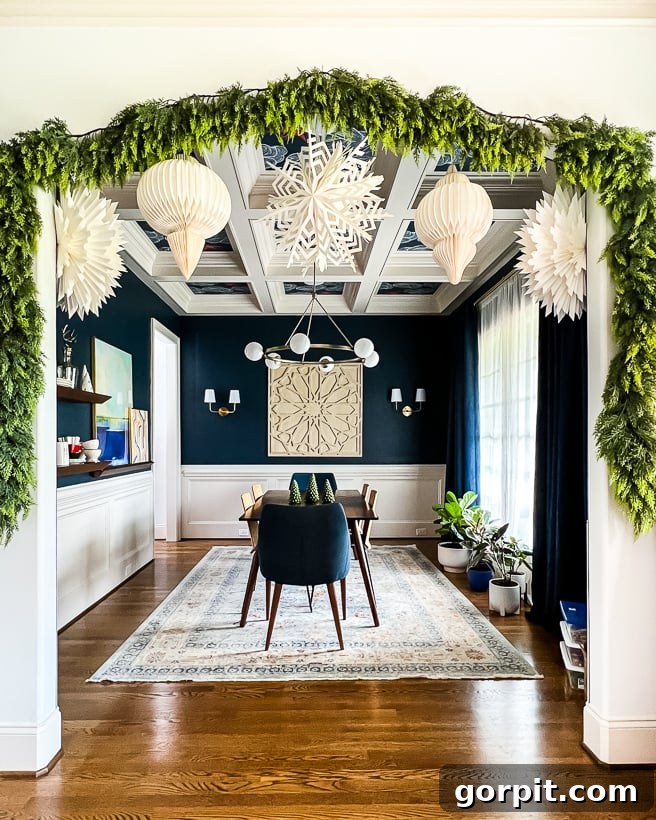
Imagine your dining room, entryway, or even a cozy reading nook bathed in the gentle, inviting light of these handcrafted lanterns. They provide a unique blend of rustic charm and sophisticated sparkle, making them perfect for any decor style, from modern minimalist to traditional festive. Keep reading to discover all the information you need to create these stunning light-up paper Christmas lanterns for yourself and infuse your home with unparalleled holiday magic!
This post contains affiliate links for your convenience. Click here for my full disclosure policy.
Why These DIY Christmas Lanterns Are a Must-Make
Beyond their stunning visual appeal, these paper Christmas lanterns offer numerous advantages, making them an ideal project for anyone looking to enhance their holiday decor:
- Effortless Elegance: Despite their sophisticated look, these lanterns are incredibly easy to assemble, requiring no special crafting skills. It’s a rewarding project that yields impressive results.
- Budget-Friendly: Achieve a high-end look without breaking the bank. The primary materials—paper lanterns and puck lights—are generally inexpensive, making this an accessible decoration for all.
- Customizable: Choose from a vast array of paper lantern designs, sizes, and colors to perfectly match your existing Christmas theme or create an entirely new aesthetic.
- Reusable & Sustainable: Unlike single-use decorations, these lanterns can be collapsed and stored neatly, ready to bring joy year after year, reducing waste and saving you money on future holiday decor.
- Child-Friendly (with supervision): Older children can often help with the assembly, making it a wonderful family activity to bond over during the festive season.
- Versatile Placement: Hang them in a cluster, string them across a room, or use them as individual accent pieces. Their soft glow is perfect for entryways, living rooms, dining areas, bedrooms, or even as unique party decorations.
By investing a small amount of time and effort, you’ll create a captivating focal point that radiates warmth and wonder, truly embodying the spirit of Christmas.
Materials You’ll Need for Your Light-Up Lanterns
Gathering your materials is the first exciting step towards creating your magical light-up paper Christmas lanterns. The good news is that you don’t need a lengthy list of expensive or hard-to-find items. Here’s exactly what you’ll require:
- Large Paper Lanterns: The key to this project is selecting hollow paper lanterns that allow space for the light source. I sourced all of my original lanterns from World Market back in 2021. While specific designs can sell out quickly, especially closer to the holidays, two of my exact favorites are sometimes restocked (as of December 2023). Keep an eye out for these stunning options:
- Paper Snowflake Lantern
- Layered Snowflake Lantern
Alternative Lantern Suggestions: If your preferred World Market designs are unavailable, don’t despair! Many retailers, including Amazon, offer beautiful alternatives. I highly recommend this set of 10 gorgeous light-up paper lanterns. We’ve used them in another part of our home, and they are equally stunning. Look for designs that are collapsible and have an opening large enough to insert a puck light.
- Remote-Controlled Puck Lights: These small, battery-operated lights are the heart of your glowing lanterns. The remote control feature is crucial, allowing you to easily turn them on and off without disturbing the display. Look for models with warm white light for a cozy, inviting glow.
- Recommended: High-quality remote-controlled puck lights
- Picture Hanging Strips: These are incredibly handy for securing your paper lanterns, especially if some designs tend to spring open after assembly. They provide a strong, temporary hold without damaging the paper.
- Recommended: Reliable picture hanging strips
- Clear Command Hooks: For effortless hanging, clear Command hooks are your best friend. They adhere securely to walls and ceilings, are virtually invisible, and can be removed cleanly without leaving residue or damaging surfaces.
- Recommended: Durable clear Command hooks
With these simple supplies in hand, you’re ready to embark on your DIY journey to creating a truly magical Christmas display!
Step-by-Step Guide to Creating Your Paper Christmas Lanterns
Creating these magical light-up paper Christmas lanterns is far simpler than you might imagine. Follow these easy steps to bring your festive vision to life:
Step 1: Assemble Your Paper Lanterns
Carefully unpack your paper lanterns. Most paper lanterns come folded flat and require minimal assembly. Typically, you’ll expand the lantern and insert a wire frame or plastic support to hold its spherical or specific shape. Pay close attention to the instructions provided with your specific lantern. If the lantern has multiple layers or delicate cutouts, handle it gently to avoid tears.
Tip: Some lanterns might feel a bit loose or want to spring open. If this happens, use a small piece of a picture hanging strip to secure the edges together. Simply apply one half of the strip to one edge and the other half to the corresponding edge, pressing them firmly to create a discreet, temporary seal.
Step 2: Insert the Puck Lights
Once your lantern is fully assembled and stable, it’s time to add the light. Open the battery compartment of your remote-controlled puck light and insert the required batteries (usually AAA). Turn the puck light on to ensure it’s working.
Gently insert one puck light into the center of each assembled paper lantern. The goal is to position the light so it hangs freely or rests within the lantern, allowing its glow to disperse evenly without being directly visible. For most lanterns, the light will simply sit inside, but for larger or oddly shaped lanterns, you might use a tiny piece of clear tape or fishing line to suspend the light from the lantern’s internal structure, ensuring it stays centered.
Important: Ensure the puck light is securely placed and won’t fall out. Test the remote control to confirm you can switch the light on and off while it’s inside the lantern.
Step 3: Prepare for Hanging
Decide where you want to hang your lanterns. Common spots include hallways, above a dining table, in a living room corner, or clustered in an entryway. For optimal visual impact, consider grouping several lanterns at varying heights.
Clean the surface where you plan to attach your Command hooks. Ensure it’s dry and free of dust or grease. Following the package instructions, apply the clear Command hooks to your chosen locations. Press firmly for the recommended amount of time to ensure a strong bond. Remember to wait an hour before hanging any weight on them to allow the adhesive to cure properly.
Step 4: Hang Your Magical Lanterns
Carefully hang each assembled lantern onto a Command hook. Adjust the position of the lanterns until you achieve your desired arrangement. Experiment with different heights and groupings to create a dynamic and visually appealing display.
Step back and admire your handiwork! Now, use the remote control to switch on your puck lights. Watch as your simple paper lanterns transform into a breathtaking, glowing Christmas display that will infuse your home with warmth and holiday cheer.
This simple process will quickly yield stunning results, allowing you to enjoy your beautiful, handcrafted Christmas decor throughout the season.
Design & Display Ideas for Your Festive Lanterns
Once you’ve crafted your beautiful light-up paper Christmas lanterns, the fun really begins with deciding how to display them! Their versatility allows for endless creative arrangements that can elevate any space.
- Enchanting Entryway: Create a captivating first impression by hanging a cluster of lanterns in your entryway or foyer. Vary the heights to add visual interest and a welcoming glow.
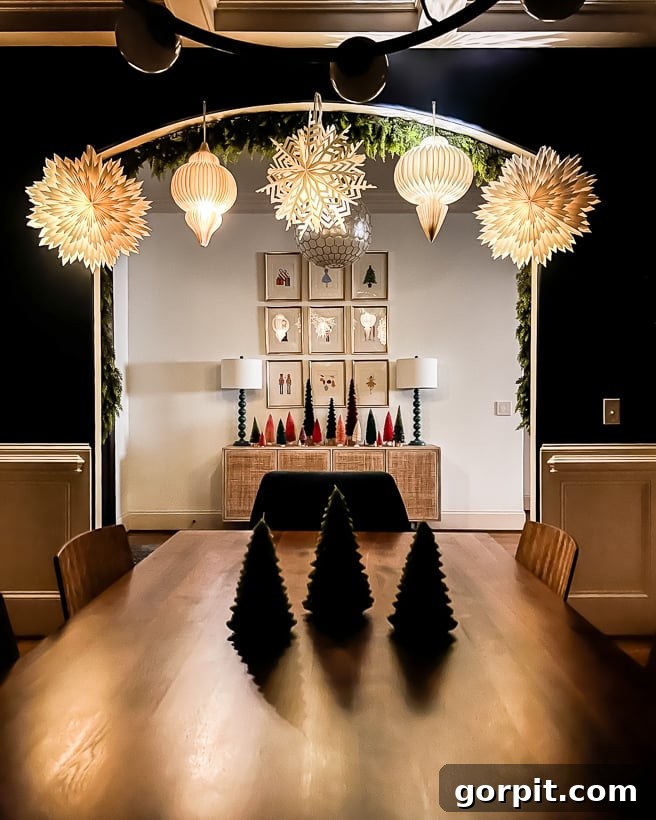
- Dining Room Drama: Suspend a series of lanterns over your dining table as a whimsical alternative to a traditional chandelier. This creates a soft, inviting atmosphere perfect for holiday meals.
- Hallway of Lights: Transform a mundane hallway into a magical corridor by hanging lanterns at regular intervals or in an irregular pattern along its length. The repeating glow will guide guests and delight residents.
- Cozy Corners: Place a single, larger lantern in a cozy reading nook or a less-used corner of a room to add a surprising element of light and warmth.
- Bedroom Bliss: For a gentle, dreamy ambiance, hang smaller lanterns in a child’s bedroom or guest room. They can serve as a soft nightlight or a charming decorative accent.
- Window Wonderland: Hang lanterns in front of windows, visible from both inside and out, to share your festive spirit with neighbors and passersby.
- Groupings and Clusters: Don’t be afraid to mix and match! Combine lanterns of different sizes, shapes (if available), and even subtle textures. A tight cluster can create a striking focal point, while a more spread-out arrangement can diffuse light across a larger area.
- Layer with Greenery: For an extra festive touch, intertwine your hanging lanterns with faux garlands or sprigs of evergreen. This adds natural texture and depth to your glowing display.
Remember, the goal is to create a magical moment. Let your creativity guide you, and don’t hesitate to experiment with different placements until you find the perfect arrangement that brings joy and light to your home this Christmas.
Safety Tips for Your Light-Up Decor
While these DIY light-up paper lanterns are generally very safe, it’s always wise to keep a few safety tips in mind to ensure a worry-free holiday season:
- Use Battery-Operated Lights ONLY: Never, under any circumstances, use real candles or any open flame inside paper lanterns. Only use battery-operated LED puck lights.
- Check Batteries Regularly: Ensure the batteries in your puck lights are fresh at the start of the season. If the lights dim significantly, replace the batteries promptly. Avoid mixing old and new batteries.
- Indoor Use Only: These paper lanterns are designed for indoor use. Exposure to moisture, wind, or extreme temperatures can damage the paper and the electronic components of the lights.
- Keep Away from Heat Sources: Avoid hanging lanterns directly near fireplaces, radiators, or other heat sources. While LED lights produce minimal heat, it’s best to err on the side of caution.
- Securely Hung: Ensure Command hooks are properly applied and fully cured before hanging the lanterns. Double-check that the lanterns are securely attached to prevent them from falling.
- Children and Pets: Keep lanterns out of reach of small children and pets, especially if they are prone to pulling or chewing on hanging objects. While the materials are non-toxic, small battery parts could be a choking hazard.
- Proper Storage: When the holiday season ends, remove the puck lights, collapse the lanterns, and store them in a dry, enclosed container to protect them from dust and damage, ensuring they are ready for next year.
By following these simple guidelines, you can safely enjoy the magical glow of your DIY Christmas lanterns throughout the entire festive period.
Frequently Asked Questions
Where did you buy your paper lanterns?
I purchased all of our original paper lanterns from World Market back in 2021. They often have unique and beautiful designs. While specific styles can sell out, especially as Christmas approaches, some of the ones I used occasionally get restocked. I’ve included direct links to the exact styles I could find that are currently in stock (as of December 2023) in the “Materials Needed” section above. It’s always a good idea to check their website early in the season!
How do you store these light-up lanterns after Christmas?
Storing these lanterns is incredibly easy, which is one of their many benefits! At the end of the holiday season, we simply take them down, remove the remote-controlled puck lights, and gently collapse the paper lanterns back into their flat, original packaging or a similar flat state. We then store them in a plastic storage bin along with our other cherished Christmas decorations. This method keeps them protected from dust and damage, ready to be reused year after year.
How do you turn the puck lights on and off if they are inside the paper lanterns?
The magic of these lanterns comes from using remote-controlled puck lights! Each set of puck lights typically comes with a small remote. This allows you to effortlessly turn all the lights on or off simultaneously, even if they are nestled deep inside the paper lanterns. Many remotes also offer additional features like dimming options, different light colors (if applicable), and even a timer function, which is fantastic for setting them to automatically turn off after a few hours, conserving battery life.
Your specific paper lanterns are sold out or no longer available. Do you have any other suggestions?
Absolutely! Don’t let sold-out items dampen your holiday spirit. I highly recommend this set of 10 light-up paper lanterns available on Amazon. We’ve used them in another area of our home, and honestly, I love them just as much, if not more, than the ones in our dining room! They offer a similar magical effect and are a fantastic alternative. For more details and inspiration on using these, be sure to check out my dedicated post on stunning light-up paper snowflake lanterns.
How long do the batteries in the puck lights typically last?
Battery life can vary depending on the brand of puck light, the quality of the batteries, and how often you use them. Generally, with daily use for several hours, you can expect the batteries (usually AAA or AA) to last anywhere from 50 to 100 hours. If your puck lights have a timer function, utilizing it for 4-6 hours a day can significantly extend battery life throughout the holiday season, meaning fewer battery changes!
Can these lanterns be used outdoors?
These particular paper lanterns are designed for indoor use only. Paper is not weather-resistant and can be damaged by moisture, wind, or direct sunlight. While the puck lights are battery-operated, they are generally not waterproof. For outdoor holiday lighting, look for products specifically designed and rated for exterior conditions to ensure durability and safety.
More Seasonal and Holiday Decorating Inspiration
SEE ALL HOLIDAY POSTS
-
The Most Realistic Faux Garlands for 2025
-
Stunning Light-Up Paper Snowflake Lanterns
-
How to Decorate Bedroom Doors to Look Like Apartment Doors
-
DIY Santa Sacks Your Kids Will LOVE!
-
Magical Light-Up Paper Christmas Lanterns
-
Inspiring Front Porch Christmas Decorations & Tips
Other posts you may enjoy for more DIY and decor inspiration:
- Creative DIY Advent Calendars for a Festive Countdown
- How to Make Adorable Christmas Reindeer from Logs!
- Cheery and Bright Christmas Mantel Ideas to Spark Joy
- Fun and Festive Advent Calendar Ideas for Everyone
- 6 Secrets to Effortlessly Elevate Your Christmas Aesthetic
Transform Your Home with Designer in a Binder®
Curious about my unique approach to transforming rooms and spaces within our home? If you’re looking for a structured, simple, and affordable way to decorate any room, then you absolutely must check out Designer in a Binder®. It’s my proven system designed to help you create cohesive, beautiful spaces with confidence, without the need for an expensive interior designer.
And if you want exclusive content, behind-the-scenes sneak peeks into new projects, and early access to my best tips and tricks, be sure to subscribe to my newsletter before you head out! Join our community and never miss a dose of design inspiration and DIY magic.