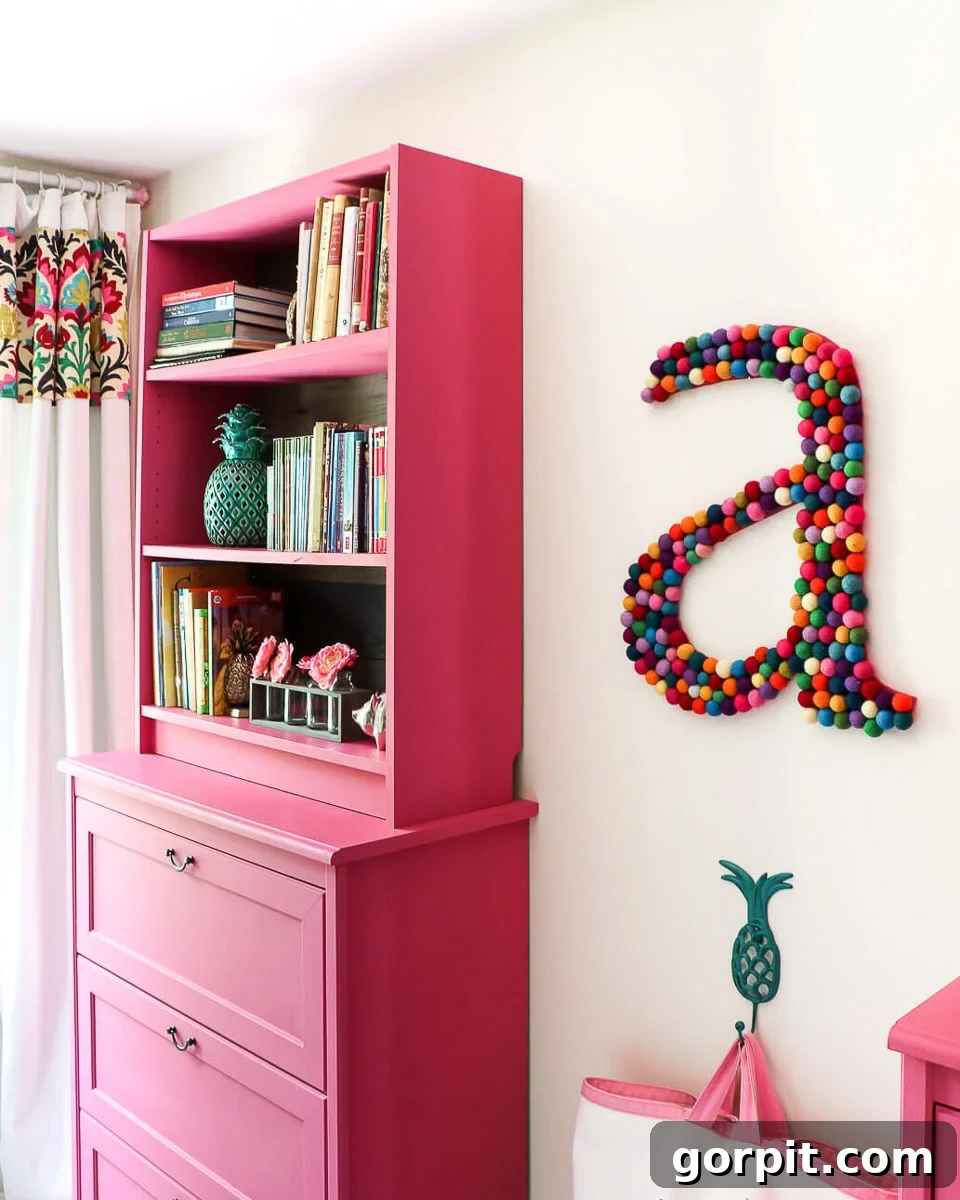
Transform your living space with this incredibly simple, yet stunning and highly functional IKEA Billy bookcase hack! Discover how basic IKEA pieces can be ingeniously combined and customized to achieve the sophisticated aesthetic of high-end, custom built-in shelving, providing abundant storage and unparalleled style without breaking the bank.
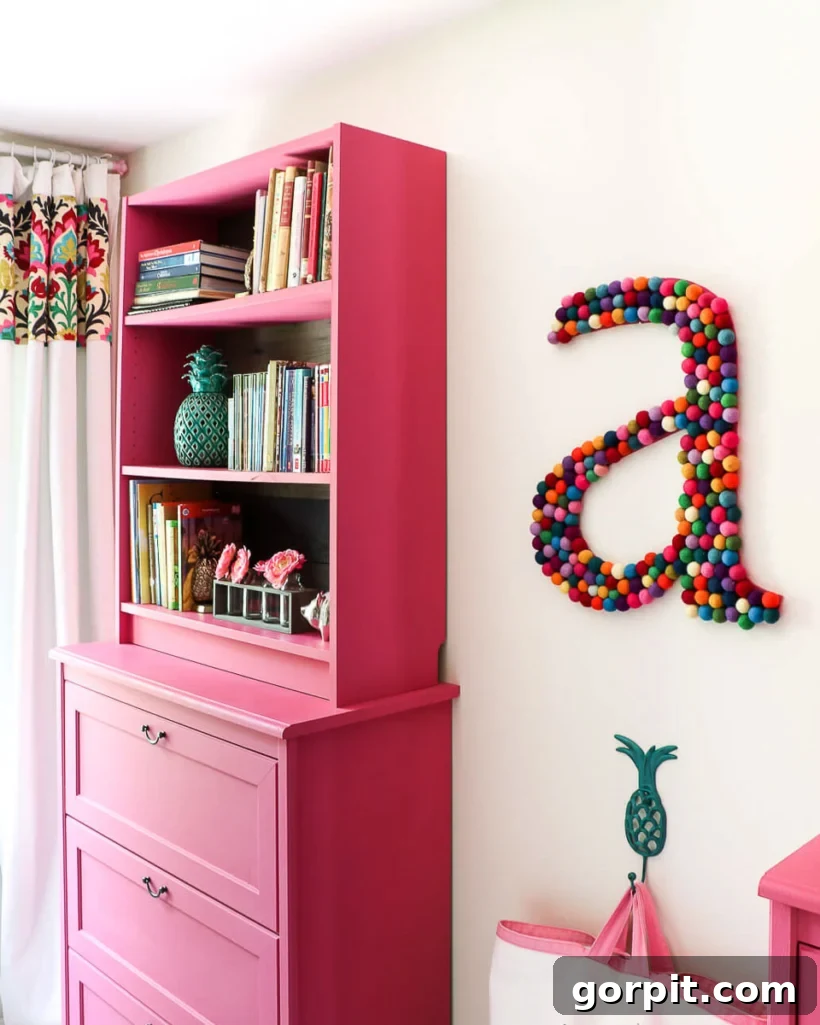
Do you admire the elegance of custom-built furniture but find its price tag a formidable obstacle? You’re not alone! Many homeowners dream of personalized, integrated storage solutions but are constrained by budget realities. This common dilemma led us to explore creative avenues for achieving a high-end look using affordable components.
Almost seven years ago, the news of expecting twins brought immense joy, swiftly followed by the daunting realization of purchasing everything in duplicate. Two cribs, two high chairs, double the clothes – the sheer volume of necessities was overwhelming for our budget. As someone who values tidiness and impeccable organization, I knew that robust, efficient storage would be paramount for our girls’ nursery, and later, their bedrooms. This pressing need for smart, economical storage solutions naturally steered us toward IKEA, a treasure trove of versatile and budget-friendly furniture. We embarked on a brainstorming journey, determined to leverage IKEA’s accessible pieces to craft the stylish, organized space we envisioned without financial strain.
Why IKEA Hacks Offer Unbeatable Value
Our primary goal was straightforward: to replicate the seamless, integrated appearance of custom built-in units in a manner that was both straightforward to execute and highly economical. IKEA furniture stands out as an exceptional choice for home renovators and DIY enthusiasts seeking to reduce the overall expenditure on furnishings and home enhancements. Their product lines are renowned for their modern, clean designs, often featuring practical elements like adjustable shelves and pre-drilled holes, making them inherently easy to modify and adapt.
The beauty of revamping IKEA pieces lies in their inherent potential for transformation. A simple change of hardware, the addition of glass doors, or a fresh coat of paint can elevate a basic item into a bespoke masterpiece. This project, for instance, demonstrates how a carefully chosen paint color and a unique backer board can completely redefine the character of standard bookcases and dressers. IKEA furniture strikes a perfect balance: it’s durable enough to withstand years of use, yet affordable enough that you feel comfortable experimenting, altering, and truly making it your own through DIY projects. This freedom to customize empowers you to create unique pieces that reflect your personal style, all while keeping costs in check.
Exploring the World of IKEA Hacks and This Unique Billy Bookcase Transformation
The DIY community is brimming with ingenious IKEA built-in hacks, showcasing the incredible versatility of their furniture lines. From transforming Kallax shelves into custom consoles to upgrading Pax wardrobes into dream closets, the possibilities are vast. However, amidst the wealth of creative ideas, we realized we hadn’t seen this particular IKEA Billy bookcase hack anywhere else. Inspired to innovate, we conceived and executed our own unique modification, resulting in a phenomenal storage solution that not only looks incredibly stylish but also provides an enormous amount of practical storage space for any room. This specific hack goes beyond basic modifications, introducing elements that significantly enhance both aesthetics and functionality. Read on to discover the detailed process of how we achieved this impressive transformation, turning simple IKEA components into a show-stopping feature.
This post contains some affiliate links for your convenience. Click here to read my full disclosure policy.
IKEA Billy Bookcase Hack: A Comprehensive Step-by-Step Tutorial
Ready to embark on your own IKEA transformation journey? This detailed tutorial will guide you through every step of creating a custom built-in look with IKEA Billy bookcases and dressers. The process is designed to be accessible for DIY enthusiasts of varying skill levels, promising a rewarding outcome that enhances your home’s aesthetic and storage capacity.
Materials Needed
To recreate this beautiful and functional built-in unit, gather the following supplies. We’ve included links to specific products for your convenience, along with alternatives where appropriate.
- Paint: Amy Howard at Home One Step Paint (We used the vibrant color “Drama Queen.” This paint is excellent for IKEA laminate as it often requires no priming or sanding, simplifying the process significantly.)
- Bookcases: Two IKEA Billy Bookcases (Opt for the 41 3/4 inch height, which provides a balanced proportion when stacked on top of a dresser.)
- Dressers: Two dressers or chest of drawers from IKEA. We originally used the Aspelund chest of drawers, which has since been discontinued. However, the IKEA Songesand 4-drawer chest is a very similar and excellent alternative. See our detailed suggestions below for more suitable options.
- Fastening Tool: Staple gun (We highly recommend this specific model as it operates without the need for an air compressor, making it ideal for home DIY projects.)
- Cutting Tools: Compound miter saw or a hand saw and miter box (Essential for precise cuts on your backer board material.)
- Router (Optional, but Recommended for Custom Backer): Palm router (Used to remove the existing backer board channel for a flush custom back.)
- Custom Backer Material (Optional, but Highly Recommended): Pallet wood (This adds a unique, rustic, and high-end touch. Ensure wood is clean and free of pests.)
- Wood Treatment (Optional, for Pallet Wood): Amy Howard at Home Vintage Wood wood treatment (This product magically transforms raw wood into a beautifully weathered, aged finish.)
- General DIY Tools: Measuring tape, level, pencil, painter’s tape, sandpaper (fine-grit), wood glue (if assembling new pallet wood pieces).
Suggested Chest of Drawers/Dressers for This IKEA Billy Bookcase Hack
As mentioned, the exact dresser we utilized is no longer available. However, the key to a successful hack is choosing a chest of drawers that is at least as wide as your Billy bookcases, which typically measure 31 1/2 inches wide. For optimal aesthetic balance and functionality, aim for a dresser that is approximately 32 inches wide and around 40 inches tall. This proportion ensures the assembled unit appears cohesive and custom-made. Here are some currently available IKEA dressers that are suitable for this project:
- IKEA Songesand 4-drawer chest: This model is very similar in dimensions and style to our original dresser. It boasts the same height, making it an ideal choice. While our previous dresser featured three deep drawers, the Songesand offers four smaller drawers, which can often be more practical for organizing various items.
- IKEA Gullaberg 8-drawer chest: This dresser is taller than the one we used, making it an excellent option if your room features higher ceilings. Taller dressers can create a more imposing and grand built-in look in spaces with ample verticality.
- IKEA Gullaberg 6-drawer chest: Similar to its 8-drawer counterpart, this chest provides extra height, which is advantageous for rooms with elevated ceilings, contributing to a more dramatic and expansive built-in appearance.
Detailed Steps to Create Your Custom Built-In
1) Prepare and Paint Your IKEA Furniture Pieces
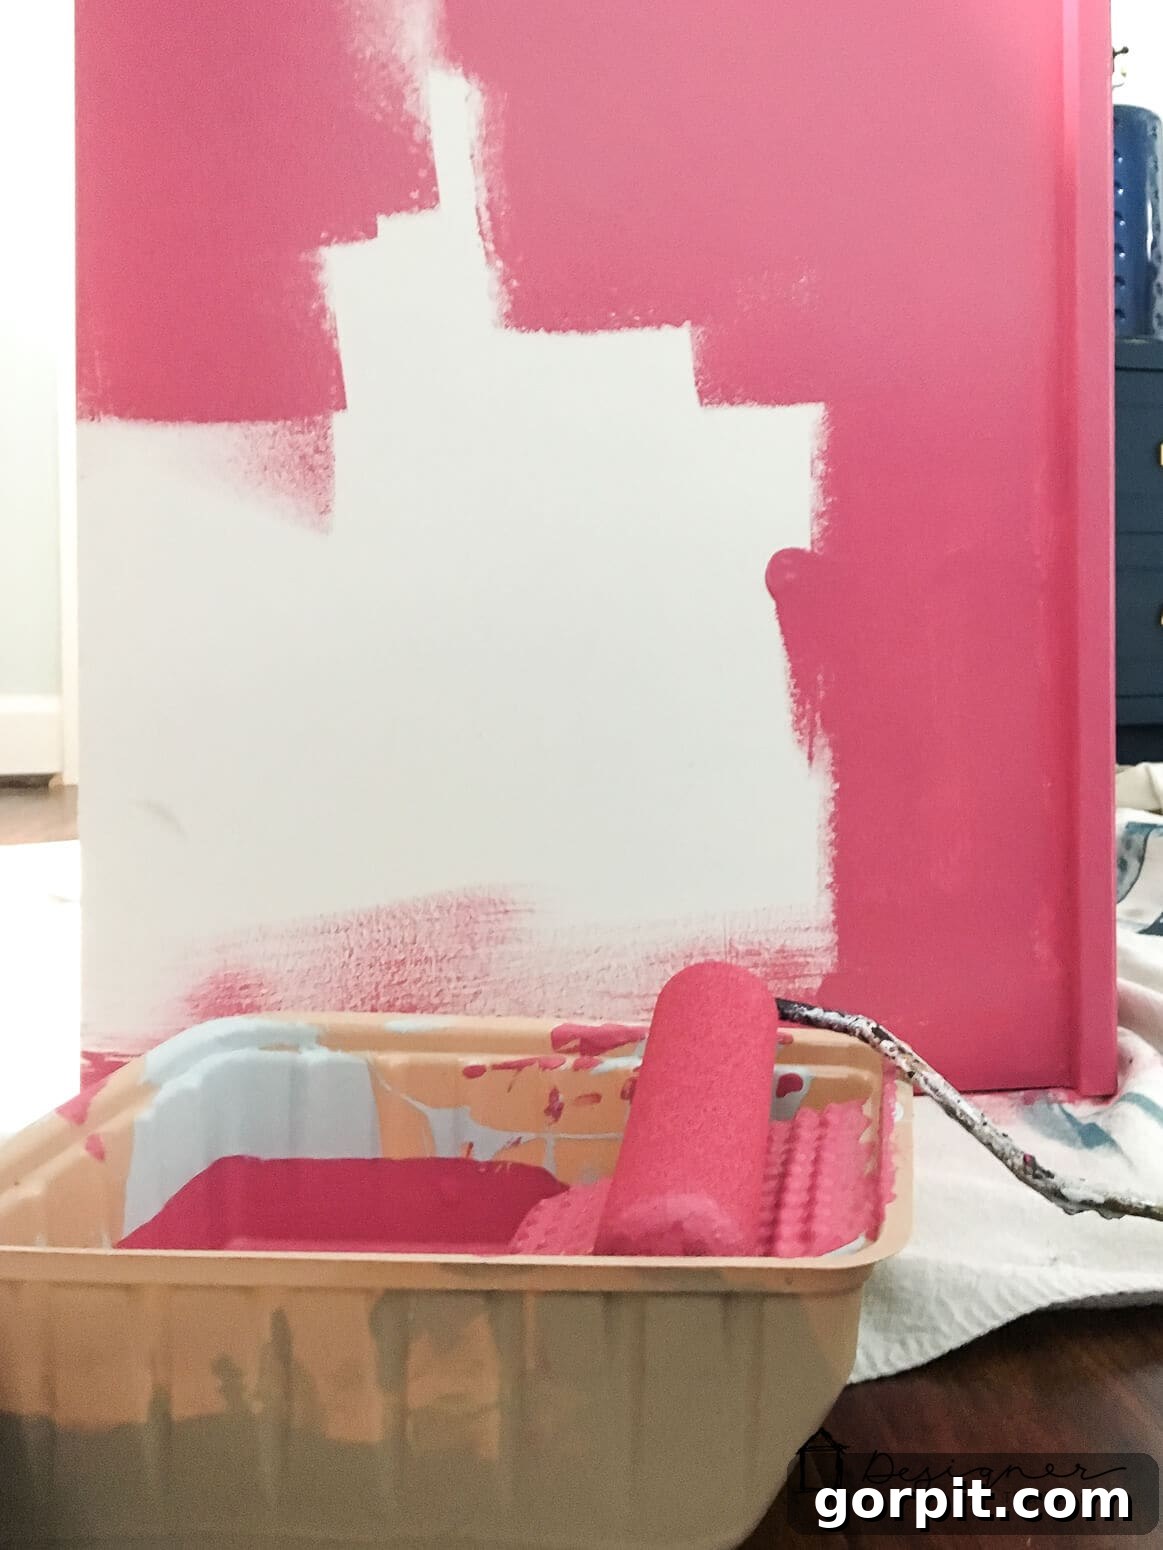
The first crucial step is to meticulously paint your entire dresser and bookcase. This includes the visible exterior surfaces and, if you plan to retain it, the backer board. If you intend to replace the standard backer board with custom pallet wood or another material, you may skip painting the original backer. Achieving a durable, professional finish on IKEA laminate furniture requires a specific approach to ensure proper paint adhesion.
IMPORTANT NOTE ABOUT PAINTING IKEA FURNITURE
IKEA laminate furniture demands a specific painting technique. If not followed correctly, the paint will not adhere properly and will likely peel or chip off over time. This detailed guide provides comprehensive instructions on how to paint IKEA furniture effectively and highlights common mistakes to avoid. By following these steps, you’ll achieve a beautifully smooth, durable finish that typically requires only two coats of paint, ensuring your hard work lasts for years.
2) Treat Your Pallet Wood for a Weathered Look (Optional Backer Board Upgrade)
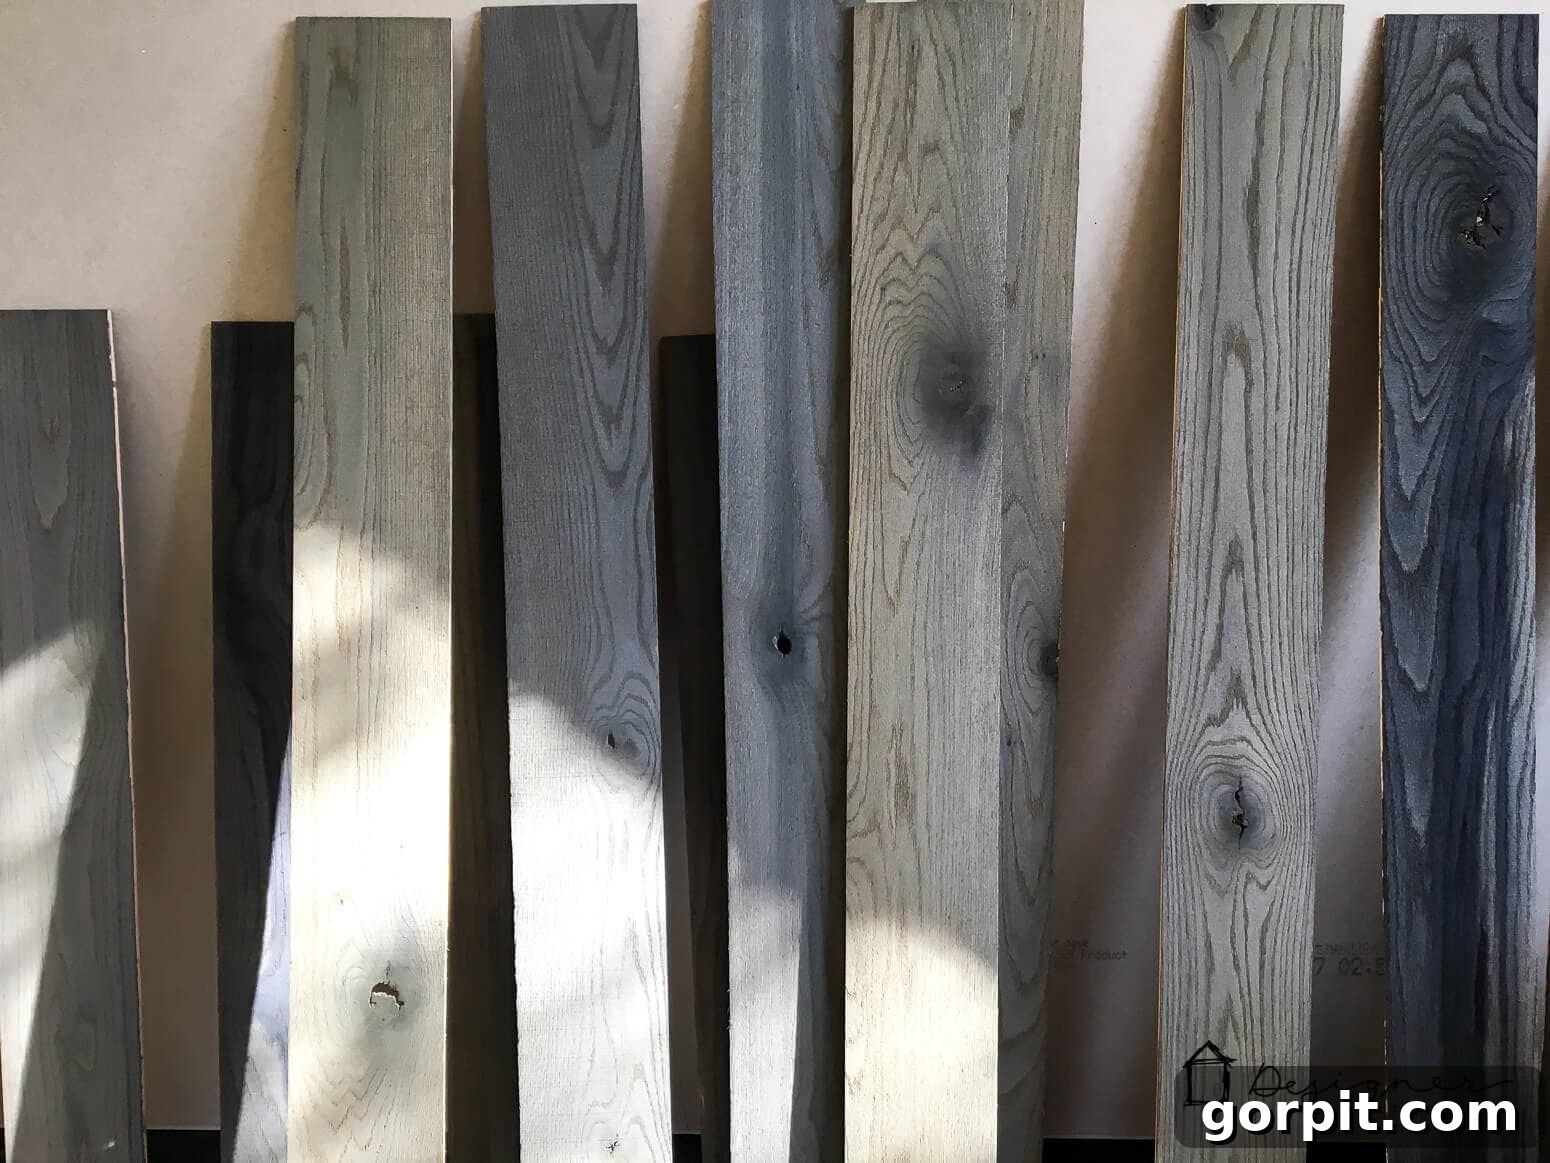
If you’ve opted to replace the flimsy original backer board with pallet wood for a more substantial and visually appealing backdrop, this step is for you. We used seven pieces of pallet wood per bookcase. Apply Amy Howard at Home Vintage Wood treatment to your pallet wood. We found an inexpensive boar’s hair brush to be ideal for this application; remember to always brush with the grain of the wood for the best results.
This product is truly remarkable! It allows you to bestow an ordinary piece of raw wood with a beautifully weathered, aged appearance, bypassing the lengthy natural aging process. Upon initial application, the treatment subtly darkens the wood. However, as it reacts with the wood and begins to dry, a magnificent gray patina develops. The beauty of this process is that each piece of wood responds uniquely, resulting in a varied and authentic distressed look, adding incredible character to your built-ins.
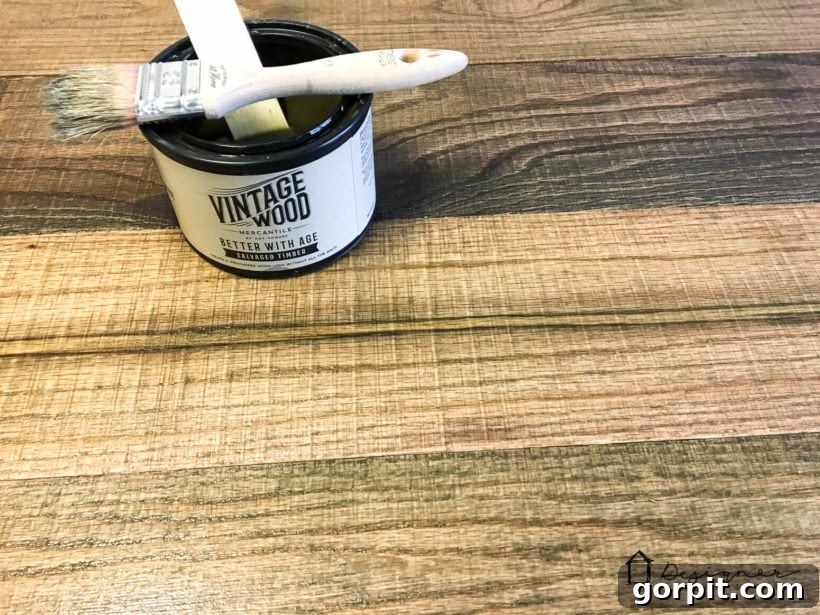
Here’s a glimpse of our pallet wood pieces as they were drying. The color transformation between applications and the final dry state is quite dramatic and truly enhances the aesthetic appeal.
3) Prepare the Bookcase for the Custom Backer Board
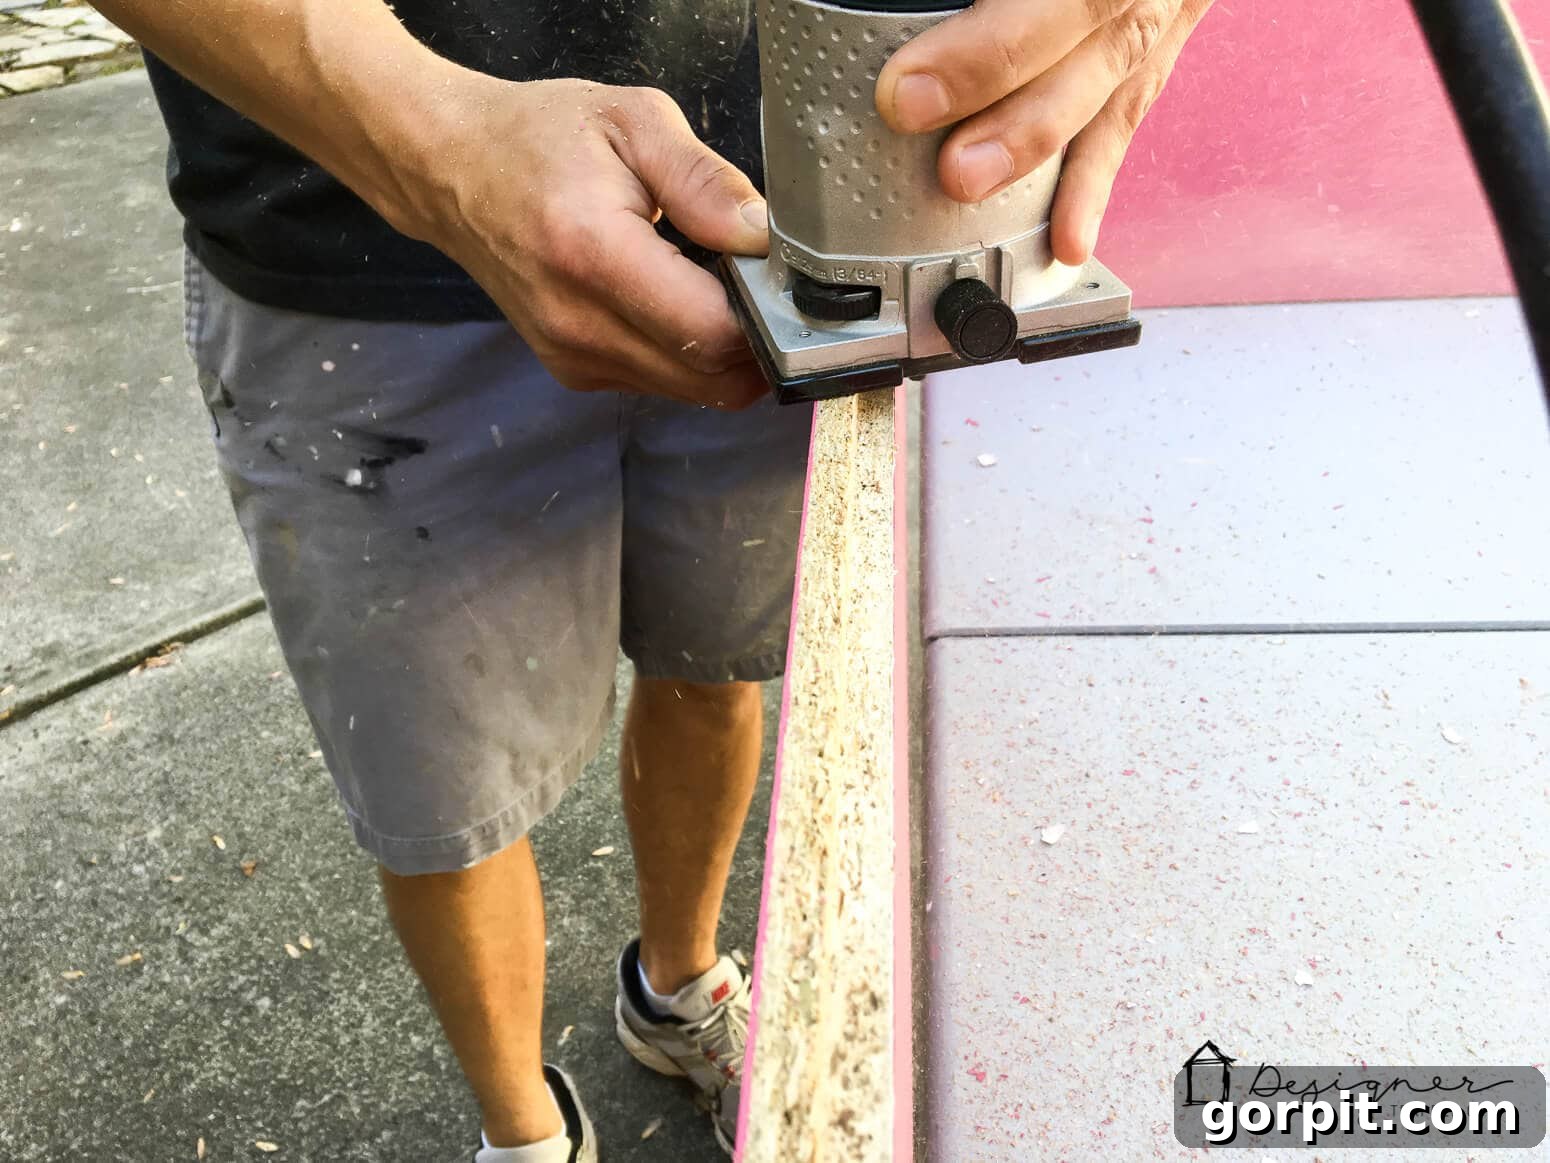
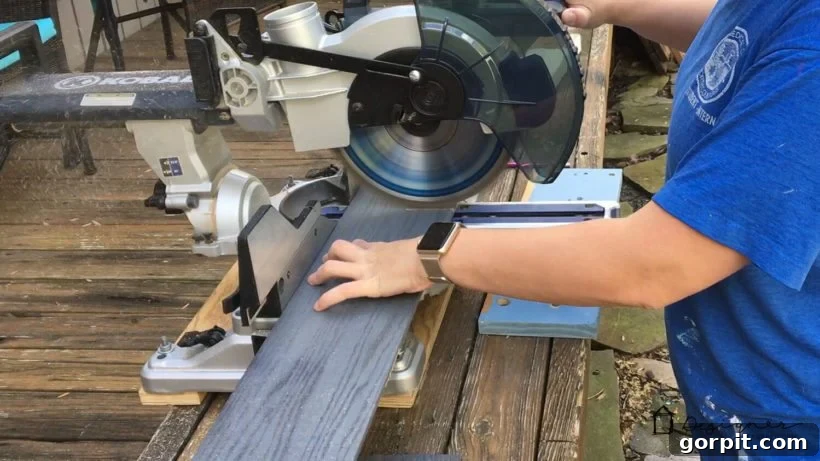
If you’ve decided to replace the standard IKEA backer board with your treated pallet wood, you’ll need to modify the Billy bookcase frame slightly. Use a palm router equipped with an appropriate bit to carefully remove the shallow channel located in the back of your Billy bookcase. This channel is designed to house the original thin backer board. By removing it, you create a flush surface that allows your custom pallet wood to sit neatly against the back of the bookcase, providing a more integrated and robust look. After removing the channel, precisely measure the internal distance of your bookcase opening. This measurement will determine the exact length to which your pallet wood pieces should be cut. Use a compound miter saw or a reliable hand saw with a miter box for accurate, clean cuts.
4) Secure Your Custom Backer Board or Original Backer in Place
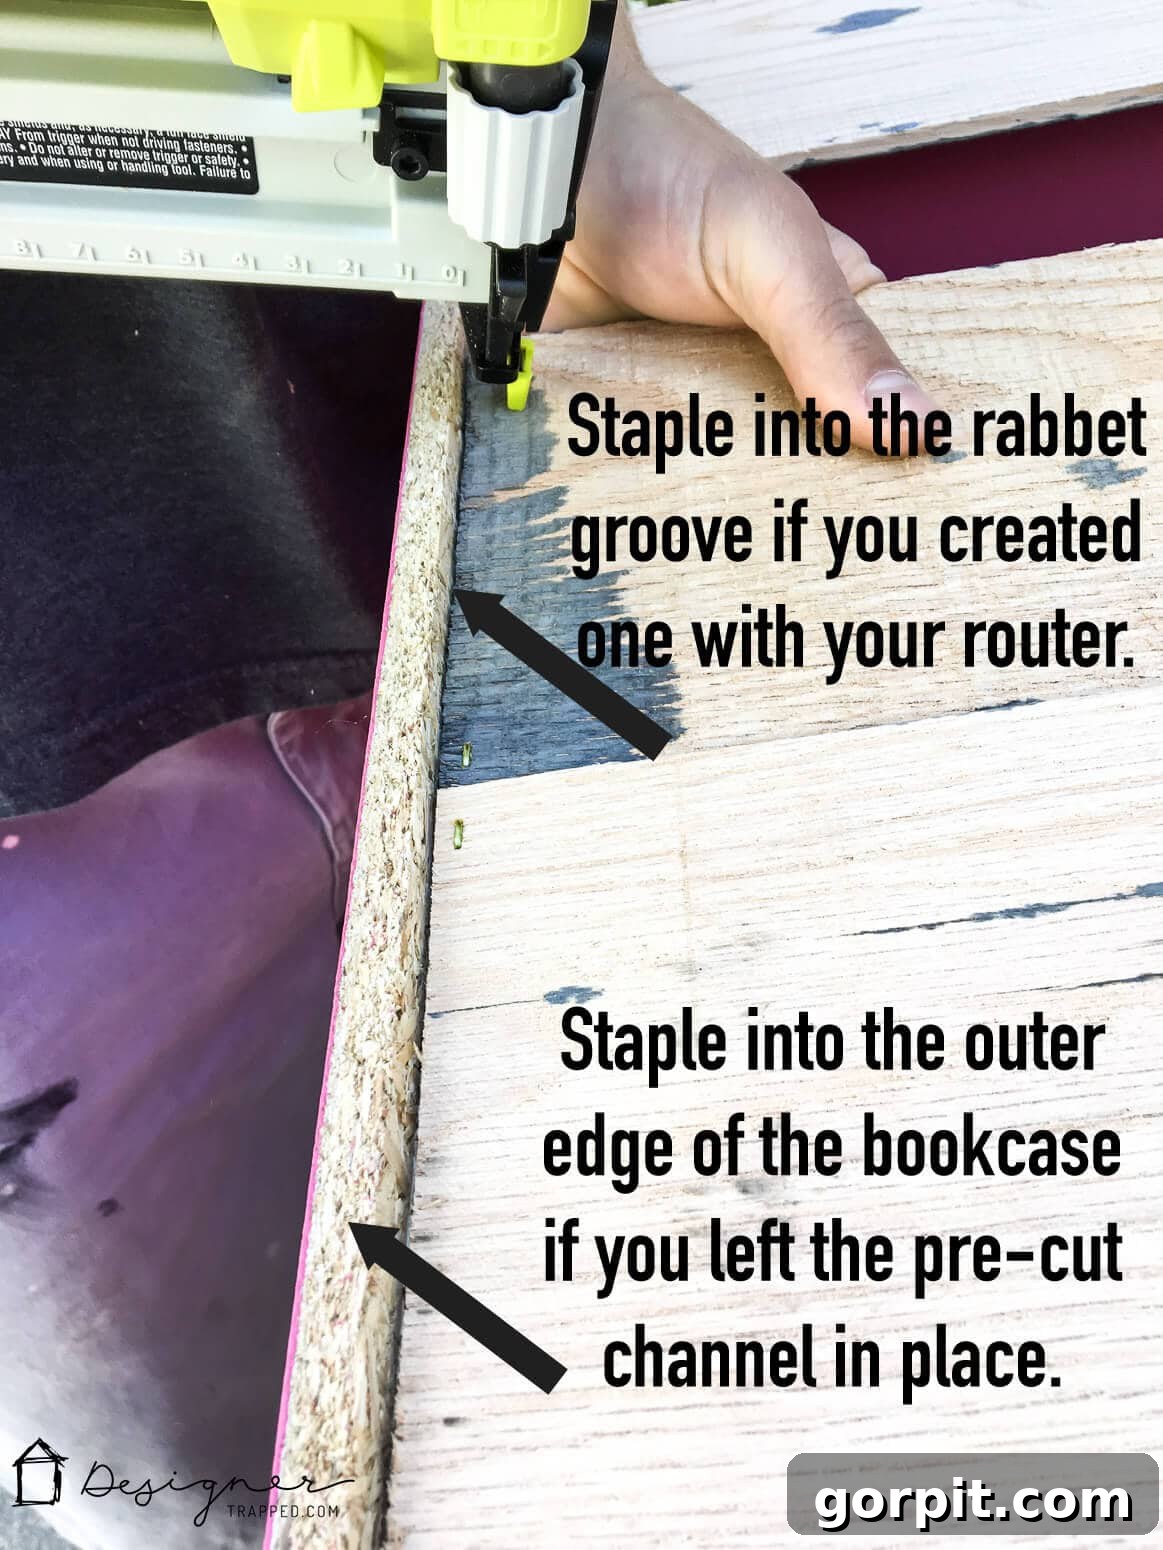
Once your pallet wood pieces are cut to the precise length and treated (if applicable), it’s time to secure them. Using your staple gun, firmly attach each piece of pallet wood directly to the back of the bookcase. If you opted not to remove the channel with a router, simply staple the original backer board into the outer edge of the bookcase. Ensure that the staples are evenly spaced and penetrate securely, holding the backer material taut and flush against the frame. This step is crucial for the structural integrity and finished appearance of your built-in unit.
5) Install Your Dressers and Secure Bookcases
With your painted and backed bookcases ready, proceed to install your chosen dressers. Before stacking, it is paramount to secure each dresser to the wall using anti-tipping hardware. This safety measure is non-negotiable, especially in homes with children or pets, preventing accidental tipping. Once the dressers are firmly in place, carefully lift and stack your prepared Billy bookcases directly on top of them. Ensure that the base of each bookcase aligns perfectly with the top edge of the dresser, creating a seamless, custom look. After aligning, secure the bookcases to the wall with anti-tipping hardware as well. For added stability and a truly integrated appearance, consider using small L-brackets or wood screws to connect the bookcases to the dressers from the inside, if possible. Once everything is secured, step back and admire the transformation!
How stunningly upscale does this IKEA Billy bookcase hack look? And perhaps even more impressively, can you believe how robustly this furniture has held up after seven years of continuous use? We are absolutely thrilled with its enduring quality and functionality!
6) Elevate with Finishing Touches for a True Custom Look (Optional Enhancements)
To further enhance the bespoke appearance of your IKEA built-ins, consider adding some architectural details. Applying crown molding along the top edge of the bookcase can instantly elevate its aesthetic, creating a more finished and integrated look that extends visually to the ceiling. Similarly, installing base molding or skirting board where the Billy bookcase meets the top of the dresser will bridge the two pieces seamlessly, making them appear as a single, unified unit. For an even greater sense of custom craftsmanship, decorative trim pieces can be added along the sides of the bookcase, though the unit retains its charm and elegance even without these additional embellishments. Finally, to achieve a truly polished finish, use caulk to fill any visible seams or gaps between the furniture pieces and the wall. This small detail can make a significant difference, lending a professional, flawless appearance to your newly hacked built-ins.
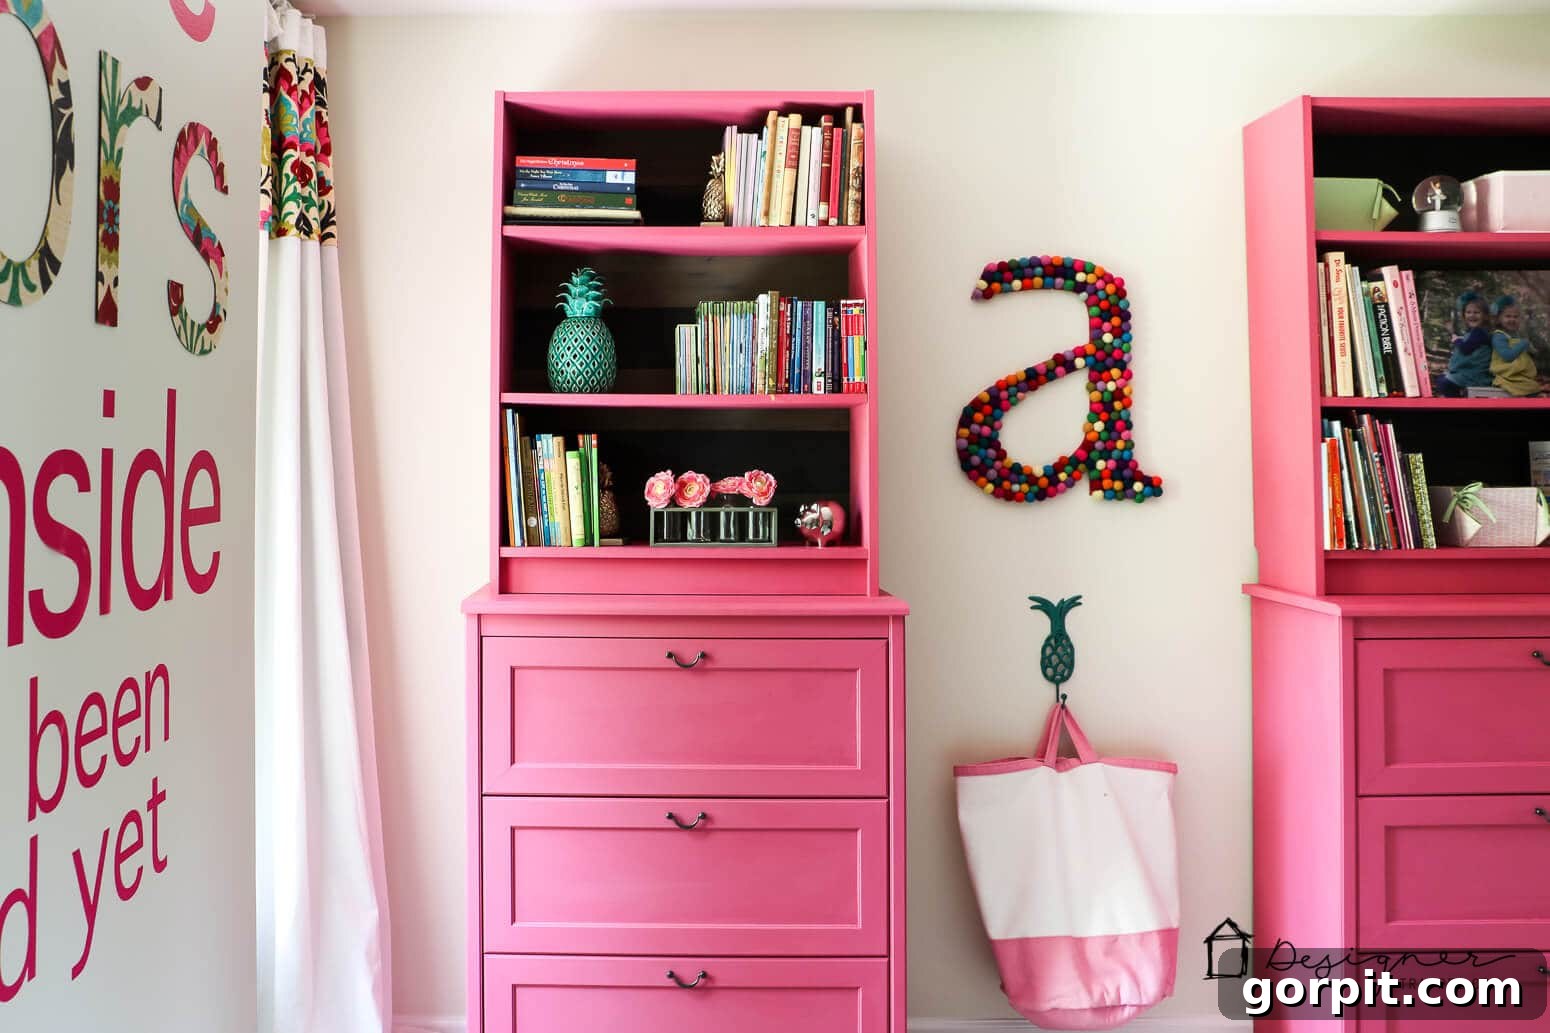
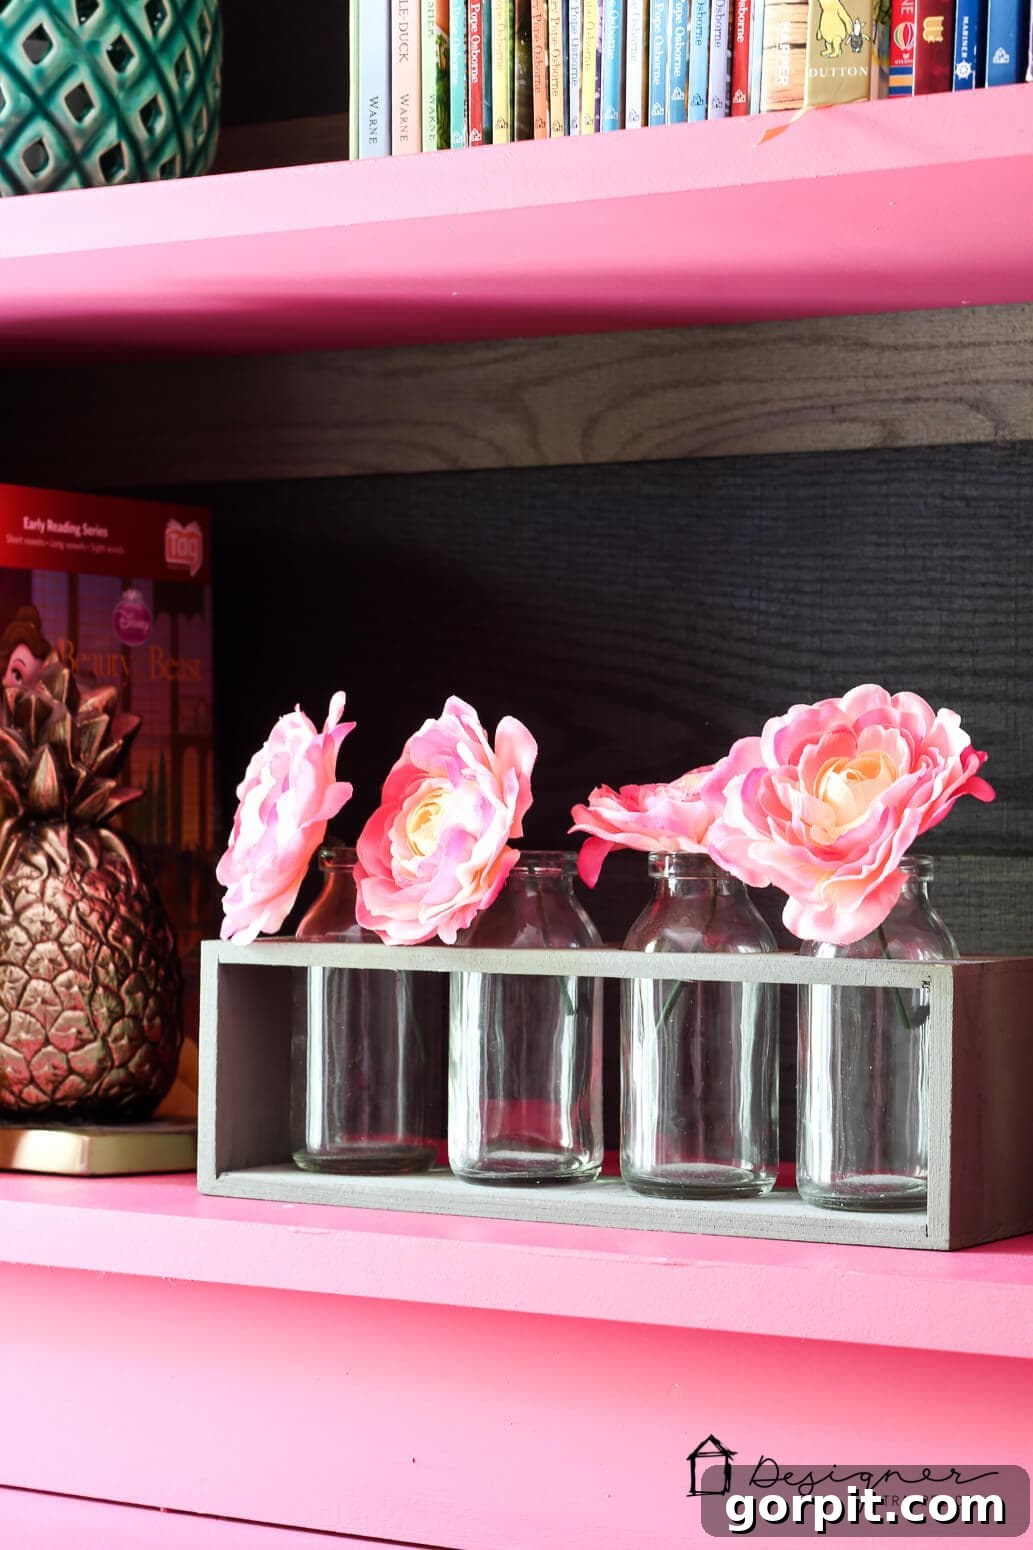
What truly sets this IKEA Billy bookcase hack apart and elevates it beyond standard modifications is the ingenious use of pine boards from pallet wood for the backer. That flimsy, tri-fold backer board typically supplied by IKEA often detracts from the overall quality, giving the furniture a less substantial, cheaper appearance. By replacing it with solid, treated wood, we’ve not only added structural integrity but also injected a unique, custom character that transforms the entire unit into a statement piece. It’s a small change with a monumental impact on the perceived value and design of the built-ins.
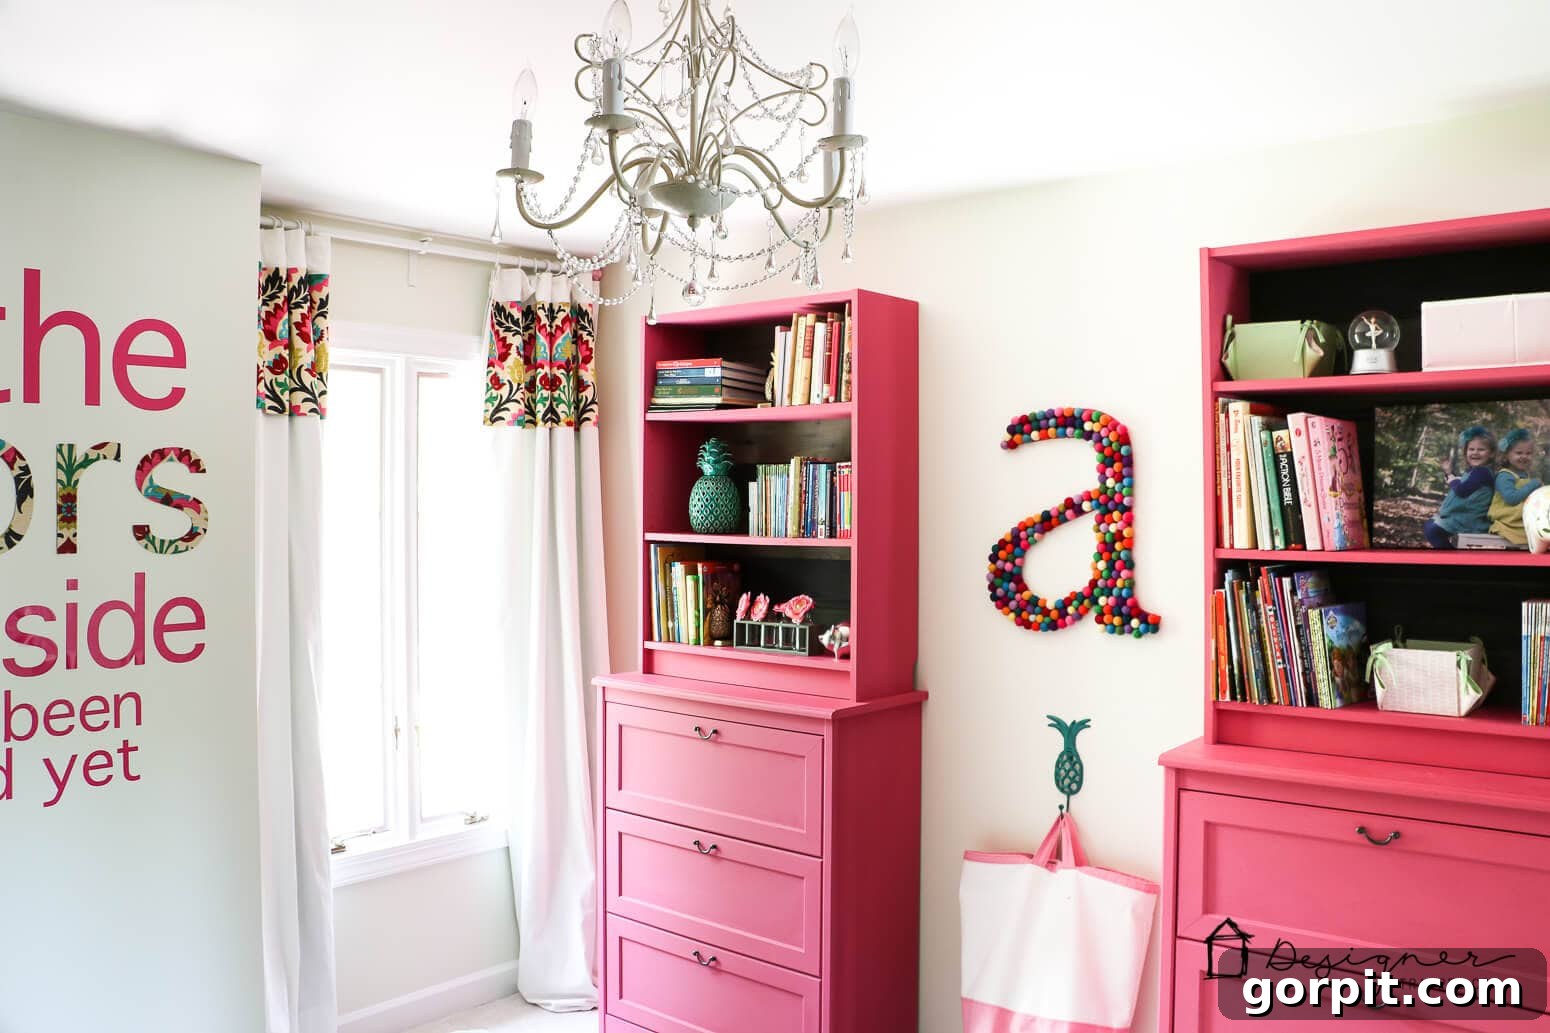
If this inspiring idea resonates with you, be sure to pin it for future reference! You can also find the complete tutorial for that adorable felt ball letter, a perfect complement to your newly customized IKEA pieces, right here on our site. It’s another simple DIY that adds a personalized touch to any room.
More IKEA HACK Posts
SEE ALL DIY POSTS
-
Creative Hacks for IKEA Bookshelves and Built-In Cabinets
-
Easy Furniture Repair to Match IKEA Paint Colors!
-
IKEA Billy Bookcase Hack for Loads of Storage
-
Affordable IKEA Desk Hacks You Will LOVE
-
How to Paint IKEA Furniture and Mistakes to Avoid
-
50 IKEA Hacks You Have to See to Believe
Other Posts You Will Enjoy:
- 16 Cool DIY Bunk Beds
- Avery’s Built-in Bunk Beds and Room Reveal!
- 16 Teen Bedroom Ideas for Boys + Girls
- Stylish Dressers We Love (That Don’t Break the Budget!)
Curious about our unique approach to transforming rooms and spaces within our home? Explore Designer in a Binder®, our signature system designed to simplify and streamline your decorating process.
For exclusive content, behind-the-scenes glimpses, and early access to our latest projects and tips, be sure to subscribe to our newsletter before you leave!