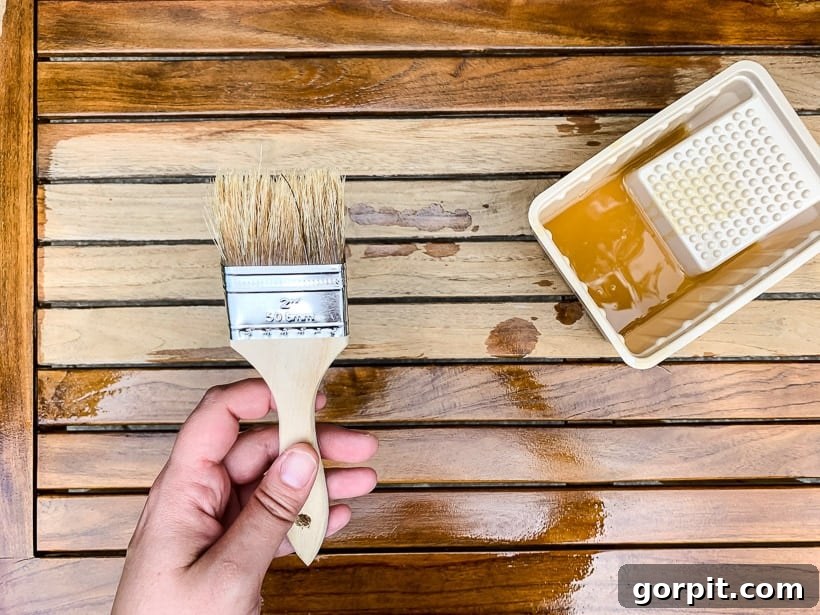
Is your once-stunning outdoor teak or acacia furniture looking neglected, weathered, and dull? You’re not alone! Many homeowners find themselves wondering how to bring their beautiful outdoor pieces back to life. After a couple of years of honest neglect, we faced the exact same challenge with our own teak dining set and acacia rocking chairs. The good news? We successfully restored them to their original glory, and they look absolutely gorgeous! This comprehensive guide will walk you through the simple yet transformative process of how to restore teak furniture and acacia furniture, ensuring your outdoor oasis remains a source of pride and comfort.
If you own outdoor teak furniture or acacia furniture, chances are you’ve experienced the frustrating reality of its beautiful golden hues fading to an uneven, often splotchy, gray. While teak is renowned for its durability and natural weather resistance, and acacia for its strength and appealing grain, even these resilient hardwoods require proper care and occasional restoration to maintain their aesthetic appeal and structural integrity. Our recent experience tackling this exact problem taught us invaluable lessons, making this guide a must-read for anyone looking to revitalize their cherished outdoor pieces. The process is not overly complicated, but it does require dedication and a bit of elbow grease – a truly worthwhile investment for furniture that will last for years to come.
This post contains some affiliate links for your convenience. Click here to read my full disclosure policy.
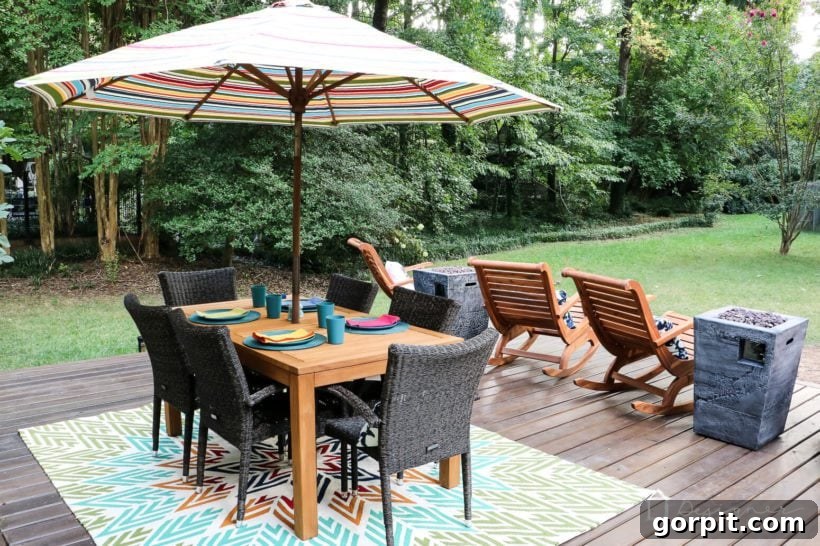
Our journey began a couple of years ago when we embarked on our deck makeover. We carefully selected a stunning teak dining table set and a pair of wonderfully oversized and incredibly comfortable acacia rocking chairs. We were absolutely thrilled with our choices, and they immediately transformed our deck into an inviting outdoor living space. You can glimpse their brand-new appearance below and discover more about our home and DIY projects in our full home tour.

However, we soon discovered an important detail after the fact: our beautiful new furniture wasn’t merely protected with natural oil. It had been coated with a tinted protector, which essentially acted like a semi-transparent deck stain. The manufacturer even sent a bottle of this protector with the table. This meant our furniture wouldn’t simply “gray out” gracefully as untreated teak often does. For those unfamiliar, raw teak is a dense, naturally oily hardwood that develops a beautiful silvery-gray patina over time when exposed to the elements. This natural graying is often sought after for its weathered, sophisticated look. Unfortunately, the tinted sealer on our furniture did not weather well, preventing this elegant natural transformation.
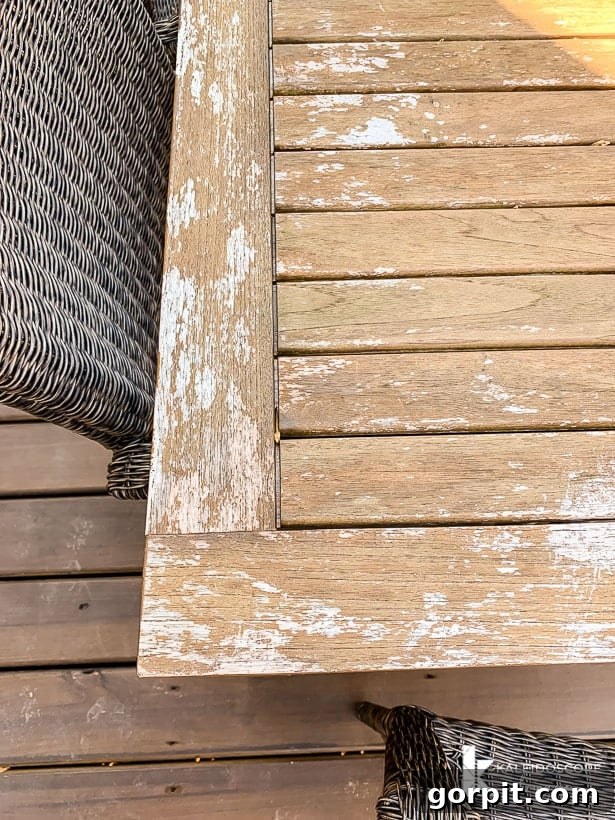
Two years passed, and our gorgeous outdoor furniture began to show significant signs of wear. The tinted coating had chipped and flaked off unevenly, creating a patchy, unattractive appearance. The natural graying process only occurred where the pigmented coating had eroded, leaving the rest of the wood in a state of disarray. While we admittedly didn’t reapply the tinted sealer during this period (which certainly didn’t help), in hindsight, we’re almost glad we didn’t. Reapplying it would have only made the eventual restoration process of getting down to the raw wood even more challenging. But I digress…
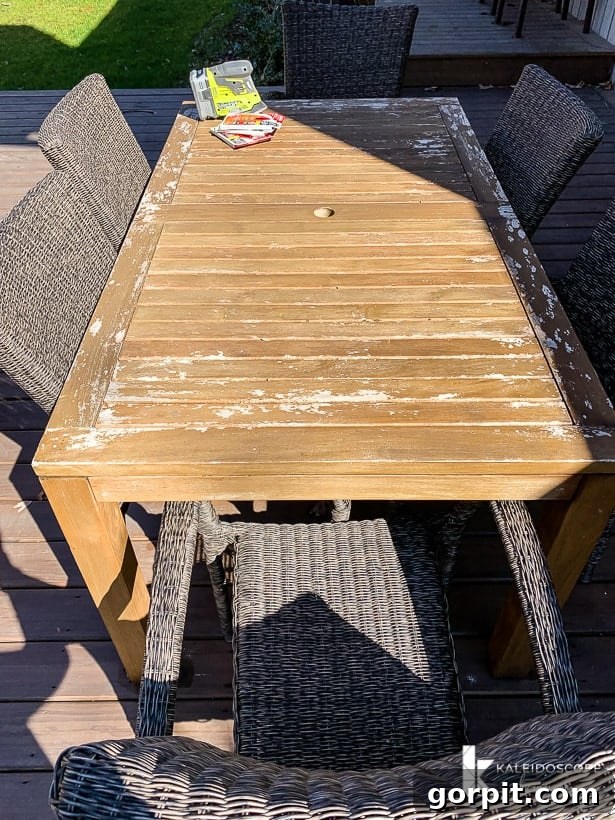
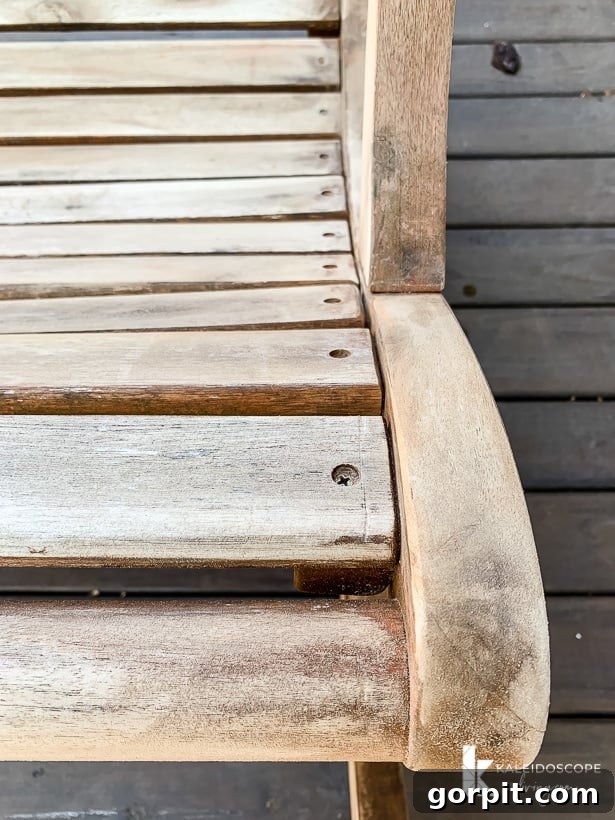
After enduring two harsh seasons, our outdoor teak table presented a less-than-ideal picture. The uneven weathering and peeling finish were starkly visible, making the pieces look tired and neglected, far from their initial charm.
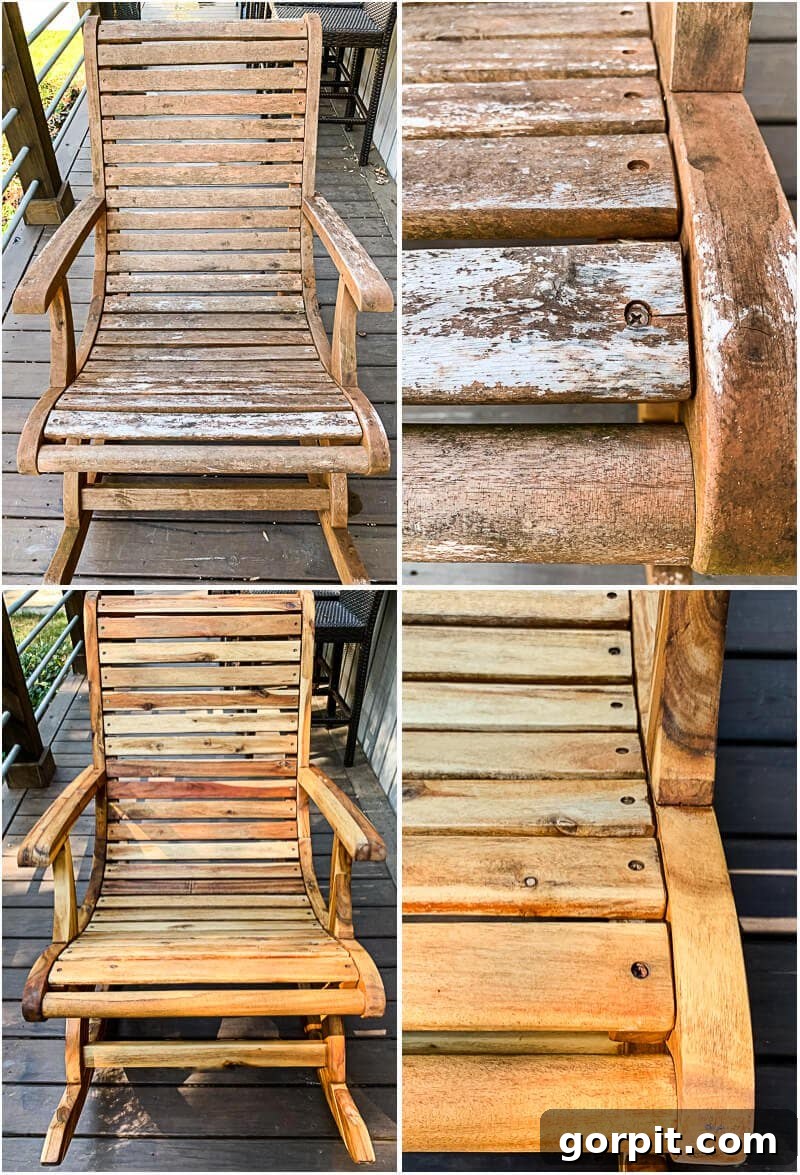
Our acacia rocking chairs suffered a similar fate. Their once rich, warm tones were now obscured by dullness and inconsistent fading, a truly unfortunate sight for such comfortable pieces.
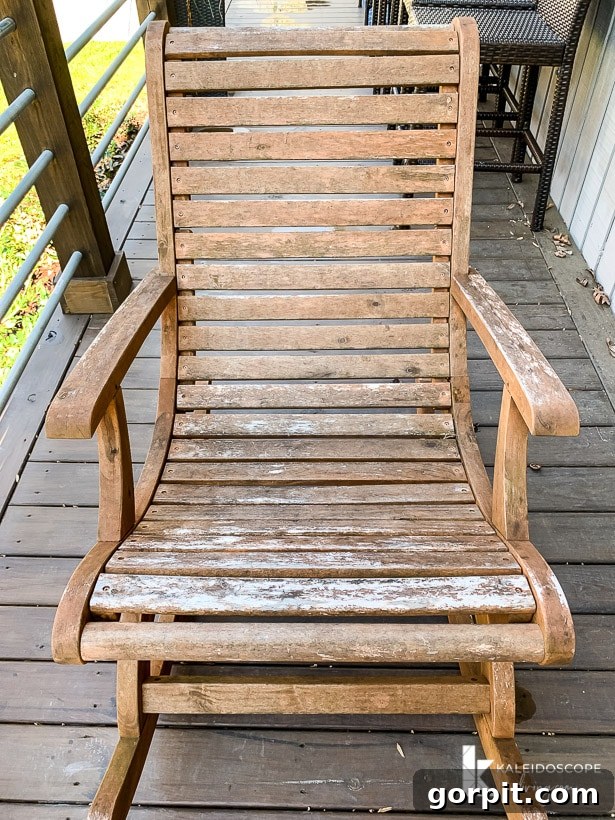
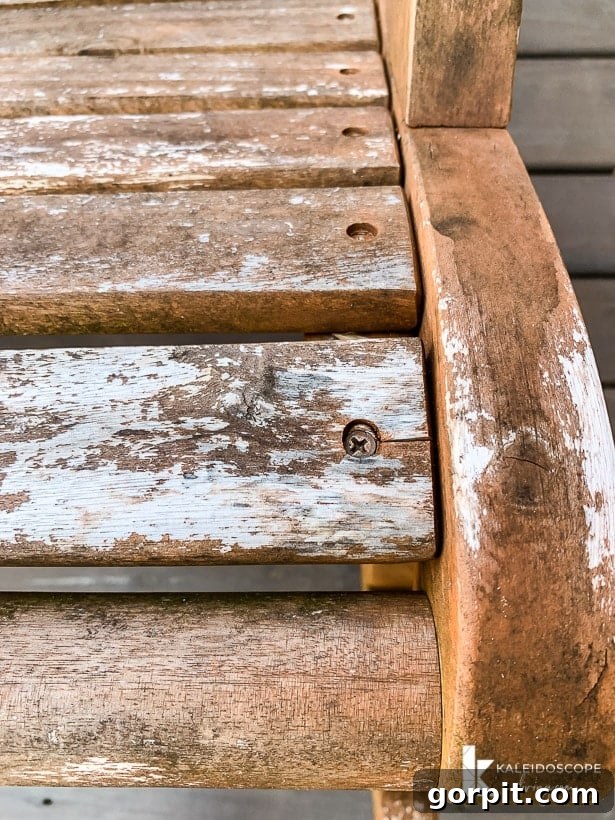
Now that you understand the background and the extent of the damage, let’s dive into the practical steps to transform your worn-out outdoor furniture into stunning, well-maintained pieces once again. This tutorial will empower you to restore the beauty of your teak and acacia furniture, ensuring they remain cherished parts of your outdoor living space for years to come.
How to Restore Teak and Acacia Outdoor Furniture: A Complete Guide
Essential Tools & Materials to Restore Teak and Acacia Furniture
Before you begin your restoration project, gather all the necessary tools and materials. Having everything on hand will ensure a smooth and efficient process.
- Sandpaper: You’ll need a range of grits. Start with a coarser grit (e.g., 80 or 100) for removing old finishes and heavy weathering, then progressively move to finer grits (e.g., 120-150, then 180-220) for a smooth finish.
- Electric Corner Sander: Ideal for reaching tight corners and intricate details on your furniture. This is a game-changer for chairs with curves and angles.
- Orbital Sander: Highly recommended for larger, flat surfaces like tabletops. An orbital sander significantly speeds up the sanding process and ensures an even finish. While hand sanding is possible, it is incredibly time-consuming and often yields less consistent results, especially for extensive restoration.
- Pressure Washer (optional, but highly recommended): A pressure washer makes quick work of cleaning off sawdust and stubborn dirt, preparing the wood perfectly for the next step. If you don’t have one, a strong garden hose with a spray nozzle will suffice, though it may require more effort.
- Teak Oil: This is the nourishing finish that will bring your wood back to life. We used two gallons of Watco Teak Oil for our four oversized rocking chairs and dining table, applying two generous coats to achieve a deep, lustrous finish. Teak oil penetrates the wood, enhancing its natural color and providing protection.
- Clean Rags or Applicator Pads: For applying the teak oil. Ensure they are lint-free.
- Safety Gear: Don’t forget safety glasses, a dust mask (especially for sanding), and gloves.
Step-by-Step Guide: How to Restore Teak and Acacia Furniture
Step 1: Thorough Sanding to Bare Wood
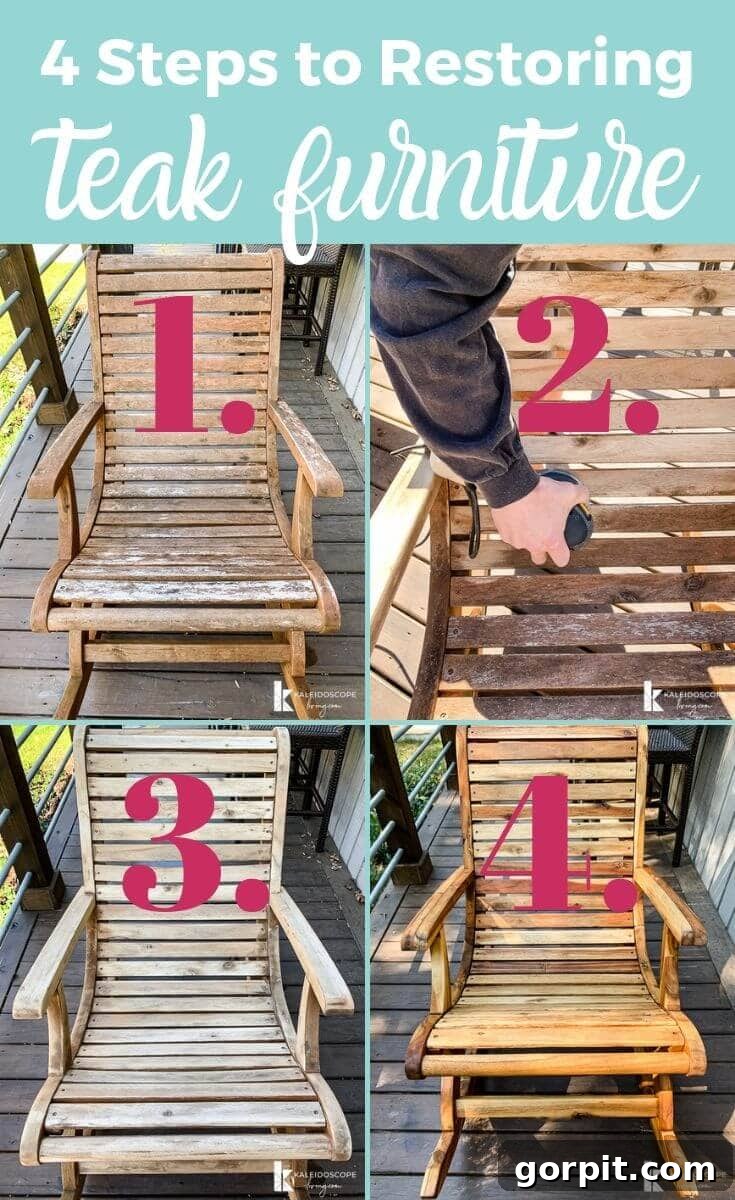
The first and most crucial step in restoring your outdoor furniture is to sand it down to expose the raw wood surface. This step removes any old, peeling finishes, weathered gray layers, and imperfections, creating a clean canvas for your new protective oil. For flat surfaces like tabletops, an orbital sander will make this task relatively quick and easy. For curved components, intricate details, or the many angles found on rocking chairs, an electric corner sander (or detail sander) is invaluable. Begin with a coarser grit sandpaper (e.g., 80 or 100-grit) to effectively strip away the old coating and weathered wood. Once you’ve removed the bulk of the old finish, progress to a medium grit (120-150) to smooth out any sanding marks, and finally, finish with a fine grit (180-220) to achieve a beautifully smooth, ready-to-oil surface. Remember to sand with the grain of the wood to prevent scratches. This phase can be time-consuming, particularly for multiple pieces with complex designs, but patience here ensures a superior final result. See how much better our chairs looked even after just sanding!
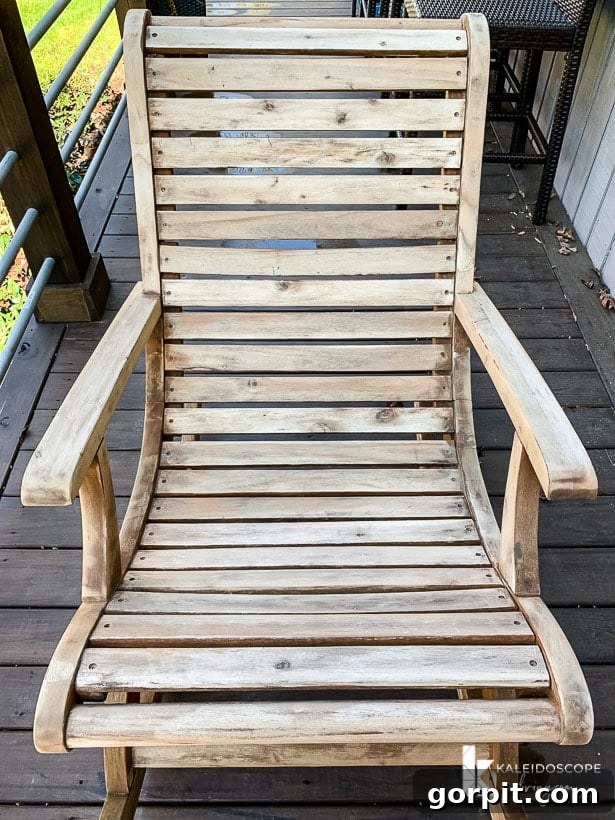
Step 2: Deep Cleaning and Washing
Once all the sanding is complete, your furniture will be covered in a fine layer of sawdust, and possibly some lingering dirt. It’s crucial to thoroughly clean the pieces before applying any oil. The most effective way to do this is with a pressure washer, which can quickly and efficiently remove all debris from the wood grain. Hold the pressure washer nozzle at a safe distance to avoid damaging the wood, and work methodically across all surfaces. If a pressure washer isn’t available, you can use a strong garden hose with a spray nozzle and a stiff brush. Scrub the furniture with a mild soap solution (like dish soap and water) or a specialized wood cleaner, then rinse thoroughly until all soap residue and sawdust are gone. Ensure the water runs clear from all surfaces, indicating a clean finish.
Step 3: Complete Drying
After washing, it is absolutely essential to allow your furniture to dry completely. This isn’t a step to rush. Depending on the humidity and sunlight, this can take several days. If the wood retains any moisture, the applied oil will not penetrate correctly, leading to an uneven finish and potential issues like mildew or rot trapped beneath the new coating. Choose a period with several sunny, dry days for this step. If rain is expected, move your furniture indoors or cover it completely with a waterproof tarp, ensuring adequate airflow underneath to prevent condensation. We carefully timed our project to take advantage of a stretch of warm, sunny weather, allowing our pieces to air dry naturally outdoors.
Step 4: Nourishing with Teak Oil
With your furniture completely dry and clean, you are now ready for the most rewarding step: applying the teak oil. Teak oil is specifically formulated to penetrate deeply into dense hardwoods like teak and acacia, replenishing their natural oils, enhancing their rich color, and providing crucial protection against UV rays and moisture. It brings out the stunning natural grain and gives the wood a beautiful, warm glow.
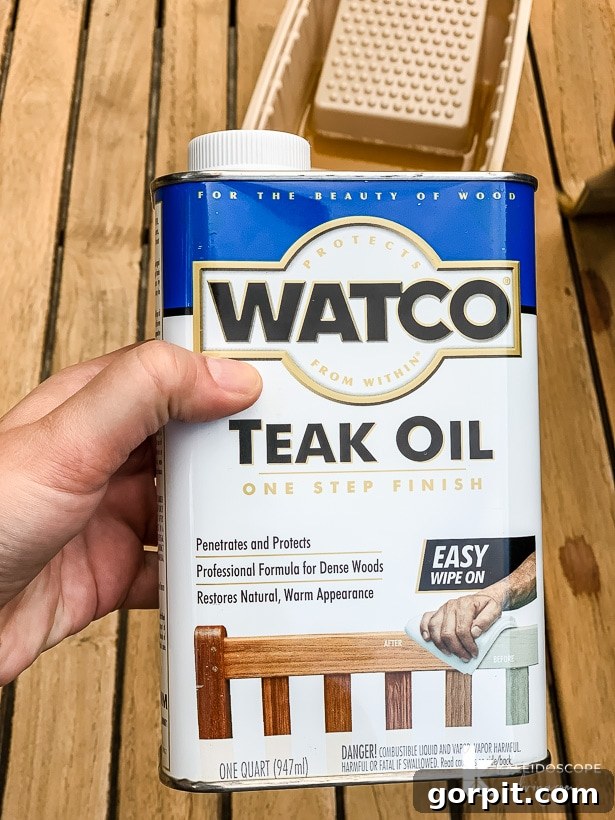
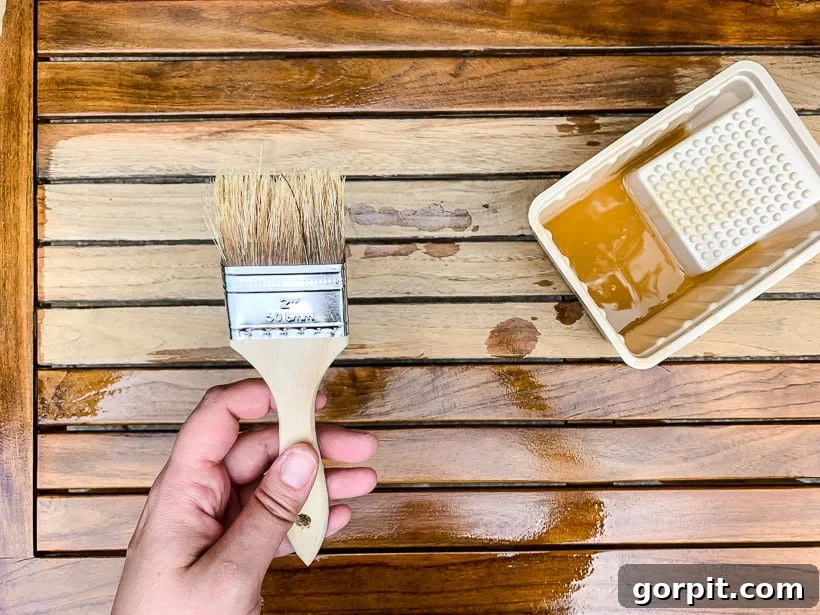
Application is straightforward: simply pour some teak oil onto a clean, lint-free cloth or applicator pad. Apply the oil liberally, working it into the wood in the direction of the grain. You’ll notice the wood immediately soak up the oil and its rich colors will intensify. Don’t be shy with the first coat, as the dry wood will be very thirsty. Allow the first coat to penetrate for the time recommended on your specific teak oil product (typically 15-30 minutes). After this initial penetration, wipe off any excess oil with a clean cloth. Allowing excess oil to dry on the surface can result in a sticky or patchy finish. We were quite generous with our first coat and then allowed it to cure for a few days before applying the second. While waiting that long isn’t strictly necessary, it fit our schedule perfectly and ensured deep absorption. For best results and maximum protection, apply a second coat after the first has dried according to the product instructions. This usually means waiting 4-6 hours, or overnight. Two coats typically provide excellent coverage and durability. Remember to dispose of oil-soaked rags properly, as they can be a fire hazard if not allowed to dry flat or submerged in water.
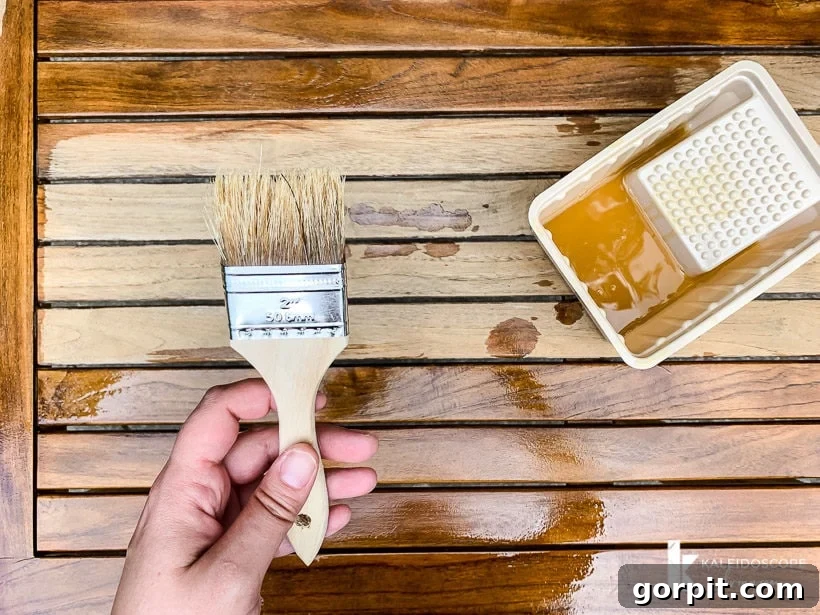
This part of the process was incredibly satisfying and surprisingly fun. Seeing the wood absorb the oil and transform before our eyes was truly rewarding. Even our girls enjoyed helping with the application, making it a wonderful family project.
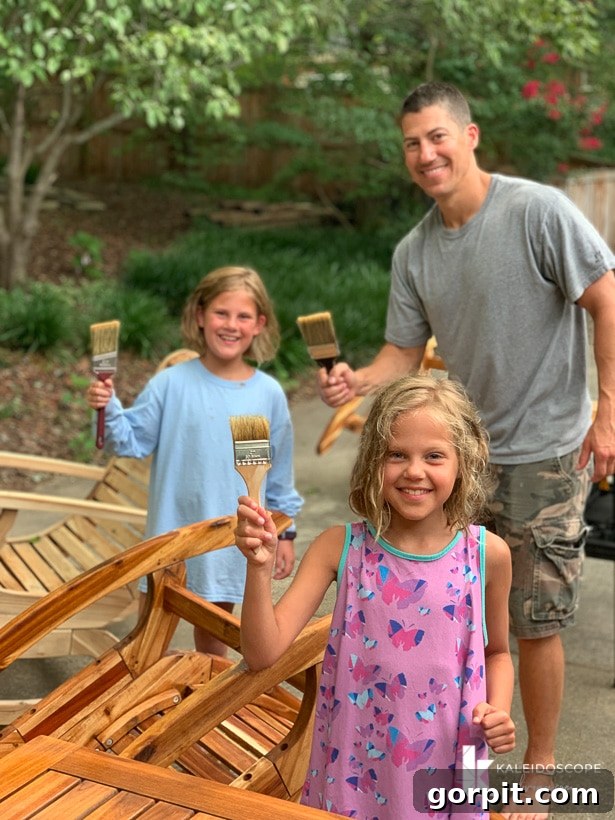
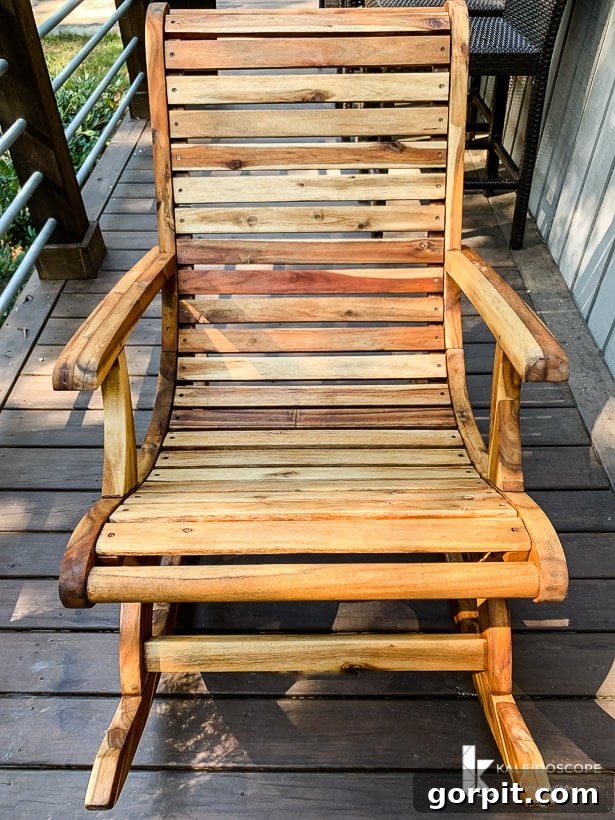
And that’s it! A fairly simple and straightforward process, isn’t it? The results speak for themselves. Our rocking chairs are now vibrant and rich, showcasing the stunning natural color variations that were previously hidden under the pigmented coating. It’s truly amazing to see the transformation once the wood is properly nourished.
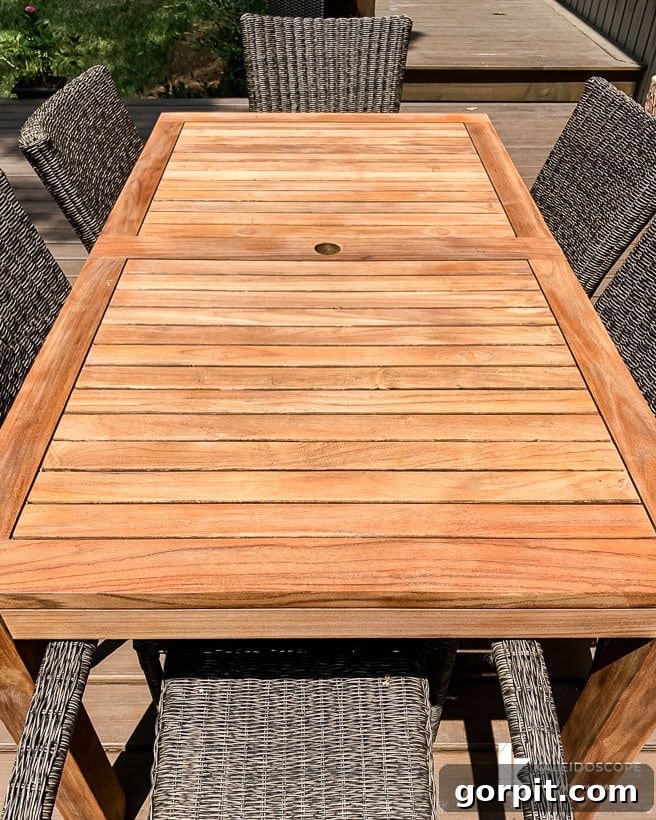
And here’s the magnificent outcome for our outdoor teak dining table. The golden tones have returned, creating a warm and inviting centerpiece for our deck.
The Beautiful Transformation: Before & After
To truly appreciate the dramatic transformation, take a look at these before-and-after collages. They vividly illustrate the incredible difference a little effort and the right approach can make in bringing your outdoor furniture back from the brink of decay to stunning beauty.
More OUTDOOR IDEAS
SEE ALL outdoor POSTS
-
Fire Pit Ideas for Every Outdoor Space
-
How to Make a DIY Outdoor Chandelier
-
Modern DIY Garden Trellis
-
DIY Outdoor Electrical Box Cover
-
DIY Diamond Wire Trellis for a Vine
-
A Complete Review of Vego Garden Beds: Pros, Cons, and Everything In-between
Maintaining Your Restored Teak & Acacia Furniture for Lasting Beauty
Now that your outdoor furniture has been beautifully restored, ongoing maintenance is key to preserving its renewed look and extending its lifespan. Untreated teak will naturally gray over time, a process many find appealing. If you prefer the rich, golden hue, or want to ensure your acacia furniture retains its warmth, re-oiling is essential. We recommend re-oiling your furniture every 6-12 months, or as needed, depending on your climate and how much sun exposure your pieces receive. Regularly cleaning your furniture with a mild soap and water solution will also help prevent dirt and grime buildup. For prolonged periods of harsh weather, consider investing in high-quality outdoor furniture covers to provide an extra layer of protection. With these simple maintenance steps, your restored teak and acacia furniture will continue to be a stunning and durable feature of your outdoor living space for many years.
Frequently Asked Questions (FAQs) About Teak & Acacia Furniture Restoration
Here are answers to some common questions you might have about restoring your outdoor wood furniture:
Q: Can I use teak oil on other types of outdoor wood furniture?
A: Yes, teak oil is often suitable for other dense hardwoods like acacia, mahogany, and even some softwoods, as it helps to replenish natural oils and provide protection. However, always test on an inconspicuous area first.
Q: How often should I re-oil my outdoor furniture after restoration?
A: Generally, you should re-oil every 6-12 months. In hotter, sunnier climates, or if your furniture is exposed to harsh elements year-round, you might consider re-oiling more frequently, perhaps every 3-6 months. Observe your furniture; if it starts to look dry or faded, it’s time for another coat.
Q: What if my furniture has mold or mildew?
A: Before sanding, treat mold and mildew with a specialized outdoor wood cleaner or a solution of water and a small amount of bleach (test first!). Scrub the affected areas thoroughly and rinse well before allowing the furniture to dry completely. This ensures you’re not sanding mold spores into the wood.
Q: Is sanding absolutely necessary?
A: If your furniture has an old, peeling finish or significant weathering, sanding is essential to achieve a smooth, even surface and allow the new oil to penetrate properly. For lightly weathered, unsealed teak that you simply want to brighten, a thorough cleaning with a teak cleaner might suffice, followed by oiling.
Q: What’s the difference between teak oil and teak sealer?
A: Teak oil penetrates the wood to nourish and enhance its natural color while offering some water resistance. Teak sealers, on the other hand, typically form a protective layer on the surface, offering more robust protection against UV and moisture, and often include pigments to maintain a specific color. We prefer teak oil for its ability to allow the wood to breathe and for easier reapplication over time, embracing the wood’s natural beauty.
If you loved learning how to restore teak and acacia furniture in this post, you will love these other outdoor projects of ours:
- DIY Deck Bar: Elevate Your Outdoor Entertaining
- DIY Outdoor Chalkboard: Fun for All Ages
- Outdoor Games for Families: Activities Kids & Adults Actually Enjoy Together
And don’t forget you can take our full house tour by clicking HERE for more home decor inspiration and DIY projects.
Wondering how I approach transforming rooms and spaces in our home? Check out Designer in a Binder®, my proven system for decorating your home with confidence and ease.
And if you want exclusive content, behind-the-scenes sneak peeks, and valuable tips delivered straight to your inbox, be sure to subscribe before you head out! Join our community and never miss out on our latest DIY triumphs and design insights.