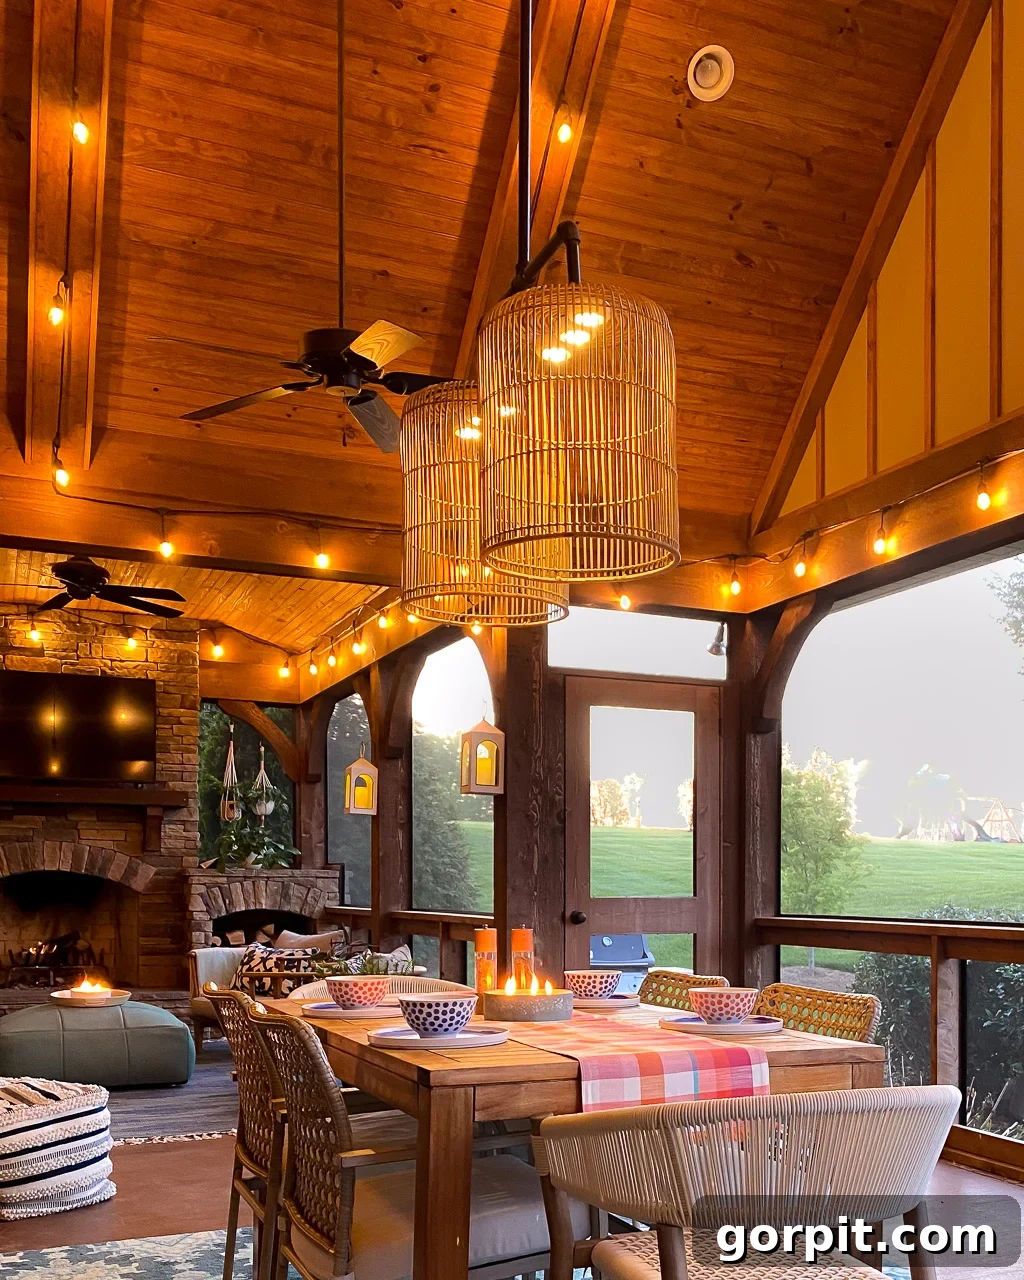
Transform your outdoor living space with a stunning DIY chandelier that makes a grand statement without the need for complicated wiring or intimidating power tools. A few years ago, we embarked on this very project, crafting a magnificent outdoor chandelier to hang gracefully above our dining table, and the impact has been nothing short of spectacular. It’s an incredibly easy and beginner-friendly project that delivers a huge punch of style and ambiance, proving that high-impact outdoor decor doesn’t have to be expensive or difficult. Get ready to illuminate your evenings and impress your guests – this full tutorial will guide you through every simple step to create your own bespoke outdoor lighting masterpiece!
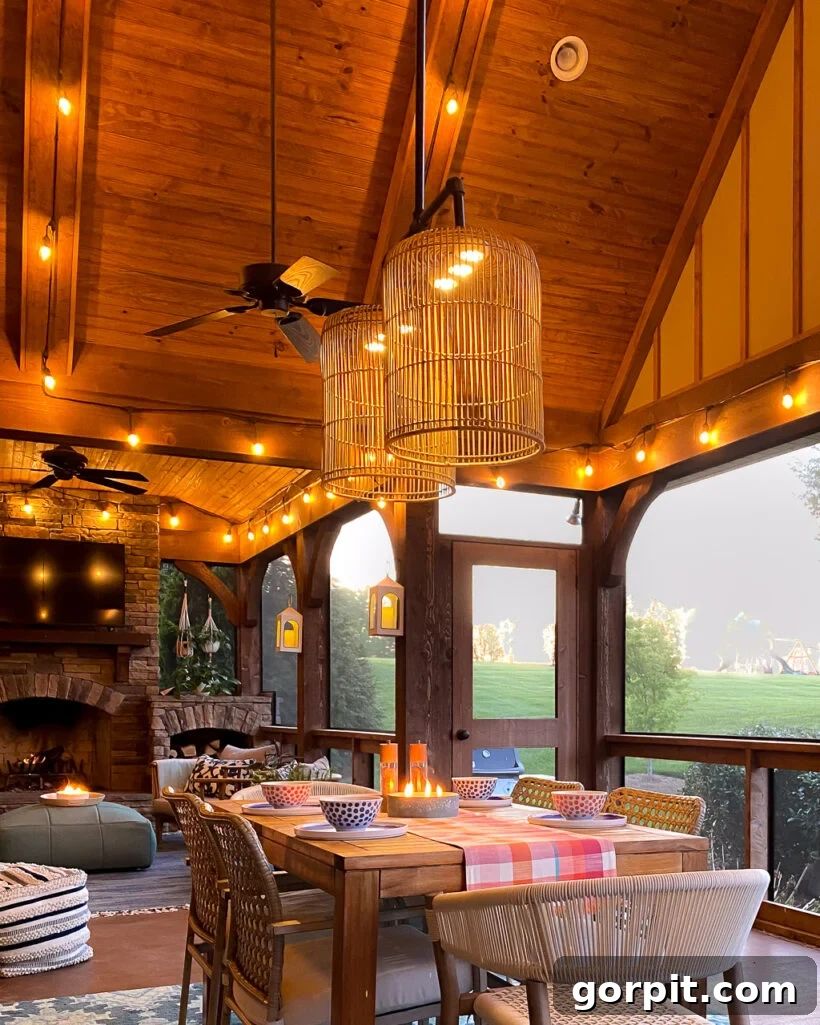
When we first unveiled our screened-in porch reveal and showcased a tour of the space on Instagram, the response to our easy DIY outdoor chandelier was absolutely overwhelming. Crafted by my husband, Joe, and me in just a couple of hours, this project captivated so many of you. Perhaps I shouldn’t have been surprised, as incorporating overhead and ambient lighting is one of my top porch decorating tips, instantly elevating any outdoor area! Given the incredible interest, it was clear that a comprehensive tutorial was in order, enabling you to replicate this amazing DIY outdoor chandelier for your own home.
This project truly is designed for DIY enthusiasts of all skill levels, especially beginners. You won’t need an extensive toolkit or complex machinery; the only power tool we utilized was a drill driver, and that was solely for securely mounting the chandelier in place. The secret to its simplicity and accessibility lies in what we affectionately call the “magic light trick.” This ingenious method completely eliminates the need for any electrical wiring or specialized electrical knowledge, making it a safe and straightforward endeavor. We’ve successfully employed the magic light trick in other projects, such as our vibrant DIY gallery wall of family photos, and it remains one of our absolute favorite hacks for adding illumination without hassle. Who’s ready to shout “woo hoo” for a brilliant, no-fuss lighting solution?
Why an Outdoor Chandelier Will Transform Your Space
Outdoor spaces are extensions of our homes, offering opportunities for relaxation, dining, and entertaining. However, they often lack the thoughtful lighting that makes indoor rooms feel cozy and functional. Adding an outdoor chandelier instantly elevates the aesthetic, transforming a simple patio or porch into a sophisticated retreat. Beyond its visual appeal, an outdoor chandelier provides essential overhead lighting, perfect for evening meals, game nights, or simply enjoying a good book after sunset. It creates a focal point, drawing the eye and adding a layer of design sophistication that can make your outdoor area feel just as inviting and well-appointed as any interior room. This particular DIY outdoor chandelier project stands out because it combines style with incredible ease, allowing you to achieve a high-end look on a budget, and most importantly, without any electrical expertise.
The Magic Light Trick: Your Secret Weapon for No-Wiring Lighting
The concept behind the “magic light trick” is wonderfully simple yet incredibly effective: utilizing battery-operated puck lights to provide illumination where traditional electrical wiring isn’t feasible or desired. This clever hack eliminates the need to hire an electrician, run unsightly cords, or worry about weatherproofing complex electrical connections. Puck lights are small, self-contained LED lights that are powered by batteries and often come with a remote control, allowing you to turn them on and off with ease. They are surprisingly bright and offer a warm, ambient glow perfect for creating a cozy atmosphere. For outdoor applications, choosing weather-resistant or indoor-rated puck lights that will be sheltered within a basket is key. This method not only makes the project accessible to everyone but also offers unparalleled flexibility in placement – you can hang your DIY outdoor chandelier virtually anywhere without being limited by power outlets. It’s perfect for screened porches, pergolas, gazebos, or even temporary event lighting, offering both convenience and charm.
This post contains affiliate links for your convenience. Click here for my full disclosure policy.
How to Make an Outdoor Chandelier: A Step-by-Step Guide
Materials and Tools Needed
Before diving into the assembly, gathering all your materials and tools is crucial for a smooth and enjoyable DIY experience. Each item plays a specific role in creating a sturdy, stylish, and functional outdoor chandelier.
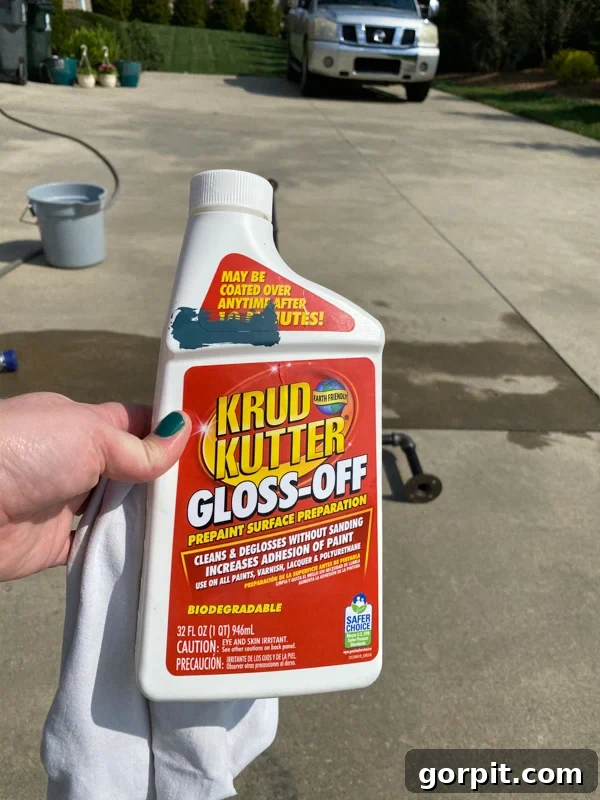
- Krud Kutter or similar degreaser: Essential for thoroughly cleaning the gas pipes, ensuring proper paint adhesion and a clean finish.
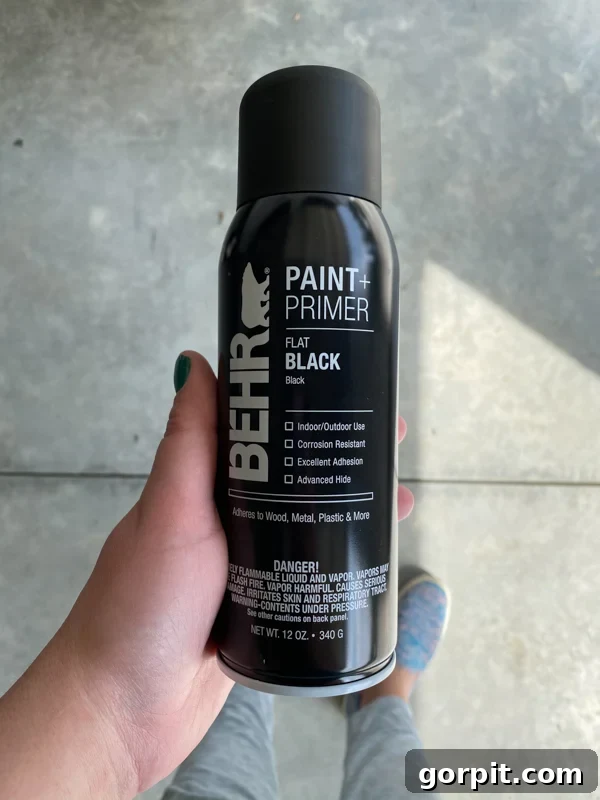
- Flat Black Spray Paint (outdoor-rated): Used to achieve a uniform, sleek look and cover any manufacturer markings on the pipes. Ensure it’s suitable for metal and outdoor conditions.
- 2 Large Baskets: These will serve as your chandelier’s stylish lamp shades. Look for baskets with an open weave or a design that allows light to diffuse beautifully. Consider weather-resistant materials like rattan, wicker, or even metal for durability. Their size should be proportionate to your outdoor space and desired impact.
- 6 Battery-Operated Puck Lights with a Remote: The heart of the “magic light trick.” We recommend at least three lights per basket for ample illumination. Look for models with good battery life, adjustable brightness, and a reliable remote for convenience.
- Hot Glue Gun and Glue Sticks: For securely attaching the puck lights inside the baskets. Make sure to use glue sticks that offer strong adhesion.
- 1 “T” Joint (3/4 inch diameter): This forms the central connection point for the arms of your chandelier.
- 2 Elbow Joints (3/4 inch diameter): Used to create the angled “arms” that hold the baskets.
- 3 Floor Flanges (3/4 inch diameter): One for securing the chandelier to your ceiling/hanging surface, and two for attaching the baskets to the chandelier arms.
- 3/4 inch Gas Pipe (various lengths): The amount of pipe required will depend entirely on the desired height of your chandelier and the distance from your hanging point.
- NOTE: Consistency is key! If you opt for a different pipe diameter, ensure that all your fittings (T-joint, elbow joints, floor flanges) match that exact diameter.
- We specifically chose gas pipe because it often comes pre-finished in black, which looks great and simplifies the painting process. Additionally, we purchased pre-cut, pre-threaded lengths to avoid the hassle of cutting and threading the pipe ourselves. This makes the project much more accessible.
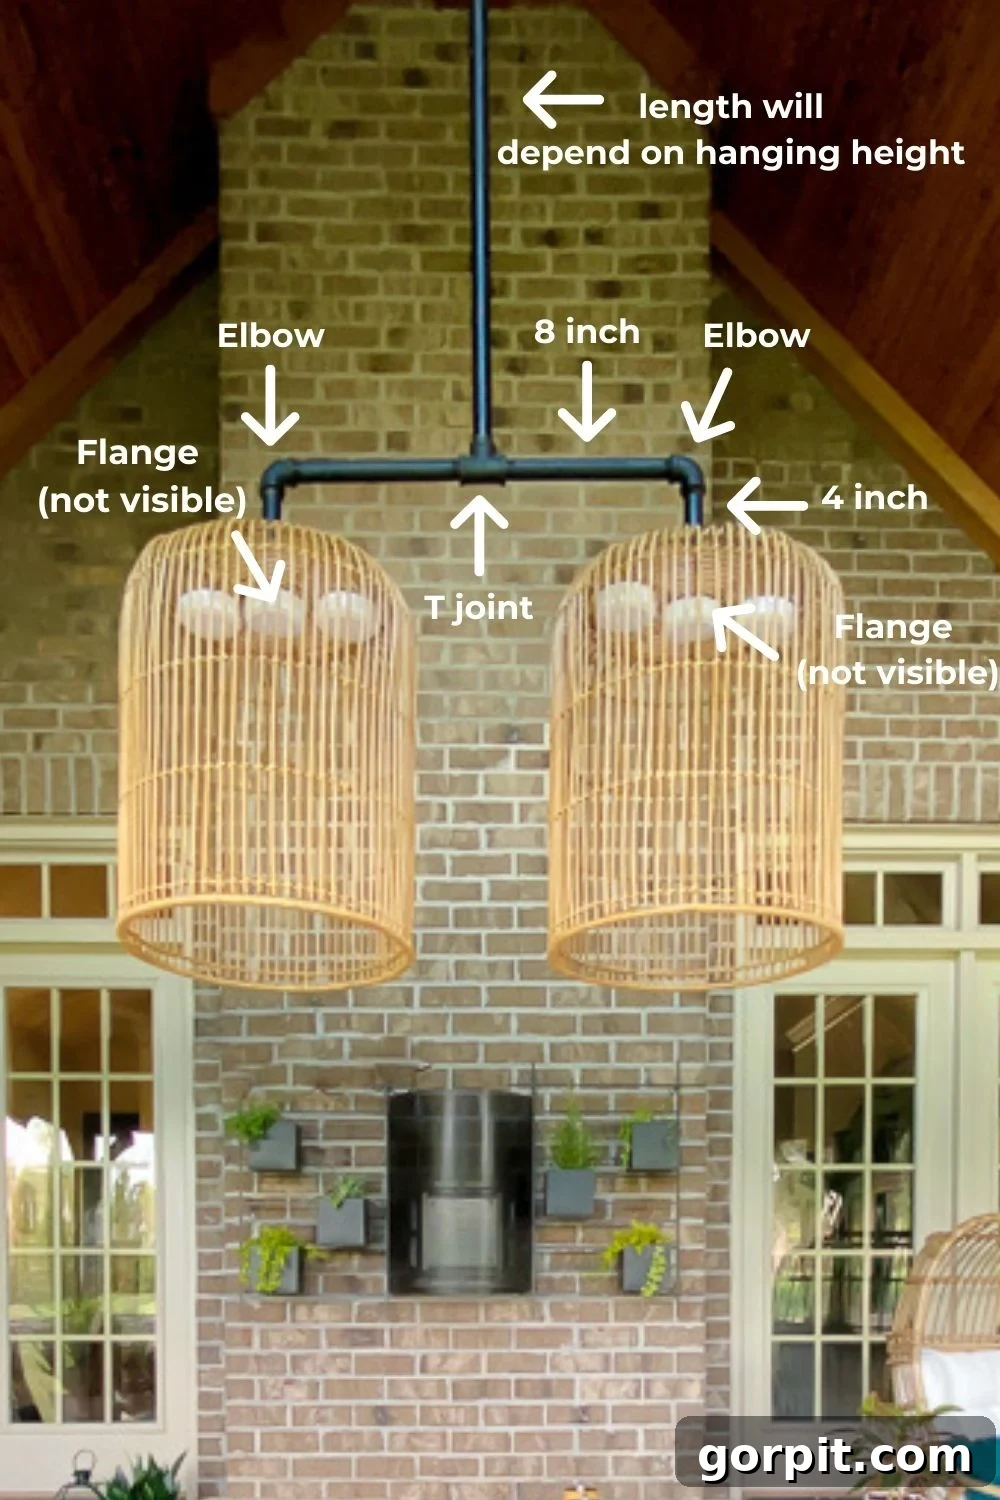
- Refer to the diagram below to visualize the specific lengths and configuration we used, and adjust according to your unique space and design preferences.
- Drill Driver and Screws: The only power tool needed, primarily for screwing the ceiling flange into your overhead support structure. Ensure you use appropriate screws for your specific ceiling material (e.g., wood screws for joists, anchors for drywall or concrete).
- Zip Ties: For attaching the baskets securely to the flanges.
Steps to Make This Project
Visual learners, rejoice! If you prefer seeing this project come to life, you can explore this Instagram reel or browse these Instagram story highlights where I provide a more detailed walk-through.
Step 1: Preparation is Key – Cleaning Your Pipes Thoroughly.
All newly purchased pipes, especially gas pipes, come coated with a layer of grease or oil to prevent rust during shipping and storage. This residue must be completely removed for any paint to adhere properly and for a clean overall finish. Apply Krud Kutter or a similar heavy-duty degreaser to a clean rag and meticulously wipe down every single piece of pipe and fitting. Pay close attention to threads and any textured areas. Repeat the cleaning process if necessary until the pipes are entirely free of any oily film. This foundational step is often overlooked but is absolutely critical for the success and durability of your chandelier’s finish.
Step 2: Assembling the Chandelier Base – The Core Structure.
Lay out your pipe pieces and fittings according to the diagram provided. Begin by screwing the T-joint onto one end of a short pipe segment. Then, attach an elbow joint to each of the two open ends of the T-joint, creating the foundational “arms” that will hold your baskets. Finally, screw a floor flange onto the open end of each elbow joint. This creates the three points of attachment: one for the main hanging pipe, and two for the chandelier “shades” (your baskets). Ensure all connections are tightened firmly by hand, creating a robust and stable base for your chandelier.
Step 3: Painting for a Flawless Finish (Optional but Recommended).
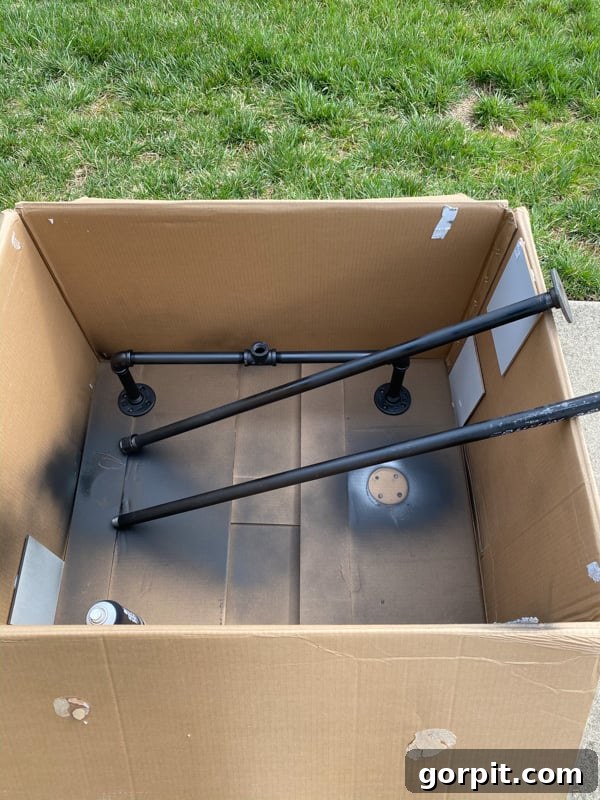
While gas pipe is often black, it typically has printed branding and size information stamped on it, which can detract from the finished look. Spray painting all your assembled pipe parts with a flat black, outdoor-rated spray paint is an optional but highly recommended step. This will give your chandelier a cohesive, professional, and refined appearance. Work in a well-ventilated area, preferably outdoors on a drop cloth. Apply several light, even coats rather than one thick coat, allowing ample drying time between each. This technique prevents drips and ensures a smooth, durable finish that can withstand outdoor elements.
Step 4: Extending Your Chandelier – Attaching the Main Vertical Pipe.
Once your painted pipe pieces are completely dry, attach the long, straight pipe segment to the central T-joint of your chandelier base. This long pipe will serve as the main support, connecting your chandelier to the overhead hanging point. Twist it firmly until it’s secure. Take care to ensure the entire structure feels sturdy and properly aligned. This is the main vertical element that will determine the final hanging height of your chandelier, so ensure it’s the correct length for your space.
Step 5: Secure Installation – Hanging Your Chandelier.
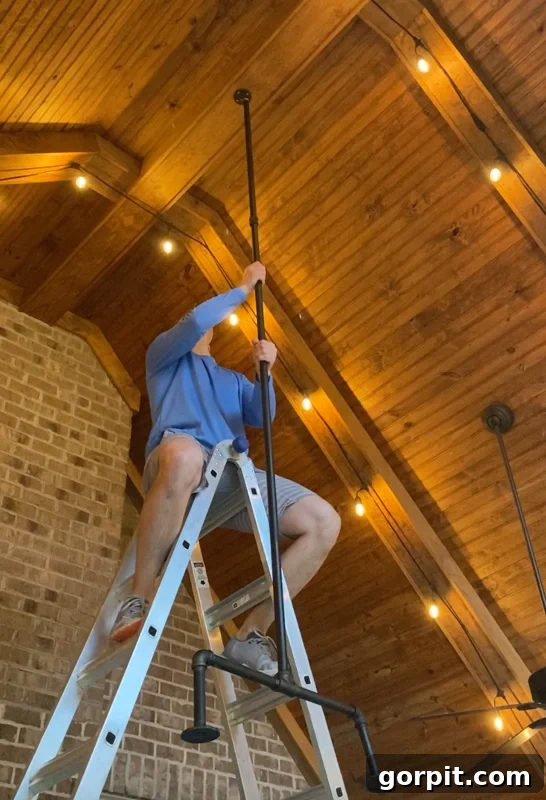
This step requires careful attention to safety, especially if working at height. First, identify a sturdy overhead surface from which to hang your chandelier, such as a ceiling joist, a pergola beam, or a robust support structure on your screened porch. Using your drill driver, screw one of the floor flanges securely onto this hanging surface. Make sure to use appropriate screws that will provide a strong hold for the weight of your chandelier. Once the flange is firmly mounted, carefully lift your assembled chandelier and thread/screw the top of the long, straight pipe into the mounted floor flange. Twist it until it is tight and the entire structure hangs securely and without wobble. Have a helper spot you or hold the chandelier while you secure it.
Step 6: Preparing Your Shades – Modifying the Baskets.
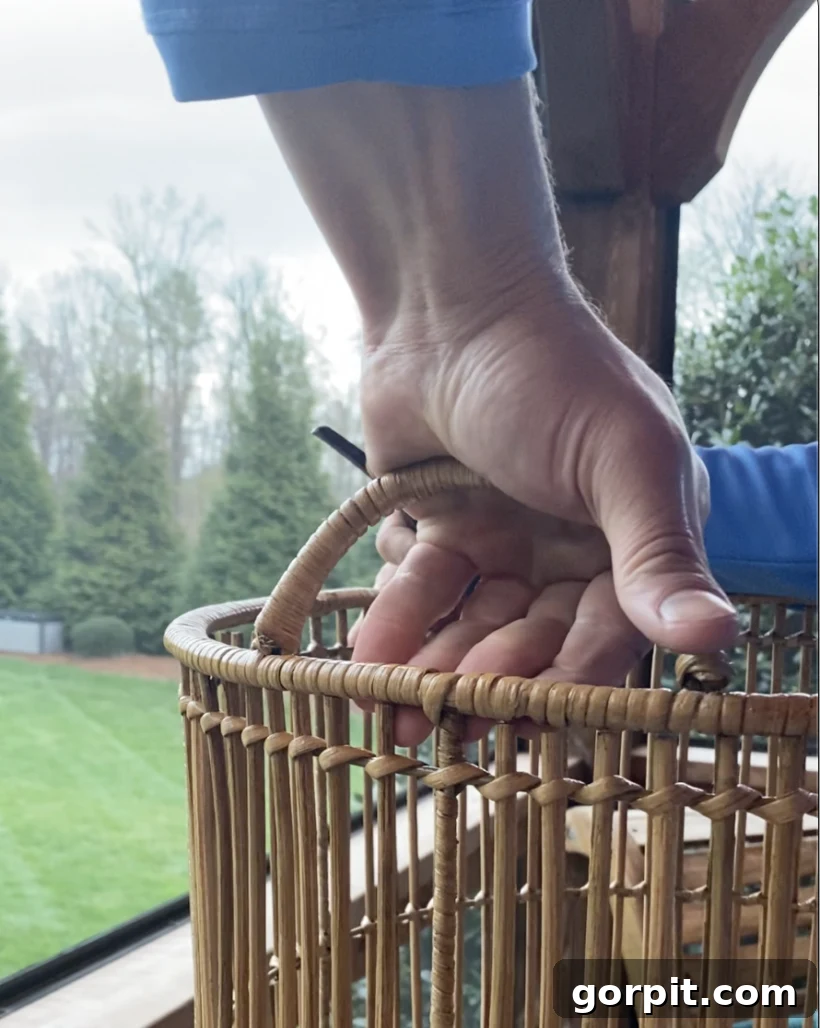
The baskets you’ve chosen will act as your stylish lamp shades. Most baskets come with handles, which you’ll need to remove to achieve a clean, chandelier-like aesthetic. For woven rattan or wicker baskets, you can often remove the handles easily by repeatedly bending them back and forth at their attachment points until they snap off cleanly. For more rigid handles, you might need a pair of pliers or wire cutters. Ensure the edges are smooth after removal to prevent snags or injuries. Consider the material of your baskets and how they will hold up to outdoor exposure – natural materials might require a protective sealant if they’re not fully sheltered.
Step 7: Basket Integration – Securing the Shades.
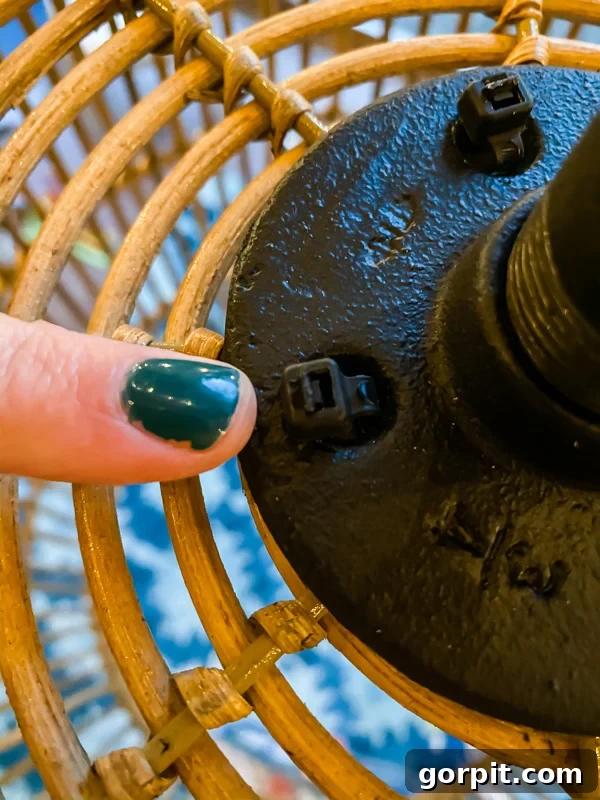
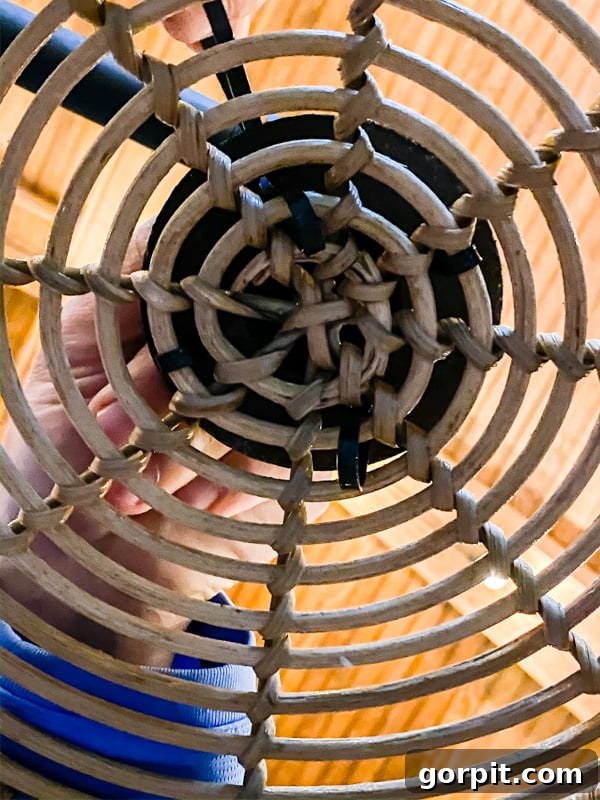
Now it’s time to attach your decorative baskets to the chandelier’s arms. Align each basket beneath one of the two floor flanges at the ends of the chandelier’s base. Using durable zip ties, thread them through the openings of the basket and around the spokes or perimeter of the floor flange. Pull the zip ties tightly to secure the basket firmly to the flange, ensuring there’s no movement. Use at least two to four zip ties per basket for maximum stability. Once secured, trim any excess length from the zip ties for a neat and discreet finish. Make sure the baskets hang evenly and are positioned aesthetically.
Step 8: Illuminating Your Creation – Attaching the Puck Lights.
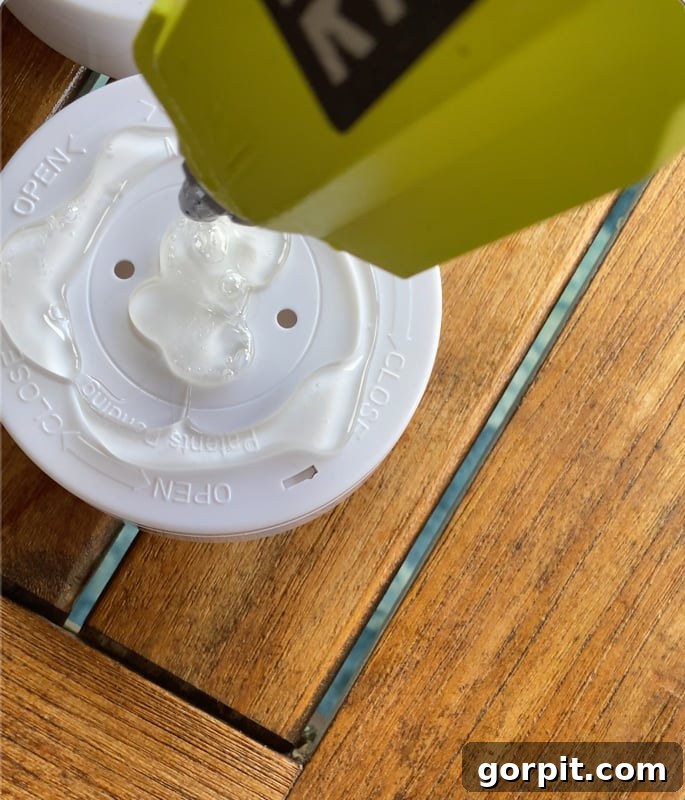
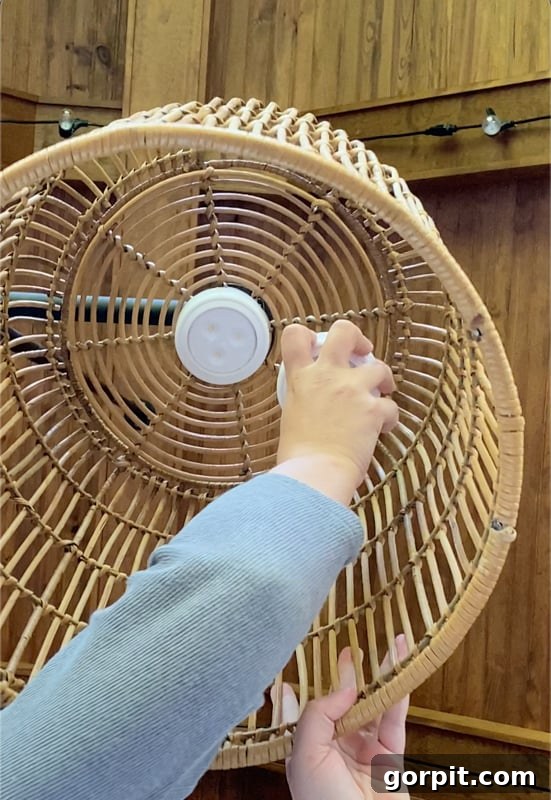
The final, exciting step is to add the “magic” – your puck lights! Using a hot glue gun, apply a generous amount of hot glue to the back of three puck lights. Carefully press each light onto the inside top surface of each basket. Position them strategically to ensure even light distribution and to prevent them from being visible from below. For example, placing them slightly offset from the center or in a small triangle can create a beautiful glow. The hot glue provides a strong, quick bond. Allow the glue to cool and set completely before handling. Once all lights are in place, insert the batteries, test them with the remote control, and admire your brilliantly lit DIY outdoor chandelier!
Enjoying Your New Outdoor Oasis
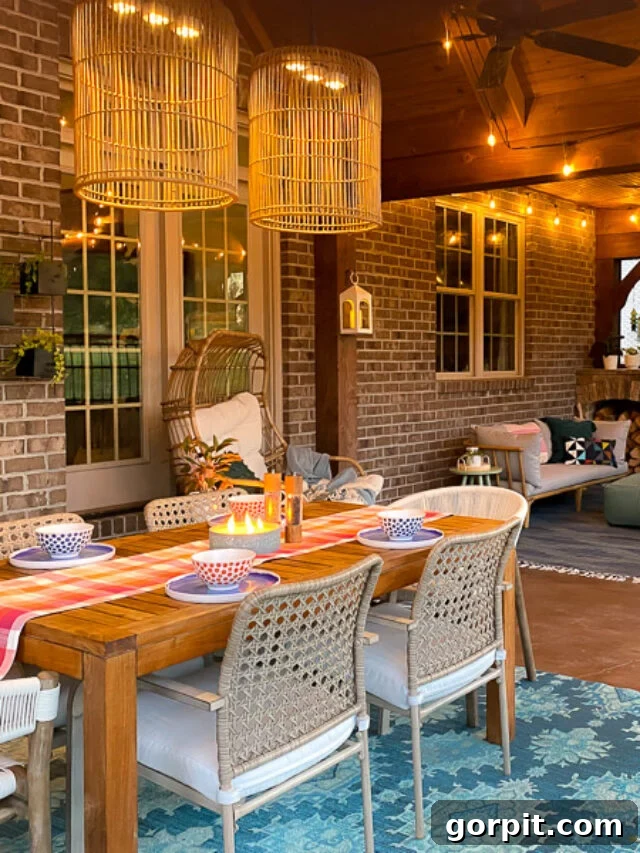
That’s it! Your magnificent DIY outdoor chandelier is now complete and ready to illuminate your outdoor gatherings. The beauty of the puck lights we chose is that they are conveniently operated by a small remote control, which we keep readily accessible on our outdoor dining table. With a simple click, you can instantly transform the ambiance of your space, casting the perfect amount of soft, inviting light for both visibility and creating a magical atmosphere. This chandelier doesn’t just provide light; it adds a layer of warmth and sophistication, making your screened-in porch or patio an even more enjoyable place to relax and entertain. Here’s a glimpse of how beautifully it lights up our very own screened-in porch!
Design Variations and Customization Tips
While this tutorial provides a solid foundation for your DIY outdoor chandelier, don’t hesitate to unleash your creativity and personalize it to match your unique style. Consider exploring different basket styles—from tightly woven wicker for a more traditional look to airy metal baskets for a modern industrial vibe. You could also experiment with the pipe finish; instead of flat black, perhaps a metallic copper spray paint for a touch of glam, or even a clear coat over natural galvanized pipe for a raw, industrial aesthetic. For added flair, think about incorporating decorative elements such as strings of wooden beads, faux greenery, or even subtle fairy lights intertwined around the baskets. Adjust the number of puck lights per basket to control brightness, or even use color-changing puck lights for dynamic ambiance. Your DIY outdoor chandelier is a canvas for your imagination!
Maintenance for Longevity
To ensure your beautiful DIY outdoor chandelier continues to shine for seasons to come, a little basic maintenance goes a long way. The primary upkeep will involve replacing the batteries in your puck lights as needed; depending on usage, this might be every few weeks or months. Keep an eye on the light output and change them when they dim. Periodically, gently wipe down the baskets and pipe structure with a damp cloth to remove any dust, pollen, or outdoor debris. If your chandelier is exposed to the elements, inspect the zip ties and glue adhesion annually to ensure everything remains secure. For prolonged durability, especially in harsh weather conditions, consider bringing down the baskets and puck lights during extreme winter months or heavy storms. With minimal care, your no-wiring outdoor chandelier will continue to be a cherished focal point.
What do you think of this simple yet impactful DIY project?! If you’ve enjoyed creating this piece, you’ll be thrilled to know this isn’t our first foray into DIY lighting. Explore more of our creative lighting solutions and other inspiring outdoor ideas below:
- DIY Bentwood Pendant Light
- DIY Wood Bead Chandelier
More OUTDOOR IDEAS
SEE ALL outdoor POSTS
-
Fire Pit Ideas for Every Outdoor Space
-
How to Make a DIY Outdoor Chandelier
-
Modern DIY Garden Trellis
-
DIY Outdoor Electrical Box Cover
-
DIY Diamond Wire Trellis for a Vine
-
A Complete Review of Vego Garden Beds: Pros, Cons, and Everything In-between
Curious about our philosophy for transforming rooms and spaces within our home? Dive into the structured yet creative approach outlined in Designer in a Binder® – it’s your affordable and simple roadmap to beautifully decorated spaces.
For even more exclusive content, behind-the-scenes glimpses, and insider tips delivered straight to your inbox, be sure to subscribe to our newsletter before you go! Join our community of DIY enthusiasts and design lovers.