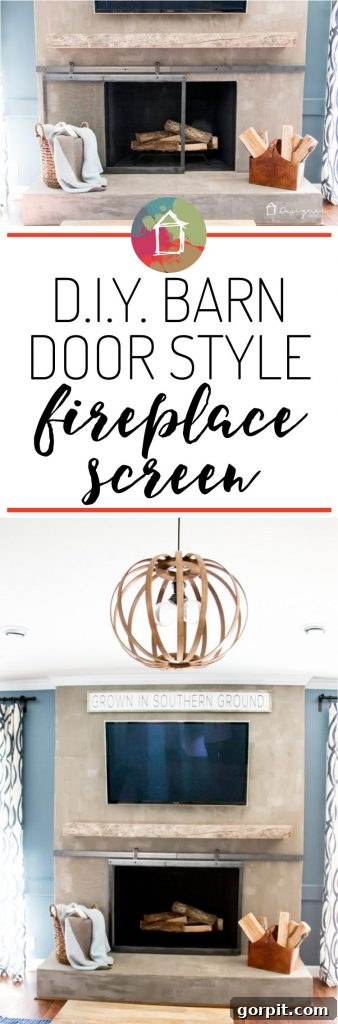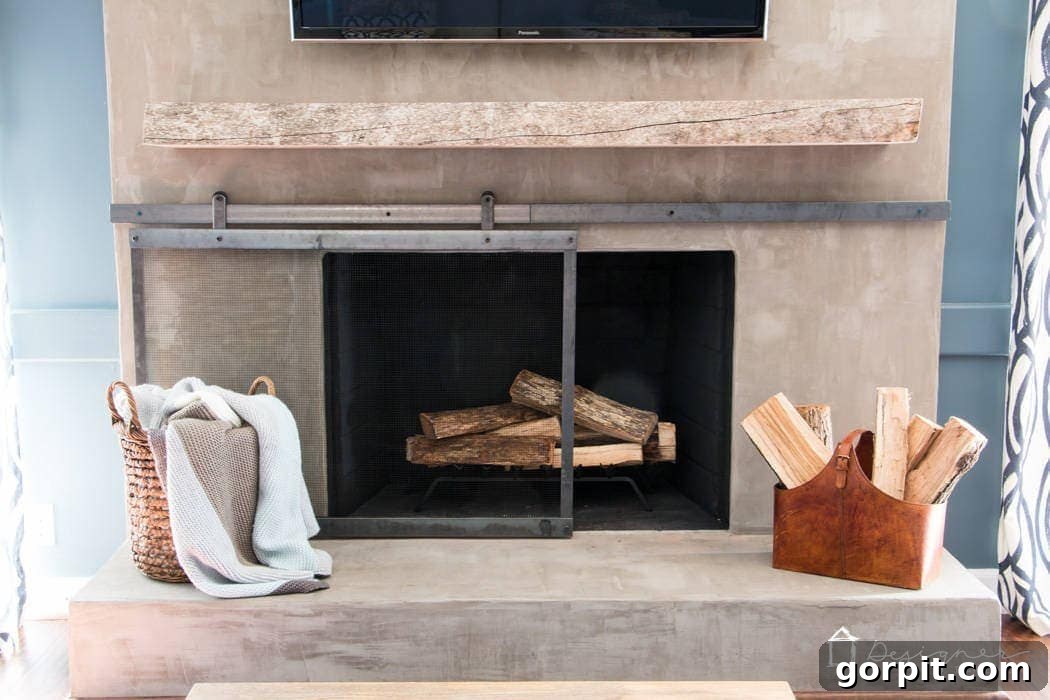
Are you envisioning a rustic yet elegant upgrade for your fireplace? A barn door style fireplace screen offers a unique blend of modern farmhouse charm and practical functionality, transforming your living space into a cozy haven. However, the dream often comes with a significant roadblock: the need for welding skills or the expense of custom fabrication. What if we told you there’s a revolutionary way to achieve this sophisticated look without ever touching a welding torch?
You’ve landed on the ultimate guide that provides a completely original, step-by-step DIY tutorial for building a stunning sliding fireplace screen. This isn’t just another project; it’s an ingenious solution born from a desire for custom design without the professional price tag. While this guide may appear extensive, it’s not due to the complexity of the project itself, but rather our commitment to providing clear, detailed instructions for every single phase. We’ve meticulously broken down each step to ensure your success. So, banish any apprehension – you absolutely possess the capability to create this incredible fireplace feature!
The genesis of this remarkable project began with a serendipitous discovery. I was captivated by a Porch.com article featuring a breathtaking home design project by Robin Chell Design. Within that tour, nestled against a beautifully styled hearth, was the most gorgeous sliding fireplace screen I had ever seen. Its clean lines, industrial appeal, and seamless operation immediately commanded my attention. It was clear that this masterpiece was the result of expert craftsmanship, likely involving a highly skilled welder and custom metalwork. I found myself completely entranced, literally “swooning” over its aesthetic and functionality. The vision of it gracing my own home was instant and undeniable.
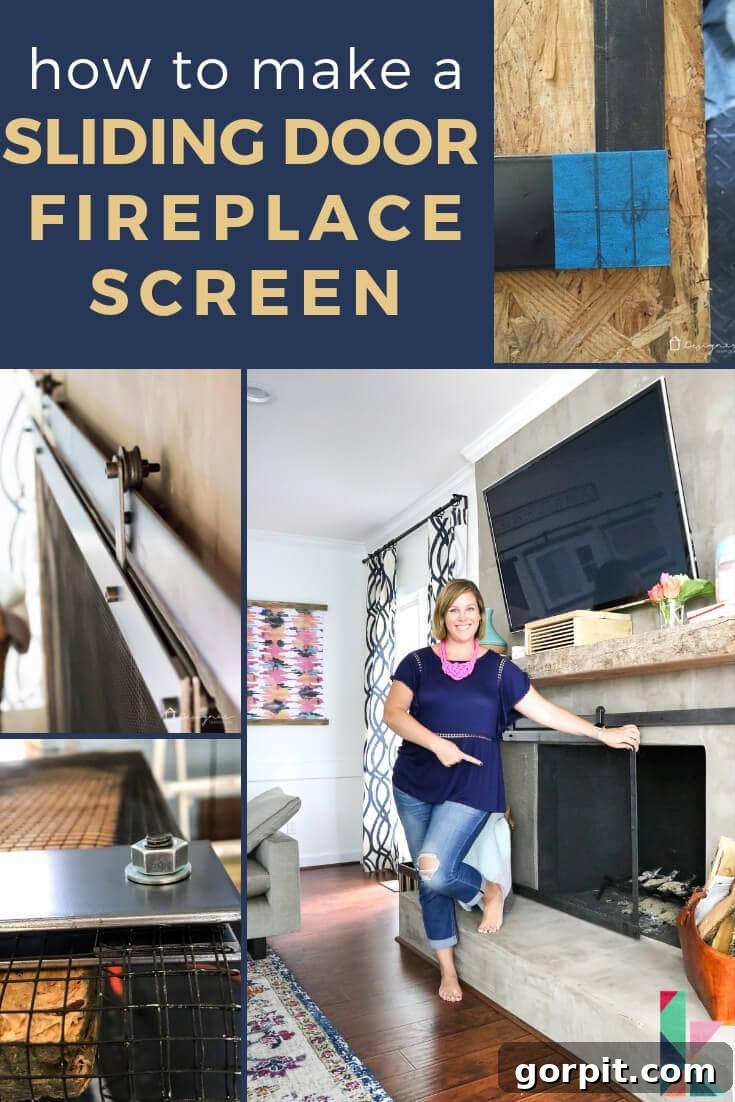
However, reality quickly set in. Neither my husband nor I possessed welding expertise, and commissioning such a bespoke piece was well beyond our budget. This common dilemma often deters many DIY enthusiasts from pursuing dream projects. But for us, it simply ignited our creative problem-solving spirit. We embarked on a mission to replicate this stunning design, finding an innovative way to build a barn door style, sliding fireplace screen entirely without welding. Our journey culminated in this comprehensive tutorial, empowering you to achieve the same sophisticated result. Please note that this post may contain affiliate links, which means we may earn a small commission at no extra cost to you if you make a purchase through our links. You can read our full disclosure policy here.
How to Make a Barn Door Style Fireplace Screen: A No-Weld DIY Guide
This detailed guide will walk you through the process of constructing your very own sliding fireplace screen, emulating the sought-after barn door aesthetic. We’ve broken down the project into manageable steps, ensuring that even DIY beginners can achieve professional-looking results. Let’s gather our materials and tools!
Essential Materials for Your Fireplace Screen Project
Before you begin, it’s crucial to gather all necessary materials. Please note that the dimensions provided below are specific to our finished fireplace screen, which measures 45″ x 32″ and is designed to perfectly cover our large fireplace opening (42 1/2″ x 30 1/4″). We highly recommend that you measure your own fireplace opening carefully and adjust all material dimensions accordingly to ensure a perfect fit for your custom screen. Quantities needed are indicated in parentheses.
- (4) 48” x 2” x 1/8” Steel Bar: These robust steel bars will form the sturdy top and bottom rails of your fireplace screen, providing essential structural support and a clean finish.
- (2) 48” x 1 1/4” x 1/8” Steel Bar: These slightly narrower steel bars are designated for the side rails of the fireplace screen, completing the frame’s perimeter.
- (2) 48” x 2” x 3/16” Steel Bar: These thicker and stronger steel bars are critical for constructing the sliding rail system that will be mounted above your fireplace, allowing your screen to glide smoothly.
- (1) 3’ x 5’ x 1/4” Hardware Cloth (23 gauge): This durable metal mesh will serve as the protective screen, preventing sparks and embers from escaping while maintaining an open, airy aesthetic. The 23 gauge provides a good balance of strength and flexibility.
- (2) 1/2” Swivel Pulleys: These pulleys are key to the sliding mechanism, allowing the screen to move effortlessly along the rail. The swivel feature ensures smooth movement and adaptability.
- (6) 1.25 x 25mm bolts: These bolts will be used to securely fasten various components of the screen frame, ensuring structural integrity.
- (2) 1.25 x 35mm bolts: Slightly longer, these bolts are specifically for attaching the pulley wheels to the wheel posts, providing a secure connection.
- (4) 5/16 x 1” Chrome Steel Spacers: These spacers are essential for creating the necessary clearance between the mounting rail and the fireplace surface, ensuring the screen can slide freely without friction.
- (4) 1/4” x 3 1/4” Tapcon Hex Head screws: These specialized concrete screws are designed for secure attachment to masonry or concrete fireplaces, offering robust holding power.
- (10) 1/4” washers: Washers are used to distribute the load of fasteners, preventing damage to materials and ensuring a tighter, more secure connection.
- High heat spray paint in black (we used Rustoleum): Essential for giving your metal components a uniform, sleek black finish that can withstand the heat generated by your fireplace.
Tools You’ll Need for the Project
Having the right tools is paramount for a smooth and successful DIY project. Here’s what you’ll need to get started:
- Power drill and various size drill bits: Indispensable for creating precise holes in your steel bars and for pre-drilling mounting points on your fireplace. A range of sizes will allow you to gradually enlarge holes.
- Power driver: Used to efficiently tighten screws and bolts, saving time and effort compared to manual screwdrivers.
- Metal snips: Specifically designed for cutting metal mesh like hardware cloth, these snips will allow for clean and efficient trimming.
- Angle Grinder: A powerful and versatile tool for cutting and grinding metal. If you don’t own one, consider it a valuable addition to your workshop – they are surprisingly inexpensive and useful for many DIY tasks.
- Metal cutting blade: Essential for use with your angle grinder to make clean and accurate cuts through the steel bars.
- Metal file: Crucial for deburring and smoothing any sharp edges created during cutting, ensuring a safe and polished finish.
- Hammer drill (for Tapcon screws): A specialized drill necessary for creating pilot holes in masonry or concrete when using Tapcon screws.
- Measuring tape and pencil/marker: For accurate measurements and marking cut lines and drill points.
- Level: To ensure your sliding rail is perfectly horizontal for smooth screen operation and aesthetic appeal.
Building the Sliding Fireplace Screen Portion: Step-by-Step Instructions
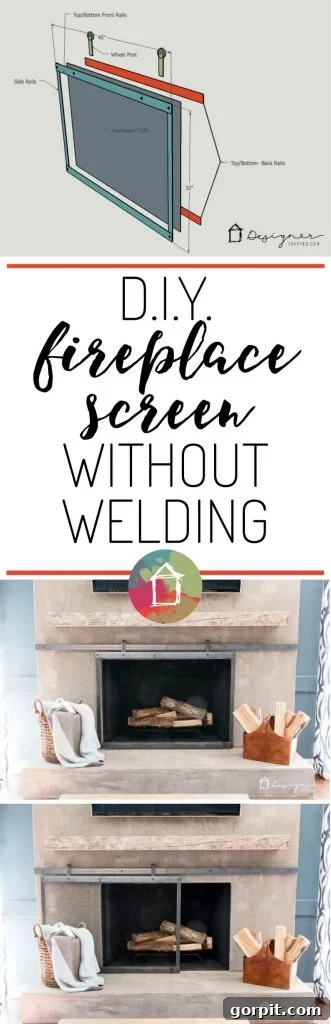
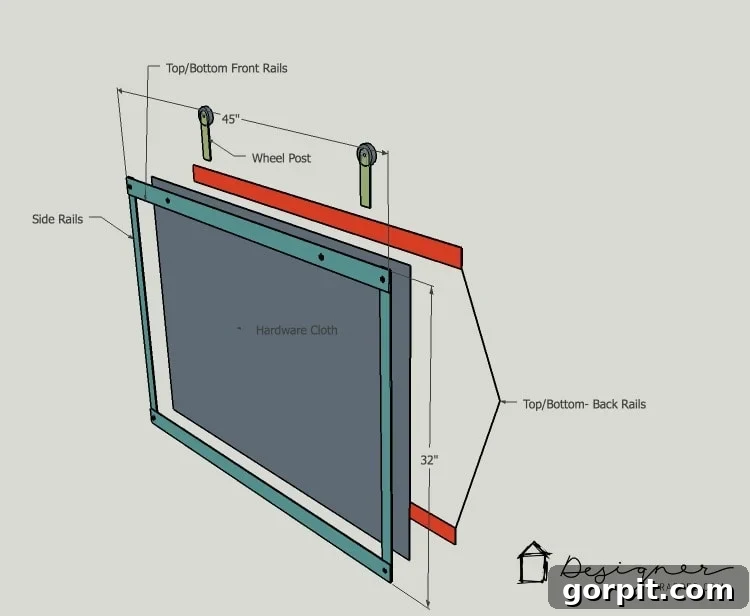
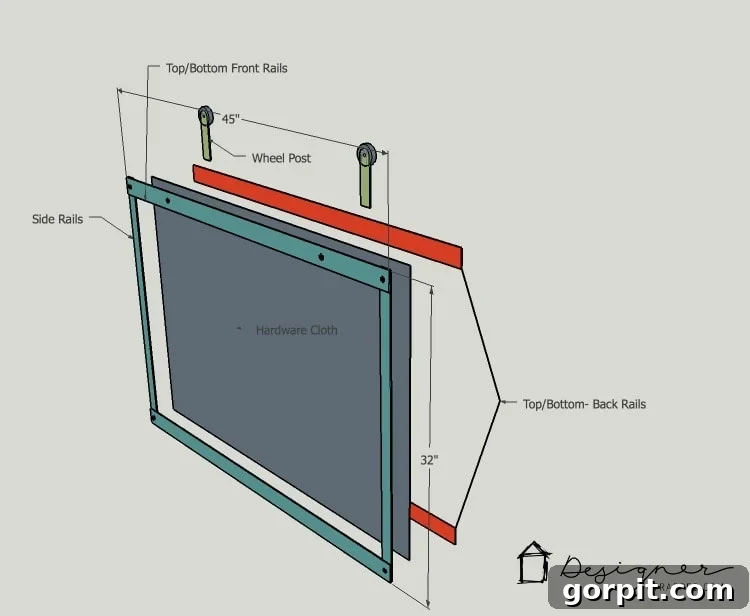
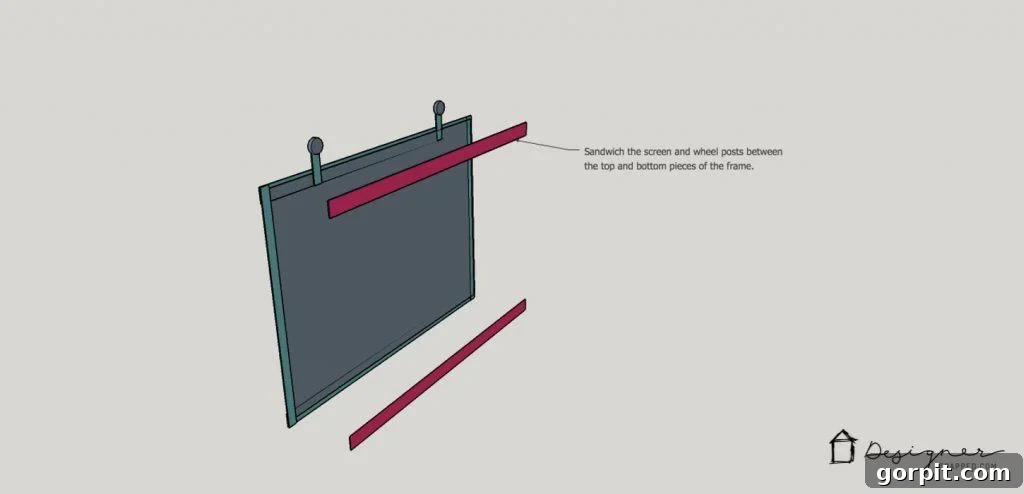
This section details the construction of the screen itself, including framing and pulley attachment. Before diving into the written steps, take a moment to review the provided diagram below. It will give you a visual overview of how all the components fit together, providing essential context for the assembly process.
-
Prepare the Hardware Cloth: Begin by cutting your hardware cloth to a roughly oversized dimension of 40” x 50” using your metal snips. Making it slightly larger than needed simplifies handling during the initial stages. Hardware cloth often comes rolled up, so to ensure it lies flat for easier working, place a piece of plywood on top with some weights and leave it overnight. This will help to flatten out any curves or kinks.
-
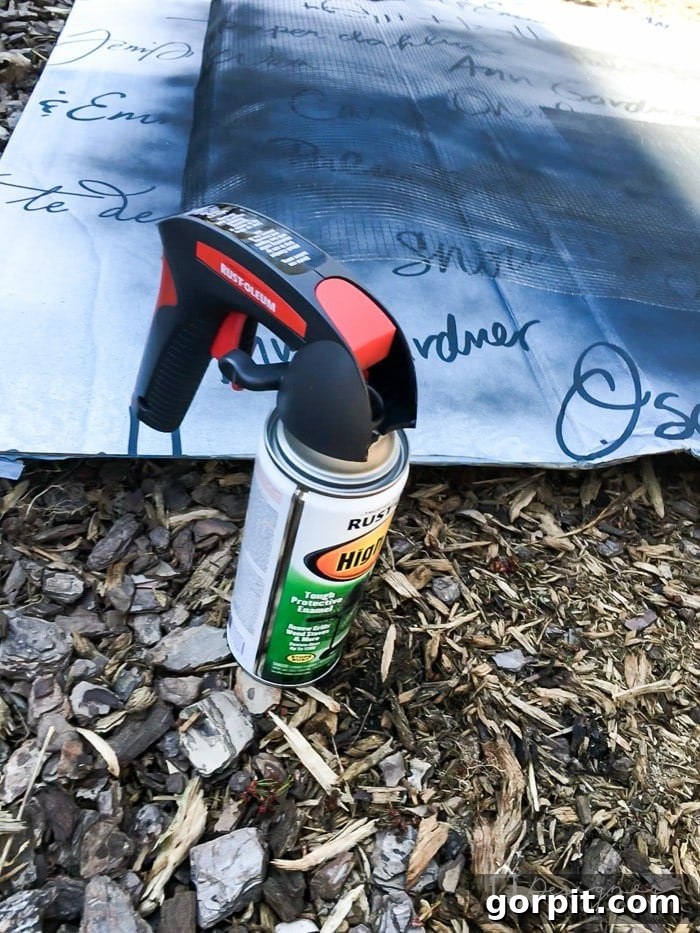
Paint Components: Disassemble your 1/2” swivel pulleys by separating the pulley wheels from their swivel mechanisms. Many models, like ours, simply require the removal of a cotter pin to do this. Once separated, use your high-heat spray paint in black to coat the hardware cloth, chrome spacers, washers, and the separated pulley wheels. Apply several thin, even coats for a durable and uniform finish. We were fortunate to find black bolts, which eliminated the need to paint them; if your bolts are not black, you may wish to paint them as well for a cohesive look.

-
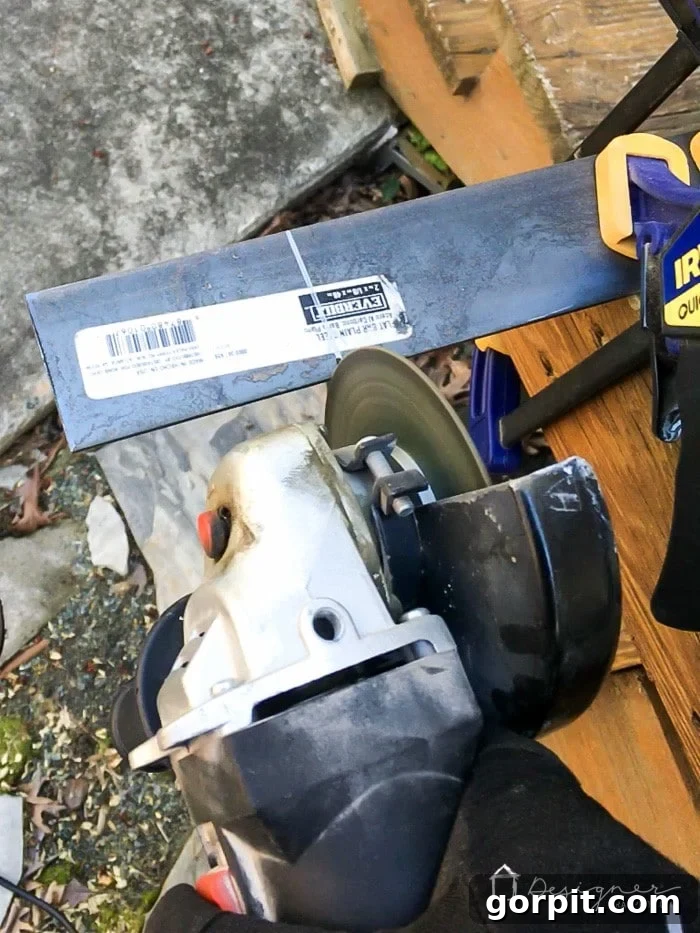
Cut Top and Bottom Rails: Take two of your 48” x 2” x 1/8” steel bars and cut them down to a length of 45” using your angle grinder fitted with a metal cutting wheel. Always wear appropriate safety gear, including eye protection and gloves, when operating an angle grinder. These will form the main horizontal elements of your screen frame.
-
Cut Side Rails and Retain Scraps: Next, cut the two 48” x 1 1/4” x 1/8” steel bars down to a length of 32″. These will serve as the vertical side rails for your screen. After making these cuts, it’s essential to clean up any rough or sharp edges using a metal file for safety and a polished appearance. Critically, do not discard the 16″ pieces you cut off these bars; these will be used in the very next step for creating the wheel posts.
-
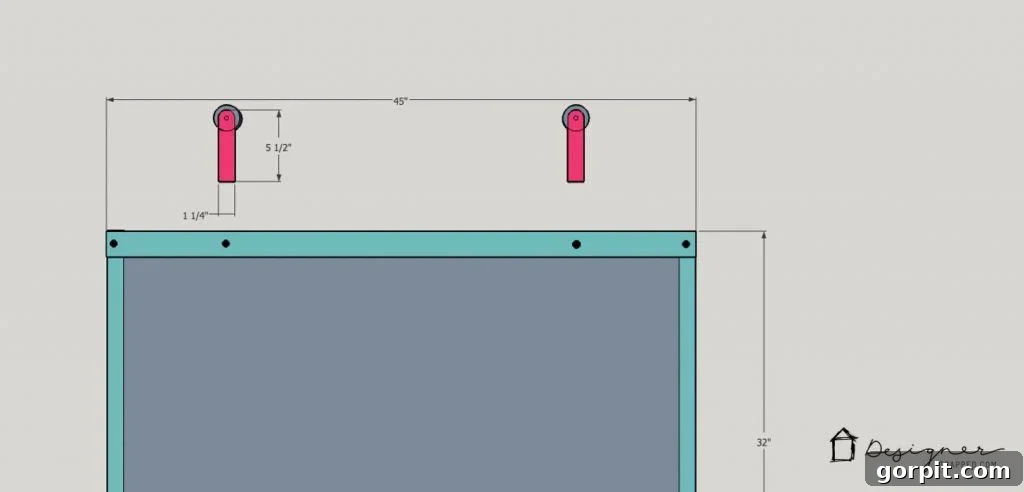
Fabricate Wheel Posts: From the 16″ pieces of 1 1/4” steel bar you saved from the previous step, cut two segments, each 5 1/2” long. These are your wheel posts, vital for attaching the pulleys (as highlighted in pink in the diagram). To create the necessary curve for the pulley wheels to sit flush, trace the outline of a pulley wheel onto the top of each 5 1/2” post. Carefully use your angle grinder to cut along these traced curves, forming a saddle-like shape at the top of each wheel post. File down any rough edges for a smooth finish.
-
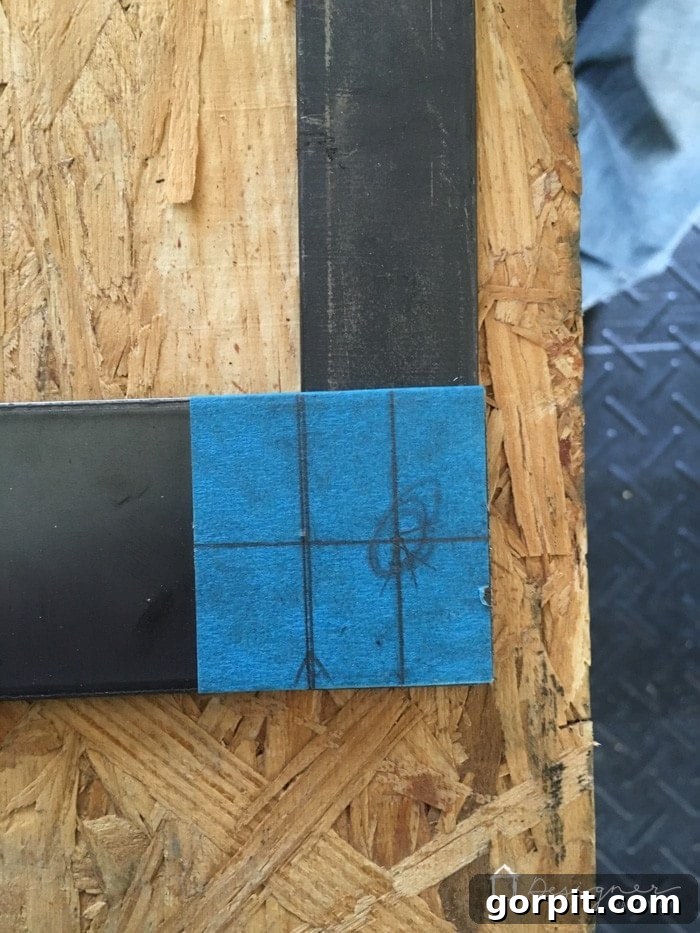
Layout the Screen Frame: Now, you’re ready to meticulously lay out the steel bars that will form the exterior frame of your fireplace screen. Carefully arrange the two 2″ bars (cut to 45″) at the top and bottom, remembering that these are doubled up (one bar on the front, one on the back of the screen). Position the two narrower 1 1/4″ steel bars (cut to 32″) vertically for the sides of the fireplace screen. These side rails are used only on the front side of the screen. Mark the precise center of each corner where the bars overlap using a pencil or painter’s tape to guide your drilling.
-
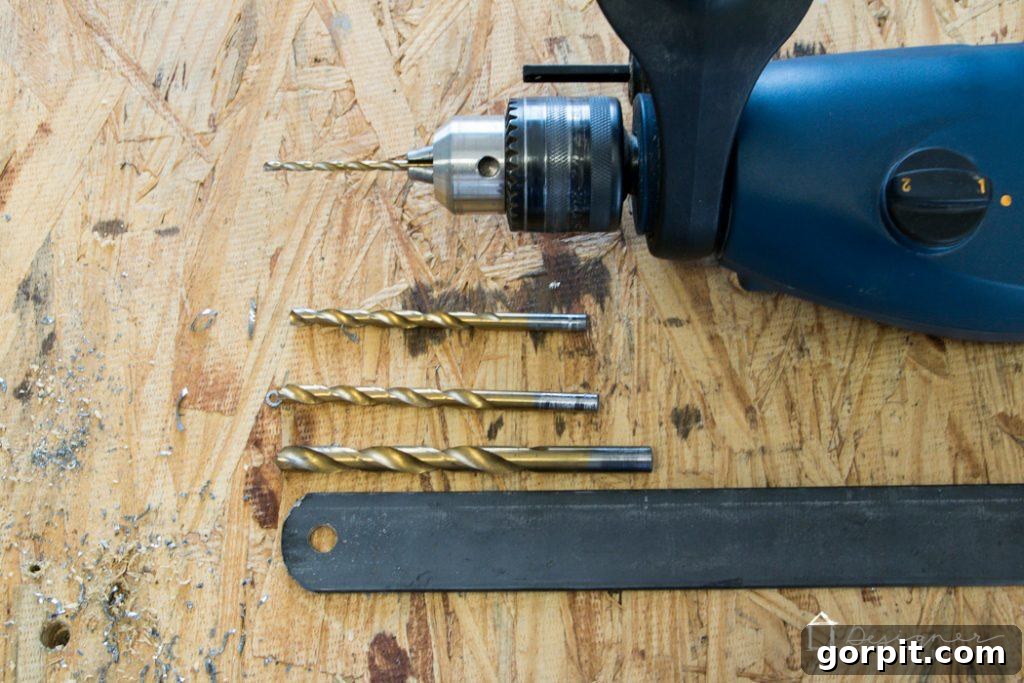
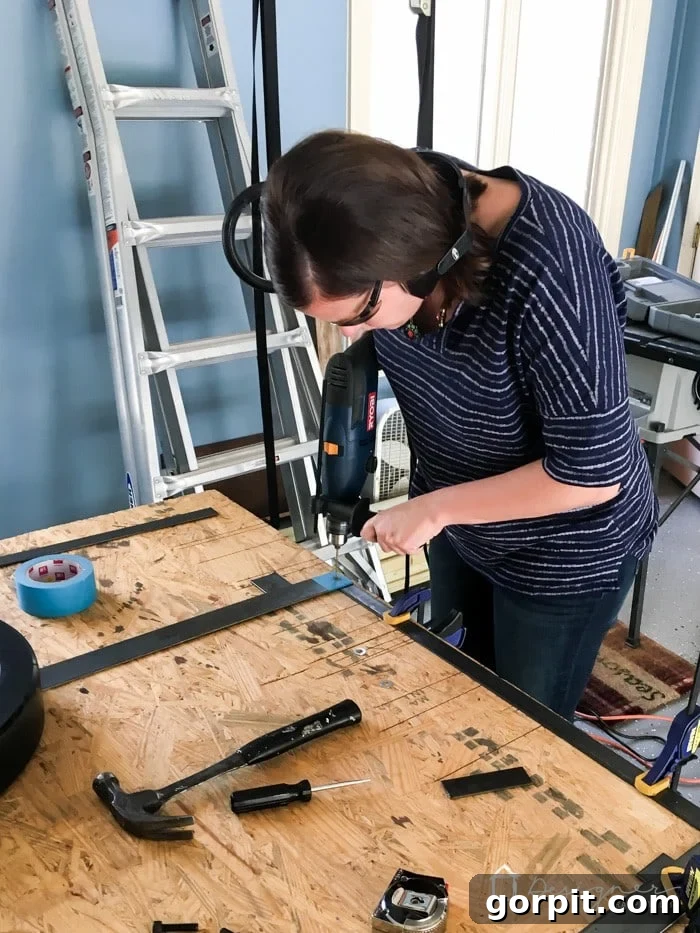
Drill Bolt Holes: This step requires patience and precision. Using an electric drill, you will create the holes for your bolts. It’s highly recommended to start with a small pilot drill bit, gradually increasing the size until you reach the final diameter of 5/16”. This method prevents the drill bit from wandering, reduces strain on your drill, and minimizes the risk of damaging your material. To streamline the process, drill all the initial small pilot holes across all marked points. Then, switch to the next larger drill bit size and enlarge all existing holes. Repeat this process, moving up in drill bit size, until all holes achieve the desired 5/16″ diameter. This systematic approach, though seemingly longer, is actually more efficient and yields cleaner, more accurate holes.
-
Assemble the Screen Frame with Hardware Cloth: Once all your bolt holes are perfectly drilled, lay out the front portion of your frame: the front top rail (2″ bar), the two side rails (1 1/4″ bars), and the front bottom rail (2″ bar). Carefully place the painted hardware cloth on top of this frame. For added stability and a cleaner edge, we recommend folding the hardware cloth edge over by about 1″ along the side edges before placing it. Now, position the back top and bottom rails directly on top of the hardware cloth, aligning them precisely with the front rails.
-
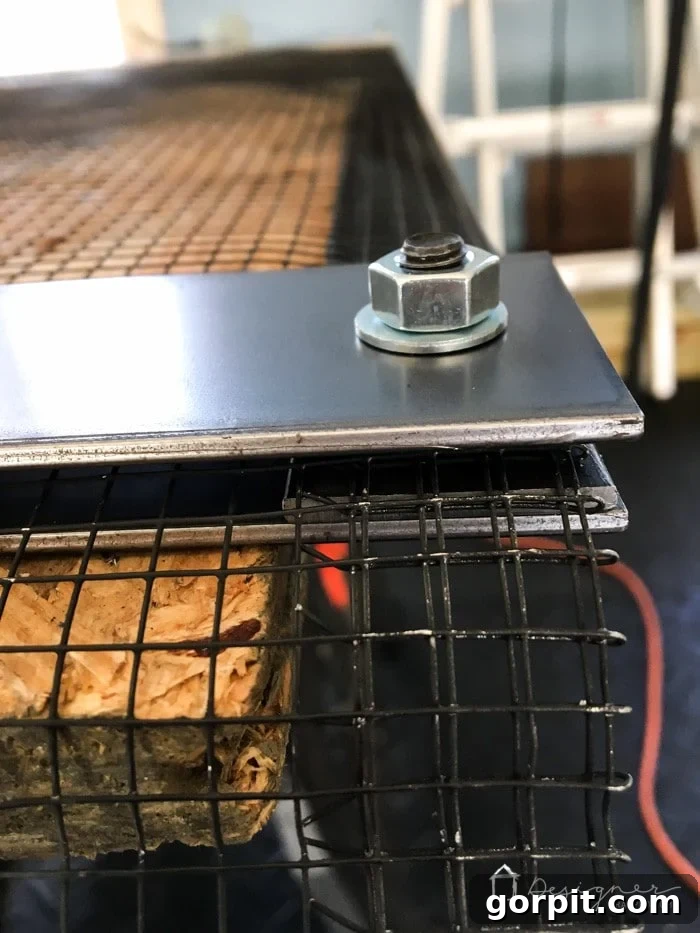
Secure the Frame Components: This step involves “sandwiching” the hardware cloth and wheel posts within the frame. Begin by feeding the appropriate bolts through each component in this specific order: 1) the front top/bottom rails, 2) the side rails, 3) the screen (hardware cloth), 4) the prepared wheel posts, and finally, 5) the back top/bottom rails. Note that the top and bottom rails are “doubled up” (front and back), while the side rails are single and positioned only on the front. Once all components are aligned and bolted through, place a washer and then a nut onto each bolt and tighten securely with your power driver. Do not overtighten, but ensure all connections are firm. The diagrams and photos below offer crucial visual guidance to clarify this intricate assembly.
-
Trim Excess Hardware Cloth: With the frame securely bolted, use your metal snips to carefully trim off any excess or overhanging hardware cloth that extends beyond the steel frame. Aim for a neat, flush finish to prevent snags and maintain a clean aesthetic.
-
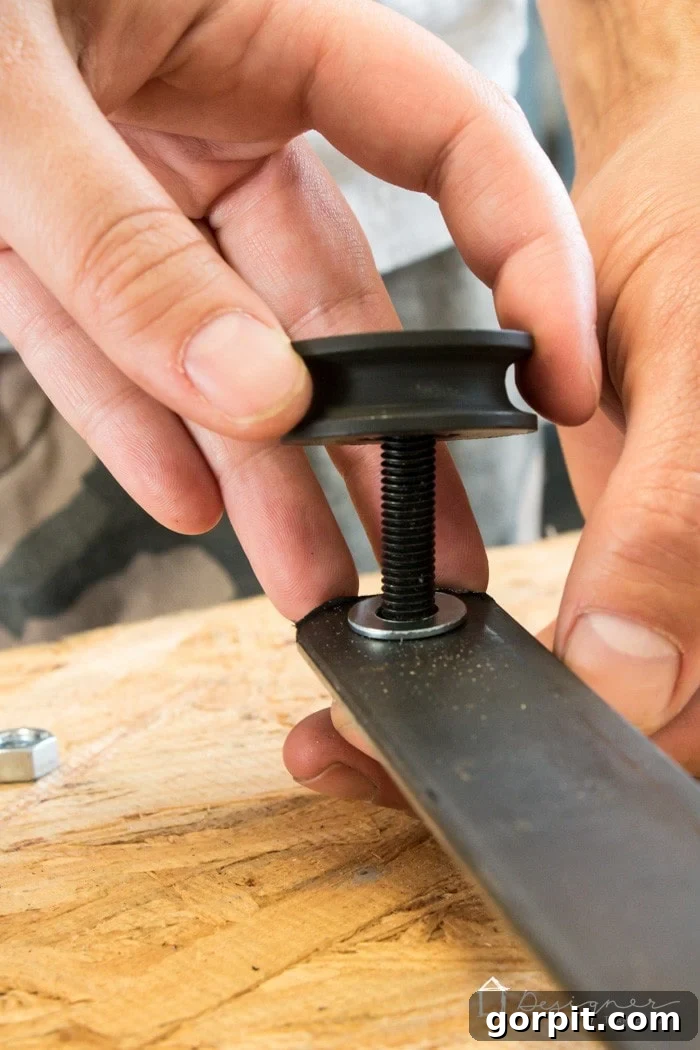
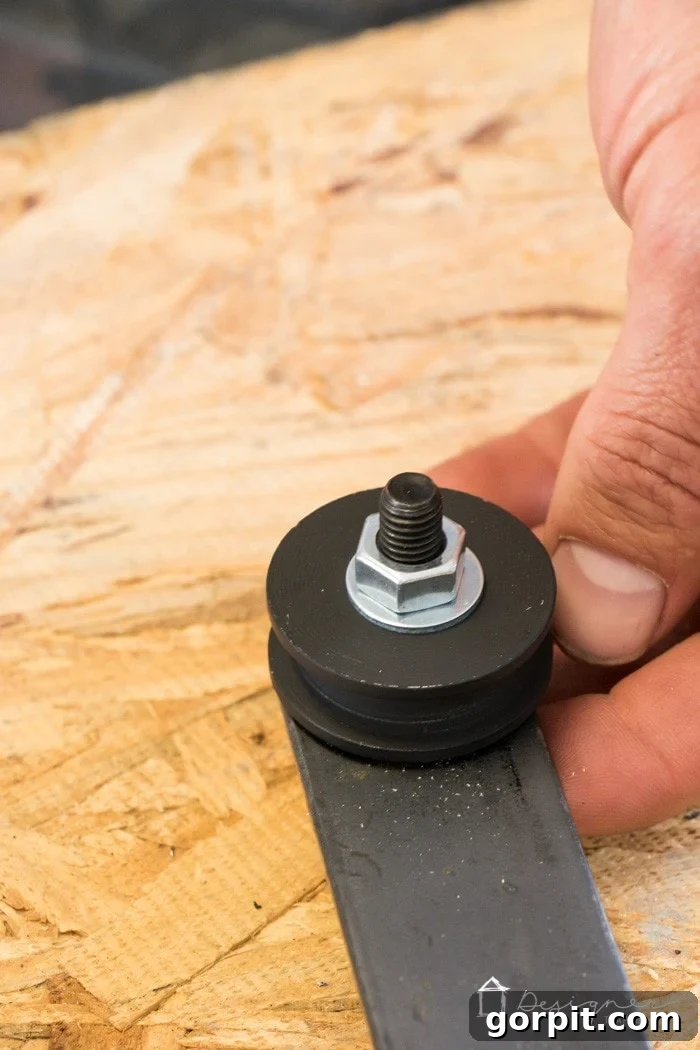
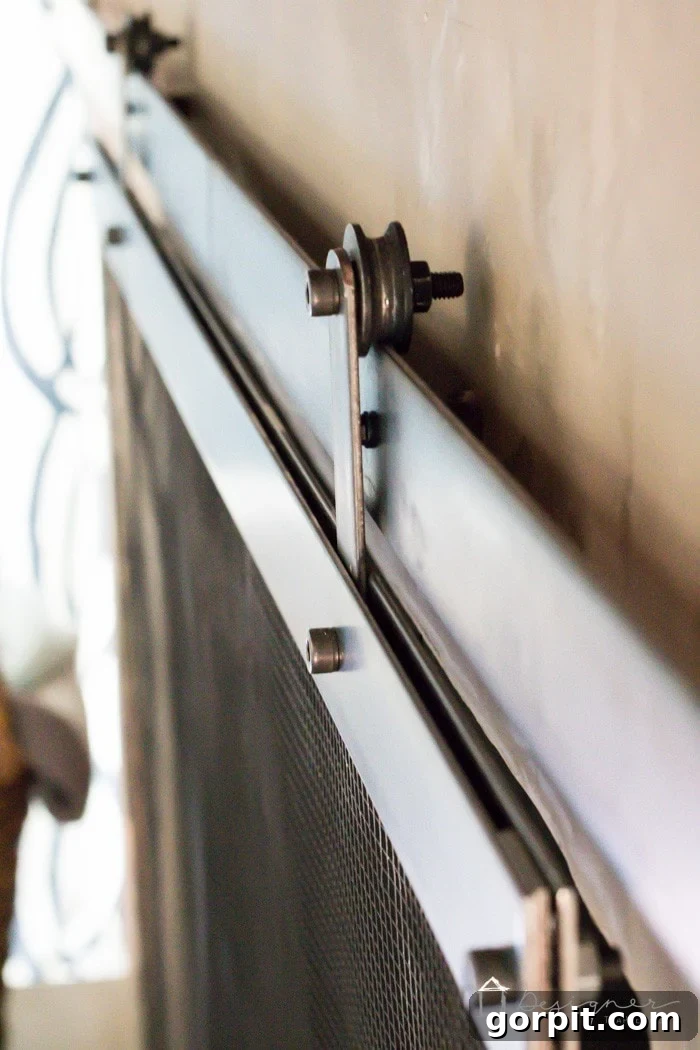
Attach Pulley Wheels: The final step in building the screen is to attach the painted pulley wheels to the prepared wheel posts. Insert one of the longer 1.25 x 35mm bolts through each wheel post. On the bolt, add a 1/4” washer, then slide on the pulley wheel, followed by another 1/4” washer, and finally, secure it with a nut. Tighten firmly, but ensure the pulley wheel can still rotate freely without excessive friction. This assembly will allow your screen to smoothly glide along the top rail.
Installing the Sliding Rail System on Your Fireplace
Now that your barn door style screen is complete, it’s time to install the crucial sliding rail system onto your fireplace. Careful measurement and secure fastening are key for proper function and safety.
-
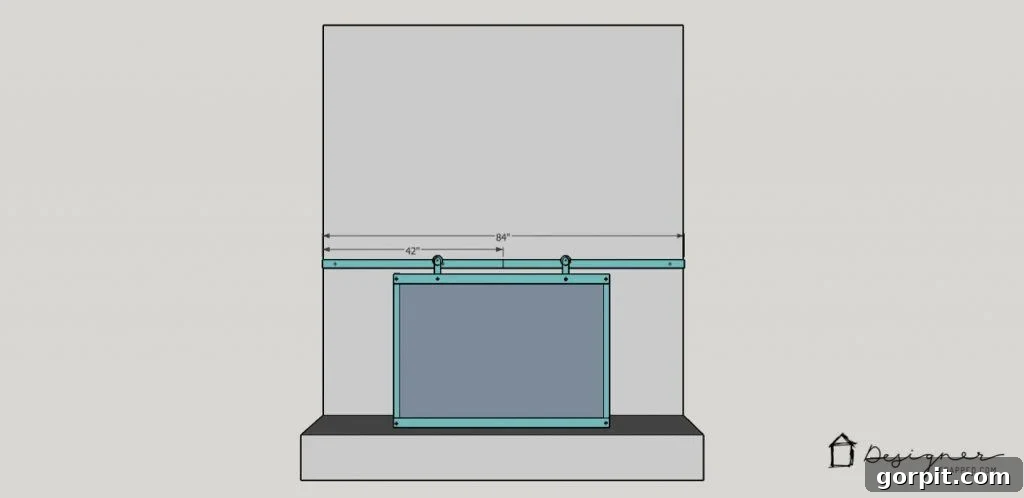
Determine Rail Height: The height of your sliding rail is critical for the screen’s operation. We mounted the bottom edge of our rail 33” above the fireplace hearth. This measurement provided ample clearance, allowing the screen to slide effortlessly back and forth without dragging or catching on the hearth. We strongly advise using your fully assembled screen as a physical guide. Hold it up to your fireplace to determine the optimal height that ensures sufficient clearance for smooth opening and closing, adapting to your specific fireplace dimensions.
-
Cut the Sliding Rail Steel Bars: Take the two 48” x 2” x 3/16” steel bars, which are specifically for the sliding rail, and cut them down to a length of 42” each. If your fireplace opening is significantly narrower than ours, you might find that a single continuous length of steel bar is sufficient for your rail. However, for wider fireplaces like ours, splitting the rail into two separate, precisely measured steel bars is necessary to ensure adequate coverage and stability. Remember to deburr any cut edges with a metal file.
-
Drill Holes in the Rail Bars: Using the same gradual drill bit method employed for the screen frame, drill holes in your rail bar(s). We placed our holes at 3” and 28” from each end of each 42” bar. Ensure these holes are sufficiently sized to accommodate your Tapcon screws, maintaining precision for a secure installation.
-
Mark Fireplace Drilling Points: Carefully hold your cut steel rail bar(s) against the fireplace surface at the exact height you previously determined. Use a level to confirm that the rail is perfectly horizontal – this is crucial for the screen to slide smoothly. With the rail held firmly in place and level, use a marker or pencil to accurately transfer the drill points from the holes in your steel bar(s) onto your fireplace surface. These marks indicate where you’ll pre-drill the mounting holes.
-
Pre-Drill Fireplace Holes: Following the manufacturer’s instructions for your specific Tapcon screws, use a hammer drill to pre-drill holes into your fireplace at the marked points. The type of drill bit and drilling technique will vary depending on your fireplace material (e.g., brick, concrete, stone). For our fireplace, which is brick covered with cement board and a thin cement overlay, we used appropriate masonry bits. You can find more details about our DIY concrete fireplace project here, which may offer additional insights into working with similar surfaces.
-
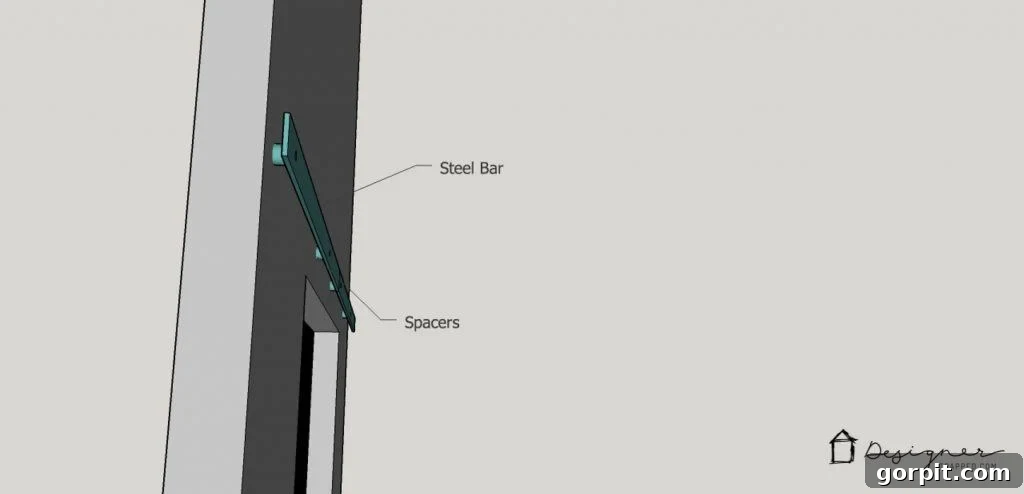
Attach the Rail System: With the fireplace holes pre-drilled, it’s time to mount the rail. Feed the Tapcon screws through the holes in your steel bar rail(s), then place the chrome steel spacers onto the screws. These spacers create the necessary gap between the rail and the fireplace surface. Finally, drive and tighten the Tapcon screws into the pre-drilled holes in your fireplace using your power driver. Ensure the rail is firmly secured and level across its entire length. The spacers are critical for allowing the pulley wheels to roll freely above the rail, preventing any scraping or sticking.
-
Final Touches and Installation: Apply a small touch of black paint to cover the blue tips on the Tapcon screws, ensuring a seamless and finished appearance that blends with your newly painted steel rail. Once dry, you are ready for the satisfying moment of hanging your screen! Carefully lift your assembled barn door fireplace screen and gently place the pulley wheels on top of the installed steel rail. Test the sliding mechanism to ensure it glides smoothly from side to side. Make any minor adjustments if necessary.
And there you have it! As we mentioned earlier, constructing a barn door style fireplace screen involves a series of steps, but as you’ve seen, none of them are inherently difficult. The payoff is immense – the final result is nothing short of AMAZING, adding a touch of rustic sophistication and practical safety to your hearth. Take a moment to admire your handiwork and the transformation of your living space.
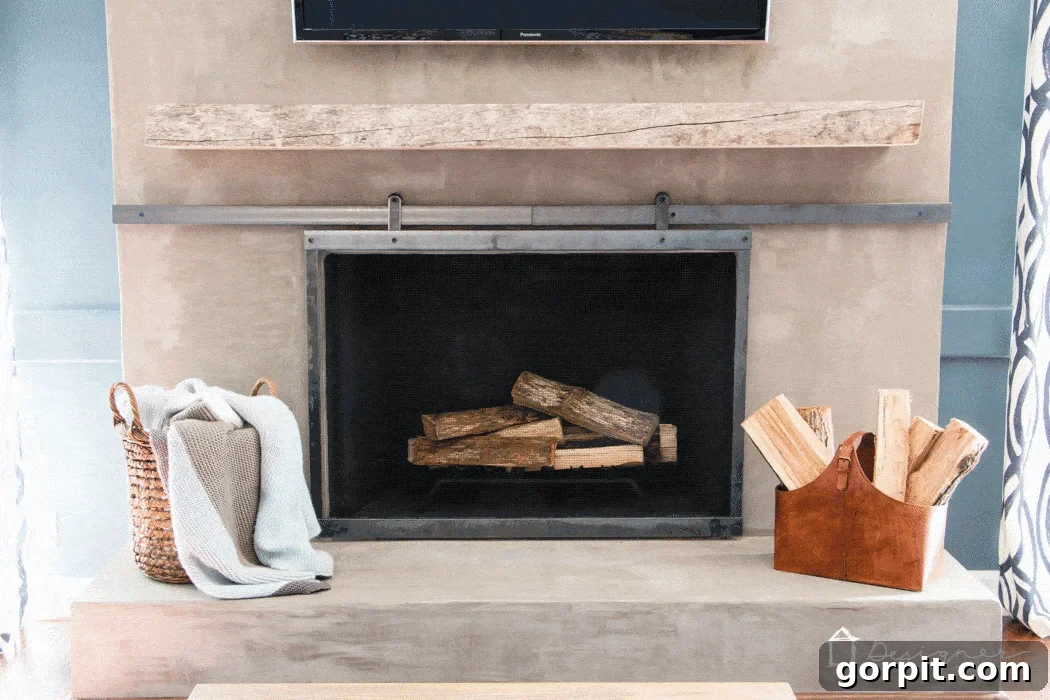
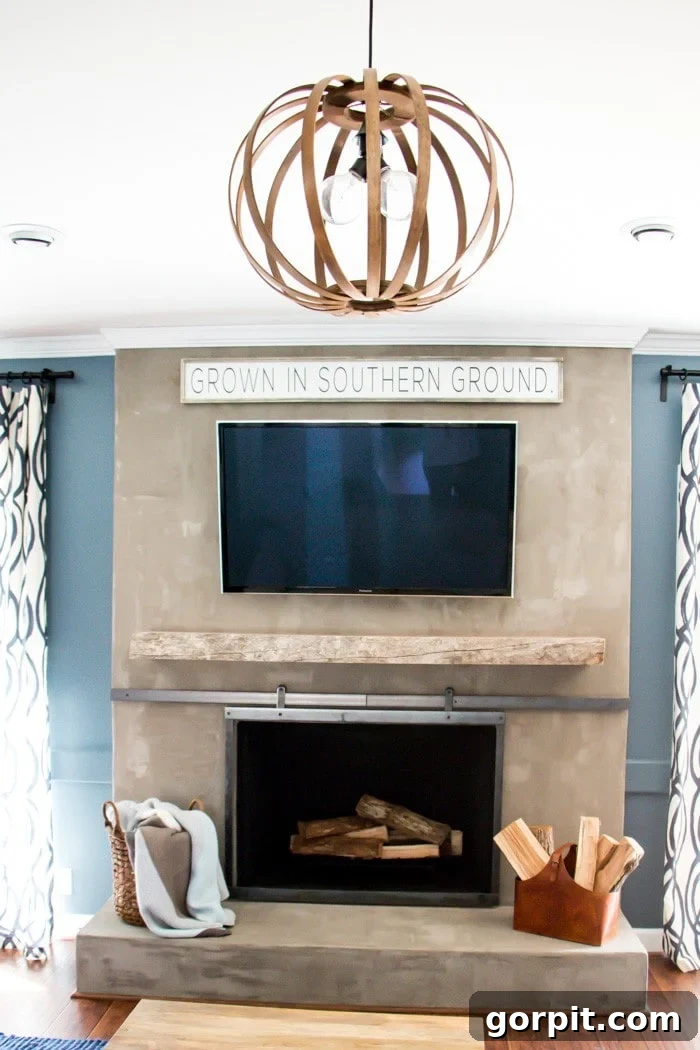
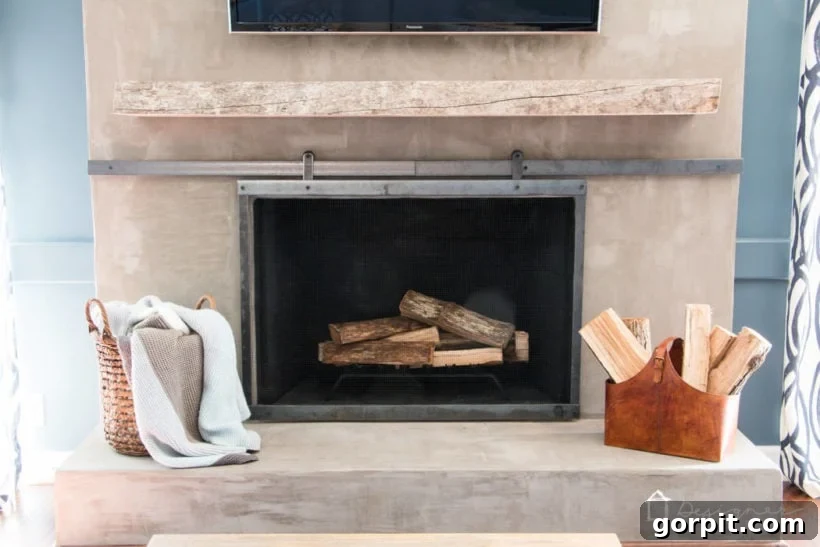
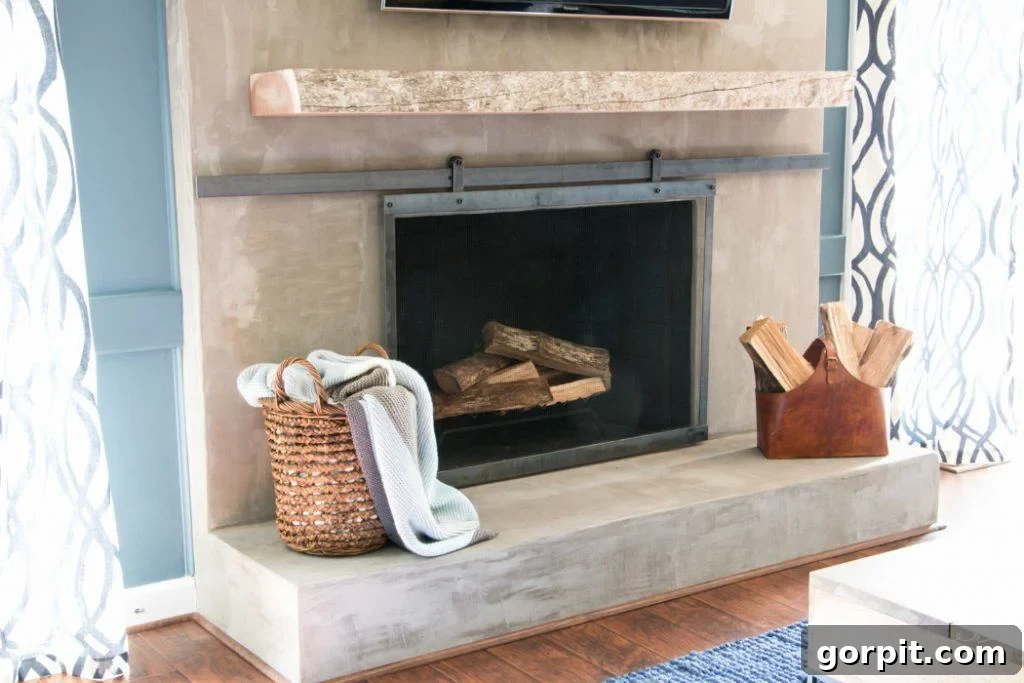
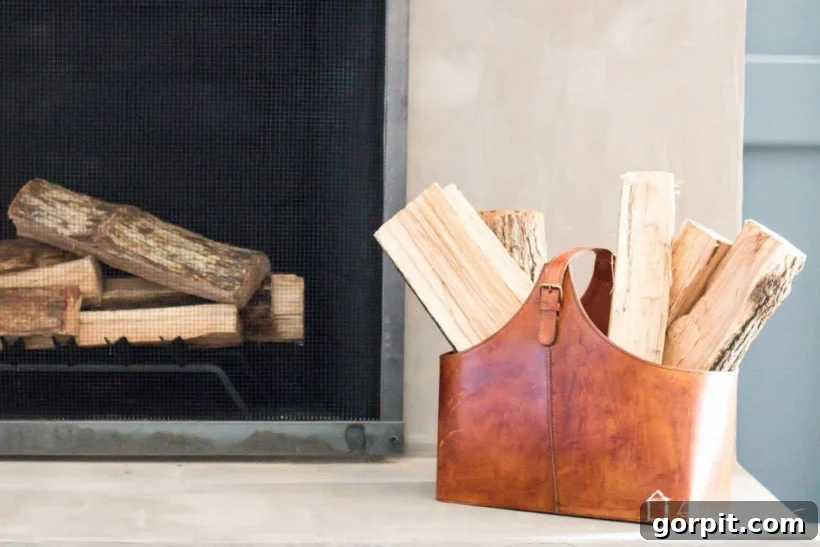
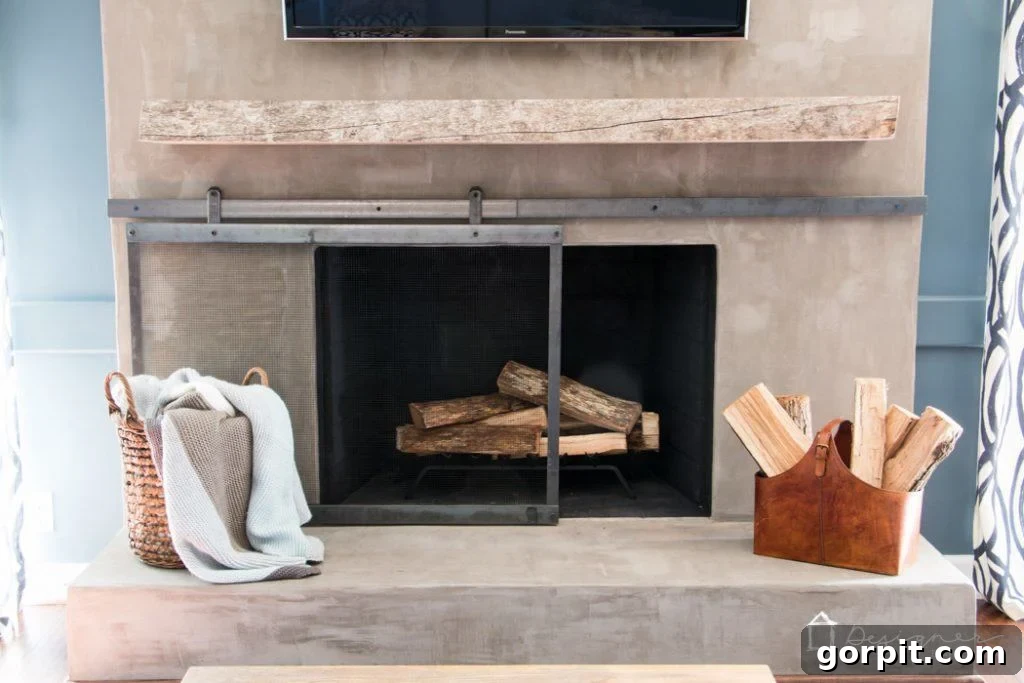
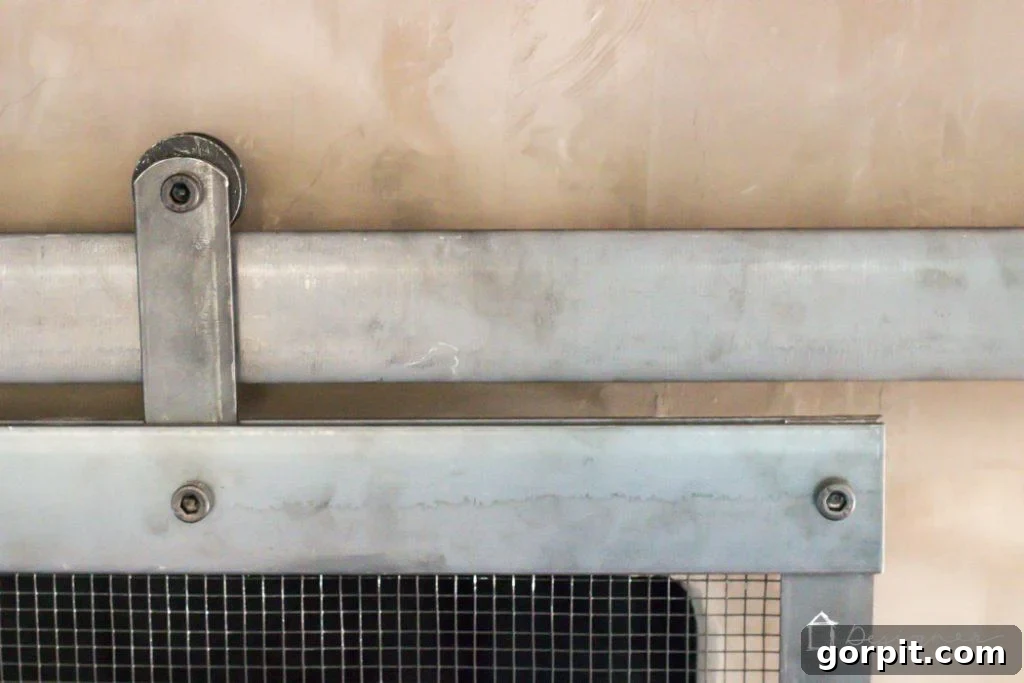
We are absolutely thrilled with the outcome of this project. The barn door fireplace screen has not only enhanced the aesthetic appeal of our living room but also added a layer of practical safety. What are your thoughts on this unique DIY transformation? If you’re as enamored with it as we are, please consider pinning this tutorial. It’s an excellent way to save it for future reference and inspire others to embark on their own custom fireplace screen journey!