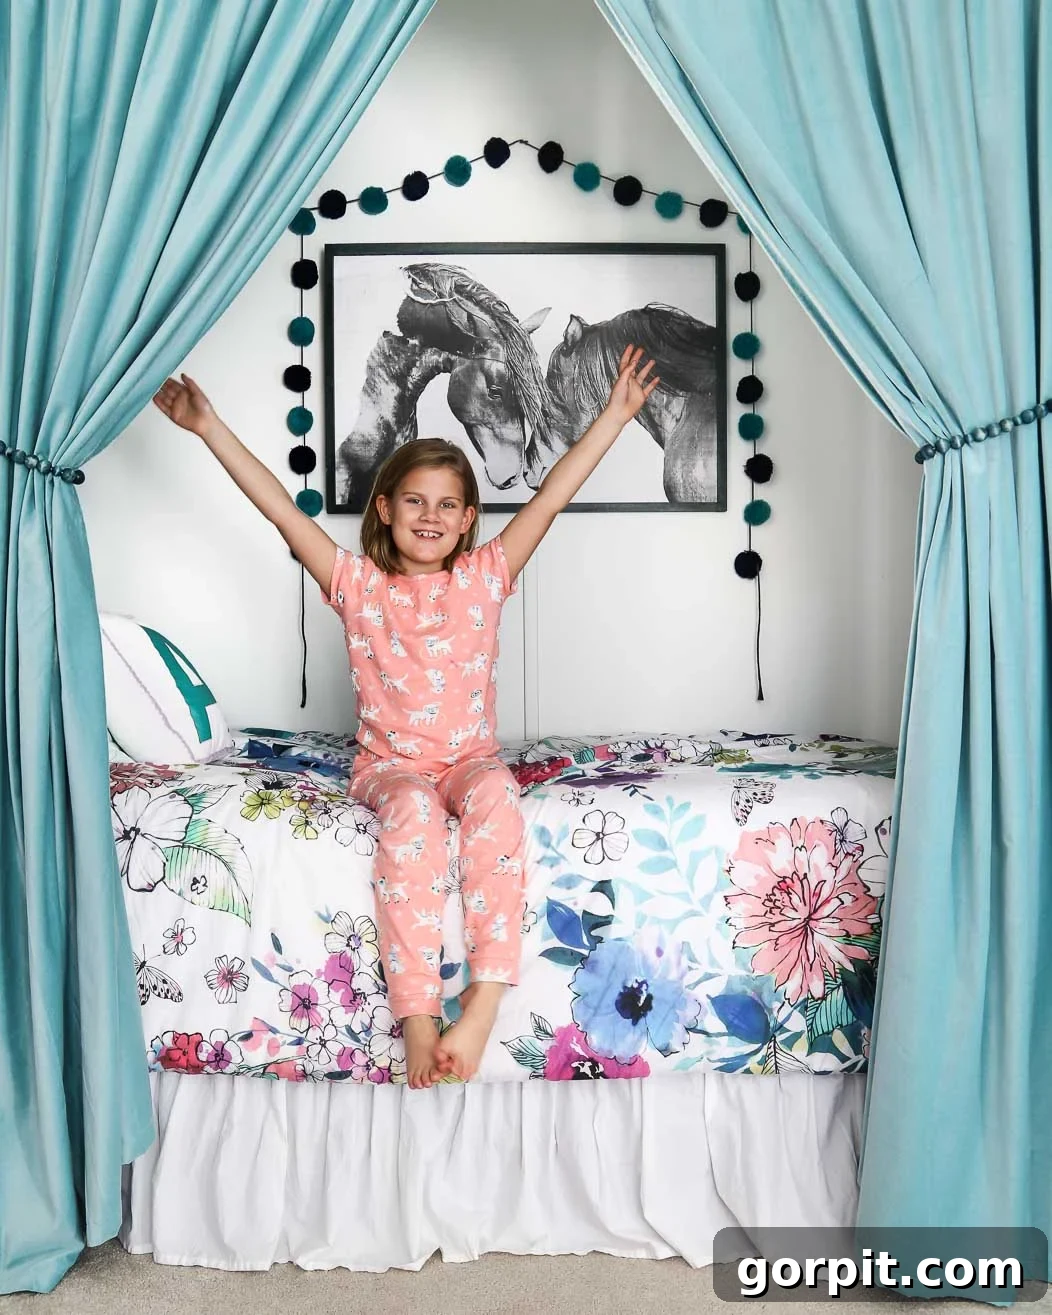
Are you grappling with the challenge of a cramped children’s bedroom? Or perhaps you’re seeking a clever, space-saving solution to accommodate guests during family gatherings and sleepovers? If these scenarios resonate with you, then transforming an unused or underutilized closet into a charming bed nook could be the ideal answer for your home. This ingenious DIY project not only serves to dramatically reclaim valuable floor space within a bedroom but also crafts a uniquely personal and incredibly cozy sleeping haven for your child – truly the stuff of childhood dreams. The thought of converting a closet into a dedicated bed nook might seem daunting, but rest assured, it’s a surprisingly straightforward and budget-friendly endeavor. Get ready to unlock the hidden potential of your home and learn exactly how to embark on this rewarding do-it-yourself transformation!
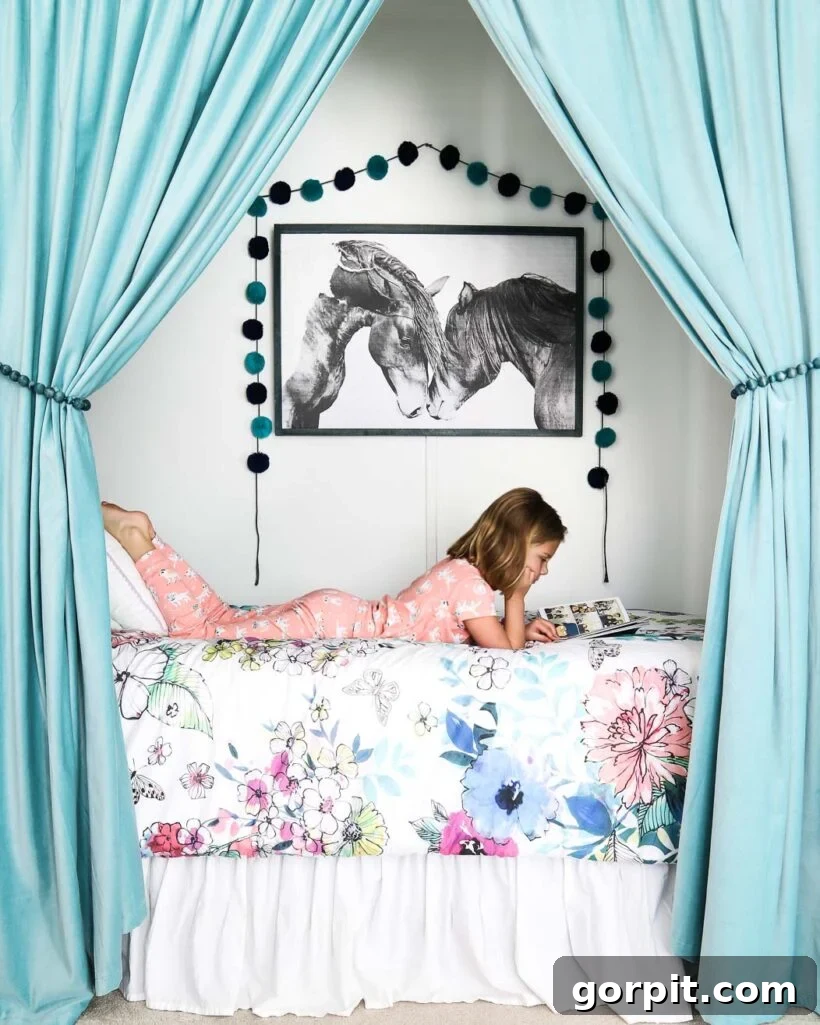
Table of Contents
In our previous home, my daughter Avery’s room inexplicably boasted two closets. While an abundance of storage might seem enviable, she certainly didn’t require both for her wardrobe. What she *did* desperately need, however, was additional floor space – room to spread out, play, and simply be a kid. This presented the perfect opportunity to transform one of her unused closets into the most adorable and functional bed nook imaginable. It quickly became one of my absolute favorite DIY projects we’ve ever undertaken, proving that even a seemingly impractical feature can be reinvented with a little creativity.
Even if Avery’s room had possessed only a single closet, I would still have been inclined to convert it into this cozy sanctuary, opting to store her clothes in stylish dresser drawers instead. This highlights a crucial point: don’t let the lack of a “spare” closet deter you from this brilliant idea! With clever storage solutions and a vision for maximizing space, almost any closet can become a charming bed nook. This post contains affiliate links for your convenience. Click here for my full disclosure policy.
The Ultimate Space-Saver: Why a Closet Bed Nook is a Game-Changer
The concept of transforming a closet into a dedicated bed nook is more than just a clever trick; it’s a fundamental shift in how we perceive and utilize small spaces. This innovative approach offers a multitude of benefits, particularly for children’s bedrooms or homes that simply need a flexible sleeping solution:
- Maximize Floor Space: This is arguably the most significant advantage. By moving the bed out of the main room area and into an existing enclosure, you instantly free up precious square footage. This newfound space can be repurposed for a play zone, a study area, additional storage, or simply create a more open and airy feel in a small bedroom.
- Creates a Cozy, Secure Retreat: For many children, a snug, enclosed space feels incredibly safe and comforting. A bed nook provides a built-in sense of privacy and security, often enhancing sleep quality and making bedtime a more appealing prospect. It becomes their personal hideaway, a sanctuary within their room.
- Adds Architectural Interest and Character: Standard bedrooms can sometimes lack unique features. A well-designed bed nook transforms a mundane closet into a charming, focal point. With creative decor, lighting, and textiles, it can become a stylish statement piece that elevates the entire room’s aesthetic.
- Budget-Friendly Sleeping Solution: Compared to adding an extension or purchasing elaborate bunk beds, converting a closet is often a far more economical way to gain an extra sleeping spot. Most of the structure is already in place, reducing material costs significantly.
- Versatile for Various Needs: While ideal for a child’s permanent bed, a closet bed nook also serves as an great solution for guest sleeping arrangements. It’s perfect for sleepovers, visiting relatives, or as a quiet space for reading and relaxation during the day.
Embracing this DIY project allows you to reimagine your living areas, proving that intelligent design can dramatically enhance both the functionality and charm of your home without extensive renovations.
How to Transform a Closet into a Bed Nook: A Step-by-Step Guide
Planning Your Bed Nook: Essentials Before You Begin
Before you even pick up a tool, meticulous planning is key to a successful and functional closet bed nook. This initial phase ensures that your vision aligns with the practical realities of your space.
- Assess Your Closet: Not all closets are created equal, but many can be adapted. An empty or underused closet in a bedroom or playroom is the obvious choice. Consider its current function and what items will need to be relocated.
- Measure, Measure, Measure: This is the most critical step. You need to precisely measure the width, depth, and height of your chosen closet.
- Width & Depth: Determine if it’s wide enough to comfortably fit a twin, twin XL, or even a full-sized mattress. Remember to account for bedding and a bit of wiggle room. A standard twin mattress is 38×75 inches. Ensure there’s enough depth to accommodate the mattress and allow for sitting up or getting in and out of bed.
- Height: Is it tall enough for someone to sit up comfortably without hitting their head? This is especially important if you plan on adding a headboard or overhead lighting.
Our closet for Avery’s bed nook was generously deep and wide enough to accommodate an extra-long twin mattress, making it an ideal candidate for this cozy conversion. Always measure twice, cut once – or in this case, plan once, build perfectly!
- Consider Functionality & Comfort: Think about who will be using the bed nook and for what purpose. Will it be a permanent sleeping spot, a guest bed, or a reading haven? This will influence your design choices for lighting, shelving, and overall decor.
- Lighting & Ventilation: Closets are often dark and enclosed. Plan for adequate lighting (battery-operated puck lights, wall-mounted sconces, or even a small task lamp) and consider how to ensure proper airflow to prevent stuffiness and maintain comfort.
- Electrical Outlets (Optional but Recommended): If possible, adding an outlet inside the nook can be incredibly useful for charging devices, plugging in a lamp, or even a small fan. This may require professional electrical work.
Materials and Tools for Your Closet Bed Conversion
Gathering all your supplies before you start will make the entire process smoother and more efficient. Here’s a comprehensive list of what you’ll likely need:
- Tools for Demolition and Preparation:
- Screwdriver or electric drill/driver (for removing existing closet components and doors)
- Crowbar or pry bar (for stubborn shelving or door frames)
- Tape measure and level
- Putty knife (for applying spackling)
- Sandpaper (various grits for smooth finishes)
- Utility knife
- Face mask and safety glasses (essential for dust and fumes)
- Wall Repair and Painting Supplies:
- DAP Alex Plus Spackling (or similar high-quality spackling compound for filling holes and imperfections)
- Primer (if painting a dark color or uneven surface)
- Interior paint (choose a color that complements the room and makes the nook feel inviting)
- Paintbrushes and rollers
- Drop cloths or old sheets (to protect your floors)
- Painter’s tape
- Bedding and Nook Elements:
- Inside mount curtain rod brackets (specifically designed to fit within a door frame)
- Curtain rod and curtains (select fabric, style, and color to enhance coziness)
- Metal bed frame (or materials for a custom-built platform bed, depending on your design)
- Mattress & box spring (or just a mattress if using a platform/slat base)
- Headboard (DIY upholstered, wooden, or wall-mounted options)
- Bed skirt (to conceal the bed frame and add a polished look)
- Optional Decor and Lighting:
- Picture ledges or floating shelves
- Wall sconces or battery-operated lights
- Throw pillows and blankets
- Wall art or decals
- Small rug
Step-by-Step Tutorial: Creating Your Dream Bed Nook
Time needed: 1 day and 6 hours
This project typically takes about a day and a half to complete, largely depending on the extent of drywall repair and paint touch-ups required. If your closet walls are in good condition, you could finish it much faster!
- Step 1: Conduct a Thorough Closet Assessment and Initial Planning
As detailed in our planning section, your very first step is to ensure your chosen closet is suitable for a bed nook. Verify its dimensions (width, depth, and height) can comfortably accommodate your desired mattress size, allowing ample space for movement and sitting up. Confirm there are no significant structural issues or dampness. Visualize the final look, considering potential lighting, decor, and the overall flow with the adjoining room. This foundational step is critical for avoiding surprises down the line.
- Step 2: Demolish and Prepare the Space
It’s time for some light demolition! Begin by carefully removing the closet door(s) from their hinges. Store them away if you think you might want to revert the closet to its original function someday, or dispose of them responsibly. Next, remove any existing closet rods, shelving, brackets, or other internal components. Use your screwdriver or electric drill for fasteners, and a crowbar if anything is stubborn. After removal, give the entire interior of the closet a thorough cleaning to remove dust, debris, and any cobwebs. This prepares a clean canvas for your transformation.
- Step 3: Repair and Beautify Your Walls
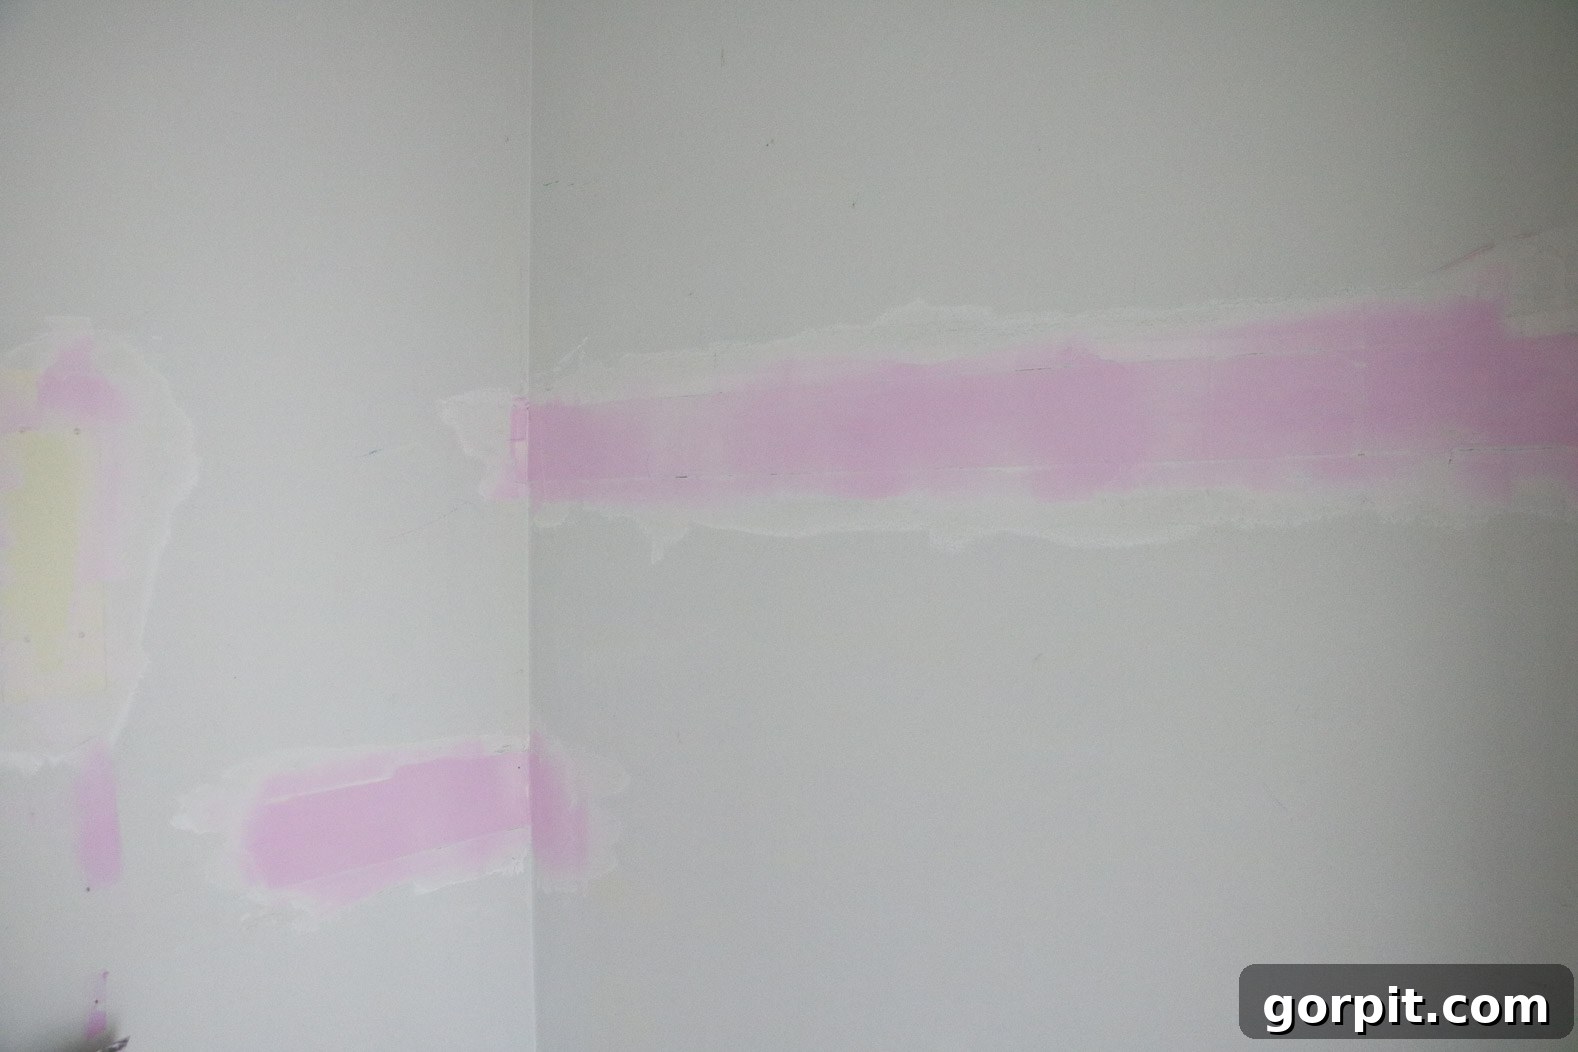
Most closets will have imperfections once their internal components are removed – nail holes, screw holes, and possibly even larger patches of damaged drywall. This is where your repair work comes in. We found DAP Alex Plus Spackling to be an absolute game-changer for this task. Its smooth, easy-to-apply consistency is a dream to work with, combining the best qualities of caulk and spackle. Apply it generously to fill all holes and cracks with a putty knife, allowing it to dry completely. Once dry, don your face mask and safety glasses, then sand the repaired areas until they are perfectly smooth and flush with the wall. The less dust generated, the better, and this spackle truly helps. You can find more tips for repairing drywall here. After achieving silky-smooth walls, apply a coat of primer if necessary, and then paint the entire interior of the closet in your chosen color. Don’t forget to touch up any adjoining paintwork outside the nook as needed for a seamless finish.

- Step 4: Install Your Bed Base
With your walls prepped and painted, it’s time to bring in the bed. For Avery’s bed nook, we opted for the easiest and most practical route: a super inexpensive metal bed frame. This simplified the process immensely, allowing us to focus on aesthetics without complex carpentry. If your closet is particularly narrow or you prefer a custom look, you might consider building a simple wooden platform bed directly into the closet, maximizing every inch. Fun fact: several years after this project, we actually enhanced this very closet by adding DIY built-in bunk beds, showcasing the long-term versatility of a closet space. Regardless of your chosen bed base, once in place, consider adding a DIY headboard to the back wall for comfort and style (I simply updated the fabric on mine before installation). A bed skirt is an excellent way to gracefully conceal a metal frame, creating a soft, cohesive look. This step is all about making the bed functional and visually appealing within its new home.
- Step 5: Enhance Coziness with Curtains
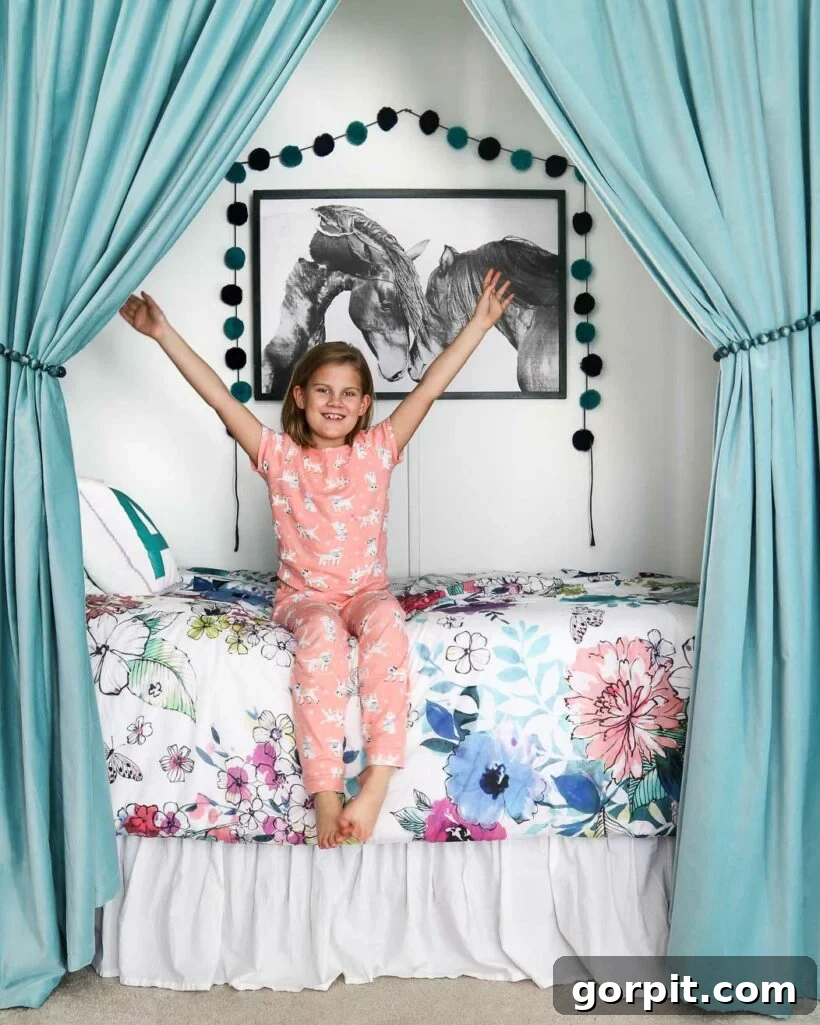
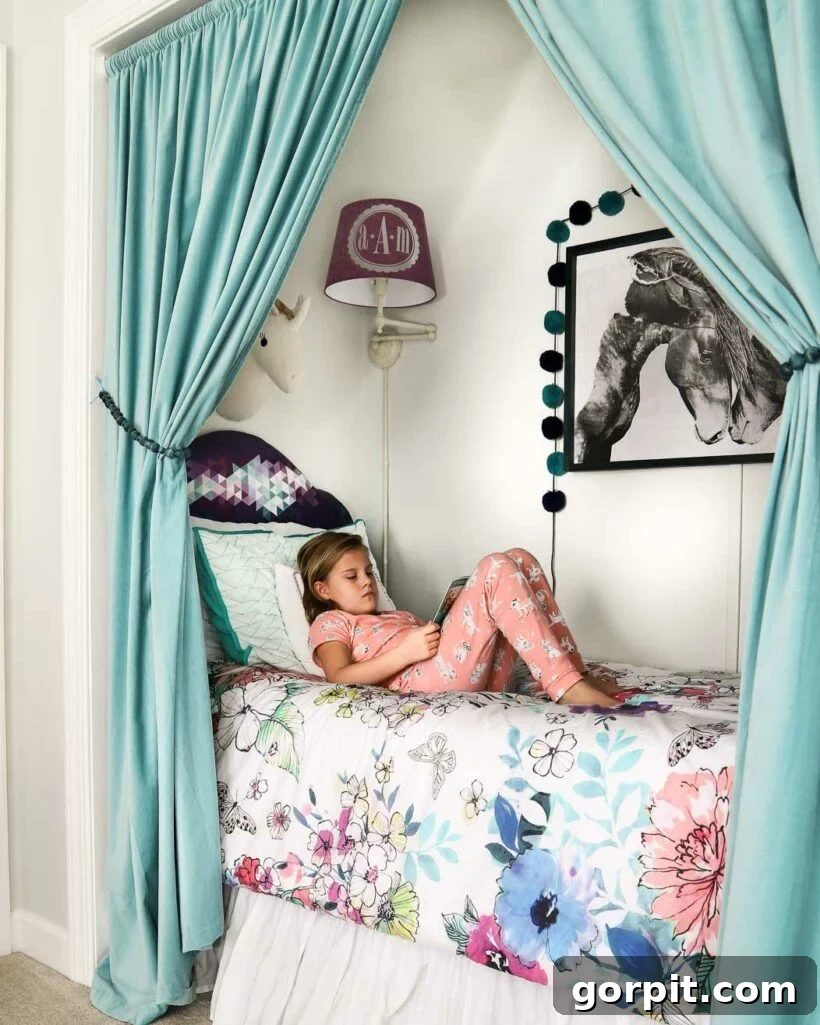
Curtains are essential for transforming a simple opening into a truly cozy and private bed nook. To achieve this, mount your curtain hanging hardware on the inside of the door frame. You’ll specifically need inside mount curtain rod brackets, as they are designed to fit snugly within the frame, creating a seamless look. We found wonderful, inexpensive blue velvet curtains at IKEA that added a pop of color and luxurious texture. Finish the look by creating your own personalized DIY curtain tie-backs, which not only hold the curtains open neatly but also add another layer of bespoke charm to the nook. Curtains allow for varying levels of privacy and light control, making the space adaptable throughout the day.
- Step 6: Decorate and Personalize Your Nook
Now for the most exciting part: bringing your bed nook to life with decor! This is where personality shines through. If space allows, hanging picture ledges at the foot or side of the bed are fantastic for storing books, small toys, or decorative items without taking up valuable floor space. We utilized IKEA picture ledges to create a mini library within the nook. Consider adding a small, wall-mounted lamp or sconce for reading light – battery-operated options are great if you don’t have an outlet. We also integrated a huge DIY art print and some playful pom-poms (a lucky find from the Target Dollar Spot) to make Avery’s nook uniquely hers. Don’t forget comfortable throw pillows and blankets to amplify the cozy factor. The goal is to create a space that is not only functional for sleeping but also an inspiring and happy retreat for its occupant.
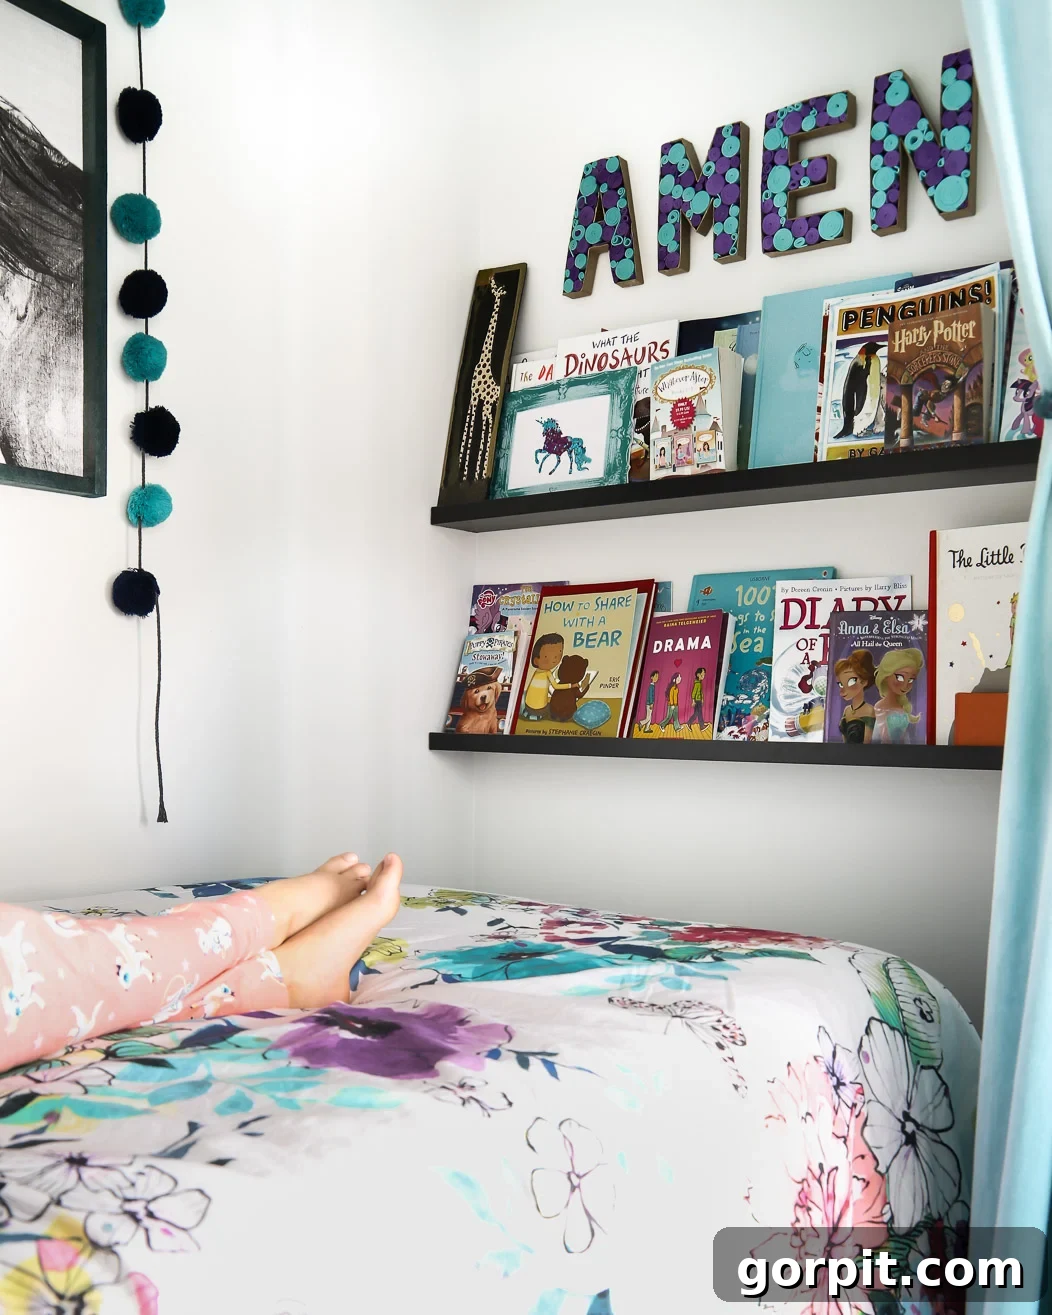
Take a look at the finished result! I believe it’s safe to say that Avery was absolutely thrilled with her new bed nook. The joy on her face upon seeing her personalized, cozy sanctuary made every step of the DIY process immensely rewarding. Witnessing her delight truly underscored the value and impact of this thoughtful home transformation.
Personalizing Your Bed Nook: Decor and Design Ideas
The beauty of a closet bed nook lies in its potential for personalization. This small, intimate space is an excellent canvas for creativity, allowing you to tailor it perfectly to the occupant’s tastes and needs.
- Theme It Up: A bed nook is perfect for creating a themed retreat. Think a starry night sky with glow-in-the-dark stickers, a whimsical forest with leafy decals, or a nautical haven with stripes and anchors. The enclosed nature enhances the immersive feel.
- Smart Storage Solutions: Even though it’s a bed, there’s still room for smart storage. Utilize the wall space above the bed for floating shelves, or install shallow picture ledges for books and small display items. Hooks on the side walls can hold robes or small bags. If you build a custom platform, integrate drawers underneath for hidden storage.
- Lighting is Key: Beyond a main room light, consider accent lighting within the nook. Fairy lights strung around the frame can create a magical ambiance. A wall-mounted sconce offers targeted reading light without taking up bedside table space. Battery-operated options eliminate the need for electrical wiring.
- Textiles and Comfort: Layering textiles is crucial for coziness. Plush pillows, a soft duvet, and extra throws invite relaxation. Consider a washable rug on the floor for added warmth and a touch of softness underfoot. The curtains themselves can be a major decor element – choose colors, patterns, and fabrics that complement the room.
- Artwork and Personal Touches: Frame favorite drawings, hang lightweight prints, or create a gallery wall with cherished photos. A small mirror can also help reflect light and make the space feel a bit larger. Remember, even a small space benefits from personal touches that make it feel uniquely theirs.
By thoughtfully combining functional elements with decorative flair, your closet bed nook will become more than just a sleeping area; it will be a cherished, custom-designed haven.
As you can see, transforming a closet into a bed nook is a truly fantastic and impactful home project. It’s an innovative way to address common challenges like limited bedroom space, all while creating a delightful and highly functional area. This DIY endeavor is not only relatively easy to tackle but also budget-friendly and incredibly customizable, allowing you to infuse personal style into every detail. With careful planning, the right materials, and a dash of creativity, you can construct a beautiful, bespoke bed nook that your child – or even your guests – will adore and enjoy for many years to come. So, don’t hesitate! Gather your tools, let your imagination lead the way, and get started on creating this charming addition to your home today!
Beyond the Bed Nook: More Creative Ideas for Kids’ Spaces
SEE ALL KID’S SPACES
-
IKEA Billy Bookcase Hack for Loads of Storage
-
Fun and Stylish Playroom Décor Ideas & Tips
-
28 Dreamy Bedroom Ideas for Girls
-
How to Decorate Bedroom Doors to Look Like Apartment Doors
-
25 Unique Bedroom Ideas for Teen Boys and Girls
-
30 Genius Shared Bedroom Ideas for Kids
Final Thoughts on Your Closet Bed Nook Project
Transforming an ordinary closet into a charming and functional bed nook is a prime example of how intelligent design can significantly enhance a home’s utility and aesthetic appeal. This DIY project goes beyond merely adding a sleeping space; it’s about creating a personal sanctuary, a unique retreat that resonates with comfort and creativity. Whether you’re aiming to free up valuable floor space in a compact bedroom, provide an enchanting hideaway for your child, or offer a cozy spot for overnight guests, a closet bed nook is a wonderfully versatile solution.
The journey from an underutilized closet to a beloved bed nook is surprisingly achievable, even for those with moderate DIY experience. By meticulously planning, gathering the right materials, and following our step-by-step guide, you’ll be well on your way to creating a custom-designed space that is both practical and picturesque. Remember, every detail, from the choice of paint to the texture of the curtains and the personal touches of decor, contributes to the overall magic of the nook. It’s an investment of time and effort that yields immense satisfaction and a truly unique feature in your home.
So, take the leap! Embrace the opportunity to infuse your home with creativity and practicality. Grab your tools, let your imagination be your guide, and start building a beautiful bed nook that will be cherished and enjoyed for years to come. This isn’t just a project; it’s a transformation that adds character, comfort, and undeniable charm to your living space, proving that even the smallest corners can hold the greatest potential.
Other posts you may enjoy:
- Creative DIY Bunk Bed Ideas
- Girls’ Wall Art: Top Designer Picks
- DIY Headboard With Customizable Messages
- Stylish Dressers We Love (That Don’t Break the Budget!)
- 17 Gorgeous DIY Headboard Ideas
Curious about how I approach transforming rooms and spaces in our home from concept to stunning reality? Be sure to explore Designer in a Binder®, my comprehensive guide to affordable and simple home decorating.
And for those who desire exclusive content, behind-the-scenes sneak peeks into upcoming projects, and insider tips delivered straight to your inbox, don’t forget to subscribe before you go!