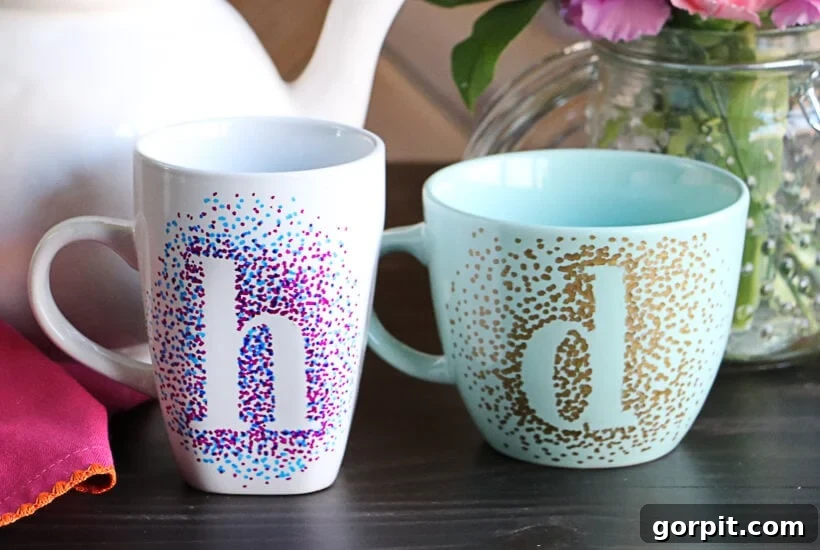
Unlock your creativity and craft truly special gifts with our comprehensive guide to making washable DIY Sharpie mugs! Imagine presenting a personalized mug, adorned with unique designs and vibrant colors, knowing that your thoughtful creation won’t fade or wash away. This isn’t just another craft project; it’s an opportunity to create lasting memories and cherished keepsakes for friends, family, or even a delightful treat for yourself. The secret to their durability lies in a few crucial tips, and we’re here to share every detail, ensuring your custom mugs are as practical as they are beautiful.
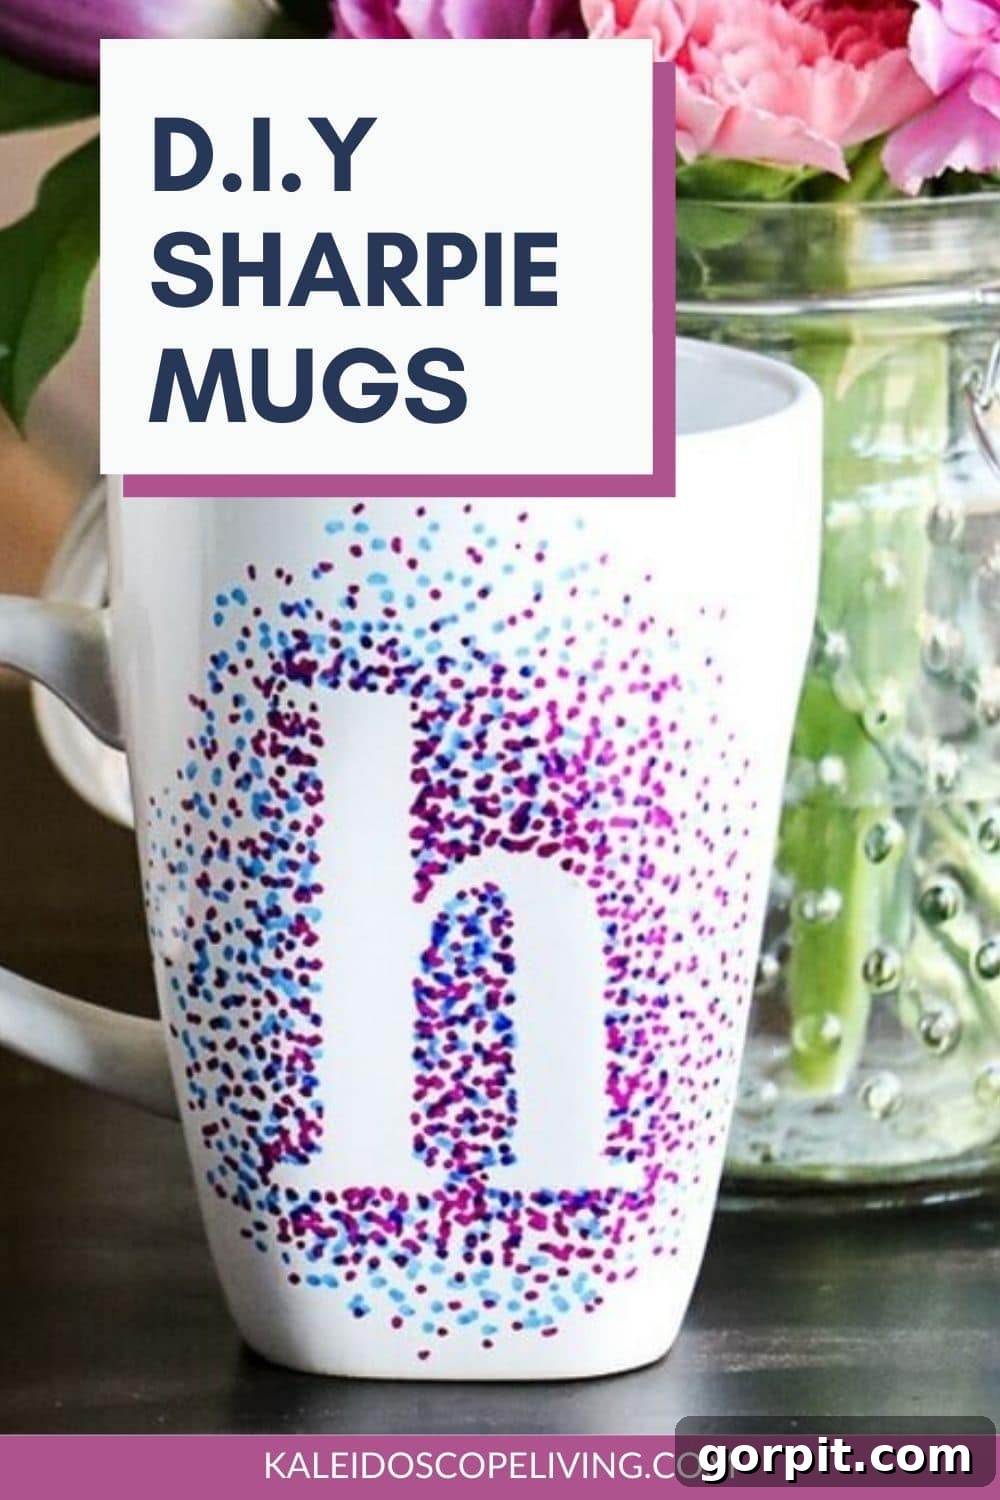
There’s something inherently charming about a well-loved mug. For many, it’s more than just a vessel for beverages; it’s a source of comfort, a personal statement, or a delightful reminder of a special moment. While I confess to having a collection that might raise an eyebrow or two, I firmly believe you can never have too many! However, high-end, uniquely designed mugs can quickly become an expensive indulgence. That’s precisely why I fell in love with the art of customizing mugs. It’s an incredibly cost-effective way to create stunning, one-of-a-kind pieces that are universally adored and deeply appreciated.
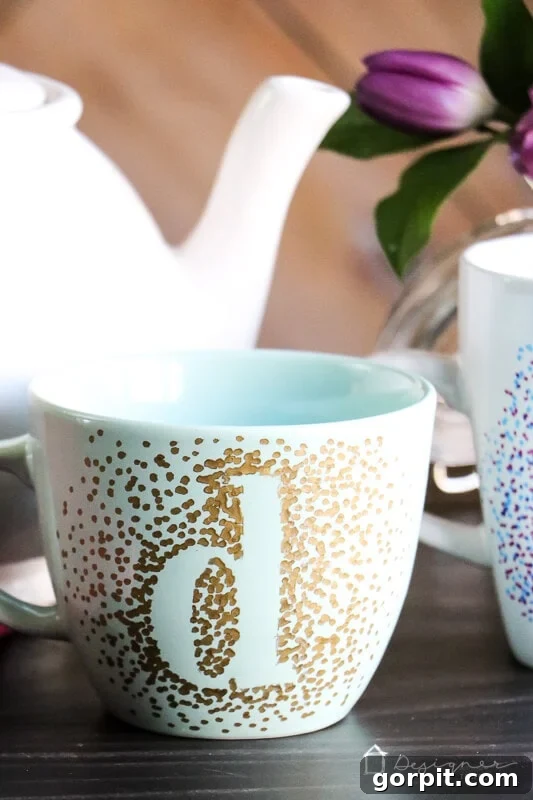
In this detailed tutorial, we’ll walk you through the process of creating these adorable monogrammed dotted Sharpie mugs, but the techniques you’ll learn are versatile enough for virtually any design you can imagine. The key to success, and the ability to wash your masterpieces without fear, hinges on using the correct type of paint pens. Get ready to discover how to transform plain ceramic into wonderful, affordable, and personal gifts that truly stand out.
This post contains affiliate links for your convenience. Click here for my full disclosure policy.
The Ultimate Guide to Washable DIY Sharpie Mugs
For your convenience, a printable version of these instructions is available. Simply refer to the relevant section for a quick reference guide.
If you prefer visual learning, watch our step-by-step video below to see exactly how these fun Sharpie mugs come to life. A comprehensive written tutorial follows immediately after the video, ensuring you have all the details you need to succeed.
Essential Materials for Your DIY Mug Project
Before diving into the creative process, gathering the right materials is crucial for ensuring your Sharpie mug designs are not only beautiful but also durable and washable. Here’s a list of what you’ll need:
- Plain Ceramic Mugs: The foundation of your project! Look for smooth, plain white or light-colored ceramic mugs. These provide the best canvas for your designs and are widely available. You can often find great deals at dollar stores, thrift shops, or discount retailers. Ensure they are oven-safe.
- Oil-based Sharpie Paint Pens: This is arguably the MOST critical item on your list. Unlike standard Sharpie markers, which use ink and will wash off, oil-based paint pens contain actual paint that can be cured to a permanent finish. Do not substitute these with regular Sharpies or water-based markers if you want your design to be washable. They come in a fantastic range of colors, allowing for endless creative possibilities.
- Why Oil-Based is Crucial: Regular Sharpie markers are alcohol-based ink. When exposed to heat (like in an oven) or even just repeated washing, this ink will fade and eventually disappear. Oil-based paint pens, on the other hand, contain opaque paint that bonds to the ceramic surface once properly baked, creating a lasting, vibrant finish.
- Large Felt Stickers or Vinyl Letters: These are perfect for creating crisp monograms or specific shapes. Vinyl letters are generally easier to remove cleanly than paper stickers. Alternatively, if you prefer a freehand design, a pencil can be used to lightly sketch your pattern before applying paint. Avoid regular paper stickers, as they can leave residue or be difficult to peel off after painting.
- An Oven: Essential for baking and curing your mug designs, making them permanent and washable.
- Rubbing Alcohol: Used to thoroughly clean your mugs before you start, removing any oils, dust, or residues that could prevent the paint from adhering properly. This step is vital for a long-lasting design.
- Nail Polish Remover and Q-tips: Your best friends for fixing any stray dots, smudges, or imperfections. Acetone-based remover works effectively to erase mistakes before the paint has been baked.
Step-by-Step Tutorial: Crafting Your Personalized Mug
Time needed: Approximately 25 minutes per mug (excluding baking and cooling time)
This project is wonderfully quick and easy, making it perfect for last-minute gifts or a fun afternoon craft. Each mug takes about 20-25 minutes of active design time, plus baking and cooling.
- Step 1: Prepare Your Mug for Design.
Begin by ensuring your mug is pristine. Wipe the entire surface you plan to decorate with rubbing alcohol. This crucial step removes any fingerprints, dirt, or oils that might interfere with the paint’s adhesion. Allow it to air dry completely. Once clean, carefully place your chosen felt sticker or vinyl letter onto the mug. Press it down firmly, paying special attention to the edges, to ensure there are no air bubbles or lifted areas where paint could bleed underneath. If you’re going for a freehand design, this is the stage to lightly sketch your pattern with a pencil.
- Step 2: Bring Your Design to Life with Paint Pens.
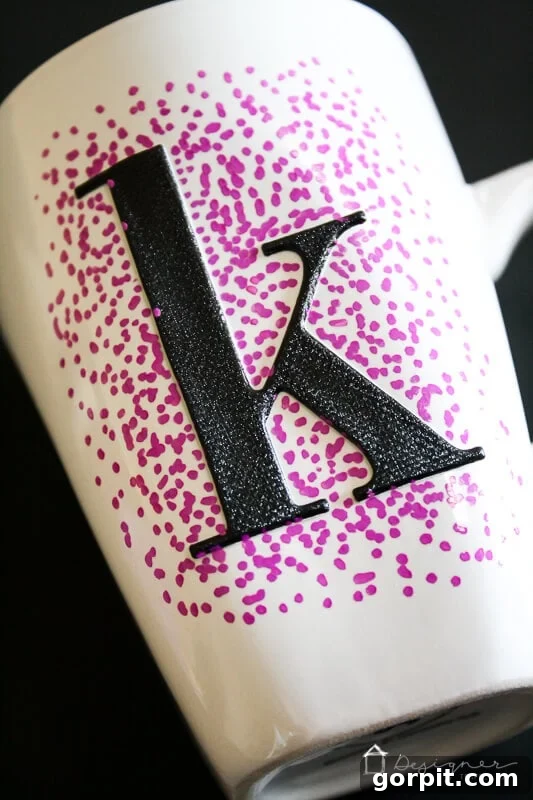
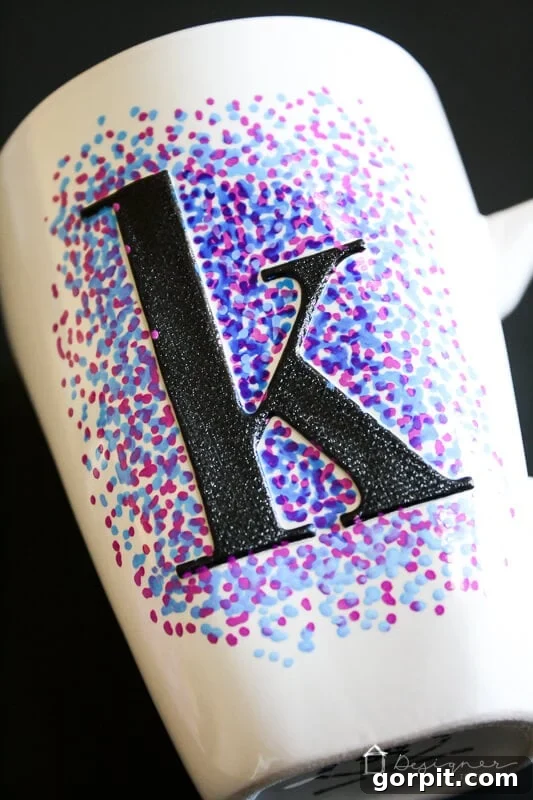
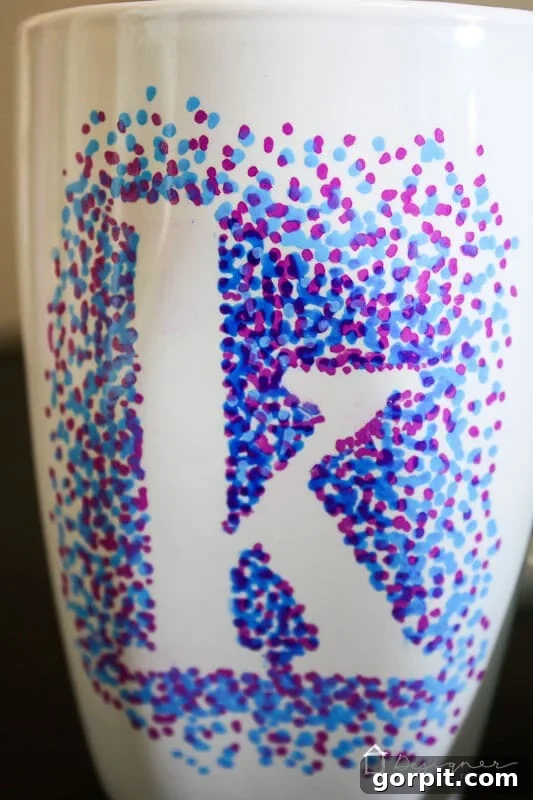
With your oil-based paint pens in hand, it’s time to add your design. For a dotted monogram, start by creating a dense concentration of dots directly around the edges of your sticker. Aim for consistency, but don’t be afraid to vary the pressure slightly to create dots of different sizes, adding texture and depth to your design. As you move further away from the sticker, gradually make your dots more sparse, creating a lovely fade effect. You can stick to a single color for a minimalist look or experiment with multiple colors for a vibrant, layered appearance.

If you choose to use more than one color, allow the first layer of dots to dry completely before applying the next color. Oil-based paint typically dries quite quickly to the touch, but giving it a few minutes ensures no smudging or color blending you didn’t intend. Experiment with different patterns: stripes, geometric shapes, or abstract swirls can also look fantastic with these pens. Always ensure good ventilation while working with paint pens.
- Step 3: Dry Your Design and Perfect Any Touch-Ups.
Once your design is complete, allow all the painted dots or lines to dry completely. This usually takes about 10-15 minutes, but giving it a little extra time won’t hurt. After the paint is thoroughly dry, carefully peel off your sticker or vinyl letter. If you notice any small mistakes, smudges, or areas where the paint might have bled slightly under the sticker, don’t worry! Dip a q-tip into a small amount of nail polish remover (acetone-based works best) and gently wipe away the unwanted paint. This allows for precise corrections, ensuring your design looks crisp and professional.
- Step 4: Bake Your Mug(s) for Permanence.
This is the critical step that makes your designs washable! Place your decorated mugs inside a COLD oven. It’s essential not to pre-heat the oven beforehand. Starting with a cold oven allows the mugs to heat up gradually, preventing thermal shock that could cause cracking or uneven curing of the paint. Once the mugs are inside, set your oven to 350 degrees Fahrenheit (175 degrees Celsius). Allow the oven to reach this temperature and then let your mugs “bake” for 30 minutes. For best results and to avoid potential discoloration on the mug’s bottom, we recommend placing them upside down directly on an oven grate rather than on a cookie sheet. After the 30-minute baking period, turn off the oven completely. DO NOT open the oven door immediately. Let the mugs cool down completely inside the oven as it returns to room temperature. This slow cooling process is just as important as the baking itself for properly setting and hardening the paint. Once the oven is entirely cool (which can take a few hours), carefully remove your beautifully customized mugs. You might notice a slight change in the intensity or hue of some colors after baking – this is a normal part of the curing process and varies depending on the specific paint colors used.
Caring for Your Washable Sharpie Mugs: Tips for Longevity
Now for the burning question: are these truly washable? YES, absolutely! With the proper oil-based paint pens and baking process, your custom designs are designed to last. I generally recommend hand-washing your Sharpie mugs to ensure the absolute longest life for your artwork. A gentle wash with warm, soapy water will keep your designs vibrant for years. However, I can personally attest to having put my own Sharpie mugs through the dishwasher on numerous occasions (on the top rack and a gentle cycle, mind you!), and the designs have held up beautifully without washing off. While dishwasher use is possible, hand-washing remains the gold standard for preserving your personalized creation as long as possible.
Beyond Monograms: Creative Design Ideas for Your Mugs
While the dotted monogram is undeniably charming, the beauty of DIY Sharpie mugs lies in their limitless customization potential. Here are a few ideas to spark your imagination:
- Quotes and Sayings: Use vinyl letter stencils for favorite quotes, song lyrics, or inside jokes. Once the stencil is removed, fill in the letters or outline them with your paint pens.
- Abstract Patterns: Forget precision! Create freeform swirls, stripes, geometric shapes, or a confetti-like sprinkle of dots all over the mug for a modern look.
- Seasonal Themes: Design mugs for specific holidays – pumpkins for Halloween, snowflakes for winter, hearts for Valentine’s Day, or floral patterns for spring.
- Mini Illustrations: If you’re confident in your drawing skills, sketch small illustrations of coffee beans, tea leaves, cats, dogs, or tiny landscapes.
- Kid’s Artwork: Trace a child’s drawing or handprint onto the mug with a pencil, then go over it with paint pens for a truly priceless keepsake.
- Geometric Designs: Use masking tape to create clean lines and geometric shapes. Paint within the taped-off areas, then carefully peel the tape away when dry.
Troubleshooting Common DIY Mug Issues
Even seasoned crafters encounter bumps in the road. Here are some solutions to common problems you might face:
- Paint Washing Off: The most common culprit is using regular Sharpie markers instead of oil-based paint pens, or not baking the mug properly. Always ensure you’re using oil-based pens and follow the baking instructions precisely.
- Smudges or Fingerprints: This usually happens if the paint isn’t completely dry before handling or if the mug wasn’t properly cleaned with rubbing alcohol beforehand. Patience is key when letting paint dry, and thorough cleaning prevents oil transfer.
- Uneven Dots or Lines: Practice makes perfect! Try experimenting on a piece of paper or an old plate first to get a feel for the paint pens and the pressure needed for consistent results.
- Sticker Residue: If your stickers leave a sticky film, gently rub the area with a cotton ball soaked in rubbing alcohol or a small amount of cooking oil, then wash thoroughly.
- Mug Cracks During Baking: This is rare but can occur due to thermal shock. Always start with a cold oven and allow the mugs to cool down completely inside the oven before removing them.
THAT’S IT! How utterly adorable and fun are these DIY Sharpie mugs? There’s an unparalleled joy in crafting personalized gifts for the special people in your life. To elevate your thoughtful present even further, consider adding a Starbucks gift card, a selection of gourmet tea bags, or a packet of luxurious hot chocolate mix inside the mug. It transforms a wonderful handmade gift into a truly memorable experience.
More GIFT IDEAS
EXPLORE ALL GIFT GUIDES
-
The Best Gifts for Crafters, DIYers and Makers
-
The 19 Best Gifts for Grandparents
-
The Absolute Best Housewarming Gift Ideas
-
Thoughtful Mother’s Day Gift Ideas
-
Favorite Things Gift Ideas Under $25
-
Holiday Gift Guide Collection