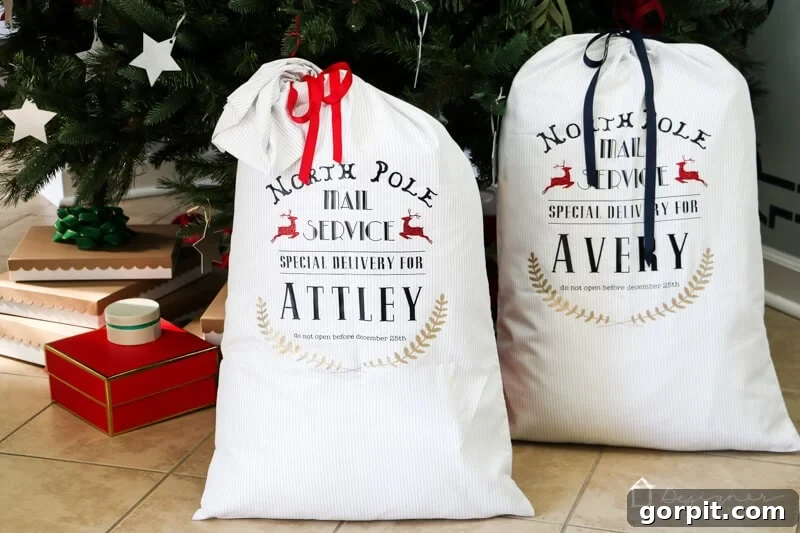
Transform your holiday traditions with a touch of handmade magic! Learn how to create personalized DIY Santa sacks that will delight your children year after year. This comprehensive, step-by-step tutorial makes crafting these festive bags fun and easy, even for beginners. Imagine the sparkle in their eyes when they discover their very own custom Santa sack, brimming with gifts on Christmas morning!
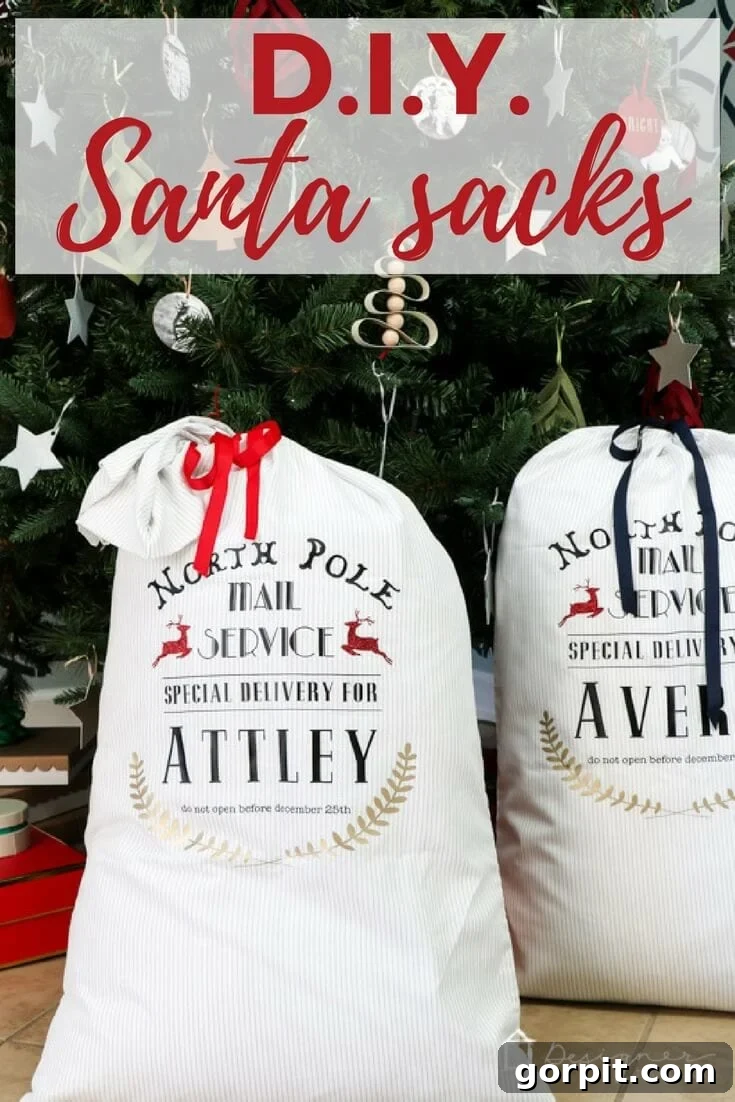
There’s something truly special about personalized Christmas decor, and these DIY Santa sacks are no exception. I crafted these adorable sacks for my own girls over five years ago, and they remain a cherished part of our holiday celebrations. In their younger years, these sacks were exclusively for gifts from Santa, adding an extra layer of enchantment to Christmas morning. Now that they’re older, they serve a practical and fun purpose, perfect for holding those oddly shaped or bulky gifts that are notoriously difficult to wrap. They’ve proven to be incredibly durable and have certainly stood the test of time, becoming a beloved family tradition. If you’re ready to add a touch of personal flair and enduring charm to your Christmas, read on to discover how simple it is to create these custom treasures yourself!
This post contains affiliate links for your convenience. Click here for my full disclosure policy.
Crafting Personalized DIY Santa Sacks: A Step-by-Step Christmas Tutorial
Creating your own personalized Santa sacks is a rewarding project that combines creativity with the joy of giving. Not only do these sacks add a unique and charming element to your holiday decor, but they also become cherished keepsakes that evoke fond memories for years to come. Forget the generic gift wrapping; imagine the anticipation your children will feel seeing their very own name emblazoned on a festive bag, knowing it’s filled with Santa’s special deliveries! This tutorial will guide you through every step, ensuring a smooth and enjoyable crafting experience.
Essential Materials for Your DIY Santa Sacks:
Before diving into the creative process, gathering the right materials is crucial. This project leverages the precision and ease of a Cricut cutting machine to achieve professional-looking results with minimal effort. Here’s everything you’ll need to get started on your personalized Santa sacks:
- King-size Pillowcase: Opt for a sturdy, light-colored fabric like a poly/cotton blend or 100% cotton. The larger size provides ample space for gifts and a significant canvas for your design. Ensure it’s clean and wrinkle-free before you begin.
- Cricut Cutting Machine: While I personally used my powerful Cricut Maker for its versatility and speed, any Cricut model (such as the Explore Air series or even a Cricut Joy for smaller designs) can be used for this project. If you’re unsure which machine is right for your crafting needs, you might find my guide on how to choose the best Cricut machine for you particularly helpful. These machines are perfect for cutting intricate designs from iron-on vinyl with precision.
- Iron-On Vinyl (Heat Transfer Vinyl – HTV): This is where your personalization comes to life! I chose classic black, shimmering gold, and festive glitter red to create a traditional yet vibrant look. Consider a variety of colors and finishes to match your desired aesthetic. Always select high-quality HTV for best adhesion and durability.
- Cricut EasyPress (or Heat Press): A game-changer for iron-on projects! The EasyPress ensures even heat distribution and precise temperature control, which are vital for successful vinyl application. While a traditional iron can be used, an EasyPress offers superior, consistent results, preventing common issues like peeling or incomplete adhesion.
- Blanket or Towel: Essential for providing a firm, flat, and heat-resistant surface when pressing your vinyl onto the pillowcase. This helps in achieving uniform pressure.
- Sharp Scissors: For trimming your vinyl sheets and other minor adjustments.
- Cricut Weeding Tool: This specialized tool allows you to easily remove excess vinyl from your cut designs, revealing the intricate details. It’s indispensable for clean, crisp results.
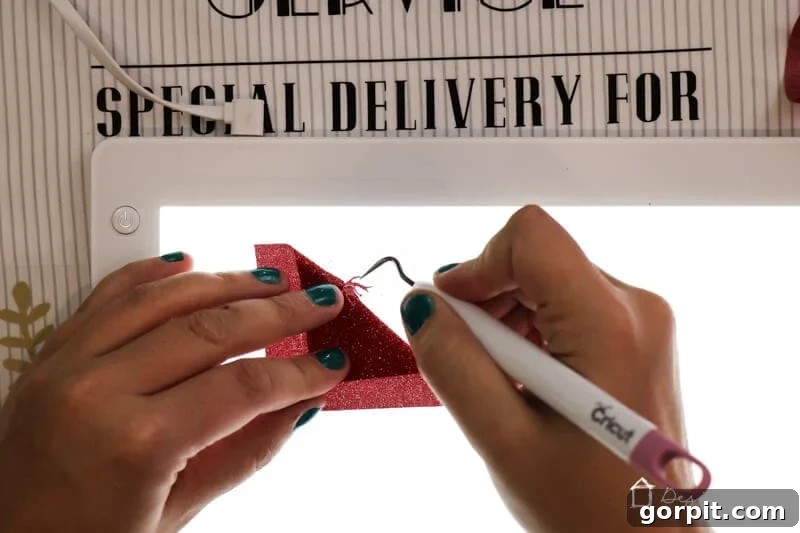
- Optional but Highly Recommended: Cricut BrightPad: If you’re working with glitter iron-on vinyl, the BrightPad provides an illuminated surface that makes weeding significantly easier by highlighting the cut lines. It dramatically reduces eye strain and speeds up the weeding process.
Having all these items ready before you start will ensure a smooth and enjoyable crafting experience, leading to beautifully finished personalized Santa sacks that will be cherished for many Christmases to come.
Creating Your Personalized Santa Sacks: A Detailed Guide
Embark on the journey of crafting your custom Santa sacks with these detailed steps. Each stage is crucial for ensuring a high-quality, long-lasting product that will bring joy for years.
Step 1: Accessing and Customizing Your Design in Cricut Design Space
The first exciting step is to personalize your Santa sack design! You can easily access the base project I used in Cricut Design Space by clicking HERE. Once the project opens, the customization possibilities are endless. The primary modification you’ll need to make is filling in your child’s name! Simply click on the text box and replace the placeholder with their unique name. This simple act immediately transforms a generic design into a deeply personal gift. The font I originally used for my girls’ names is called “Pottery Barn” (I honestly can’t recall where I acquired it years ago!), but the beauty of Cricut Design Space is that you have access to hundreds of fonts, both Cricut’s own library and any fonts installed on your computer. Experiment with different styles—from playful scripts to bold block letters—to find the perfect font that reflects your child’s personality and the festive spirit of Christmas. Remember to size your design appropriately to fit your king-size pillowcase; aim for a width that leaves a good margin on both sides for a balanced look. Before cutting, ensure all elements of your design are “attached” or “welded” if you want them to cut as a single unit, especially for multi-layer text or complex shapes.
Step 2: Cutting and Meticulously Weeding Your Designs
Once your design is finalized in Cricut Design Space, it’s time to bring it to life with your cutting machine. Place your iron-on vinyl onto your Cricut mat, ensuring the shiny, carrier sheet side is face down. Select the appropriate material setting in Design Space (e.g., “Iron-On” or “Glitter Iron-On”) and, crucially, remember to toggle the “Mirror” option ON for all your iron-on vinyl layers. This is a common but critical step for all heat transfer vinyl projects, as it ensures your design appears correctly once applied to the fabric. Load your mat and press the “Go” button to begin cutting.
After your Cricut machine has completed the cut, carefully remove the vinyl from the mat. Now comes the weeding process – removing the excess vinyl that isn’t part of your design. This step requires a bit of patience and a steady hand. My Cricut BrightPad proved invaluable for weeding the glitter red iron-on vinyl. The BrightPad illuminates the cut lines from underneath, making it dramatically easier to distinguish the design from the scrap pieces, especially with reflective or intricate materials. Use your weeding tool to gently lift and peel away all the unwanted vinyl, leaving only your beautiful, personalized design on the clear carrier sheet. Take your time with this step to ensure all small details are preserved and no stray pieces remain.
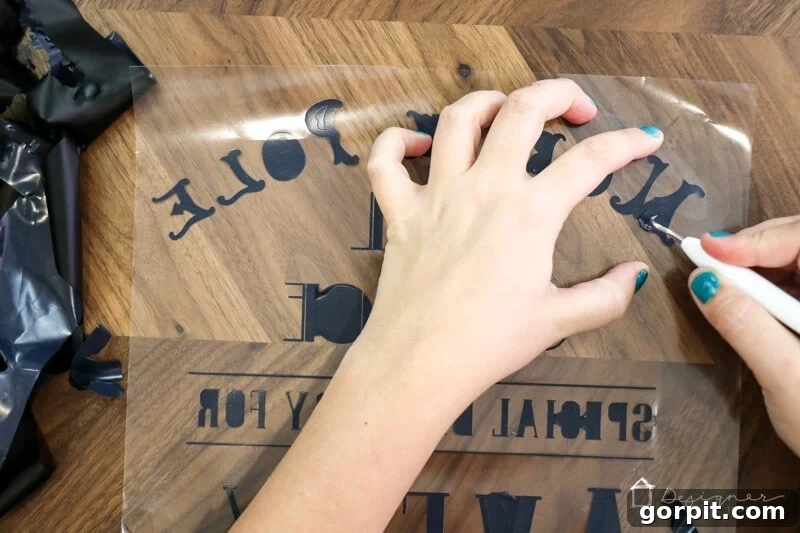
Step 3: Flawlessly Applying Heat Transfer Vinyl with the Cricut EasyPress
With your designs perfectly weeded, it’s time for the magic of application. Lay your king-size pillowcase flat on a sturdy, heat-safe surface (like an ironing board or table) with a thick blanket or towel underneath to provide firm, even pressure. Preheat your Cricut EasyPress to the recommended settings for your specific vinyl and fabric. For the poly/cotton blend pillowcases I used, I found that setting the EasyPress to 285 degrees Fahrenheit and applying heat for 15 seconds worked perfectly. Always pre-press your fabric for 5-10 seconds to remove moisture and wrinkles, creating a smooth surface for adhesion.
Position the largest part of your design (with the clear carrier sheet facing up) onto the pillowcase. Center it carefully, as once it’s pressed, it’s permanent! Place the EasyPress firmly over the design, ensuring even pressure. The built-in countdown timer on the EasyPress is a fantastic feature, beeping when the recommended pressing time is complete, eliminating guesswork. Once the time is up, return the EasyPress to its base. Allow the vinyl to cool completely before attempting to peel off the plastic carrier sheet. This is known as a “cool peel” and is crucial for many types of iron-on vinyl to ensure proper adhesion. Gently and slowly peel back the carrier sheet; if any part of the vinyl lifts, re-cover with the sheet and press again for a few more seconds.
I must confess, I had nearly given up on iron-on projects entirely before discovering the EasyPress. I’d ruined countless shirts and wasted so much material due to inconsistent results with traditional household irons. It wasn’t until I learned about the incredibly uneven heat distribution of standard irons that I understood why my efforts were so often frustrating. The Cricut EasyPress changed everything for me. Its larger surface area (9″x9″ for the model I used) and precisely heated plate guarantee uniform heat and pressure across your entire design, making successful application a breeze. I was initially skeptical, given my past failures, but it has not disappointed. Its compact size is another huge plus; I don’t have the space or desire for a bulky, traditional heat press machine. The EasyPress is truly idiot-proof, which is exactly what a busy crafter needs!
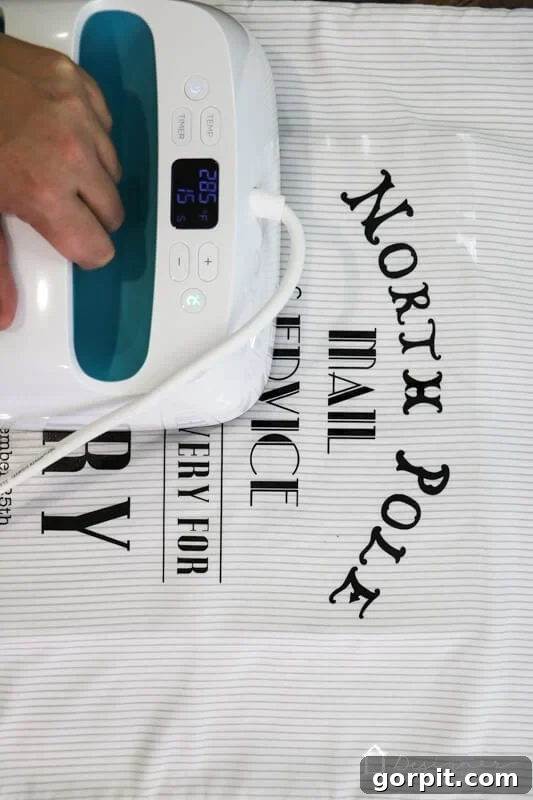
Step 4: Layering Your Design – Adding Names and Festive Accents
After the largest part of your design is securely attached, it’s time to add the personal touch: your child’s name! Carefully position the weeded name vinyl (carrier sheet up) onto the pillowcase, ensuring it is perfectly aligned with your main design. Use the EasyPress again, applying heat for the recommended time and temperature. Remember to allow it to cool completely before peeling the carrier sheet. Finally, add any additional festive elements, such as the reindeer or snowflakes, following the same heat application and cool peel method. If you are layering different vinyl types (e.g., glitter over standard), always consult Cricut’s Heat Guide for precise instructions, as layering often requires shorter press times for each layer to prevent overheating the bottom vinyl.
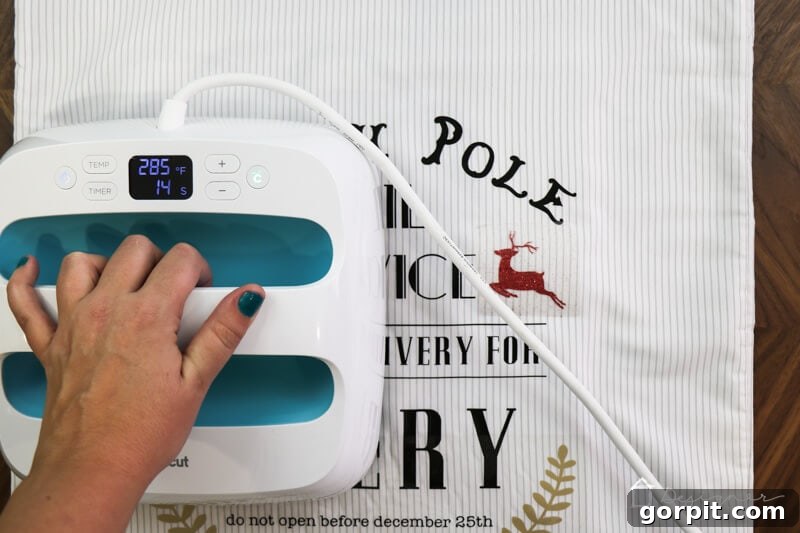
That’s it! Your custom DIY Santa sacks are now complete and ready to be filled with Christmas cheer. Once stuffed full of presents, simply tie the top closed with a festive ribbon for a beautiful presentation. How incredibly cute and personalized are these Santa sacks?! They truly add a magical touch to your holiday celebrations.
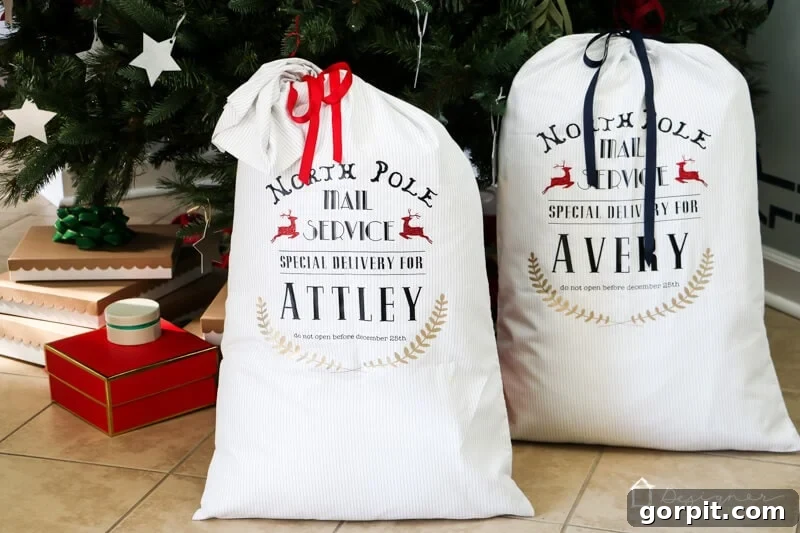
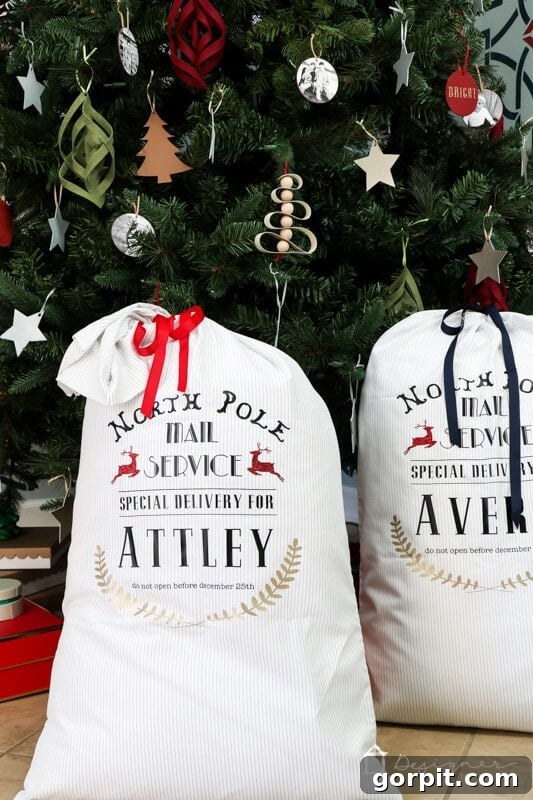
These personalized Santa sacks are more than just gift bags; they are an investment in creating lasting Christmas memories. Imagine the delight on your children’s faces when they see their very own name on a sack, knowing it’s specially for them. This project is not only easy and affordable but also a sustainable choice, as these durable bags can be reused year after year, becoming a treasured family heirloom. They are perfect for family photos, adding a cohesive and magical element to your holiday display. Plus, making them yourself means you can perfectly match your holiday decor or choose designs that reflect your family’s unique style.
Don’t let this fantastic idea get lost in the holiday rush! Be sure to save this tutorial to your favorite Christmas craft board on Pinterest or share it on Facebook so you can easily find it again when you’re ready to start crafting. Spread the joy of personalized holiday gifting!
More Festive and Seasonal Posts to Inspire Your Holidays
SEE ALL HOLIDAY POSTS
-
The Most Realistic Faux Garlands for 2025
-
Stunning Light-Up Paper Snowflake Lanterns
-
How to Decorate Bedroom Doors to Look Like Apartment Doors
-
DIY Santa Sacks Your Kids Will LOVE!
-
Magical Light-Up Paper Christmas Lanterns
-
Inspiring Front Porch Christmas Decorations & Tips
Curious about my unique approach to transforming rooms and spaces in our home? Explore the strategies and insights shared in Designer in a Binder® – it’s your go-to guide for making design dreams a reality!
For even more exclusive content, behind-the-scenes sneak peeks, and fresh DIY ideas delivered straight to your inbox, be sure to subscribe to my newsletter before you go! Join our community of fellow crafters and home design enthusiasts.