
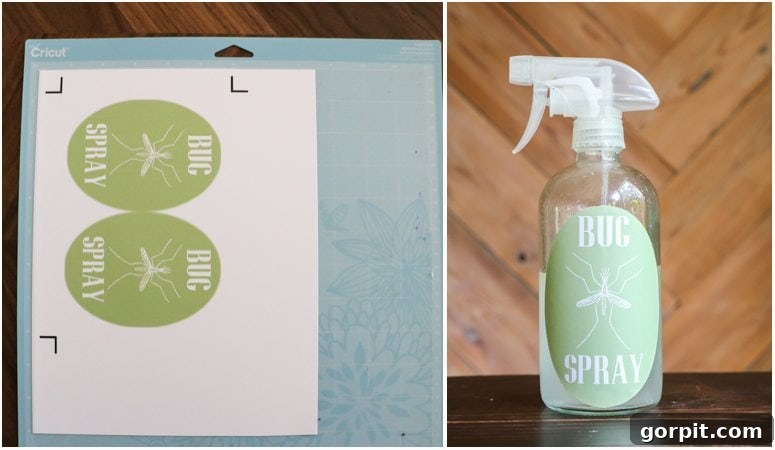
This is a sponsored conversation written by me on behalf of Cricut. The opinions and text are all mine.
Hey creative friends! For years, my die-cutting machine has been an indispensable tool in my crafting arsenal, tackling countless projects from intricate paper designs to personalized apparel. Yet, out of all its incredible capabilities, one of my absolute favorite ways to use my Cricut machine is undoubtedly creating custom DIY stickers. Why the obsession? Because stickers offer an unparalleled versatility for labeling, organizing, and personalizing almost anything you can imagine. As someone whose brain thrives on organization, the ability to effortlessly produce beautiful, functional labels and stickers is pure joy!
Sadly, I’ve noticed that many Cricut owners primarily stick to cutting vinyl or paper, barely scratching the surface of their machine’s full potential. It’s time to change that! Learning how to make stunning, professional-quality stickers with your Cricut machine is surprisingly simple and incredibly rewarding. To help you unlock this fantastic feature, I’ve put together a comprehensive, easy-to-follow guide that will walk you through every step of crafting your own custom stickers and labels.
This post contains some affiliate links for your convenience (which means if you make a purchase after clicking a link I will earn a small commission which helps keep my blog up and running but it won’t cost you a penny more)! Click here to read my full disclosure policy.
Unlock Your Creativity: The Ultimate Guide to Making Custom Stickers & Labels with Your Cricut Machine
Imagine a world where every container in your pantry is perfectly labeled, your planner is bursting with adorable custom stickers, or your homemade gifts feature unique, personalized tags. With your Cricut machine, this world is not just a dream—it’s a vibrant reality waiting for you to create it! This tutorial will guide you through the process I used to design a charming sticker label for my homemade DIY bug spray. However, the techniques you’ll learn are universally applicable, empowering you to create any kind of sticker or label your heart desires. From practical organizational aids to decorative embellishments, the possibilities are truly endless.
Making your own stickers isn’t just a fun craft; it’s a game-changer for organization, personalization, and adding a unique touch to your belongings. Forget the limitations of store-bought labels. With your Cricut, you’re the designer, the printer, and the creator, bringing your vision to life with precision and ease. Let’s dive into the essential materials and detailed steps to get you started on your sticker-making journey.
Essential Materials Needed:
- A Cricut Cutting Machine: While many models work beautifully, I personally use and highly recommend the Cricut Explore Air 2 for its fantastic balance of features and affordability. Any Cricut machine with a “Print Then Cut” feature (like the Maker series or newer Explore models) will be perfect for this project.
- Cricut Printable Sticker Paper: This is the star of the show! Cricut offers various types, including removable, permanent, and transparent options. For most labeling and general sticker needs, the standard white printable sticker paper works wonderfully.
- An Inkjet Printer: You’ll need an inkjet printer to print your designs onto the sticker paper before the Cricut cuts them. Most standard home inkjet printers will do the trick.
- Cricut StandardGrip Cutting Mat: This mat will hold your sticker paper securely during the cutting process.
- Weeding Tool (Optional but Recommended): A weeding tool can be helpful for easily removing excess sticker paper around your designs, especially for intricate cuts.
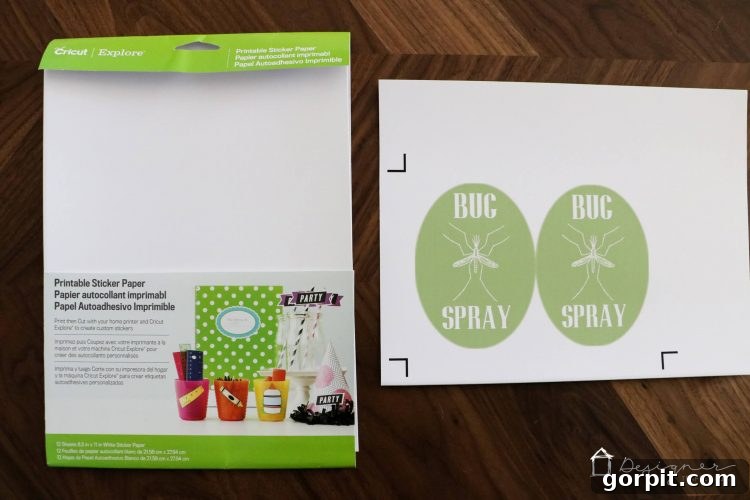
Step-by-Step Guide: Crafting Your Own Stickers in Cricut Design Space
Making stickers with your Cricut is an engaging two-part process: first, your design is printed by your home printer, and then your Cricut machine precisely cuts out the shapes. This “Print Then Cut” feature is what makes custom stickers possible. Follow these detailed steps to create your own personalized labels.
Step 1: Design Your Sticker in Cricut Design Space
- Open Cricut Design Space: Launch the software on your computer or mobile device.
- Start a New Project: Click “New Project” to open a blank canvas.
- Create or Upload Your Design:
- Text and Shapes: Use the “Text” tool to add words and phrases. Select fonts that are clear and legible for labels. Utilize the “Shapes” tool to create basic forms like circles, squares, or stars for your sticker base.
- Images from Cricut Access: Browse the vast library of images available through Cricut Access. Filter by “Printable Images” for designs specifically made for Print Then Cut.
- Upload Your Own Images: If you have a specific image (like a logo, hand-drawn graphic, or photo) you want to use, click “Upload” and follow the prompts. For stickers, you’ll typically want to upload complex images and select the “Print Then Cut” option during the upload process.
- Arrange and Size Your Design: Position your text and images as desired. Use the resizing handles or the “Size” panel to adjust the dimensions of your sticker. For labels, ensure the text is easily readable and the sticker fits your intended surface.
- Combine and Flatten Your Design: This is the crucial step for “Print Then Cut.” Once your design elements (text, images, shapes) are perfectly arranged, select all layers of your sticker design. Then, click the “Flatten” button in the Layers panel (usually found at the bottom right). Flattening combines all selected layers into a single, printable layer, telling your Cricut to print the entire design as one image and then cut around its outer edge.
Step 2: Prepare for Printing and Cutting
- Duplicate for Multiple Stickers (Optional): If you need multiple copies of the same sticker/label, simply select your flattened design and use the “Duplicate” function. Arrange these duplicates on your canvas. To ensure they print and cut together as efficiently as possible on one sheet, select all duplicated, flattened designs and “Flatten” them *again*. This creates one large flattened image containing all your individual stickers, optimizing paper usage. Be mindful of the maximum printable area for Print Then Cut (typically 6.75″ x 9.25″). If your combined design exceeds this, Design Space will prompt you to resize or separate them.
- Click “Make It”: Once your design is flattened and ready, click the green “Make It” button in the top right corner of Design Space.
- Review the Mat Preview: Design Space will show you a preview of your designs on the cutting mat. Ensure everything looks correct and fits within the red border, which indicates the printable and cuttable area.
Step 3: Print Your Stickers
- Click “Continue”: This will take you to the “Print Then Cut” screen.
- Send to Printer: Click “Send to Printer.” A print dialog box will appear.
- Select Your Printer: Choose your home inkjet printer from the dropdown menu.
- Turn Off “Add Bleed” (Optional, but Recommended for Crisp Edges): “Bleed” extends the print slightly beyond the cut line to prevent white edges if the cut is slightly off. While useful for photos, for labels, especially with clear backgrounds, turning it off can sometimes yield cleaner results, particularly if your design has a precise border. Experiment to see what works best for your specific design.
- Toggle “Use System Dialog”: This is very important. Turn this ON. This allows you to access your printer’s advanced settings, where you can select the “Best Quality” print setting and specify “Glossy Photo Paper” or “Cardstock” as the paper type, which often works best for sticker paper to ensure vibrant colors and proper ink saturation.
- Print: Once you’ve adjusted settings, click “Print.” Load your Cricut Printable Sticker Paper into your printer tray (ensure it’s loaded correctly so it prints on the correct side – usually the glossy or sticky side).
Step 4: Cut Your Stickers with Cricut
- Place Printed Sheet on Mat: Carefully place your freshly printed sticker paper onto your Cricut StandardGrip mat, aligning it with the top-left corner as shown in Design Space. Smooth it down to remove any air bubbles.
- Load Mat into Machine: Load the mat into your Cricut machine.
- Select Material Setting: In Design Space, select the appropriate material setting. Cricut Design Space has a dedicated setting for “Printable Sticker Paper.” If you can’t find it, you can browse “All Materials” or create a custom setting. Ensure the pressure is set correctly for a clean cut – often “Default” or “More” pressure works well.
- Start Cutting: Ensure your fine-point blade is installed in Clamp B. Press the flashing “Go” button (Cricut logo) on your machine. Your Cricut will first scan the registration marks (the black rectangle printed around your design) to ensure precise cutting. Then, it will proceed to cut out your stickers.
Step 5: Peel and Apply Your Custom Stickers
- Unload Mat: Once the cut is complete, unload the mat from your machine.
- Remove Stickers: Gently peel your custom stickers from the backing paper. For easier removal, you can slightly bend the mat away from the sticker paper.
- Apply!: Your personalized stickers are now ready to be applied to your chosen surfaces!
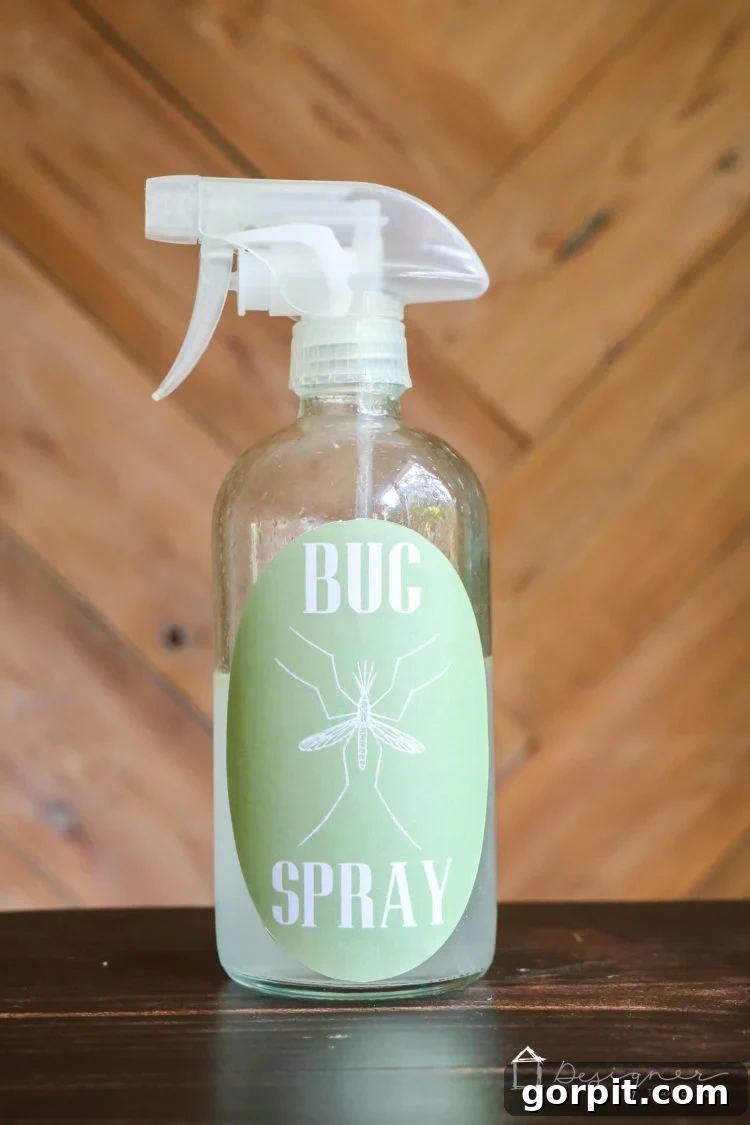
I utilized this precise method to create the charming label for my DIY Bug Spray. The results are always flawless, and the sheer number of possibilities for how and where you can use these custom creations is truly limitless! Just look at how fantastic this particular label turned out on my spray bottle. So cute and perfectly integrated!
For us, who frequently mix our own household cleaners and other DIY solutions, having clear, durable labels on our spray bottles isn’t just about aesthetics—it’s a necessity! It ensures we always know what’s inside, preventing confusion and enhancing safety. This simple act of creating a label transforms a generic bottle into an organized, functional, and even stylish item.
Tips and Tricks for Perfect Cricut Stickers:
- Laminating for Durability: For stickers that need to withstand moisture, wear, or frequent handling (like labels for kitchen containers or water bottles), consider laminating them after printing but before cutting. Apply a clear self-adhesive laminate sheet over your printed design on the sticker paper, then proceed with the Print Then Cut process. Your Cricut will cut through both layers, leaving you with water-resistant and scratch-proof stickers.
- Calibrate Your Machine: If you notice your cuts aren’t perfectly aligned with your print, perform a “Print Then Cut Calibration” in Design Space (Menu > Calibration). This helps your Cricut accurately read the registration marks.
- Saving Sticker Paper: To maximize space on a single sheet, group and flatten multiple smaller designs together before sending them to print. This minimizes waste and makes your sticker-making more cost-effective.
- Experiment with Paper Types: While Cricut Printable Sticker Paper is excellent, you can also experiment with other printable vinyls or label papers. Always do a test cut first to ensure the material settings are correct.
- Weeding Techniques: For intricate designs, try “reverse weeding” where you peel the excess sticker paper *around* your design first, leaving the actual sticker on the backing. This can prevent small details from lifting.
Endless Creative Possibilities: What Else Can You Label?
Beyond bug spray, the applications for your custom Cricut stickers are truly limitless. Think about:
- Kitchen Organization: Labeling spice jars, pantry containers, meal prep boxes, and homemade preserves.
- Office and Craft Room: Organizing storage bins, file folders, supply drawers, and toolboxes.
- Kids’ Essentials: Personalizing school supplies, lunchboxes, toy bins, and creating fun reward charts.
- Gift Giving: Designing unique gift tags, sealing envelopes, or personalizing handmade gifts.
- Party Decorations: Creating custom cupcake toppers, party favor labels, or thematic stickers.
- Business Branding: Making product labels, packaging stickers, or branded elements for your small business.
- Planner and Journaling: Crafting decorative elements, functional labels, and inspirational quotes for your planners and journals.
The satisfaction of creating something both beautiful and functional with your own hands, aided by the precision of your Cricut machine, is unparalleled. This versatile skill opens up a world of personalized projects, transforming mundane tasks into opportunities for creative expression. So, gather your materials, fire up Design Space, and start transforming your organizational dreams into tangible, custom stickers today!
