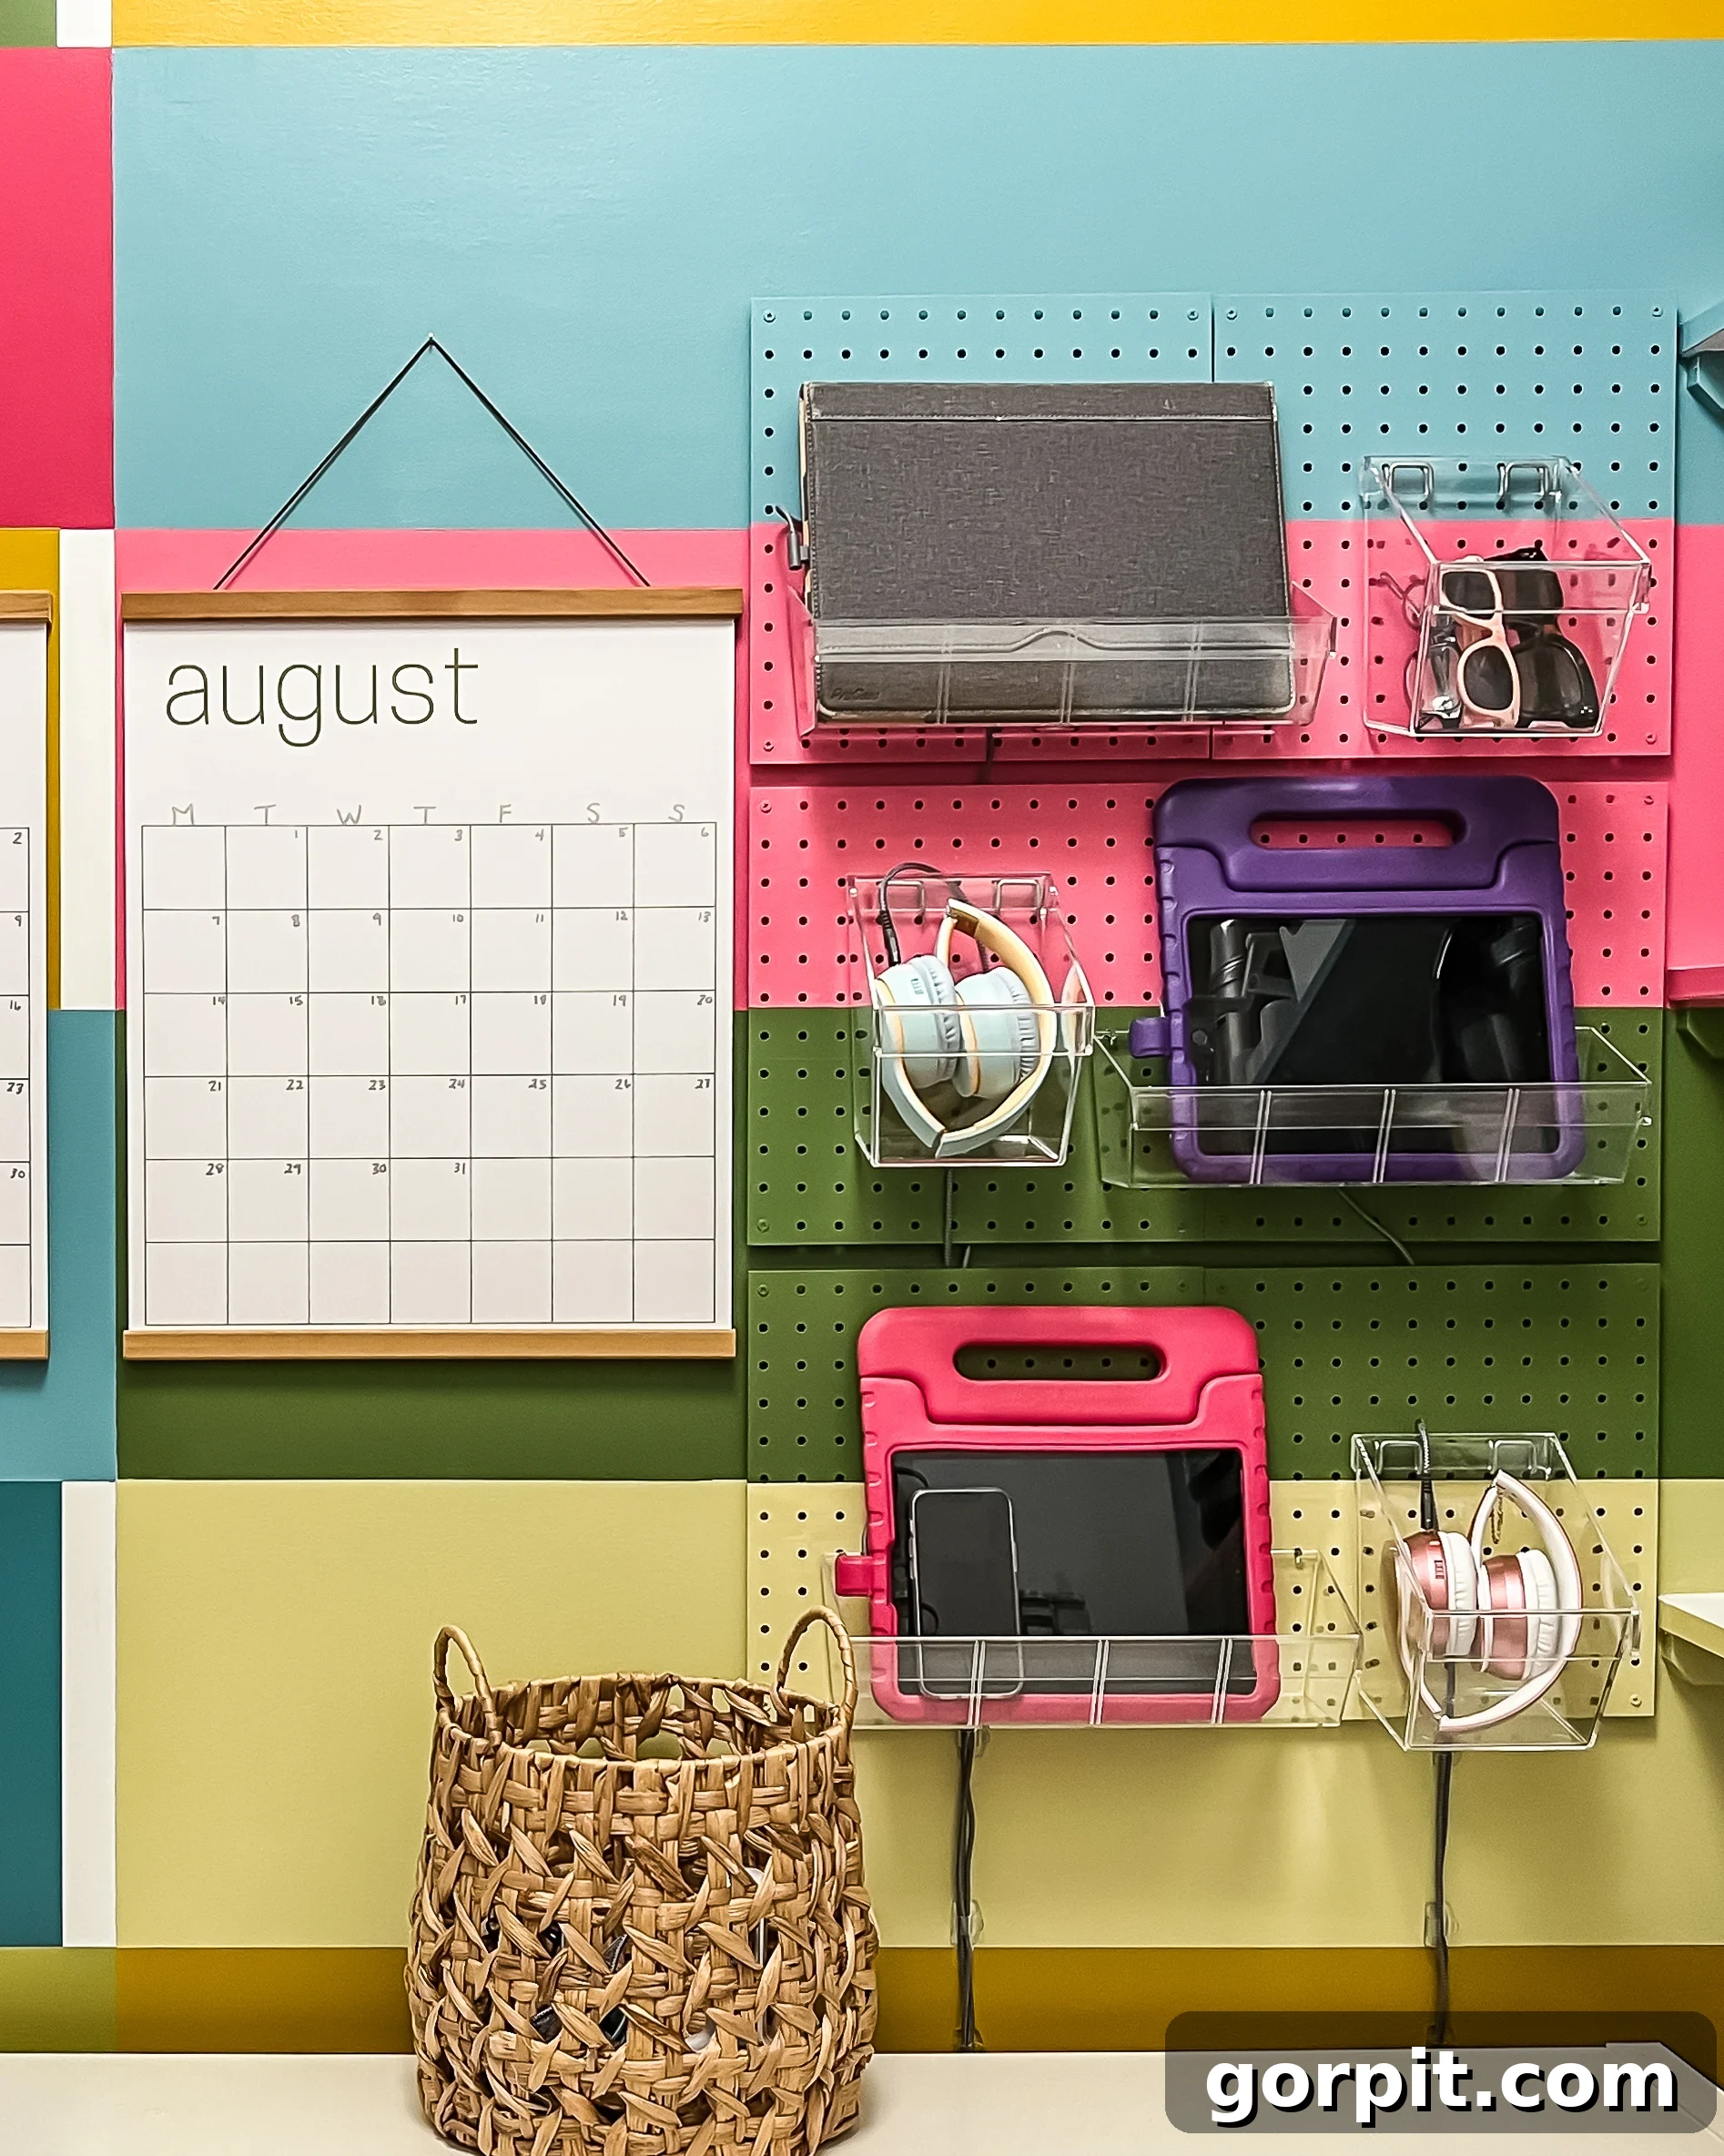
Tired of tangled charging cables and electronic devices cluttering every available surface in your home? You’re not alone! For years, our family faced the same challenge, with iPads, phones, and cordless headphones creating an endless mess. We tried numerous store-bought solutions, but none truly offered a comprehensive, lasting fix. That’s when inspiration struck, leading to the creation of our wall-mounted pegboard charging station – a truly transformative DIY project that has revolutionized our home organization. It’s more than just a place to charge; it’s a dedicated hub that brings order and calm to our daily digital life. If you’re ready to reclaim your countertops and embrace a clutter-free existence, read on to discover how you can build this game-changing solution for your own family.
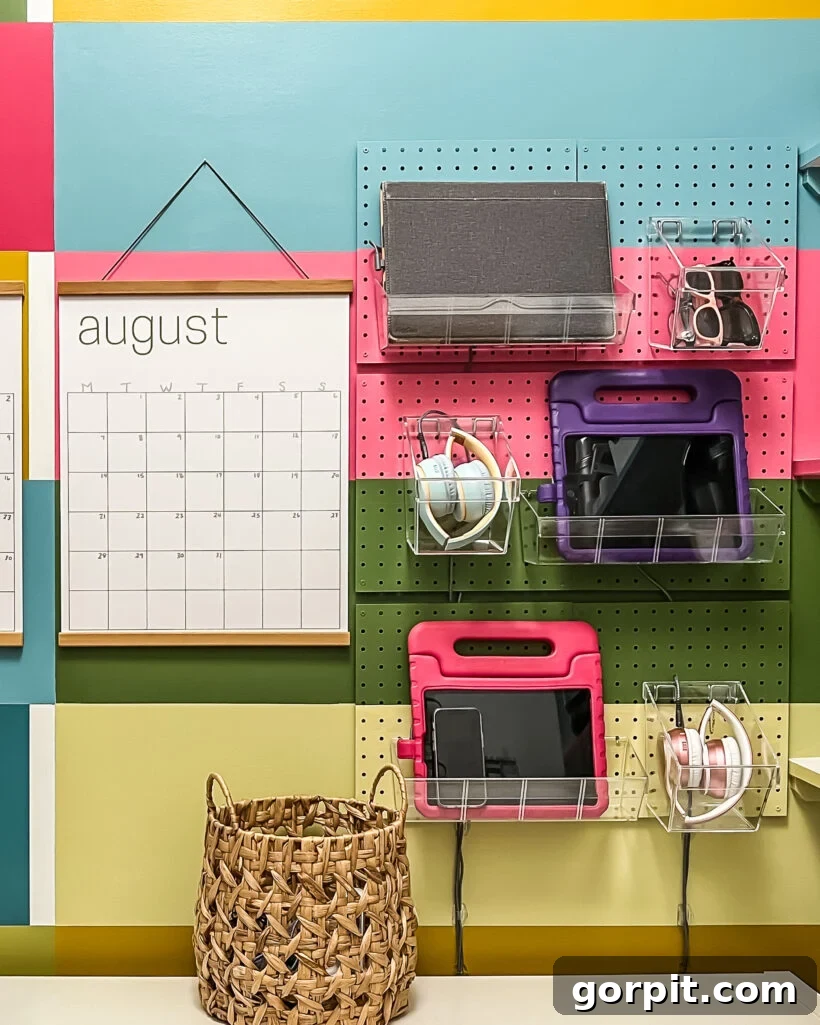
Table of Contents
Toggle
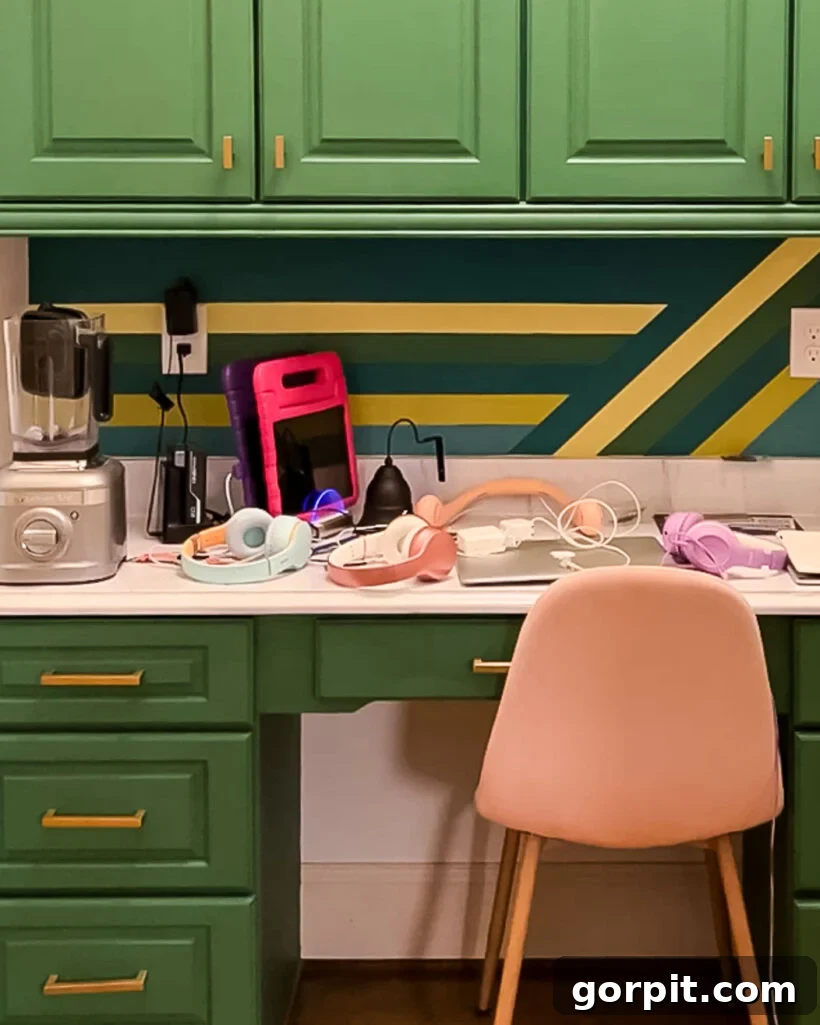
The perpetual mess of electronics and their accompanying charging cords had been a persistent headache in our home for far too long. Despite our best efforts, and investing in various store-bought “solutions,” we found ourselves continually battling the clutter. These commercial options often offered partial relief but never truly resolved the underlying chaos. Just take a look at our old built-in office, which has since been beautifully remodeled into a DIY Butler’s pantry. Even with a designated charging station, it simply couldn’t accommodate all our devices, leaving us with cords and headphones scattered everywhere. It was frustrating, unsightly, and far from the organized space we desired.
It’s important to note one of our core house rules: our daughters’ iPads and phones must remain downstairs when they head to bed. This means that even if a device is fully charged, it finds its home in one of the dedicated bins on the charging station every night. While my husband, Joe, and I charge our phones in our bedroom, I frequently utilize the family charging station for my iPad. This routine underscores the necessity of a highly functional and easily accessible charging hub for everyone.
I am absolutely thrilled to report that our new vertical charging station, installed approximately six weeks ago, has been a resounding success. It’s working flawlessly, and every family member is happily using it, effectively eliminating the previous electronic clutter. This project has been a monumental win for household organization and peace of mind. Without further ado, let’s delve into the detailed tutorial so you can create your own perfectly organized charging hub!
This post contains affiliate links for your convenience. Click here for my full disclosure policy.
Step-by-Step Tutorial: Building Your Pegboard Family Charging Station
Creating a DIY pegboard charging station is a straightforward and incredibly rewarding project. By following these steps, you can transform a chaotic collection of devices and cables into a streamlined, stylish, and functional command center for all your electronics. This vertical solution not only saves valuable counter space but also ensures that devices are always charged and easily found.
Materials Needed for Your DIY Charging Station
Gathering the right materials is the first step to a successful project. While you can customize your choices based on your aesthetic preferences and device needs, here’s a list of essential items, along with some considerations. We’ve found that investing in quality materials upfront pays off in terms of durability and a polished finish. You can find convenient links to everything I used to complete this project, making your shopping experience as seamless as possible. Simply click HERE or on the image below to access the curated list.
Video Overview: Visualizing Your Charging Station Project
For those who prefer visual guidance, a brief video overview is incredibly helpful for understanding the scope and flow of this DIY project. While the full functionality of the video player is not embedded directly here, imagine watching a concise demonstration that highlights key steps, showcases the materials in action, and provides a quick tour of the finished charging station. Such a video would offer valuable insights into techniques like mounting the pegboard, routing cables discreetly, and arranging the bins. We highly recommend watching this type of visual aid first, as it often makes the detailed written instructions much easier to conceptualize and follow. It helps bridge the gap between static images and the dynamic process of creation, ensuring you feel confident before you even pick up a tool.
Steps to Build Your Vertical Charging Hub
Time needed: 1 hour (minimum)
This efficient DIY charging station can be assembled in as little as an hour, assuming all materials are pre-cut and ready. However, if you opt to paint your pegboard for a custom look, as I did, allocate several additional hours for drying time and multiple coats.
- Determine the ideal size and placement for your charging station.
Begin by carefully assessing the number and type of electronic devices your family regularly uses – iPads, phones, smartwatches, headphones, and e-readers. Roughly measure the space you anticipate needing to comfortably accommodate all these items, considering both their physical dimensions and the necessary charging cables. It’s also crucial to factor in the overall scale and proportion of the charging station within its intended space. For instance, if you’re mounting it on a tall, ten-foot wall, a tiny charging station would appear disproportionate and easily get lost. Envision how the pegboard will integrate with the existing décor. Thinking about scale and proportion ensures your new charging hub is both functional and aesthetically pleasing. (This concept of choosing furniture and decor that is the proper scale and proportion for a space is a foundational principle taught extensively in Designer in a Binder, a resource I highly recommend!).
- Select and securely hang your pegboard panels.
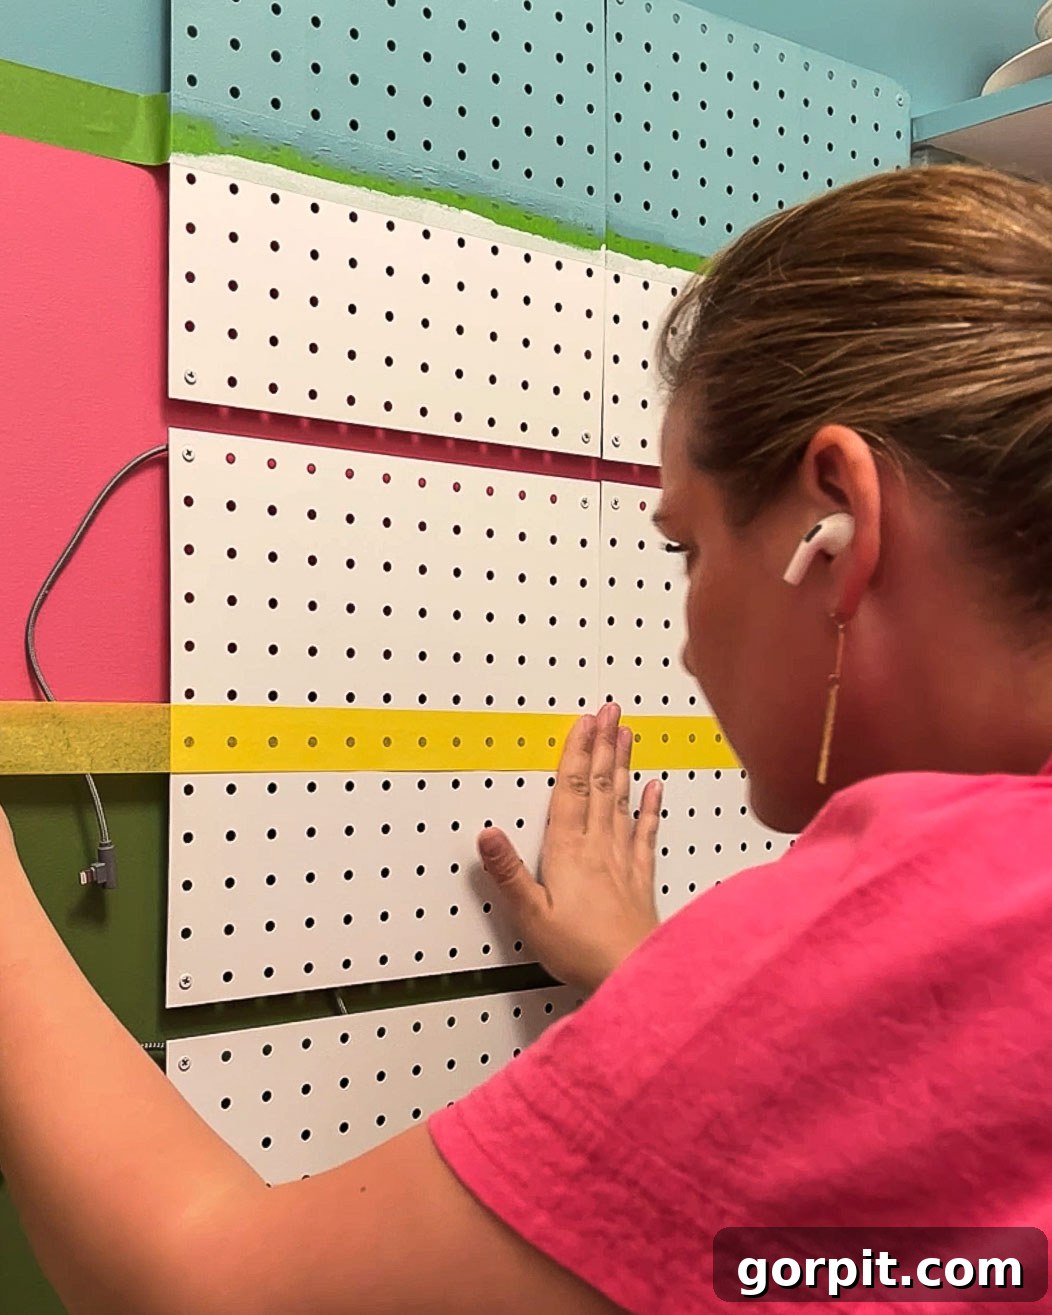
For our project, we opted for metal pegboard due to its sleek appearance, enhanced durability, and the crisp, clean finish of its holes. We purchased six individual metal panels, each measuring 12 inches square, resulting in a total pegboard surface of 36 inches tall by 14 inches wide. The main drawback to this choice is the need to hang six separate panels, requiring careful alignment. If you prefer a simpler installation, a single large sheet of wood pegboard can be used instead, minimizing hanging effort. Regardless of your material choice, ensure that your pegboard kit includes wall spacers. These spacers are absolutely essential as they create a small gap between the pegboard and the wall, allowing room for hooks, bins, and most critically, the discreet routing of charging cables behind the board. You’ll notice in our design that I intentionally left a slight horizontal gap between each set of two metal panels—this strategic spacing will prove invaluable later for managing cords, a detail we’ll elaborate on in subsequent steps.
- Paint your pegboard for a custom look, if desired.
While painting your pegboard is an entirely optional step, it offers a wonderful opportunity for personalization. In our case, I chose to paint the pegboard to seamlessly blend it with a mural I had previously created on the wall, ensuring the charging station became an integrated part of the room’s aesthetic rather than a standalone utility item. If you decide to paint, choose a durable paint suitable for the pegboard material (e.g., metal or wood). A good primer will ensure better adhesion and a more even finish. Allow ample drying time between coats and before proceeding to the next steps. This attention to detail can elevate your DIY charging station from purely functional to a stylish organizational feature.

- Attach your chosen pegboard bins, hooks, and accessories.
Now comes the fun part of customizing your charging station! We specifically selected clear acrylic storage bins to hold our devices, and we couldn’t be happier with the choice. These bins offer a clean, modern aesthetic that looks far more expensive than they actually are – especially considering they often come in multi-packs, making the per-bin cost quite reasonable. Their transparency also allows for easy identification of devices. However, the world of pegboard storage is vast, offering countless options from wire baskets and plastic cups to specialized hooks for headphones or smartwatches. Choose accessories that best suit your family’s specific devices, organizational style, and the overall look you’re aiming for. Ensure the bins and hooks are securely fastened to the pegboard, ready to bear the weight of your electronics.
- Integrate a USB charging tower within a suitable basket.
To maintain a minimalist and clutter-free appearance, a key strategy is to minimize the visibility of power strips and excessive cords. I achieved this by neatly placing an inexpensive multi-port USB charging tower into a small, aesthetically pleasing basket that I’ve owned for years. This tower acts as the central power hub for multiple devices, reducing the need for numerous individual wall adapters. When selecting a bin or basket for your charging tower, look for one that has sufficient openings or holes (like woven designs or a discreet gap at the top) through which you can easily run the USB charging cables out to your devices. This hides the bulk of the power unit and its primary power cord, contributing significantly to the station’s tidy look.
- Discreetly route charging cords from the tower to your devices.
This step is crucial for achieving that coveted clean and organized aesthetic. Since our pegboard sits slightly off the wall due to the wall spacers, there’s a convenient channel behind it for cable management. I meticulously ran the individual charging cords from the USB tower behind the pegboard. When a cord reached the horizontal level of its corresponding device bin, I utilized the small horizontal gap I intentionally left between the pegboard panels to pull the cord through. From there, I ran the cord directly behind the specific acrylic bin it was intended for, ensuring only a minimal portion of the cord was visible as it connected to the device. If you’re using a solid wood pegboard, a simple alternative would be to drill small holes directly into the pegboard at strategic locations, large enough to feed your charging cords through to the bins, achieving a similarly neat appearance.
- Organize and add your family’s electronic devices.
With the structure complete and cords expertly routed, it’s time to populate your new family charging station. Our organizational strategy is simple yet effective: my girls store both their iPads and phones together in the same individual bin. Each of these bins is equipped with a single charging cord, as it’s rare for them to need to charge both devices simultaneously. Their wireless headphones, which require a different type of charger, each have their own dedicated bin and charging cord, ensuring specialized power access. I, being taller, conveniently store my iPad in the top-most bin. We even found an excellent use for an extra square bin, repurposing it for storing sunglasses that aren’t kept in our cars, demonstrating the versatility of the pegboard system. This systematic approach ensures every device has a clear home and charging spot.
- Tame and secure any remaining visible cords.
While much of the cabling is hidden behind the pegboard, you might still have some visible cords, particularly where the main power cord from the USB tower connects to an outlet, or if you have cords running down from the bottom of the pegboard. This final, optional step makes a significant difference in achieving a truly polished and professional look for your charging station. I utilized simple Command Cord Clips to neatly gather and secure any visible cords running along the wall beneath the pegboard. These clips are easy to apply and remove without damaging surfaces, allowing for a quick and effective way to tidy up the last remnants of cable clutter. This small detail ensures that your DIY charging station looks exceptionally clean and organized from every angle.
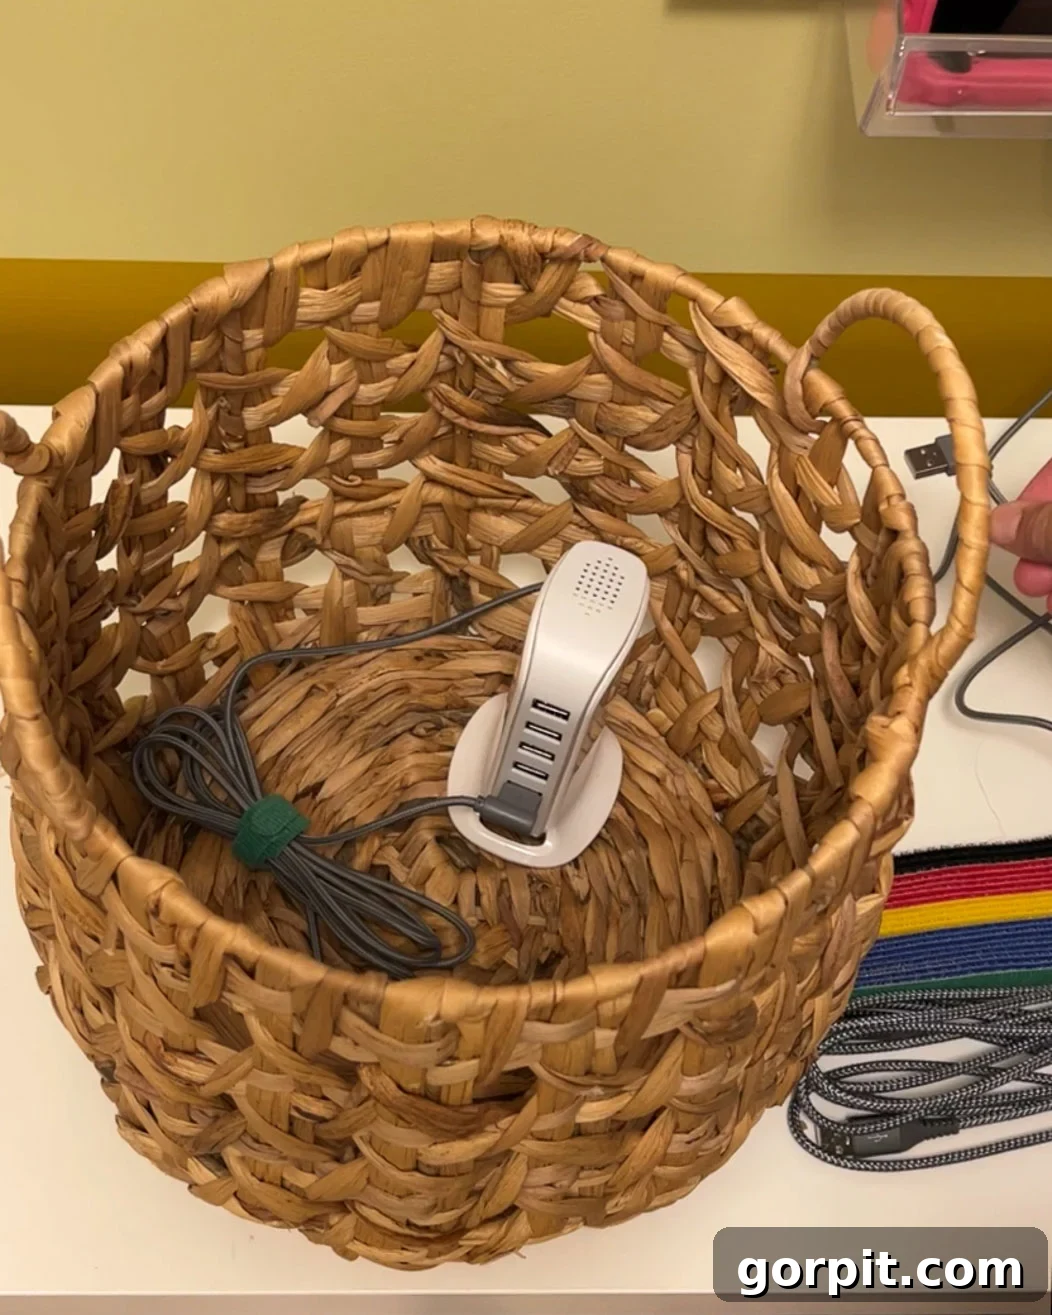
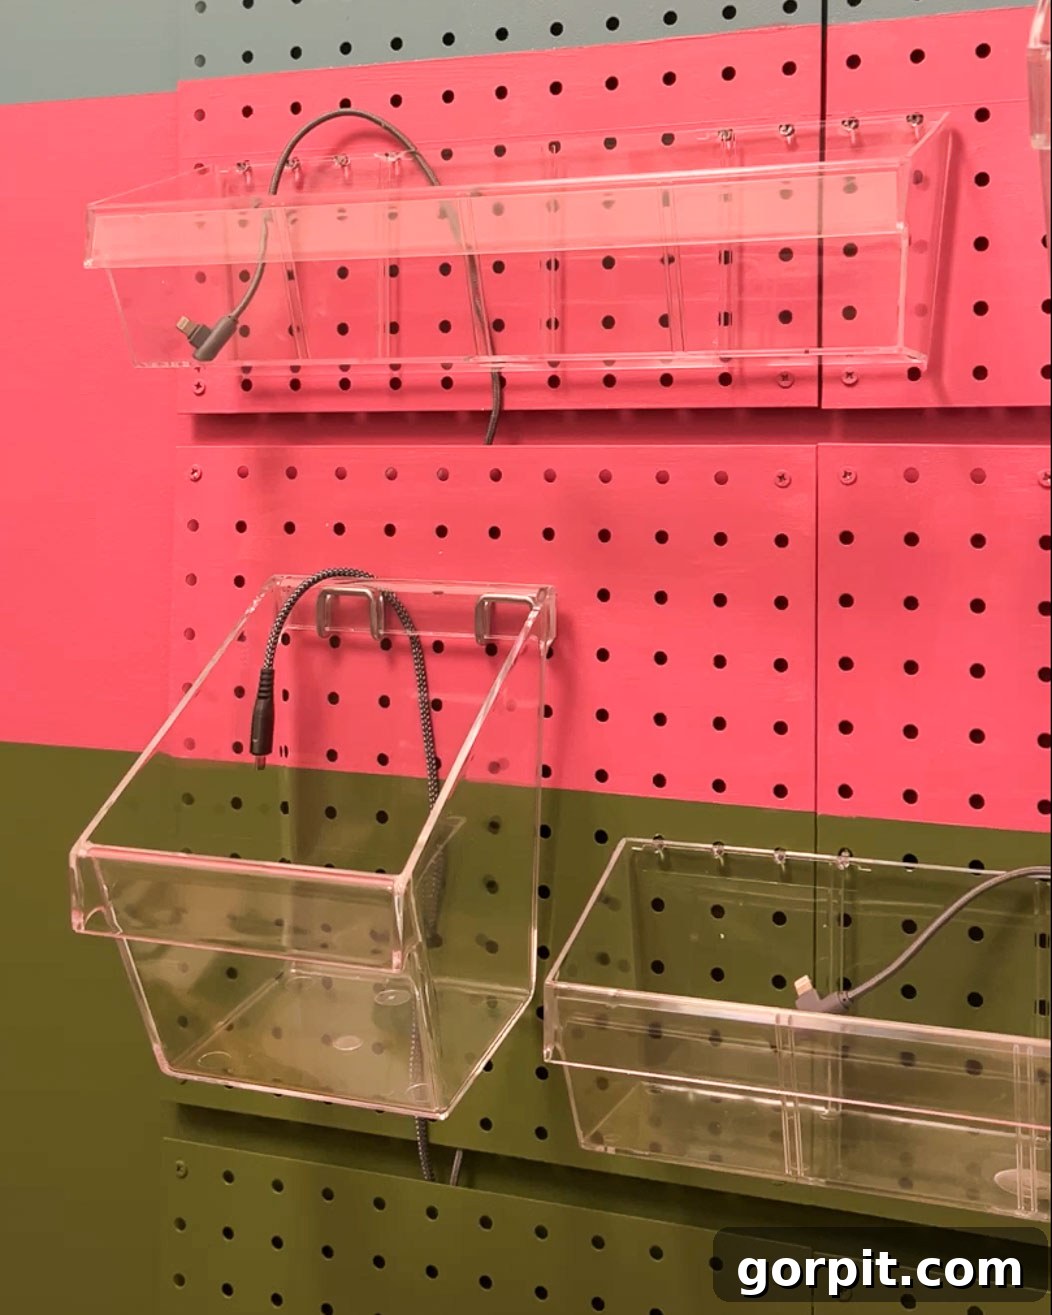
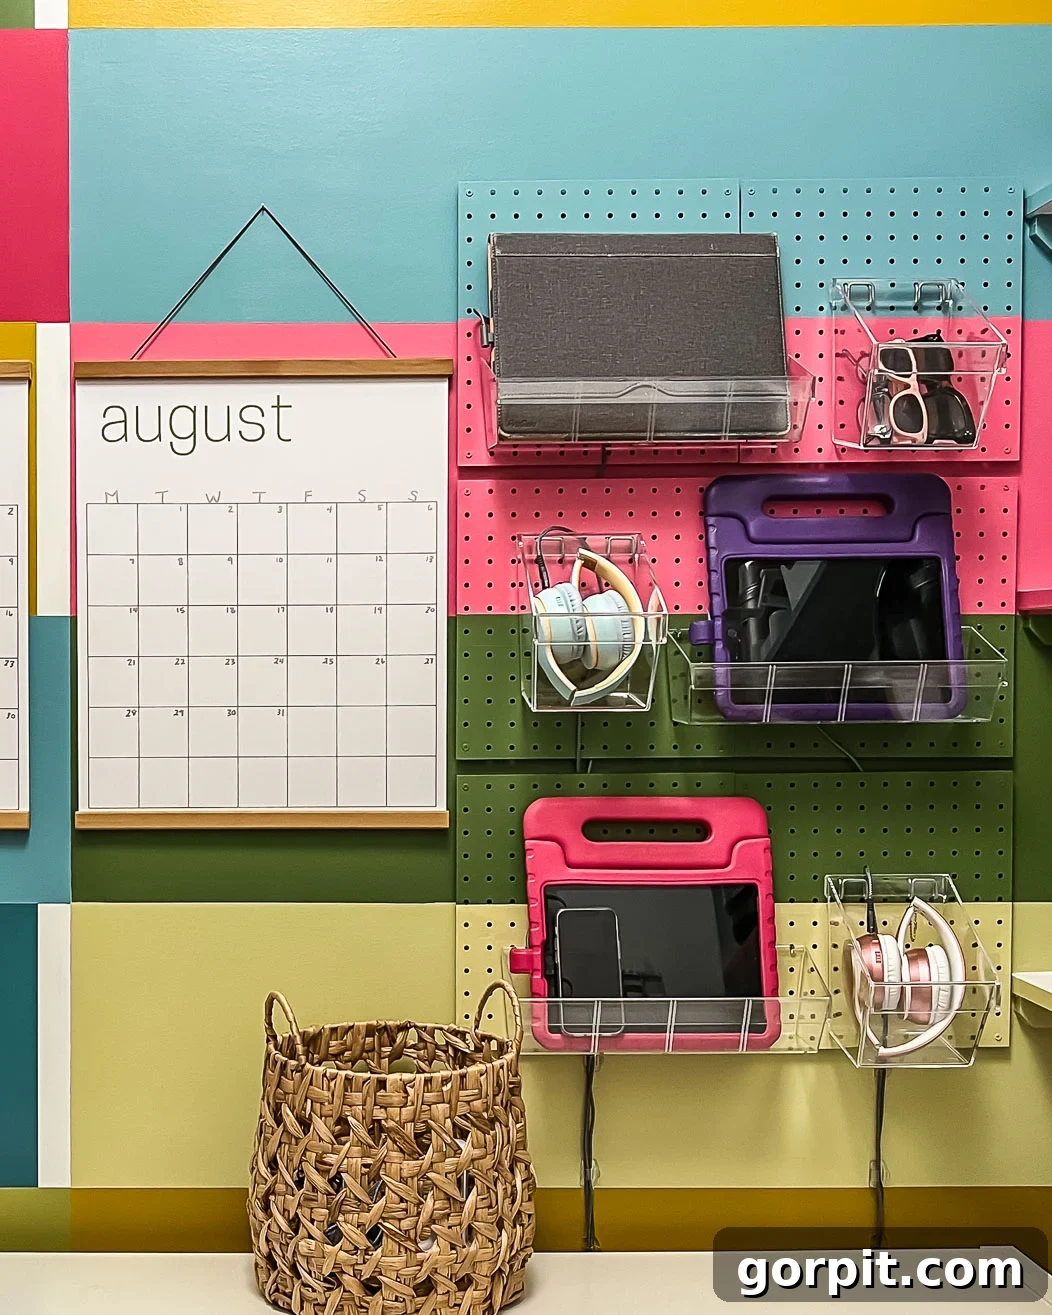
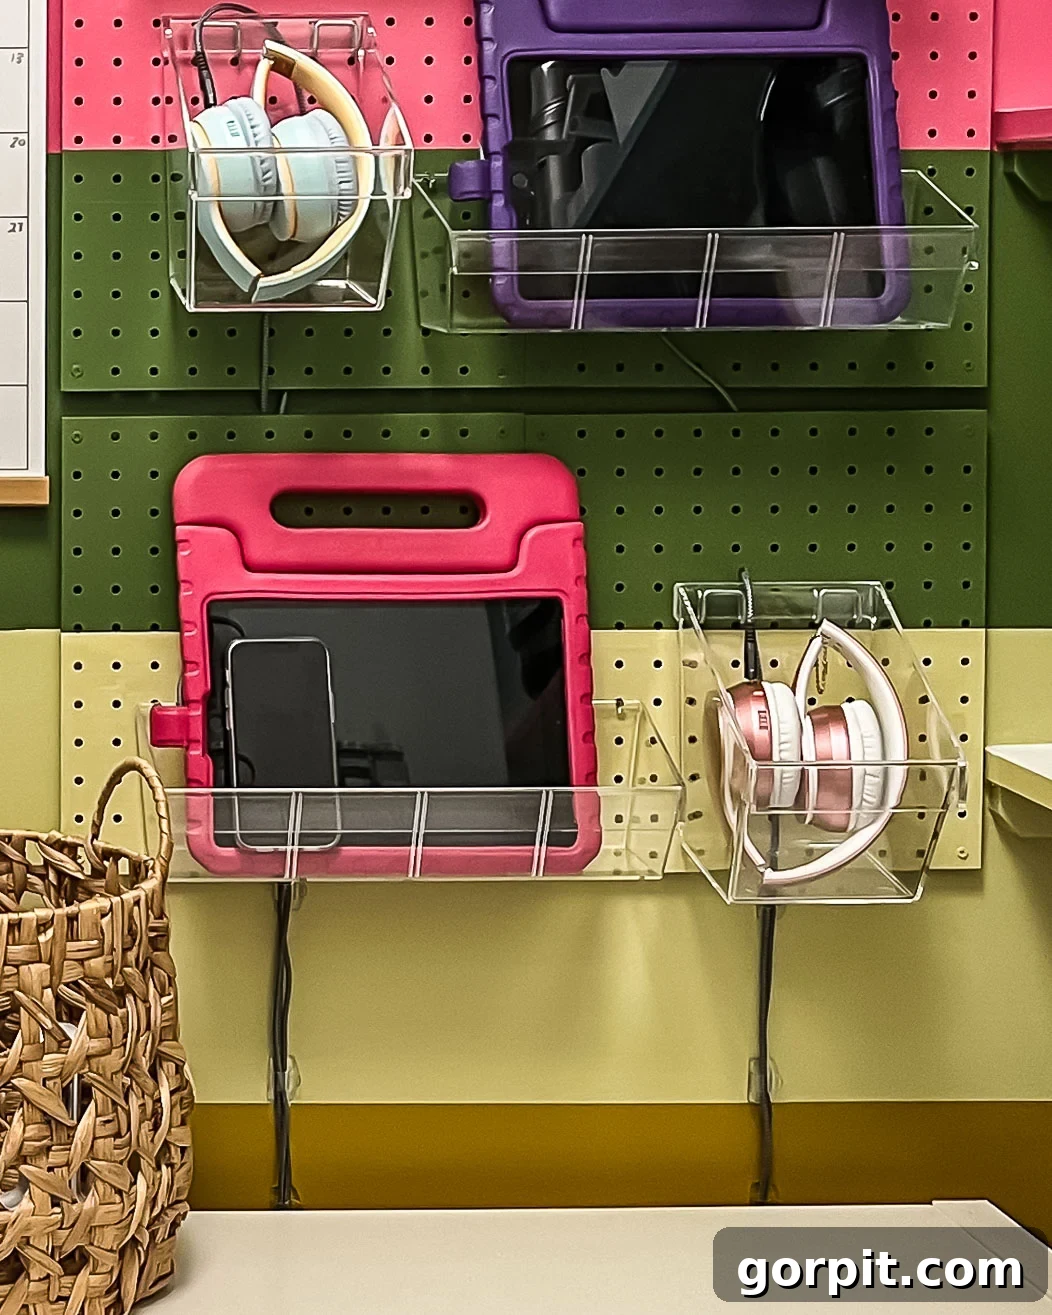
And there you have it! Your brand-new, beautifully organized family charging station is complete. Now you can plug in your devices with ease and truly enjoy this newfound world of perfectly managed charging cords and electronics. No longer will you find yourselves battling an endless tangle of wires or searching for misplaced devices. Our countertops and desks are finally free from clutter, transformed into serene, functional spaces. This vertical charging solution has truly elevated our home organization, proving that with a little DIY effort, even the most persistent household annoyances can be resolved with style and efficiency.
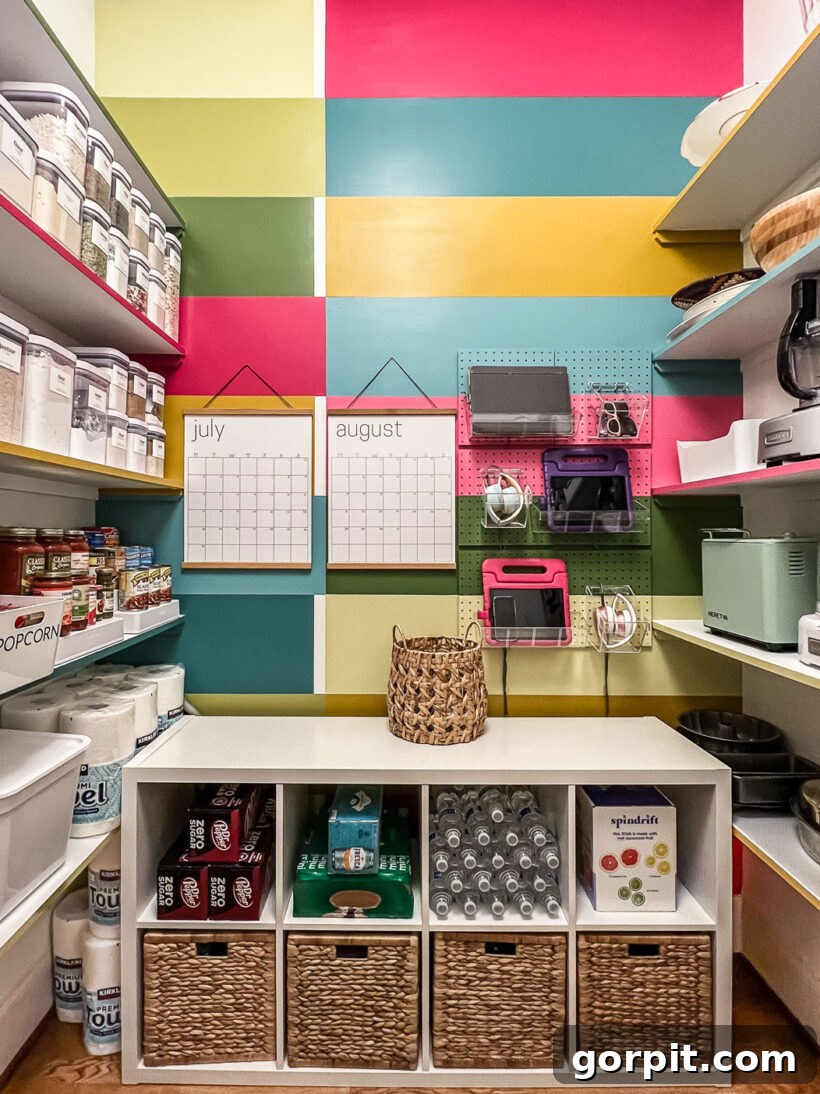
Embracing a vertical approach with our family charging station and leveraging the versatility of pegboard storage has proven to be the absolute perfect solution for our household. It has consistently performed flawlessly for over six weeks, transforming daily routines. Beyond its primary function, I particularly appreciate how it intelligently utilizes a previously overlooked and unused wall in our pantry, turning dead space into a highly functional organizational hub. What are your thoughts? Does this innovative DIY pegboard charging station seem like an ideal option for bringing order to your family’s electronics and decluttering your living spaces?
More Family Organizing Solutions
SEE ALL ORGANIZING POSTS
If you’re eager to further streamline your household and conquer clutter, explore these additional resources. From stylish charging solutions to comprehensive decluttering guides, these posts are packed with practical advice and inspiration to help you create an organized and harmonious home environment.
-
Stylish and Functional Family Charging Stations
-
Family Calendar Ideas to Keep You Sane & Organized
-
The Best Family Command Centers for Staying Organized
-
DIY Family Charging Station for iPads, Phones & More!
-
Our 7 Closet Makeovers & the DIY Closet Systems We Have Used
-
Learn How to Declutter Your Home: A Realistic Guide
Are you wondering how I approach the exciting journey of transforming rooms and spaces throughout our home, turning design dreams into reality? Dive into the comprehensive strategies and creative insights offered by Designer in a Binder®. This invaluable resource provides a structured, accessible framework for anyone looking to design and decorate their living spaces with confidence and flair.
For even more exclusive content, behind-the-scenes sneak peeks, and fresh inspiration delivered directly to your inbox, don’t forget to subscribe before you go! Join our community and stay connected with all our latest DIY projects, organizing tips, and home decor ideas. We’re always sharing new ways to create a home you love.