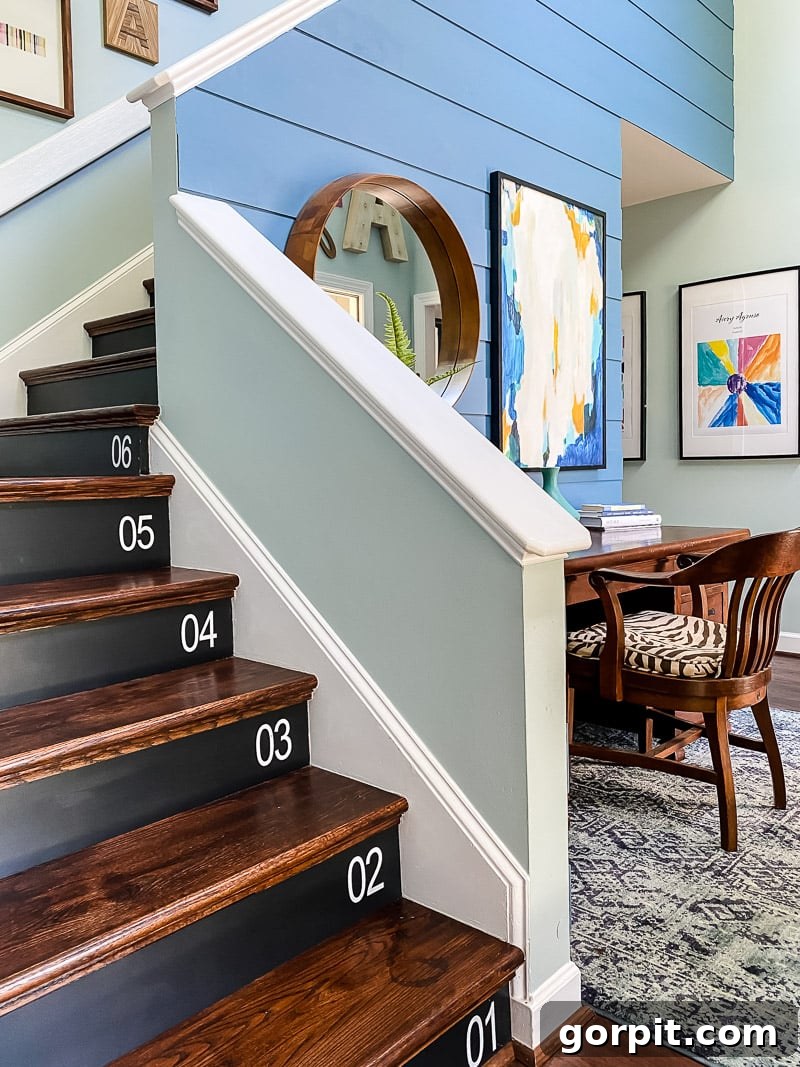
Transforming your home’s staircase from outdated carpet to elegant hardwood is a home improvement project that offers immense satisfaction and lasting value. If you’ve been contemplating a significant upgrade to your entryway, consider the timeless beauty and durability of hardwood stairs. This guide proves that replacing carpet with new wood stair treads is not only achievable for the dedicated DIY enthusiast but can also be completed surprisingly quickly and cost-effectively. Join us as we share a comprehensive, step-by-step tutorial that will empower you to tackle this rewarding DIY home improvement project, just as we did, transforming our own staircase in less than two days.
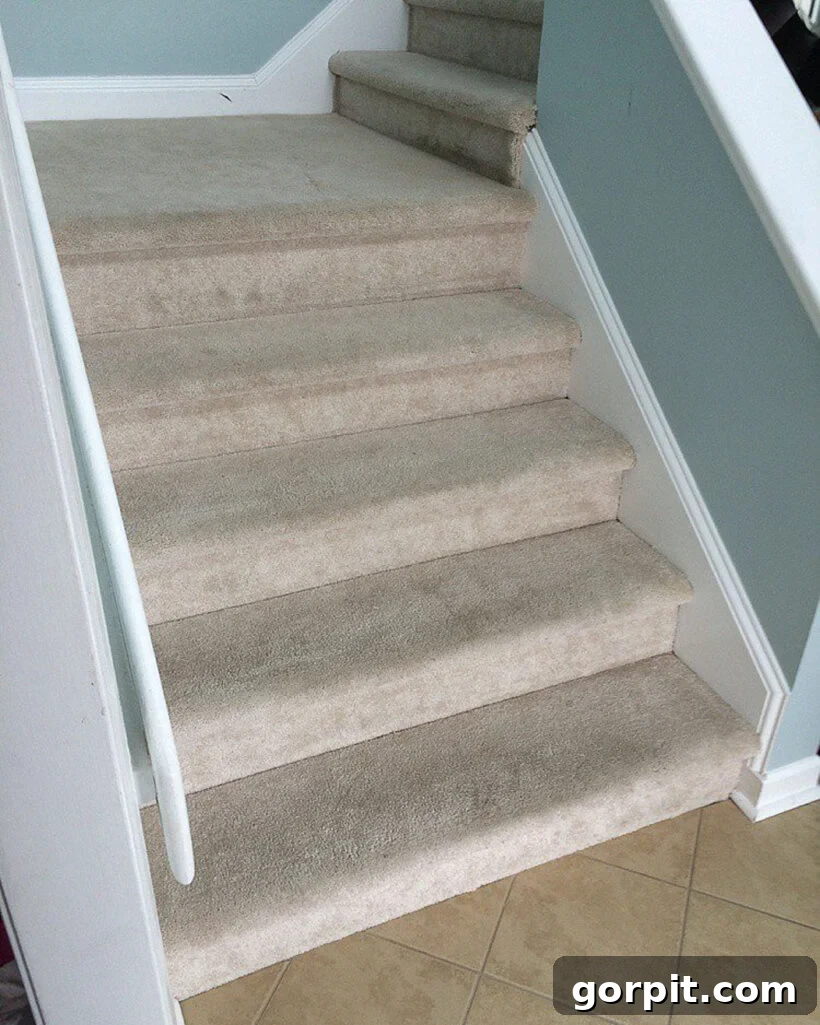
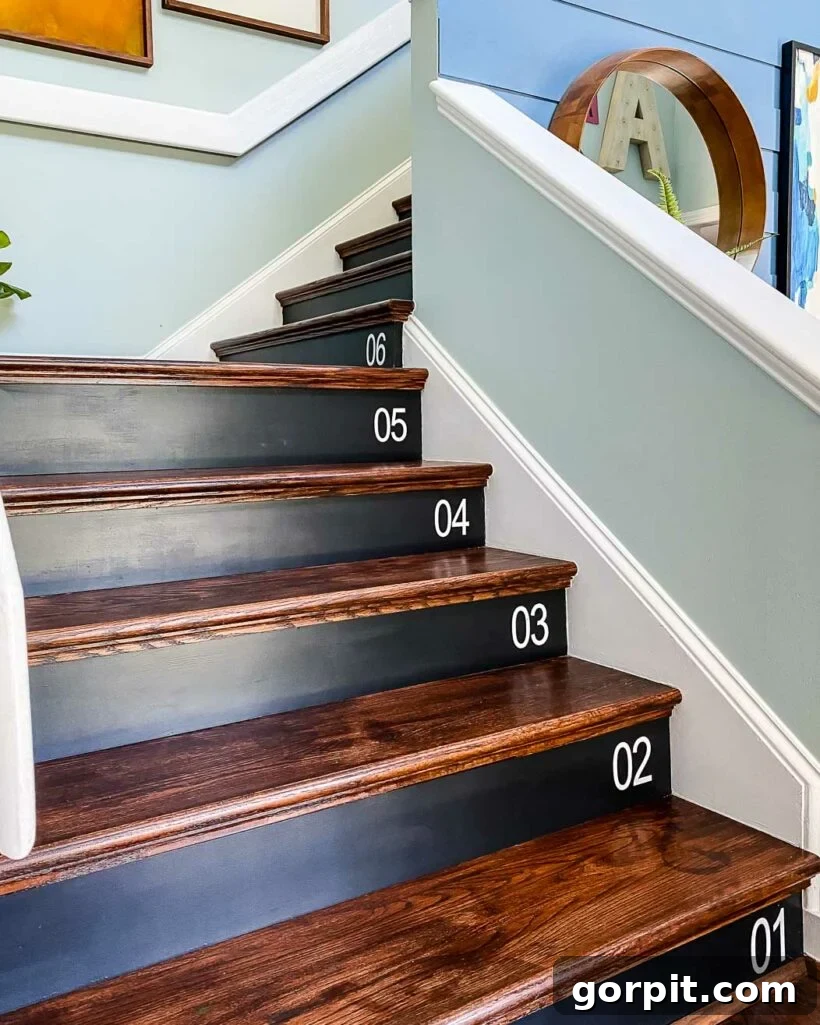
Table of Contents
UPDATE: We successfully installed our DIY hardwood stairs and originally published this tutorial in 2015. We are thrilled to report that they still looked absolutely perfect when we sold this home in 2020, standing as a testament to the quality and durability of this DIY project. We couldn’t have been happier with the results!
Our home’s previous staircase, cloaked in drab beige carpet, was a significant eyesore. It felt dated and contributed to a rather uninspiring entryway. Determined to modernize our space, we embarked on a complete staircase overhaul, which involved ripping out the old carpet and meticulously installing stunning hardwood stair treads. The entire transformation was completed in an astonishing 1 1/2 days!
Initially, the idea of installing wood stair treads seemed daunting, almost impossibly difficult. However, having undertaken numerous DIY projects and home improvement initiatives over the years, including installing new laminate flooring throughout our entire home, we approached this challenge with cautious optimism. To our pleasant surprise, installing these new stair treads proved to be significantly easier and less labor-intensive than installing traditional flooring. This revelation was particularly satisfying given our past experience with professional stair installations, which, while beautiful, came with a shockingly high price tag that we still recall nearly two decades later.
This post contains affiliate links for your convenience. Click here for my full disclosure policy.
How to Remove Carpet and Install Wood Stairs
Upgrading your staircase with hardwood treads is a game-changer for any home. It not only enhances aesthetic appeal but also adds significant value and durability. This detailed guide will walk you through every step of the process, from removing old carpet to the final touches of a stunning hardwood staircase.
Materials and Tools Needed for Your Stair Transformation
Before you begin, gather all necessary materials and tools to ensure a smooth and efficient workflow. Investing in the right equipment will save you time and frustration in the long run.
- Wood Treads / Hardwood Treads: Often referred to as “retreads,” these are designed to fit over your existing stair structure. Consider whether you prefer pre-finished (ready to install) or unfinished (allowing custom staining). We opted for unfinished red oak to perfectly match our existing laminate flooring.
- Construction Adhesive: A high-quality urethane-based adhesive is crucial for securely bonding the new treads and risers to the existing structure, preventing squeaks and ensuring stability.
- Nail Puller: Essential for removing stubborn nails, staples, and tack strips left behind by the old carpet.
- Utility Knife: For cutting carpet into manageable sections for easier removal.
- Hammer: A versatile tool for prying, tapping, and general demolition.
- Crow Bar: Invaluable for prying up carpet padding, tack strips, and any other stubborn elements.
- Circular Saw: A basic requirement for making straight cuts. While inexpensive, it gets the job done for trimming treads and risers to size.
- Miter Saw: Highly recommended for making precise, angled, and cross-cuts on your treads and risers, significantly speeding up the cutting process.
- Table Saw: Extremely helpful for ripping treads and risers lengthwise, especially when dealing with slight variations in stair width. This is the table saw we personally own and love for its precision.
- Caulk, Painter’s Tape, and Touch-Up Paint: For sealing gaps, creating clean lines, and perfecting the finished look of your newly installed stairs and surrounding trim. If you don’t have leftover paint, you can use these tips to match a paint color that is already on your walls.
- Wood Stain and Water-Based Polyurethane: If you choose unfinished treads, these are vital for achieving your desired color and providing durable protection.
When selecting your stair treads, remember there are a wide variety of options available. While some home improvement stores like Home Depot might carry a limited selection, you’ll often need to order specific types. For our project, we ultimately chose NuStair hardwood stair treads due to their exceptional quality and the convenience of having all necessary materials, including the specialized adhesive, shipped directly to our doorstep. This comprehensive approach saved us valuable time and streamlined the entire process.
The installation of our DIY hardwood stairs, using this specific system, proceeded with remarkable smoothness – arguably one of the most efficient projects we’ve undertaken recently. We had high expectations for both the system’s functionality and the aesthetic outcome, but the simplicity and speed truly surpassed our estimates. We completed approximately 95% of the work in just one weekend, specifically 1 1/2 days. It was an incredibly rewarding experience.
Helpful Installation Video Guide
To fully grasp the installation process, we highly recommend watching this instructional video before you begin. Even if you decide to use a different stair retread product, the fundamental installation steps are likely to be very similar, offering valuable visual guidance.
Step-by-Step Tutorial for DIY Hardwood Stairs
Time needed: 1 day and 4 hours
Follow these steps to successfully remove old carpeting and install beautiful, durable wood stair treads, transforming your staircase in roughly a day and a half.
-
Step 1: Remove Your Old Carpet & Tack Strips.
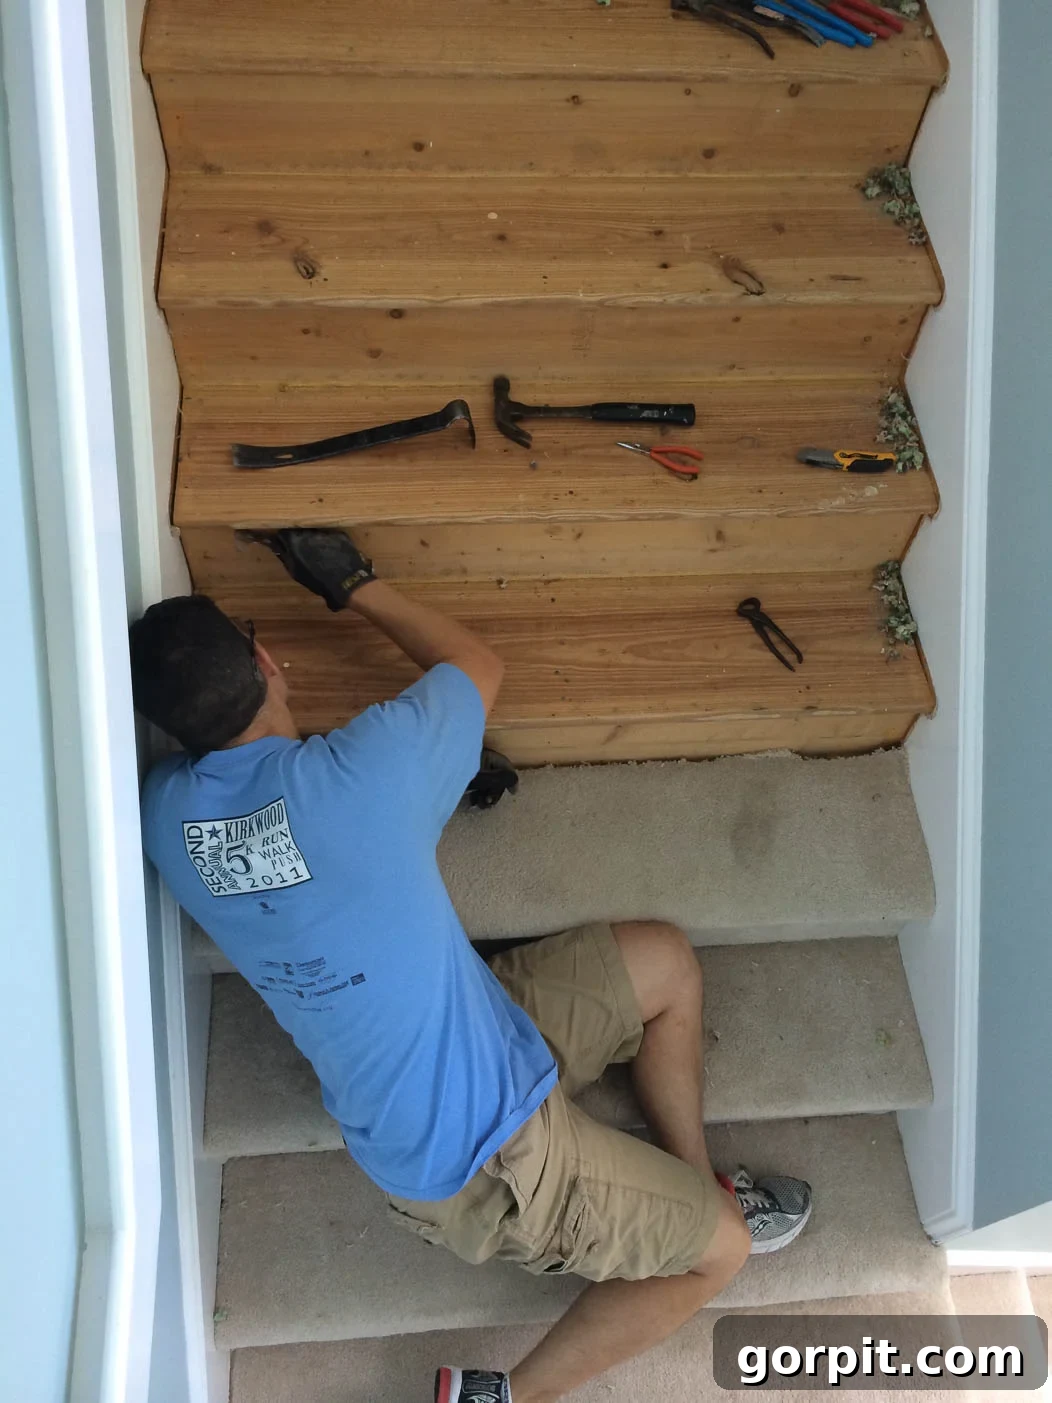
The initial phase of your staircase renovation involves carefully removing the existing carpet and its underlying padding. Start by using a utility knife to cut the carpeting into smaller, more manageable sections. This makes it easier to pull up and dispose of. While removing the carpet itself isn’t particularly difficult, dealing with the tack strips and the countless staples embedded in the subfloor can be more challenging and less enjoyable. However, with the right tools—a hammer, crowbar, and nail puller—this part of the demolition can still proceed relatively quickly. Be thorough in removing all staples and carpet tacks to ensure a smooth, clean surface for your new treads. This crucial “demo” step typically takes approximately 4 person-hours to complete efficiently, depending on the size of your staircase.

-
Step 2: Stain Your Hardwood Stair Treads (If Unfinished).
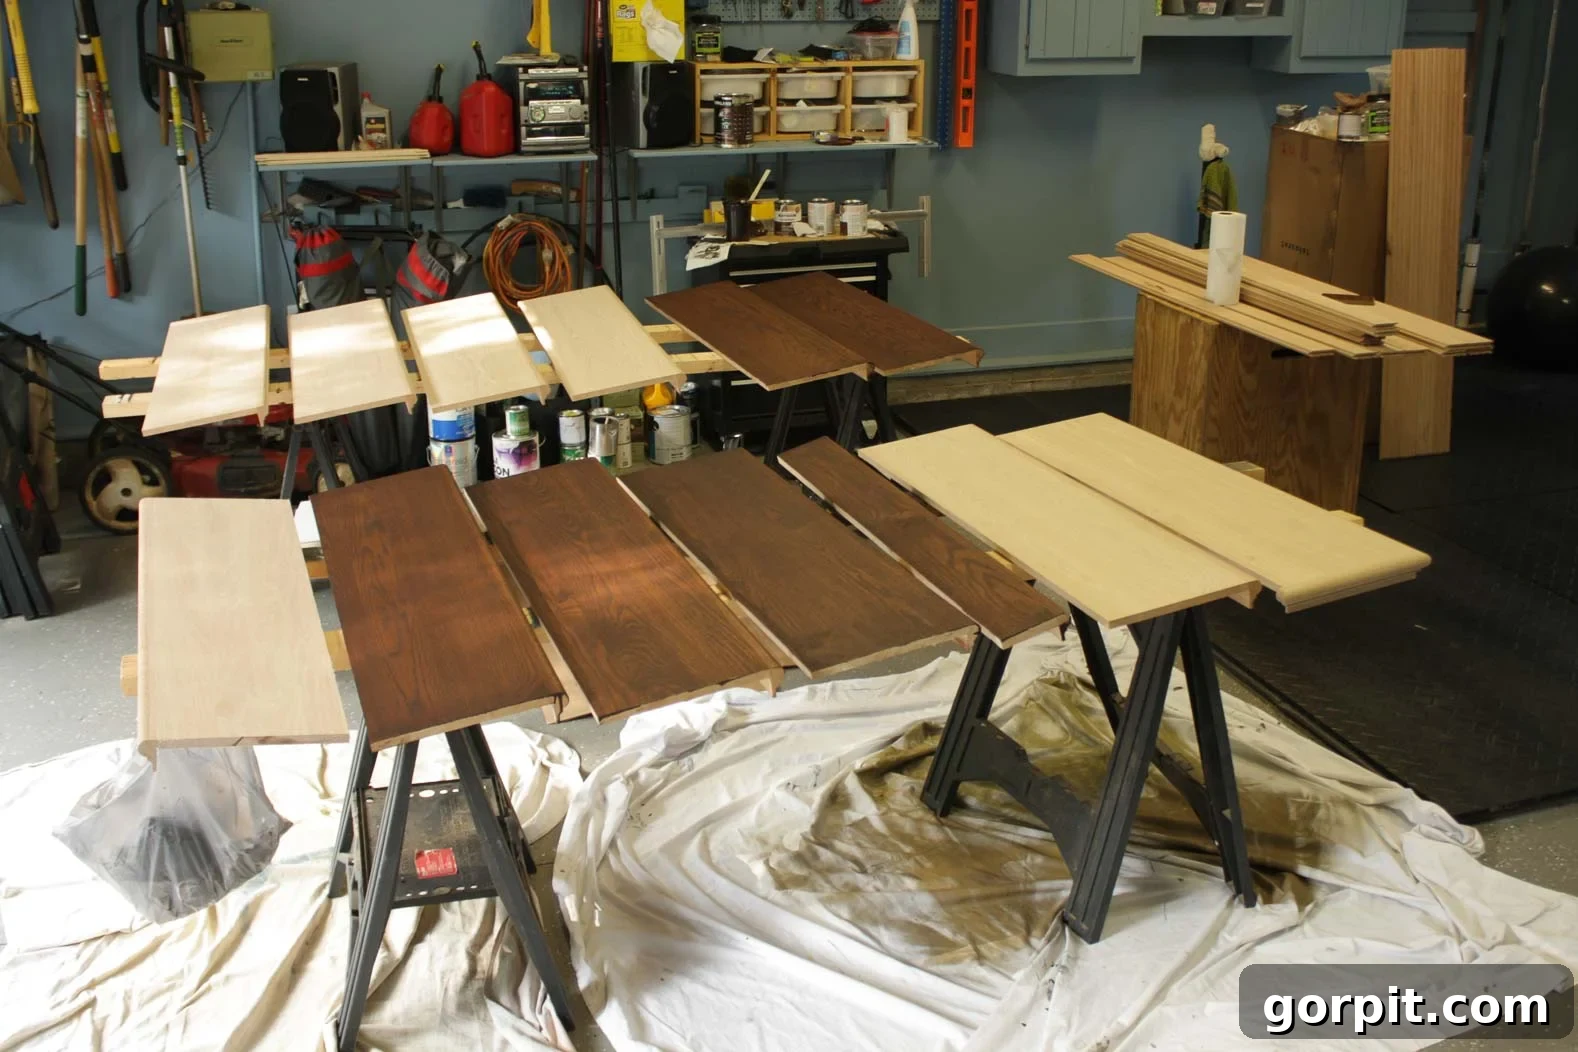
If you opted for unfinished wood treads, the next significant step is staining and finishing. While pre-finished treads are available for convenience, we chose unfinished red oak to achieve a perfect match with the laminate flooring throughout our home. This involved carefully custom mixing a stain to achieve the desired shade. The staining process requires patience but can be surprisingly swift. Fortunately, we only needed to apply one coat of stain, which dried quickly enough for us to apply a protective layer of water-based polyurethane before going to bed that same night. This two-step finishing process ensures both the desired aesthetic and long-term durability for your new stairs.
-
Step 3: Paint the Stair Risers.
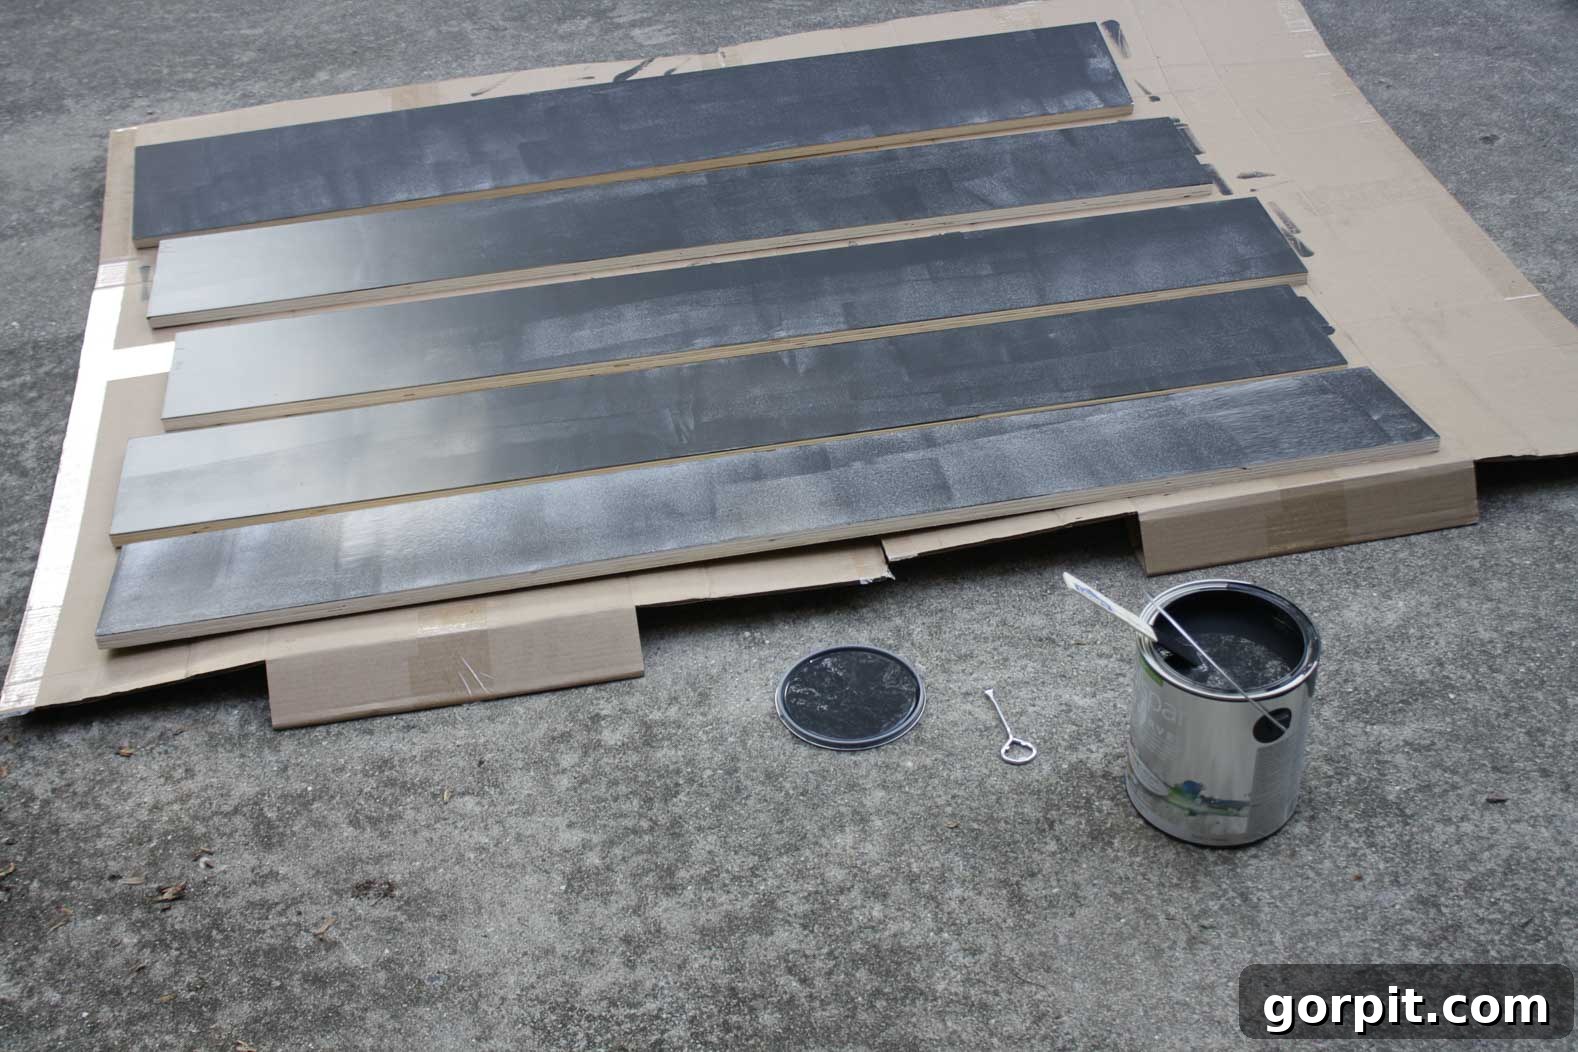
Most stair retread kits, including the NuStair kit we utilized, come complete with stair risers. For a bold, modern contrast, we decided to paint our risers black. A major advantage was that the risers came pre-primed, which eliminated an extra step and saved us valuable time. We applied two coats of black paint to ensure full, even coverage. The painting, along with the staining and sealing of the treads, took us approximately 4 hours, with both of us working diligently. After allowing the stain/polyurethane and paint to dry overnight, we were ready to move on to the exciting installation phase the following day.
-
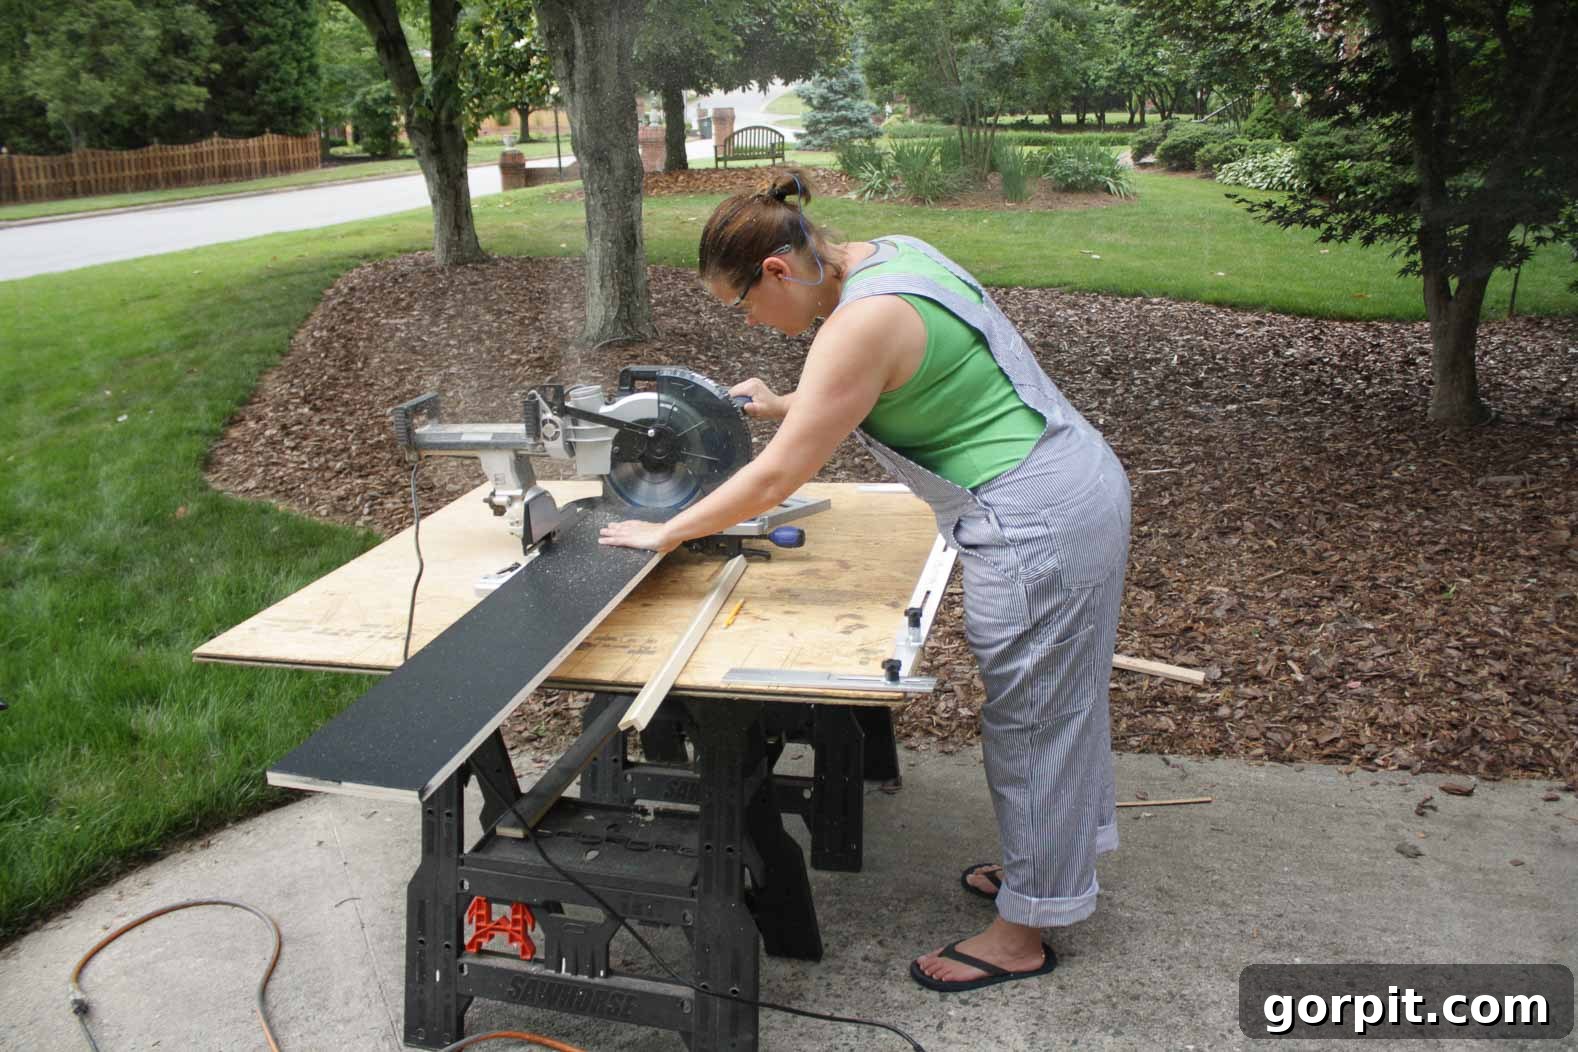
Step 4: Trim All of Your Stair Treads and Risers to Size.
While it may seem complex, the installation process is surprisingly straightforward, thanks to innovative tools. NuStair, for instance, provides a specialized tool called a “NuScribe,” which functions much like a sliding ruler. You position the NuScribe on each step, allowing its arms to fit tightly against the stair stringers (the side supports of the staircase). Once a snug fit is achieved, you lock the arms in place, remove the tool, and then transfer the exact measurements to your new NuStair tread or riser. These precise marks then guide your cuts, ensuring each piece fits perfectly. For those without a NuScribe, careful measurement with a tape measure and a straight edge, combined with dry-fitting each piece, is equally effective, though potentially more time-consuming.
-
Step 5: Install the First Wood Stair Tread and Riser.
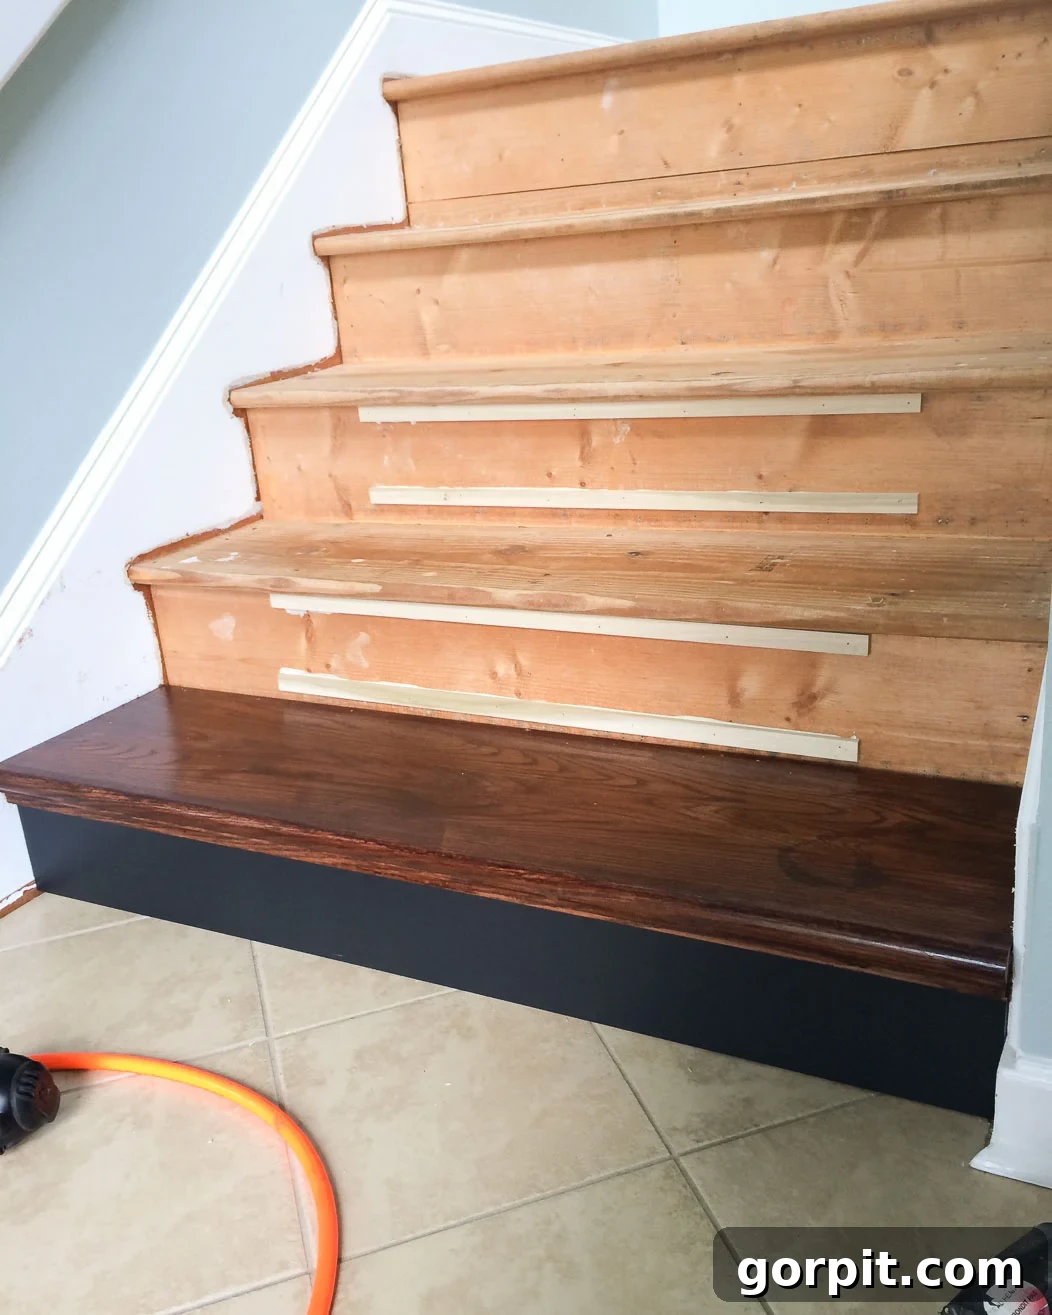
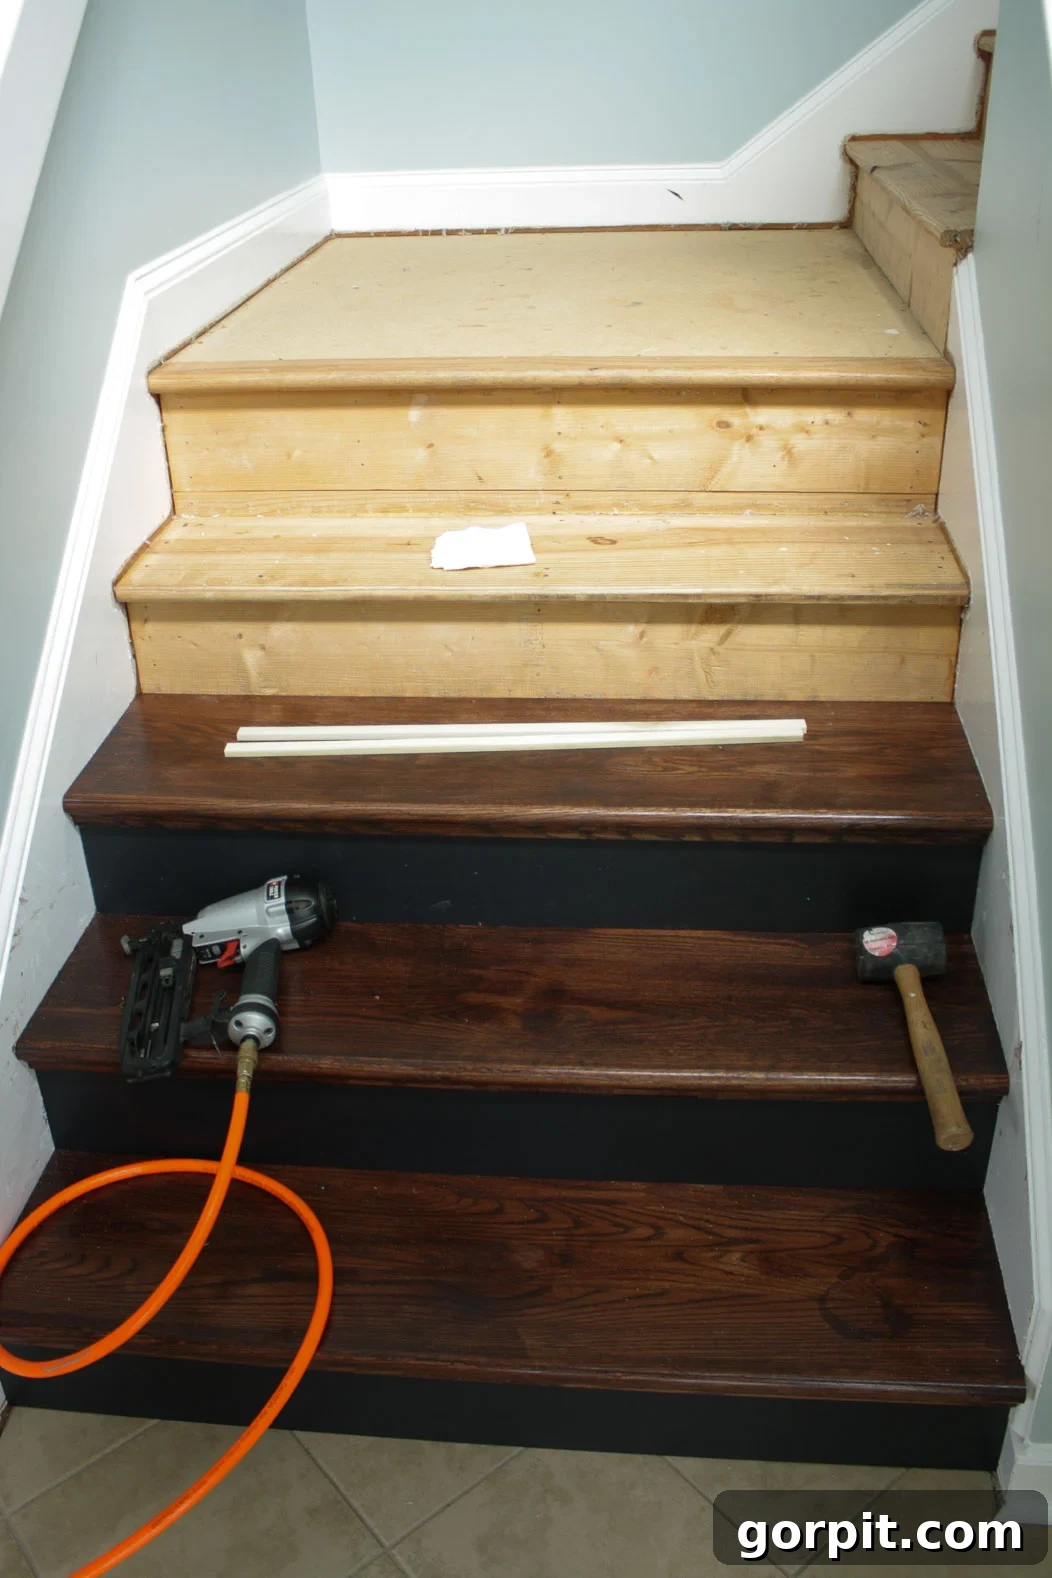
Begin by installing the very first stair tread. Apply a generous amount of urethane-based construction adhesive to the existing sub-tread in a zigzag pattern, ensuring good coverage for strong adhesion. Carefully position your first pre-finished stair tread, pressing it firmly into place. Secure the back edge of the tread with nails, strategically placing them where they will eventually be concealed by the riser directly above it. Next, install a set of shims (which often come with stair retread kits) using both adhesive and nails. These shims are critical if you choose not to remove the existing bullnose (the rounded front edge) from your plywood stairs. The bullnose would otherwise cause the new tread to protrude too far. Shims behind the risers effectively compensate for this, creating a perfectly flush and seamless transition. While cutting off the bullnose is an option, using shims is generally faster and results in a tidier finish. Finally, install the first riser with its cut edge facing upwards and the factory edge resting flush against the floor. The accompanying image clearly illustrates the installation of the first stair tread and riser, along with how the shims are applied to steps two and three.
-
Step 6: Continue Installing Your Wood Treads and Risers Systematically.
With the first tread and riser securely in place, the rest of the installation follows a logical, repetitive pattern. Simply continue working your way up the staircase, installing one riser and then its corresponding stair tread at a time. Maintain consistent adhesive application and secure nailing techniques for each step. Precision in measurement and cutting, combined with a methodical approach, will ensure a uniform and professional finish across your entire staircase. Before you know it, your carpeted stairs will be a distant memory, replaced by the elegant and durable beauty of hardwood.
-
Step 7: Install Hardwood Flooring on Your Landing (If Applicable).
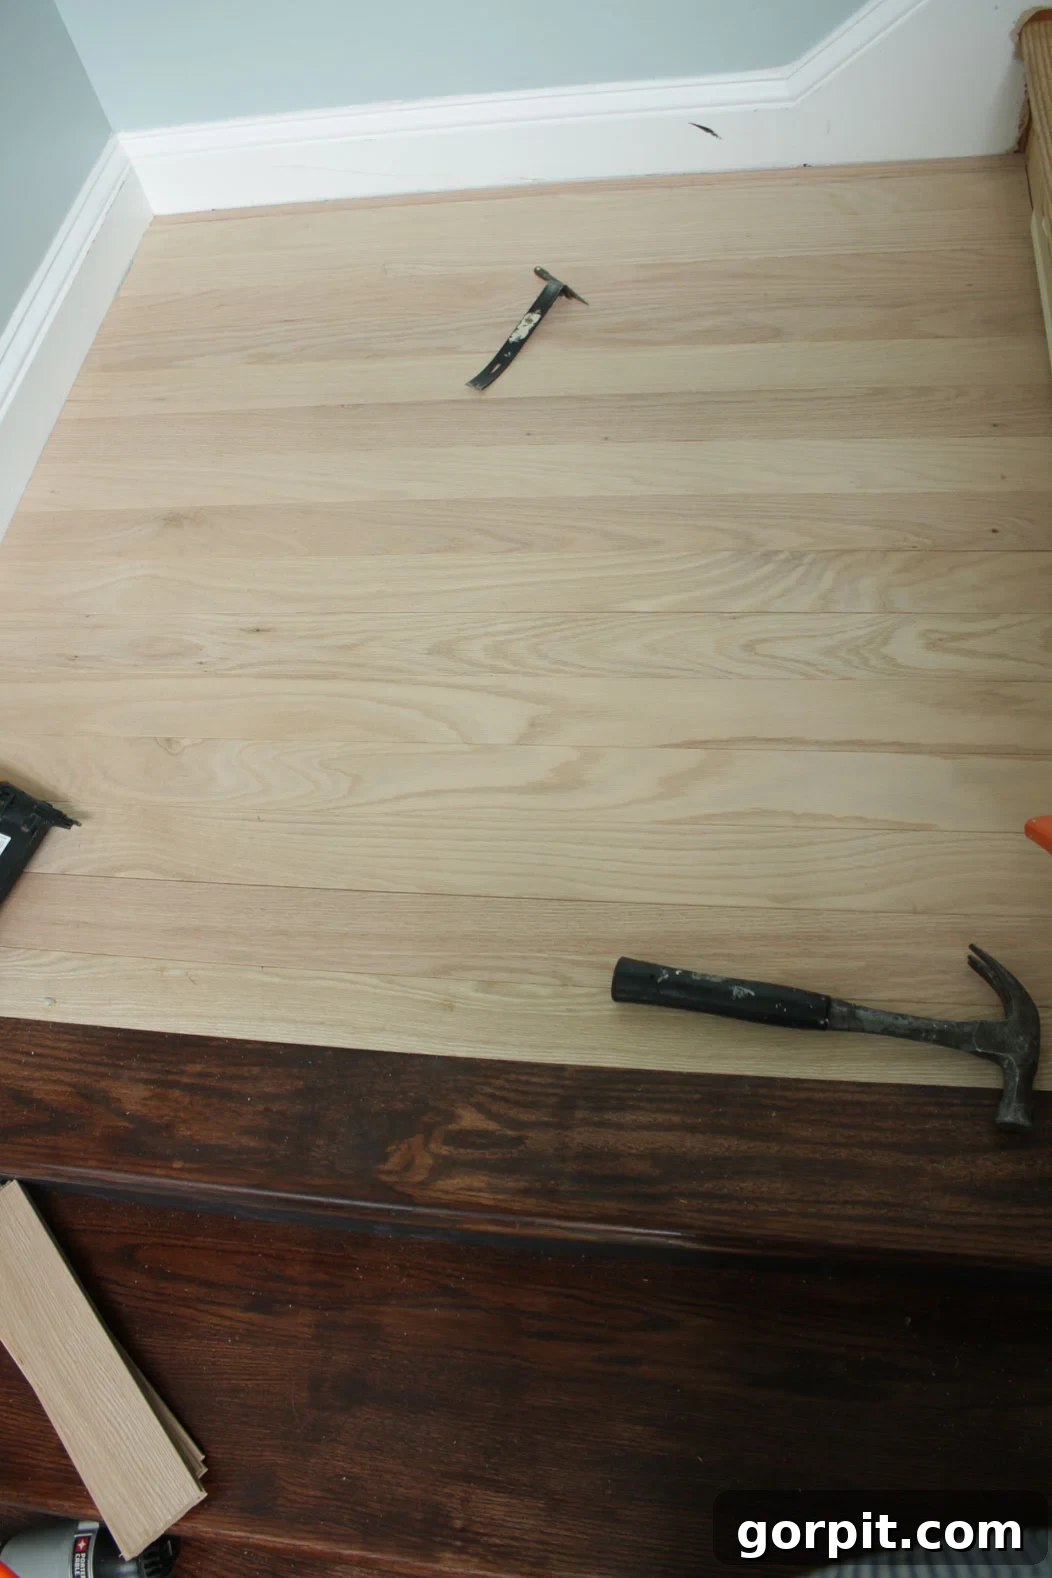
Many staircases include a small landing where the stairs turn. If your staircase has such a feature, you’ll want to extend the hardwood aesthetic to this area. In our case, we installed hardwood red oak flooring on our landing. We were able to easily order the specific amount of hardwood planks needed for this section directly from NuStair, ensuring a perfect match with our new stair treads. Once the landing planks were installed, we stained them to seamlessly blend with the finished stair treads, creating a cohesive and beautifully integrated look throughout the entire staircase structure. This step ensures a polished and continuous flow from the stairs to the surrounding areas.
-
Step 8: Caulk and Touch-Up Paint as Needed for a Flawless Finish.
Once all the new wood treads and risers are securely installed, the final step involves refining the details for a truly professional appearance. Apply caulk along all edges and seams where the new wood meets the walls or existing trim. This not only creates a clean, finished line but also helps to seal any small gaps, preventing dust accumulation and potential squeaks. After the caulk has dried, perform any necessary touch-up painting on the baseboards, stair stringers, banister, or handrail. This step rectifies any minor imperfections or marks that may have occurred during the installation process, ensuring your newly transformed staircase looks absolutely pristine and ready to impress!
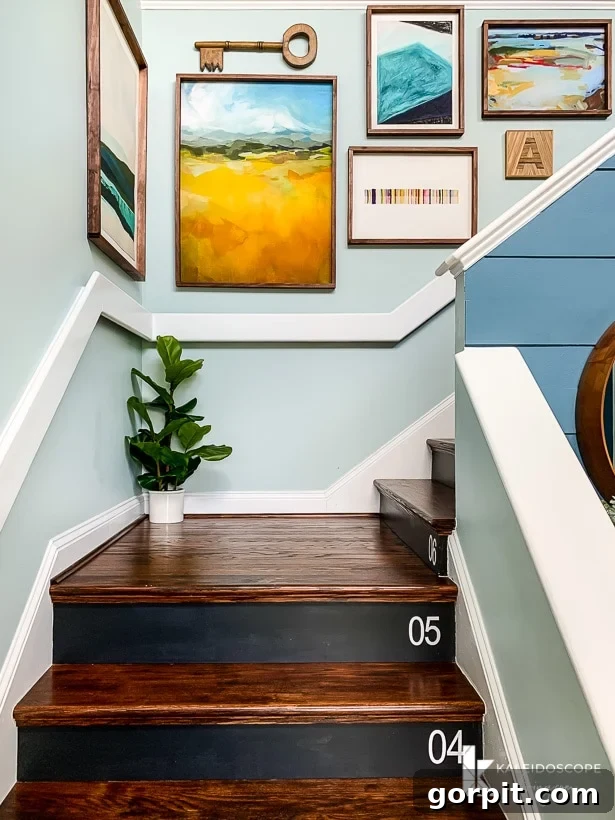
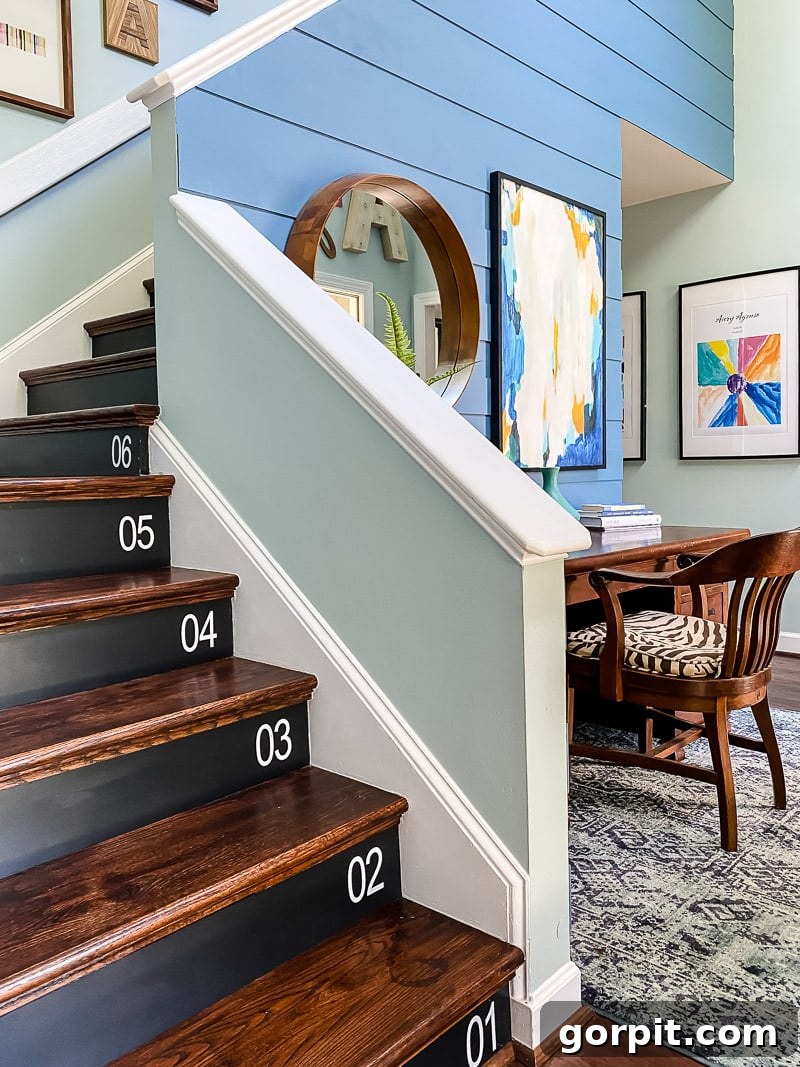
Beyond the structural installation, we decided to infuse a bit of personality into our newly renovated staircase. We added a stylish touch to our black stair risers by numbering them with durable peel-and-stick vinyl. This small detail provides a subtle, custom flourish, though a stencil and paint could achieve a similar effect. While initially considering a stair runner for added softness, we ultimately wanted to fully appreciate the clean, modern aesthetic and the fruits of our hard work with the exposed hardwood.
To further enhance the entryway, we couldn’t resist creating an eye-catching gallery wall using our inexpensive DIY frames. This adds a personal and artistic focal point that draws the eye upward. We also installed a sleek modern plank wall in the foyer and painted it one of our favorite blue paint colors, tying the entire space together with a cohesive and contemporary design. We are absolutely thrilled with the finished look and the significant impact it has made on our home’s overall ambiance.
Frequently Asked Questions About Hardwood Stairs
The cost of installing hardwood on stairs can vary significantly depending on whether you opt for professional installation or choose the DIY route. If you hire out a stair renovation job, it can indeed be quite expensive! Generally, the cost of replacing carpeting with wood stairs professionally can range from $3,000 to $5,500, or even more for complex designs. This price fluctuation depends on various factors: the length and complexity of your staircase (e.g., straight flight vs. turns, landings), the type of wood selected, the number of balusters, and whether you have open or closed railings. We once had hardwood stairs professionally installed in a previous home almost 20 years ago, and the cost was remarkably high—surpassing the expense of installing hardwoods throughout the entire first floor of the house. This experience made us determined to find a more affordable solution for our current home.
Choosing to install DIY hardwood stairs yourself drastically reduces the overall expense, making this a much more budget-friendly home improvement project. For our entire project, including all the high-quality wood treads, risers, the specific hardwood needed for our landing, the specialized construction adhesive, shims, and the precision NuScribe measuring tool, the total cost was right around $2,000. This represents a significant saving compared to professional installation. The aesthetic upgrade and increased home value we gained for this investment made it one of the best home improvement projects we’ve ever tackled. We firmly believe it was a key factor in selling our home quickly when we moved.
When choosing wood for stair treads, durability and hardness are key considerations due to the high traffic they endure. Popular choices include Red Oak, White Oak, Maple, and Ash. Red Oak is a very common and excellent choice, known for its strength, moderate hardness, and distinctive grain pattern, and it takes stain very well. White Oak is slightly harder and more durable than red oak, with a straighter grain. Maple offers a very clean, uniform look and is quite hard. Ultimately, the “best” wood often comes down to personal preference for grain, color, and how it complements your home’s existing flooring and decor. Our choice of red oak allowed for easy custom staining to match our existing laminate.
With proper installation and maintenance, DIY hardwood stairs can last for decades, often outliving carpeted stairs by a significant margin. The durability largely depends on the quality of the wood treads, the strength of the adhesive and fasteners used during installation, and how well they are cared for over time. Regular cleaning, prompt attention to spills, and occasional re-application of protective finishes (like polyurethane) will ensure your hardwood stairs remain beautiful and functional for many years. As mentioned in our update, our DIY stairs looked perfect after five years, demonstrating their long-lasting quality.
If you’re willing to invest a little time and effort, installing hardwood stairs is an incredibly rewarding and worthwhile DIY project. By diligently following these steps, you can confidently remove the outdated carpeting from your stairs, expertly finish the wood treads, and install them yourself for a beautifully polished and enduring look. While the process may span a couple of days, the breathtaking result will be a stunning, high-value addition to your home that will be cherished for years to come!
So, what are your thoughts? Are you now convinced that you have what it takes to tackle your own staircase makeover? Seriously, you absolutely can do it! For even more inspiration and ideas to fuel your project, be sure to explore these fantastic DIY staircase makeover ideas.
More STAIR Posts
SEE ALL stair POSTS
-
15 Chic Stair Railing Ideas to Update Your Staircase
-
How to Install a Stair Runner: A Step-by-Step Tutorial
-
15+ Inspiring DIY Staircase Makeover Ideas
-
From Carpet to DIY Hardwood Stairs: Step-by-Step Tutorial
-
How to Replace Balusters to Update Your Stair Railing
-
Stair Riser Ideas to Make Your Stairs More Stylish
You may also enjoy these posts:
- Gorgeous But Cheap Flooring Ideas
- 16 Ideas for the Perfect Entryway Storage Bench
Wondering how I approach transforming rooms and spaces in our home? Consider exploring my systematic approach to home decor and design.
For exclusive content and behind-the-scenes sneak peeks into our latest projects, be sure to subscribe before you leave!