
DIY Custom Range Hood: Get a High-End Concrete & Wood Look for Less
Are you dreaming of a stylish, custom-designed range hood for your kitchen but balking at the hefty price tag? Custom range hoods often come with a significant cost, making them seem out of reach for many budget-conscious renovators. However, achieving that high-end, bespoke look doesn’t have to break the bank. With a little DIY effort, you can create a stunning focal point in your kitchen that rivals professional installations at a fraction of the cost.
We’re thrilled to share our own experience creating a custom DIY range hood, featuring a chic concrete finish complemented by warm wood detailing. This simple and inexpensive DIY project adds immense style and character, fitting seamlessly into various aesthetics, from modern and minimalist to contemporary farmhouse or even industrial kitchens. Many of you have been asking about our range hood since we unveiled our colorful kitchen renovation, and we’re so excited to finally walk you through every step of how we created this unique piece. We love it, and we know you will too!
The Inspiration: Why We Chose a DIY Concrete Range Hood
When planning our kitchen remodel, the range hood was a key design element. We initially explored options for a custom-fabricated finish through our cabinet maker. While these options were certainly beautiful, they came with a very high price tag that didn’t align with our overall renovation budget. Furthermore, many of the traditional custom designs felt a bit too conventional for the fresh, modern aesthetic we envisioned for our kitchen. We wanted something unique, something with texture and a contemporary edge, without compromising on functionality or breaking the bank.
That’s when we decided to take the DIY route. We knew we could achieve a sophisticated, custom look ourselves, saving a substantial amount of money in the process. This post will detail exactly how we transformed a basic range hood enclosure into a standout feature using accessible materials and techniques. It’s a testament to the fact that you don’t need a massive budget to infuse your home with personalized style and craftsmanship.
Clarifying Our DIY Approach: What This Guide Covers
Before we dive into the details, let’s clarify what this tutorial aims to teach. This guide focuses specifically on how we DIYed the exposed, decorative portion of our range hood. We will not be covering the initial installation of the actual range hood insert or the construction of its basic plywood enclosure. Our trusted contractor handled the installation of our Broan range hood and built the surrounding framework. This is often recommended due to the complexities of venting, electrical work, and local building code inspections.
Instead, this post empowers you to create a beautiful, custom finish for an existing or newly installed range hood enclosure. Our final design features a sleek white concrete texture, beautifully contrasted with a simple yet elegant band of natural cedar wood at the bottom. The result is a clean, modern aesthetic that is surprisingly versatile, effortlessly complementing both contemporary and even rustic farmhouse kitchen styles. And the best part? The materials for this transformative finish cost us next to nothing, proving that big style doesn’t always come with a big price tag!
This post contains some affiliate links for your convenience. Click here to read my full disclosure policy.
DIY Concrete Range Hood with Wood Accent: Step-by-Step Guide
Materials You’ll Need for Your Custom Range Hood Finish:
- Accent Wood: Choose a type of wood for the decorative band around the bottom of the vent hood. We salvaged cedar from our old fence, making it completely FREE! Reclaimed wood adds character and keeps costs down, but new lumber (like pine, oak, or cedar) works just as well.
- Dap Rapid Fuse Wood Adhesive: An excellent, strong wood glue. One bottle is typically more than enough for this project, ensuring a secure bond for your wood accent.
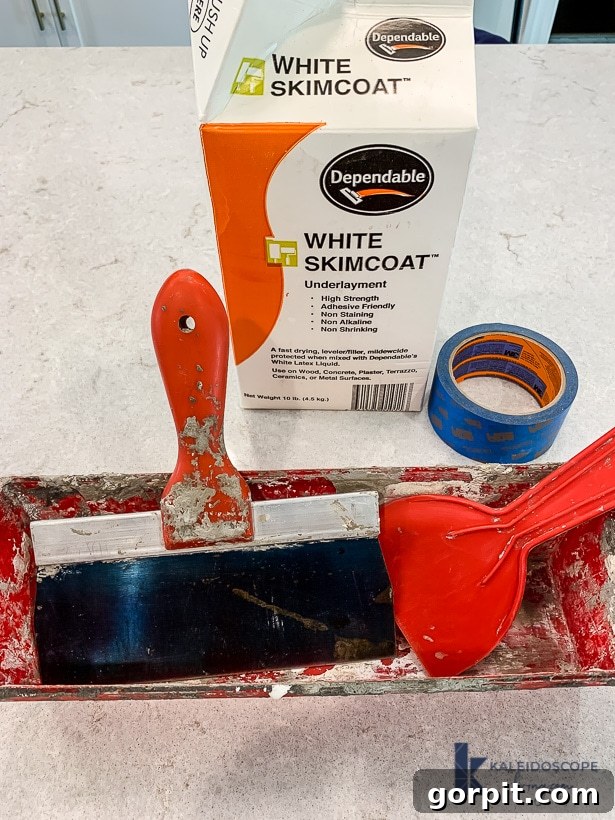
- White Skimcoat (Concrete Overlay Mix): This specialized product is key to achieving the concrete look. It’s easy to mix and apply, offering a durable, smooth, and concrete-like finish.
- Painter’s Tape: Essential for protecting surrounding cabinets, walls, and countertops from the skimcoat. A high-quality tape will provide crisp lines and clean removal.
- Sandpaper: Various grits (e.g., 120-grit for initial smoothing, 220-grit for final finish) will be needed for preparing the surface and smoothing between coats.
- Table Saw: Necessary for precisely cutting your accent wood to the desired dimensions.
- Miter Saw (Optional but Recommended): This tool makes cutting precise angles for the wood band corners much easier, ensuring a professional, seamless look.
- Drywall Mud Pan: Perfect for mixing small batches of skimcoat, making it easy to keep the mixture consistent and workable.
- 8 to 10-inch Drywall Taping Knife: Your primary tool for applying the skimcoat smoothly and evenly over large surfaces.
- Small Putty Knife: Useful for mixing the skimcoat in the mud pan and for applying it to smaller, tighter areas like corners.
- Water: For mixing the skimcoat.
- Clean Rags/Sponges: For cleanup during the process.
- Water-based Acrylic Concrete Sealer (Satin Finish): To protect and seal the finished concrete surface.
- Safety Glasses & Dust Mask: Always recommended when sanding and working with dry mixes.
Detailed Steps to Create Your DIY Concrete and Wood Range Hood:
Step 1: Ensure Your Range Hood is Properly Installed and Framed
The very first step, and a crucial one, is to have your actual range hood unit installed and properly enclosed. As we mentioned, our contractor handled the installation of our Broan range hood (which we sourced from Build.com) and built the surrounding box. This framing, typically made from plywood, creates the foundational structure that you will then transform with your decorative finish. While the basic boxing isn’t complicated and can be a DIY task for experienced individuals, we opted for professional installation due to the intricate venting requirements, electrical connections, and necessary inspections.
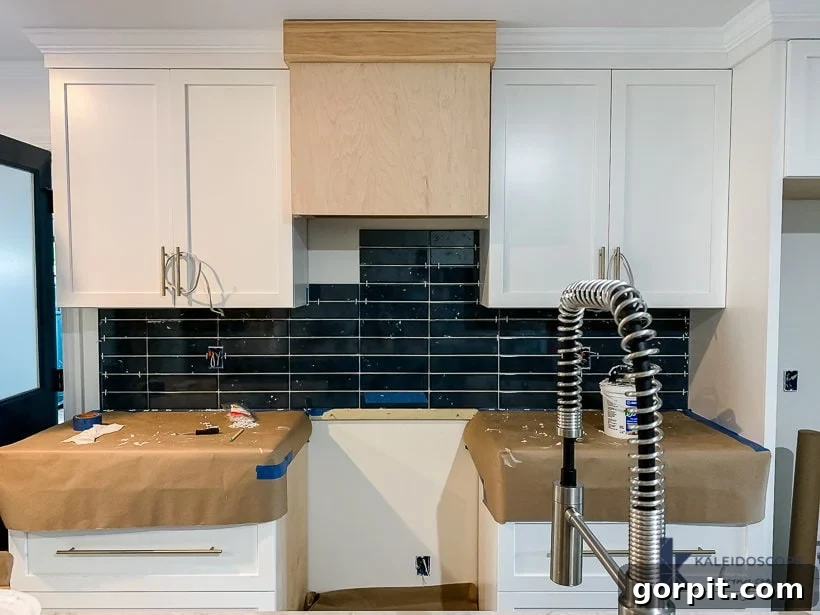
For a sleek, modern aesthetic, we deliberately chose to forgo traditional crown molding at the top of our vent hood. Instead, we finished the top edge with a simple 1 x 6 piece of wood. This was then carefully caulked to create smooth seams and painted to match the surrounding cabinetry, providing a clean, integrated look. This pre-finishing of the top edge is important as it sets the boundary for your concrete application.
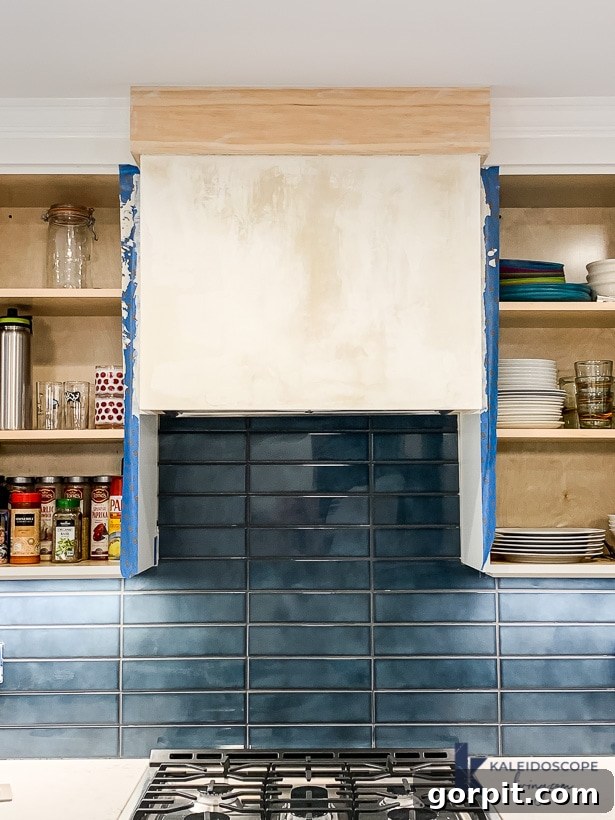
This is the exact point where our DIY journey began – transforming this basic, boxed-in structure. Here’s a look at what it appeared like before we started applying our custom finish (please excuse the mess; this photo was taken mid-backsplash tiling!):
And for those curious about the underlying structure, here’s a glimpse underneath:
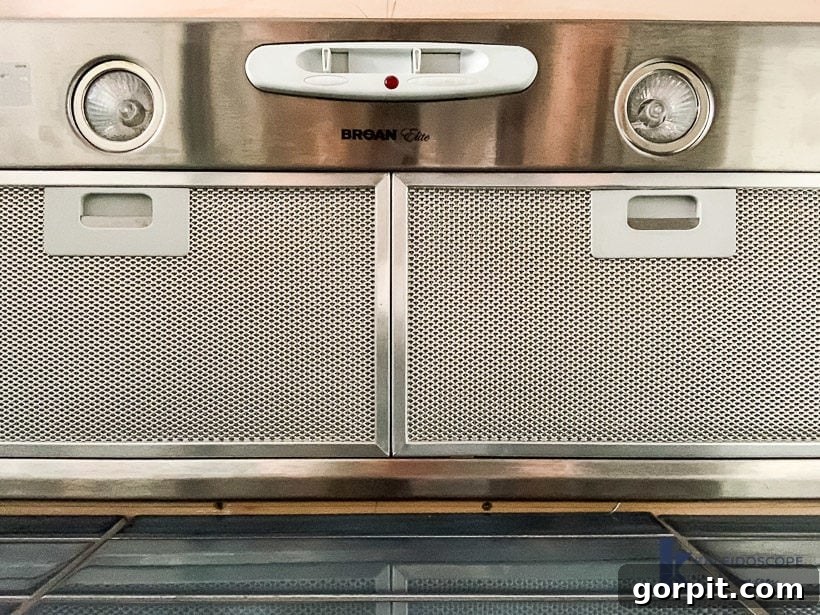
A Quick Note on Our Range Hood: We absolutely adore our Broan range hood from Build.com! Our contractor highly recommended Broan over other brands, and it truly lives up to its reputation. While it can be a bit loud on its highest setting, its powerful ventilation capability is precisely what we wanted for efficiently clearing cooking odors and steam from our kitchen. It’s a fantastic choice for any serious home cook.
Step 2: Meticulously Protect Surrounding Surfaces
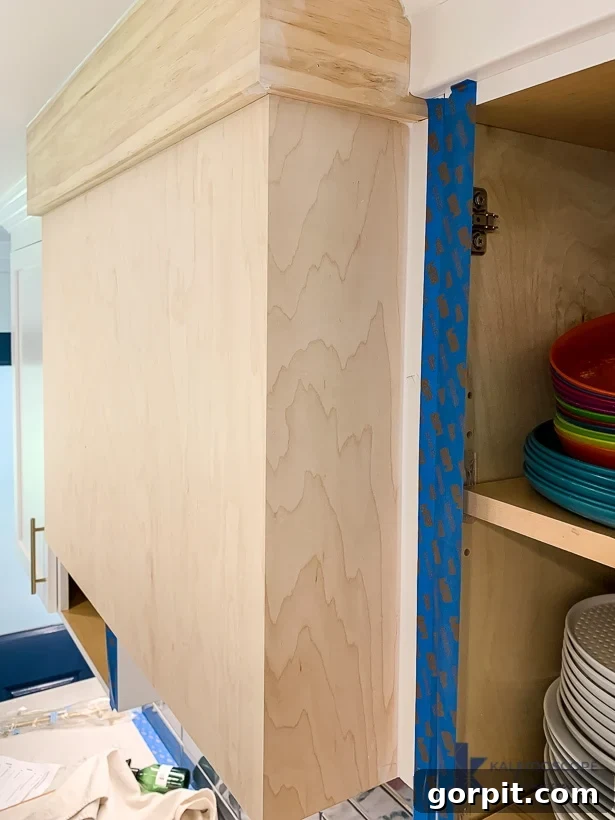
Before you begin mixing any concrete skimcoat, it is paramount to thoroughly protect all surrounding surfaces. Use high-quality painter’s tape to create clean, precise lines around your cabinetry, adjacent walls, and any other areas you want to shield from the white concrete mixture. We recommend applying tape along all edges where the range hood meets other surfaces. Additionally, lay down drop cloths or plastic sheeting on your countertops and flooring directly beneath the work area. Accidents happen, and a few extra minutes spent on preparation can save you hours of tedious cleanup and potential damage to your beautiful kitchen.
Step 3: Prepare Your White Concrete Skimcoat Mixture
Now, it’s time to prepare your white concrete skimcoat. We are huge proponents of this product, having successfully used this exact white version on DIY wooden step stools, and its natural gray counterpart on our DIY concrete fireplace and DIY concrete vanity overlay. It’s incredibly versatile, surprisingly easy to work with, and very inexpensive, delivering impressive results every time!
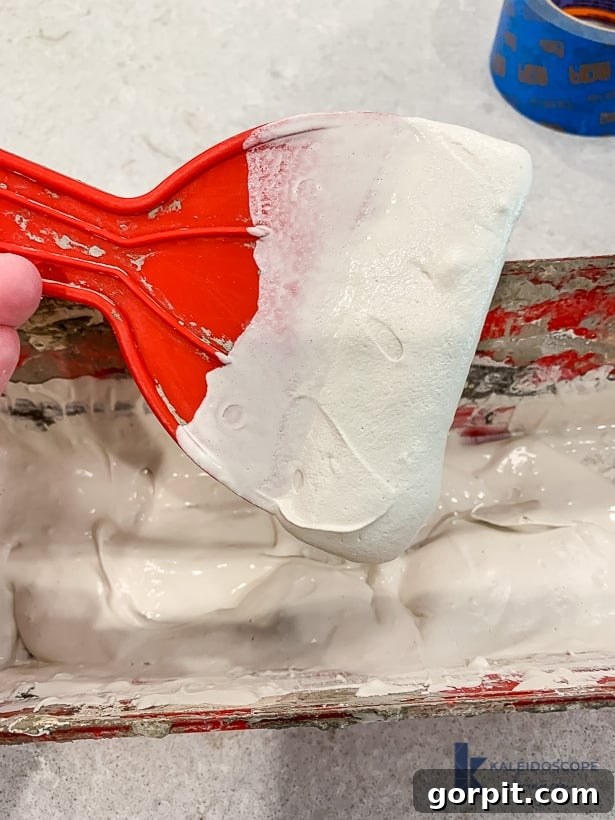
To mix, pour a small amount of the dry skimcoat powder into your drywall mud pan. Gradually add water, mixing constantly with a small putty knife. The goal is to achieve a consistency similar to thick pancake batter or smooth frosting – thick enough to adhere without dripping, but fluid enough to spread smoothly. Avoid adding too much water at once; it’s easier to add more water than more powder. Once mixed, let the batch sit for about 3-5 minutes to allow the polymers to activate. Then, give it another thorough mix. It’s now ready to use.
Crucial Tip: This particular skimcoat has a working time of approximately 5-10 minutes before it starts to thicken and become difficult to apply smoothly. Therefore, *only mix small batches at a time*. This ensures you’re always working with fresh, pliable material. If a batch begins to stiffen or clump, discard it and mix a new one. Working in small, manageable batches is key to a smooth, flawless finish.
Step 4: Apply Your First Thin Layer of Skimcoat
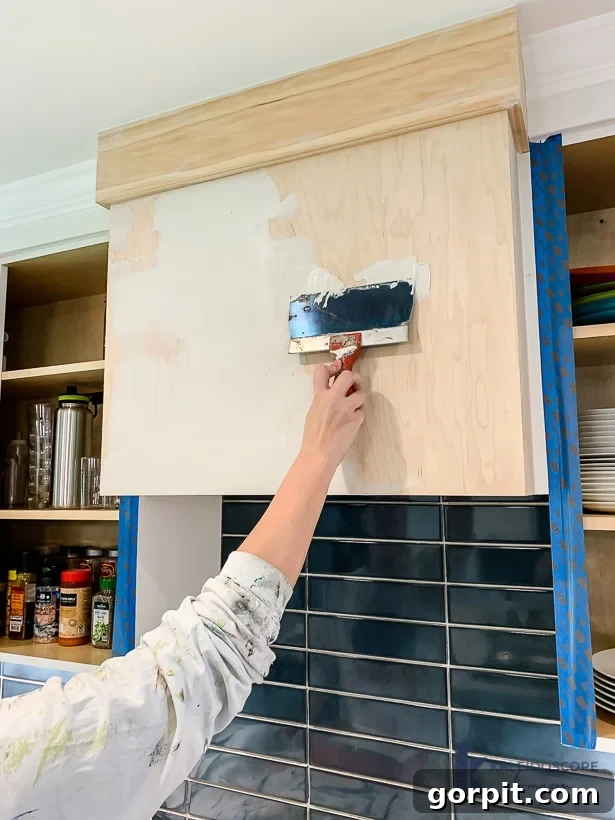
With your mixture ready, it’s time for the first coat. Using your 8 to 10-inch drywall knife, apply a *very thin* layer of the concrete skimcoat to the surface of your range hood. Use long, even strokes, striving for consistency but *not* aiming for full, opaque coverage. It’s absolutely normal for the first coat to look splotchy, uneven, and even a bit like a “hot mess.” Do not get nervous or try to overcompensate by applying it too thickly; this initial layer is primarily for adhesion and to build a base. For corners and tighter spots where the drywall knife is awkward, don’t hesitate to use your fingers for precise application, ensuring full coverage in all areas.
Step 5: Allow to Dry and Lightly Sand
Once the first coat is applied, allow it to dry completely. While skimcoat dries relatively quickly to the touch, for optimal results and to ensure thorough curing, we recommend letting the first coat dry overnight, or for at least 8-12 hours. Proper drying prevents issues like cracking or uneven texture in subsequent layers. Once fully dry, lightly hand sand the entire surface using a fine-grit sandpaper (e.g., 220-grit). This step helps to smooth out any minor imperfections, remove high spots, and provides a slightly roughened surface for better adhesion of the next coat. If, however, your first coat was applied too thickly and resulted in significant bumps or ridges, you might find an electric sander (with appropriate dust collection) to be more efficient for achieving a smooth base.
Step 6: Repeat Application for Desired Coverage and Smoothness
Repeat Steps 4 and 5 – mixing small batches, applying thin coats, allowing to dry, and light sanding – until you achieve the desired coverage and smoothness for your DIY concrete range hood. We found that three coats were sufficient for our project, largely due to our prior experience with this product on our DIY concrete fireplace, which allowed us to apply it fairly smoothly from the start. If you’re new to working with skimcoat, you might find that four or even five thin coats are necessary to achieve a perfectly smooth, opaque finish without any underlying imperfections showing through. Patience is key here; multiple thin layers always yield a better, more durable, and professional-looking result than a single thick layer. Don’t be alarmed if the subsequent coats also look splotchy as they dry – this is completely normal and will even out with additional layers and final sanding. Just keep going!
Step 7: Final Sanding and Sealing for Durability
Once you are completely satisfied with the coverage and smoothness of your concrete finish, it’s time for the final touches. Perform a thorough hand-sanding of the entire surface using a fine-grit sandpaper (e.g., 220-grit or even 320-grit) to achieve a silky-smooth feel. Remove all dust from the surface with a damp cloth and allow it to dry completely. This preparation is critical for the next step: sealing.
Applying a high-quality sealer is absolutely essential. It protects your concrete range hood from moisture, stains, and everyday wear and tear, making it durable and easy to clean. We highly recommend using a water-based acrylic concrete sealer with a satin finish, such as Quikrete 873002 Concrete Cure And Seal Satin Finish. This type of sealer will enhance the concrete’s natural look while providing a subtle, elegant sheen. When applied, the sealer will typically have a milky white appearance, but don’t worry – it dries to a clear, protective finish. Carefully follow the manufacturer’s instructions for application. It’s crucial not to apply the sealer too thickly or allow it to puddle, as this can lead to an uneven or cloudy finish. Pay close attention to the recommended drying and recoating times to ensure optimal protection and a flawless final look.
Step 8: Add Your Chosen Wood Accent Detail
The final step in personalizing your DIY range hood is to add the beautiful wood accent band at the bottom. This detail truly elevates the custom look and provides a lovely contrast to the crisp concrete. As previously mentioned, we utilized reclaimed cedar from an old fence, which also made an appearance in our DIY herringbone plank wall. This is a fantastic way to introduce unique character and sustainability into your project, but any wood species you prefer will work beautifully.
For the simplest and most recommended approach, cut your chosen wood pieces to size using a table saw. If you want seamless corners, use a miter saw to cut 45-degree angles where the pieces meet. Then, simply apply the wood band directly to the bottom surface of your range hood using Dap Rapid Fuse Wood Adhesive. This adhesive provides a strong, fast-curing bond, making it incredibly easy to achieve a clean finish.
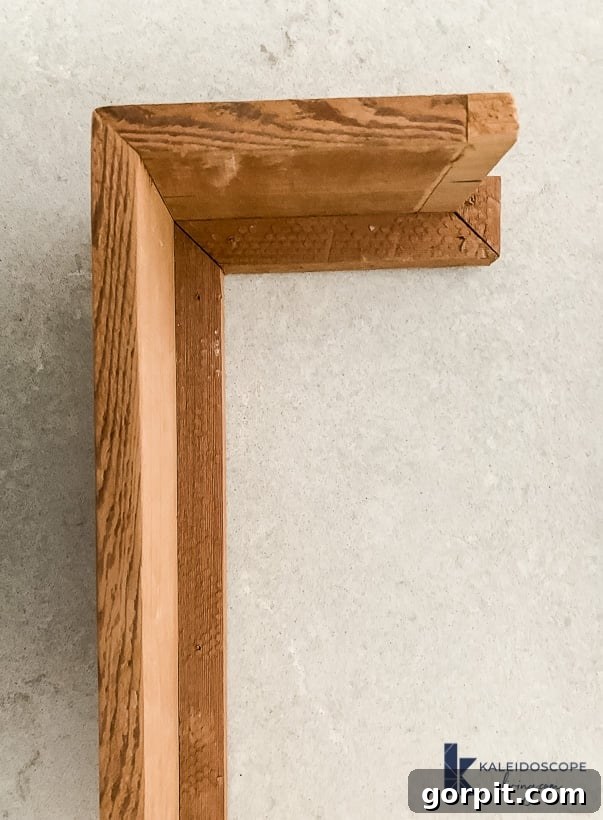
In our case, my husband, Joe, desired a slightly more intricate, wrapped-around look for the wood detail, perhaps anticipating curious guests inspecting the underside of our vent hood! While this method is a bit more complex than simply gluing a flat piece, it results in an even more integrated and polished finish. We’ll spare you the intricate details of the specific joinery we used, as the simpler method is highly effective for most DIYers. However, if you’re curious about the construction for a wrapped-around design, here’s a visual:
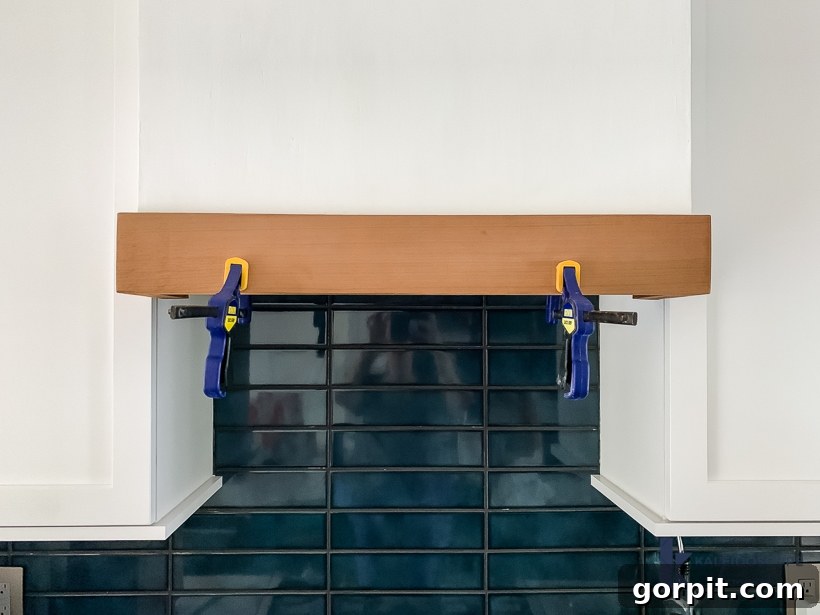
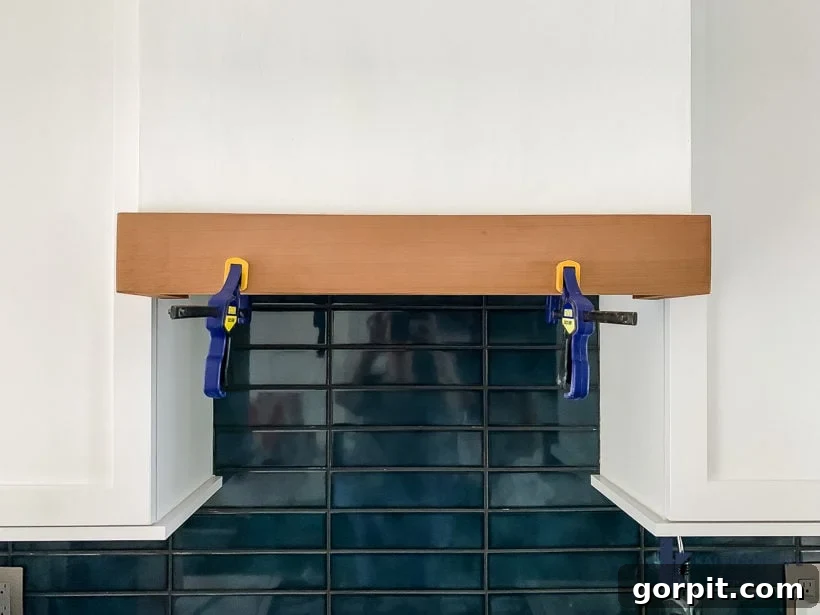
Regardless of whether you choose the simple or more complex method, the application process for the wood to the concrete surface remains similar. We applied our Dap Rapid Fuse Wood Adhesive generously to the back of the wood pieces and then used clamps to hold the cedar firmly in place while the adhesive cured completely. Ensure good contact and pressure for a secure, lasting bond.
Admire Your Beautifully Finished DIY Range Hood!
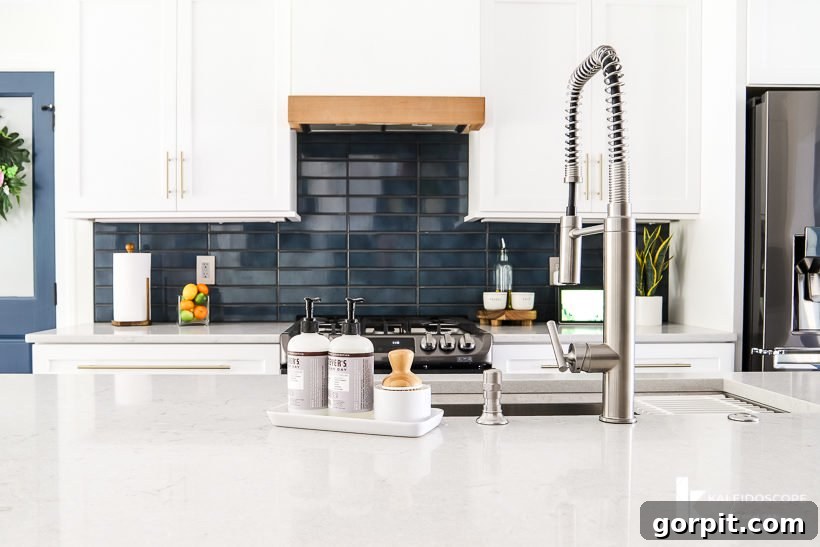
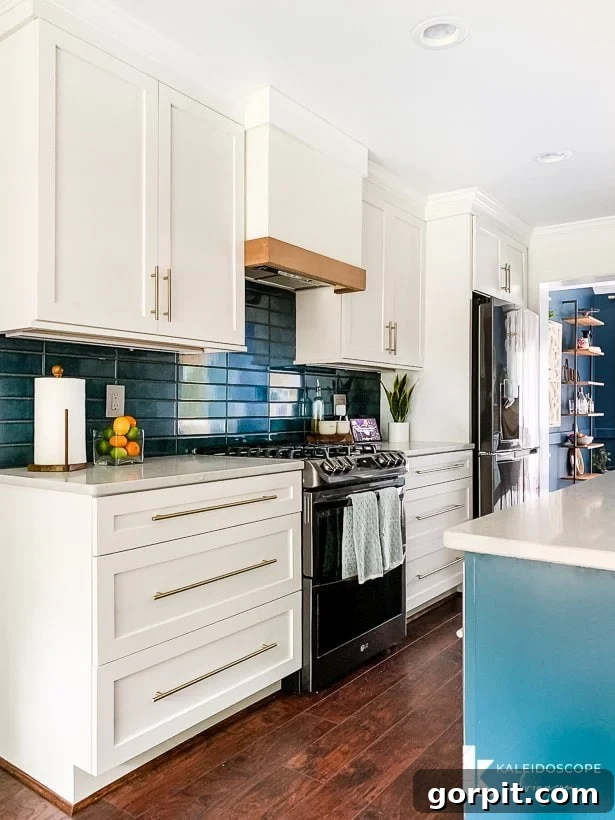
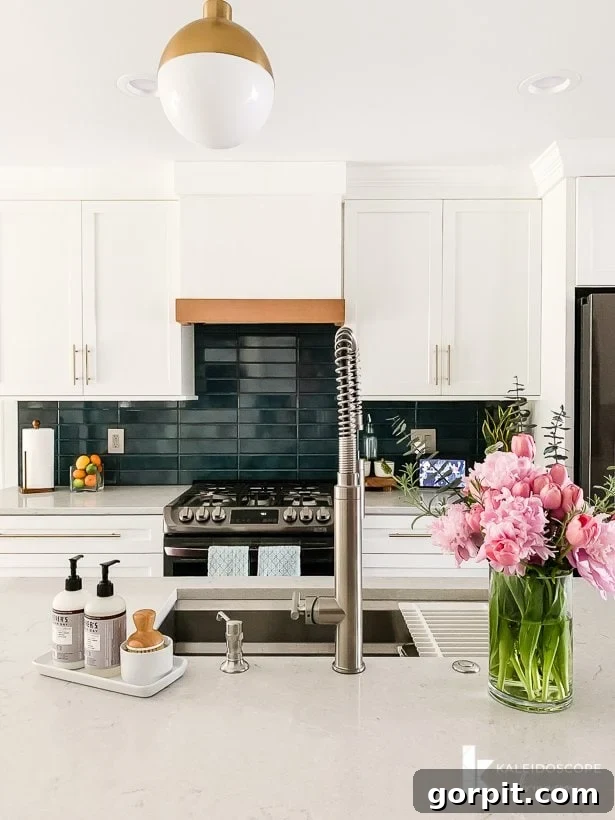
And there you have it! Your stunning, custom-look DIY range hood is complete. Take a step back and admire your handiwork. This project delivers immense satisfaction, knowing you’ve created a high-impact design feature in your kitchen that truly reflects your personal style, all while staying within budget. Here are some views of our finished product, showcasing its elegant integration into our kitchen:
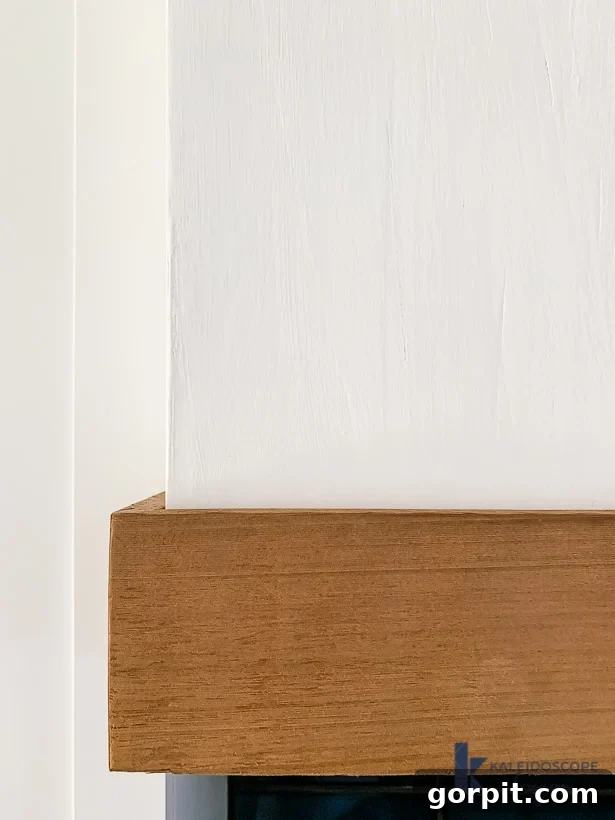
This shot offers a closer look at the subtle yet captivating texture of the concrete finish:
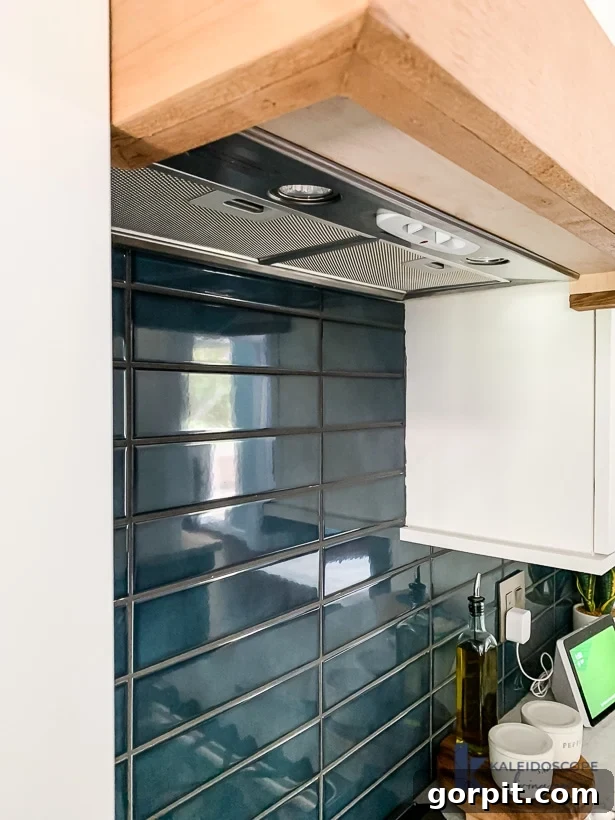
And here’s a unique perspective from directly underneath – not a view you’ll often get, but it showcases the thoughtful detailing!
Our Thoughts on the DIY Concrete Range Hood
What are your thoughts? We are absolutely thrilled with how simple, yet impactful, this DIY project turned out to be. While photographs don’t always fully capture it, the unique, subtle texture of the concrete finish in person adds an incredible depth and character that we truly adore. It’s a sophisticated detail that instantly elevates the entire kitchen. This project not only saved us a significant amount of money but also allowed us to achieve a truly custom and personalized look that perfectly complements our modern kitchen design. We encourage you to tackle this rewarding project and add a touch of custom charm to your own home!
Before you embark on your DIY journey, be sure to explore our exclusive collection of FREE design guides! These resources are packed with valuable tips and insights to help you design spaces you’ll absolutely love. Subscribe now to receive instant access to a password-protected digital library filled with all our design secrets and guides. Happy designing!
