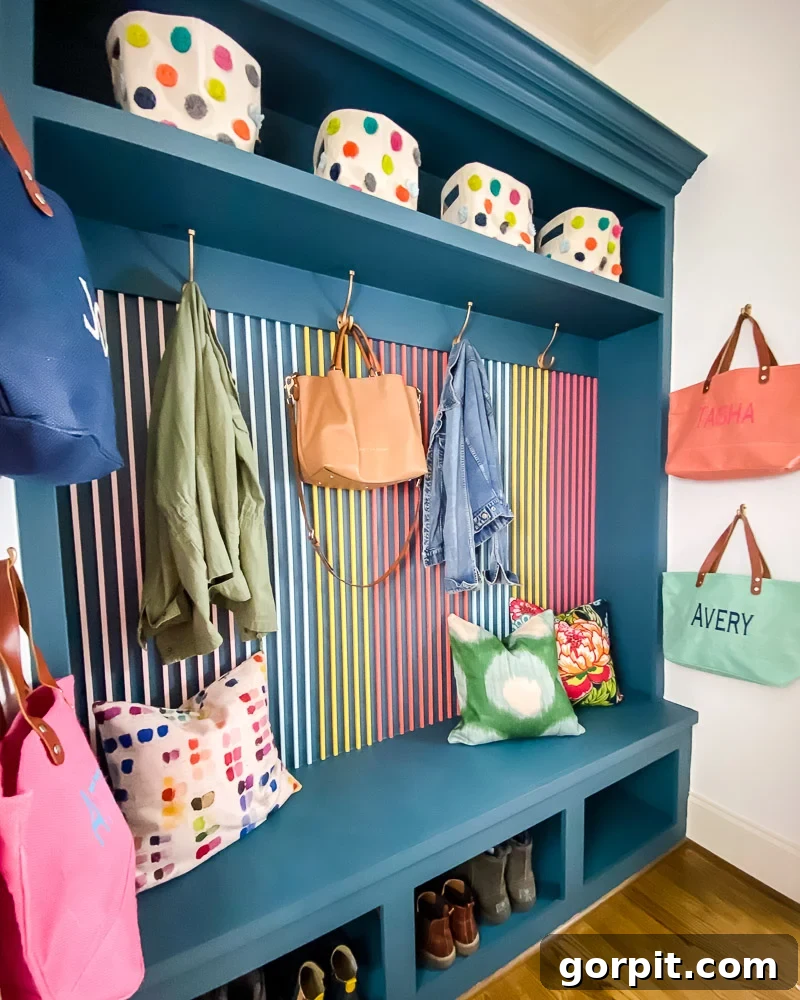
DIY Wood Slat Wall: A Modern Accent That Transforms Any Space
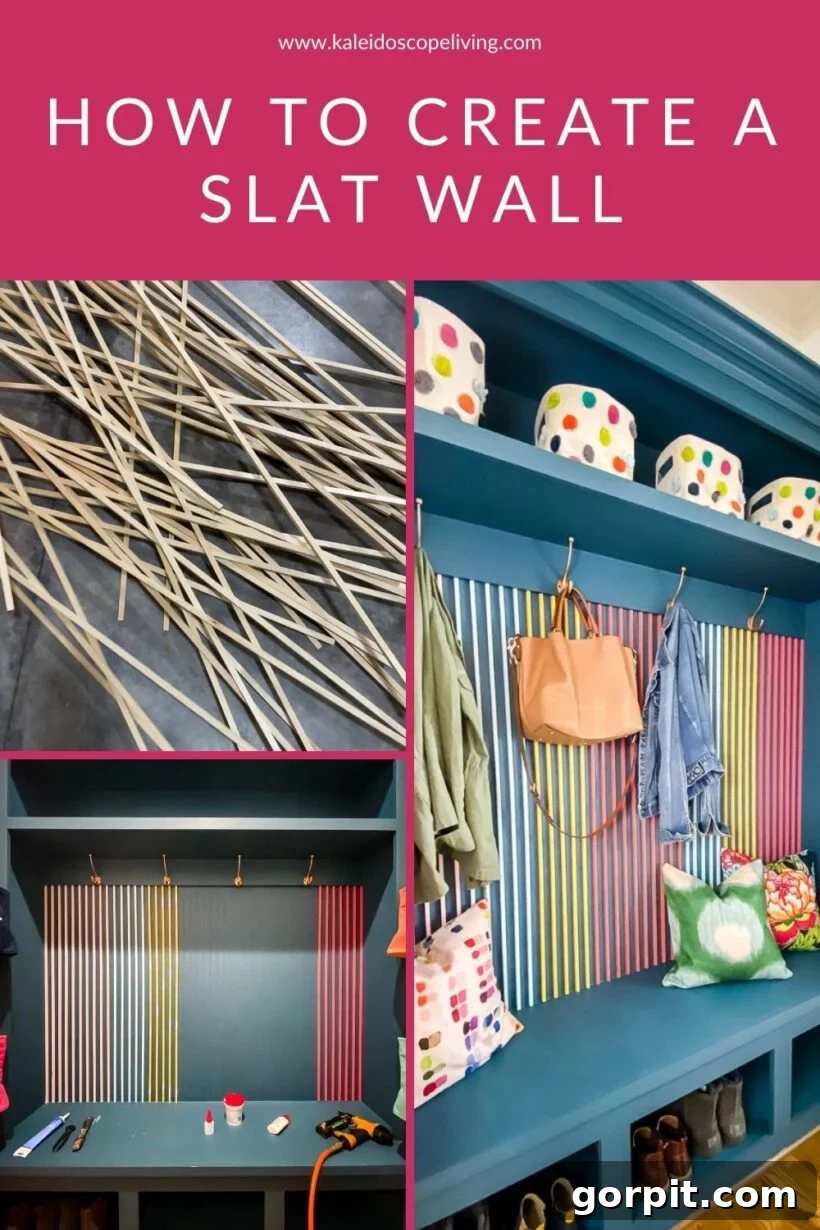
Are you searching for an easy yet impactful way to elevate your home’s interior? A DIY wood slat wall is a fantastic project that adds modern elegance, unique texture, and architectural interest to any room. This surprisingly straightforward and affordable undertaking can transform a plain wall into a captivating focal point, delivering a dramatic visual punch without requiring extensive carpentry skills or a large budget. We recently embarked on this very project in our mudroom, and the stunning results compelled us to create a comprehensive tutorial for you to follow.
Our motivation to update the mudroom stemmed from a desire for design cohesion. Having just completed a vibrant laundry room makeover, the adjacent mudroom felt stark and uninspired in comparison. It was a clear case of a lively, beautifully designed space meeting a rather lifeless counterpart. This contrast spurred us to extend that same energy and aesthetic into the mudroom, creating an inviting and functional transition zone. The wood slat wall emerged as the perfect design solution, infusing the area with texture, a dynamic color palette, and a distinctly modern flair. It seamlessly connected the two rooms, making our home’s entry points feel welcoming and cohesive. You’ll be able to see the remarkable transformation and how these spaces now beautifully complement each other in the reveal photos at the end of this article.
Thank you to DAP Products for sponsoring this post. As always, all opinions are 100% my own. This post contains some affiliate links for your convenience. Click here to read my full disclosure policy.
Why a DIY Wood Slat Wall is Your Next Home Project
Wood slat walls have become a staple in contemporary interior design, celebrated for their ability to add sophistication and visual intrigue. This DIY project is more than just a trend; it’s a timeless way to enhance your living space. Here are compelling reasons why a wood slat wall might be the perfect addition to your home:
- Instant Modern Appeal: Slat walls introduce clean lines and a structured look that is synonymous with modern and minimalist design. They effortlessly elevate the aesthetic of a room, making it feel current and thoughtfully designed.
- Adds Texture and Depth: Beyond flat paint, a slat wall brings a tactile dimension to your space. The varying shadows and light created by the slats add a dynamic visual texture that makes a room feel richer and more complex.
- Creates a Striking Focal Point: Whether in a living room, bedroom, or entryway, a wood slat wall naturally draws the eye, transforming an otherwise ordinary wall into an architectural statement. It’s an effective way to highlight a specific area or design feature.
- Incredibly Versatile: While we applied this treatment in a mudroom, the design possibilities are endless. Consider a slat wall as a unique headboard in a bedroom, a stylish backdrop for a media console, a welcoming feature in your foyer, or even a chic element in a home office. Its adaptability allows it to blend seamlessly with various decor styles, from Scandinavian to industrial chic.
- High Impact, Low Cost: One of the most attractive aspects of this DIY project is its affordability relative to its visual impact. Compared to custom-built wall treatments or professionally installed architectural features, a DIY wood slat wall uses readily available and inexpensive materials, making it an excellent budget-friendly renovation.
- Customization at Your Fingertips: This project offers immense creative freedom. You can choose different types of wood, apply various stains or paints to match any color scheme, and experiment with spacing and orientation (vertical or horizontal) to achieve a truly personalized look that reflects your unique style.
Strategic Planning for Your Wood Slat Wall
Successful DIY projects begin with careful planning. Taking the time to consider these elements will ensure your wood slat wall not only looks fantastic but also functions perfectly within your space.
Choosing the Best Location
Identify walls that could benefit from added texture or a focal point. Entryways and mudrooms are excellent choices as they often serve as the first impression of your home. Living rooms, dining areas, and bedrooms also benefit greatly from an accent wall. Consider how natural light interacts with the chosen wall throughout the day; the play of light and shadow on the slats can enhance their visual appeal.
Key Design Considerations
- Orientation: Decide whether your slats will run vertically or horizontally. Vertical slats tend to make ceilings appear higher and add a sense of grandeur, while horizontal slats can create the illusion of a wider room and a more contemporary, grounded feel.
- Slat Dimensions: The thickness and depth of your wood dowels significantly impact the final look. Thinner, more delicate dowels (like our 3/8″ square ones) offer a subtle, elegant texture. Thicker dowels create a bolder, more pronounced architectural statement. Consider the scale of your room and wall when making this choice.
- Spacing: The gap between each slat is crucial for the overall aesthetic. Closer spacing results in a denser, more textured appearance, while wider spacing creates a lighter, more open feel. Consistent spacing is vital for a professional, polished outcome.
- Color Palette: This is your opportunity for personalization. You can choose to highlight the natural beauty of the wood with a clear coat or stain, or go bold with paint. We opted for a vibrant, multi-color scheme in our mudroom, but a single solid color that complements your existing decor can be equally striking. Consider the mood you want to create and how your chosen colors will contribute to the room’s atmosphere.
How to Install Square Wood Dowels on a Wall: Materials & Tools Guide
Equipping yourself with the right materials and tools is fundamental to the success of your DIY wood slat wall. Here’s a comprehensive checklist to prepare for your project:
Materials Needed:
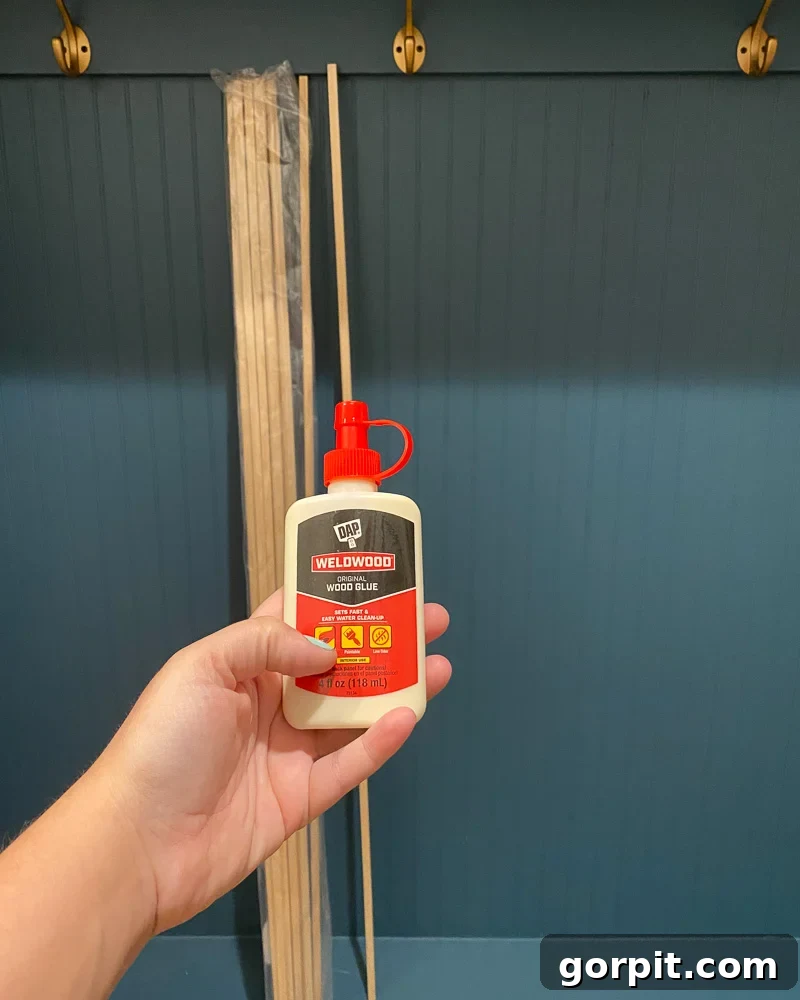
- 3/8″ Square Wood Dowels: We utilized 47 pieces of 4-foot lengths for our mudroom project. These dowels are a popular choice due to their versatility and availability. You can find them at most hardware stores or online retailers. (The specific 4-foot lengths we purchased are available here). When selecting, always prioritize straight dowels to ensure your finished wall looks pristine and uniform.
- DAP Weldwood Original Wood Glue: A high-quality wood glue is non-negotiable for a strong, long-lasting bond between your dowels and the wall. It acts as the primary adhesive, working in conjunction with nails for maximum security.
- Paint in Your Chosen Colors: This is where your personal style shines! For our vibrant mudroom, we used a lively combination of Bee, Swimming, Oleander, and Quite Coral by Sherwin-Williams, complemented by Coral Crush from this brand on the dowels. The main mudroom built-in was painted using this paint in Seaside for a cohesive look. Consider the finish as well; satin or semi-gloss paints offer excellent durability and are easier to clean.
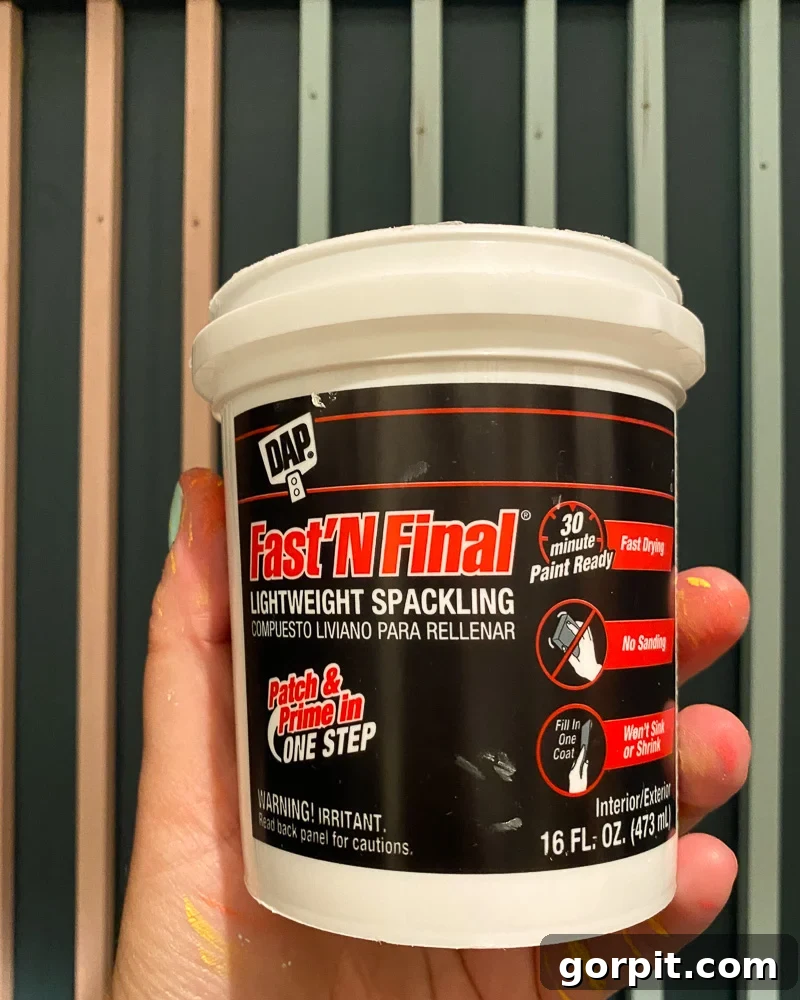
- DAP Fast N’ Final Lightweight Spackling: This product is a DIY secret weapon for achieving a flawless finish. It’s perfect for concealing nail holes, as it dries quickly and allows for patching and priming in a single, efficient step, significantly streamlining your finishing process.
- Sandpaper: Essential for smoothing any rough edges on your freshly cut dowels and for preparing the spackled areas for a final touch-up. Keeping a variety of grits, such as 120-grit for initial smoothing and 220-grit for a finer finish, is recommended.
Tools Needed:
- Compound Miter Saw: This power tool is invaluable for making precise, repeatable cuts, which is key for a uniform slat wall. It greatly speeds up the process. If you don’t own one, inquire about cutting services at your local hardware store, or consider a more budget-friendly hand saw and miter box for manual cutting, keeping in mind it will require more time and effort.
- Finishing Nailer: A finishing nailer makes quick work of securing the dowels to the wall, creating strong attachments. We used 16 gauge 1 1/2″ finishing nails. For those without a nailer, a hammer and small finishing nails will work; just ensure the nails are small enough to be easily hidden by spackling.
- Tape Measure: For all your measuring needs, from wall dimensions to dowel lengths, accuracy is paramount.
- Pencil: For marking cut lines, dowel placement, and any other notes on your project.
- Level: An absolute must-have! Use it to ensure every single dowel is perfectly vertical (or horizontal) and that your spacing remains consistent throughout the installation.
- Drop Cloths/Tarps: Protect your flooring and furniture from paint drips, sawdust, and glue spills during the entire process.
- Rags/Wet Cloths: Keep these handy for immediate clean-ups of any errant glue or paint, preventing permanent marks.
- Safety Glasses: Always wear eye protection when cutting wood or operating any power tools to prevent injuries.
Step-by-Step Tutorial: Building Your DIY Wood Slat Wall
Creating a beautiful wood slat accent wall is a rewarding project. Follow these detailed steps, paying close attention to precision, to achieve a professional-looking finish:
1) Prepare and Cut Your Wood Dowels to Length:
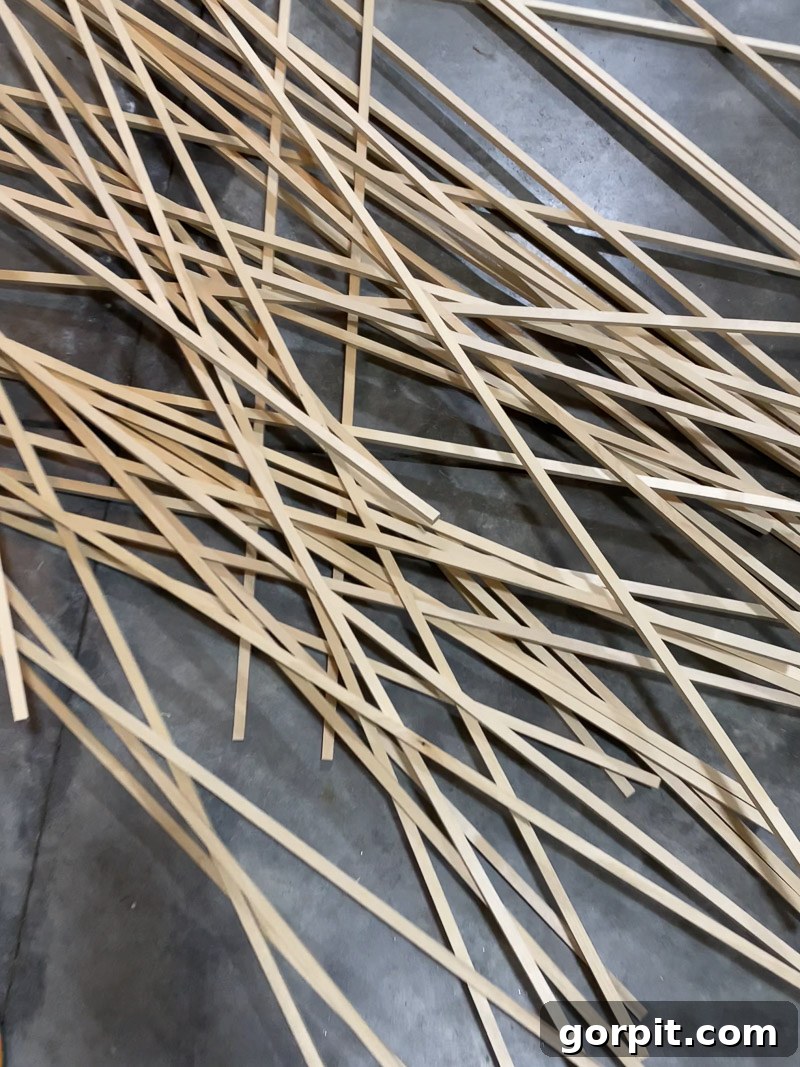
Start by meticulously measuring the exact height of the wall section where your wood slats will be installed. Once you have this critical measurement, you can begin cutting your dowels. To ensure every dowel is identical in length, which is crucial for a seamless look, set up a simple jig on your compound miter saw. This involves clamping a scrap piece of wood to your saw’s fence at the precise length you need. This allows you to butt each dowel against the stop block and cut them uniformly without re-measuring, significantly speeding up the process and guaranteeing consistency. Always prioritize safety: wear safety glasses to protect your eyes from flying debris. After each cut, use sandpaper to gently smooth out any rough edges or splinters. This step is vital for achieving a clean, polished appearance and preventing snags when you apply paint or during installation.
2) Paint Your Wood Dowels for Aesthetic Impact:
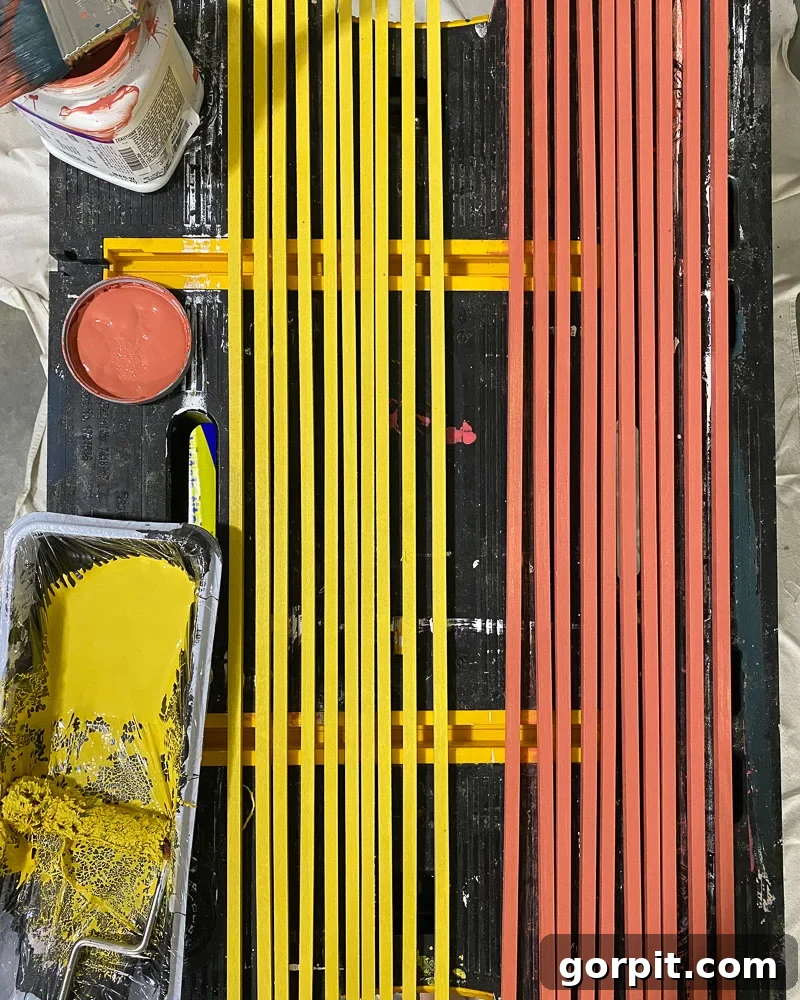
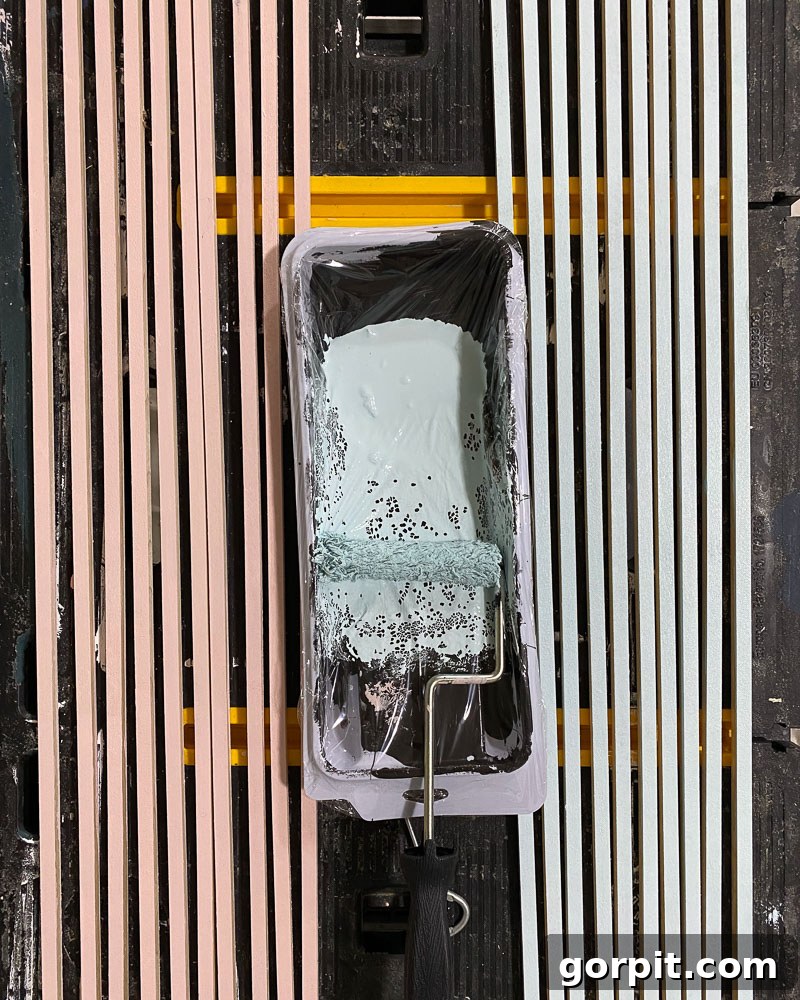
With your dowels cut and sanded, it’s time to add color! Paint three sides of each wood dowel with your chosen paint colors. The fourth side, which will face the wall, does not need to be painted, as it will be covered and serves as the optimal surface for glue adhesion. For our mudroom, we selected a lively combination of Sherwin-Williams’ Bee, Swimming, Oleander, and Quite Coral, alongside Coral Crush from this brand, creating a truly unique and vibrant effect. To achieve a rich, streak-free finish, it’s always best to apply multiple thin coats of paint rather than one thick one. Allow each coat to dry completely according to the paint manufacturer’s instructions before applying the next. This technique prevents drips and ensures the colors are bold and consistent. (Just a note: the main mudroom built-in itself was painted using this paint in Seaside, providing a complementary base for the colorful slats).
3) Precisely Attach the Dowels to Your Wall:
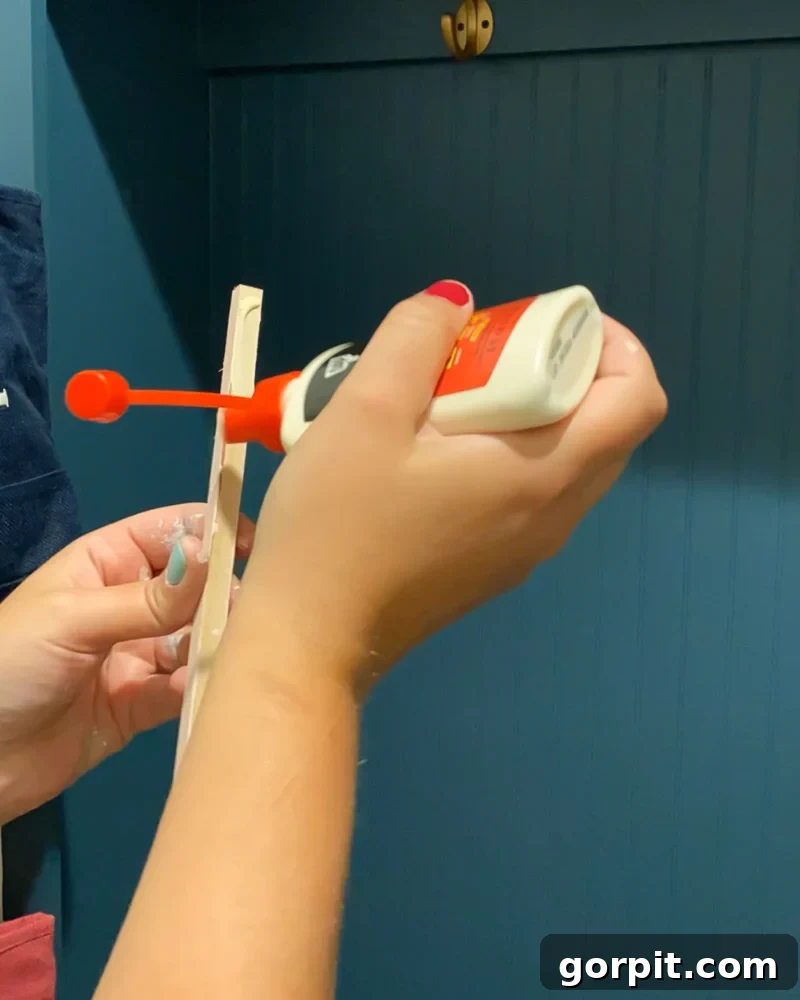
Once your painted dowels are thoroughly dry, it’s time for installation. Apply a thin, consistent bead of DAP Weldwood Original Wood Glue down the unpainted side of each dowel. This glue will create a robust, long-lasting bond to your wall. Carefully position the first dowel on your wall. Then, using your finishing nailer (or a hammer and small finishing nails), secure it in place with one nail near the top, one in the middle, and one near the bottom. If you notice a dowel isn’t perfectly straight, add a few extra nails to gently straighten and hold it firmly in its desired position.
Achieving Consistent Spacing for a Professional Finish: This step is paramount for a polished, professional-looking slat wall. In our mudroom, we had the advantage of installing the dowels over beadboard, allowing us to use the existing grooves as natural guides for perfectly even spacing, which simplified the process. If you are applying this treatment to a flat wall, you’ll need to create a simple spacer jig. Cut a piece of scrap wood to the exact width of the gap you desire between your dowels. Use this spacer as you install each subsequent dowel to guarantee uniform spacing across your entire wall. Crucially, before nailing each dowel, use a level to double-check that it is perfectly vertical (or horizontal, depending on your chosen orientation) to ensure a perfectly aligned and professional aesthetic.
4) Final Touches: Finishing and Refining Your Slat Wall:
Continue installing the dowels, repeating step 3, until your entire accent wall is beautifully covered and all dowels are securely in place. The next crucial step is to achieve a flawless finish by meticulously concealing any visible nail holes. For this, DAP Fast N’ Final Lightweight Spackling is your ideal product. Apply a small amount of spackling over each nail hole, ensuring it’s slightly mounded to allow for sanding. We highly recommend this particular spackling because it boasts incredibly fast drying times and, being lightweight, it conveniently allows you to patch and prime in a single, efficient step, saving you precious time. For expert tips on achieving perfectly smooth and invisible patches, refer to our comprehensive spackling guide in this post. Once the spackling has completely dried and hardened, gently sand the patched areas until they are perfectly smooth and flush with the surface of the dowels. Finally, inspect your work and carefully touch up any painted areas that require it to ensure a uniform and impeccable finish. This attention to detail in the finishing stage will elevate your DIY project to a truly professional standard.
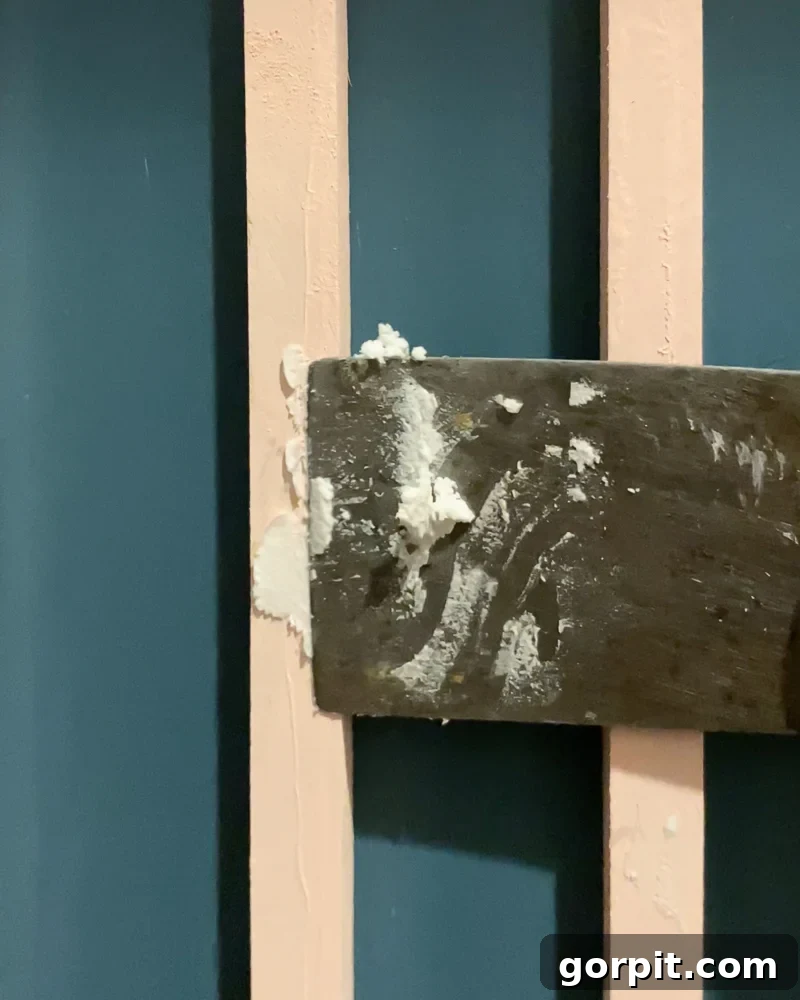
And there you have it! With these straightforward steps, you can achieve a truly remarkable transformation. This DIY wood slat wall project is incredibly accessible, yet its impact on a space is nothing short of dramatic. The difference between the before and after is incredibly inspiring, proving that a little creativity and effort can yield spectacular results.
The Mudroom Transformation: Before and After Reveal
Prepare to be amazed by the incredible metamorphosis of our mudroom, all thanks to the integration of our DIY wood slat wall. What was once a mundane, often overlooked passage has been completely revitalized into a vibrant, highly functional, and aesthetically captivating space that truly reflects our family’s personality and needs.
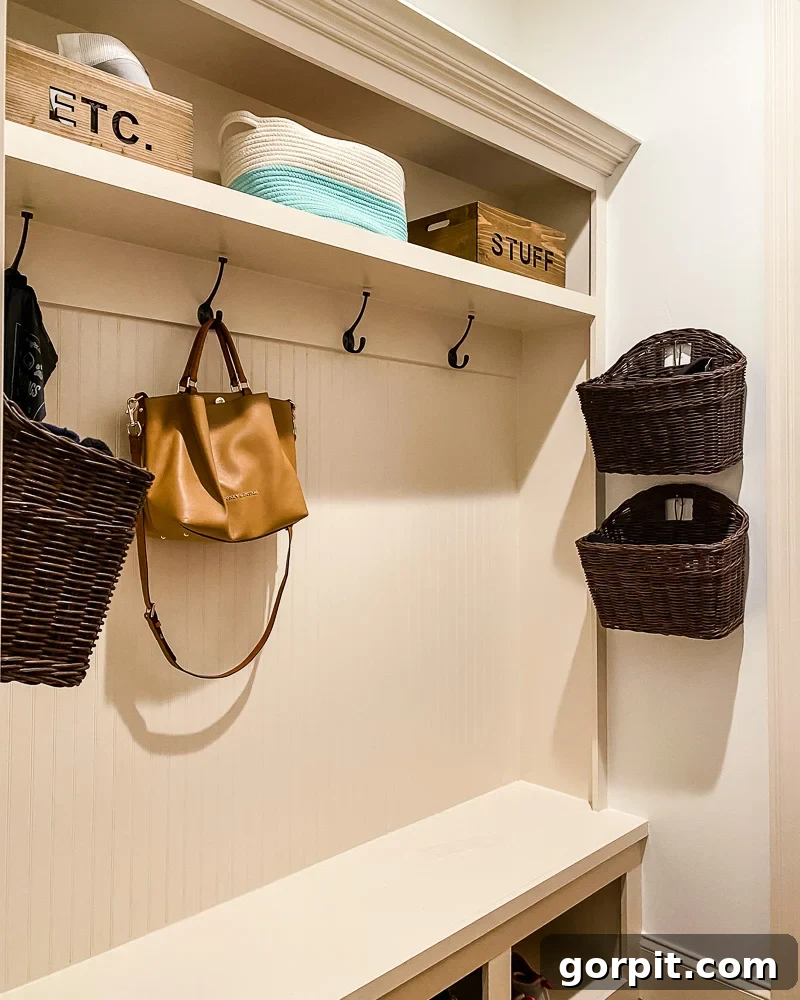
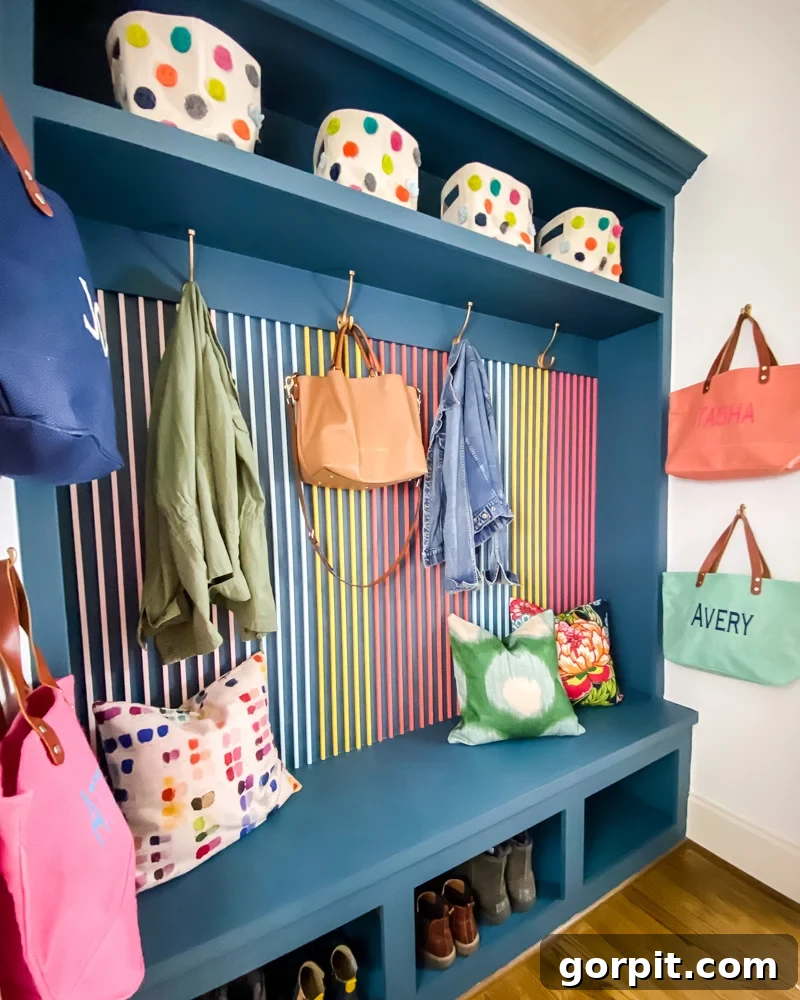
Our once drab mudroom has been reborn, now standing as a testament to the power of thoughtful design, strategic organization, and a bold embrace of color. The DIY wood slat wall provides a dynamic and visually stimulating backdrop that not only enhances the overall aesthetic but also sets the tone for a space that is as beautiful as it is functional. It’s no longer just a pass-through; it’s an integral part of our home’s vibrant character.
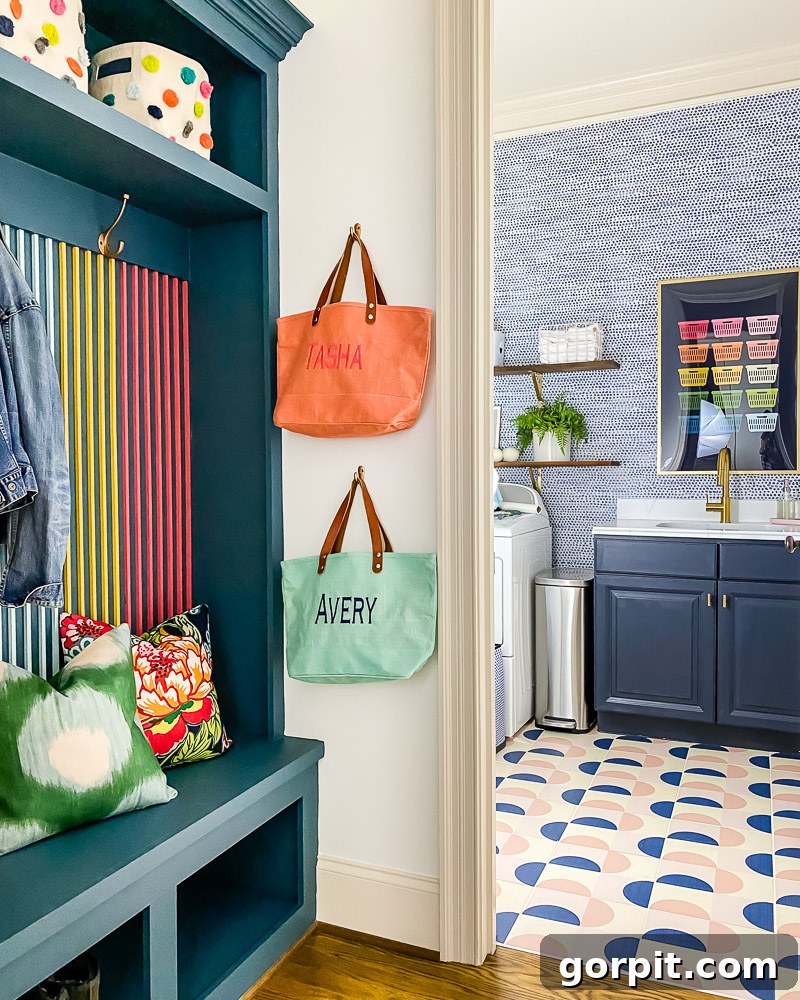
Functional Storage & Vibrant Decor for a Busy Family
Beyond its striking aesthetic, our newly designed mudroom now offers an abundance of practical, well-organized storage solutions, all beautifully framed by the colorful wood slat wall. The top shelf features a collection of stylish, vibrant bins – perfect for neatly stowing away items we don’t need to access daily, such as refills for dog waste bags or seasonal hand and toe warmers. Conveniently placed hooks on the mudroom bench serve as dedicated spots for my husband’s and my coats, jackets, and my everyday purse, ensuring they are always easily accessible.
To cater to each family member, we’ve incorporated personalized, monogrammed bags. These are ideal for storing smaller essentials like hats, gloves, and masks, allowing everyone to grab what they need quickly as they head out the door. Recognizing that the mudroom bench hooks were a bit too high for our girls, we thoughtfully added even more storage on the wall directly opposite the bench. This dedicated area for their coats and backpacks is not only highly functional but also a charming display of their budding creativity. We filled this space with a curated selection of their artwork from younger years, embracing a joyous and unrestrained use of color to create a personal gallery wall. This ensures everything has its place, streamlining daily routines and infusing the mudroom with an extra layer of warmth and personal charm.
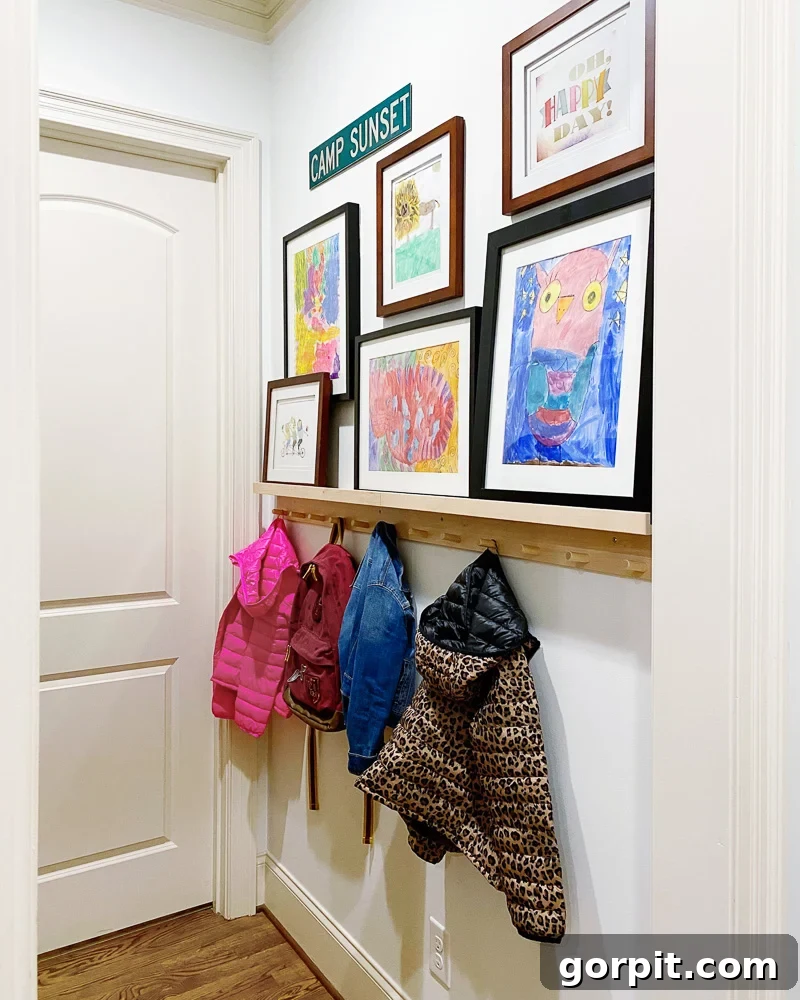
With this comprehensive update, we have successfully integrated all the necessary storage and a burst of vibrant color to make this space both incredibly functional and utterly delightful. Every element now contributes to a welcoming, organized, and truly cheerful entryway for our busy family, making coming and going a pleasant experience for everyone.
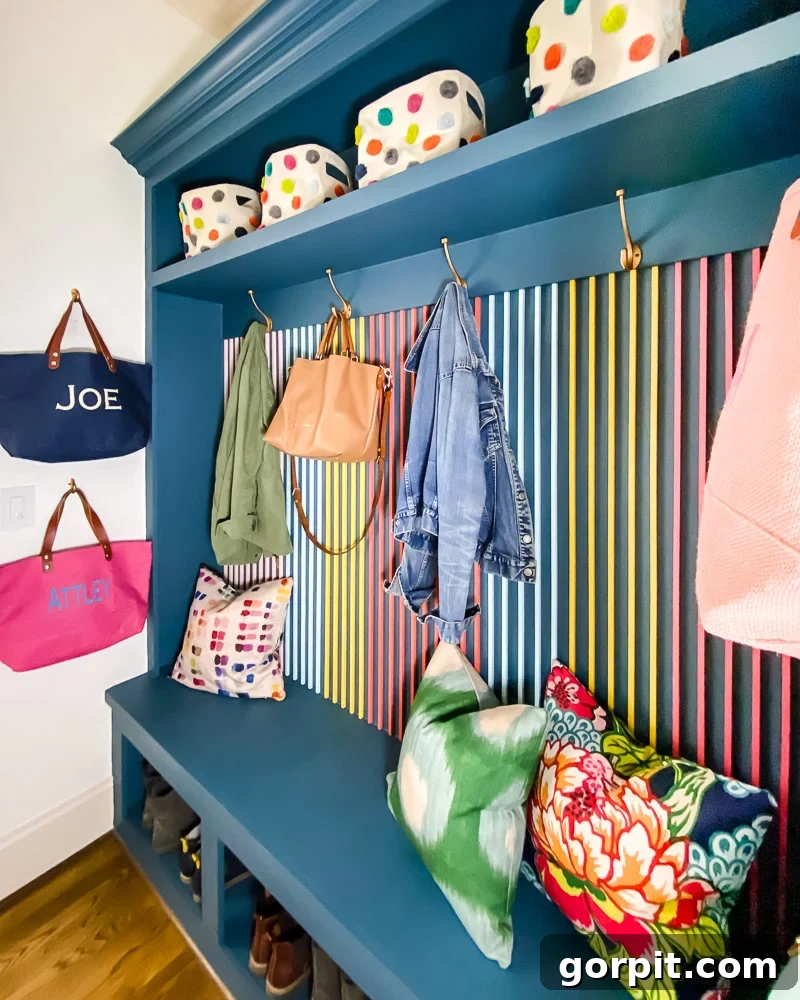
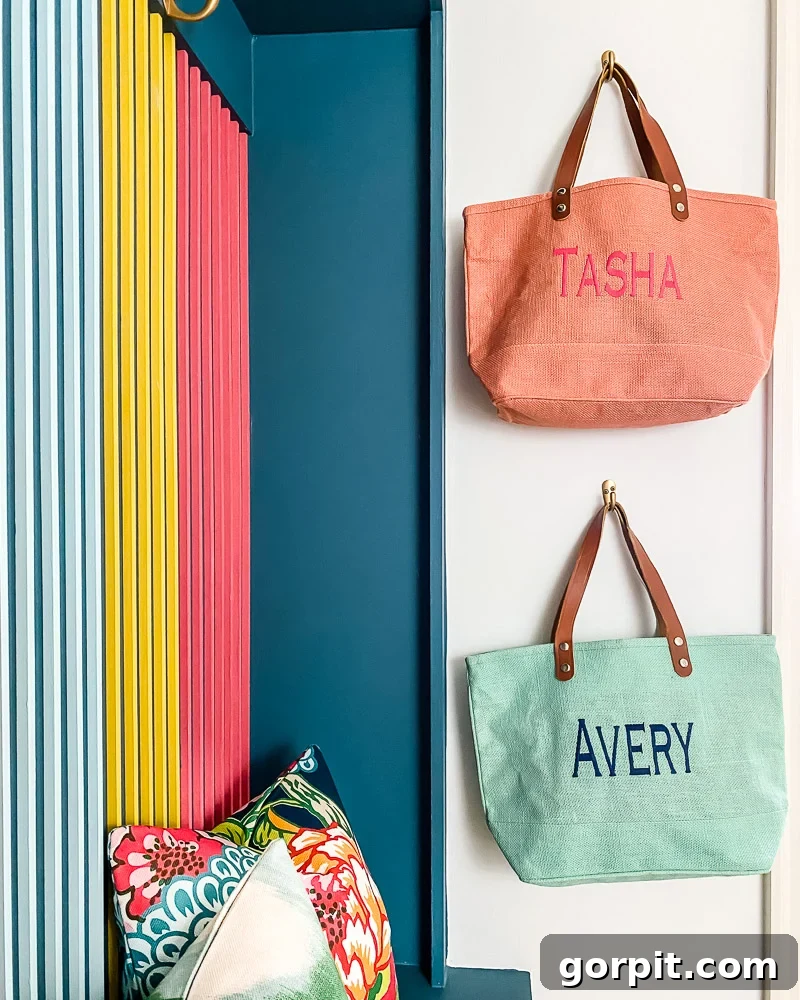
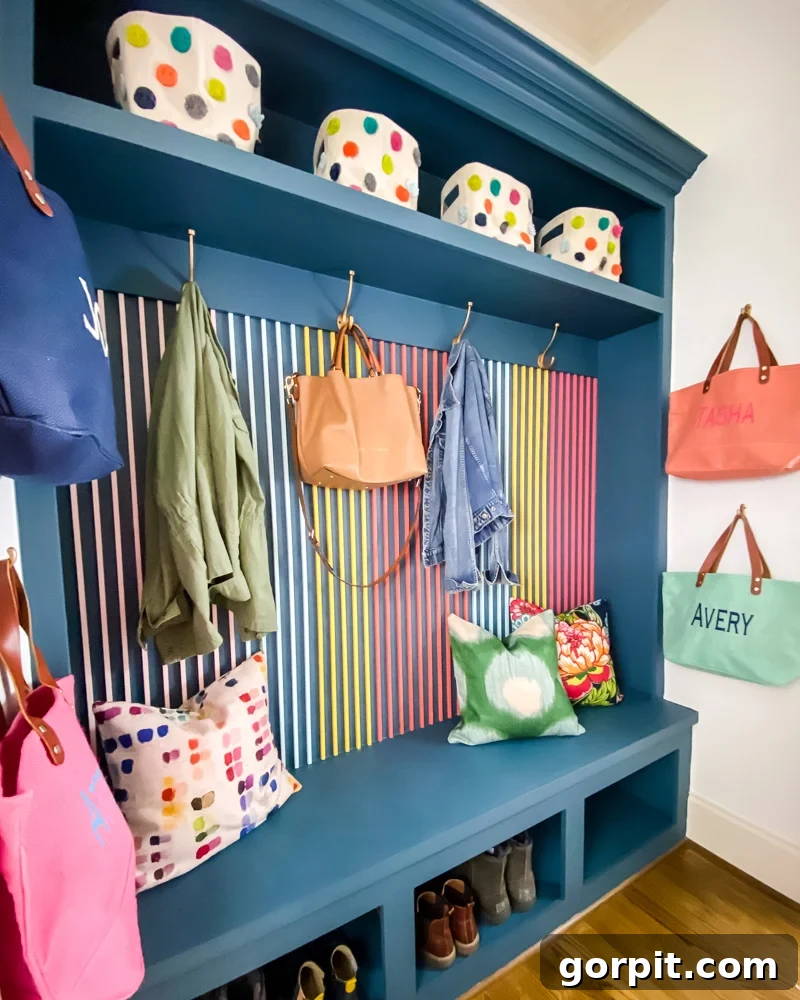
Unleash Your Creativity: Endless Design Variations for Your Slat Wall
The true brilliance of a DIY wood slat wall lies in its remarkable adaptability, transforming it from a simple project into a canvas for your personal style and design vision. This project offers boundless opportunities for customization. Here are several ideas to spark your imagination and inspire you to create a unique slat wall that perfectly reflects your taste:
- Explore Different Wood Species and Finishes: Beyond painting, consider using various types of wood for different textures and tones. Oak or walnut dowels can introduce a rich, natural elegance, while a simple pine can be stained in countless shades, from light natural to deep espresso. A clear protective coat can also be applied to let the wood’s inherent beauty shine through, while also protecting it from wear and tear.
- Vary Slat Dimensions and Depths: Don’t feel limited to uniform slats. Experiment with mixing wider and thinner dowels, or even dowels of different depths, to create a more dynamic and sculptural effect. This layered approach can add significant visual interest and a sophisticated, custom-built look.
- Embrace Geometric Patterns: While vertical installations are classic, challenge yourself with different orientations. Install slats horizontally to make a room feel wider, or try creating a captivating chevron or diagonal pattern. These geometric designs require more precise cuts and careful planning but offer an exceptionally striking and modern visual reward.
- Integrate Smart Lighting: Elevate your slat wall by incorporating integrated lighting. Installing LED strip lights behind the slats can create a stunning backlighting effect, enhancing the wall’s texture and casting a soft, ambient glow that adds warmth and sophistication to the room, especially in the evenings.
- Expand Beyond Accent Walls: Think innovatively about where else wood slats can be used. They can serve as elegant room dividers, providing subtle separation without blocking light. Consider them for custom headboards in bedrooms, a unique treatment for kitchen islands, or even distinctive ceiling features to bring a cohesive and architectural design element throughout your home.
Conclusion: Transform Your Home with This DIY Project
We genuinely hope that your creative juices are now flowing, and you’re envisioning the perfect spot in your own home for a stunning DIY wood slat wall. This project truly exemplifies how simple materials, combined with a bit of effort and creativity, can lead to a monumental and transformative change in your living space. The incredible flexibility to completely customize the colors, choose different wood types, and even vary the spacing means you have the power to create an entirely different and unique look, tailored perfectly to your aesthetic preferences and the existing style of your home.
Whether your goal is to achieve subtle elegance, a bold and vibrant statement, or a minimalist modern touch, this wood slat wall treatment offers an accessible, affordable, and immensely rewarding way to add significant value and personalized style to any area of your home. Prepare to embark on a project that not only enhances your living environment but also provides immense satisfaction as you create a personalized accent wall that will undoubtedly garner compliments for years to come!
Mudroom Source List
If you are looking for any of the sources for the items you see in our mudroom, just click on any of the images below for full product details.
Other posts you may enjoy:
- 16 Ideas for the Perfect Entryway Storage Bench
- Gorgeous + Functional Mudroom Ideas for Busy Families
- DIY Board and Batten Accent Wall: The Easiest Method
- How to Style Open Storage The Easy Way
- Coat Closet Organization for Under $100
- 25+ Entryway Benches with Storage
Wondering how I approach transforming rooms and spaces in our home? Check out Designer in a Binder®.
And if you want exclusive content and behind-the-scenes sneak peeks, be sure to subscribe before you head out!